


Not sure what tool to use?
 06-05-19, 10:35 PM
#1
Senior Member
Thread Starter
Not sure what tool to use?
Hi.
I usually figure this out on my own, but have not see this type before. Does this use a pin spanner? or a socket of some type?

Thanks in Advance.
I usually figure this out on my own, but have not see this type before. Does this use a pin spanner? or a socket of some type?
Thanks in Advance.
 06-05-19, 10:37 PM
#2
Really Old Senior Member

Whatever you use, start applying penetrating oil now.
06-05-19, 10:46 PM
#3
Senior Member
Thread Starter
Yeah, Already started. Funny the reset of the bike "fell apart" all greasy, except the bottom is worn for lack of lubrication.
06-06-19, 08:26 AM
#5

Senior Member
Join Date: Feb 2012
Location: Rochester, NY
Posts: 18,053
Bikes: Stewart S&S coupled sport tourer, Stewart Sunday light, Stewart Commuting, Stewart Touring, Co Motion Tandem, Stewart 3-Spd, Stewart Track, Fuji Finest, Mongoose Tomac ATB, GT Bravado ATB, JCP Folder, Stewart 650B ATB
Mentioned: 0 Post(s)
Tagged: 0 Thread(s)
Quoted: 4194 Post(s)
Liked 3,837 Times
in
2,295 Posts
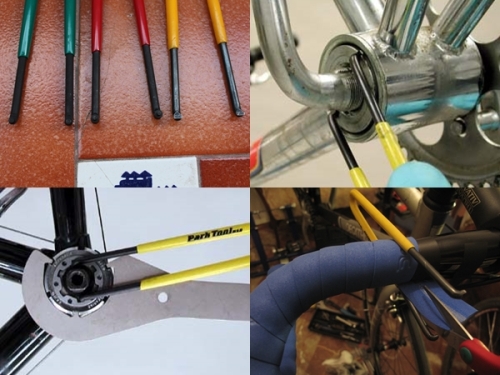
Park SPA-3, yellow handle. No longer in production. Although do know that this series of loop bent rod (SPA-1-6) tools are fairly flexible and not well suited to high forces. Andy
__________________
AndrewRStewart
AndrewRStewart
06-06-19, 08:42 AM
#6
Senior Member
Join Date: Aug 2005
Location: Pittsburgh, PA
Posts: 33,656
Bikes: '96 Litespeed Catalyst, '05 Litespeed Firenze, '06 Litespeed Tuscany, '20 Surly Midnight Special, All are 3x10. It is hilly around here!
Mentioned: 39 Post(s)
Tagged: 0 Thread(s)
Quoted: 2026 Post(s)
Likes: 0
Liked 1,095 Times
in
741 Posts
Those Park pin spanners are useful but, as Andy noted, they aren't strong enough the apply any serious torque. There are much stronger pin spanners available such as Park's SPA-6 but for a one-time use (you are going to discard this thing I hope) the hammer and punch approach makes more sense.
06-06-19, 01:13 PM
#7
Senior Member
Thread Starter
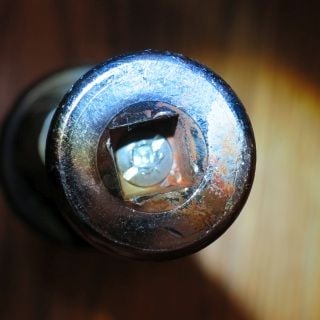
I tried hammer and brass punch, just for giggles. Then sprayed it. Just going to wait a bit and try the other side.
Need to inspect the inside somehow, and need to spray the seat tube also. It is weird, because the frame is very clean, with little rust.
Thanks
Need to inspect the inside somehow, and need to spray the seat tube also. It is weird, because the frame is very clean, with little rust.
Thanks
06-07-19, 06:19 AM
#8
Half way there

Join Date: Sep 2015
Location: North Carolina
Posts: 2,955
Bikes: Many, and the list changes frequently
Mentioned: 5 Post(s)
Tagged: 0 Thread(s)
Quoted: 985 Post(s)
Liked 879 Times
in
526 Posts
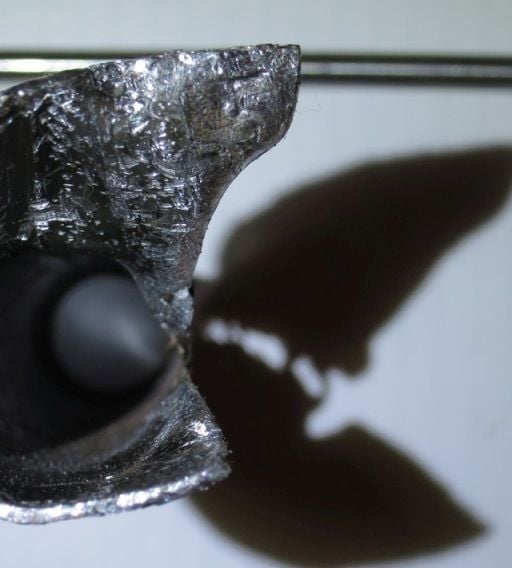
I'm hoping that you have good luck with this. The picture doesn't lead to an optimistic view. Patience is the key.
Likes For Moe Zhoost:
06-07-19, 07:55 AM
#9
Senior Member

Join Date: Aug 2017
Location: Mid Atlantic / USA
Posts: 2,115
Bikes: 2017 Specialized Crosstrail / 2013 Trek Crossrip Elite
Mentioned: 43 Post(s)
Tagged: 0 Thread(s)
Quoted: 1002 Post(s)
Liked 237 Times
in
155 Posts
This probably isn't helpful....but laughter is the best medicine.

06-07-19, 08:06 AM
#10
Senior Member

Join Date: Feb 2004
Location: St Peters, Missouri
Posts: 30,225
Bikes: Catrike 559 I own some others but they don't get ridden very much.
Mentioned: 16 Post(s)
Tagged: 0 Thread(s)
Quoted: 1572 Post(s)
Liked 643 Times
in
364 Posts
Sure you're going the correct direction? What's the diameter of the BB shell and what brand bike?
__________________
My greatest fear is all of my kids standing around my coffin and talking about "how sensible" dad was.
My greatest fear is all of my kids standing around my coffin and talking about "how sensible" dad was.
06-07-19, 03:30 PM
#11
Banned
a 6 pin spanner engaging them all
with some grinding skill you might make one out of a deep socket ..
with some grinding skill you might make one out of a deep socket ..
06-07-19, 03:46 PM
#12
SE Wis
Join Date: Apr 2005
Location: Milwaukee, WI
Posts: 10,493
Bikes: '68 Raleigh Sprite, '02 Raleigh C500, '84 Raleigh Gran Prix, '91 Trek 400, 2013 Novara Randonee, 1990 Trek 970
Mentioned: 40 Post(s)
Tagged: 0 Thread(s)
Quoted: 2740 Post(s)
Liked 3,386 Times
in
2,049 Posts
2 correct diameter punches with hex shafts set the correct distance apart between 2 pieces of flat bar stock and bolted or a big vice grips/C clamp to squeeze it together.
You could even run a bolt between the flat stock and threaded into the spindle to hold it in.
You could even run a bolt between the flat stock and threaded into the spindle to hold it in.
Last edited by dedhed; 06-07-19 at 04:53 PM.
06-07-19, 04:13 PM
#13
Senior Member
yikes....get a pin tool used to change pads on an angle grinder....quick look on Amazon shows they're cheaper than the old Park
06-09-19, 10:25 PM
#14
Senior Member
Thread Starter
I got the drive side off easy. It is Raleigh, my favorite. :-)
I just been soaking it, and got lucky at garage sale today. Correct tool just happened to be in a PronTools set ($5 whole set, so they must be good), hope it last on time.
They must have been running this thing without grease for 10 years, what is left of the races are paper thin, hug groove in the cups ( going to turn these into thread chasers), axle is deep grooved also.
There was a scrap bike with a great bottom end, so I hope save the Raleigh.
Also there is one step paste the torch, 12Lbs Sledge. :-)
Thanks Everyone.
06-28-19, 10:31 PM
#16
Senior Member
Thread Starter
Follow up for those interested. Made the tool, once it got started after a lot of heat, it came out pretty easy.
Made a thread chaser out of the cup, still able to use ratchet with this setup.
Now to the stuck seat post. :-)

Made a thread chaser out of the cup, still able to use ratchet with this setup.
Now to the stuck seat post. :-)
06-29-19, 12:18 PM
#17
Senior Member
Likes For sch:
06-30-19, 07:21 AM
#20
Newbie

Join Date: Mar 2013
Location: Winston-Salem, NC
Posts: 33
Bikes: 2014 Wilier Zero.9, 2010 Orbea Aqua, 2007 Ross mtb, 1972 Sekine GS, 1971 Motobecane Grand Record, 1953 Parkes Magpie
Mentioned: 0 Post(s)
Tagged: 0 Thread(s)
Quoted: 7 Post(s)
Likes: 0
Liked 8 Times
in
4 Posts
Agreed. Nice workmanship.
06-30-19, 07:59 AM
#21
SE Wis
Join Date: Apr 2005
Location: Milwaukee, WI
Posts: 10,493
Bikes: '68 Raleigh Sprite, '02 Raleigh C500, '84 Raleigh Gran Prix, '91 Trek 400, 2013 Novara Randonee, 1990 Trek 970
Mentioned: 40 Post(s)
Tagged: 0 Thread(s)
Quoted: 2740 Post(s)
Liked 3,386 Times
in
2,049 Posts
How is the bolt held in so it can be screwed into the spindle to hold the tool in place and still put the ratchet in? Or is it smaller diameter just to center & align the tool?
06-30-19, 10:05 PM
#23
Senior Member
Thread Starter
Well, because the other side was off, it was just a washer and a nut to hold it in place. The socket being of the cheap no name variety, has a kind of square flange inside, that allow a countersunk screw to drop in perfectly.
Next day I got the seat post out. Brute method, that saved the frame.

Grind until to start to see rust. Rust mean the frame tube is there. Seat post should be thinner than paper.
Then at the thin point I hammer a long thin punch on one side, spray some helper, then Vice grips and Big,Big, channel lock to turn vice grips,
Sort of like peeling inside out. :-)
Next day I got the seat post out. Brute method, that saved the frame.
Grind until to start to see rust. Rust mean the frame tube is there. Seat post should be thinner than paper.
Then at the thin point I hammer a long thin punch on one side, spray some helper, then Vice grips and Big,Big, channel lock to turn vice grips,
Sort of like peeling inside out. :-)
Last edited by NickDandy; 06-30-19 at 10:17 PM.
07-01-19, 10:32 PM
#25
Senior Member
Thread Starter
Make socket , about 20 minute, remove cup under 10 minute. Seat post, grrr. Under two hours, but you have to go slower at the end so as not damaging the seat tube.

Thread
Thread Starter
Forum
Replies
Last Post
CaptainMalick98
Electronics, Lighting, & Gadgets
7
06-05-12 05:36 PM


