


Crank keeps loosening. Replace or not?
 08-21-20, 09:03 AM
#1
Member
Thread Starter
Join Date: Oct 2018
Posts: 32
Mentioned: 0 Post(s)
Tagged: 0 Thread(s)
Quoted: 19 Post(s)
Liked 0 Times
in
0 Posts
Crank keeps loosening. Replace or not?
A week or so ago I found that my right crank had come loose. I bought an 8mm Allen key and tightened it again, but it came loose once more. Then I tried gripping the Allen key with pliers to lengthen the lever and applying what felt to me like a lot of force, but it still came loose.
I have read on various other forums that some people think that once this starts to happen, the parts are already damaged and will need replacing, but others think that a touch of Loctite 243 Threadlocker will fix the problem well enough that the parts don't need to be replaced. Who is right? And if I do need to replace some parts, which parts exactly will need replacing? Just the crank and gearwheel? Or a lot more than that?
I have read on various other forums that some people think that once this starts to happen, the parts are already damaged and will need replacing, but others think that a touch of Loctite 243 Threadlocker will fix the problem well enough that the parts don't need to be replaced. Who is right? And if I do need to replace some parts, which parts exactly will need replacing? Just the crank and gearwheel? Or a lot more than that?
 08-21-20, 09:12 AM
#2
Banned
Replace.
It's the enlarged square taper socket in the crank arm moving that is working as it moves causing the bolt to unscrew
letting the bolt loosen & continuing to ride caused the reshaping in the aluminum arm...
want to use threadlock on the bolt ? 1st buy new cranks you cant undo the existing damage .
Once again a torque wrench is required to say 'how tight' the bolt must be , in a standardized number system..
..
letting the bolt loosen & continuing to ride caused the reshaping in the aluminum arm...
want to use threadlock on the bolt ? 1st buy new cranks you cant undo the existing damage .
Once again a torque wrench is required to say 'how tight' the bolt must be , in a standardized number system..
..
Last edited by fietsbob; 08-21-20 at 09:21 AM.
08-21-20, 09:28 AM
#3

Friendship is Magic

Join Date: Nov 2010
Location: Sacramento, CA
Posts: 22,984
Bikes: old ones
Mentioned: 304 Post(s)
Tagged: 0 Thread(s)
Quoted: 26402 Post(s)
Liked 10,374 Times
in
7,203 Posts
.
...what happens is that the walls of the crank arm tapered socket that go on the spindle (which are made from aluminum, versus the steel of the spindle) distort and are damaged on the flats. So you can never again achieve the tight press fit required for such a high stress joining area on your bike. It's possible in some cases to re-seat the crank arm using some kind of Loctite bedding compound (both surfaces mated need to be very clean). And it might extend the use cycle of the crank.
But then you will encounter some removal issues when it finally does need to be removed. Removal will doubtless require a torch or an angle grinder at that point.
So unless you are really strapped for cash right now, or have some emotional attachment to the current crank, or the bike is kind of low end and you will probably toss it soon anyway, replacement is your best option.
A new and different crank often requires a different spindle, which you buy and install at the same time.
08-21-20, 02:37 PM
#5
LR�P=HR
Join Date: Sep 2019
Location: SF Bay Area
Posts: 2,173
Bikes: 1981 Holdsworth Special, 1993 C-dale MT3000 & 1996 F700CAD3, 2018 Cervelo R3 & 2022 R5, JustGo Runt, Ridley Oval, Kickr Bike 8-)
Mentioned: 1 Post(s)
Tagged: 0 Thread(s)
Quoted: 865 Post(s)
Liked 1,201 Times
in
692 Posts
Mother of invention.
At times I've needed to tighten large nuts/bolts that were bigger that I can use my torque wrench for.
I've extended a wrench with a pipe and used a luggage scale to apply the correct number of foot pounds.
It aint pretty.
But the item in question (not to be discussed here) still works and the "tube" has not fallen off.

Barry
I've extended a wrench with a pipe and used a luggage scale to apply the correct number of foot pounds.
It aint pretty.
But the item in question (not to be discussed here) still works and the "tube" has not fallen off.
Barry

Likes For Barry2:
08-21-20, 02:52 PM
#6
Senior Member
Join Date: Jun 2020
Location: Maryland
Posts: 1,380
Bikes: 1982 Bianchi Sport SX, Rayleigh Tamland 1, Rans V-Rex recumbent, Fuji MTB, 80's Cannondale MTB with BBSHD ebike motor
Mentioned: 1 Post(s)
Tagged: 0 Thread(s)
Quoted: 668 Post(s)
Liked 529 Times
in
355 Posts
Had this happening on my ebike with brand new crank arms. Ended up using loctite and a hex drive socket and breaker bar to torque it down tight. Haven't had an issue since. 240# rider on a 60# bike.
Lots of these guys are bike mechanics and have more overall experience. But I wouldn't give up on your crank arms just yet. Torque it down properly with loctite and see what happens. If it falls off again than you won't have to wrestle to remove it.
Lots of these guys are bike mechanics and have more overall experience. But I wouldn't give up on your crank arms just yet. Torque it down properly with loctite and see what happens. If it falls off again than you won't have to wrestle to remove it.
08-21-20, 03:06 PM
#7
Junior Member
Join Date: Aug 2020
Posts: 12
Mentioned: 0 Post(s)
Tagged: 0 Thread(s)
Quoted: 1 Post(s)
Likes: 0
Liked 0 Times
in
0 Posts
OK I have a long history with loose nuts (a lot of them were friends but I will stick to mechanical things) On a Crank I had great luck using Locktite. I was in Korea. The bike was American made (been a while) machine that some GI had left behind. My experience iis if the LT holds for 5 miles ya got it made.
08-23-20, 08:58 AM
#9
Senior Member
Join Date: Jun 2014
Location: Ontario, Canada
Posts: 4,624
Bikes: iele Latina, Miele Suprema, Miele Uno LS, Miele Miele Beta, MMTB, Bianchi Model Unknown, Fiori Venezia, Fiori Napoli, VeloSport Adamas AX
Mentioned: 16 Post(s)
Tagged: 0 Thread(s)
Quoted: 1324 Post(s)
Liked 927 Times
in
640 Posts
If you can't get another crankset and if it's a square-taper one you might be able to extend its life.
Get a soda can and cut it apart so that you can get strips the width of the flats on your spindle. You'll need four of these shims.
Use a gel type cyanoacrylic glue to glue a piece of the soda can on each of the four flats on the spindle. I apply glue to one flat then use a small bar clamp from a dollar store to clamp the shim to the flat. It only takes a minute or so for the glue to set up enough to remove the clamp. I do that for each of the four shims.
Put the crank back on and fully tighten the bolt.
I save a really nice 34 - 50 drilled rings compact crank with this method.

Cheers
Get a soda can and cut it apart so that you can get strips the width of the flats on your spindle. You'll need four of these shims.
Use a gel type cyanoacrylic glue to glue a piece of the soda can on each of the four flats on the spindle. I apply glue to one flat then use a small bar clamp from a dollar store to clamp the shim to the flat. It only takes a minute or so for the glue to set up enough to remove the clamp. I do that for each of the four shims.
Put the crank back on and fully tighten the bolt.
I save a really nice 34 - 50 drilled rings compact crank with this method.
Cheers
08-23-20, 10:04 AM
#10
Senior Member

Join Date: Feb 2004
Location: St Peters, Missouri
Posts: 30,225
Bikes: Catrike 559 I own some others but they don't get ridden very much.
Mentioned: 16 Post(s)
Tagged: 0 Thread(s)
Quoted: 1572 Post(s)
Liked 643 Times
in
364 Posts
The torque spec for the crank arm bolt with a square taper crankset is usually around 30 ft/lbs. Think a 30 pound weight hanging off the end of a foot long Allen key. If you're tightening it with just your fingers and a 6 inch Allen key, you aren't getting even close to 30 ft/lbs.
__________________
My greatest fear is all of my kids standing around my coffin and talking about "how sensible" dad was.
My greatest fear is all of my kids standing around my coffin and talking about "how sensible" dad was.
08-23-20, 10:10 AM
#11
Banned
Got a crank bolt with an 8mm hex ? 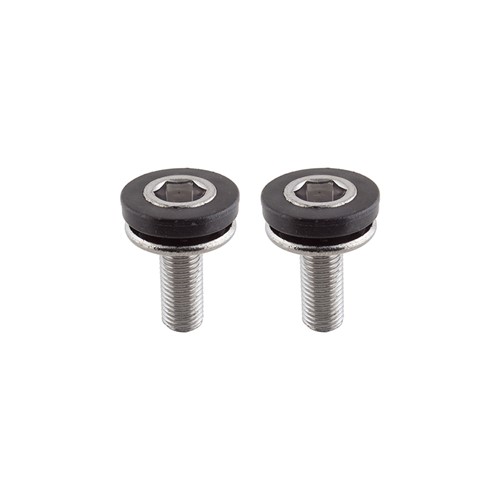 there are 3/8" drive sockets
to fit in those.. & your torque wrench..
there are 3/8" drive socketsto fit in those.. & your torque wrench..
08-31-20, 04:08 PM
#12
Senior Member
A week or so ago I found that my right crank had come loose. I bought an 8mm Allen key and tightened it again, but it came loose once more. Then I tried gripping the Allen key with pliers to lengthen the lever and applying what felt to me like a lot of force, but it still came loose.
I have read on various other forums that some people think that once this starts to happen, the parts are already damaged and will need replacing, but others think that a touch of Loctite 243 Threadlocker will fix the problem well enough that the parts don't need to be replaced. Who is right? And if I do need to replace some parts, which parts exactly will need replacing? Just the crank and gearwheel? Or a lot more than that?
I have read on various other forums that some people think that once this starts to happen, the parts are already damaged and will need replacing, but others think that a touch of Loctite 243 Threadlocker will fix the problem well enough that the parts don't need to be replaced. Who is right? And if I do need to replace some parts, which parts exactly will need replacing? Just the crank and gearwheel? Or a lot more than that?
08-31-20, 10:41 PM
#13
Mostly harmless �

Join Date: Nov 2010
Location: Novi Sad
Posts: 4,430
Bikes: Heavy, with friction shifters
Mentioned: 22 Post(s)
Tagged: 0 Thread(s)
Quoted: 1107 Post(s)
Liked 216 Times
in
130 Posts
Square taper cranks are fixed to the axle using preload. Common mistake when mounting them is not tightening the mounting bolt enough, and/or not putting any mounting paste (or grease) on the axle, and the mounting bolt. This results in the cranks not getting pushed high enough against the axle. So, when you start riding, there is some elastic deformation in the crank material. And they will move a bit higher up - moving away from the pressure/force that the tightening bolt is exerting on them. Which then makes the tightening bolt loose. It then starts coming out, and the cranks follow it - looking to go towards the lower pressure/preload. Once they slide down enough, they will get damaged, since when you put pedalling force, the axle and the crank interface is no longer aligned.
Depending on how bad the damage is, lubricating and re-tightening can help - sometimes. Most often not.
Aluminium cranks usually take all the damage, while steel ones can damage the axle as well - so both the axle and the cranks need to be replaced.
It is interesting that I found some manufacturer recommendations (think I still have a Campagnolo manual somewhere in the shop) say to not lubricate the interface before mounting. Based on my knowledge and experience, this is wrong. Of course, on them Internetssess, opinions on that, as well as most other stuff, are divided.
Torque wrench is the safe bet when tightening. Especially if you don't do that every day or so.
09-01-20, 11:59 AM
#14
Senior Member
Also, once the bolt has been properly torqued don't come back and retighten the bolt. https://www.sheldonbrown.com/brandt/...ng-cranks.html
Likes For davidad:
09-01-20, 09:08 PM
#15
Member
Thread Starter
Join Date: Oct 2018
Posts: 32
Mentioned: 0 Post(s)
Tagged: 0 Thread(s)
Quoted: 19 Post(s)
Liked 0 Times
in
0 Posts
Thanks for all your replies.
I took the bike to a non-profit bike workshop and the technician there advised me that I needed to replace the crank, but that I didn't need to replace the spindle. It\s been a week since then and so far the new crank has stayed firmly attached.
I took the bike to a non-profit bike workshop and the technician there advised me that I needed to replace the crank, but that I didn't need to replace the spindle. It\s been a week since then and so far the new crank has stayed firmly attached.
09-01-20, 09:32 PM
#16
Senior Member

Join Date: May 2017
Location: Northampton, MA
Posts: 1,909
Bikes: 36" Unicycle, winter knock-around hybrid bike
Mentioned: 15 Post(s)
Tagged: 0 Thread(s)
Quoted: 930 Post(s)
Liked 393 Times
in
282 Posts
You won't get a square taper crank bolt tight enough with even a hardware store extra long allen key.
What works is either an adapter for a socket wrench, or the extra extra long allen keys sold specifically for cycling use.
I ride with a special 8 inch one in my saddle bag.
What works is either an adapter for a socket wrench, or the extra extra long allen keys sold specifically for cycling use.
I ride with a special 8 inch one in my saddle bag.
09-02-20, 02:34 AM
#17
Senior Member
Join Date: Mar 2008
Posts: 8,688
Mentioned: 46 Post(s)
Tagged: 0 Thread(s)
Quoted: 1074 Post(s)
Liked 295 Times
in
222 Posts
If you can't get another crankset and if it's a square-taper one you might be able to extend its life.
Get a soda can and cut it apart so that you can get strips the width of the flats on your spindle. You'll need four of these shims.
Use a gel type cyanoacrylic glue to glue a piece of the soda can on each of the four flats on the spindle. I apply glue to one flat then use a small bar clamp from a dollar store to clamp the shim to the flat. It only takes a minute or so for the glue to set up enough to remove the clamp. I do that for each of the four shims.
Put the crank back on and fully tighten the bolt.
I believe what made it successful is the "fully tighten the bolt" bit.
Other only option I can see is that it's the cyanoacrylate acting as a filler with just the right amount of give.
I've read about people using the liquid metal type epoxys, or epoxys mixed with metal filings as filler and gotten that to work.
09-02-20, 04:18 AM
#18
Senior Member
Join Date: Jun 2014
Location: Ontario, Canada
Posts: 4,624
Bikes: iele Latina, Miele Suprema, Miele Uno LS, Miele Miele Beta, MMTB, Bianchi Model Unknown, Fiori Venezia, Fiori Napoli, VeloSport Adamas AX
Mentioned: 16 Post(s)
Tagged: 0 Thread(s)
Quoted: 1324 Post(s)
Liked 927 Times
in
640 Posts
I'm not sure you've got the cause and effect right here. The soda can shims don't change the shape of the damaged interface, only the dimensions. For all intents and purposes, they' re no more squishable than the base material either.
I believe what made it successful is the "fully tighten the bolt" bit.
Other only option I can see is that it's the cyanoacrylate acting as a filler with just the right amount of give.
I've read about people using the liquid metal type epoxys, or epoxys mixed with metal filings as filler and gotten that to work.
Cheers
09-02-20, 08:39 AM
#19
Senior Member
Thanks for all your replies.
I took the bike to a non-profit bike workshop and the technician there advised me that I needed to replace the crank, but that I didn't need to replace the spindle. It\s been a week since then and so far the new crank has stayed firmly attached.
I took the bike to a non-profit bike workshop and the technician there advised me that I needed to replace the crank, but that I didn't need to replace the spindle. It\s been a week since then and so far the new crank has stayed firmly attached.
09-02-20, 03:23 PM
#20
Senior Member
Join Date: May 2003
Location: Mountain Brook. AL
Posts: 4,002
Mentioned: 14 Post(s)
Tagged: 0 Thread(s)
Quoted: 303 Post(s)
Likes: 0
Liked 136 Times
in
104 Posts
Normally when mounting a sq taper set, the end of the spindle should be inset at least 1/16" from the crank
surface where the bolt meets it. Better to be closer to 1/8" inset. Then when tightening the bolt the spindle
and crank are pulled together. If the spindle end is very close to the mounting surface of crank then the
bolt bottoms out on the spindle before it gets tight and an amount of torque sufficient to break the bolt will
not be enough. Adding the soda can shims to the taper pushes the crank a bit further out and prevents the
bolt from bottoming out, at least for awhile. Once the taper in the crank is wallowed out enough the only
option is replacement.
