


Blasptwenty: Overdone, over-complicated mod build for video rig
 06-06-20, 02:49 PM
#201

www.theheadbadge.com
Thread Starter

Join Date: Sep 2005
Location: Southern Florida
Posts: 28,513
Bikes: https://www.theheadbadge.com
Mentioned: 124 Post(s)
Tagged: 0 Thread(s)
Quoted: 2422 Post(s)
Liked 4,395 Times
in
2,092 Posts
Interesting things have happened. Apparently, the Loctite 242 that I used to cinch the upper fender bolt leaked out and attacked the front fender - which explains why the fender kept rubbing the tire.
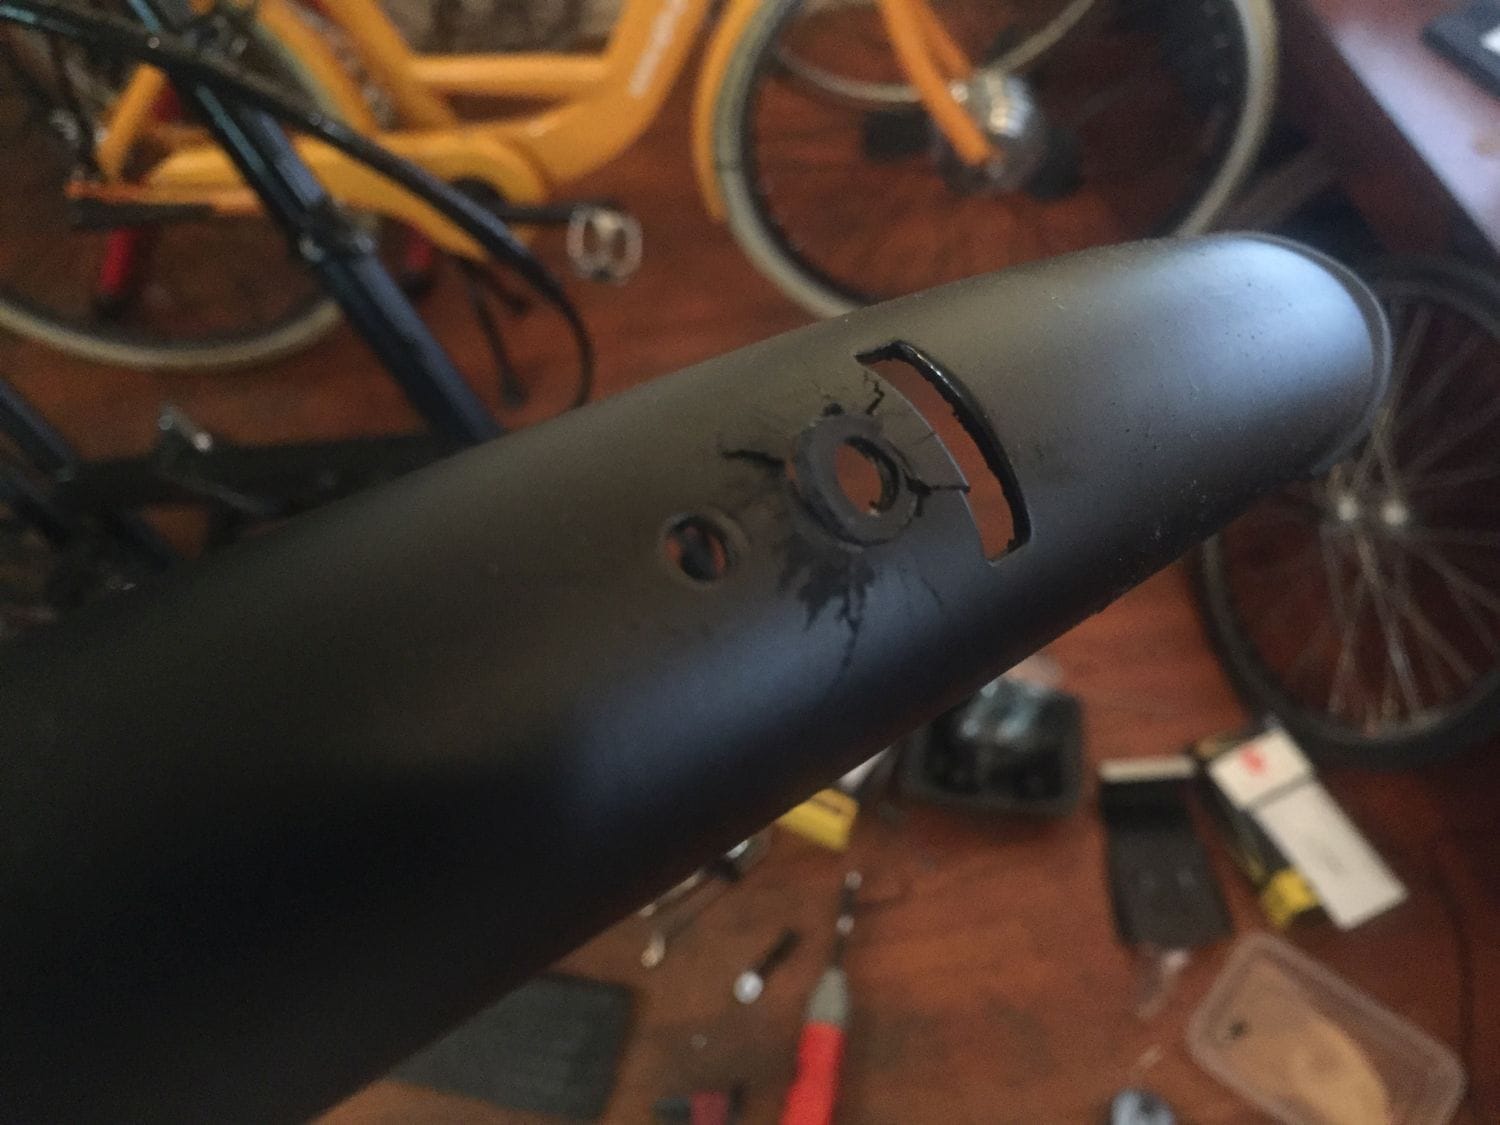
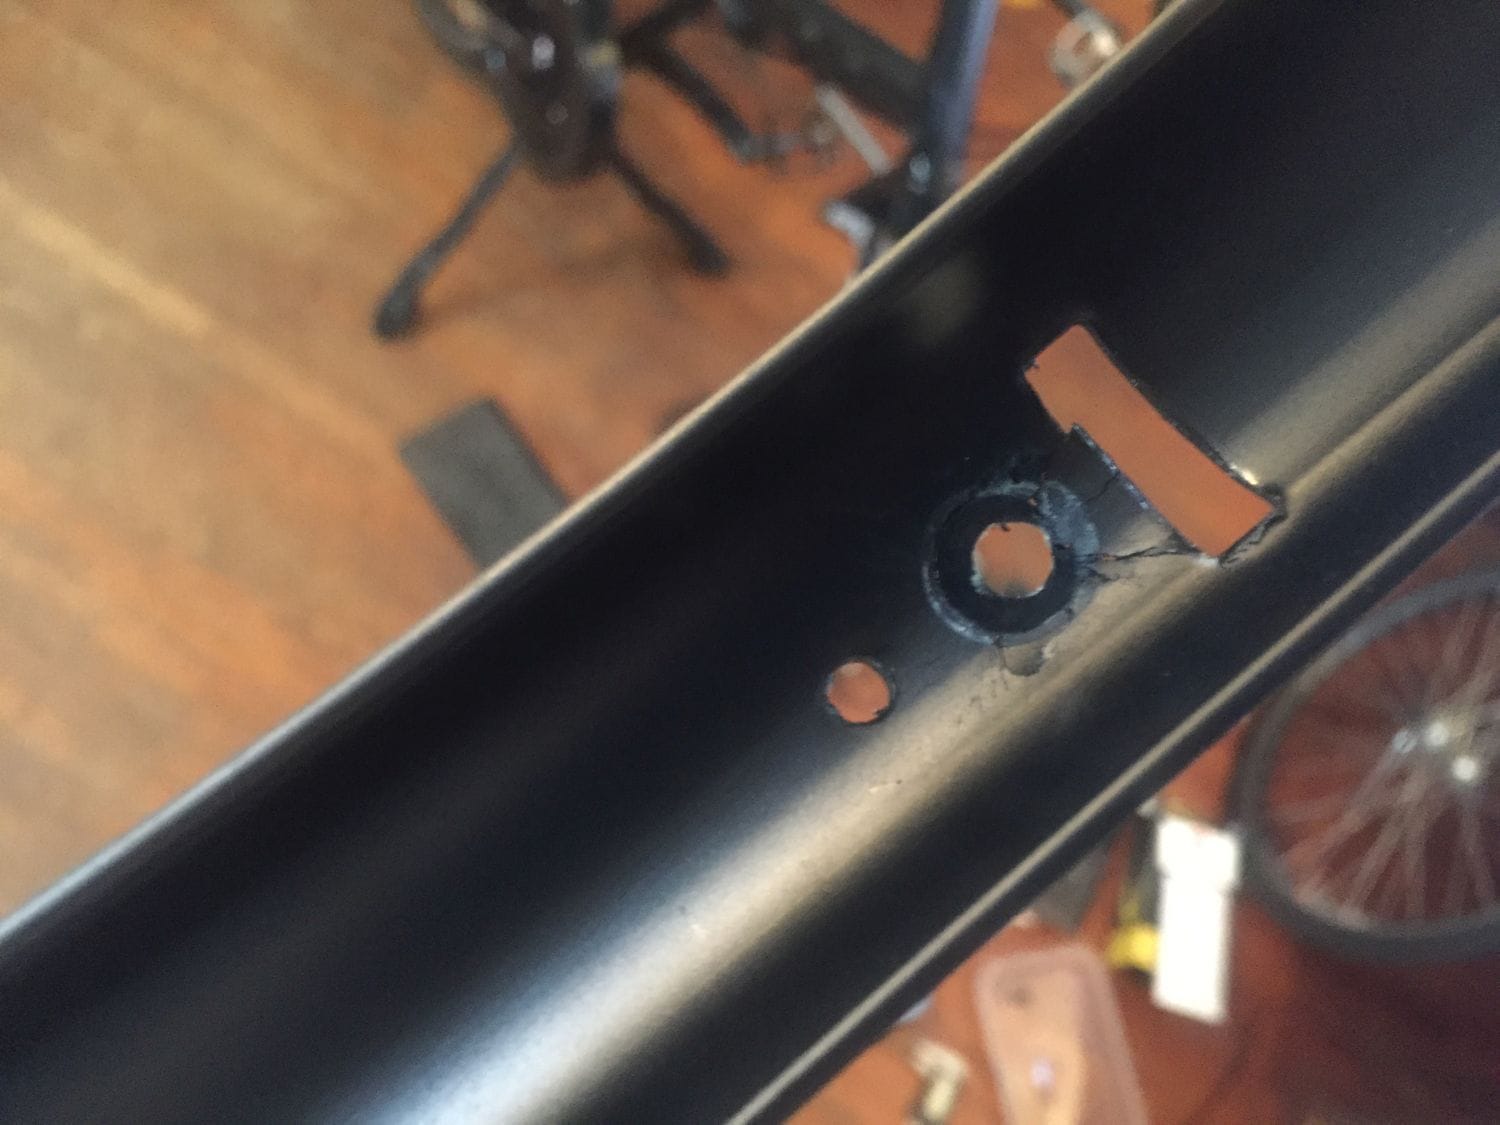
I've since filled the entire broken area, slot, and rear hole with Milliput, and lined the bottom with a sliver of an aluminum can just to be on the safe side. I'll find out tomorrow if the end result will have the strength to stay together, get another hole drilled through it, and not crack again.
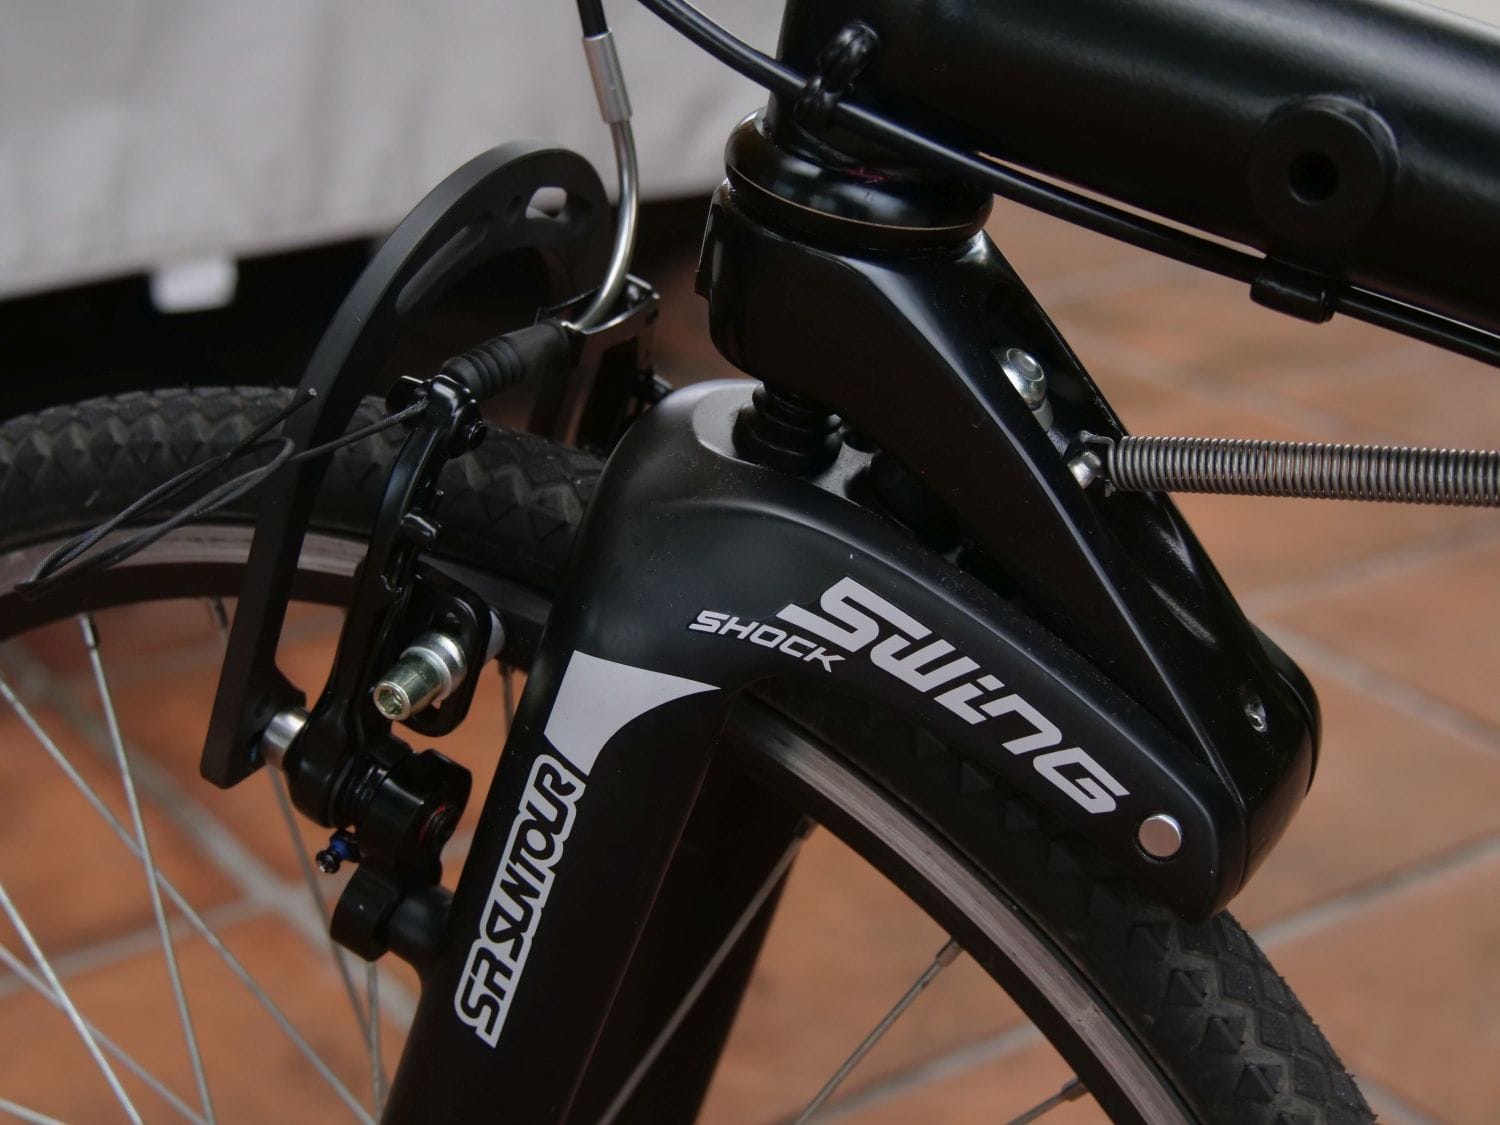
This is a pretty lousy photo (and doesn't show what I'm about to describe), but upon installing the new Mini-V brakes, I found that the V-brake cable binder bolt interferes with the brake stiffener. Yet another order to McMaster Carr for stainless spacers should solve that.
Paul Duplex lever is also on order too.
-Kurt
I've since filled the entire broken area, slot, and rear hole with Milliput, and lined the bottom with a sliver of an aluminum can just to be on the safe side. I'll find out tomorrow if the end result will have the strength to stay together, get another hole drilled through it, and not crack again.
This is a pretty lousy photo (and doesn't show what I'm about to describe), but upon installing the new Mini-V brakes, I found that the V-brake cable binder bolt interferes with the brake stiffener. Yet another order to McMaster Carr for stainless spacers should solve that.
Paul Duplex lever is also on order too.
-Kurt
__________________


 06-08-20, 11:52 PM
#202
C*pt*i* Obvious
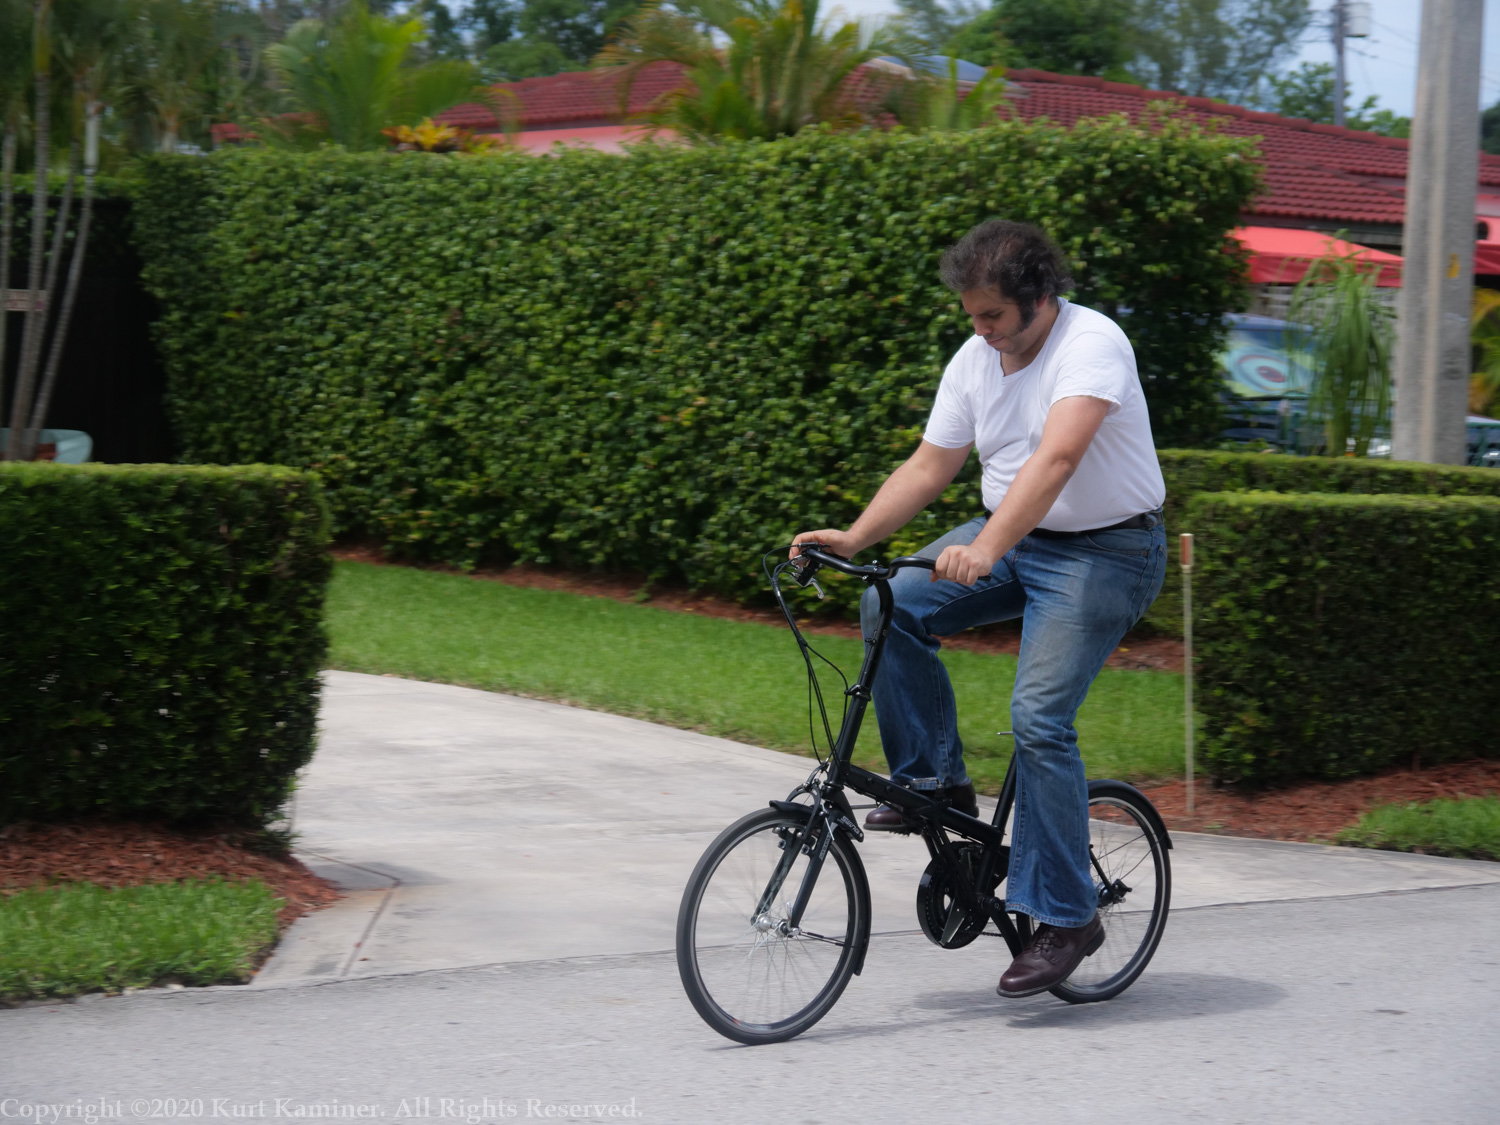
First impressions: The front end of this thing is fantastic. Obviously, it is slightly whippy given that the headtube and stack is so tall, and the bars so narrow, but nothing worse than what you might find from, say, metric 531. I've never ridden a PX10, but I've ridden the 1979/80 PY10 NY International Bike Show prototype, and the front end handling feels very much like that.
It feels surprisingly stable at the top speed I brought it up to (19.5mph according to the phone GPS) even with one hand. It does tend to shimmy if you're being sloppy with the handling, but I'm certain that is the the fork return spring playing silly buggers with the handling and not the inherent geometry of the design itself. The spring will cause the front end to oscillate unnervingly if you attempt to ride it hands off, but - once again - not a geometry issue. Given what I built this for, I'm glad to give up no-hands riding for the benefit of the spring keeping the fork straight when the whole thing is parked.
This said, it is also extremely smooth and maneuverable at low speed. It is not skittish and doesn't at all resemble a stock Twenty. Nor does it resemble the next thing I own in the small-wheeled department - my 18" Birdy BD-1 (which is more skittish than a trapped rat). As a matter of fact, it is the first small-wheel bike I've ever ridden that feels as if there's a 700C up front, but without the extra rotating mass.
Totally my fault, I grabbed too much front brake while riding one handed, jack knifed the front wheel and face planted like a tall tree on hard pavement.
Cracked my nose, and probably my knee, I was able to ride home and walk up the stairs! (wife was freaked out, mostly at my nonchalance of the whole situation)
I'd like to think I know how to ride a bike, until I realize just how easy it is to forget.
Operator skill trumps equipment every time!
06-09-20, 07:25 AM
#203
www.theheadbadge.com
Thread Starter
Join Date: Sep 2005
Location: Southern Florida
Posts: 28,513
Bikes: https://www.theheadbadge.com
Mentioned: 124 Post(s)
Tagged: 0 Thread(s)
Quoted: 2422 Post(s)
Liked 4,395 Times
in
2,092 Posts
My Dahon kicked my ass a couple of weeks ago.
Totally my fault, I grabbed too much front brake while riding one handed, jack knifed the front wheel and face planted like a tall tree on hard pavement.
Cracked my nose, and probably my knee, I was able to ride home and walk up the stairs! (wife was freaked out, mostly at my nonchalance of the whole situation)
I'd like to think I know how to ride a bike, until I realize just how easy it is to forget.
Operator skill trumps equipment every time!
I wouldn't necessarily put it down to operator skill. My experiences with Dahon have been limited to two Speed D7s and a Boardwalk S1, all stock, and each one of them rode like their front ends were just waiting for the slightest lapse in concentration. I've never measured the headtube angle on these machines, but I wonder if they're steep enough to cause mechanical trail to reduce more rapidly during cornering than, say, this Twenty.
At any rate, I believe that the combination of flat bars with a short effective stem length is a combination for trouble too.
-Kurt
__________________
06-09-20, 07:34 AM
#204
Freewheel Medic

Join Date: Oct 2005
Location: An Island on the Coast of GA!
Posts: 12,882
Bikes: Snazzy* Schwinns, Classy Cannondales & a Super Pro Aero Lotus (* Ed.)
Mentioned: 140 Post(s)
Tagged: 0 Thread(s)
Quoted: 1452 Post(s)
Liked 2,195 Times
in
962 Posts
Just my 2 cents based on my Dahon Speed 7 (converted to dropbars to ride like a road bike), is that it rides very simular to my road bikes, just that it is harsher on absorbing rough road conditions due to the 20 inch (406mm) wheels and narrow tires. I can ride no-hands with great confidence.
Kurt, so sorry about your fender cracking and the new mini V-brakes challenge. Bummer!
Kurt, so sorry about your fender cracking and the new mini V-brakes challenge. Bummer!
__________________
Bob
Enjoying the GA coast all year long!
Thanks for visiting my website: www.freewheelspa.com
Bob
Enjoying the GA coast all year long!
Thanks for visiting my website: www.freewheelspa.com
06-09-20, 07:28 PM
#205
C*pt*i* Obvious
Sorry to hear it. You have to admit, the human body is quite a resilient thing. Can't say I've had any crash that violent, but I've had the side of my face torn half-open from an automobile-induced faceplant. Had that same nonchalant reaction.
I wouldn't necessarily put it down to operator skill. My experiences with Dahon have been limited to two Speed D7s and a Boardwalk S1, all stock, and each one of them rode like their front ends were just waiting for the slightest lapse in concentration. I've never measured the headtube angle on these machines, but I wonder if they're steep enough to cause mechanical trail to reduce more rapidly during cornering than, say, this Twenty.
At any rate, I believe that the combination of flat bars with a short effective stem length is a combination for trouble too.
-Kurt
I'm not confident enough to ride it hands free anymore, that front wheel flips around really quickly.
It "appears" my injuries have healed, I only have a bruised ego at this point, that too will heal.
06-10-20, 06:50 AM
#206
www.theheadbadge.com
Thread Starter
Join Date: Sep 2005
Location: Southern Florida
Posts: 28,513
Bikes: https://www.theheadbadge.com
Mentioned: 124 Post(s)
Tagged: 0 Thread(s)
Quoted: 2422 Post(s)
Liked 4,395 Times
in
2,092 Posts
Just my 2 cents based on my Dahon Speed 7 (converted to dropbars to ride like a road bike), is that it rides very simular to my road bikes, just that it is harsher on absorbing rough road conditions due to the 20 inch (406mm) wheels and narrow tires. I can ride no-hands with great confidence.
Kurt, so sorry about your fender cracking and the new mini V-brakes challenge. Bummer!
Kurt, so sorry about your fender cracking and the new mini V-brakes challenge. Bummer!
The spacers for the V brakes arrive today, if all goes well. McMaster Carr have been making a gazillion dollars out of me as of recent.
-Kurt
__________________
06-10-20, 05:02 PM
#207
www.theheadbadge.com
Thread Starter
Join Date: Sep 2005
Location: Southern Florida
Posts: 28,513
Bikes: https://www.theheadbadge.com
Mentioned: 124 Post(s)
Tagged: 0 Thread(s)
Quoted: 2422 Post(s)
Liked 4,395 Times
in
2,092 Posts
Some work today: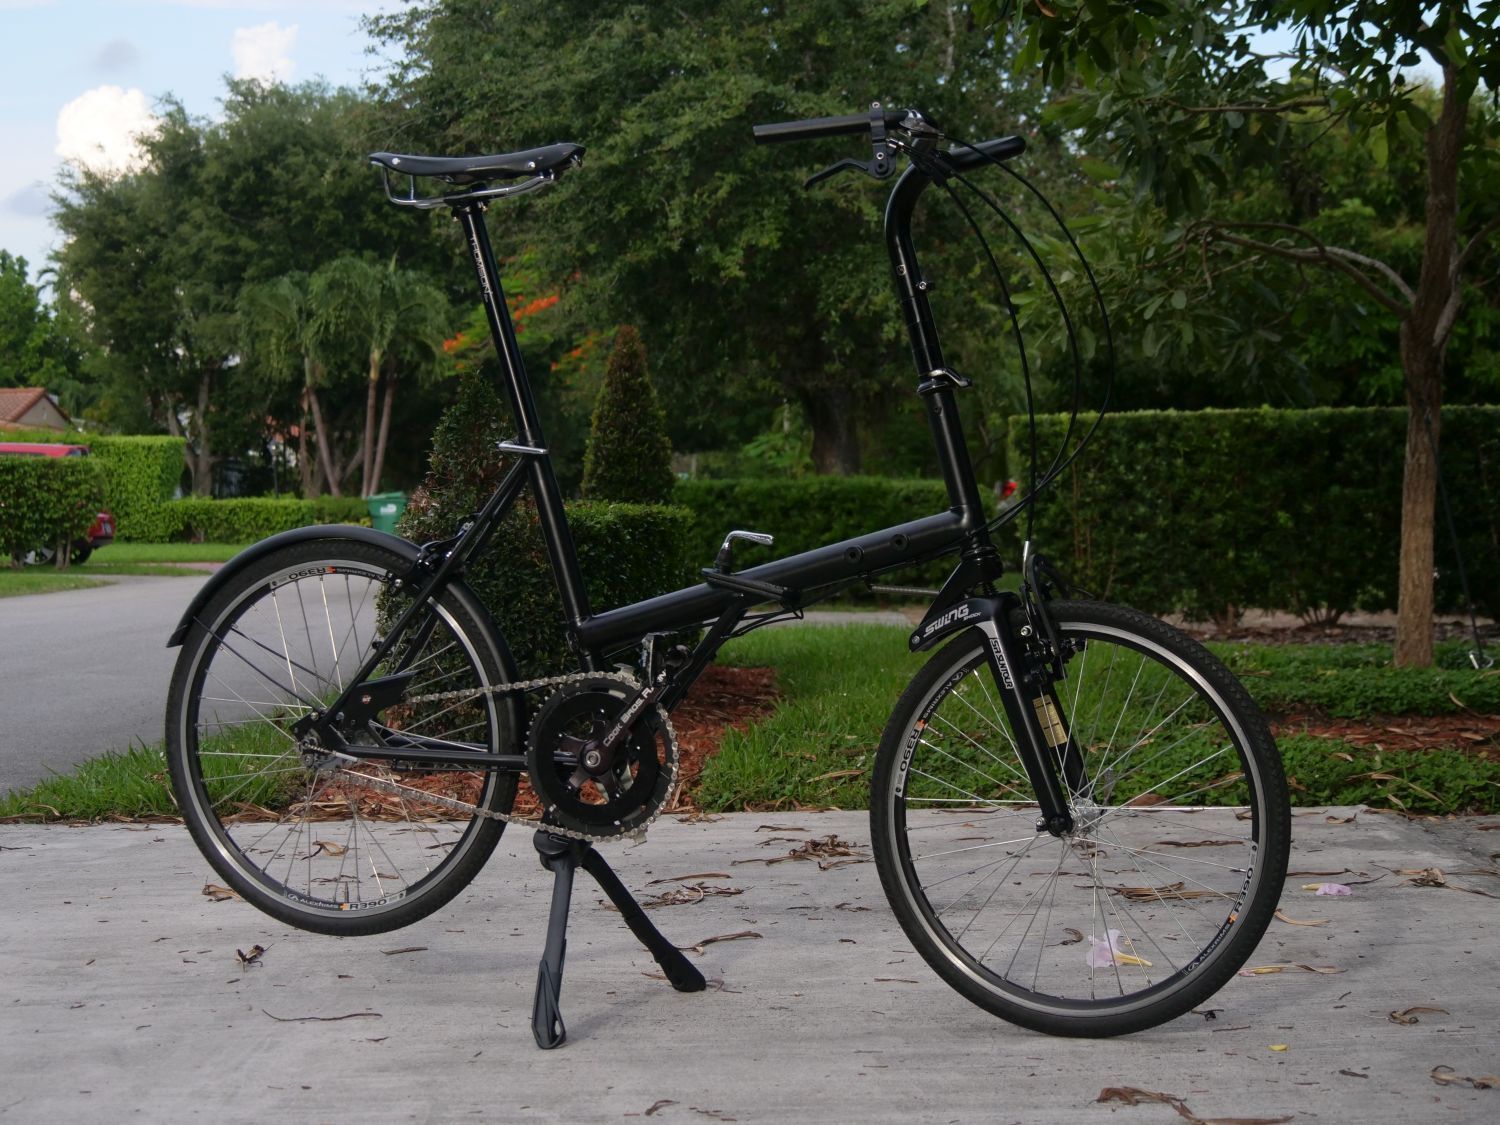
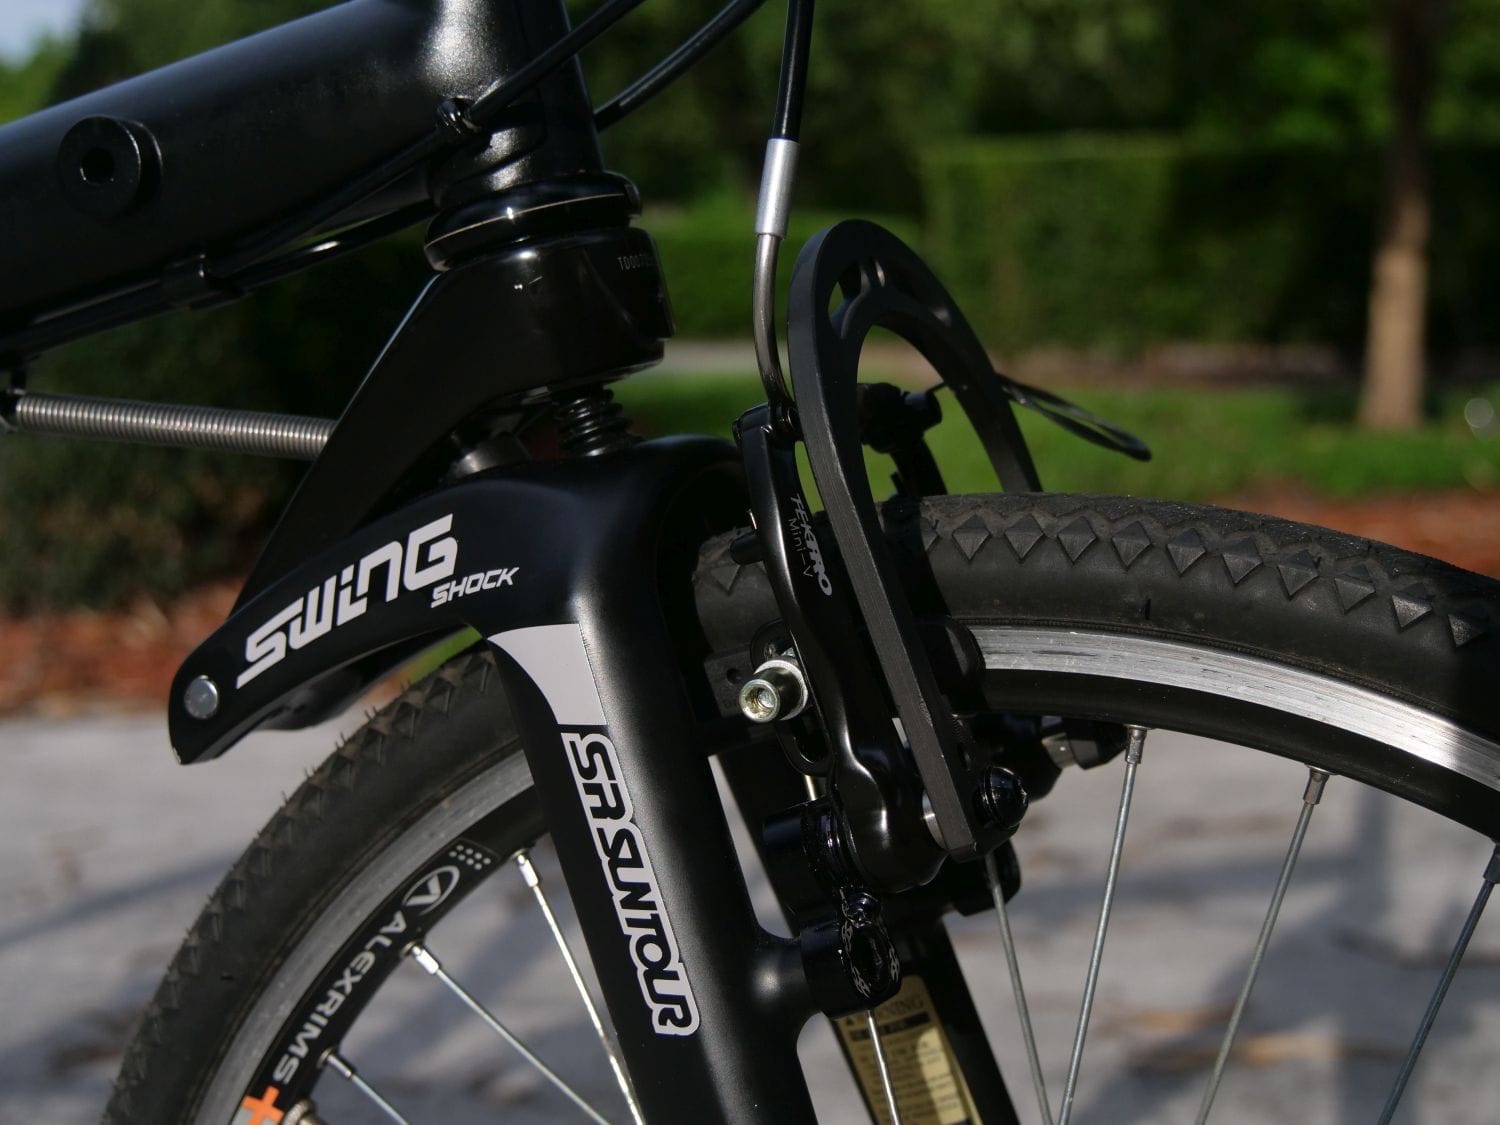
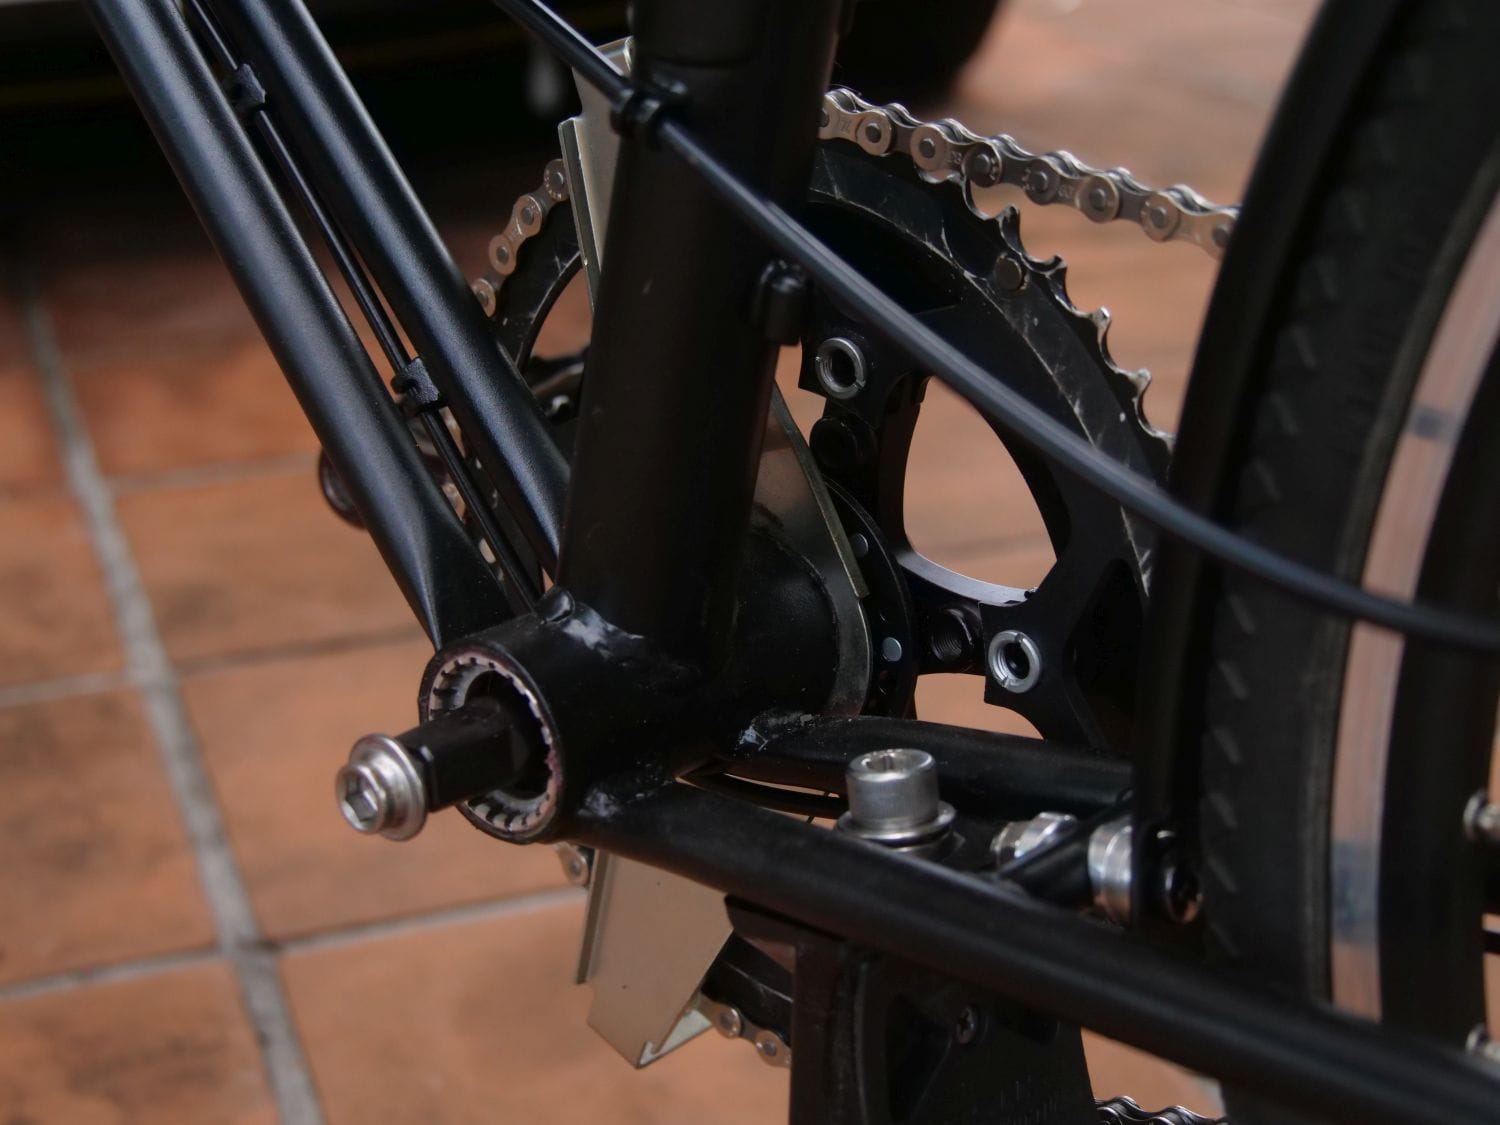
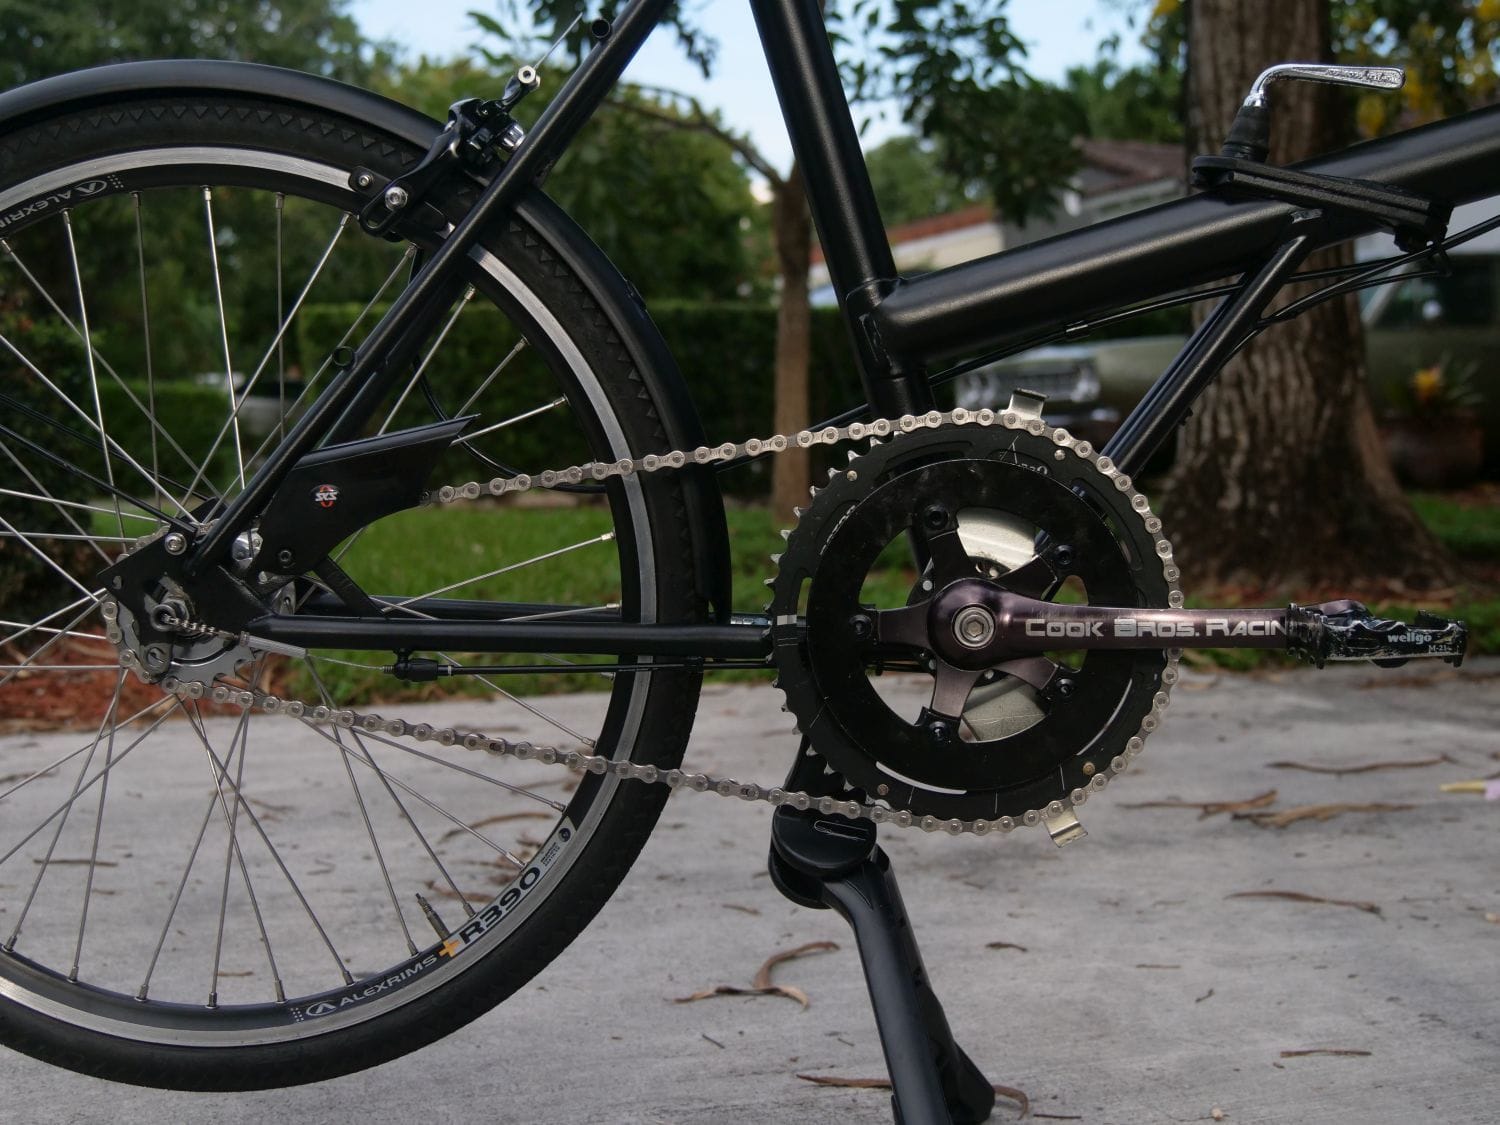

- I decided to stick with the 50t ring. To get good chainline - and so the triplizer chainring bolts wouldn't bottom out - this required the triple spacers I originally bought, plus some additional 1mm spacers.
- In preparation for the 4-speed,
I decided to add enough chain to wrap a 16t Sturmey cog in back. I'm going to change it with a 15t to get the rear wheel positioned better (if it's not just right, it rubs on the rear stay bolt - if too far forward, it's too far to the end of the drops).Apparently, I can't read. I thought it was a 16t. That thing I installed is a 19t. Oops. - The thickest spacers I ordered from McMaster Carr (6mm) worked perfectly to space the brake booster from the Mini-V's binder bolt.
- The new bottom bracket isn't wide enough to clear the PAS sensor ring.
- The Paul lever works perfectly. Absolutely perfectly. Worth every penny.
__________________
Last edited by cudak888; 06-10-20 at 07:28 PM.
06-10-20, 07:15 PM
#209
www.theheadbadge.com
Thread Starter
Join Date: Sep 2005
Location: Southern Florida
Posts: 28,513
Bikes: https://www.theheadbadge.com
Mentioned: 124 Post(s)
Tagged: 0 Thread(s)
Quoted: 2422 Post(s)
Liked 4,395 Times
in
2,092 Posts
Gotta look at my previous posts to see what BB length I need to order now...
-Kurt
__________________
06-11-20, 10:30 PM
#210
C*pt*i* Obvious
This thread delivers, that machine is way more complicated than any bike I have built!
That said, in terms of cost effectiveness, it might actually be a tool that pays for itself. (cinema gear is wildly expensive)
My Dahon has been the most cost effective new bike I have ever owned.
That said, in terms of cost effectiveness, it might actually be a tool that pays for itself. (cinema gear is wildly expensive)
My Dahon has been the most cost effective new bike I have ever owned.
06-12-20, 07:28 AM
#211
www.theheadbadge.com
Thread Starter
Join Date: Sep 2005
Location: Southern Florida
Posts: 28,513
Bikes: https://www.theheadbadge.com
Mentioned: 124 Post(s)
Tagged: 0 Thread(s)
Quoted: 2422 Post(s)
Liked 4,395 Times
in
2,092 Posts
This thread delivers, that machine is way more complicated than any bike I have built!
That said, in terms of cost effectiveness, it might actually be a tool that pays for itself. (cinema gear is wildly expensive)
My Dahon has been the most cost effective new bike I have ever owned.
That said, in terms of cost effectiveness, it might actually be a tool that pays for itself. (cinema gear is wildly expensive)
My Dahon has been the most cost effective new bike I have ever owned.
The gear that's going to be mounted to it has eaten a fair bit into my savings too
 . GH5's, DJI Ronins, and GoPro 7/8 Black Editions don't come cheap.
-Kurt
__________________
06-29-20, 02:48 AM
#212
C*pt*i* Obvious
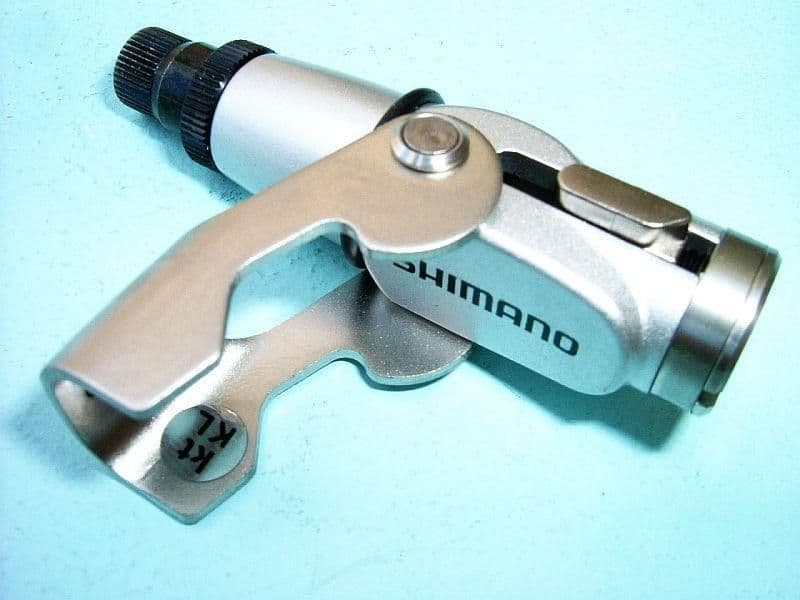
I just made it more complicated - turns out the rim is narrow enough that the front quick release noodle won't come out easily. Just bought one of these to fit inline:
The gear that's going to be mounted to it has eaten a fair bit into my savings too. GH5's, DJI Ronins, and GoPro 7/8 Black Editions don't come cheap.
-Kurt
The gear that's going to be mounted to it has eaten a fair bit into my savings too
. GH5's, DJI Ronins, and GoPro 7/8 Black Editions don't come cheap.-Kurt
I only replace wear items at this point, I have no interest in any bike mods at this time. (my singlespeed is my favorite, and the most robust)
The wife on the other hand is getting the touring bug, I installed a stainless steel rack, and now she wants some waterproof panniers.
Maybe a wireless bike computer and she's done! (I hope anyway)
07-06-20, 06:36 PM
#213
www.theheadbadge.com
Thread Starter
Join Date: Sep 2005
Location: Southern Florida
Posts: 28,513
Bikes: https://www.theheadbadge.com
Mentioned: 124 Post(s)
Tagged: 0 Thread(s)
Quoted: 2422 Post(s)
Liked 4,395 Times
in
2,092 Posts
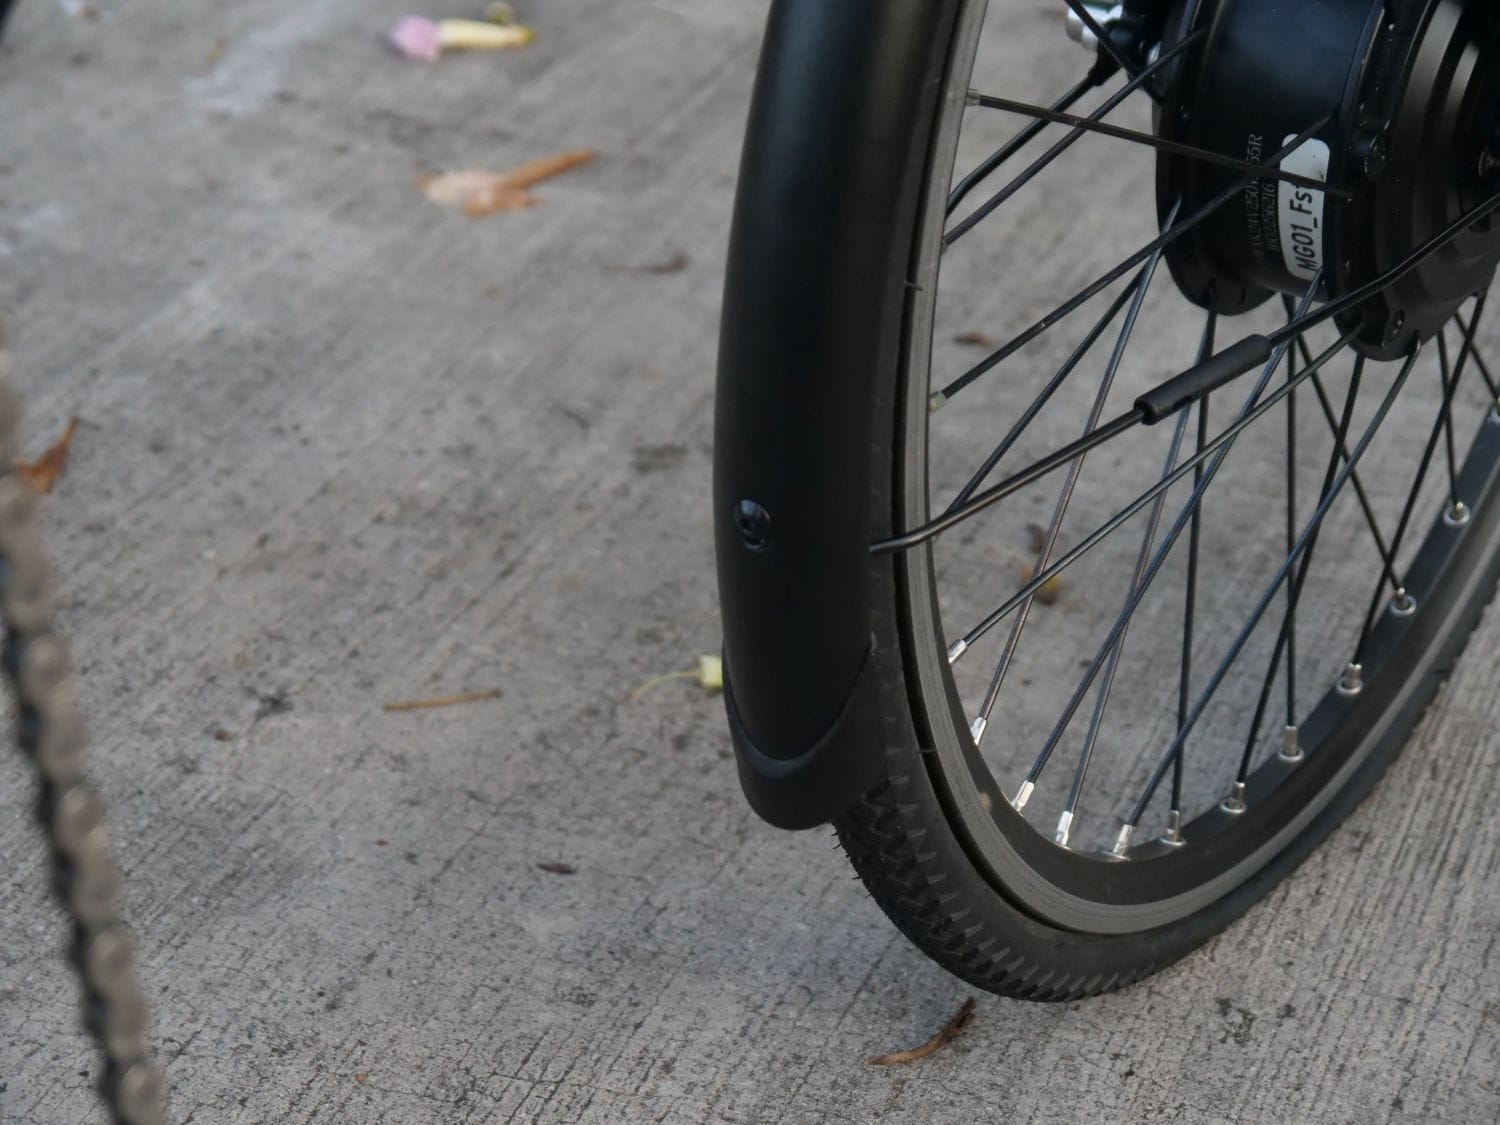
Small update. I asked Tern if they sold just the front fender out of that set...and, believe it or not, they warrantied that fenders. Still surprised, and very pleasantly so - after all, this isn't quite a standard application here. Tern's folding design and welds may be questionable, but their US customer service goes above and beyond for their accessories, that's for sure.
The replacements arrived today...and I decided to do something unconventional. Again.
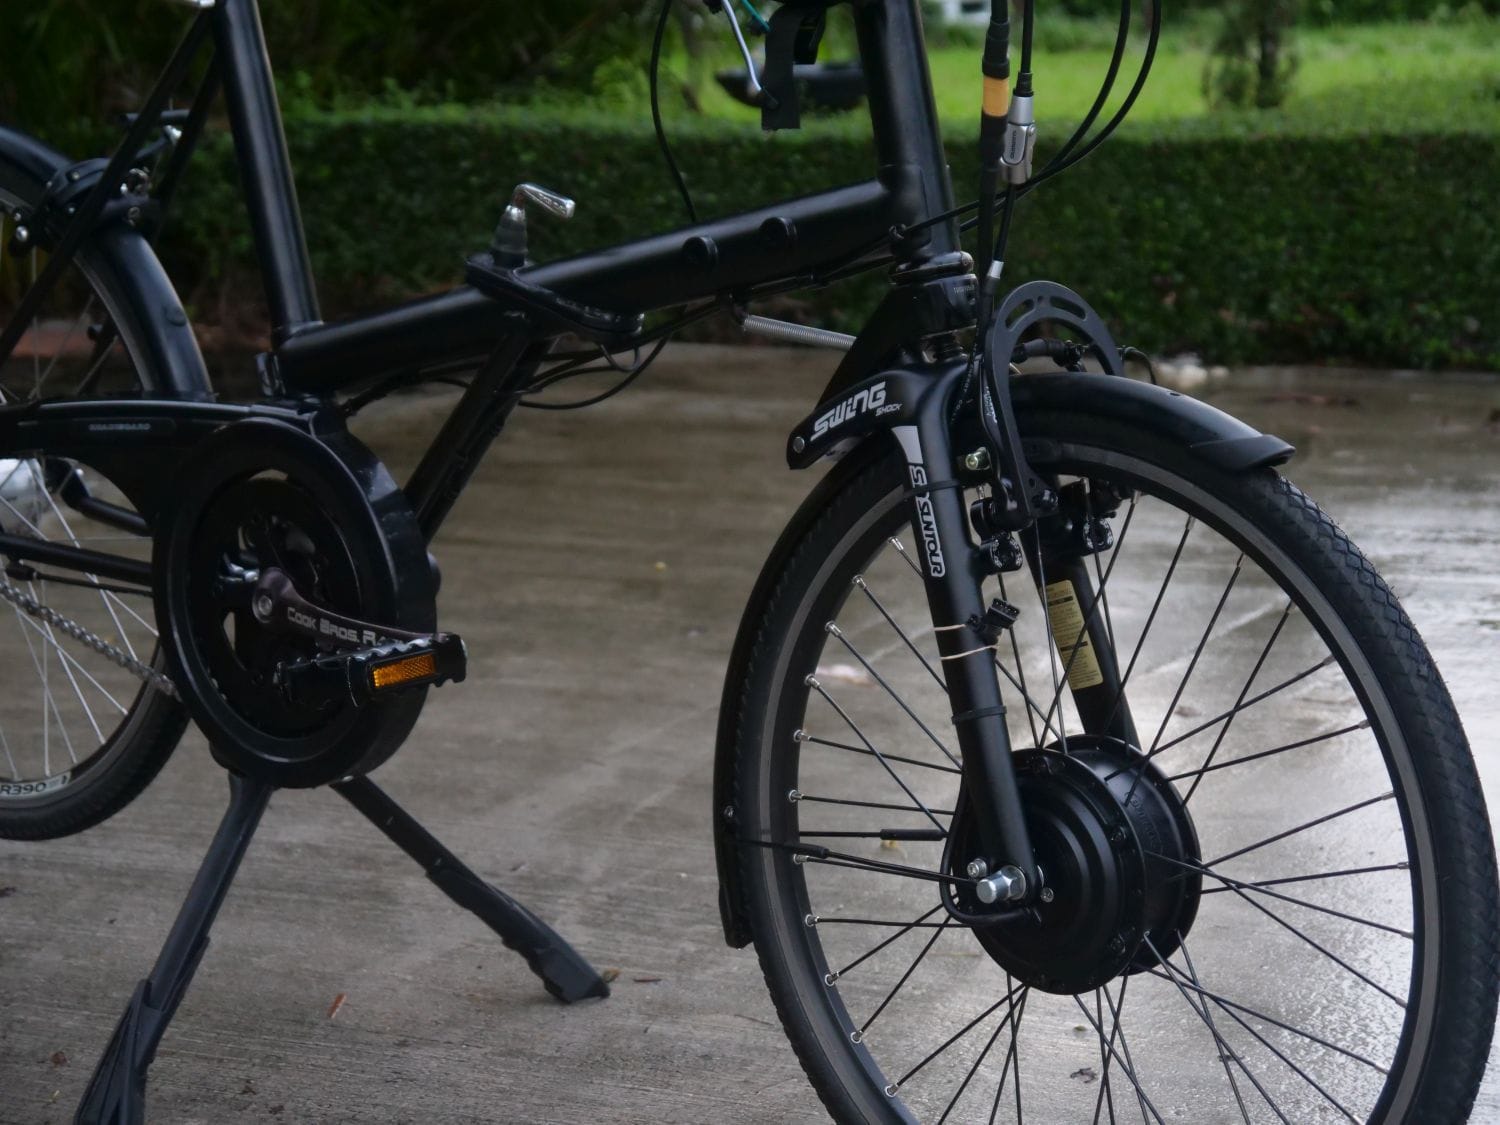
That's the new rear fender on the front, mounted backwards and cut to length. Rather that risk damaging the front fender again, I decided to play with the new spare.
Not only did this save me from having to drill rivets out and use the slotted (and inherently weaker) part of the front fender, I was able to make use of both front fender mounting points under the fork.
The rear required a spare, concave front brake spacer. The shallowest curve I could find, and it matched up perfectly.
Using the rear fender allowed me to play a bit of French Fender Day with this thing, running the fender just a wee bit longer at both ends. The SKS design has a cap at each end which made it impossible to mess up the cut, but the end result under that cap looks pretty good.
The rear brake bridge hole has been repurposed for the stays.
I still have a fairly long, dangling fender to deal with here though, but I might put the original fender stay bolt hole to work by bending a pair of stays from the stock fender position to the V-brake studs on the booster. If I do this, I'll never have to deal with rattling or rubbing...ever.
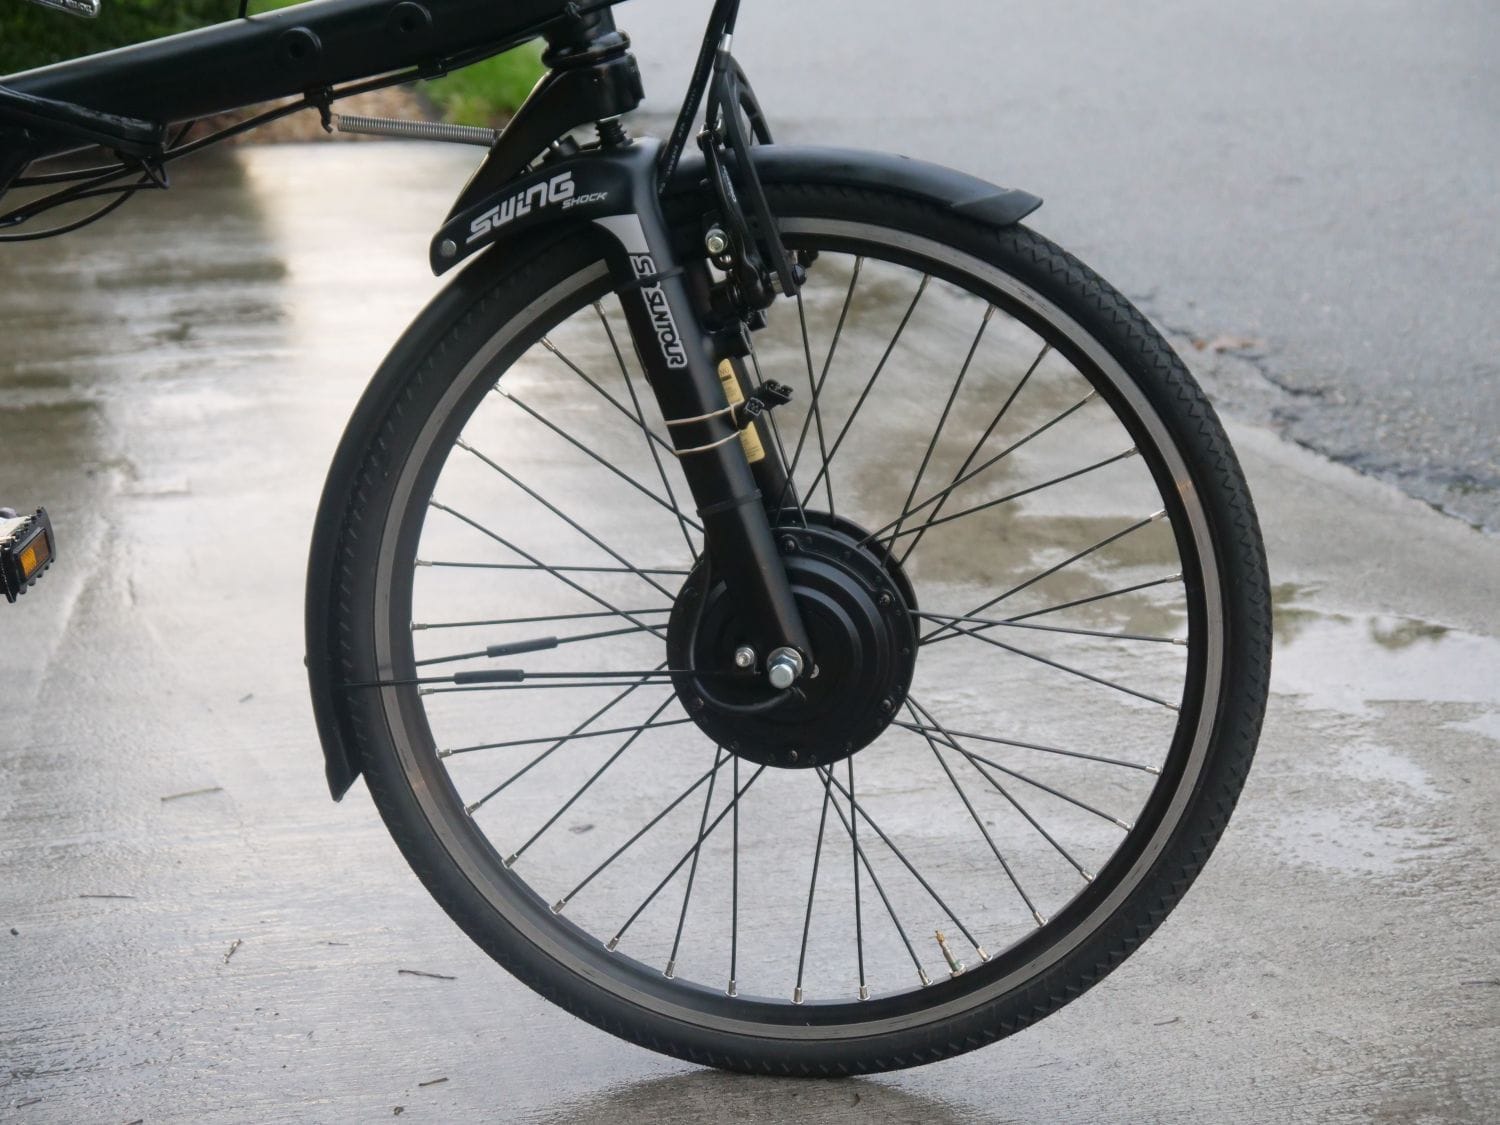
Also, that tube got a (presumably) pinch flat in it right after I re-laced it to the Bafang hub. I have to patch it tonight or tomorrow, but I've also decided to change my non-crossover lacing on the hub motor.
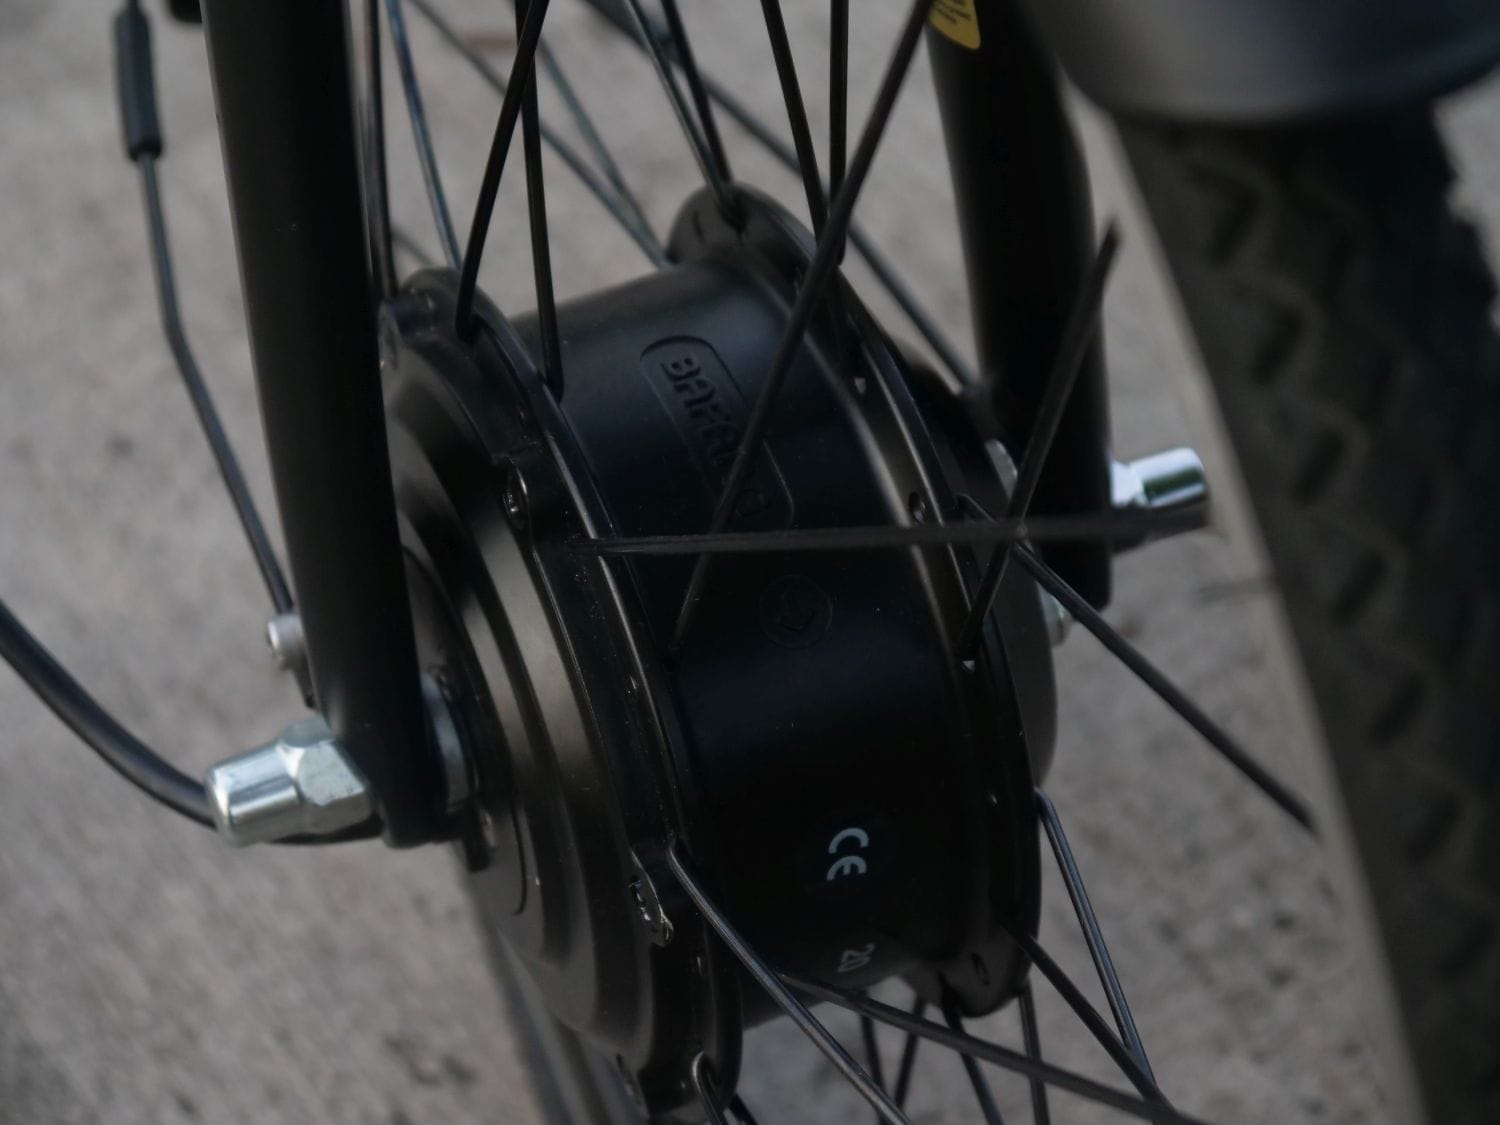
I read a fair bit about the difficulties of lacing 1-cross on a small wheel, and had decided that this was an OK - if not perfect - way around it.
Then I realized that the 1-cross, 350W Bafang motors on JUMP's later 5.5 electric bikes do cross - as all the spokes on these are inboard.
I'll do this modification while I have the tube out. Hope I don't have to replace any spoke nipples from the previous tensioning.
I like both - but there's always something appealing about doing what hasn't been done before.
-Kurt
The replacements arrived today...and I decided to do something unconventional. Again.
That's the new rear fender on the front, mounted backwards and cut to length. Rather that risk damaging the front fender again, I decided to play with the new spare.
Not only did this save me from having to drill rivets out and use the slotted (and inherently weaker) part of the front fender, I was able to make use of both front fender mounting points under the fork.
The rear required a spare, concave front brake spacer. The shallowest curve I could find, and it matched up perfectly.
Using the rear fender allowed me to play a bit of French Fender Day with this thing, running the fender just a wee bit longer at both ends. The SKS design has a cap at each end which made it impossible to mess up the cut, but the end result under that cap looks pretty good.
The rear brake bridge hole has been repurposed for the stays.
I still have a fairly long, dangling fender to deal with here though, but I might put the original fender stay bolt hole to work by bending a pair of stays from the stock fender position to the V-brake studs on the booster. If I do this, I'll never have to deal with rattling or rubbing...ever.
Also, that tube got a (presumably) pinch flat in it right after I re-laced it to the Bafang hub. I have to patch it tonight or tomorrow, but I've also decided to change my non-crossover lacing on the hub motor.
I read a fair bit about the difficulties of lacing 1-cross on a small wheel, and had decided that this was an OK - if not perfect - way around it.
Then I realized that the 1-cross, 350W Bafang motors on JUMP's later 5.5 electric bikes do cross - as all the spokes on these are inboard.
I'll do this modification while I have the tube out. Hope I don't have to replace any spoke nipples from the previous tensioning.
-Kurt
__________________
Likes For cudak888:
07-11-20, 06:43 PM
#214
www.theheadbadge.com
Thread Starter
Join Date: Sep 2005
Location: Southern Florida
Posts: 28,513
Bikes: https://www.theheadbadge.com
Mentioned: 124 Post(s)
Tagged: 0 Thread(s)
Quoted: 2422 Post(s)
Liked 4,395 Times
in
2,092 Posts
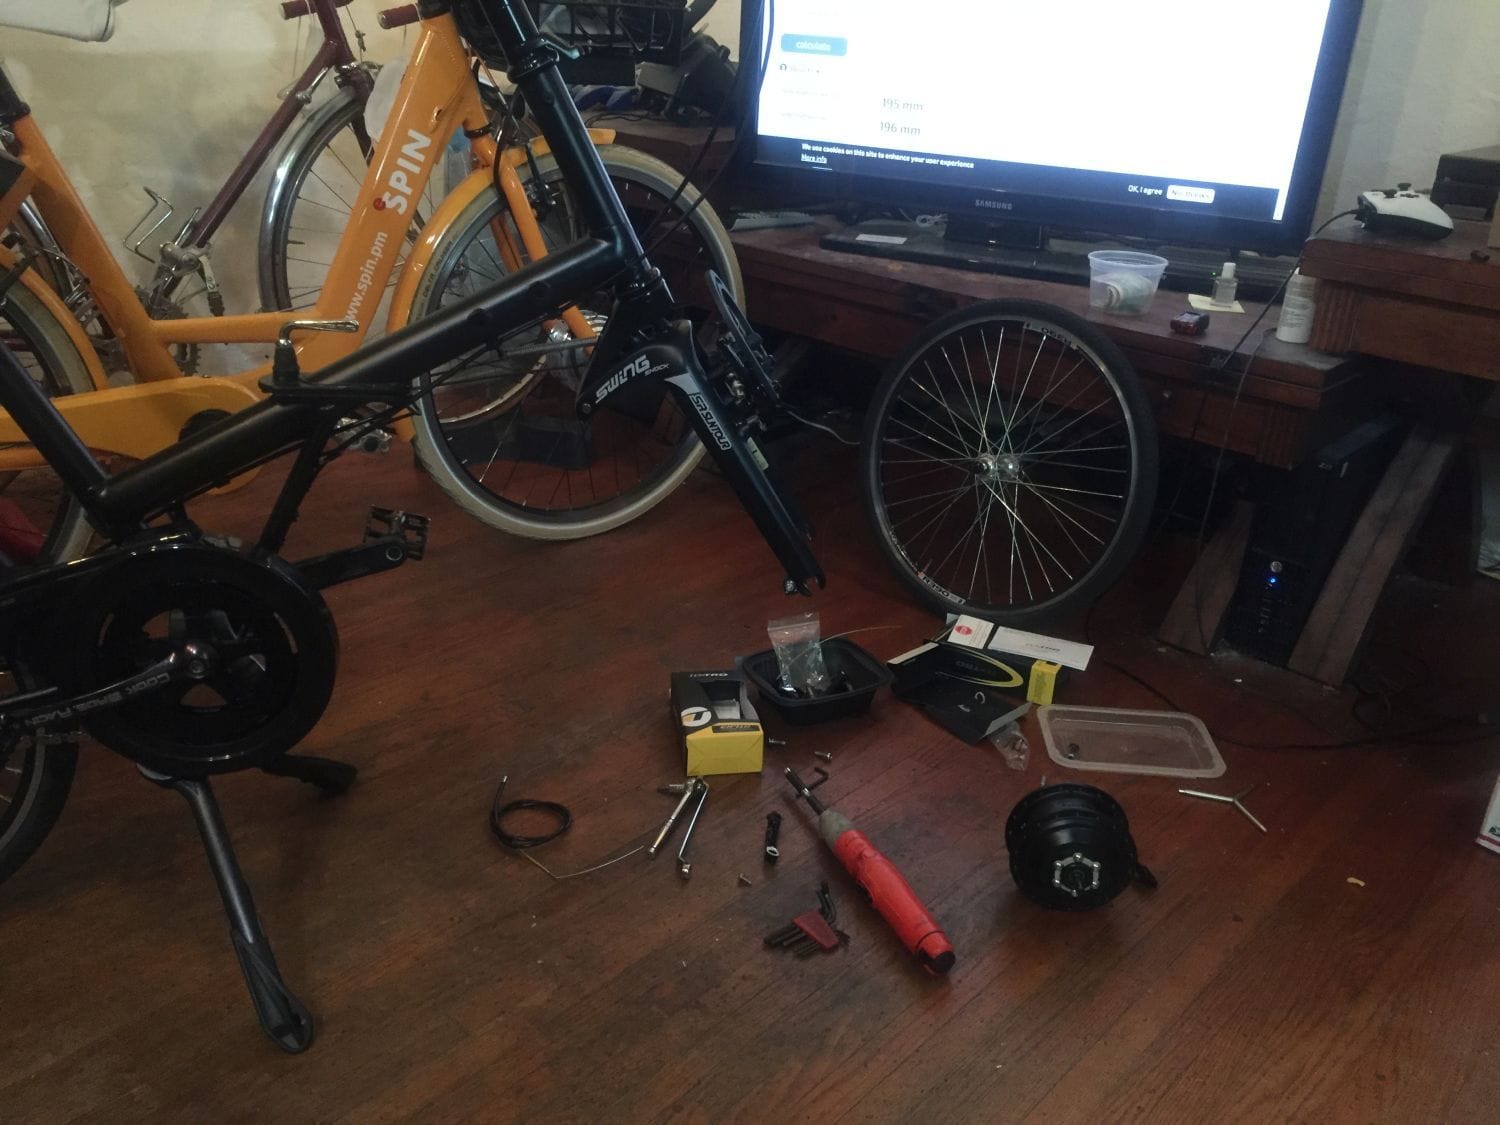
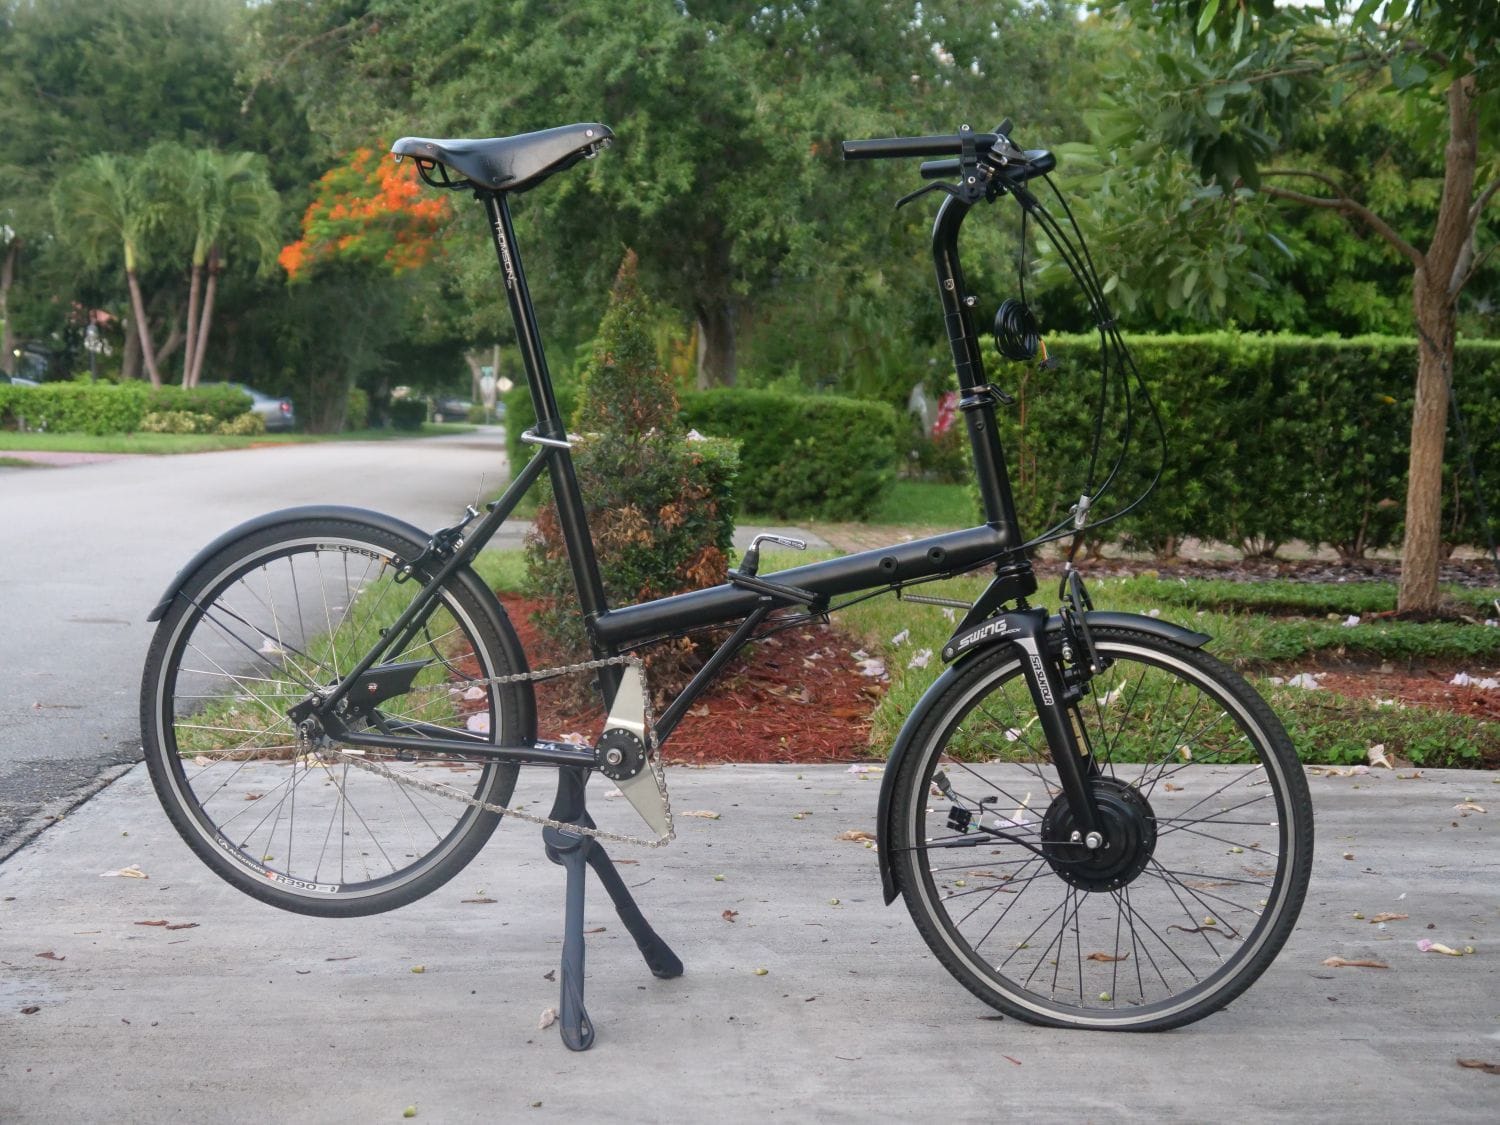
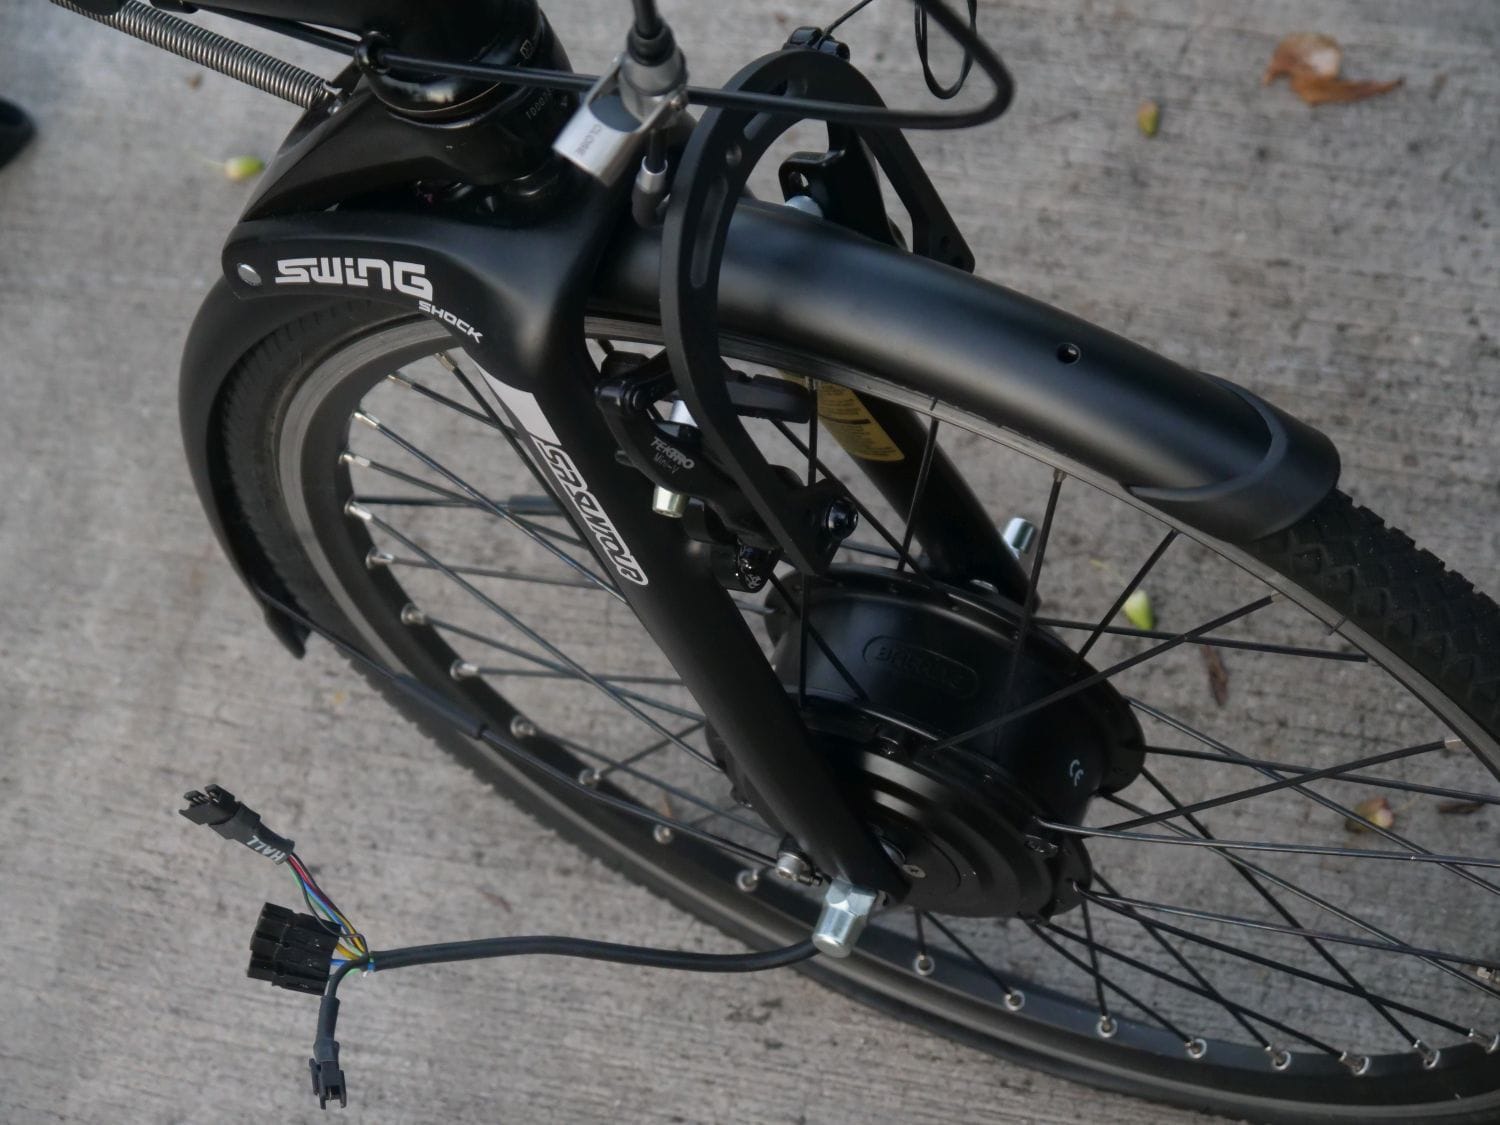
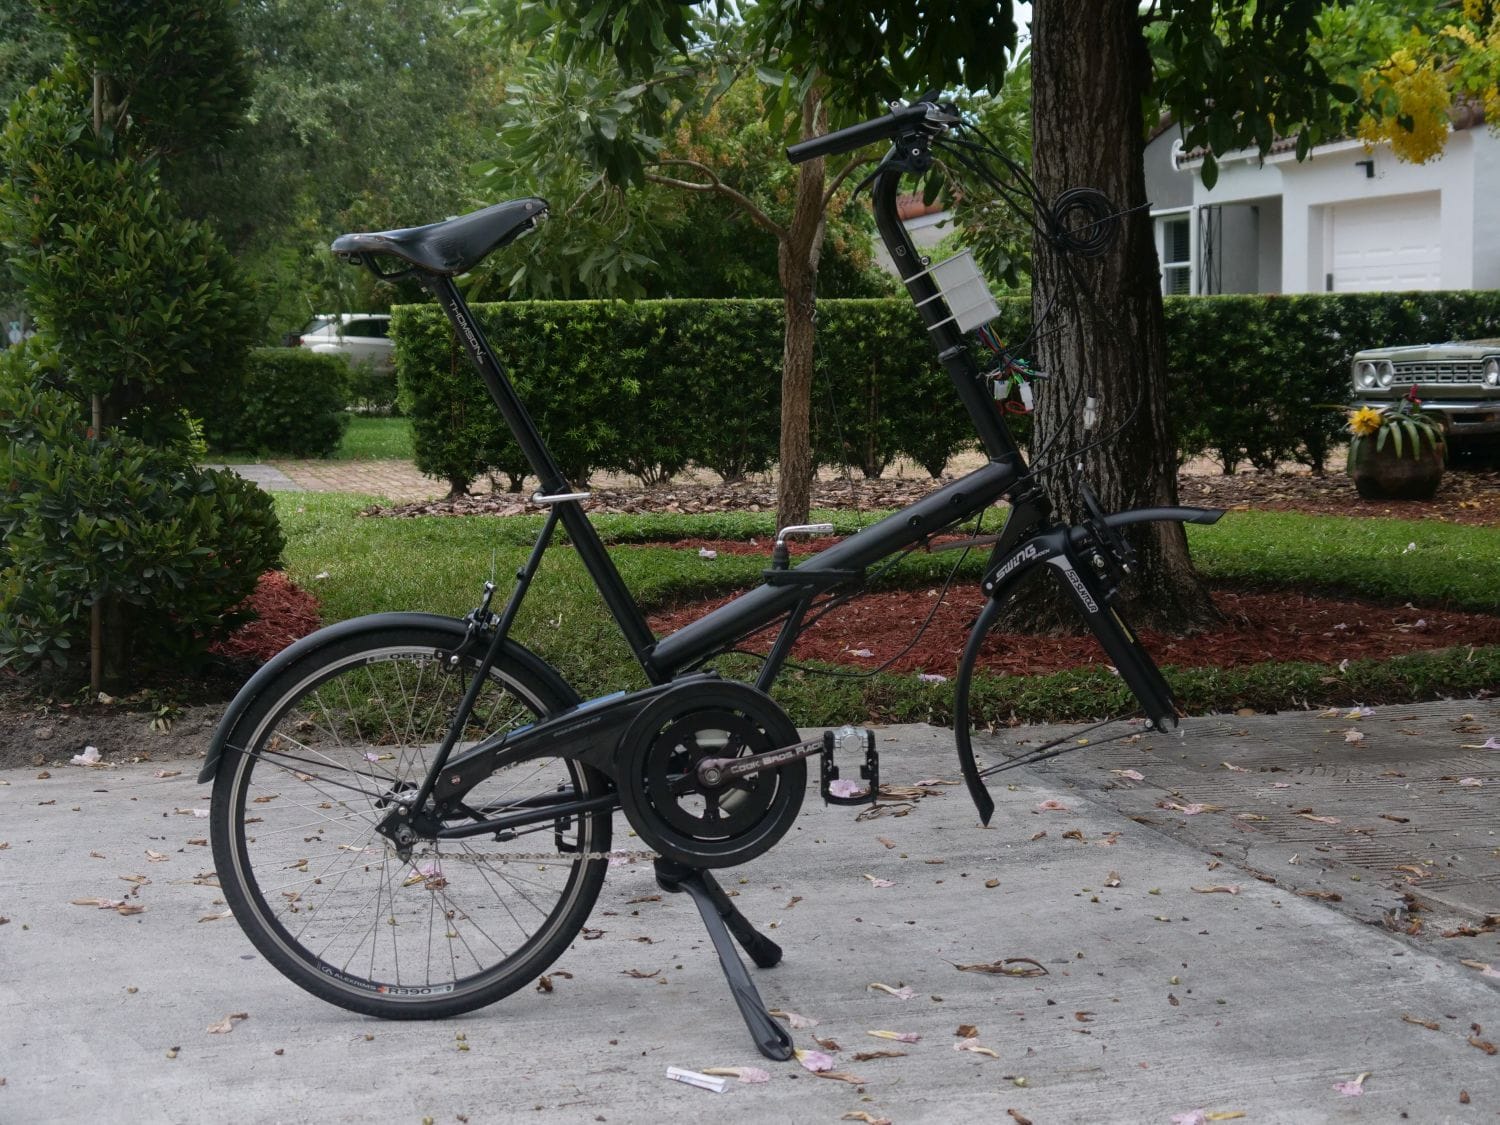
I found a workable bottom bracket and soldered up the brushless motor leads today - and the PAS sensor arrived too. Figured I'd hang everything with rubber bands and bags to test the electric assist system a test between rain showers.
Worked well too. Topped out at 18mph, though the assist seems to come in a bit slow. I couldn't really hear over the rainwater being lapped up by the tires. May have to try an eight magnet sensor wheel instead of five.
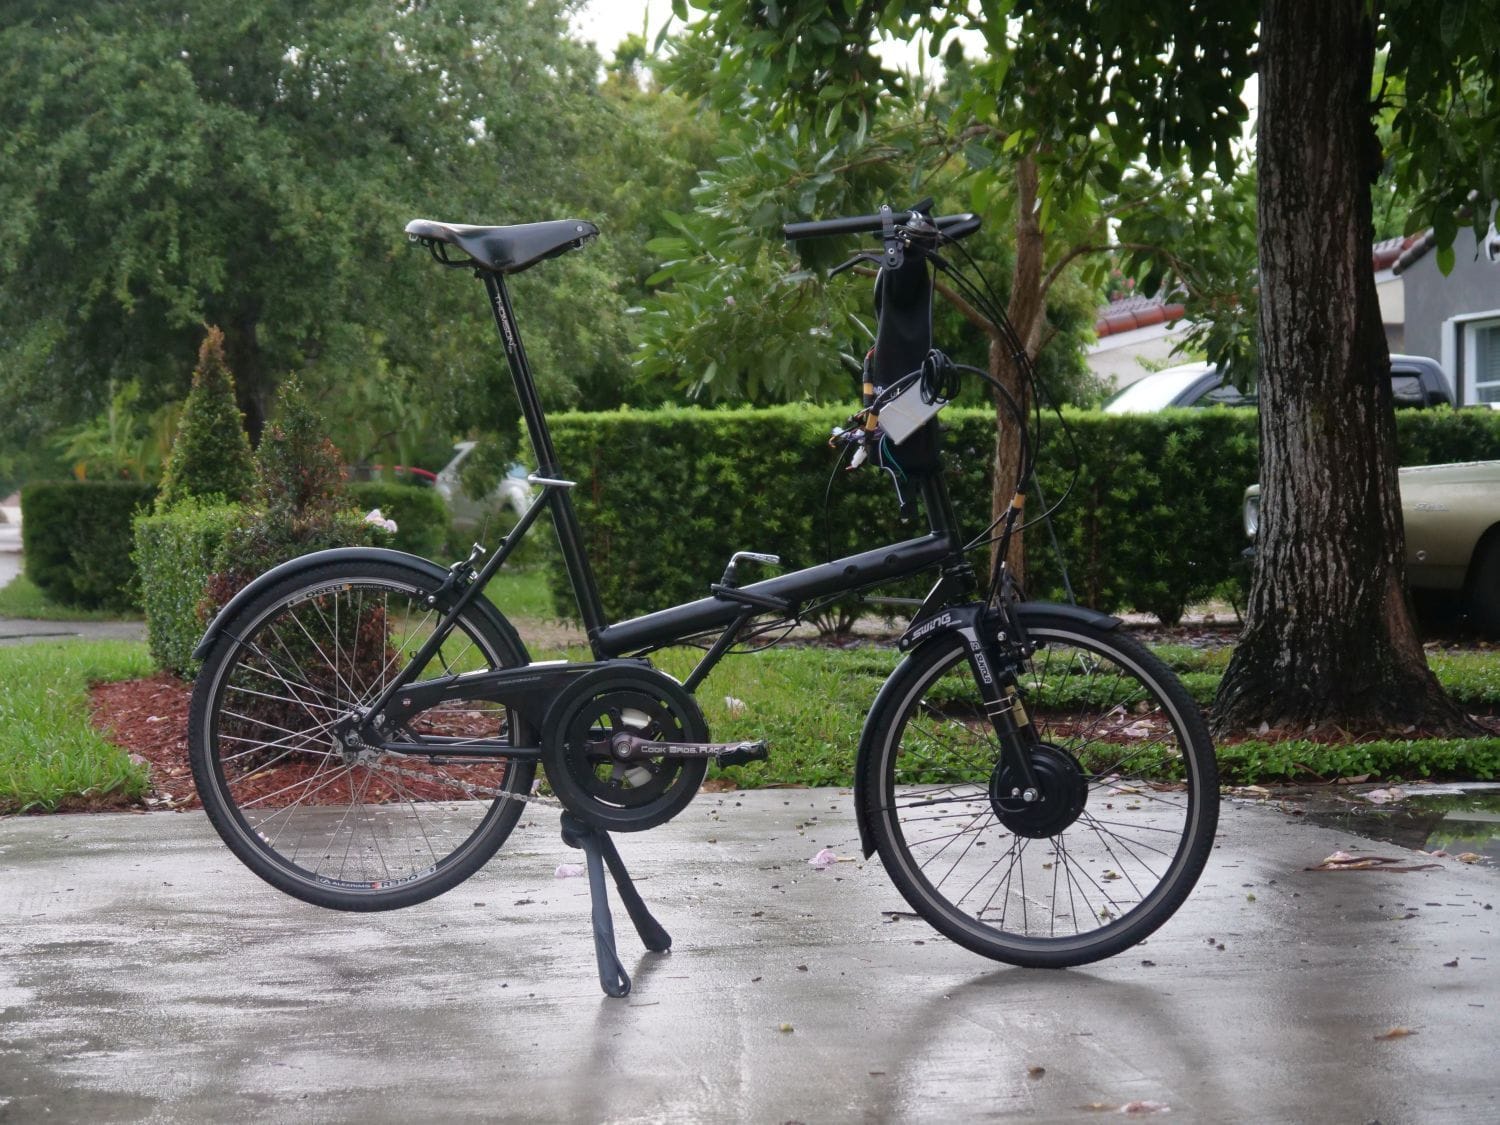
Despite the mess upstairs (temporary - battery will be fitted between the seatpost and the rear fender), the motor wires aren't that obtrusive. I might replace the yellow MT60 connectors (the visible ones, anyway) with black ones later on.
It's also wearing MKS FD-7 folding pedals now, thanks to AeroGut .
Now that's a proper (and attractive) fenderline. Still hemming and hawing over bending a spare set of stays to bolt up to the brake booster.
Also, the wheel has been re-spoked with all the spokes on the inside, crossing, per the lacing of the 350W motors on the JUMP 5.5's.
-Kurt
Worked well too. Topped out at 18mph, though the assist seems to come in a bit slow. I couldn't really hear over the rainwater being lapped up by the tires. May have to try an eight magnet sensor wheel instead of five.
Despite the mess upstairs (temporary - battery will be fitted between the seatpost and the rear fender), the motor wires aren't that obtrusive. I might replace the yellow MT60 connectors (the visible ones, anyway) with black ones later on.
It's also wearing MKS FD-7 folding pedals now, thanks to AeroGut .
Now that's a proper (and attractive) fenderline. Still hemming and hawing over bending a spare set of stays to bolt up to the brake booster.
Also, the wheel has been re-spoked with all the spokes on the inside, crossing, per the lacing of the 350W motors on the JUMP 5.5's.
-Kurt
__________________
07-11-20, 10:52 PM
#215
Senior Member
Likes For Roll-Monroe-Co:
07-11-20, 11:45 PM
#216
www.theheadbadge.com
Thread Starter
Join Date: Sep 2005
Location: Southern Florida
Posts: 28,513
Bikes: https://www.theheadbadge.com
Mentioned: 124 Post(s)
Tagged: 0 Thread(s)
Quoted: 2422 Post(s)
Liked 4,395 Times
in
2,092 Posts
Likes For cudak888:
08-13-20, 10:24 AM
#218
Senior Member
Join Date: Jun 2015
Location: Montreal, Quebec, Canada
Posts: 64
Bikes: 1989 Cannondale SM2000 with drop bars and Nitto technomic stem; 194? CCM Step Through; ???? Stumpjumper (currently frame)
Mentioned: 0 Post(s)
Tagged: 0 Thread(s)
Quoted: 22 Post(s)
Likes: 0
Liked 2 Times
in
1 Post
Where did you get that thing? It looks wild and I'd honestly love to give it a try haha
08-13-20, 07:23 PM
#219
www.theheadbadge.com
Thread Starter
Join Date: Sep 2005
Location: Southern Florida
Posts: 28,513
Bikes: https://www.theheadbadge.com
Mentioned: 124 Post(s)
Tagged: 0 Thread(s)
Quoted: 2422 Post(s)
Liked 4,395 Times
in
2,092 Posts
08-14-20, 05:21 AM
#220
Freewheel Medic
Join Date: Oct 2005
Location: An Island on the Coast of GA!
Posts: 12,882
Bikes: Snazzy* Schwinns, Classy Cannondales & a Super Pro Aero Lotus (* Ed.)
Mentioned: 140 Post(s)
Tagged: 0 Thread(s)
Quoted: 1452 Post(s)
Liked 2,195 Times
in
962 Posts
Kurt I missed all these updates due to the distraction of prepping my house for sale back the end of June and into early July.
Just my 2 cents, but could you build a black battery housing that might fit neatly between the seat tube, seat stays and above the chain guard, aka something like this rough drawing?
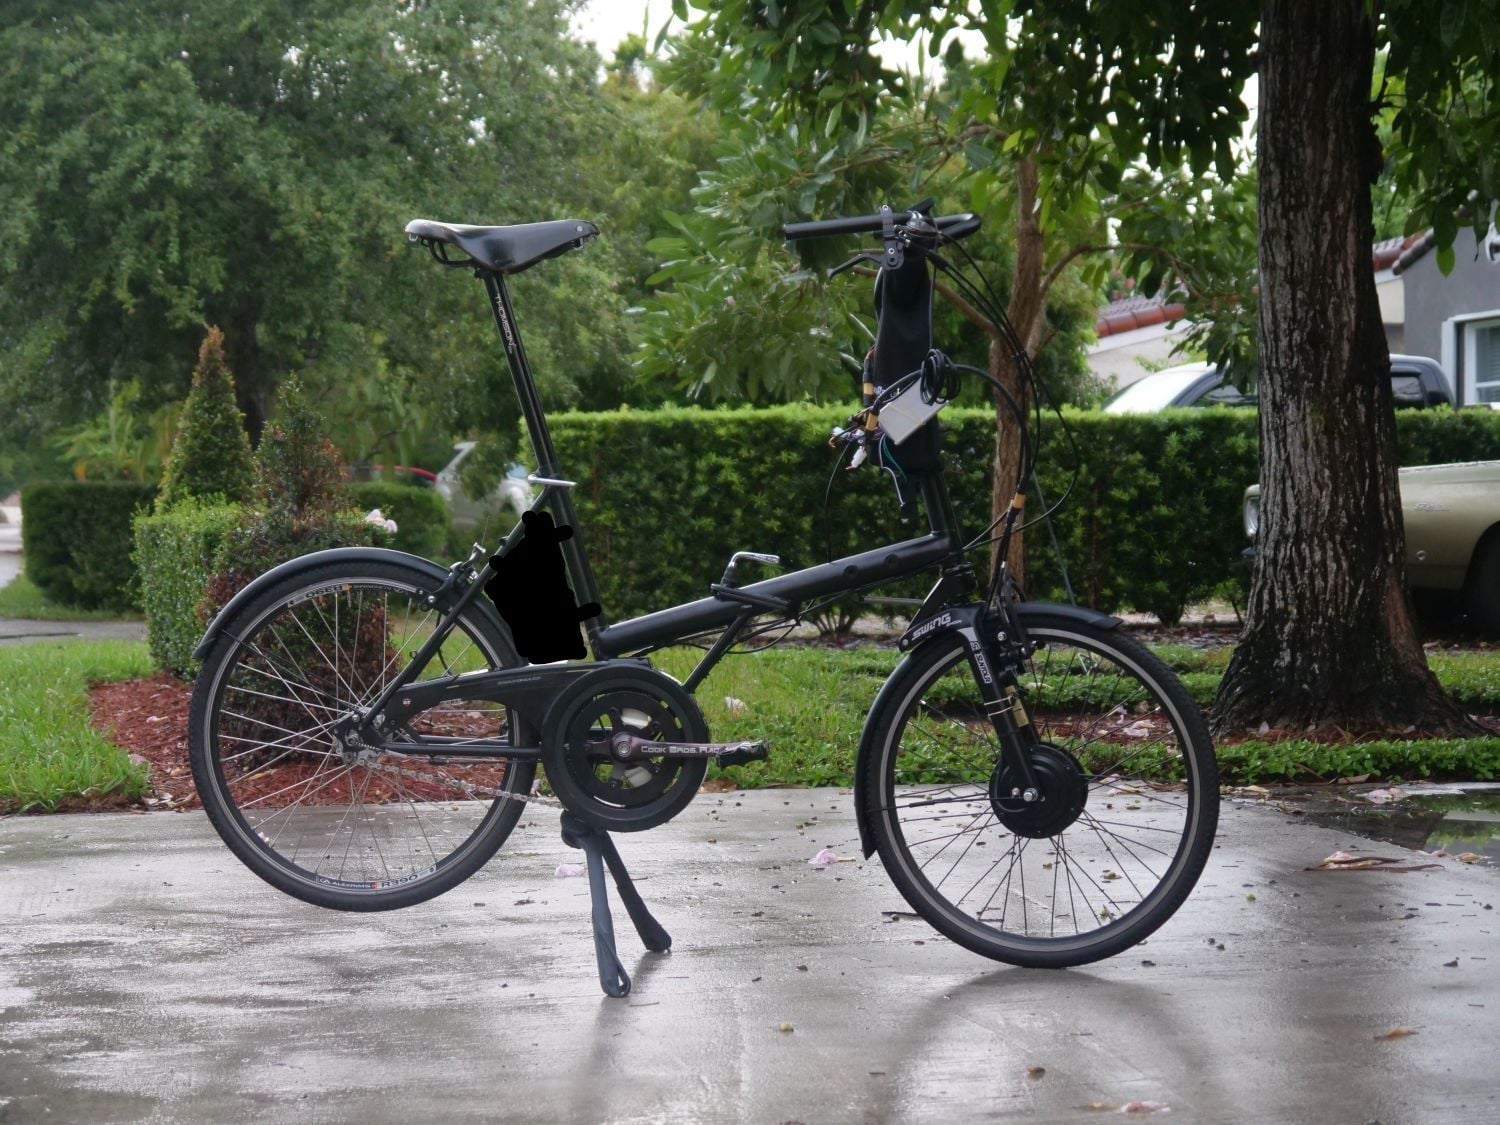
Just my 2 cents, but could you build a black battery housing that might fit neatly between the seat tube, seat stays and above the chain guard, aka something like this rough drawing?
__________________
Bob
Enjoying the GA coast all year long!
Thanks for visiting my website: www.freewheelspa.com
Bob
Enjoying the GA coast all year long!
Thanks for visiting my website: www.freewheelspa.com
08-14-20, 07:19 AM
#221
2-Wheeled Fool

Join Date: Sep 2016
Location: New Hampshire
Posts: 2,346
Bikes: Surly Ogre, Brompton
Mentioned: 18 Post(s)
Tagged: 0 Thread(s)
Quoted: 1385 Post(s)
Liked 677 Times
in
457 Posts
Kurt,
Thank you so much for your diligent recording of your this build. I have a R20 frame waiting for me to do work some magic upon, and I'm really inspired now! By the way... has anyone ever told you that you look like Danny McBride?
Thank you so much for your diligent recording of your this build. I have a R20 frame waiting for me to do work some magic upon, and I'm really inspired now! By the way... has anyone ever told you that you look like Danny McBride?
08-14-20, 08:04 AM
#222
www.theheadbadge.com
Thread Starter
Join Date: Sep 2005
Location: Southern Florida
Posts: 28,513
Bikes: https://www.theheadbadge.com
Mentioned: 124 Post(s)
Tagged: 0 Thread(s)
Quoted: 2422 Post(s)
Liked 4,395 Times
in
2,092 Posts
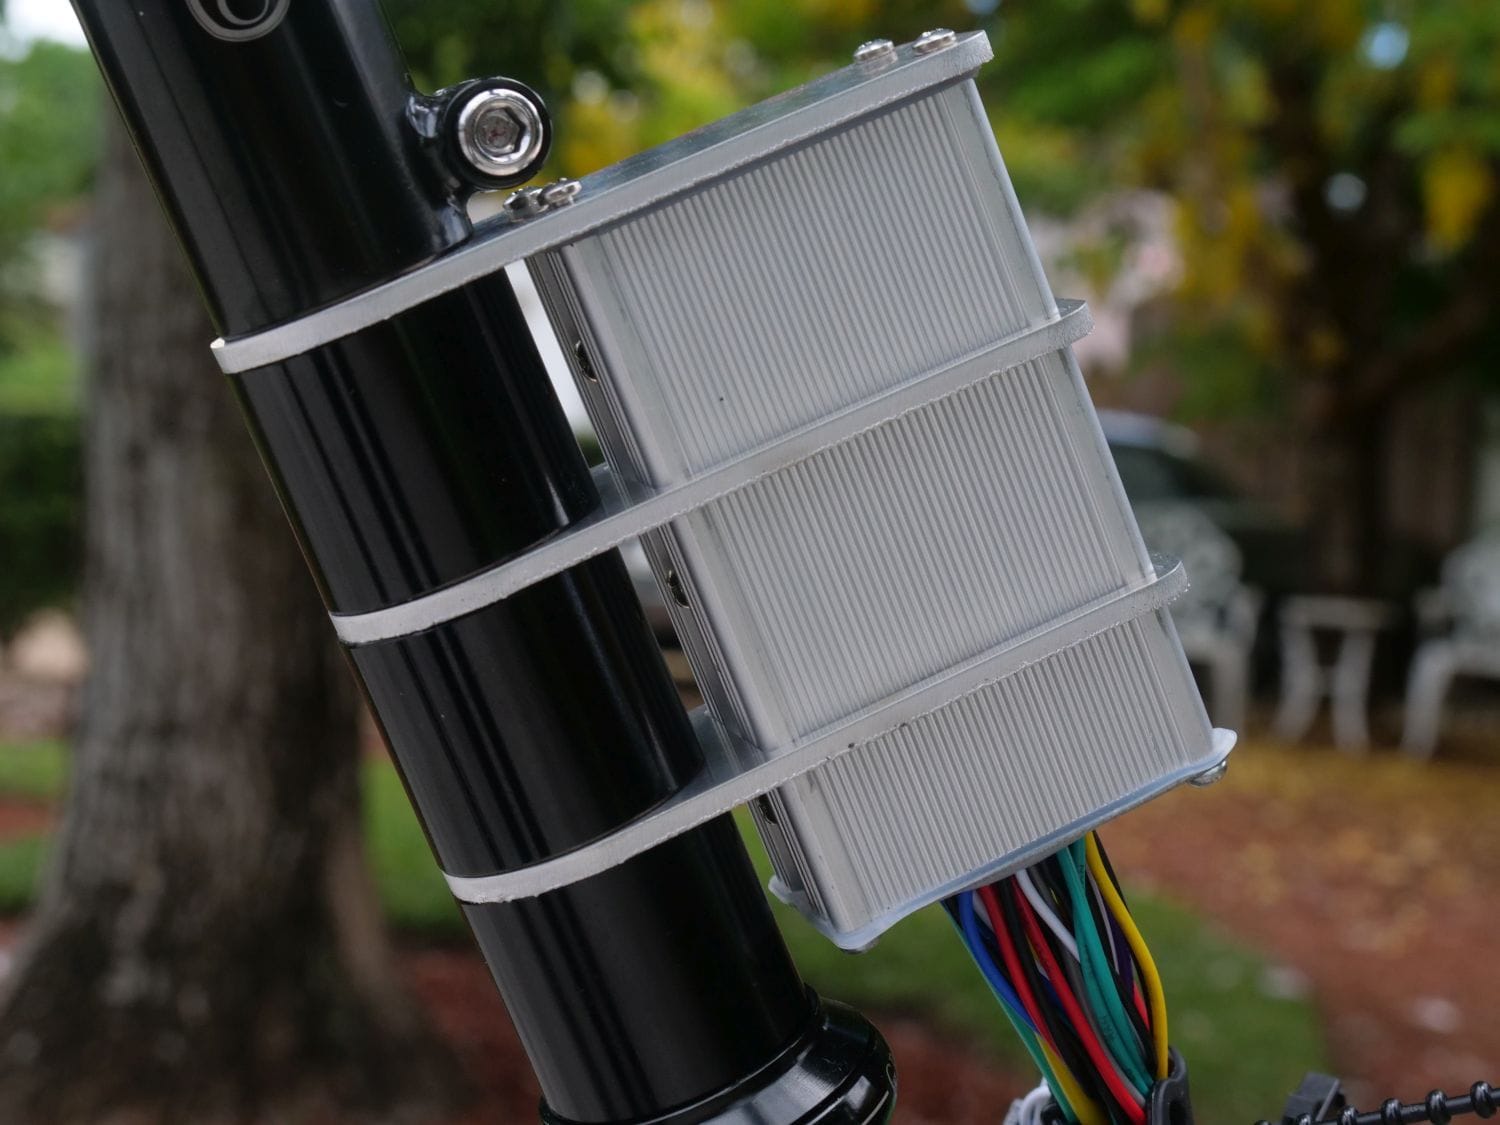
I've been focused on mounting the motor controller first though. I prefer to have it up front, and it's a much bigger mess to hide. I've ordered some laser cut aluminum parts for this.

Curtis Armstrong is the closest doppleganger I've found so far.

"Don't mind me, I'm just hanging with Tom Cruise and his bicycle..."
-Kurt
__________________
Likes For cudak888:
08-15-20, 11:40 AM
#223
www.theheadbadge.com
Thread Starter
Join Date: Sep 2005
Location: Southern Florida
Posts: 28,513
Bikes: https://www.theheadbadge.com
Mentioned: 124 Post(s)
Tagged: 0 Thread(s)
Quoted: 2422 Post(s)
Liked 4,395 Times
in
2,092 Posts
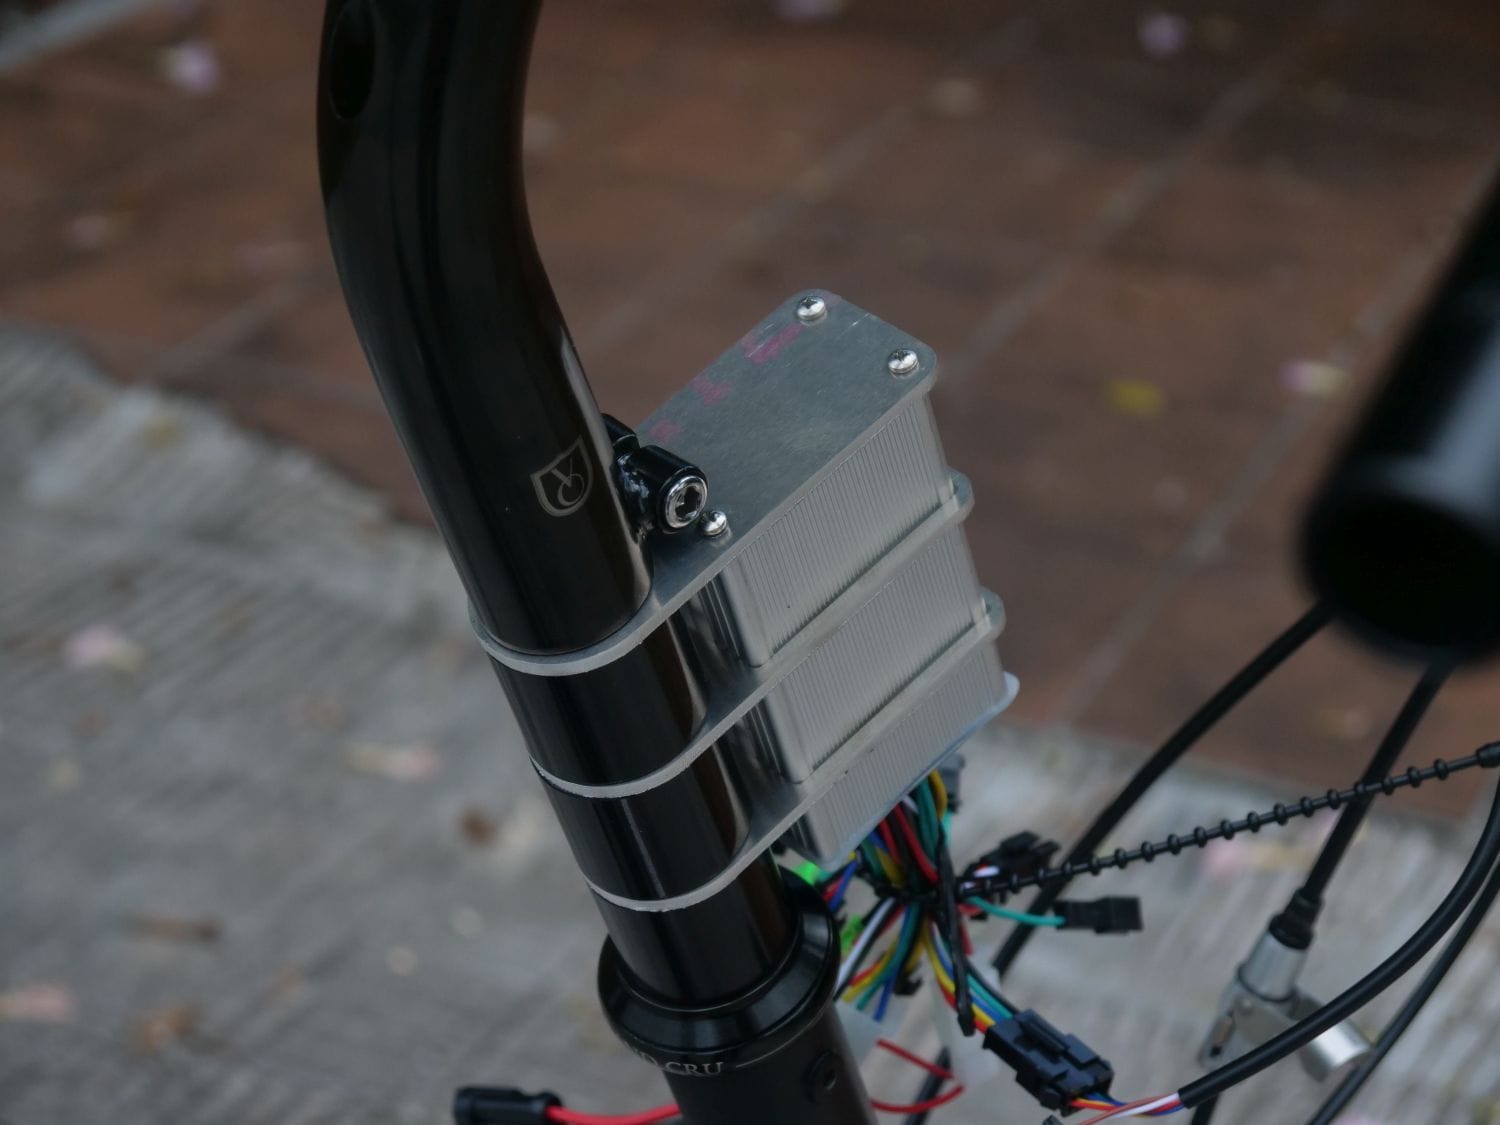
The laser-cut bits have arrived. Now I can focus on re-wiring the PCB inside the controller box.

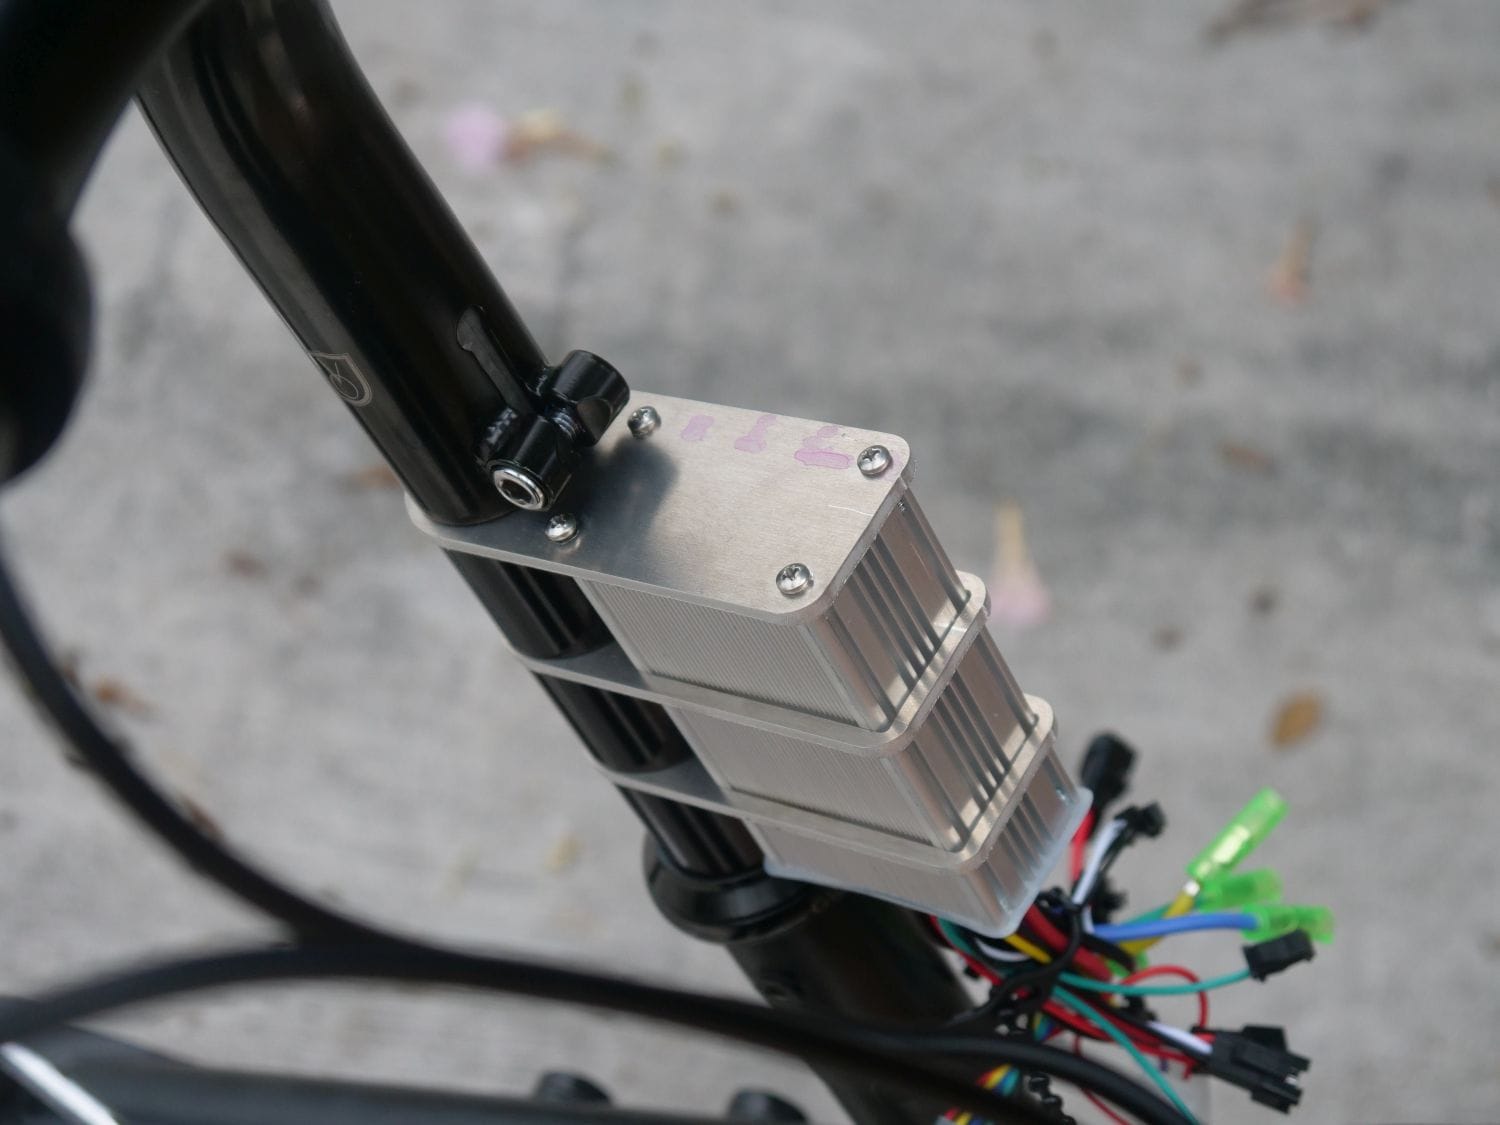
Oops, forgot to bottom one of the screws out.
-Kurt
Oops, forgot to bottom one of the screws out.
-Kurt
__________________
09-09-20, 10:20 PM
#224
www.theheadbadge.com
Thread Starter
Join Date: Sep 2005
Location: Southern Florida
Posts: 28,513
Bikes: https://www.theheadbadge.com
Mentioned: 124 Post(s)
Tagged: 0 Thread(s)
Quoted: 2422 Post(s)
Liked 4,395 Times
in
2,092 Posts
Two updates:
First, fun with FW hubs. I have an original from @nlerner which I'm using as a spring reference for the parts pile hub that I've had lying around for 10 years or so, minus springs.
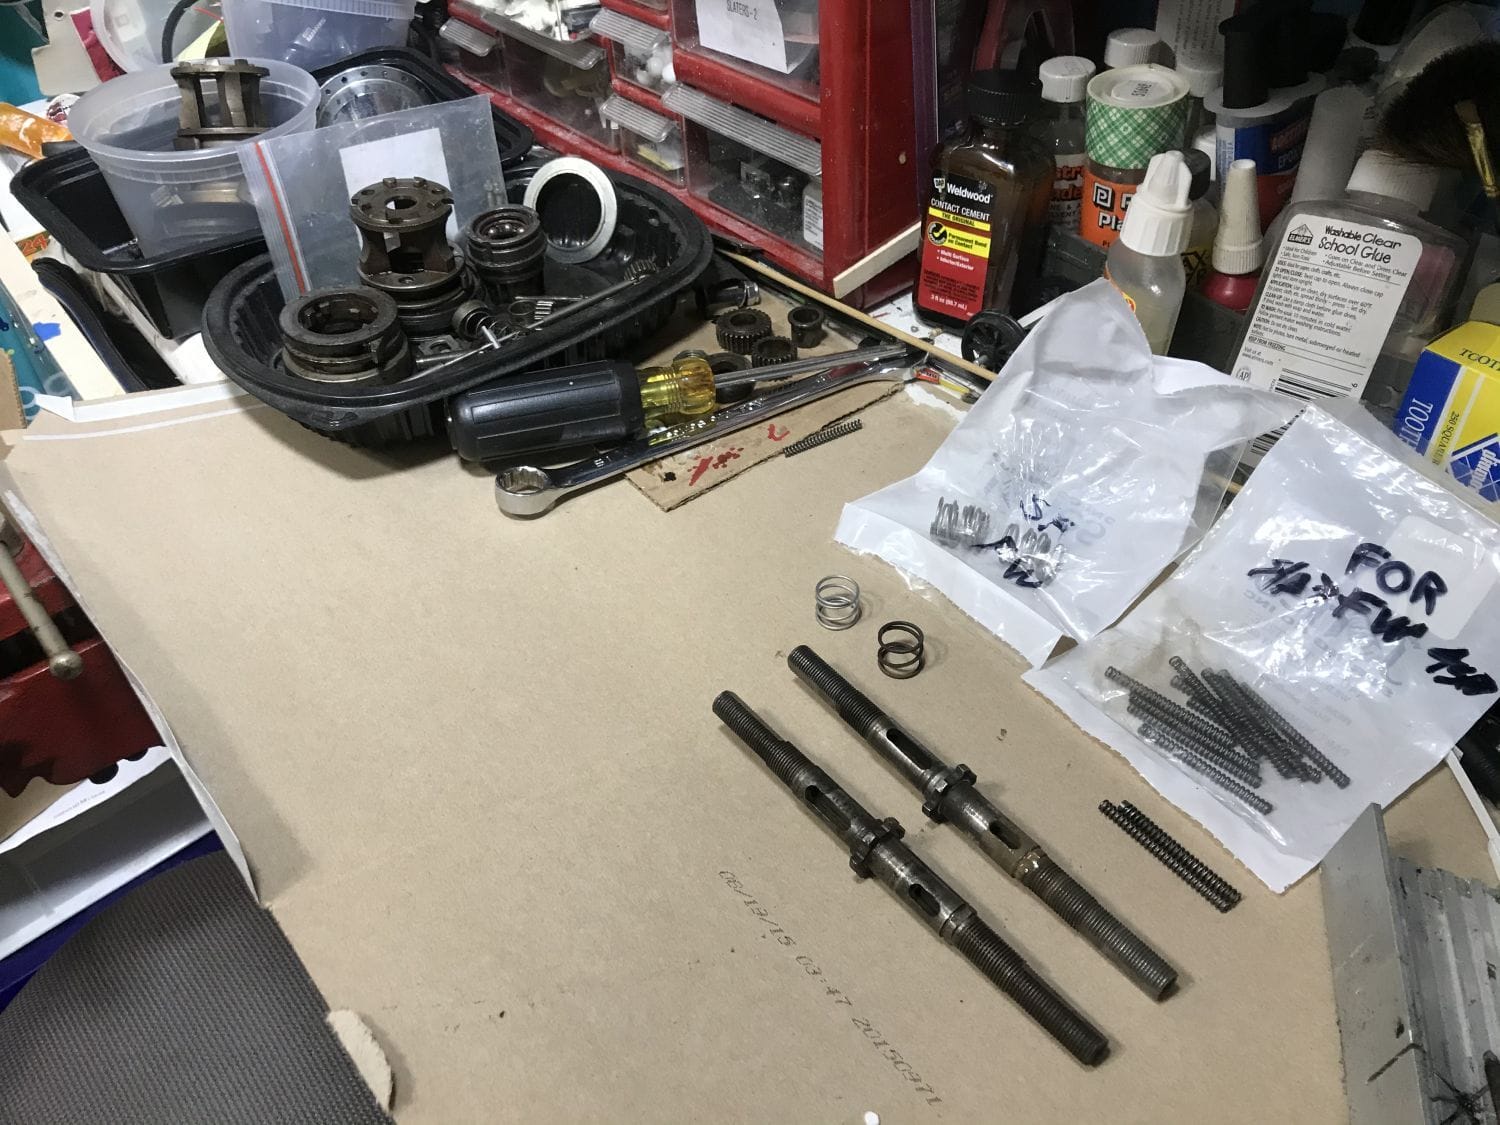
The Sturmey FW manual insists that both the small K813B Compensator Spring and the larger K410B Low Gear Spring must be replaced as a pair. I'm pretty sure this is how the hub achieves the balancing act of engaging the primary sun pinion in first gear, but not in second - if the springs aren't matched, the primary sun pinion may not engage in first, or stay engaged in second.
At any rate, I think I've found stand-in springs for the original Sturmey parts. At least, they seem to have the same compression rate.
This is McMaster Carr 1986K242 (https://www.mcmaster.com/1986K242/) next to Sturmey-Archer K410B - I'm pretty confident about this one. The dimensions are nearly perfect, and the spring rate feels identical to the original spring. The major difference is that the ends aren't ground. I can always fix that pretty quickly, but I'm worried that heat from the grinding may affect the tensile strength and spring rate.
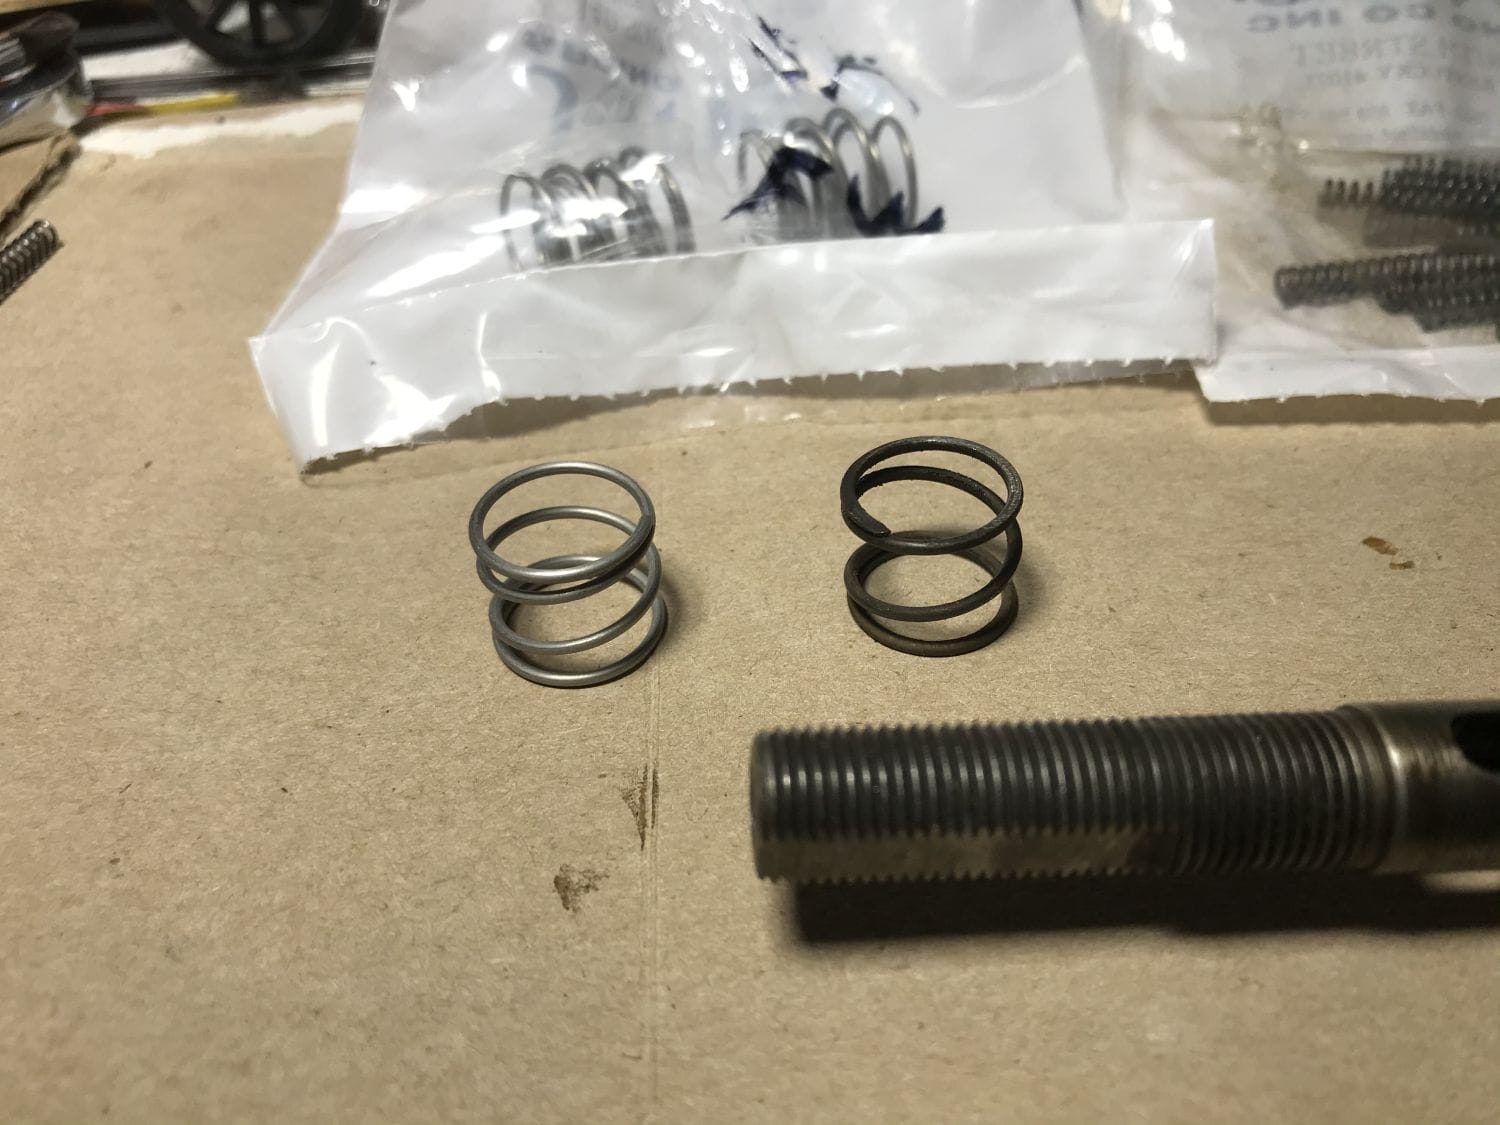
This is McMaster Carr 9657K65 (https://www.mcmaster.com/9657K65/) next to Sturmey-Archer K813B. The McMaster spring is slightly longer, requiring Dremel work. I have cut one, and it didn't seem as if it would change the spring rate enough to be a problem. It is and about 0.3mm smaller in diameter. A bit of a PITA because of the compensator spring collar (X8), but the factory X8 will fit in it with a bit of shoving.

Now, the big issue is that the Oillite bushing that I had turned into a compensator collar...fell apart. It didn't have the strength to be thinned and shoved in the spring. I plan to 3D print this part. Might have better luck.
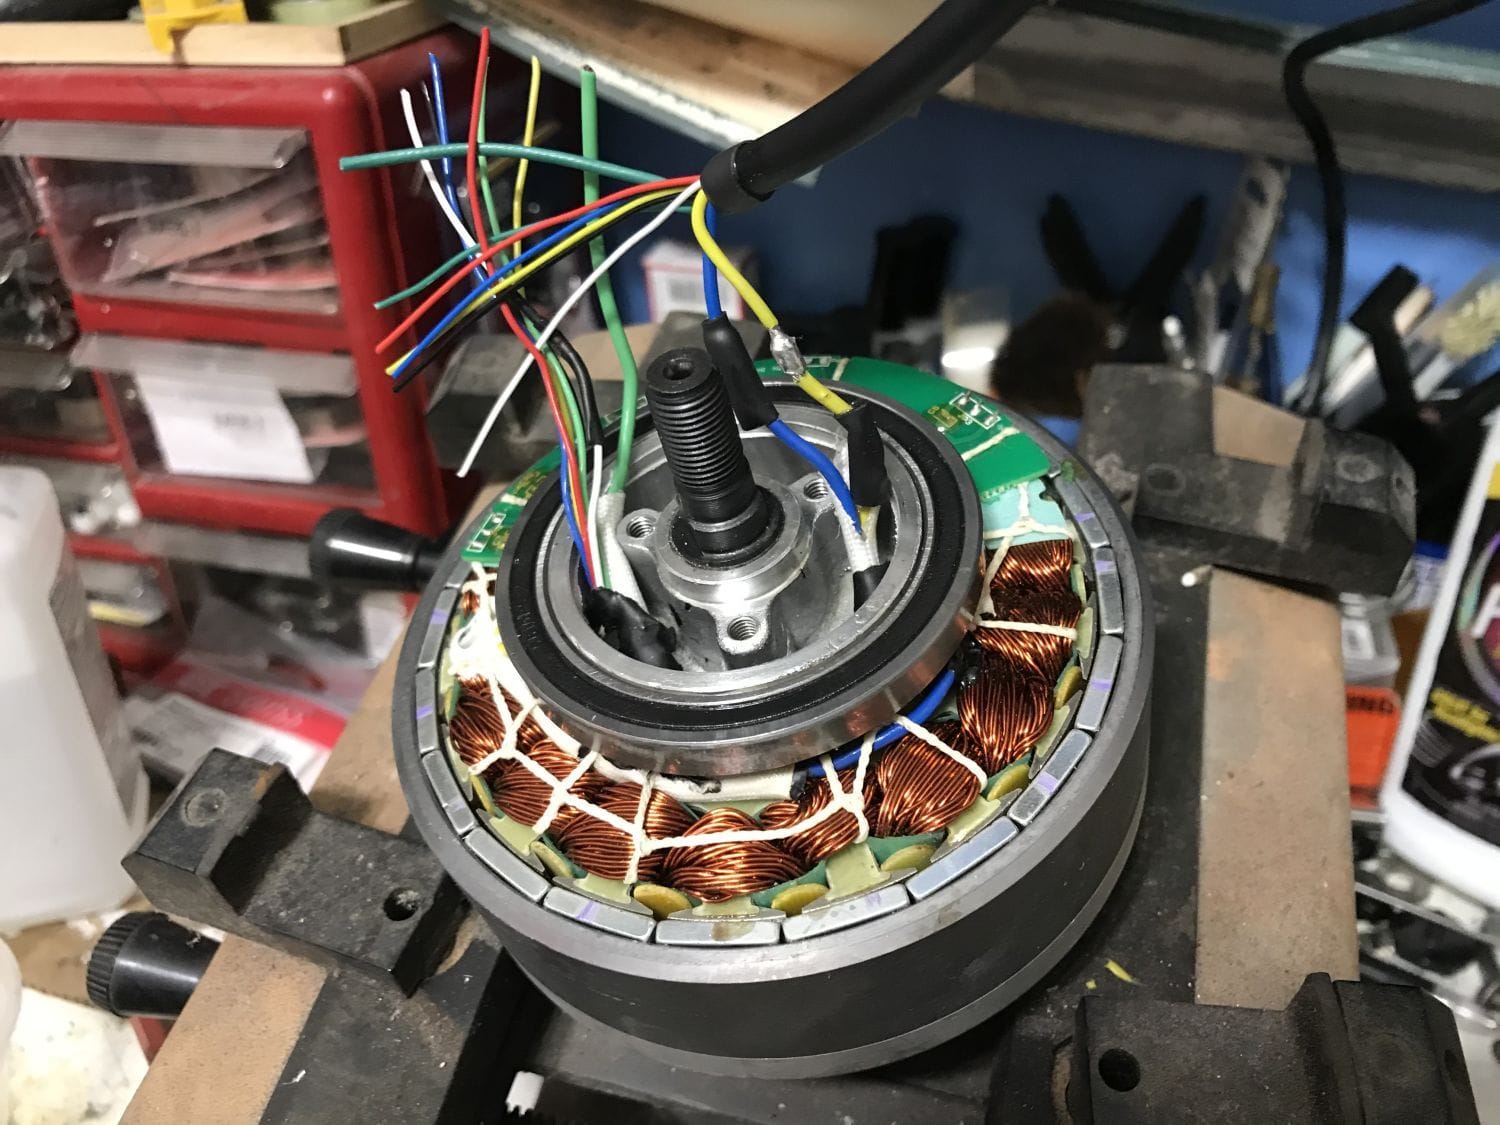
Secondly, I did some ill-advised re-wiring of the hub to accept a HIGO Z910-style 9-pin connector. There's barely any space to fit the soldered and shrunk wires. Crossing my fingers I don't have any shorts from chafed wires. If I do, I'll have to pull the sealed bearing and solder directly to the PCB, which should prove to be a big pain in the butt - if I have to resort to it.
-Kurt
First, fun with FW hubs. I have an original from @nlerner which I'm using as a spring reference for the parts pile hub that I've had lying around for 10 years or so, minus springs.
The Sturmey FW manual insists that both the small K813B Compensator Spring and the larger K410B Low Gear Spring must be replaced as a pair. I'm pretty sure this is how the hub achieves the balancing act of engaging the primary sun pinion in first gear, but not in second - if the springs aren't matched, the primary sun pinion may not engage in first, or stay engaged in second.
At any rate, I think I've found stand-in springs for the original Sturmey parts. At least, they seem to have the same compression rate.
This is McMaster Carr 1986K242 (https://www.mcmaster.com/1986K242/) next to Sturmey-Archer K410B - I'm pretty confident about this one. The dimensions are nearly perfect, and the spring rate feels identical to the original spring. The major difference is that the ends aren't ground. I can always fix that pretty quickly, but I'm worried that heat from the grinding may affect the tensile strength and spring rate.
This is McMaster Carr 9657K65 (https://www.mcmaster.com/9657K65/) next to Sturmey-Archer K813B. The McMaster spring is slightly longer, requiring Dremel work. I have cut one, and it didn't seem as if it would change the spring rate enough to be a problem. It is and about 0.3mm smaller in diameter. A bit of a PITA because of the compensator spring collar (X8), but the factory X8 will fit in it with a bit of shoving.
Now, the big issue is that the Oillite bushing that I had turned into a compensator collar...fell apart. It didn't have the strength to be thinned and shoved in the spring. I plan to 3D print this part. Might have better luck.
Secondly, I did some ill-advised re-wiring of the hub to accept a HIGO Z910-style 9-pin connector. There's barely any space to fit the soldered and shrunk wires. Crossing my fingers I don't have any shorts from chafed wires. If I do, I'll have to pull the sealed bearing and solder directly to the PCB, which should prove to be a big pain in the butt - if I have to resort to it.
-Kurt
__________________
09-09-20, 10:58 PM
#225
Senior Member

Join Date: Jun 2010
Location: Medford MA
Posts: 2,089
Bikes: Ron Cooper touring, 1959 Jack Taylor 650b ladyback touring tandem, Vitus 979, Joe Bell painted Claud Butler Dalesman, Colin Laing curved tube tandem, heavily-Dilberted 1982 Trek 6xx, Ren� Herse tandem
Mentioned: 80 Post(s)
Tagged: 0 Thread(s)
Quoted: 964 Post(s)
Liked 1,451 Times
in
723 Posts
Are those really laser-cut? Or did they use a waterjet? Just curious, I know a few lasers do aluminum but not many, and those parts kind of look waterjet cut.
That little pip that goes inside the spring? Easy to turn on a lathe. PM me the dimensions if 3D printing doesn't work.
That little pip that goes inside the spring? Easy to turn on a lathe. PM me the dimensions if 3D printing doesn't work.
__________________
Owner & co-founder, Cycles Ren� Hubris. Unfortunately attaching questionable braze-ons to perfectly good frames since about 2015. With style.
Owner & co-founder, Cycles Ren� Hubris. Unfortunately attaching questionable braze-ons to perfectly good frames since about 2015. With style.