


Getting wheel to sit
 07-31-19, 04:45 PM
#1
Senior Member
Thread Starter
Join Date: Sep 2016
Location: Woodbury, MN
Posts: 429
Bikes: 2006 Trek Pilot 1.2, 1972 Schwinn SS
Mentioned: 0 Post(s)
Tagged: 0 Thread(s)
Quoted: 156 Post(s)
Likes: 0
Liked 1 Time
in
1 Post
Getting wheel to sit
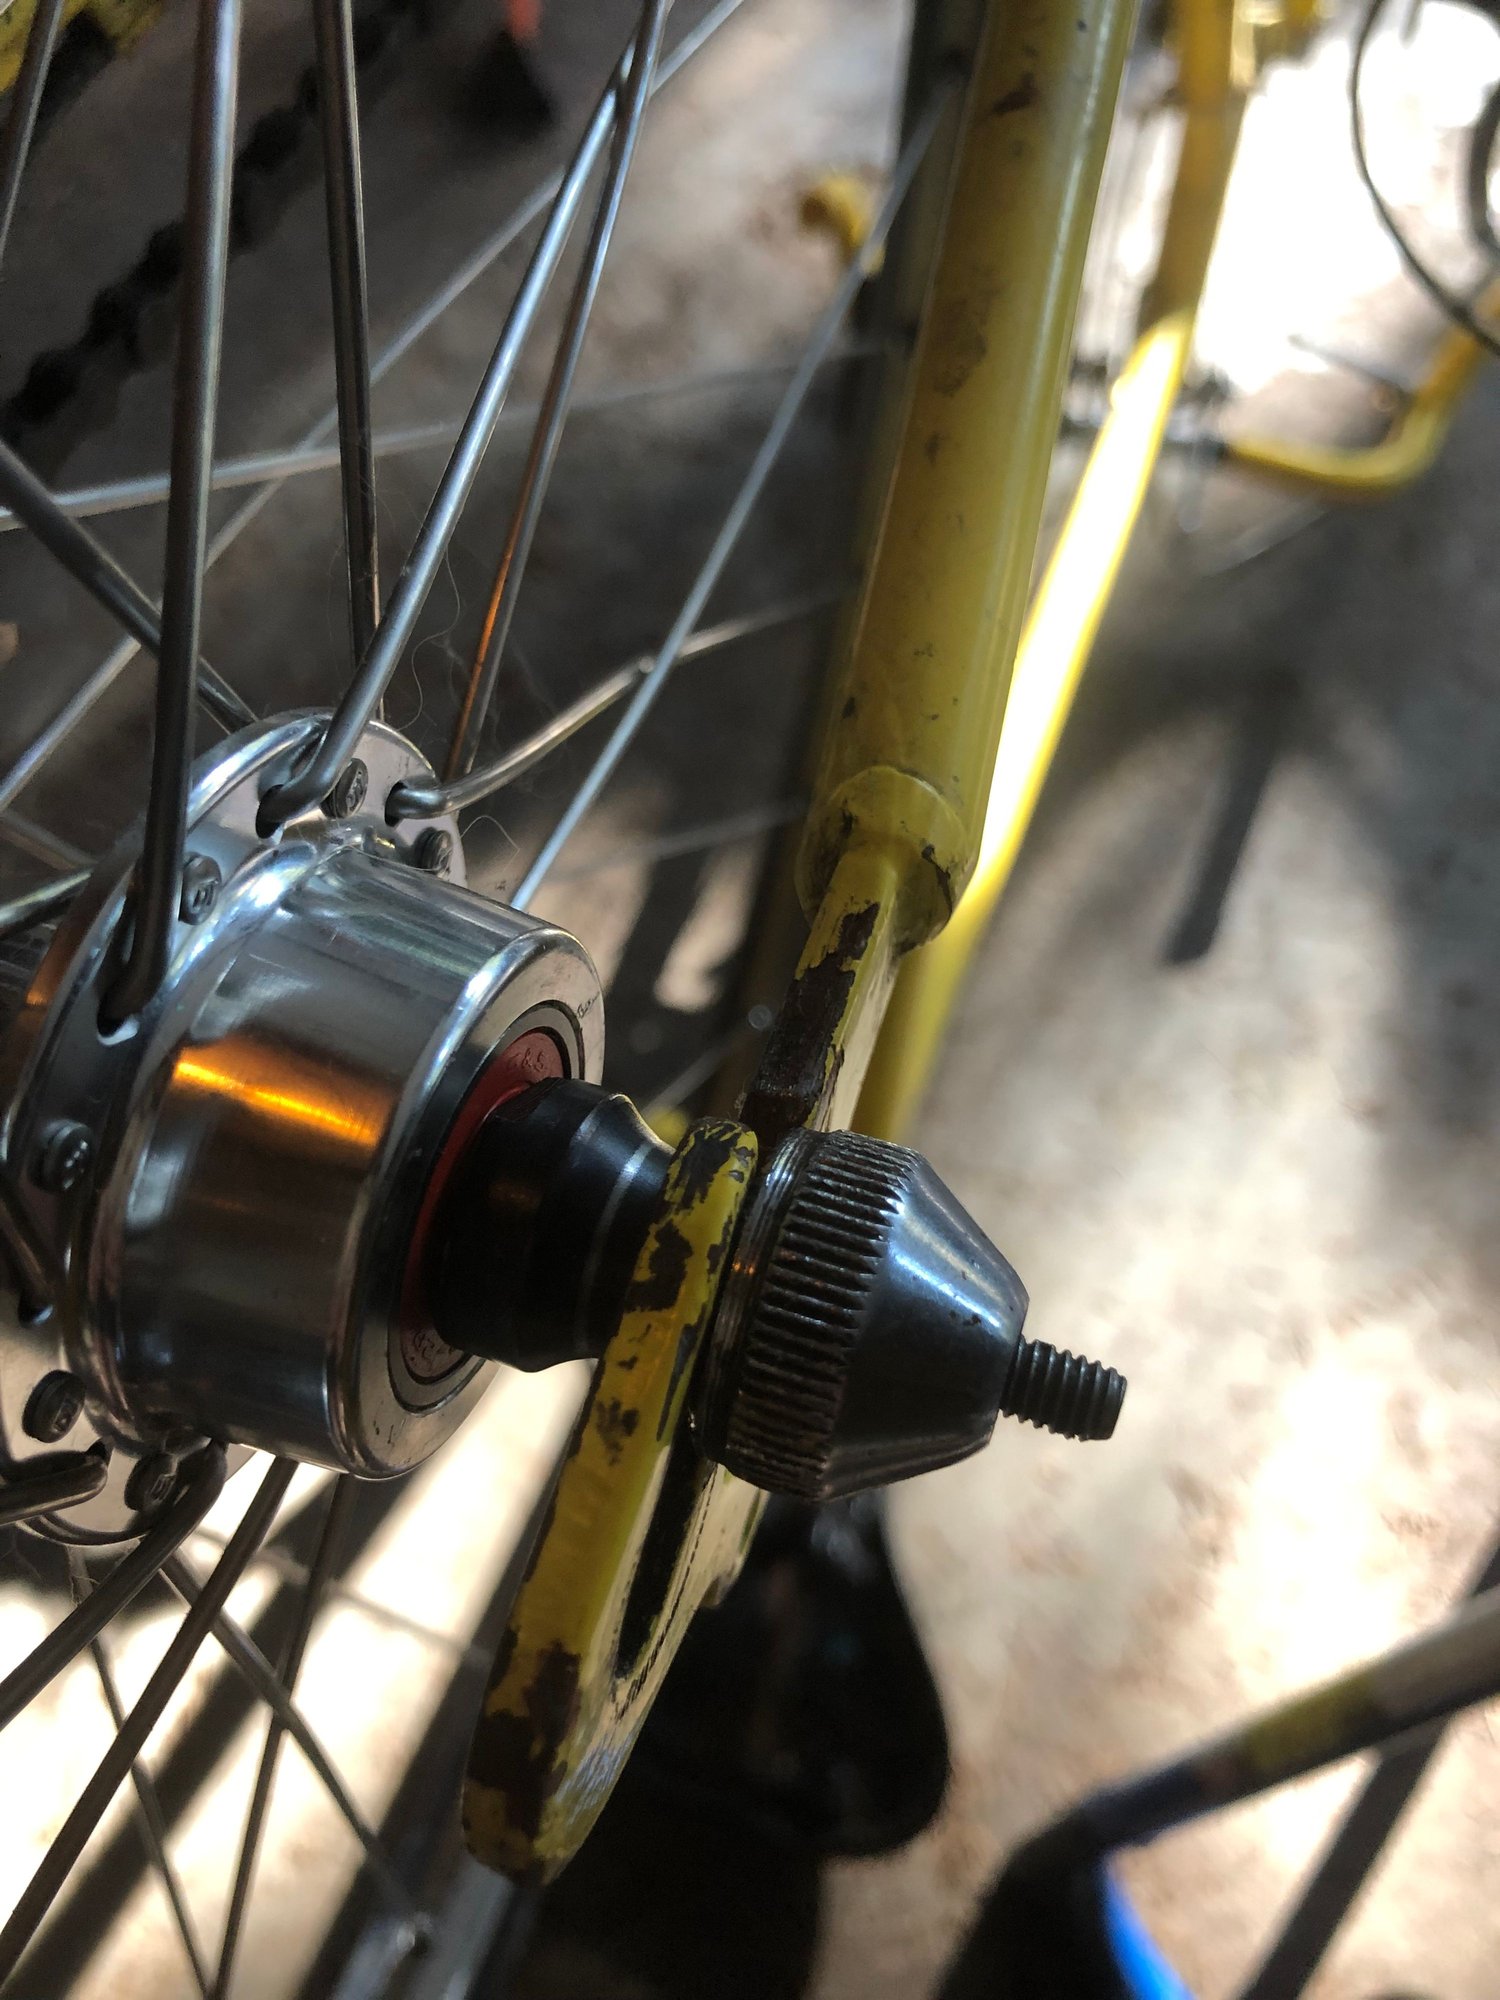

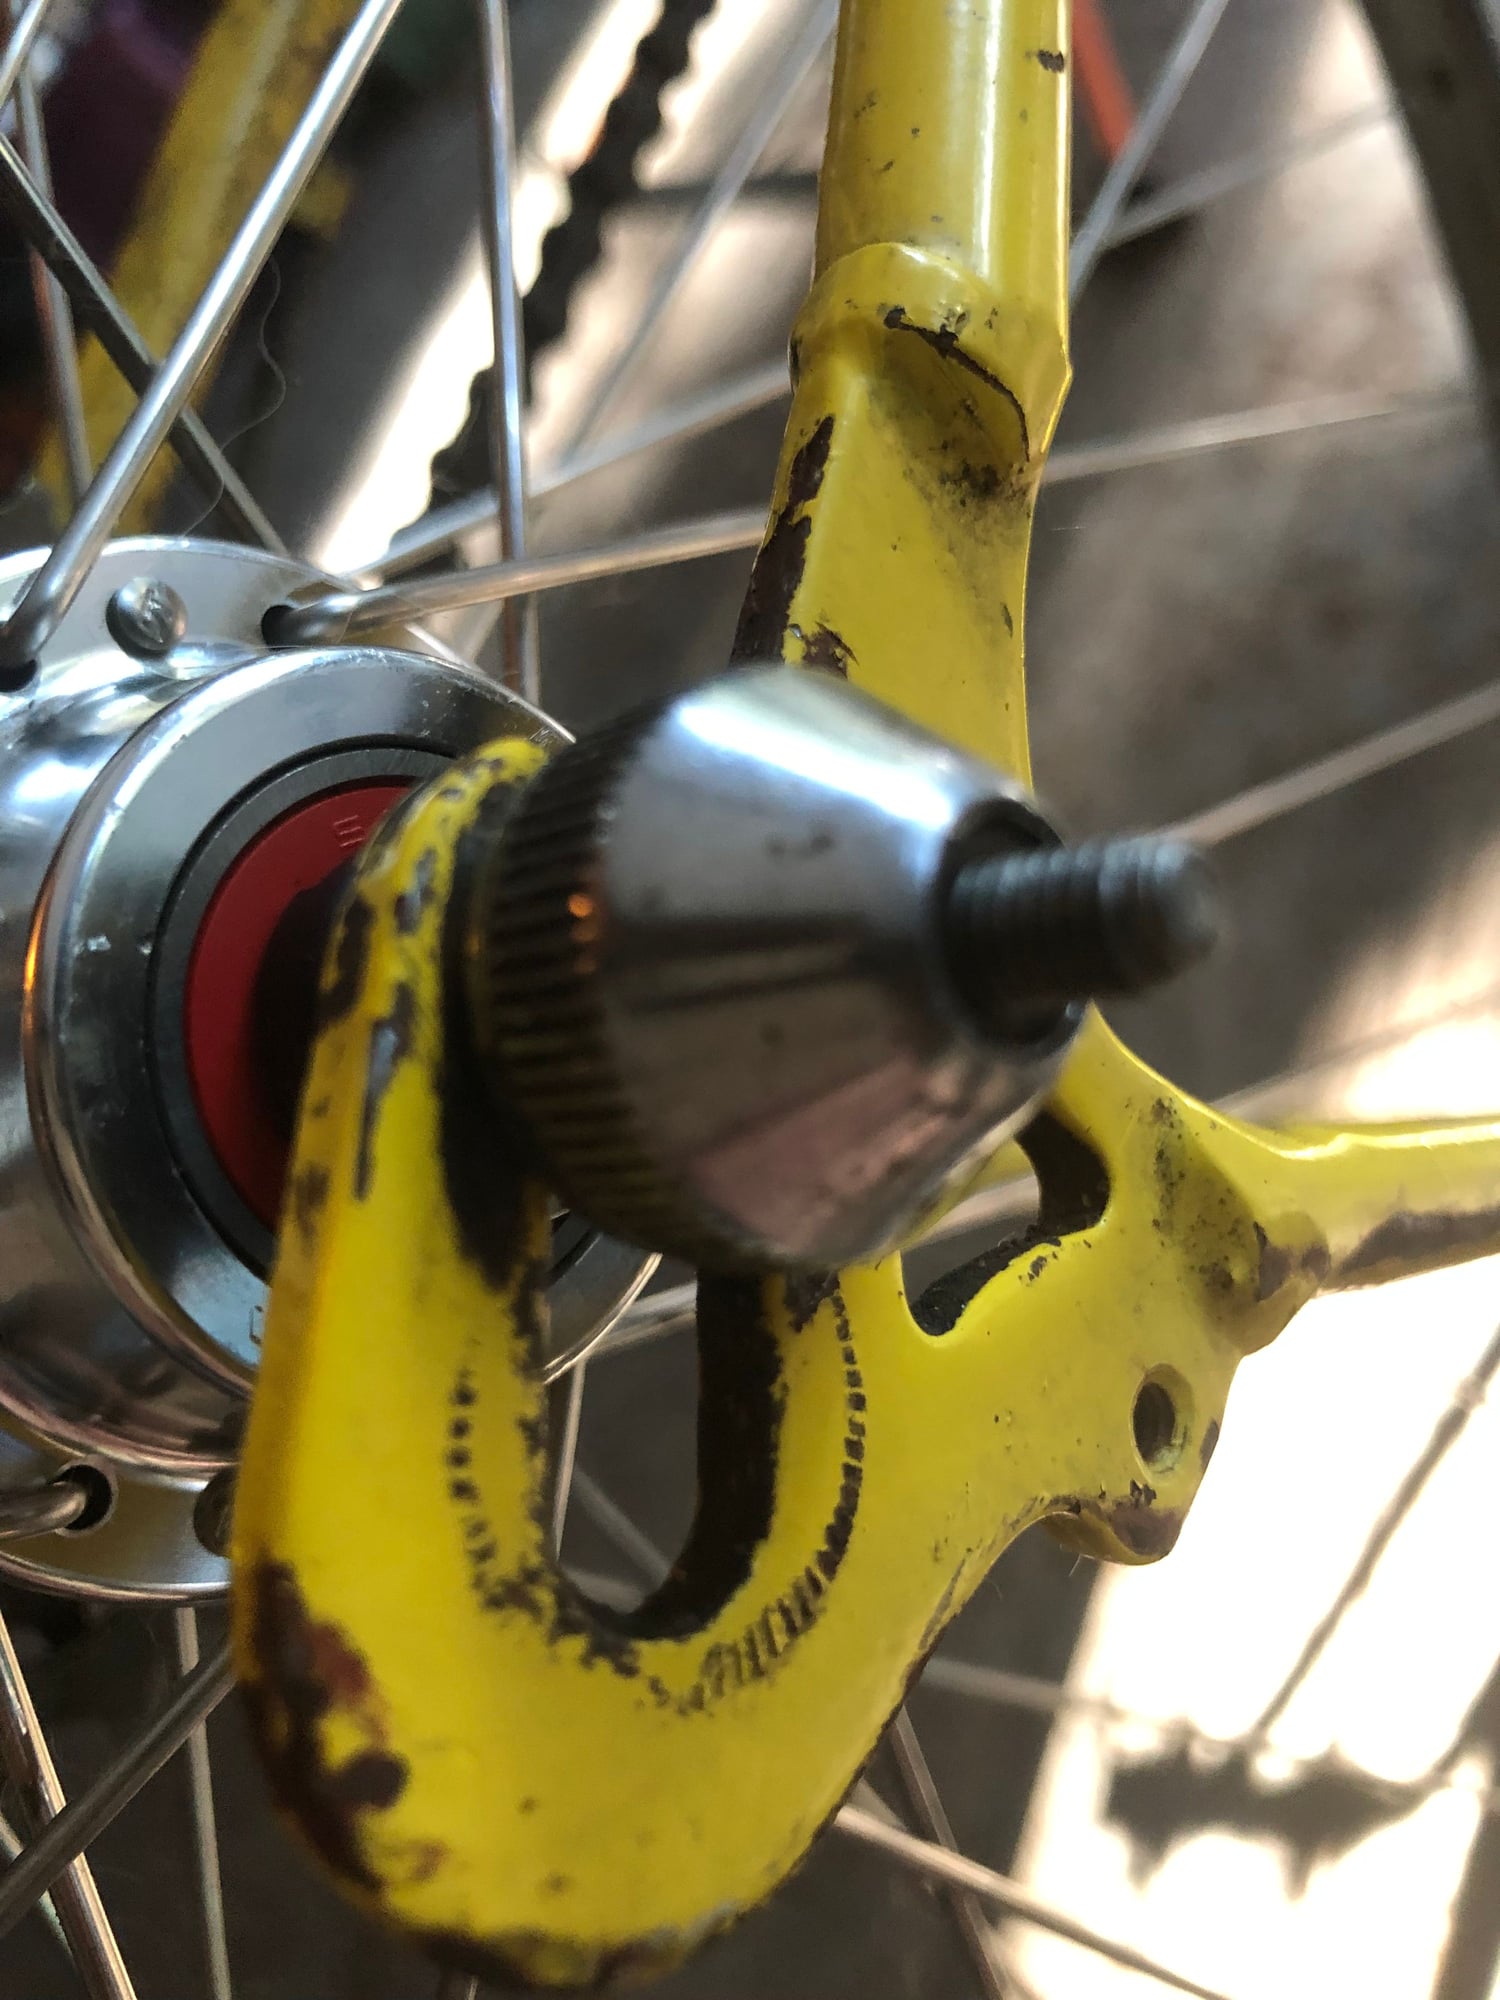

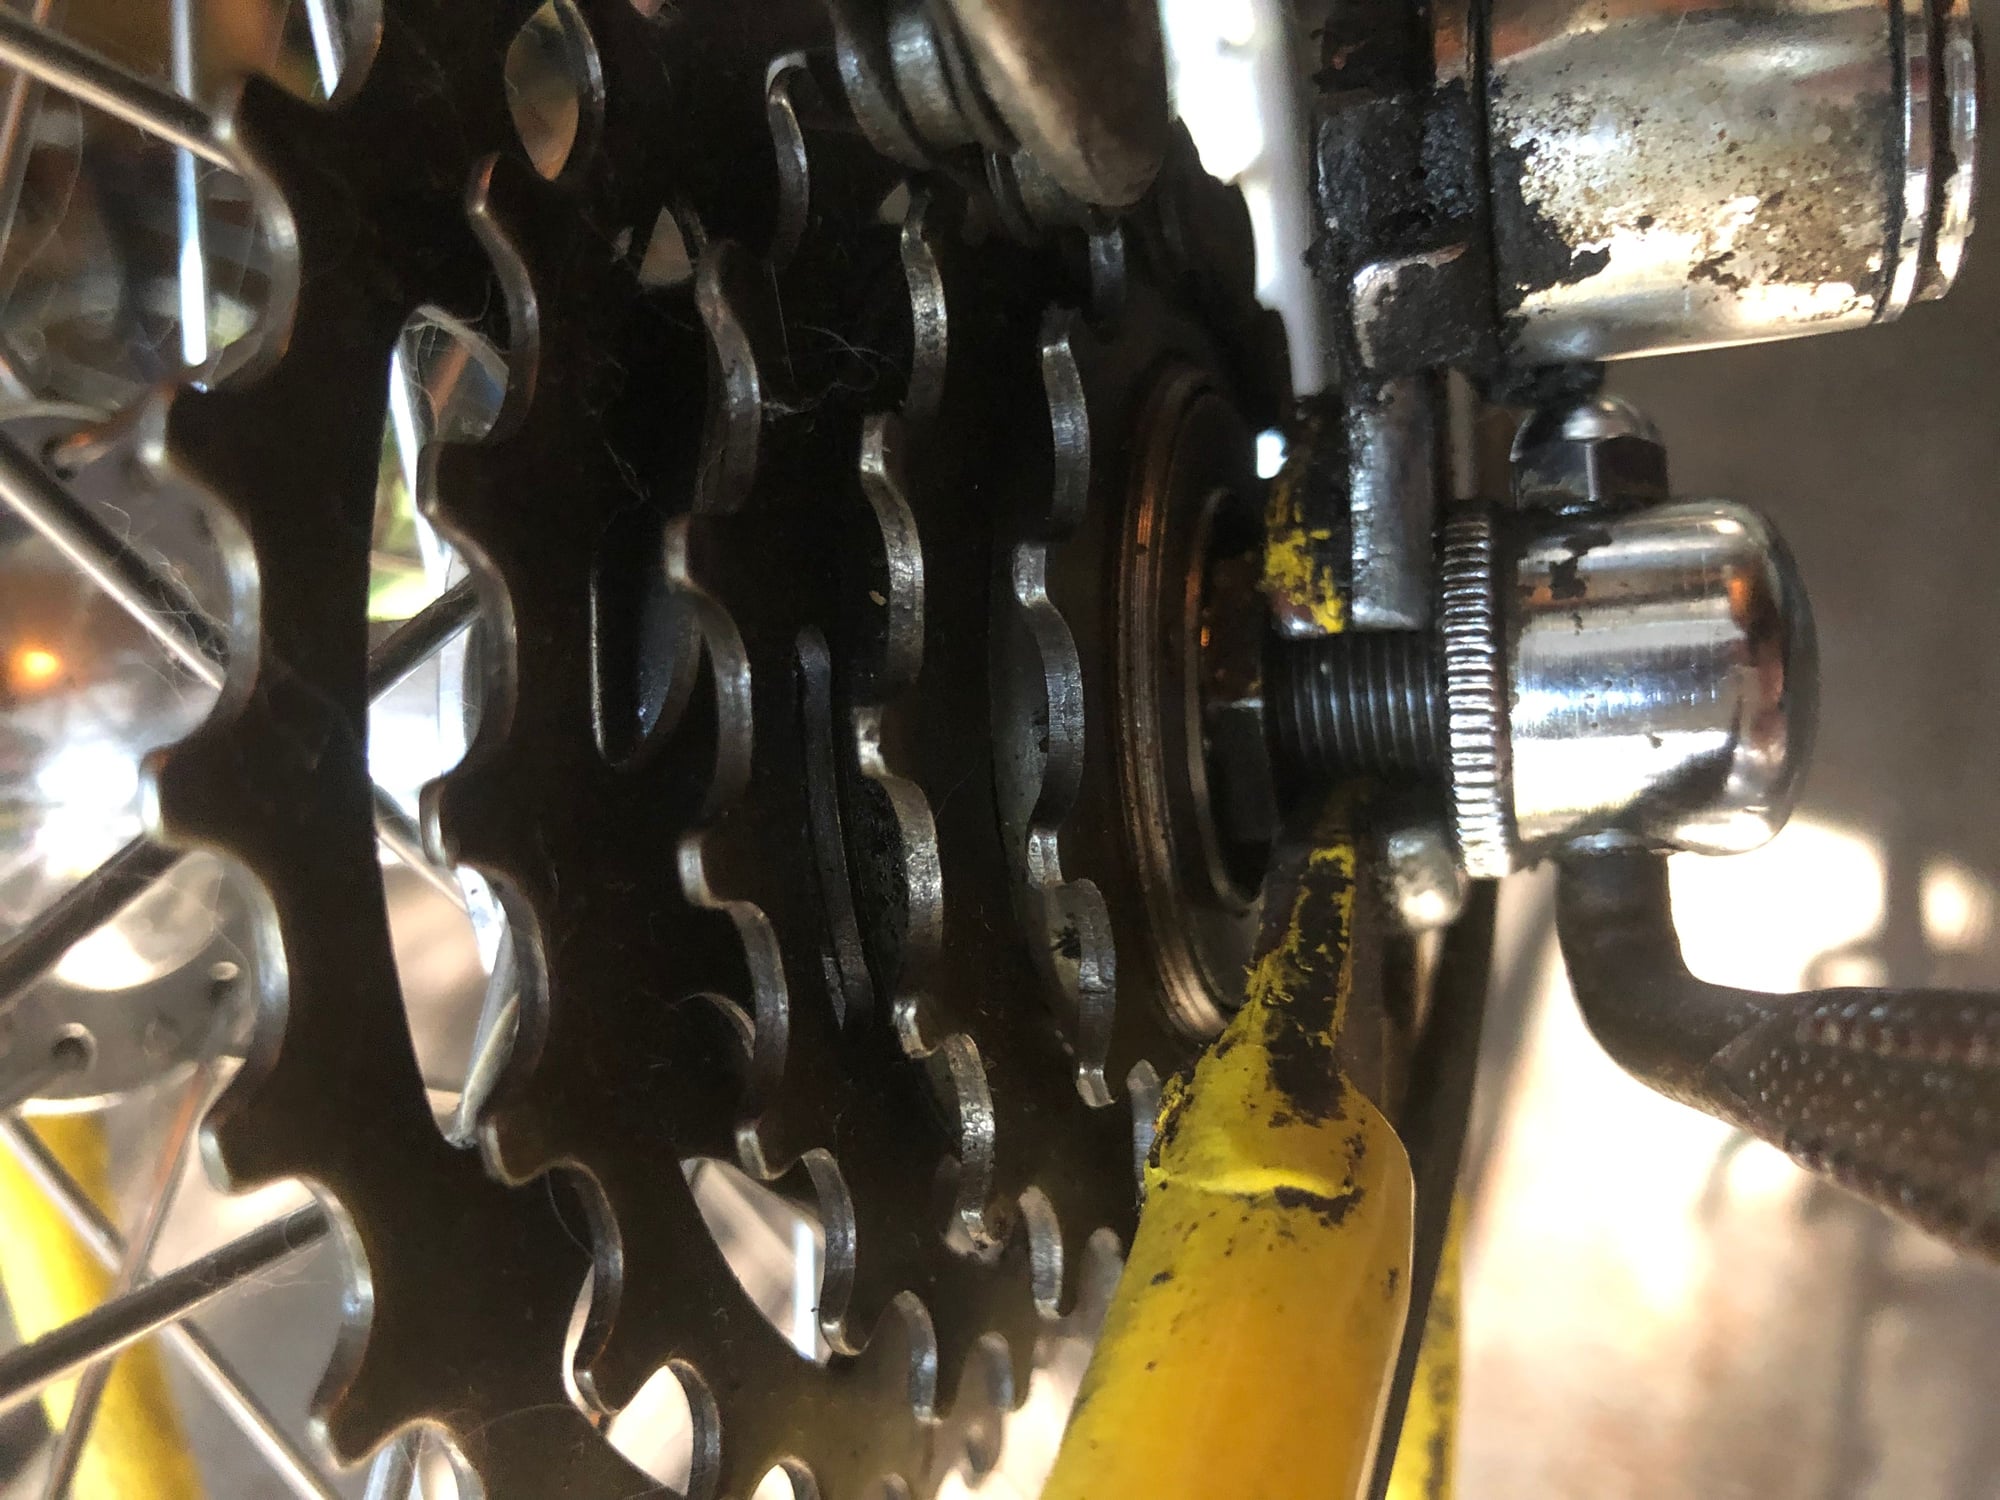
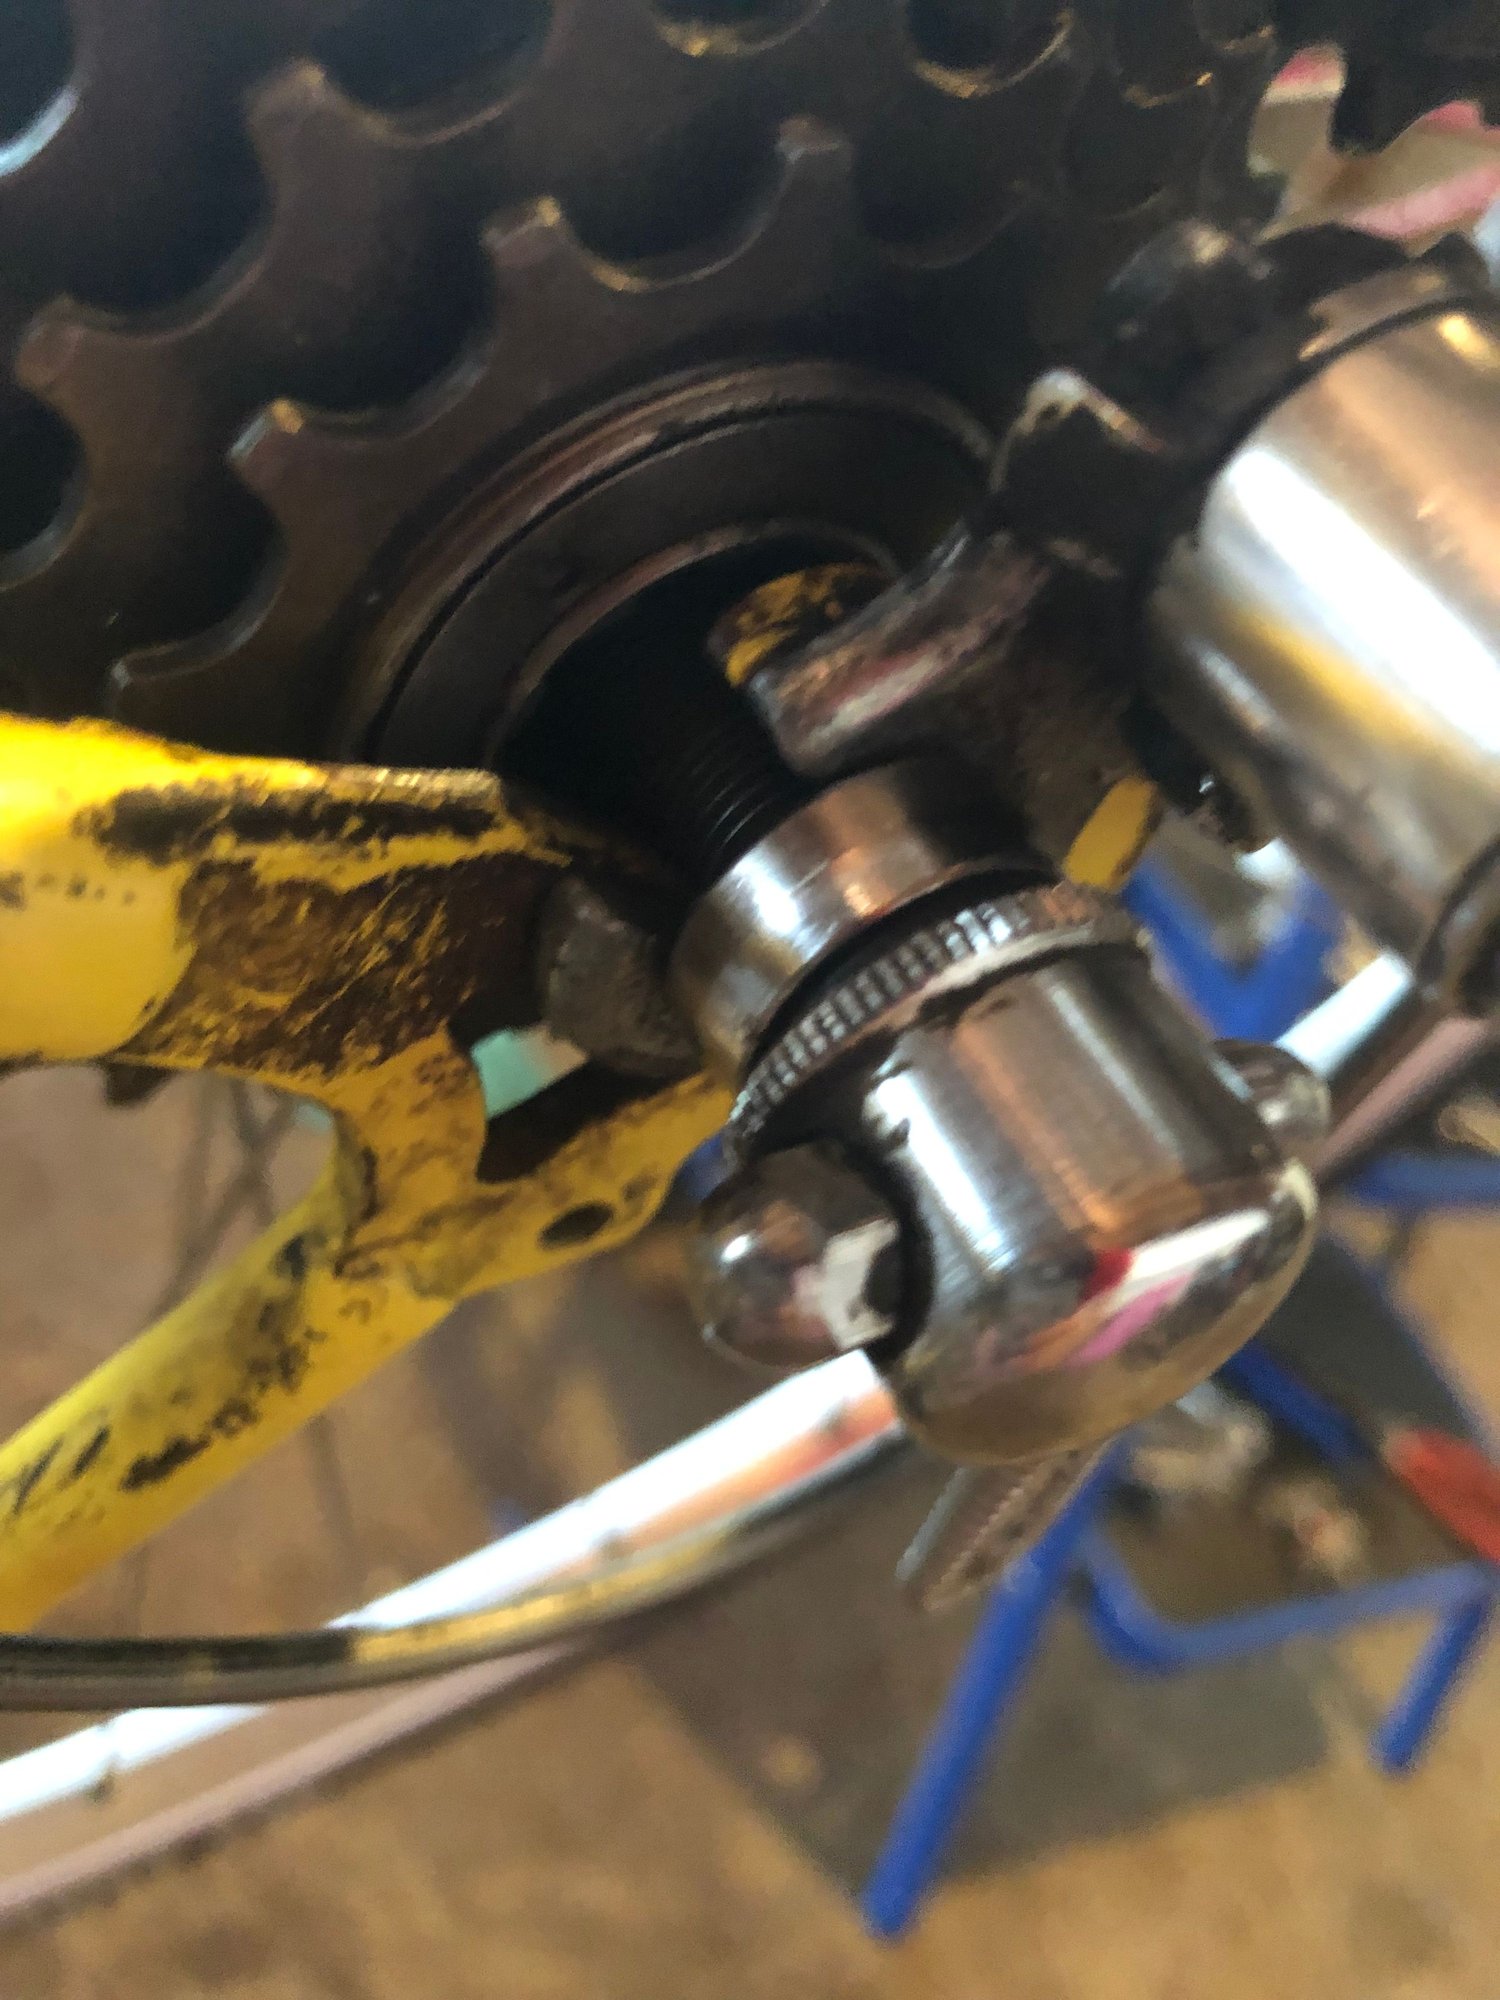
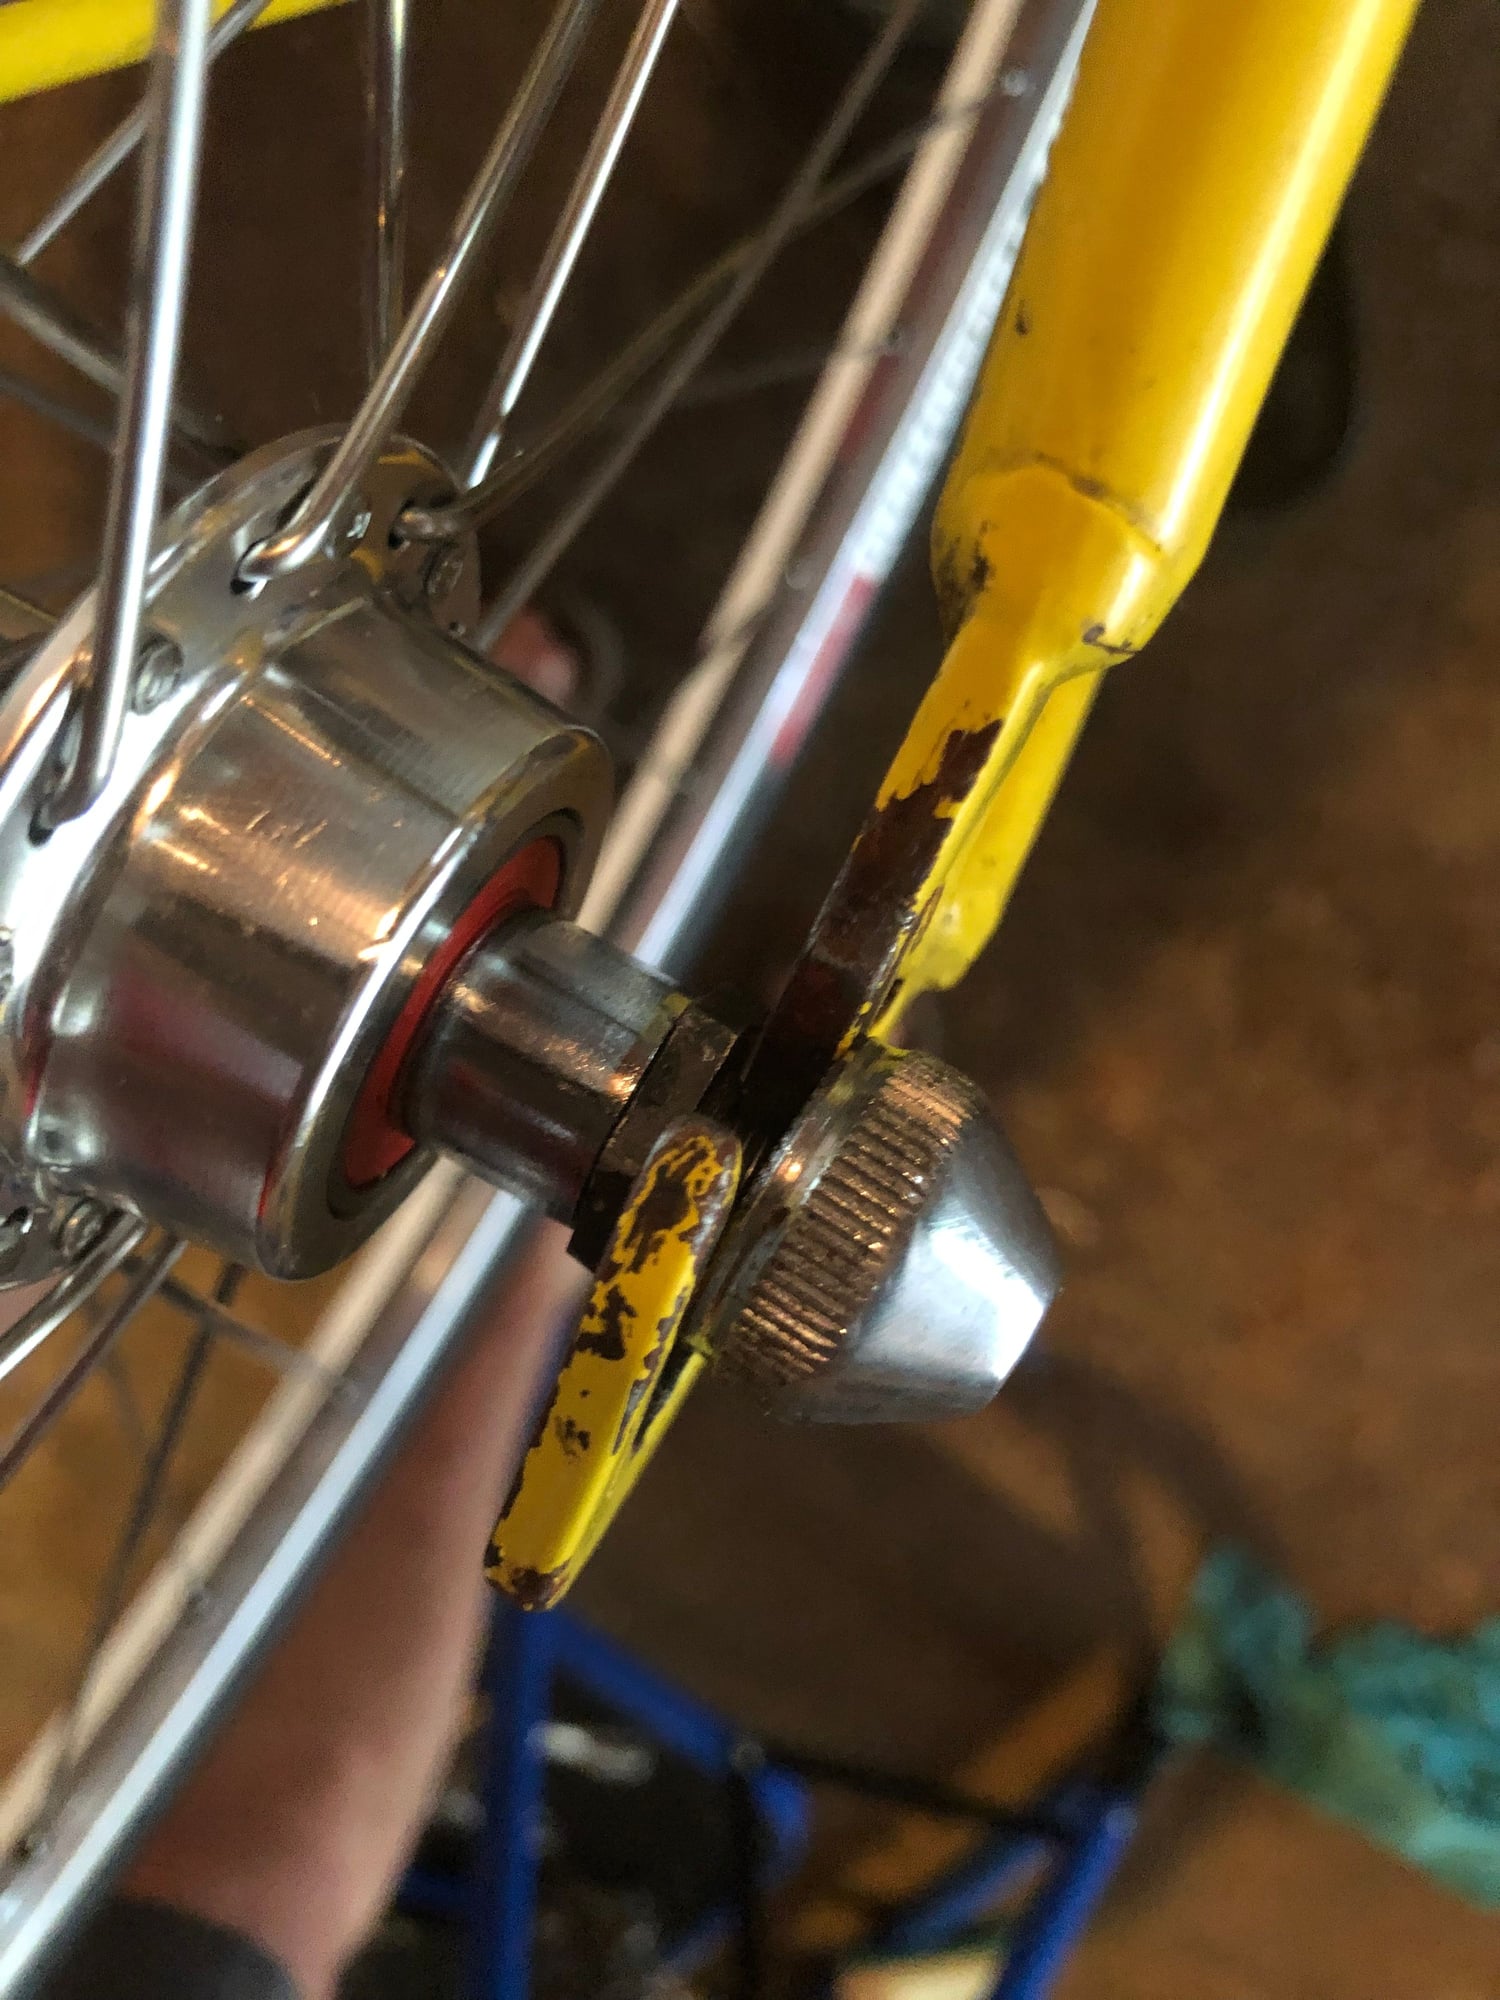
My son is trying to update a 72 Schwin Super Sport. We got new Sun CR18 rims but the spacing seems off especially on the derailleur side. I hope the pictures are illustrative enough.
 07-31-19, 06:00 PM
#2
Senior Member

Join Date: Feb 2014
Location: Pasadena, CA
Posts: 4,848
Bikes: Schwinn Varsity
Mentioned: 22 Post(s)
Tagged: 0 Thread(s)
Quoted: 1931 Post(s)
Liked 742 Times
in
422 Posts
Your Quick Release is on backwards.
Who built the wheels? Looks like cartridge bearings and a cone screwed on backwards for a nut. No Bueno.
You know that bike rear spacing is 120mm....? Right? You did measure before buying the wrong wheels and trying to fix..... you need a shorter axel most likely.
Who built the wheels? Looks like cartridge bearings and a cone screwed on backwards for a nut. No Bueno.
You know that bike rear spacing is 120mm....? Right? You did measure before buying the wrong wheels and trying to fix..... you need a shorter axel most likely.
07-31-19, 06:02 PM
#3
Full Member
The first picture shows a used cone (nut) that is on backwards. It almost looks like it is being used as a spacer. Who built the wheel? More history please.
07-31-19, 07:06 PM
#4
Senior Member
Thread Starter
Join Date: Sep 2016
Location: Woodbury, MN
Posts: 429
Bikes: 2006 Trek Pilot 1.2, 1972 Schwinn SS
Mentioned: 0 Post(s)
Tagged: 0 Thread(s)
Quoted: 156 Post(s)
Likes: 0
Liked 1 Time
in
1 Post
My son is building this. I believe he took the axel from the old wheels that were on there. These are the new wheels https://www.harriscyclery.net/produc...pokes-3135.htm
08-01-19, 06:10 AM
#5
Full Member
Kudos to your son. Let him know that fixing old bikes can be addictive. The wheel you purchased has 126 mm O.L.D. and you are trying to fit it in a frame with 120 mm spacing. Please reference this article by Sheldon Brown and all will become clear: https://www.sheldonbrown.com/frame-spacing.html . Sheldon Brown is an excellent resource that you and your son can use in the coming days. Have a great time!
Likes For mitchmellow62:
08-01-19, 07:55 AM
#6
Senior Member
Join Date: Jun 2019
Posts: 580
Mentioned: 7 Post(s)
Tagged: 0 Thread(s)
Quoted: 254 Post(s)
Likes: 0
Liked 182 Times
in
141 Posts
Those wheels come with axles in them. My guess is that your son removed the nut and spacer on the non-drive side because the overall width was too wide for the frame (126 vs 120 as noted by others). He replaced the nut and spacer with the cone from the old axle. Changing the spacing on one side only means the wheel is off-center. It will also likely be hard to close the quick release securely, as the axle will stick out too far from the frame. Try putting the original spacer and nut back on and then spread the frame until the wheel fits (as described in the sheldon brown link mentioned in the earlier reply).
In any case, this looks like a fun project. Those old Schwinns are nice sturdy bikes for getting around.
In any case, this looks like a fun project. Those old Schwinns are nice sturdy bikes for getting around.
08-01-19, 05:08 PM
#7
Full Member
You may also be able to use the axle from the original wheel making the O.L.D of the new wheel 120 mm. You'd have to experiment with cones, spacers and locknuts. When everything is in place there should be a few millimeters of exposed axle at each end and the wheel should be centered in the stays when installed.
Likes For mitchmellow62:
08-01-19, 10:22 PM
#8
Generally bewildered

Join Date: Aug 2015
Location: Eastern PA, USA
Posts: 3,037
Bikes: 2014 Trek Domane 6.9, 1999 LeMond Zurich, 1978 Schwinn Superior
Mentioned: 20 Post(s)
Tagged: 0 Thread(s)
Quoted: 1152 Post(s)
Liked 341 Times
in
251 Posts
So, first, your son's Sport's Tourer is a pretty good bike. Hand brazed in the USA Cro-Mo frame. See here: https://sheldonbrown.com/schwinn-braze.html. These were made by craftsmen and women who knew their stuff.
You have several potential sizing and compatibility issues.
1) Wheel axle width. This is the space between the two dropouts in the frame. The old one was either 120mm or 126 mm. The CR-18 for freewheel gears is going to come in a 126mm width. You can resize the the gap if it was 120mm, but you'll need to take care that you end up with the right size, centered, with both dropouts parallel. Have your son read the Sheldon Brown article about wheel spacing. There's some good advice and tests he'll need to ensure the dropouts and wheel are right.
2) Not sure about this, but what was the diameter of the old axle? And the new one? There may be a 1mm difference (9mm old, 10mm new) which would require some judicious filing of the dropout. Easy does it.
3) Did you buy a 700c or 27 inch wheel? The original was 27 inch, which is 4mm diameter larger than the 700c. If you got a 700c, make sure that the brake shoes can be adjusted to match up with the rims - you don't want the brake pads to wear on the tire. IF you got a 27 inch, no worries.
As noted above, the quick release lever goes on the side opposite the derailleur and chainring. That is, the lever goes on the NDS (non-drive-side). And your first picture did indeed show complete mismatch of parts. If you are replacing the wheel, don't try to retain the old axle. Use all new stuff - its consistent.
As someone who "set up" thousands of Schwinns of this era (And dozens of Super Sports!) I say "Bravo" to your son. He's already finding that doing anything will cause you to run into some snags. Be glad for these: if there were no snags there'd be no learning.
BTW, in addition to my more modern bikes I'm restoring a similar-framed bike (a Schwinn Superior - read the article above). I'm rebuilding the original wheels (new spokes) but the CR-18 wheels get good reviews - they were the ones I was thinking of switching to.
Last edited by WizardOfBoz; 08-02-19 at 09:43 AM.
08-02-19, 07:30 PM
#10

rebmeM roineS

Join Date: Jan 2006
Location: Metro Indy, IN
Posts: 16,216
Bikes: Bacchetta Giro A20, RANS V-Rex, RANS Screamer
Mentioned: 15 Post(s)
Tagged: 0 Thread(s)
Quoted: 653 Post(s)
Liked 347 Times
in
226 Posts
Agree Super Sport much more worthy of the effort than a Continental or Varsity.
__________________
Bacchetta Giro A20, RANS V-Rex, RANS Screamer
Bacchetta Giro A20, RANS V-Rex, RANS Screamer
08-02-19, 10:06 PM
#11


Senior Member
Join Date: Sep 2014
Posts: 3,893
Mentioned: 20 Post(s)
Tagged: 0 Thread(s)
Quoted: 1062 Post(s)
Liked 665 Times
in
421 Posts
Here's what I'd try. Remove that cone, and the lock nuts from both sides. Figure out how many washers you need to add on both sides to get the wheel centered in the frame, the correct dropout spacing, and correct amount of exposed axle threads on both ends. Put the washers between the bearings and the lock nuts, so that the lock nuts are the last thing, with the sharp ridges pointing outward. Read the Sheldon Brown article on frame spacing, and see if you can convince yourselves that everything is right.
Meaning: Let your son figure it all out, but then he has to convince you that it's correct based on his research and measurements.
An old Schwinn is a great raw material for a project like this. I've gotten both of my kids into wrenching by letting them refurbish old bikes. My rule is that they should do the work, but I'm the final judge of whether the bike is safe to ride, and they can ask for any advice.
08-03-19, 12:10 PM
#12
Senior Member
Thread Starter
Join Date: Sep 2016
Location: Woodbury, MN
Posts: 429
Bikes: 2006 Trek Pilot 1.2, 1972 Schwinn SS
Mentioned: 0 Post(s)
Tagged: 0 Thread(s)
Quoted: 156 Post(s)
Likes: 0
Liked 1 Time
in
1 Post
Update
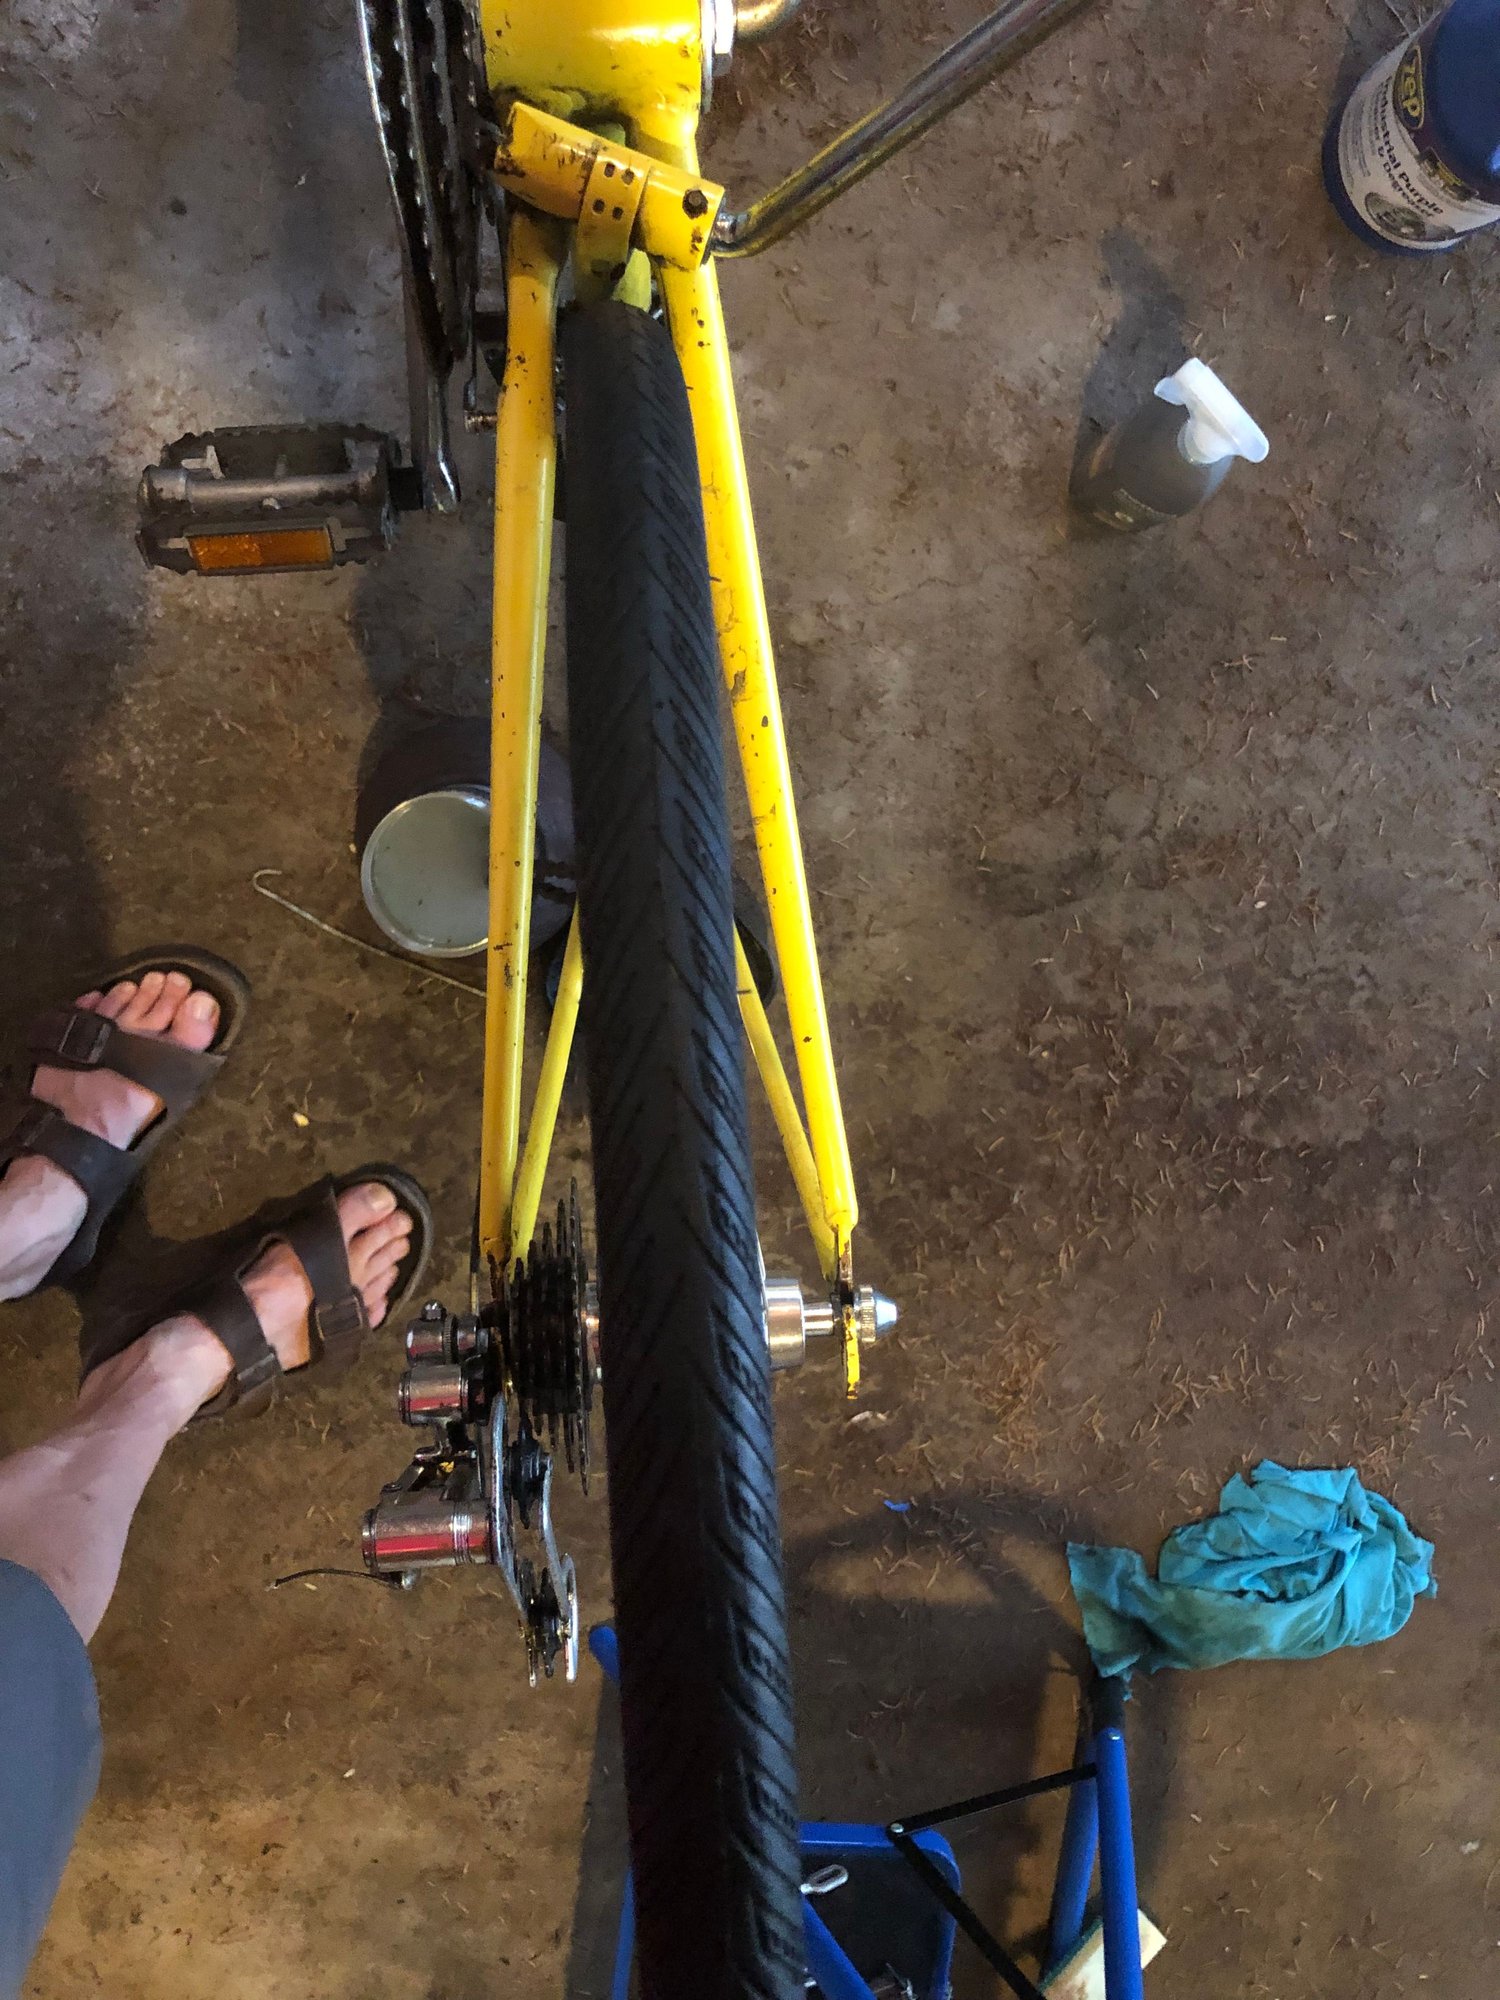
He got the wheels to go and sit properly. It seems like the spacing was already a bit wider than 120mm. He�s cleaning everything and then we just need to redo the brakes and shifters and test it. I think the crank set is probably a little loose as well
08-04-19, 08:09 AM
#13
Senior Member
Join Date: Jun 2019
Posts: 580
Mentioned: 7 Post(s)
Tagged: 0 Thread(s)
Quoted: 254 Post(s)
Likes: 0
Liked 182 Times
in
141 Posts
Good work! You'll probably find that if you remove the quick-release skewer and put it back in so that the handle is on the opposite side, it will be less likely to interfere with the derailleur and cables.
The crank is pretty simple to work on, and it's a good idea to open up the guts and see what the bearings look like. Just remember that everything on the left side (meaning the side without the chain) is reverse threaded - counter clockwise to tighten and clockwise to loosen. Sheldon Brown has a brief set of instructions on those cranks here: https://www.sheldonbrown.com/opc.html
The crank is pretty simple to work on, and it's a good idea to open up the guts and see what the bearings look like. Just remember that everything on the left side (meaning the side without the chain) is reverse threaded - counter clockwise to tighten and clockwise to loosen. Sheldon Brown has a brief set of instructions on those cranks here: https://www.sheldonbrown.com/opc.html
08-04-19, 05:09 PM
#15
Full Member
Your son's innovative solution is rather unorthodox in that he has a spacer on the outside of the frame dropout. I believe that for this to work, the spacer cannot be threaded onto the axle and must be able to slide freely. The axle is likely 5- 6 mm too long. It would be better to go back to the original arrangement of spacers, washers and nuts that the new wheel came with and spring/spread the stays when putting the wheel in. I have never done this but Sheldon Brown says it can be done. I imagine it makes installing the wheel a little more difficult.
The new wheel has cartridge bearings. My experience with cartridge bearings on a bike was in the early 70's with a Lambert so its virtually nonexistent. In an earlier post I said that you might be able to swap axles and was likely very wrong.
As others have said, the skewer should be turned around so the lever is on the left/non drive side.
08-05-19, 07:47 AM
#16
Generally bewildered
Join Date: Aug 2015
Location: Eastern PA, USA
Posts: 3,037
Bikes: 2014 Trek Domane 6.9, 1999 LeMond Zurich, 1978 Schwinn Superior
Mentioned: 20 Post(s)
Tagged: 0 Thread(s)
Quoted: 1152 Post(s)
Liked 341 Times
in
251 Posts
Agree with Mitch: there should be no spacers on the outside of the dropout.
Your statement about the width of the frame being greater than 120 concerns me a little, but it may hint at the issue. I'm wondering if at some point in the past someone didn't change out the back wheel for a wider hub, spreading the frame. This would explain why when your son used the old axle, there was a lot of extra length. Strongly strongly strongly recommend using the original axles that came with the new wheel, and to properly adjust the frame.
Sure, you can kludge things together, but the bike won't ride as nicely, and your son won't learn as much. The frame spacing should match the wheel width. And I suspect that the wheel is 120mm. I'd take the wheel off, and measure the inside distance between the dropouts. This distance can be adjusted, but you want to do so carefully so that the two dropouts are equal distances from the bike centerline. Read Sheldon Brown's article on frame width and how to adjust, here. Read his article about checking frames for centering, here. You should also check to ensure that the dropout surfaces are parallel. Lennard Zinn has a nice short read on this, too, here.
BTW, if you get the frame spacing right, and the rear wheel space is aligned, it might be worthwhile to have a bike shop align the rear dropouts (see the Zinn article) unless you want to create your own straightening tools.
This is a good frame and it will ride better and safer and more reliably (and your son will learn more) if it's properly set up.It's pretty easy to adjust (you use a couple of lengths of 2x4) and to check (you use a piece of string). And you learn something.
Regarding the QR, it is true that you CAN have the quick release handle on the drive side. It's just much, much easier to fit the wheel into the frame and secure it with the handle on the non-drive side.
08-05-19, 09:43 AM
#17
Full Member
Clarification: I disagree with Boz on this one point. The wheel you bought from Harris Cycle was sold with 126 mm spacing.
It should be easy for you to measure the distance between the inner surfaces of the dropouts to see what the spacing of the frame is. If you can only measure in inches you can convert by multiplying the result times 25.4 to get mm. Again, refer to SheldonBrown.com.
It should be easy for you to measure the distance between the inner surfaces of the dropouts to see what the spacing of the frame is. If you can only measure in inches you can convert by multiplying the result times 25.4 to get mm. Again, refer to SheldonBrown.com.

Thread
Thread Starter
Forum
Replies
Last Post
delicious
Classic and Vintage Sales
9
07-08-18 08:37 PM
ColonelJLloyd
Adaptive Cycling: Handcycles, Amputee Adaptation, Visual Impairment, and Other Needs
20
10-27-11 09:17 PM
