


Having trouble with this bottom bracket... thing
 07-03-18, 08:14 AM
#1
Saddler
Thread Starter

Join Date: Jun 2018
Posts: 18
Mentioned: 1 Post(s)
Tagged: 0 Thread(s)
Quoted: 6 Post(s)
Likes: 0
Liked 0 Times
in
0 Posts
Having trouble with this bottom bracket... thing
I'm renovating an old frame, I've removed the old bottom bracket but on one side there is a sort of... cap thing that I can't seem to get off, how would I go about getting it off, are any special tools required?
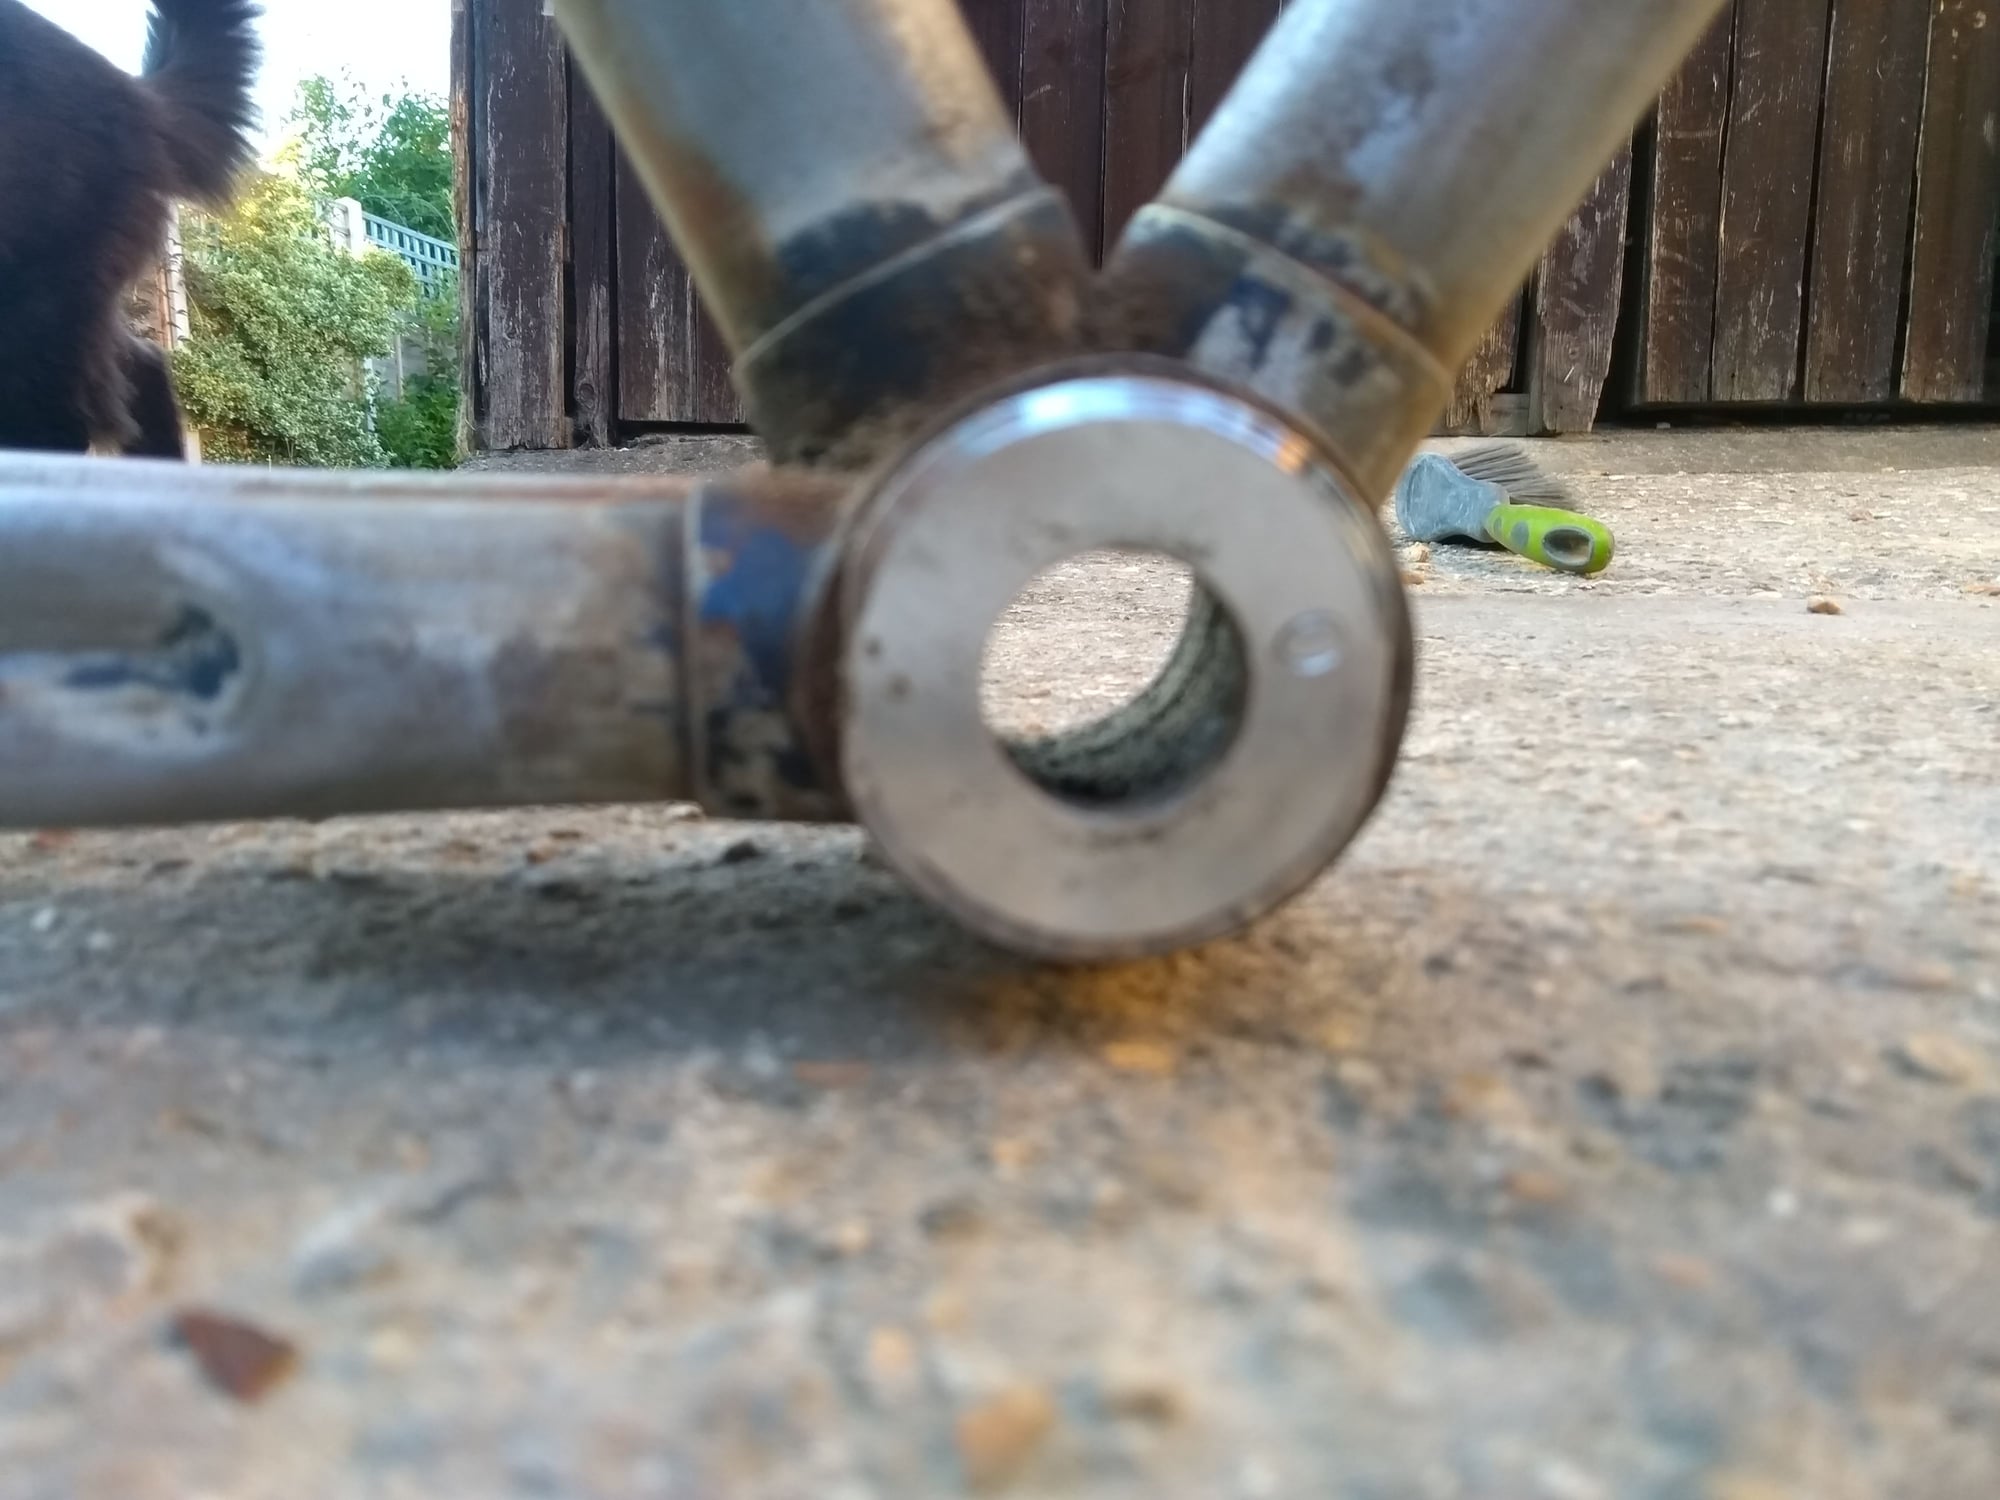
The right hand side, with the 'cap' thing on (I don't know why the camera focused on the brush in the background....)
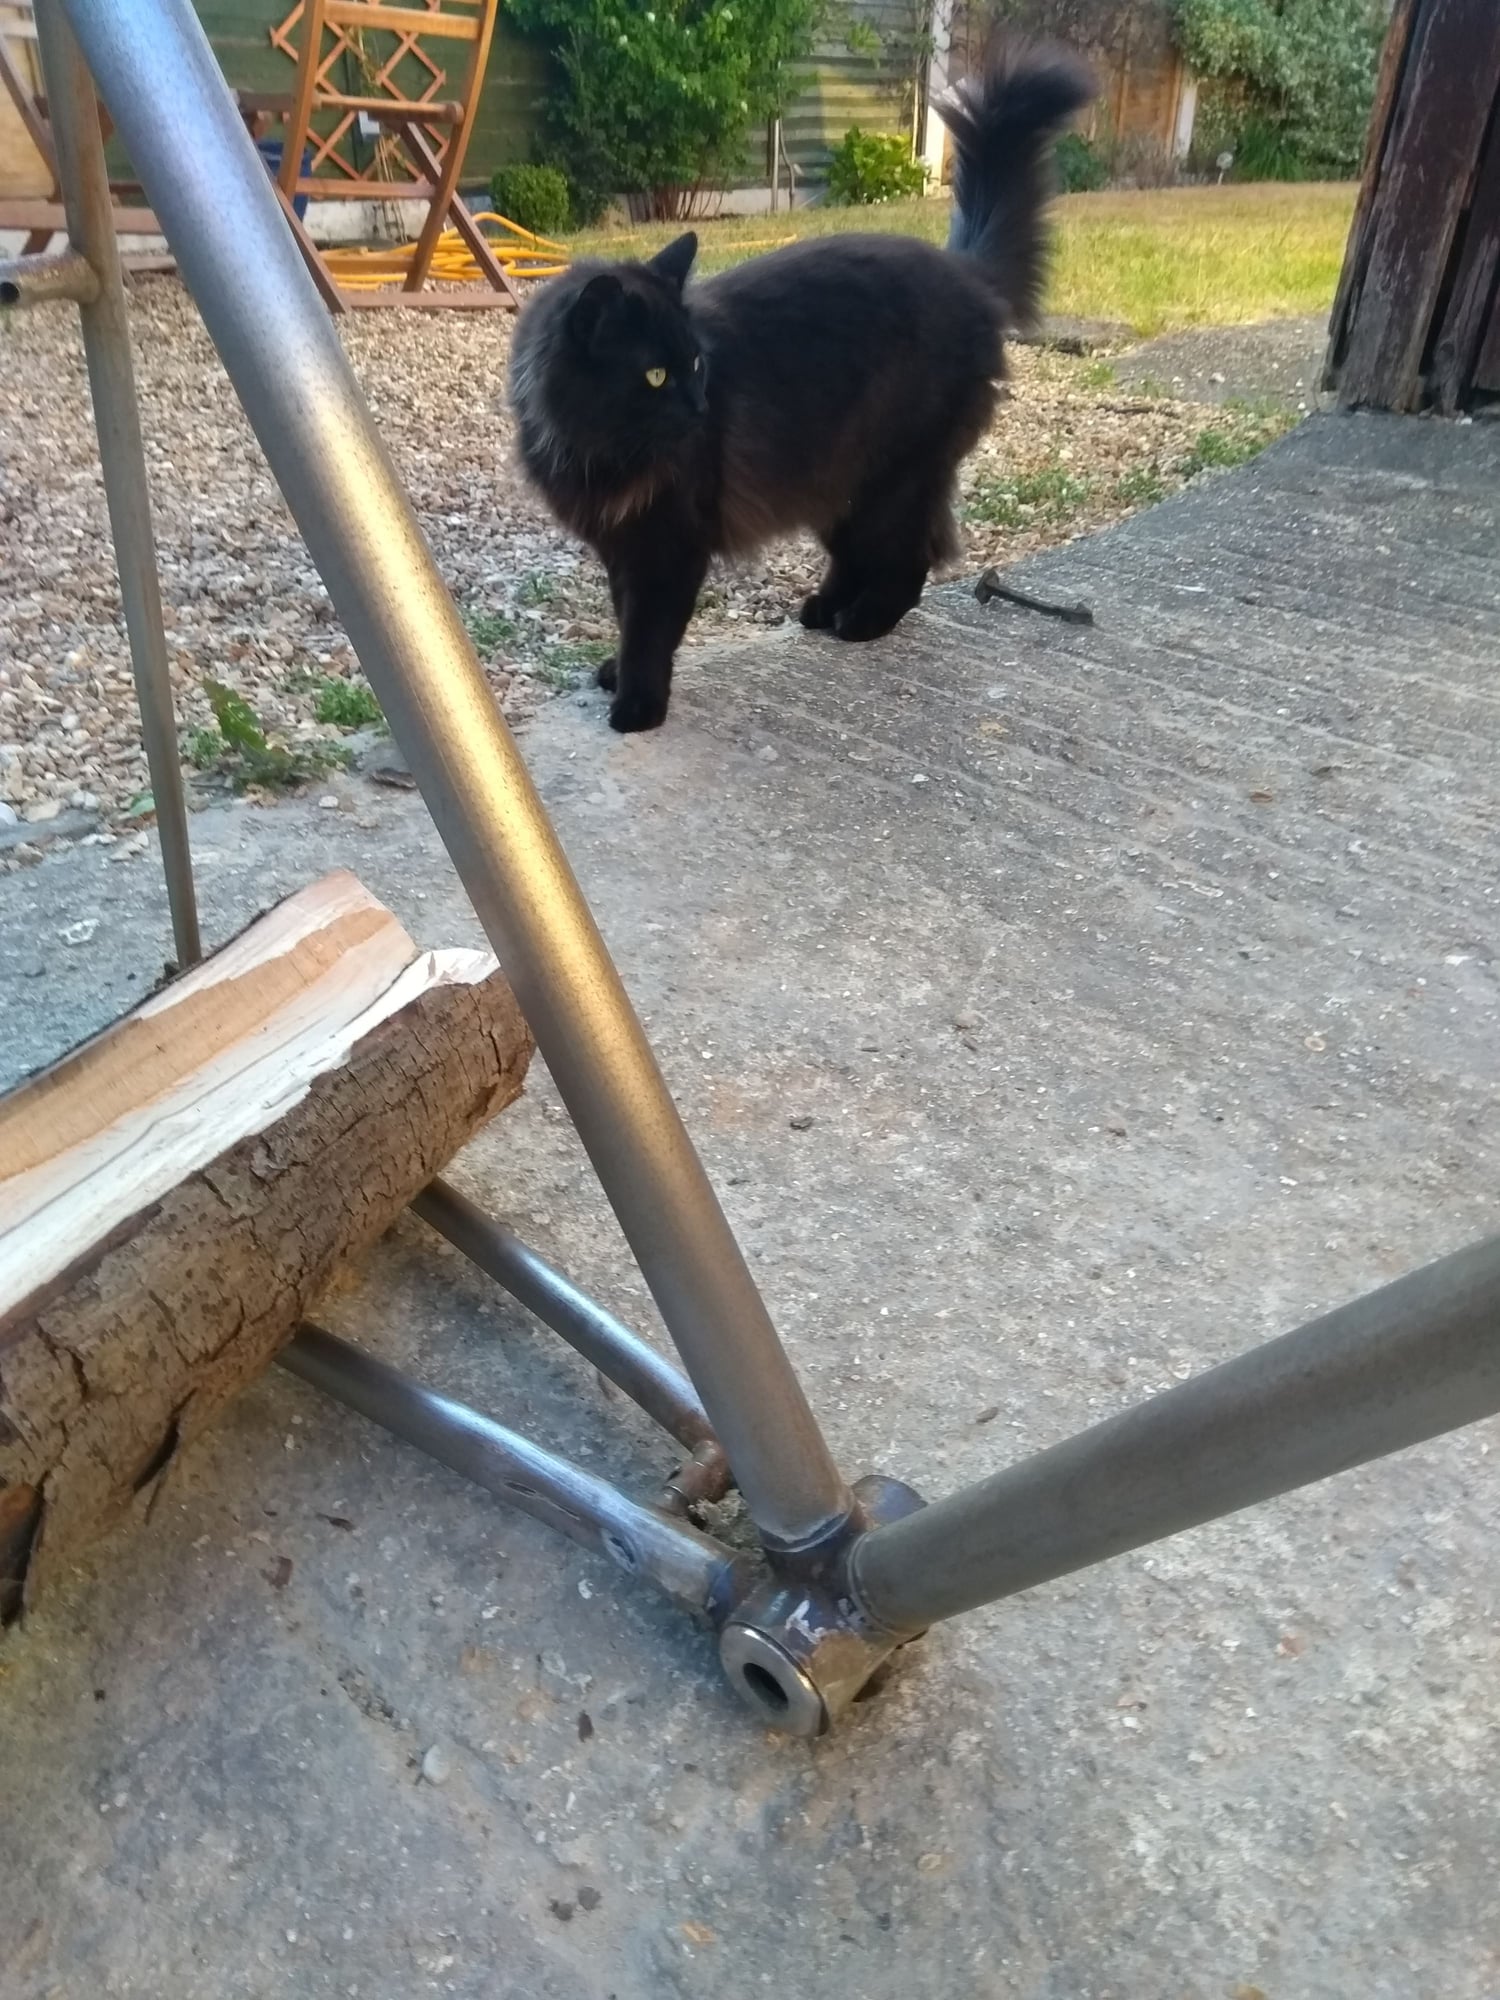
Even the cat is confused
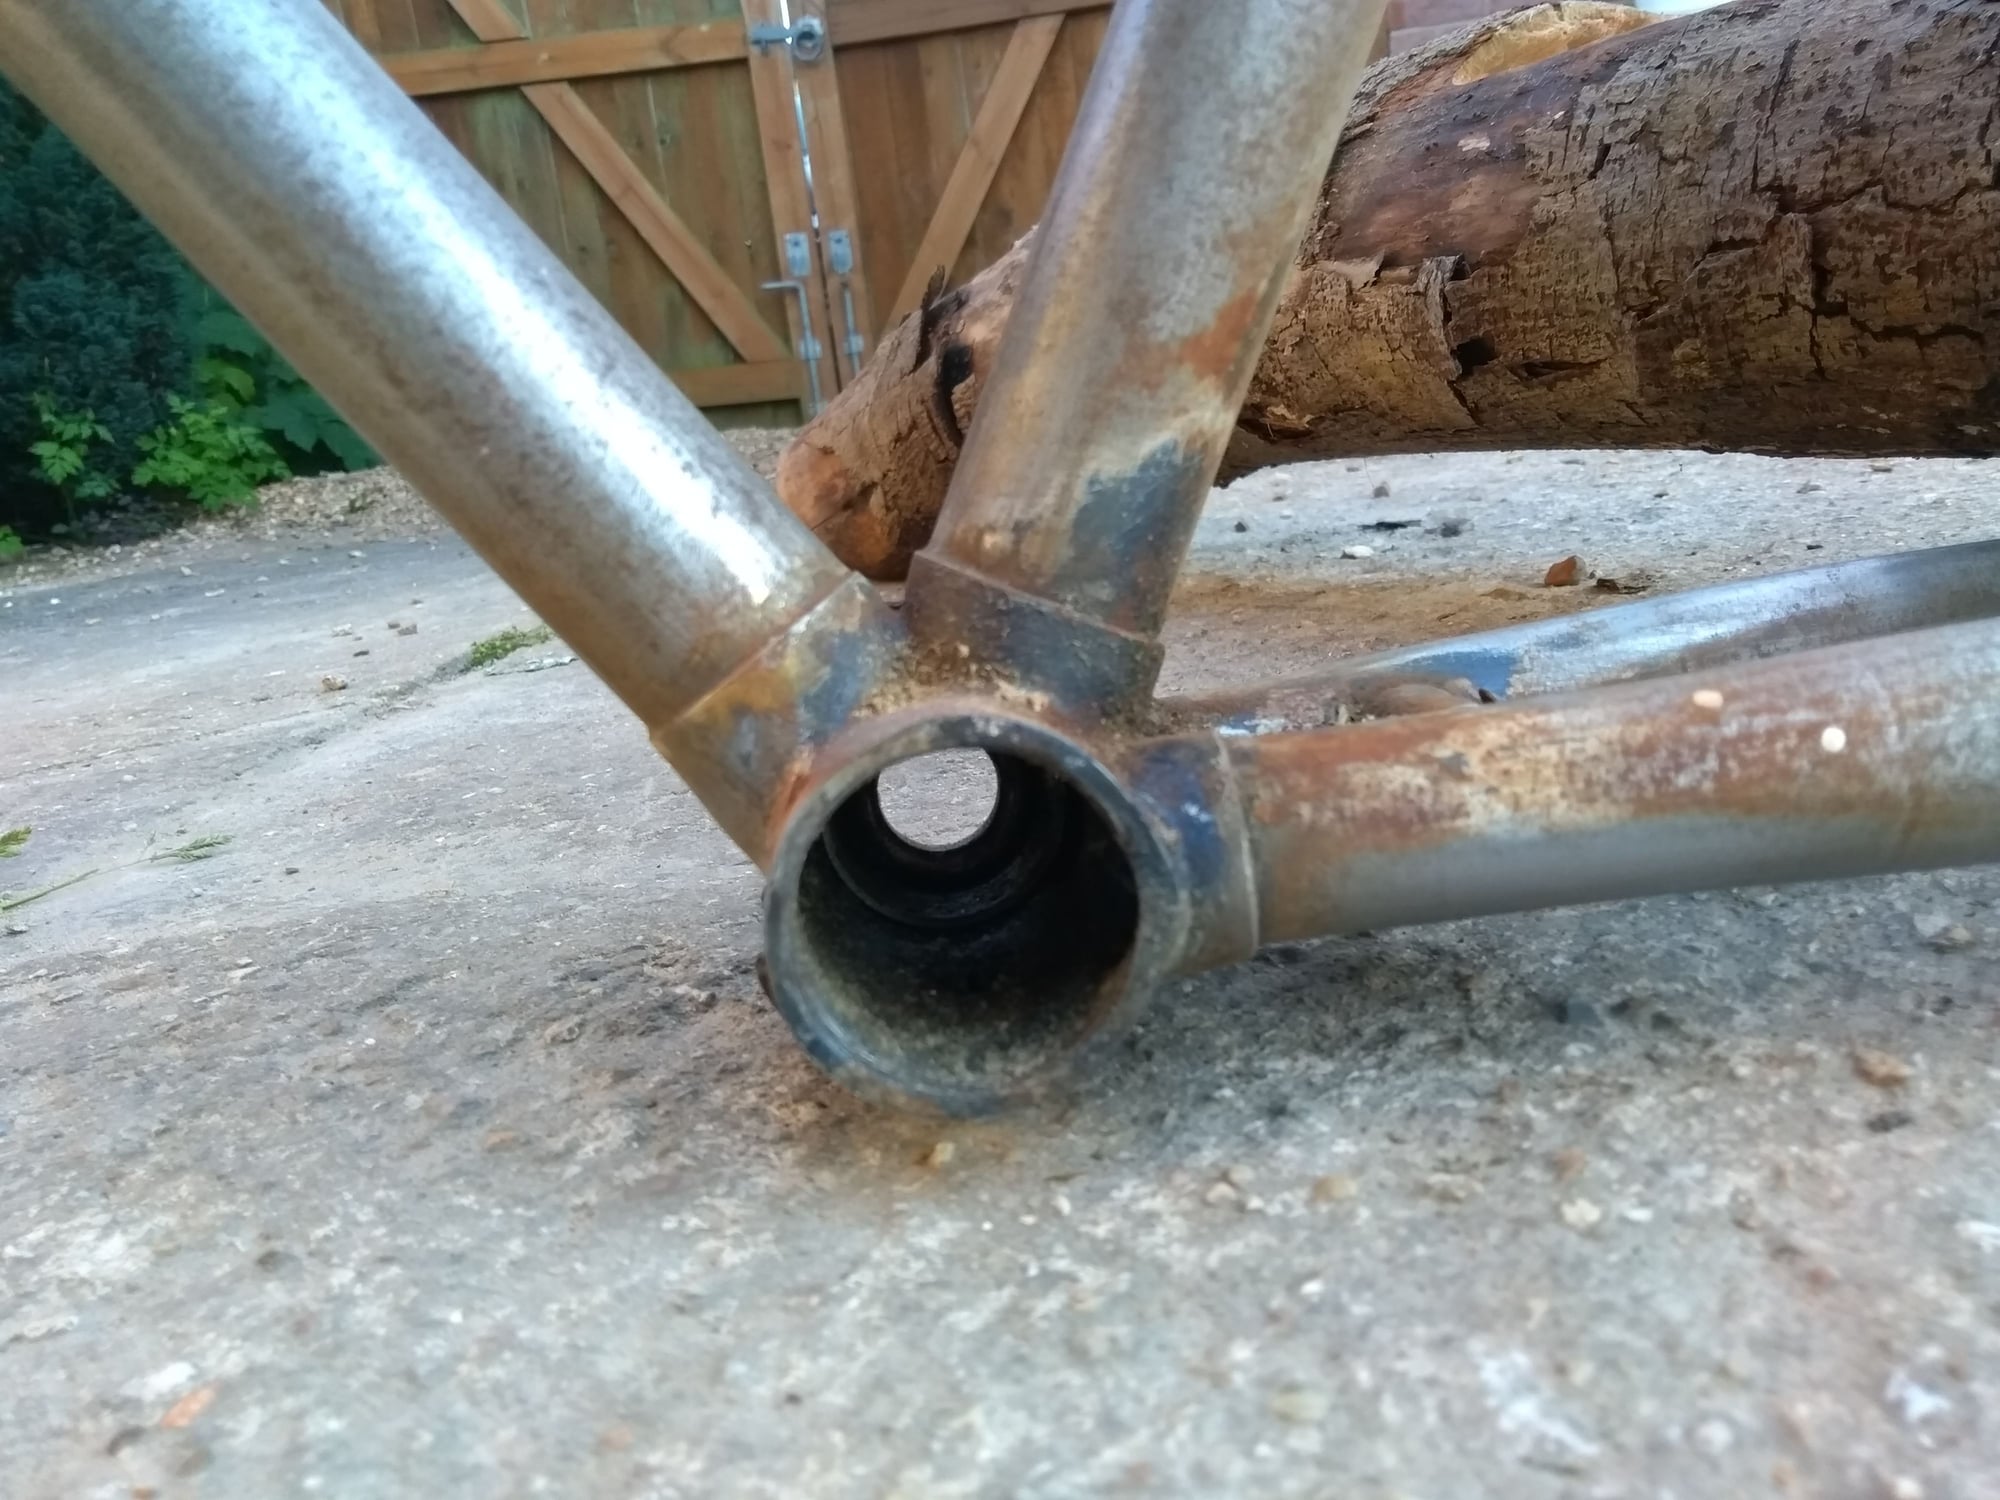
The other side
The right hand side, with the 'cap' thing on (I don't know why the camera focused on the brush in the background....)
Even the cat is confused
The other side
 07-03-18, 08:24 AM
#2
Full Member

Join Date: Oct 2017
Location: NW Florida
Posts: 389
Bikes: A Few
Mentioned: 9 Post(s)
Tagged: 0 Thread(s)
Quoted: 156 Post(s)
Liked 63 Times
in
27 Posts
That's the drive-side or "fixed" cup - You can make a homemade tool that works really well - Never failed me :
Tool Tips--Bottom Bracket Cups
Caution - It's possibly left hand thread
Tool Tips--Bottom Bracket Cups
Caution - It's possibly left hand thread
Last edited by mixteup; 07-03-18 at 08:28 AM.
07-03-18, 08:29 AM
#3
Saddler
Thread Starter
Join Date: Jun 2018
Posts: 18
Mentioned: 1 Post(s)
Tagged: 0 Thread(s)
Quoted: 6 Post(s)
Likes: 0
Liked 0 Times
in
0 Posts
That's perfect, I googled stuck fixed cup and can see that its a common problem, thanks for the tip will give it a tried tonight 
07-03-18, 08:29 AM
#4

Senior Member
Join Date: Feb 2012
Location: Rochester, NY
Posts: 18,094
Bikes: Stewart S&S coupled sport tourer, Stewart Sunday light, Stewart Commuting, Stewart Touring, Co Motion Tandem, Stewart 3-Spd, Stewart Track, Fuji Finest, Mongoose Tomac ATB, GT Bravado ATB, JCP Folder, Stewart 650B ATB
Mentioned: 0 Post(s)
Tagged: 0 Thread(s)
Quoted: 4209 Post(s)
Liked 3,875 Times
in
2,315 Posts
The "cap thing" is the RH BB bearing cup. It is very tightly secured into the shell and is often called the "fixed" cup to indicate it's not changing it's position after install. These can be a struggle to remove if the right tools are not available.
First thing is to determine the cup's threading direction so you know which way to turn it to loosen/remove it. By using the LH cup one can measure that and assume that the RH cup is also of the LH's spec standard. By looking into the shell carefully one might see the RH shell's threads and thus their direction.
Next is the tooling. While I have used bench vices and huge adjustable wrenches held onto the cup/shell with a through bolt/washers using the correct BB Fixed Cup Wrench makes things much easier to set up. Since the amount of force that will likely be needed to loosen the fixed cup is very large any tool slippage will mean greater injury.
This, like some headset work, is better done by a shop if good results are wanted. Their stock of tools and prior experience can make what can be a knuckle busting and dent prone procedure (if done at home) into a safe and damage free one. Andy.
__________________
AndrewRStewart
AndrewRStewart
07-03-18, 08:29 AM
#5
Full Member
You can also consider leaving it in place if it's still in good shape.
07-03-18, 08:36 AM
#6
Saddler
Thread Starter
Join Date: Jun 2018
Posts: 18
Mentioned: 1 Post(s)
Tagged: 0 Thread(s)
Quoted: 6 Post(s)
Likes: 0
Liked 0 Times
in
0 Posts
07-03-18, 08:42 AM
#7
Mad bike riding scientist

Join Date: Nov 2004
Location: Denver, CO
Posts: 27,365
Bikes: Some silver ones, a red one, a black and orange one, and a few titanium ones
Mentioned: 152 Post(s)
Tagged: 1 Thread(s)
Quoted: 6219 Post(s)
Liked 4,220 Times
in
2,367 Posts
You can save your knuckles a but by using something like this to hold the wrench in place
 2015-03-14 11.28.26 by Stuart Black, on Flickr
 2015-03-14 11.21.32 by Stuart Black, on Flickr
The parts are from old bike parts...an solid hub axle, axle nuts, the top of a kickstand and a lock ring. You can substitute a large fender washer for the lockring. Some clever monkey at my co-op improved the tool since the picture was taken by using a right hand cup screwed into the frame on the other side to keep the tool centered. It's still a horrible tool to use but at least you don't bash knuckles.
You might just want to take it to a shop and pay someone to take it off.
I would also suggest not putting it back on. Get a cartridge bearing bottom bracket and don't look back.
__________________
Stuart Black
Plan Epsilon Around Lake Michigan in the era of Covid
Old School�When It Wasn�t Ancient bikepacking
Gold Fever Three days of dirt in Colorado
Pokin' around the Poconos A cold ride around Lake Erie
Dinosaurs in Colorado A mountain bike guide to the Purgatory Canyon dinosaur trackway
Solo Without Pie. The search for pie in the Midwest.
Picking the Scablands. Washington and Oregon, 2005. Pie and spiders on the Columbia River!
07-03-18, 08:48 AM
#8
Saddler
Thread Starter
Join Date: Jun 2018
Posts: 18
Mentioned: 1 Post(s)
Tagged: 0 Thread(s)
Quoted: 6 Post(s)
Likes: 0
Liked 0 Times
in
0 Posts
Thanks for the info, I realise I've got a lot more research to put in before going any further. I didn't realise there were so many different bottom bracket types and not all of them will match the frame either
07-03-18, 11:43 AM
#9
aka Tom Reingold

Join Date: Jan 2009
Location: New York, NY, and High Falls, NY, USA
Posts: 40,503
Bikes: 1962 Rudge Sports, 1971 Raleigh Super Course, 1971 Raleigh Pro Track, 1974 Raleigh International, 1975 Viscount Fixie, 1982 McLean, 1996 Lemond (Ti), 2002 Burley Zydeco tandem
Mentioned: 511 Post(s)
Tagged: 0 Thread(s)
Quoted: 7349 Post(s)
Liked 2,474 Times
in
1,437 Posts
But seriously consider not taking it out unless you're going to put a new one in. And if you do decide to take it out, heed the above advice and know that it is probably reverse-threaded.
One way that sometimes works for me is to clamp the cup in a bench vise and use the frame as the lever.
One way that sometimes works for me is to clamp the cup in a bench vise and use the frame as the lever.
__________________
Tom Reingold, tom@noglider.com
New York City and High Falls, NY
Blogs: The Experienced Cyclist; noglider's ride blog
�When man invented the bicycle he reached the peak of his attainments.� � Elizabeth West, US author
Please email me rather than PM'ing me. Thanks.
Tom Reingold, tom@noglider.com
New York City and High Falls, NY
Blogs: The Experienced Cyclist; noglider's ride blog
�When man invented the bicycle he reached the peak of his attainments.� � Elizabeth West, US author
Please email me rather than PM'ing me. Thanks.
07-04-18, 03:11 AM
#10
Full Member
Depends on how much of it You need/want to change. If all the parts are fine fresh grease will do it (and new balls since they are cheap). Of all old bikes i overhauled this far not one had bad cups. I often had to change the spindle because of pitting.
07-04-18, 05:57 AM
#11
Senior Member
Join Date: Feb 2012
Location: Golden, CO and Tucson, AZ
Posts: 2,837
Bikes: 2012 Specialized Elite Disc, 1983 Trek 520
Mentioned: 13 Post(s)
Tagged: 0 Thread(s)
Quoted: 676 Post(s)
Liked 741 Times
in
430 Posts
Once you determine it needs to be removed, you determine the correct thread pitch (RH or LH), you get the right tool, and it still doesn't come off with reasonable force...use a heat gun on the shell, and rap with a mallet on the handle of the tool.
As said above, unless you have a professional tool, assume the tool will slip and plan for your knuckles to fly somewhere safe.
As said above, unless you have a professional tool, assume the tool will slip and plan for your knuckles to fly somewhere safe.
07-04-18, 07:13 AM
#12

Super Moderator

Join Date: Jul 2004
Location: Ffld Cnty Connecticut
Posts: 21,843
Bikes: Old Steelies I made, Old Cannondales
Mentioned: 12 Post(s)
Tagged: 0 Thread(s)
Quoted: 1173 Post(s)
Liked 927 Times
in
612 Posts
90-ish % of fixed cups are left hand thread, so "Clock-wise" to remove.
I've also had good luck usung cyccocommute's suggestion of clamping the tool in place for more difficult removals.
I've also had good luck usung cyccocommute's suggestion of clamping the tool in place for more difficult removals.
__________________
Bikes: Old steel race bikes, old Cannondale race bikes, less old Cannondale race bike, crappy old mtn bike.
FYI: https://www.bikeforums.net/forum-sugg...ad-please.html
Bikes: Old steel race bikes, old Cannondale race bikes, less old Cannondale race bike, crappy old mtn bike.
FYI: https://www.bikeforums.net/forum-sugg...ad-please.html
07-04-18, 10:46 AM
#14
Senior Member
 07-04-18, 04:05 PM
#15
Super Moderator
Join Date: Jul 2004
Location: Ffld Cnty Connecticut
Posts: 21,843
Bikes: Old Steelies I made, Old Cannondales
Mentioned: 12 Post(s)
Tagged: 0 Thread(s)
Quoted: 1173 Post(s)
Liked 927 Times
in
612 Posts
__________________
Bikes: Old steel race bikes, old Cannondale race bikes, less old Cannondale race bike, crappy old mtn bike.
FYI: https://www.bikeforums.net/forum-sugg...ad-please.html
Bikes: Old steel race bikes, old Cannondale race bikes, less old Cannondale race bike, crappy old mtn bike.
FYI: https://www.bikeforums.net/forum-sugg...ad-please.html
07-04-18, 08:58 PM
#16

Senior Member
Join Date: Sep 2014
Posts: 3,893
Mentioned: 20 Post(s)
Tagged: 0 Thread(s)
Quoted: 1062 Post(s)
Liked 665 Times
in
421 Posts
I've had some success giving the fixed cup tool a few gentle taps with a hammer. Clamping the tool in place, as @cyccommute shows, helps. Penetrating oil helps. Presence of rust suggests that the cup might be in there pretty good.
If you can clean the cup while it's in place, and see that it's not pitted, then it doesn't really have to come out. You could still put in a couple drops of penetrating oil, and then leave it for next time.
If you can clean the cup while it's in place, and see that it's not pitted, then it doesn't really have to come out. You could still put in a couple drops of penetrating oil, and then leave it for next time.
07-04-18, 09:06 PM
#17
Senior Member
Join Date: Dec 2011
Location: Long Beach, CA
Posts: 808
Bikes: Scott CR1 Pro, Eimei
Mentioned: 0 Post(s)
Tagged: 0 Thread(s)
Quoted: 59 Post(s)
Likes: 0
Liked 0 Times
in
0 Posts
Use a breaker bar on the end of the flat headset wrench of the correct size, hold the wrench on with your palm. Slowly break it free
Its a regular forward thread so back it out towards the back of the bike to loosen it
Its a regular forward thread so back it out towards the back of the bike to loosen it
Last edited by Reeses; 07-04-18 at 09:16 PM.
07-05-18, 12:53 AM
#18
Senior Member
Also squirt PB-blaster from inside onto threads. And outside as well.
That stuff is magical! I've sprayed it on stuck seatposts and left it overnight. Found seatpost had unlocked and slid all way down into seat-tube by morning!
That stuff is magical! I've sprayed it on stuck seatposts and left it overnight. Found seatpost had unlocked and slid all way down into seat-tube by morning!
07-05-18, 12:00 PM
#19
Senior Member
Join Date: Jan 2009
Location: San Diego, CA
Posts: 3,674
Mentioned: 10 Post(s)
Tagged: 0 Thread(s)
Quoted: 839 Post(s)
Liked 1,062 Times
in
746 Posts
Lots of good info here but I'm surprised that no one has mentioned that cats are useless at removing BB's. They also don't care if you mangle your knuckles when the wrench slips. I love cats. They're nice to have around but not much help with bike maintenance.
07-31-18, 07:41 PM
#21
Senior Member
Join Date: Aug 2011
Posts: 554
Mentioned: 1 Post(s)
Tagged: 0 Thread(s)
Quoted: 198 Post(s)
Liked 52 Times
in
41 Posts
so � as far as determining direction, would I be correct thinking left side is reverse thread, and right side is conventional ?
in other words:
left side = clockwise to LOOSEN
right side = counter - clockwise to LOOSEN
that way, pedaling would be a tightening force for both sides.
(1984 Peugeot P-17 in question)
thanks
ps: I tried the cup in the vise method but was reluctant to try too hard for lack of directional knowledge!
07-31-18, 07:46 PM
#22
Senior Member
Join Date: Aug 2011
Posts: 554
Mentioned: 1 Post(s)
Tagged: 0 Thread(s)
Quoted: 198 Post(s)
Liked 52 Times
in
41 Posts
That's the drive-side or "fixed" cup - You can make a homemade tool that works really well - Never failed me :
Tool Tips--Bottom Bracket Cups
Caution - It's possibly left hand thread
Tool Tips--Bottom Bracket Cups
Caution - It's possibly left hand thread
07-31-18, 07:49 PM
#23
aka Tom Reingold
Join Date: Jan 2009
Location: New York, NY, and High Falls, NY, USA
Posts: 40,503
Bikes: 1962 Rudge Sports, 1971 Raleigh Super Course, 1971 Raleigh Pro Track, 1974 Raleigh International, 1975 Viscount Fixie, 1982 McLean, 1996 Lemond (Ti), 2002 Burley Zydeco tandem
Mentioned: 511 Post(s)
Tagged: 0 Thread(s)
Quoted: 7349 Post(s)
Liked 2,474 Times
in
1,437 Posts
so � as far as determining direction, would I be correct thinking left side is reverse thread, and right side is conventional ?
in other words:
left side = clockwise to LOOSEN
right side = counter - clockwise to LOOSEN
that way, pedaling would be a tightening force for both sides.
(1984 Peugeot P-17 in question)
thanks
ps: I tried the cup in the vise method but was reluctant to try too hard for lack of directional knowledge!
in other words:
left side = clockwise to LOOSEN
right side = counter - clockwise to LOOSEN
that way, pedaling would be a tightening force for both sides.
(1984 Peugeot P-17 in question)
thanks
ps: I tried the cup in the vise method but was reluctant to try too hard for lack of directional knowledge!
__________________
Tom Reingold, tom@noglider.com
New York City and High Falls, NY
Blogs: The Experienced Cyclist; noglider's ride blog
�When man invented the bicycle he reached the peak of his attainments.� � Elizabeth West, US author
Please email me rather than PM'ing me. Thanks.
Tom Reingold, tom@noglider.com
New York City and High Falls, NY
Blogs: The Experienced Cyclist; noglider's ride blog
�When man invented the bicycle he reached the peak of his attainments.� � Elizabeth West, US author
Please email me rather than PM'ing me. Thanks.
07-31-18, 08:41 PM
#25
Old fart

Join Date: Nov 2004
Location: Appleton WI
Posts: 24,790
Bikes: Several, mostly not name brands.
Mentioned: 153 Post(s)
Tagged: 0 Thread(s)
Quoted: 3590 Post(s)
Liked 3,401 Times
in
1,935 Posts
Yup. You need a special tool to get it off. It's the worst tool ever made for a bike and the worst idea ever put on a bike...and there have been some real stinkers to compete with it!

But they're not cheap. And really, if there's nothing wrong with the fixed cup, there's no compelling reason to remove it.