


For the love of English 3 speeds...
 12-10-19, 09:57 AM
Senior Member
Join Date: Mar 2007
Location: SF Bay Area, East bay
Posts: 7,656
Bikes: Miyata 618 GT, Marinoni, Kestral 200 2002 Trek 5200, KHS Flite, Koga Miyata, Schwinn Spitfire 5, Mondia Special, Univega Alpina, Miyata team Ti, Santa Cruz Highball
Mentioned: 52 Post(s)
Tagged: 0 Thread(s)
Quoted: 1608 Post(s)
Liked 2,587 Times
in
1,223 Posts
I stayed away from cottered cranks for that reason. Recently picked up a really nice Park tool vice. Put some pressure on and give it a tap and those pins come right out.
 12-10-19, 10:14 AM
Senior Member

Join Date: Dec 2012
Location: St. Paul, MN
Posts: 1,597
Bikes: Too many 3-speeds, Jones Plus LWB
Mentioned: 12 Post(s)
Tagged: 0 Thread(s)
Quoted: 359 Post(s)
Liked 265 Times
in
119 Posts
If you have a cotter pin press on hand, installation and removal of cottered cranks is easier and more reliable than alloy cranks on square tapers. I really don't like creaky cranks.
There are two of the vintage Park cotter pin presses on ebay right now.
12-10-19, 12:17 PM
Senior Member
Join Date: Apr 2012
Location: Toronto
Posts: 2,572
Bikes: 1971 Hercules, 1978 Raleigh Superbe, 1978 Raleigh Tourist, 1964 Glider 3 Speed, 1967 Raleigh Sprite 5 Speed, 1968 Hercules AMF 3 Speed, 1972 Raleigh Superbe, 1976 Raleigh Superbe, 1957 Flying Pigeon, 1967 Dunelt 3 Speed
Mentioned: 57 Post(s)
Tagged: 0 Thread(s)
Quoted: 1028 Post(s)
Liked 443 Times
in
288 Posts
I would say that cotter pin removal is the number 1 topic on this forum...
12-11-19, 01:18 AM
Senior Member

Where is everyone buying their Sun CR18 rims at? I need a pair and not sure where to get them.
12-11-19, 09:28 AM
Senior Member
Join Date: Mar 2018
Location: Brooklyn, NY
Posts: 660
Bikes: 1983 Trek 600, 1972 Raleigh Sports Step Thru, 1963 Rudge Sports, 2007 Dahon MuP8, Dahon Speed, Public Mixte 8-speed IGH, mid-70s Peugeot Mixte AW conversion, Riv Platypus
Mentioned: 0 Post(s)
Tagged: 0 Thread(s)
Quoted: 350 Post(s)
Liked 24 Times
in
17 Posts
It is good that they stopped, but in my experience once the threaded section starts to bend, a press will only bend it more. Then, even if it does come loose, it won't fit out the hole past the spindle.I think it would be best to tape up the crank arm and hack saw off the bent section of the cotter. I suppose it's not necessary, but I like to center punch the new end and start with a small drill and work up to bigger drill so the top of the cotter has a counter sink that will hold the punch so it won't slip off and mar the crank arm. The counter sink also helps direct the force of the hammer blows in the direction it's needed. The important part is that I support the crank arm as I drive the cotter. Luckily I have a cement floor in my cellar. I put the bike in the stand, up off the tires. Then I fit a 2x4 with a hole drilled in the end grain to clear the cotter between the hard floor and the crank arm. Then I drive the cotter out with a hefty punch and hammer. So far, this has always worked for me, but I have seen other posts here where people had to drill all the way through to weaken the cotter enough to be able to drive it out. Good luck.
12-11-19, 12:02 PM

Bikes are okay, I guess.

Join Date: Jan 2015
Location: Richmond, Virginia
Posts: 6,938
Bikes: Waterford Paramount Touring, Giant CFM-2, Raleigh Sports 3-speeds in M23 & L23, Schwinn Cimarron oddball build, Marin Palisades Trail dropbar conversion, Nishiki Cresta GT
Mentioned: 69 Post(s)
Tagged: 0 Thread(s)
Quoted: 2647 Post(s)
Liked 2,446 Times
in
1,557 Posts
12-11-19, 06:14 PM
Senior Member

Join Date: May 2018
Location: Ottawa, Ontario, Canada
Posts: 581
Bikes: 1951 Sun Wasp, 1953 Armstrong Consort, 1975 Raleigh Competition, 1980 Apollo Gran Sport, 1988 Schwinn Voyageur, Mystery MTB
Mentioned: 31 Post(s)
Tagged: 0 Thread(s)
Quoted: 359 Post(s)
Liked 465 Times
in
191 Posts
The cotter press from Mark at bikesmith is my favourite bicycle tool in the arsenal. It takes away all of the worry. Cotters out in like a minute or two and after a BB service, the new ones go back in in about the same time. Taking my Peugeot crank apart I could sense the cotter pins resistance and likelihood to ruin my weekend in short order. The press removed them with no fuss. 90 percent of the time it works every time  for the other moments, consult the Chief.
for the other moments, consult the Chief.

Likes For Ged117:
12-11-19, 07:30 PM
Full Member
Cotters
I usually put sewing machine oil in the hole after I take the nut off and let it soak for at least an hour. Then drive it out with a framing hammer supporting the crank arm with a pipe against a solid floor.
I have had to drill a few out.
I have had to drill a few out.
12-11-19, 08:08 PM
Senior Member

Join Date: Jan 2015
Posts: 3,240
Mentioned: 103 Post(s)
Tagged: 0 Thread(s)
Quoted: 1299 Post(s)
Likes: 0
Liked 103 Times
in
85 Posts
After all these years of wrenching 3 speeds, I still don't have solid explanation of what causes cotters to be so tight that you have to battle to get them out. I do have a suspicion though. Here's my evidence. (1) I have never noticed any rust or corrosion on a nasty cotter after I won the battle. (2) When I have a stuck cotter, penetrating oil doesn't ever seem to help. (3) I have never had any trouble removing a cotter that I pressed in myself. I suspect that cotters that cause trouble are simply pressed or hammered in too tightly. The threaded top can only take so much pressure before it bends. When I press cotters in, I have a feeling of where to stop. I've never measured the torque but I'll guess it's around 50 ft lbs. Perhaps the person installing it had gorilla arms and gave it all he had. Or maybe hammered on it excessively. In any case, the torque I apply seems to work fine. I've never had one come loose on me. edit: I should mention that in recent years where Raleigh cotters weren't available, I have been using Raleigh taper cotters from Mark at Bike Smith.
__________________
Inflate Hard
Inflate Hard
Last edited by BigChief; 12-11-19 at 08:16 PM.
12-11-19, 09:26 PM
Senior Member
Join Date: Jan 2015
Posts: 3,240
Mentioned: 103 Post(s)
Tagged: 0 Thread(s)
Quoted: 1299 Post(s)
Likes: 0
Liked 103 Times
in
85 Posts
One other thing I should pass along. The approach I take with cotters that start to bend when I try to press them out is simply...More Power! I don't use the flat end Starrett punches. I have a big honkin punch with a tapered shaft and a dull pointed end. I saw off the bent end of the cotter, center punch and drill it until I have a countersink that the punch fits nicely into. I think the countersink is important because I'm not kidding around when I hit that punch with the big ball peen hammer. It would be a disaster if the punch slipped off and made a mess of the crank arm. Besides the countersink centers the force from the hammer. You must have a solid support for the crank arm when you do this. This system puts much greater force against the cotter than you can get from a press. It hasn't failed me...so far. We need more POWER Scotty!!!
__________________
Inflate Hard
Inflate Hard
12-11-19, 09:44 PM
Junior Member

Join Date: Oct 2013
Location: Granite Bay, Ca
Posts: 88
Bikes: '84 Bianchi Professional, '94 Mongoose Rockadile(Dirt drop conversion), '10 Jamis Eclipse, '71 Peugeot UE8, '17 New Albion Privateer(Rando build), '96 Specialized Crossroads Cruz(Cross build) '72 Peugeot AE8(Porteur Conversion), 2010 Guru Magis
Mentioned: 4 Post(s)
Tagged: 0 Thread(s)
Quoted: 18 Post(s)
Liked 92 Times
in
40 Posts
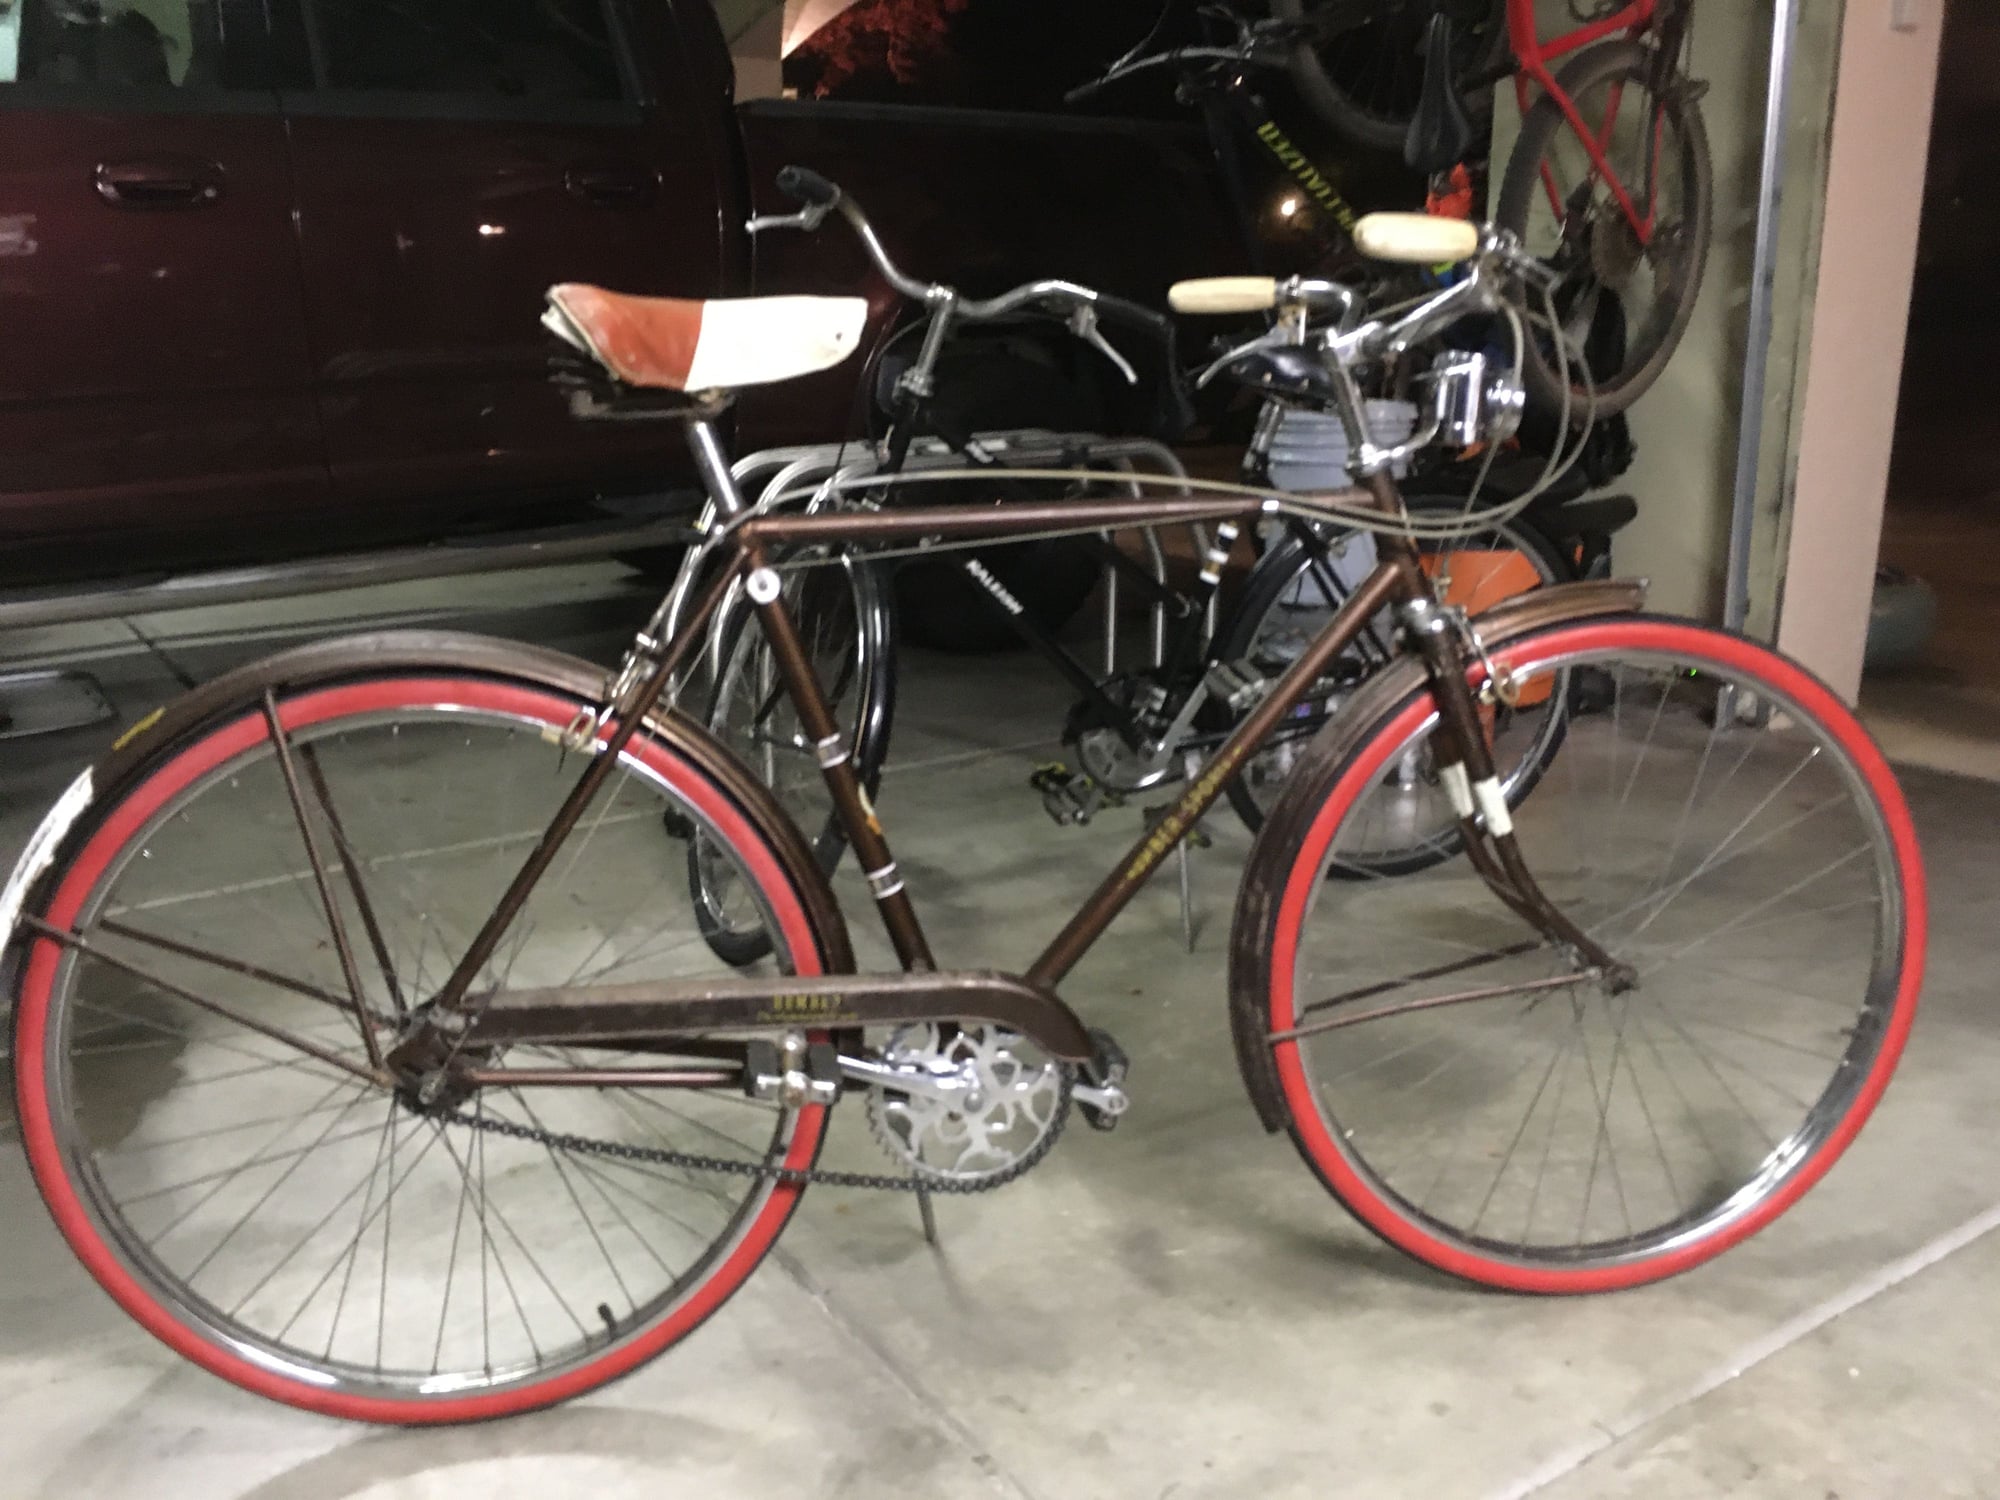
Pair of Threes
I picked up this pair of 3-speeds a couple of weeks ago. 1979 Raleigh and a 1970 Humber Sports. Dates are based on the date stamps on the SA hubs, not ironclad but that�s what I�m going with. I wanted the Humber but the Raleigh was part of the sale (I flipped in the next week).
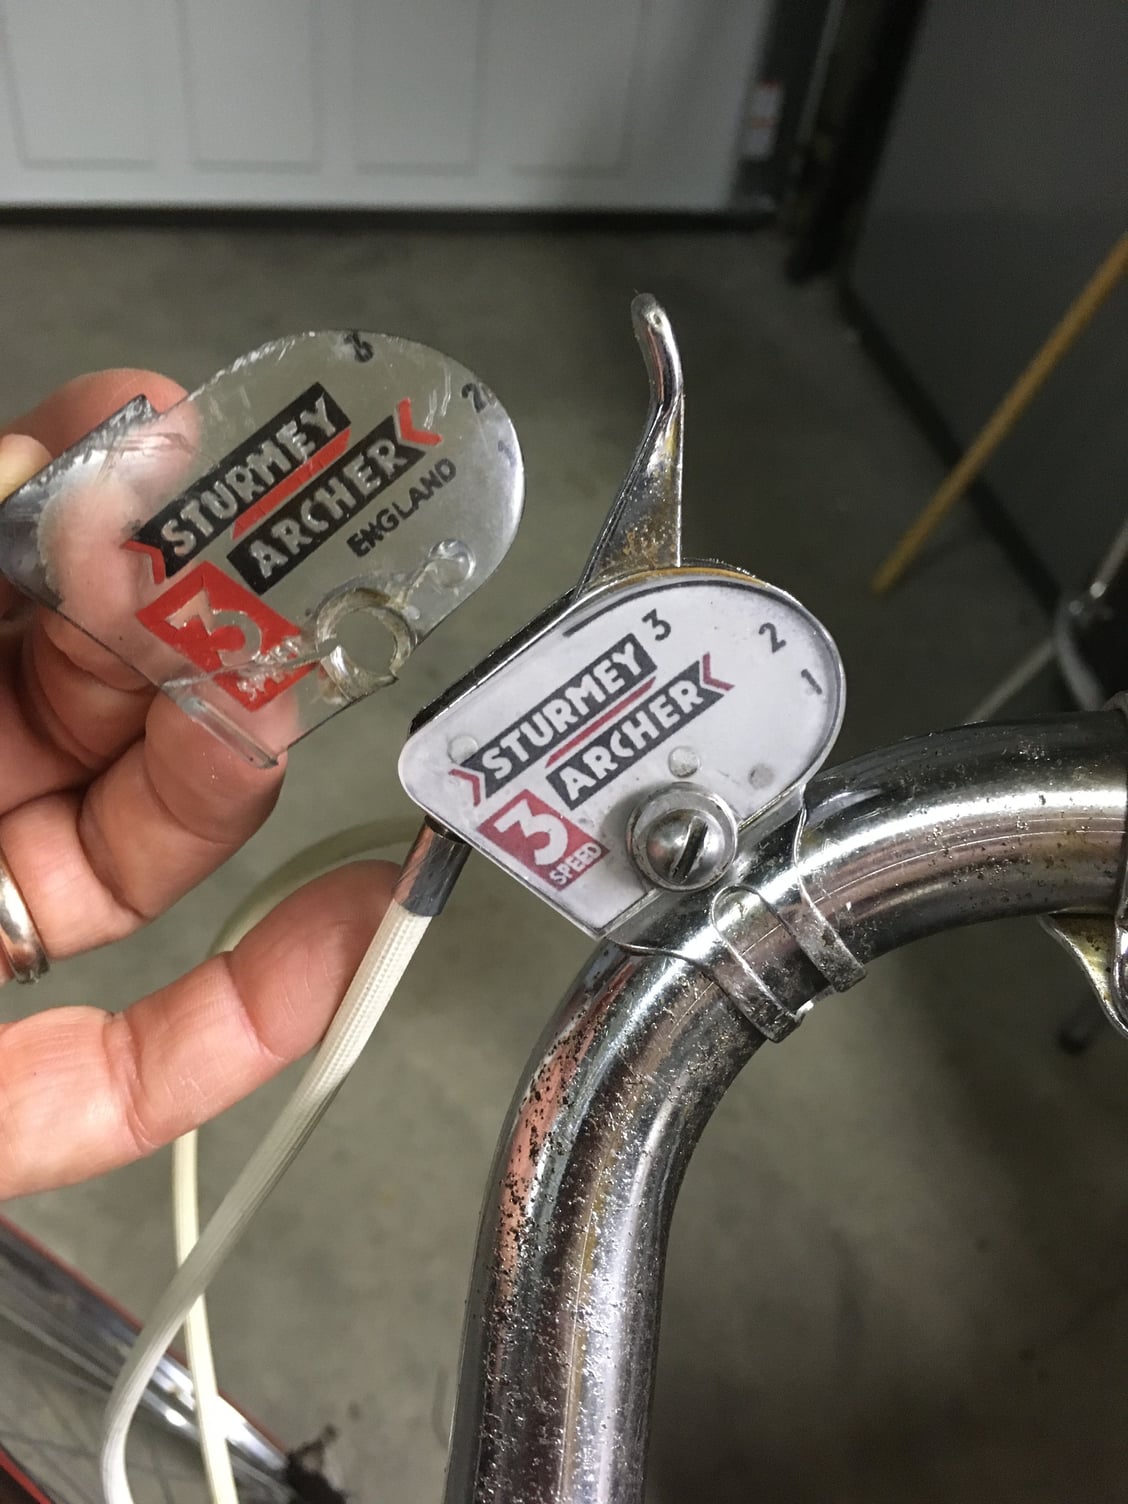
The Humber is a Christmas gift for my 15 yr old son (he like old bikes too). It has patina (a little rust, faded paint, etc) and a good look. Needed some cleaning and minor repair. Replaced all three cables with NOS with ribbed white housing, NOS Fibrax brake pads, and a new shift cable pulley. Added a NIB Top-Lite chrome bike light and a new chrome replica pump (Sunlite). The new Brooks saddle just delivered today will replace the mattress style seat. After going over everything it became evident that the cracked plastic shifter cover would not withstand retightening the screw again without completely splitting. So I jury-rigged a new one from some spare 1/8 in thick plexiglass. Printed out a reverse image of a shifter on a clear adhesive backed Avery sheet, stuck it on the underside of the plexiglass and ground it to shape. For a one hour bodge it didn�t turn out too bad. Just need to stitch up a new saddle bag and it will be ready to go.


The Humber is a Christmas gift for my 15 yr old son (he like old bikes too). It has patina (a little rust, faded paint, etc) and a good look. Needed some cleaning and minor repair. Replaced all three cables with NOS with ribbed white housing, NOS Fibrax brake pads, and a new shift cable pulley. Added a NIB Top-Lite chrome bike light and a new chrome replica pump (Sunlite). The new Brooks saddle just delivered today will replace the mattress style seat. After going over everything it became evident that the cracked plastic shifter cover would not withstand retightening the screw again without completely splitting. So I jury-rigged a new one from some spare 1/8 in thick plexiglass. Printed out a reverse image of a shifter on a clear adhesive backed Avery sheet, stuck it on the underside of the plexiglass and ground it to shape. For a one hour bodge it didn�t turn out too bad. Just need to stitch up a new saddle bag and it will be ready to go.
Likes For Goosecheck:
12-11-19, 10:19 PM

Senior Member
Join Date: Dec 2005
Posts: 17,155
Mentioned: 481 Post(s)
Tagged: 0 Thread(s)
Quoted: 3808 Post(s)
Liked 6,683 Times
in
2,609 Posts
Nice job on the repro shift lever cover. Those are notoriously fragile.
12-12-19, 07:10 AM
Senior Member
Join Date: Apr 2012
Location: Toronto
Posts: 2,572
Bikes: 1971 Hercules, 1978 Raleigh Superbe, 1978 Raleigh Tourist, 1964 Glider 3 Speed, 1967 Raleigh Sprite 5 Speed, 1968 Hercules AMF 3 Speed, 1972 Raleigh Superbe, 1976 Raleigh Superbe, 1957 Flying Pigeon, 1967 Dunelt 3 Speed
Mentioned: 57 Post(s)
Tagged: 0 Thread(s)
Quoted: 1028 Post(s)
Liked 443 Times
in
288 Posts
yes, quite clever.
12-12-19, 07:38 AM
Senior Member

Join Date: Mar 2014
Location: Southport, North Carolina, USA & Pevensey, East Sussex, UK
Posts: 309
Bikes: 1)1992 Trek 970, 2)2010 Trek 6500, 3)1973 Colnago Super, 4)1955 Freddie Grubb Meteor. 5)1993 Airborne Ti-Hag Titanium. 6)1936 BSA 602DX Roadster. 7)1957 Philips P2 Sports. 8)1955 Dayton Roadmaster. 9)1948 Humber Clubman. 10) 1949 Sunbeam WA3 Wayfarer
Mentioned: 5 Post(s)
Tagged: 0 Thread(s)
Quoted: 157 Post(s)
Liked 85 Times
in
34 Posts
It is good that they stopped, but in my experience once the threaded section starts to bend, a press will only bend it more. Then, even if it does come loose, it won't fit out the hole past the spindle.I think it would be best to tape up the crank arm and hack saw off the bent section of the cotter. I suppose it's not necessary, but I like to center punch the new end and start with a small drill and work up to bigger drill so the top of the cotter has a counter sink that will hold the punch so it won't slip off and mar the crank arm. The counter sink also helps direct the force of the hammer blows in the direction it's needed. The important part is that I support the crank arm as I drive the cotter. Luckily I have a cement floor in my cellar. I put the bike in the stand, up off the tires. Then I fit a 2x4 with a hole drilled in the end grain to clear the cotter between the hard floor and the crank arm. Then I drive the cotter out with a hefty punch and hammer. So far, this has always worked for me, but I have seen other posts here where people had to drill all the way through to weaken the cotter enough to be able to drive it out. Good luck.
__________________
Cuius summa inventa
Cuius summa inventa
Likes For PeterLYoung:
12-12-19, 08:33 AM
Senior Member
Join Date: May 2018
Location: Ottawa, Ontario, Canada
Posts: 581
Bikes: 1951 Sun Wasp, 1953 Armstrong Consort, 1975 Raleigh Competition, 1980 Apollo Gran Sport, 1988 Schwinn Voyageur, Mystery MTB
Mentioned: 31 Post(s)
Tagged: 0 Thread(s)
Quoted: 359 Post(s)
Liked 465 Times
in
191 Posts
Filter Switch Unit
So my 1950 Superbe came with its Dynoluxe system largely intact. The front and rear lamps, and wiring connected to the Filter Switch Unit (Details and schematic here https://www.bikeforums.net/classic-v...l#post13983796

Note that I do not have the "accumulator" unit, but you get the idea with this image. That was pre-Filter Switch Unit, with leaky late 1940s rechargeable cells. They switched to the FSU for that reason.
The wiring is now 70 years old, and my new drop-in LED lights from Nicelite don't work. One of the wires into the rectifier unit is cut (it has red shrink wrap, so a positive) and the bike came to me with the wiring disconnected from the AG hub, so it wasn't working decades ago prior to the bike being put into stasis. The hub has been tested, and it does produce the electron juice.
There are excellent, straight forward ways of using small bridge rectifiers inside the headlamp with a capacitor to include standlight function with modern LED lamps. I could do that, and bypass the Filter Switch Unit. Or, I would re-wire the Dynoluxe system, use some Sanyo Eneloop rechargeable units in the battery tube, and be on my way. The trick is that the rectifier unit where the torn wire goes into does not come apart. I could break it open and I suppose glue it back together once I've reconnected new wiring, but I'm not sure about that. I'd like to keep the Dynoluxe FSU system and have it working since it is original to the bike and its paint is in good shape. On the other hand, I could create a new rectifier / capacitor system in the lamps, wire them to the AG hub, and just keep the Dynoluxe tube on the bike with the wires removed for looks. That seems like a good compromise. Thoughts?
12-12-19, 11:37 AM
Senior Member
Join Date: Dec 2012
Location: St. Paul, MN
Posts: 1,597
Bikes: Too many 3-speeds, Jones Plus LWB
Mentioned: 12 Post(s)
Tagged: 0 Thread(s)
Quoted: 359 Post(s)
Liked 265 Times
in
119 Posts
I could break it open and I suppose glue it back together once I've reconnected new wiring, but I'm not sure about that. I'd like to keep the Dynoluxe FSU system and have it working since it is original to the bike and its paint is in good shape. On the other hand, I could create a new rectifier / capacitor system in the lamps, wire them to the AG hub, and just keep the Dynoluxe tube on the bike with the wires removed for looks. That seems like a good compromise. Thoughts?
I'd break open the old rectifier. Inside is a selenium rectifier, which has probably gotten dreadfully inefficient over the decades since it was made. A new silicon rectifier to do the job is a lot smaller, meaning you can make it fit, and if a bit clever about it, unnoticeable.
12-12-19, 12:30 PM
Senior Member
Join Date: May 2018
Location: Ottawa, Ontario, Canada
Posts: 581
Bikes: 1951 Sun Wasp, 1953 Armstrong Consort, 1975 Raleigh Competition, 1980 Apollo Gran Sport, 1988 Schwinn Voyageur, Mystery MTB
Mentioned: 31 Post(s)
Tagged: 0 Thread(s)
Quoted: 359 Post(s)
Liked 465 Times
in
191 Posts
I'd break open the old rectifier. Inside is a selenium rectifier, which has probably gotten dreadfully inefficient over the decades since it was made. A new silicon rectifier to do the job is a lot smaller, meaning you can make it fit, and if a bit clever about it, unnoticeable.
Do you think I could use the same rectifier this fellow did? Classic Three Speeds: LED Lighting: Circuit Board and LED's
The wiring is no good now, so I will re-wire it and use new copper connectors / hooks at the hub. I have some speaker wire I could use. I've never re-wired anything before, so this should be fun.
Thanks Salubrious.
12-12-19, 05:10 PM
Senior Member
Join Date: Dec 2012
Location: St. Paul, MN
Posts: 1,597
Bikes: Too many 3-speeds, Jones Plus LWB
Mentioned: 12 Post(s)
Tagged: 0 Thread(s)
Quoted: 359 Post(s)
Liked 265 Times
in
119 Posts
Fascinating! So do you think if I put one inside, and fashion perhaps a black rubber cap over-top, it would do the job? I'd have to figure out a way to connect it with the existing battery tube connector so that the batteries would power the standlight. It would need four terminals since there are four on the existing rectifier.
Do you think I could use the same rectifier this fellow did? Classic Three Speeds: LED Lighting: Circuit Board and LED's
Do you think I could use the same rectifier this fellow did? Classic Three Speeds: LED Lighting: Circuit Board and LED's
12-12-19, 05:45 PM
Senior Member
Join Date: May 2018
Location: Ottawa, Ontario, Canada
Posts: 581
Bikes: 1951 Sun Wasp, 1953 Armstrong Consort, 1975 Raleigh Competition, 1980 Apollo Gran Sport, 1988 Schwinn Voyageur, Mystery MTB
Mentioned: 31 Post(s)
Tagged: 0 Thread(s)
Quoted: 359 Post(s)
Liked 465 Times
in
191 Posts
There won't be room for the capacitor and the rectifier in the tube (I think). I wonder if I could put the rectifier in the tube, and the capacitor inside the headlamp somehow on a circuit board? The bulb holder might be in the way. Hmm.
Ged
Last edited by Ged117; 12-12-19 at 06:21 PM.
12-12-19, 09:49 PM
Senior Member
Join Date: Jan 2015
Posts: 3,240
Mentioned: 103 Post(s)
Tagged: 0 Thread(s)
Quoted: 1299 Post(s)
Likes: 0
Liked 103 Times
in
85 Posts
Great. I'm not exactly sure how I would connect the rectifier to the batteries in the tube. Alternative: I could wire a capacitor like he used into the circuit (I'm not sure which wire / connection I would interrupt to connect it - perhaps his project is a good guide for that). Then, I could hide the parts inside the battery tube, and with the capacitor, I won't need the D cells!
There won't be room for the capacitor and the rectifier in the tube (I think). I wonder if I could put the rectifier in the tube, and the capacitor inside the headlamp somehow on a circuit board? The bulb holder might be in the way. Hmm.
Ged
There won't be room for the capacitor and the rectifier in the tube (I think). I wonder if I could put the rectifier in the tube, and the capacitor inside the headlamp somehow on a circuit board? The bulb holder might be in the way. Hmm.
Ged
__________________
Inflate Hard
Inflate Hard
12-13-19, 01:25 PM
Senior Member
Join Date: Dec 2012
Location: St. Paul, MN
Posts: 1,597
Bikes: Too many 3-speeds, Jones Plus LWB
Mentioned: 12 Post(s)
Tagged: 0 Thread(s)
Quoted: 359 Post(s)
Liked 265 Times
in
119 Posts
Great. I'm not exactly sure how I would connect the rectifier to the batteries in the tube. Alternative: I could wire a capacitor like he used into the circuit (I'm not sure which wire / connection I would interrupt to connect it - perhaps his project is a good guide for that). Then, I could hide the parts inside the battery tube, and with the capacitor, I won't need the D cells!
There won't be room for the capacitor and the rectifier in the tube (I think). I wonder if I could put the rectifier in the tube, and the capacitor inside the headlamp somehow on a circuit board? The bulb holder might be in the way. Hmm.
Ged
There won't be room for the capacitor and the rectifier in the tube (I think). I wonder if I could put the rectifier in the tube, and the capacitor inside the headlamp somehow on a circuit board? The bulb holder might be in the way. Hmm.
Ged
12-13-19, 01:39 PM
Senior Member
Join Date: May 2018
Location: Ottawa, Ontario, Canada
Posts: 581
Bikes: 1951 Sun Wasp, 1953 Armstrong Consort, 1975 Raleigh Competition, 1980 Apollo Gran Sport, 1988 Schwinn Voyageur, Mystery MTB
Mentioned: 31 Post(s)
Tagged: 0 Thread(s)
Quoted: 359 Post(s)
Liked 465 Times
in
191 Posts
If you are using batteries, there is no need for the capacitor. That is simply there to reduce the flashing that otherwise occurs when the LED is operating and the wheel is spinning. When you have batteries it won't be flashing. The rectifier will simply be charging the batteries as the wheel spins. Its important that the rectifier get no energy from the wheel if the lighting system isn't on. Otherwise you can overcharge and damage the batteries.
The connection would be AG hub > rectifier + battery tube / head lamp and tail lamp wiring.
Thanks for your suggestions. I would likely ride with the lights on all the time to prevent damage to the batteries. I also ride the Superbe very "gently", except for that time the cycling club passed me. I downshifted and let the lion roar for a few minutes.
12-13-19, 02:50 PM
Senior Member
Join Date: Dec 2012
Location: St. Paul, MN
Posts: 1,597
Bikes: Too many 3-speeds, Jones Plus LWB
Mentioned: 12 Post(s)
Tagged: 0 Thread(s)
Quoted: 359 Post(s)
Liked 265 Times
in
119 Posts
How could I connect the D batteries in the tube to a new rectifier? If there is a way to do that, it sounds like my preferred option. I"m just not sure what the interface between the D cells and silicon bridge rectifier would look like.
The connection would be AG hub > rectifier + battery tube / head lamp and tail lamp wiring.
The connection would be AG hub > rectifier + battery tube / head lamp and tail lamp wiring.
12-14-19, 10:55 AM
Senior Member
Join Date: Apr 2012
Location: Toronto
Posts: 2,572
Bikes: 1971 Hercules, 1978 Raleigh Superbe, 1978 Raleigh Tourist, 1964 Glider 3 Speed, 1967 Raleigh Sprite 5 Speed, 1968 Hercules AMF 3 Speed, 1972 Raleigh Superbe, 1976 Raleigh Superbe, 1957 Flying Pigeon, 1967 Dunelt 3 Speed
Mentioned: 57 Post(s)
Tagged: 0 Thread(s)
Quoted: 1028 Post(s)
Liked 443 Times
in
288 Posts
Still Out There
Here's a Raleigh, year unknown for sale @ $80.00 OBO here in
Toronto.

Here's a Raleigh, year unknown for sale @ $80.00 OBO here in
Toronto.
12-14-19, 08:38 PM
Senior Member

Join Date: Jul 2014
Location: Central Indiana
Posts: 2,159
Mentioned: 27 Post(s)
Tagged: 0 Thread(s)
Quoted: 912 Post(s)
Liked 515 Times
in
344 Posts
Started the tear down on the '74 Sports today. It shifts through the gears on the stand even without any lube on the cable or shifter. The chain has many stiff links as well so it goes into a mineral spirits bath before I even bother to check for stretch.
The cotters pressed out without a hitch, cranks came off easily. I'll let some penetrating oil work on the cups before I attempt to remove them and see what shape the spindle is in. Feels dry as a bone.
The rear fender appears to have a broken tab or missing hardware, as there was a zip tie holding it to the chain stay bridge, looks like a P-clamp could fix that when I reassemble. One of the screws on the front fender was stuck tight so I put some penetrant on it and called it a night.
This bike has the original tires on it. Raleigh branded with a 74 in a circle molded in the sides. Judging by the tread wear I'd say it's got pretty low miles on it.