


Installing inline cable adjuster (JagWire Sport)
 04-12-20, 11:04 AM
#1
Senior Member
Thread Starter
Join Date: May 2014
Location: USA
Posts: 1,820
Bikes: 1996 Trek 970 ZX Single Track 2x11
Mentioned: 8 Post(s)
Tagged: 0 Thread(s)
Quoted: 614 Post(s)
Liked 564 Times
in
428 Posts
Installing inline shifter cable adjuster (JagWire Sport)
Noob question, I know, but haven't had many bikes and frankly have never installed one of these. Can't seem to find the answer anywhere, either in a prior BF discussion or on Youtube how-to videos.
How to properly install an inline shifter cable adjuster?
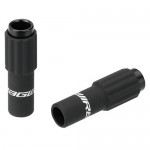
Product in question: JagWire #BSA036 Sport 4mm inline shifter cable adjuster; basic compressionless shifter housing, 4mm thick; black nylon or nickel-plated 4mm end caps.
Problem is that, once installed inline onto the cable (just off the shifter), the barrel adjuster simply spins on the cable housing, failing to adjust tension. Caps install onto cable ends properly and fully, but cable+cap fails to seat snugly into the end of the adjuster. As though the adjusters are designed for 5mm-6mm cable+caps (lots of space in there). Prior to install, in the hand each adjuster spins freely, with about 4.5 turns before coming fully unseated; springs are installed in each; so I think these are correctly assembled and operating okay, at least prior to install.
From the look of the design of the thing, I'd think that on at least one end (possibly both ends) of the adjuster it's vital that the cable+cap fit snugly (even tightly?) into the end of the inline adjuster. Else it won't adjust in or out, with the adjuster itself simply spinning 'round and 'round. Which is the problem I'm having.
Basic install on each side is: Shifter --> end cap --> short length of housing --> end cap --> inline adjuster --> end cap --> long length of housing (to derailleur). Cable tension from shifter to derailleur is quite tight, with very little slack.
So. Did the LBS provide me with adjusters that actually don't fit 4mm cable housing? (Other models of JagWire's inline adjusters are for 5mm, but that's for brake cabling and of a different design and brand labeling on the adjusters.) Is there some other part (end cap, whatever) that's supposed to go between the housing and adjuster? What am I missing?
What the JagWire adjusters look like:
How to properly install an inline shifter cable adjuster?
Product in question: JagWire #BSA036 Sport 4mm inline shifter cable adjuster; basic compressionless shifter housing, 4mm thick; black nylon or nickel-plated 4mm end caps.
Problem is that, once installed inline onto the cable (just off the shifter), the barrel adjuster simply spins on the cable housing, failing to adjust tension. Caps install onto cable ends properly and fully, but cable+cap fails to seat snugly into the end of the adjuster. As though the adjusters are designed for 5mm-6mm cable+caps (lots of space in there). Prior to install, in the hand each adjuster spins freely, with about 4.5 turns before coming fully unseated; springs are installed in each; so I think these are correctly assembled and operating okay, at least prior to install.
From the look of the design of the thing, I'd think that on at least one end (possibly both ends) of the adjuster it's vital that the cable+cap fit snugly (even tightly?) into the end of the inline adjuster. Else it won't adjust in or out, with the adjuster itself simply spinning 'round and 'round. Which is the problem I'm having.
Basic install on each side is: Shifter --> end cap --> short length of housing --> end cap --> inline adjuster --> end cap --> long length of housing (to derailleur). Cable tension from shifter to derailleur is quite tight, with very little slack.
So. Did the LBS provide me with adjusters that actually don't fit 4mm cable housing? (Other models of JagWire's inline adjusters are for 5mm, but that's for brake cabling and of a different design and brand labeling on the adjusters.) Is there some other part (end cap, whatever) that's supposed to go between the housing and adjuster? What am I missing?
What the JagWire adjusters look like:
 04-12-20, 11:37 AM
#2
Senior Member
Join Date: Jun 2002
Location: San Jose, CA
Posts: 3,676
Bikes: Too many bikes, too little time to ride
Mentioned: 2 Post(s)
Tagged: 0 Thread(s)
Quoted: 425 Post(s)
Liked 452 Times
in
311 Posts
Adjustment is done by holding both ends of the inline adjuster and unscrewing relative to each other.
04-12-20, 01:51 PM
#3
Senior Member
Thread Starter
Join Date: May 2014
Location: USA
Posts: 1,820
Bikes: 1996 Trek 970 ZX Single Track 2x11
Mentioned: 8 Post(s)
Tagged: 0 Thread(s)
Quoted: 614 Post(s)
Liked 564 Times
in
428 Posts
Strange, since every video and description I've seen shows (or specifies) that merely turning the outer adjuster does the trick. I've yet to see a single youtube video that Park or any mechanic has posted showing the need to use both hands to move both ends in opposite directions.
Or, is it just with these particular JagWire adjusters and that they work differently than everything else show/described?
So, is there supposed to be such "slop" at each end of the adjuster, so the cables/ends fit so loosely? (Allowing water, dirt and whatever to easily get in there.)
Seems like a half-solution that introduces problems, if that's true, if that's how they've been designed.
04-12-20, 03:54 PM
#4
Senior Member

Join Date: Sep 2010
Location: Roswell, GA
Posts: 8,319
Bikes: '93 Trek 750, '92 Schwinn Crisscross, '93 Mongoose Alta
Mentioned: 30 Post(s)
Tagged: 0 Thread(s)
Quoted: 1438 Post(s)
Liked 1,092 Times
in
723 Posts
There is nothing stopping you from building up one cable housing end (or both) with electrician's tape or similar, until it fits tightly. I doubt that much stuff will get past the adjuster inside the housing. You could even seal one end with silicone sealant but the other will need to turn.
04-12-20, 04:11 PM
#5

I'm good to go!
Join Date: Jul 2017
Location: Mississippi
Posts: 14,949
Bikes: Tarmac Disc Comp Di2 - 2020
Mentioned: 51 Post(s)
Tagged: 0 Thread(s)
Quoted: 6177 Post(s)
Liked 4,794 Times
in
3,306 Posts
I can do mine with one hand, but mine are shimano or something else. However these aren't made for large adjustments. Though I'm not certain how much they will adjust. And be certain when you put them on that they are not already twisted to their max which would mean you can't get any more slack out of the cable. And of course if your cable housing isn't all the way in the adjuster, then when you spin it, there may not be anything for it to tighten against. Though I'd think you'd have adjustment issues with your DR at the get go if you did that.
04-12-20, 04:34 PM
#6
Senior Member
Join Date: Jun 2002
Location: San Jose, CA
Posts: 3,676
Bikes: Too many bikes, too little time to ride
Mentioned: 2 Post(s)
Tagged: 0 Thread(s)
Quoted: 425 Post(s)
Liked 452 Times
in
311 Posts
I don't know if it's designed to be one-hand operable or not, I just know that adjusting with two hands work for me. Once there's tension in the cable I've found that it took two hands to get these things turning anyway. It's not like a downtube barrel adjuster where one end is fixed. You're just relying on friction from the cable housing and ferrule and cable tension to keep the inline adjuster fixed. Might as well use two hands.
I'm just telling you what works. But your points about maybe buying the wrong size, or maybe the internal springs weren't put back in properly, those are valid. Hard to diagnose those without being there, though.
I'm just telling you what works. But your points about maybe buying the wrong size, or maybe the internal springs weren't put back in properly, those are valid. Hard to diagnose those without being there, though.
Last edited by tFUnK; 04-12-20 at 04:46 PM.
04-12-20, 04:36 PM
#7
Senior Member
Join Date: Feb 2012
Location: Rochester, NY
Posts: 18,056
Bikes: Stewart S&S coupled sport tourer, Stewart Sunday light, Stewart Commuting, Stewart Touring, Co Motion Tandem, Stewart 3-Spd, Stewart Track, Fuji Finest, Mongoose Tomac ATB, GT Bravado ATB, JCP Folder, Stewart 650B ATB
Mentioned: 0 Post(s)
Tagged: 0 Thread(s)
Quoted: 4195 Post(s)
Liked 3,837 Times
in
2,295 Posts
So, by design it's a free-floating design that requires two hands to alter the adjustment?
Strange, since every video and description I've seen shows (or specifies) that merely turning the outer adjuster does the trick. I've yet to see a single youtube video that Park or any mechanic has posted showing the need to use both hands to move both ends in opposite directions.
Or, is it just with these particular JagWire adjusters and that they work differently than everything else show/described?
So, is there supposed to be such "slop" at each end of the adjuster, so the cables/ends fit so loosely? (Allowing water, dirt and whatever to easily get in there.)
Seems like a half-solution that introduces problems, if that's true, if that's how they've been designed.
__________________
AndrewRStewart
AndrewRStewart
04-12-20, 08:35 PM
#8
Senior Member
Thread Starter
Join Date: May 2014
Location: USA
Posts: 1,820
Bikes: 1996 Trek 970 ZX Single Track 2x11
Mentioned: 8 Post(s)
Tagged: 0 Thread(s)
Quoted: 614 Post(s)
Liked 564 Times
in
428 Posts
Gee, most wrenches I work with will try what works, even it that means two hands. Real life work is not a text book case or takes place in a studio when a act two or three can be done to please the editor. BTW I would lube all your adjuster threads or down the road even two hands might not be enough to turn them. Andy
Thanks for the tips, all.
04-12-20, 09:18 PM
#9
Senior Member
Join Date: Feb 2012
Location: Rochester, NY
Posts: 18,056
Bikes: Stewart S&S coupled sport tourer, Stewart Sunday light, Stewart Commuting, Stewart Touring, Co Motion Tandem, Stewart 3-Spd, Stewart Track, Fuji Finest, Mongoose Tomac ATB, GT Bravado ATB, JCP Folder, Stewart 650B ATB
Mentioned: 0 Post(s)
Tagged: 0 Thread(s)
Quoted: 4195 Post(s)
Liked 3,837 Times
in
2,295 Posts
For such a simple device I fail to see the challenge in understanding it. I agree with devices that have many elements and have more complex interactions with more then one other components I can see the need for involved instructions. But a cable adjuster is just a screw with a hole. It is designed to work in a certain way like pretty much all manufactured stuff is.
To tangent- One rant I have had for years is the non person to person distribution channels that now exist, think of mail order in the "olden days" and now internet. These channels can and do source some their products from secondary/tertiary steps from the manufacturer. Some of the cost savings (compared to retail) is the lack of manufactures' packaging or instructions. Some manufactures also see little real bottom line benefit to pay for more involved (if at all) instructions. So the people who need to get the negative feedback on what they sell or allow into the market place isn't forums, unless one can create a boycott or somehow reduce the poor performing (WRT information/instructions) bottom lines. Good luck on this front. The solution is to do your homework if you need to bypass the industry's skilled work force. Sorry but these days that's the bottom line as I see it.
One more question might be how much more are you willing to pay for the "complete" instructions? This topic can go on for a long time but I've given you my advice and my opinions for free. Andy (Seemingly not too tolerant tonight, try me on another day)
__________________
AndrewRStewart
AndrewRStewart
Likes For Andrew R Stewart:
04-12-20, 09:33 PM
#10
Senior Member
Thread Starter
Join Date: May 2014
Location: USA
Posts: 1,820
Bikes: 1996 Trek 970 ZX Single Track 2x11
Mentioned: 8 Post(s)
Tagged: 0 Thread(s)
Quoted: 614 Post(s)
Liked 564 Times
in
428 Posts
For such a simple device I fail to see the challenge in understanding it. I agree with devices that have many elements and have more complex interactions with more then one other components I can see the need for involved instructions. But a cable adjuster is just a screw with a hole. It is designed to work in a certain way like pretty much all manufactured stuff is.
But EVERY single instance of a video guide to installation that I've seen shows a one-handed adjustment of these things. And not ONE instance of descriptions or videos of installation described whether such adjusters were supposed to be solidly affixed to each cable end or not. Result was: my own showed zero ability to operate one-handed, and plenty of slop after install, different than every install vid I've seen.
Hence the questions, since I've not had experience with these things.
It's not difficult. It's just unexplained ... by JagWire, by how-to vids, by simple write-ups. Everyone seems to assume everyone's roughly familiar with such devices. The concept of operation (lengthening or shortening the effective cable length, resulting in a tighter or looser cable operation) is child's play to understand. That's not the point. Which is simply to understand how it's supposed to be. Can easily use two hands, despite no write-up showing the need to use two hands. Just wanted to understand why that was the case in my instance.
04-12-20, 09:37 PM
#11
Senior Member
Thread Starter
Join Date: May 2014
Location: USA
Posts: 1,820
Bikes: 1996 Trek 970 ZX Single Track 2x11
Mentioned: 8 Post(s)
Tagged: 0 Thread(s)
Quoted: 614 Post(s)
Liked 564 Times
in
428 Posts
I appreciate you and most other "wrenches" have had long experience with most parts, over the years. I've had little, given only a couple of bikes and only a handful of parts that have ever gone wonky on me. And so, simple questions for a situation I'd not seen before and where my instance differed from every write-up and every how-to vid I found. Simple. Just new to me.
Likes For dsaul:
04-17-20, 08:58 AM
#16
Senior Member
Thread Starter
Join Date: May 2014
Location: USA
Posts: 1,820
Bikes: 1996 Trek 970 ZX Single Track 2x11
Mentioned: 8 Post(s)
Tagged: 0 Thread(s)
Quoted: 614 Post(s)
Liked 564 Times
in
428 Posts
With a nylon or metal end cap on the cable ends, at either end of the adjuster, apparently there's just enough friction loss to allow the adjuster and cable to not grab each other. But without the end caps on the cable ends, the split ends of the cable+housing seem to grab onto the end of the adjuster sufficiently well. One-handed operation.
Thanks for the tip.
Easy to install. Easy to use. But a different result depending on whether the cable end-caps are used at the point of the adjuster or not.
Likes For Clyde1820:
04-17-20, 09:11 AM
#17
I'm good to go!
Join Date: Jul 2017
Location: Mississippi
Posts: 14,949
Bikes: Tarmac Disc Comp Di2 - 2020
Mentioned: 51 Post(s)
Tagged: 0 Thread(s)
Quoted: 6177 Post(s)
Liked 4,794 Times
in
3,306 Posts
Basic install on each side is: Shifter --> end cap --> short length of housing --> end cap --> inline adjuster --> end cap --> long length of housing (to derailleur).
Thumbs up for dsaul . And thanks to you also for letting us know what worked.
04-18-20, 10:45 AM
#18
Dangerous Old Man
On my jag adjusters they came with end barrels/cable covers. one end of the jag it fit very snugly, the other end fit with some play allowing simple twisting to adjust...I don't particularly like the jags, they are very hard to twist. I have a generic set on my other bike that are very easy to adjust...YMMV..
Last edited by bldegle2; 04-18-20 at 10:57 AM.
04-18-20, 01:04 PM
#19
Senior Member
Join Date: Feb 2012
Location: Rochester, NY
Posts: 18,056
Bikes: Stewart S&S coupled sport tourer, Stewart Sunday light, Stewart Commuting, Stewart Touring, Co Motion Tandem, Stewart 3-Spd, Stewart Track, Fuji Finest, Mongoose Tomac ATB, GT Bravado ATB, JCP Folder, Stewart 650B ATB
Mentioned: 0 Post(s)
Tagged: 0 Thread(s)
Quoted: 4195 Post(s)
Liked 3,837 Times
in
2,295 Posts
Originally Posted by bldegle2;21425331[b
]On my jag adjusters they came with end barrels/cable covers. one end of the jag it fit very snugly[/b], the other end fit with some play allowing simple twisting to adjust...I don't particularly like the jags, they are very hard to twist. I have a generic set on my other bike that are very easy to adjust...YMMV..
__________________
AndrewRStewart
AndrewRStewart
04-18-20, 01:24 PM
#20
Senior Member
Thread Starter
Join Date: May 2014
Location: USA
Posts: 1,820
Bikes: 1996 Trek 970 ZX Single Track 2x11
Mentioned: 8 Post(s)
Tagged: 0 Thread(s)
Quoted: 614 Post(s)
Liked 564 Times
in
428 Posts
On my jag adjusters they came with end barrels/cable covers. one end of the jag it fit very snugly, the other end fit with some play allowing simple twisting to adjust...I don't particularly like the jags, they are very hard to twist. I have a generic set on my other bike that are very easy to adjust...YMMV..
Hm. Interesting differences.
Do you know the specific Jagwire model/part# of the JagWire product you used? And the Make/model/part# of the "generic" set you use? Just wondering, possibly for future reference.
Mine came as just the adjusters, without the additional short lengths of housing+ends. And mine didn't allow a snug fit of the housing, or housing+end, into the adjuster, on either side of the adjuster. On mine, both sides of the adjuster have quite a lot of play (slop), space that allows the cable to move a bit (side to side) inside the adjuster. The space has got to be capable of transmitting water and crud, given how wide the gap is. Otherwise, I couldn't find any standard way (via cable ends) to close up the space. (The "just use electrical tape" method doesn't feel right.)
So, either JagWire designed these specifically with a lot of "slop" in the spacing on either side of the adjuster, or they designed them for some other cable end that's supposed to be used with these adjusters (but didn't include them in the package), where "standard" housing ends are too skinny to allow a snug/tight fit inside the adjusters.
Again, I've had zero prior experience with the various inline adjusters, out there. So I'm uncertain what the variations are, whether they typically fit snugly, whether they spin 'round and 'round on one or both ends, etc. Which is why I inquired as to others' experiences.
Neither here nor there, though, from a functionality standpoint. Got 'em to work fine. Just not snuggly fitting the housing into either end of the inline adjusters. I'm hoping it's a small price to pay, in terms of future moisture+gunge in that gap.
Thanks.
04-20-20, 07:22 AM
#21
Dangerous Old Man
This is the one that works very easily, one hand adjustment while on the fly...https://www.ebay.com/itm/In-Line-Bic...72.m2749.l2649
And this is the one from Jag/Aican (they are one in the same). I found it very hard to adjust on the fly. Don't really use them that much (nice for spot on micro adjustments), but they are needed for sure when you swap in new cables because of the cable stretch experienced with all new cables....https://www.ebay.com/itm/Aican-light...XaY5lOCQ-_NfoQ
And this is the one from Jag/Aican (they are one in the same). I found it very hard to adjust on the fly. Don't really use them that much (nice for spot on micro adjustments), but they are needed for sure when you swap in new cables because of the cable stretch experienced with all new cables....https://www.ebay.com/itm/Aican-light...XaY5lOCQ-_NfoQ
Last edited by bldegle2; 04-20-20 at 08:09 AM.
Likes For bldegle2:


