


1964 Moulton Restoration
 10-02-20, 08:18 PM
#26

K2ProFlex baby!

Join Date: Feb 2007
Location: My response would have been something along the lines of: "Does your bike have computer controlled suspension? Then shut your piehole, this baby is from the future!"
Posts: 6,133
Bikes: to many to list
Mentioned: 0 Post(s)
Tagged: 0 Thread(s)
Quoted: 16 Post(s)
Liked 56 Times
in
31 Posts
Thanks again! 😉👍
__________________
You see, their morals, their code...it's a bad joke, dropped at the first sign of trouble. They're only as good as the world allows them to be. I'll show you. When the chips are down, these...These "civilized" people...they'll eat each other. See, I'm not a monster. I'm just ahead of the curve
You see, their morals, their code...it's a bad joke, dropped at the first sign of trouble. They're only as good as the world allows them to be. I'll show you. When the chips are down, these...These "civilized" people...they'll eat each other. See, I'm not a monster. I'm just ahead of the curve
 10-09-20, 09:44 AM
#27
Member
Thread Starter
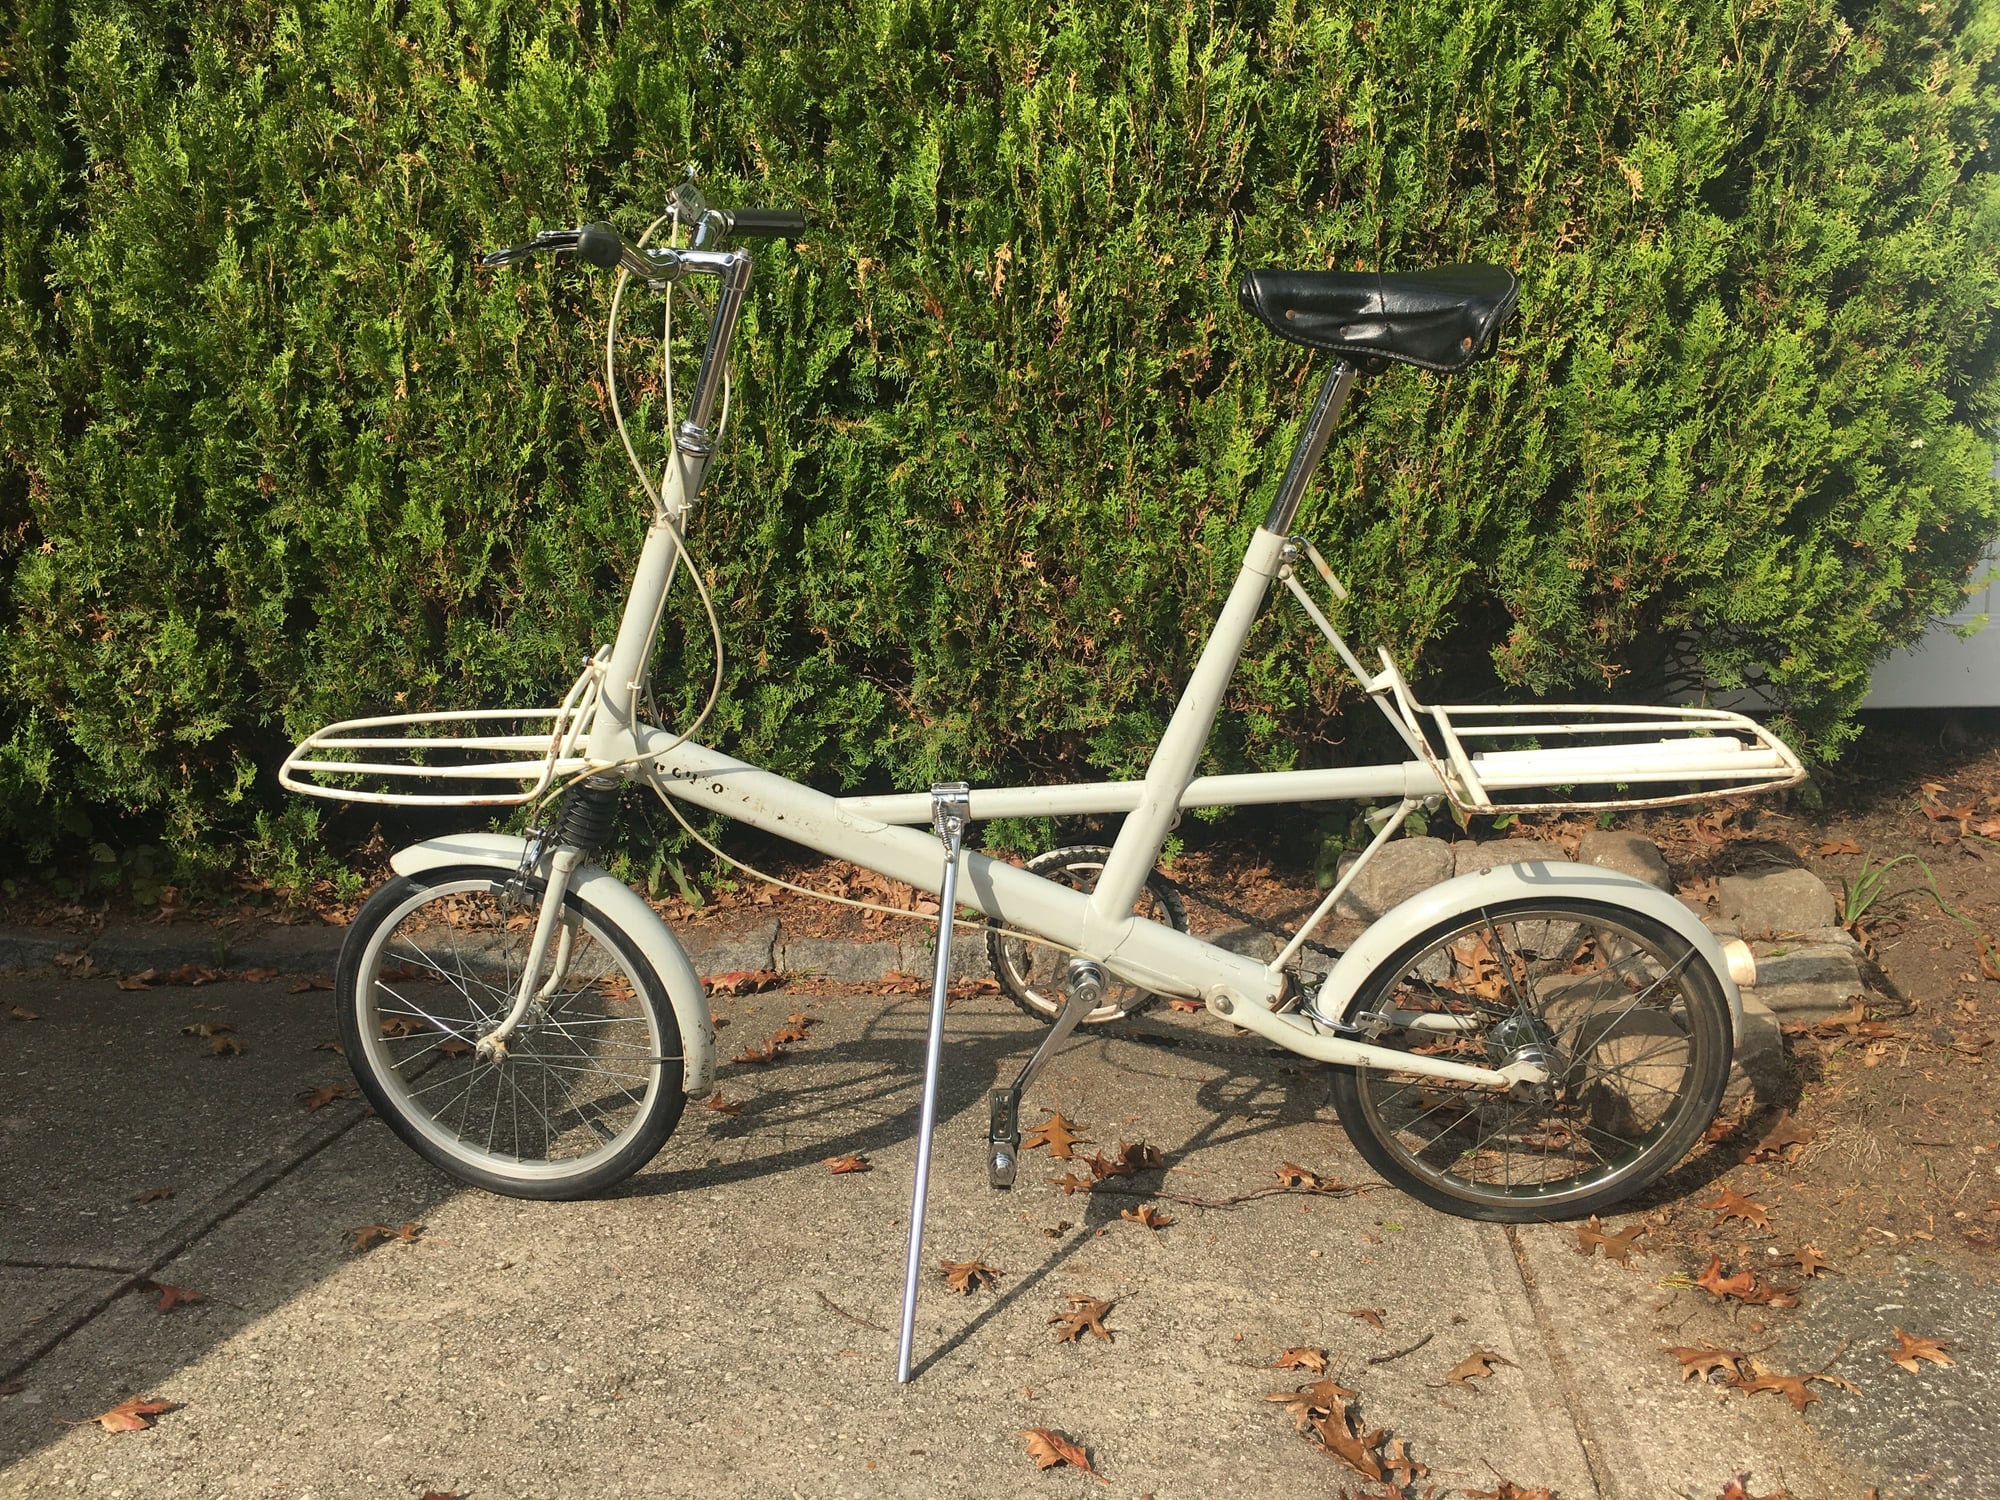
I bought a pair of 22 inch screwdrivers from Harbor Freight for about $7. I successfully loosened the screw from the fork assembly. The screw would not fall out when I inverted the fork, and the two main pieces would not easily come apart and the suspension spring is frozen in place. With a little effort, the front fork came out of the steer tube. I tried to flex the spring, but it barely moves. I removed the nylon pieces and other parts that all seem to be in good condition.
I disassembled and cleaned both brake units. I also disassembled the brake levers. The left brake lever unit was badly bent from a crash long ago. I reshaped the parts until left and right look nearly the same. I used a large screwdriver, hammer, vice, vice grip, crescent wrench, and blocks of wood.
The new SA indicator chain and cable, spanner tool, brake cable housing, gear oil, and front mudguard arrived. The mudguard is in beautiful condition aside from the old paint.
I ordered crank cotters.
Front fork inner width 97mm
Rear 110mm
Headset ball bearings 29 top and 36 crown, 1/8th inch diameter
Bottom bracket ball bearings 22 total 1/4th inch
Front wheel bearings 20 total 3/16th inch
I removed the pedals and cleaned up the cranks and chainring. I disassembled the bottom bracket. I need a bolt and nut to remove the fixed cup. Removed the rear fork spindle, but the brass/bronze grommets are too frozen to tap out. I disassembled, cleaned, and repacked bearings in the front hub.
The 4 speed SA hub needs to be rebuilt. There seems to be a problem with the pawls not grabbing consistently. I�ve watched a few videos rebuilding the popular SA 3 speed that is very similar and I have found a vintage technical manual with an exploded view. The main difference between the 4 and 3 speed hubs is the second set of planetary gears. Everything else seems to be the same.
The pump arrived and fits in the rear rack mounting points!
10-09-20, 12:11 PM
#28

Senior Member
Join Date: Feb 2020
Posts: 2,820
Mentioned: 49 Post(s)
Tagged: 0 Thread(s)
Quoted: 1106 Post(s)
Likes: 0
Liked 1,328 Times
in
784 Posts
If you're going to use a bolt-and-nut to grab the cup, don't. That may work, but get a bolt and a pair of washers instead; one stout small one to fit inside the cup, one large outer one big enough to hold a BB tool against the cup. You just snug the washer and tool up against the cup, and check your direction, and grunt. The cup should be undamaged.
The nut-and-bolt method to grab the cup depends on friction to turn it, the tool has flats. My LBS used to have a nut-and-bolt arrangement for difficult cases but they used a cone-clutch inside and the teeth on that would cut right through the cup race hard surface, and that cup would come out. Not any good anymore, but it would be out.
The nut-and-bolt method to grab the cup depends on friction to turn it, the tool has flats. My LBS used to have a nut-and-bolt arrangement for difficult cases but they used a cone-clutch inside and the teeth on that would cut right through the cup race hard surface, and that cup would come out. Not any good anymore, but it would be out.
10-14-20, 03:26 PM
#29
Member
Thread Starter
Thanks for the input. The cups were damaged anyway from my efforts to extract the cotters. There is also corrosion. So, I'm going to replace the whole BB.
10-14-20, 04:25 PM
#30
Member
Thread Starter
The brake cables arrived - the anchors are a perfect fit with the brake levers. That's a relief.
To remove the bottom bracket fixed cup, I used 1/2� bolt, nut, and lock washers along with narrower M12 washers to protect the bearing races. The left cup has dents (from my efforts with a hammer to remove the frozen cotter) and corrosion in both bearing races, so I ordered a new set of cups: vintage 1.37 inch 24tpi on eBay.
I ordered 25 3/16 ball bearings for the front wheel hub, 25 1/4 ball bearings for the BB, and a white shifter cable housing, all from Walmart. The shifter cable I ordered from Wish.com is scheduled to arrive in two months from China, which is ridiculous.
Bought several 10/32 machine screws and vibration proof nuts at Home Depot to replace those that are rusted or damaged from removing them or cutting them off.
I have tinkered with the front fork every day while spraying WD40 in both ends, but the main spring will not come out. I clamped a heavy duty QR on the drop outs and put a socket extension into the top of the tube resting against the screw receiver of the recoil spring. I put this hacked rig into a bar clamp and twisted down. The spring started to move with a gritty sound. I applied and released pressure a few times. The spring is starting to ease up, but it has a long way to go. I used a screwdriver to pry at and push the other end as it is visible around the rubber core. The rubber makes it difficult to access the spring. I can now compress the bottom of the spring slightly upward. I�ve made progress, but it seems like it�s never going to loosen up enough to slide out. The Moulton Bicycle Club has replacement forks available with refurbished suspension. It�s tempting.
10-15-20, 10:13 PM
#31
Member
Thread Starter
I tapped out the steering tube races. That wasn�t so difficult with my new 22� flat screwdriver. The rear suspension grommets will not move after a few good whacks around the inside edges on both sides. They look like brass due to the color. No worries; they can be painted over on the edges as they will not show when the bike is reassembled.
I need 1/4� inner diameter plastic tubing for the QR handles. Hard plastic would be best, but harder to find. I found a perfect match at Home Depot, but it is packaged in 10 foot lengths. I don�t know what I�ll do with the extra 9.5 feet.
I found out that the unique bolts for the handlebar clamp and the QRs are not available. They have a tab under the head that prevents slipping and the threads do not match any standard size. An employee at Mesa Fastener recommended using M8 1.0 bolts, (which are very close) and reshaping the existing threads inside the QR handles with a M8 1.0 tap. Hmmm� I have to think about that and do a bit more research.
I repaired the shift indicator rods. Using a Dremel cutting disk, I gently cut off the end of the chain link pin closest to the indicator rods on both the old 4-speed and new 3-speed. I tried to insert a small tack that fit perfectly into the new chain�s last link and the old rod, but I could not mash the end without bending it. So, I put the lower part of the cut pin in place (it has a better fitting diameter) and soldered the very top of the pin onto the flat surface of the link. To my surprise, the solder holds the pin very well as I tried to pry it off from the other side with a small screwdriver. The repaired shift chain fits through the axle bolts and the indicator assembly seems to do its job inside the hub when I pull on it. This was an exciting fix!
10-16-20, 03:19 AM
#32
Senior Member
Join Date: Feb 2020
Posts: 2,820
Mentioned: 49 Post(s)
Tagged: 0 Thread(s)
Quoted: 1106 Post(s)
Likes: 0
Liked 1,328 Times
in
784 Posts
I found out that the unique bolts for the handlebar clamp and the QRs are not available. They have a tab under the head that prevents slipping and the threads do not match any standard size. An employee at Mesa Fastener recommended using M8 1.0 bolts, (which are very close) and reshaping the existing threads inside the QR handles with a M8 1.0 tap. Hmmm… I have to think about that and do a bit more research.
Have you considered how to de-rust the frame? A box-bath and washing soda and a battery charger would be my way - cheapest and lowest-metal-loss method, plus it's no work other than you just set it up and leave it for a day. As well, if you have two steel parts rusted together, they will often come apart easily when they come out of the bath.
10-16-20, 01:58 PM
#33
Member
Thread Starter
Thanks for the recommendation! I have researched a few methods and that option came up. It's good of you to mention that it works so well.
Please let me know if you find one or more of those tabbed bolts.
Please let me know if you find one or more of those tabbed bolts.
10-19-20, 03:16 PM
#34
Member
Thread Starter
I rebuilt the 4 speed hub. I watched a couple of YouTube videos on how to rebuild the 3-speed hub and that was enough to get me through the process. I started by completely disassembling, cleaning in mineral spirits, and de-rusting some parts as needed. I used Evaporust for soaking and Rust Desolver (Rustoleum product) for big parts that cannot be easily submerged (like the rear wheel). There was rust on the inside of the rear hub housing where rainwater had collected. There was gummy old grease and rust on many of the internal parts. I reassembled it with fresh oil, three sets of new bearings repacked in marine grease, and some TLC. I prefer pure ball bearing to using retainers, so I discarded the axle bearing retainers and filled the races using a few more new bearings.
10-19-20, 03:28 PM
#35
Member
Thread Starter
I live in hilly terrain, so I replaced the original 14 tooth cog with an 18 tooth that I had in my spare parts.
I�ve started to clean and derust all the bicycle�s small parts. It is tedious work, but I�m making progress. The Evaporust is excellent for hours of soaking small parts in batches. After an overnight soak, I scrub the surfaces with a small wire brush and soak again if needed. Evaporust is amazing because it is non-toxic, environmentally friendly and reusable. The Rustoleum Rust Remover gel spray is fairly fast acting and works well on large parts because it sticks in place. It foams up as the phosphoric acid dissolves the rust and leaves the steel intact. After about 30 minutes, you rinse it off and reapply if needed. I'll be working on bits and pieces for several days.
I�ve started to clean and derust all the bicycle�s small parts. It is tedious work, but I�m making progress. The Evaporust is excellent for hours of soaking small parts in batches. After an overnight soak, I scrub the surfaces with a small wire brush and soak again if needed. Evaporust is amazing because it is non-toxic, environmentally friendly and reusable. The Rustoleum Rust Remover gel spray is fairly fast acting and works well on large parts because it sticks in place. It foams up as the phosphoric acid dissolves the rust and leaves the steel intact. After about 30 minutes, you rinse it off and reapply if needed. I'll be working on bits and pieces for several days.
10-23-20, 06:59 PM
#36
Member
Thread Starter
All loose parts have been de-rusted as much as possible.
I soaked the rubber rear suspension unit for a full day because it looked pretty corroded and now it looks completely free of rust. I intend to carefully paint the exposed metal by hand.
I changed direction on replacing the unusual QR bolts with metric. After cleaning up the old bolts, the chrome looked pretty good and the tabs are intact. I straightened the bent shorter bolt and it screwed into the QR handle and it seems to function perfectly on the bike. The longer bolt was straight and not a problem. The handlebar bolt will be the only metric bolt on the bike unless I can find an original stem in good condition.
I reassembled the brake units; the parts cleaned up really well. I adjusted the shape of the formerly bent left brake lever to align the plane of rotation with the handlebar. It now matches the right lever. Both levers move easily.
I continue to work on removing the front suspension spring with no joy. I will continue to apply compression force to hopefully push the spring loose.
I recently read that the biggest internal rust problem for this bike is in the seat tube that has no drainage. I peered in the tube and saw some debris, so I sprayed water into the tube with a hose. A few small leaves washed out. I sprayed a generous amount of rust dissolver down the tube and let it sit for 30 minutes. When I rinsed it out, quite a bit of junk flowed out including a dead lizard. That was a surprise. At least that tube is now thoroughly cleaned up and de-rusted.
I packed everything up while I wait to see my friend about straightening up the front rack. He owns a metal shop called Pro Weld in San Marcos. There is not much else I can do for now.
10-23-20, 10:53 PM
#37
Senior Member
Join Date: Oct 2011
Location: Long Island, NY
Posts: 647
Mentioned: 2 Post(s)
Tagged: 0 Thread(s)
Quoted: 41 Post(s)
Liked 51 Times
in
33 Posts
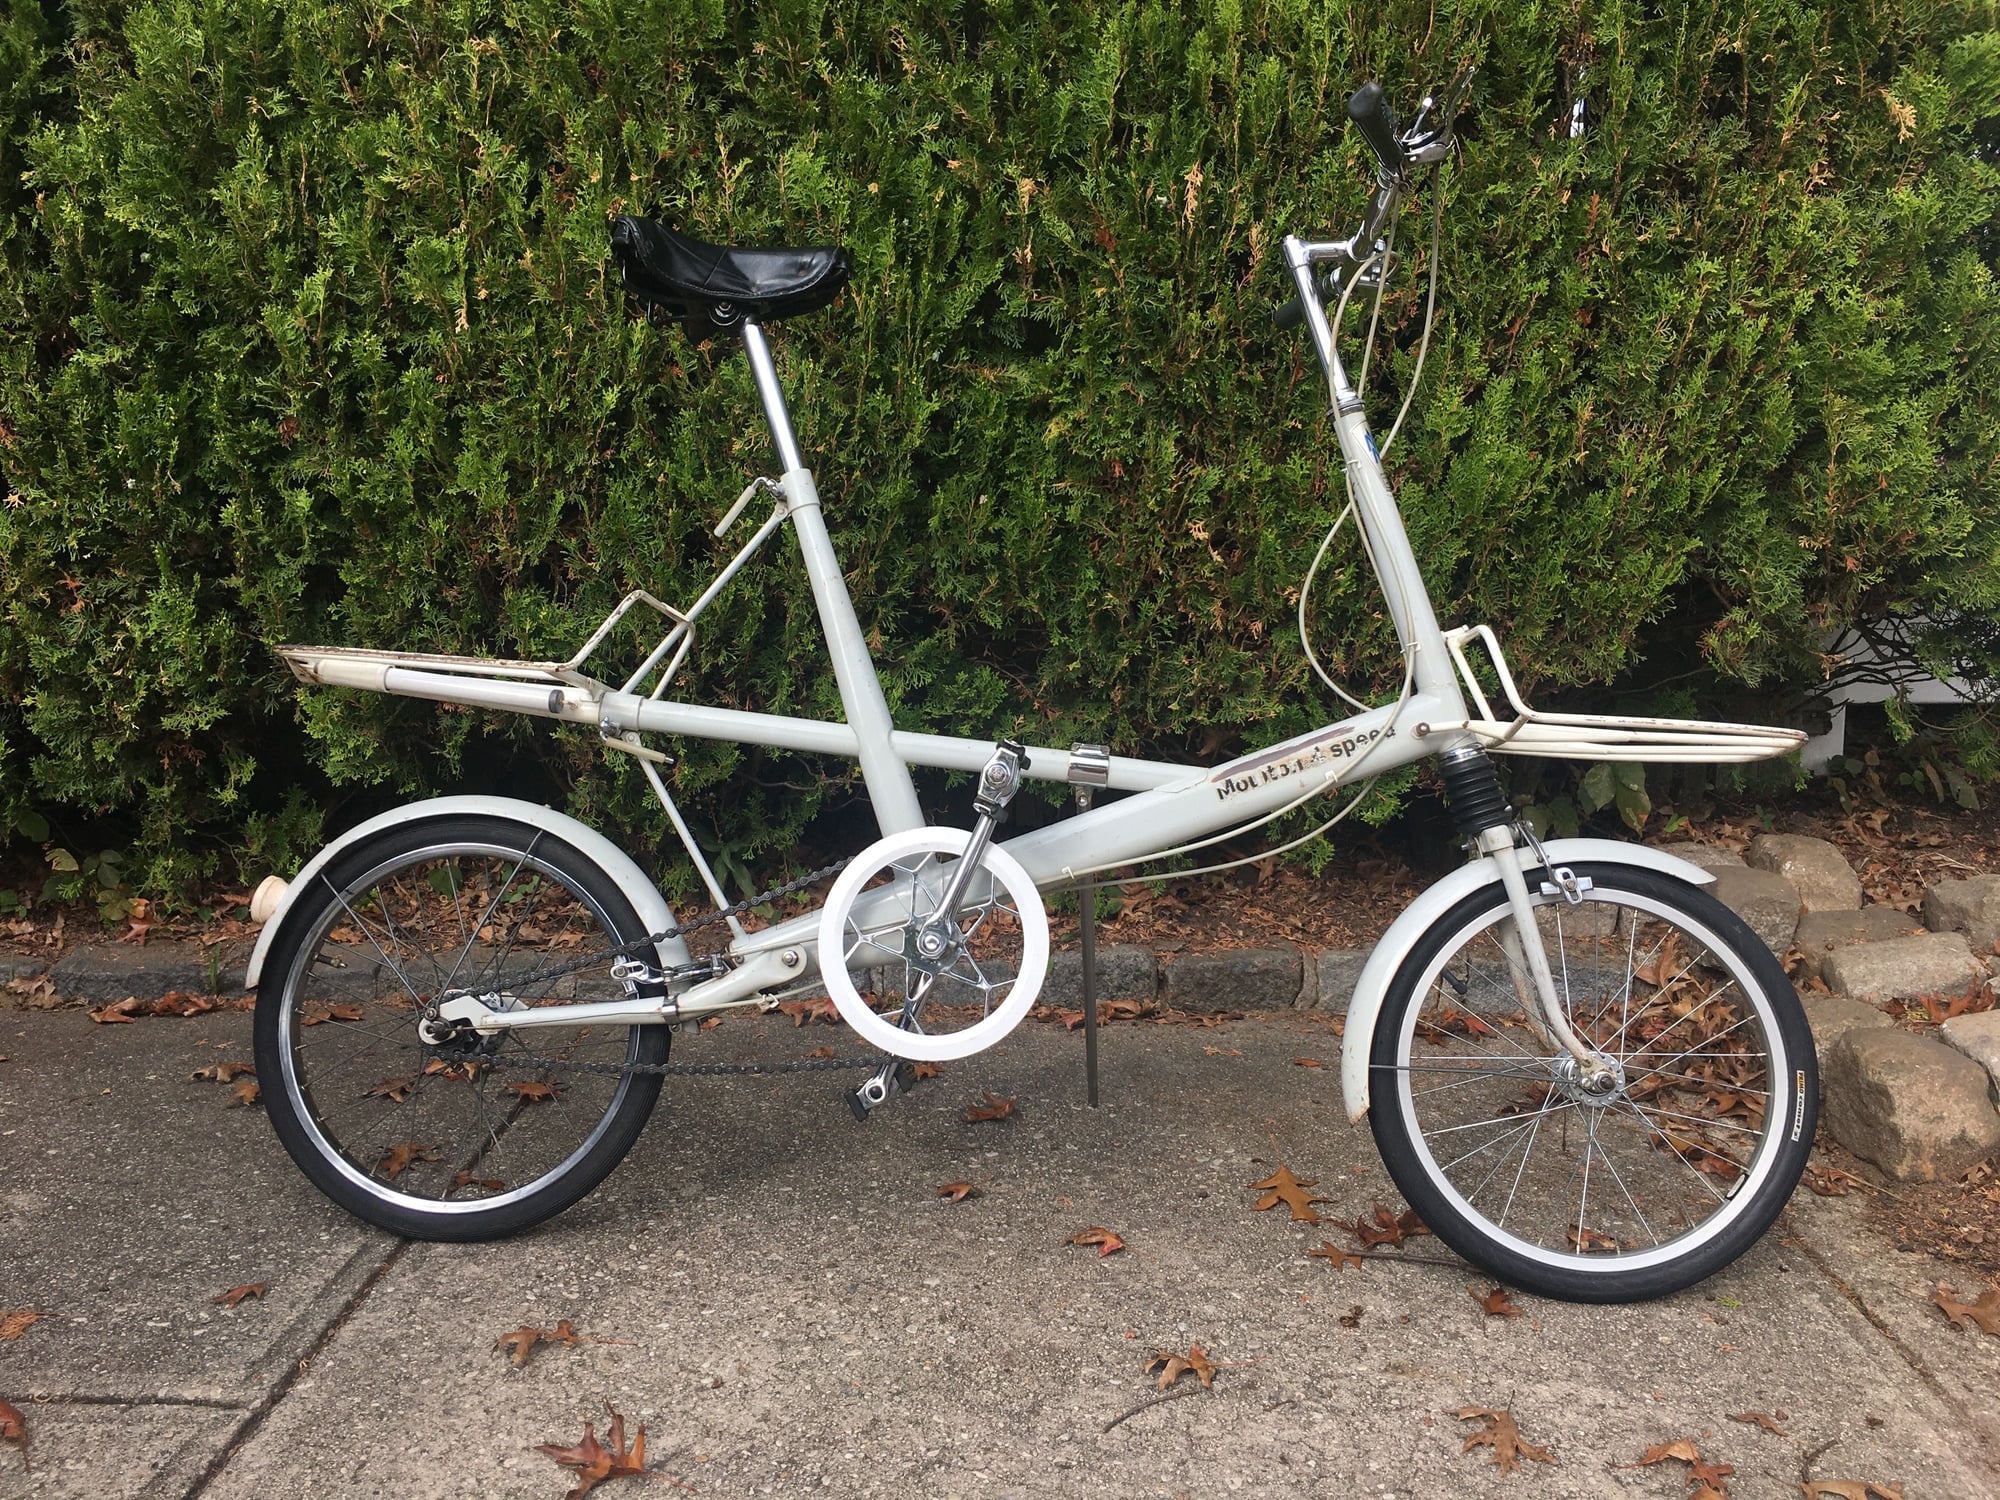
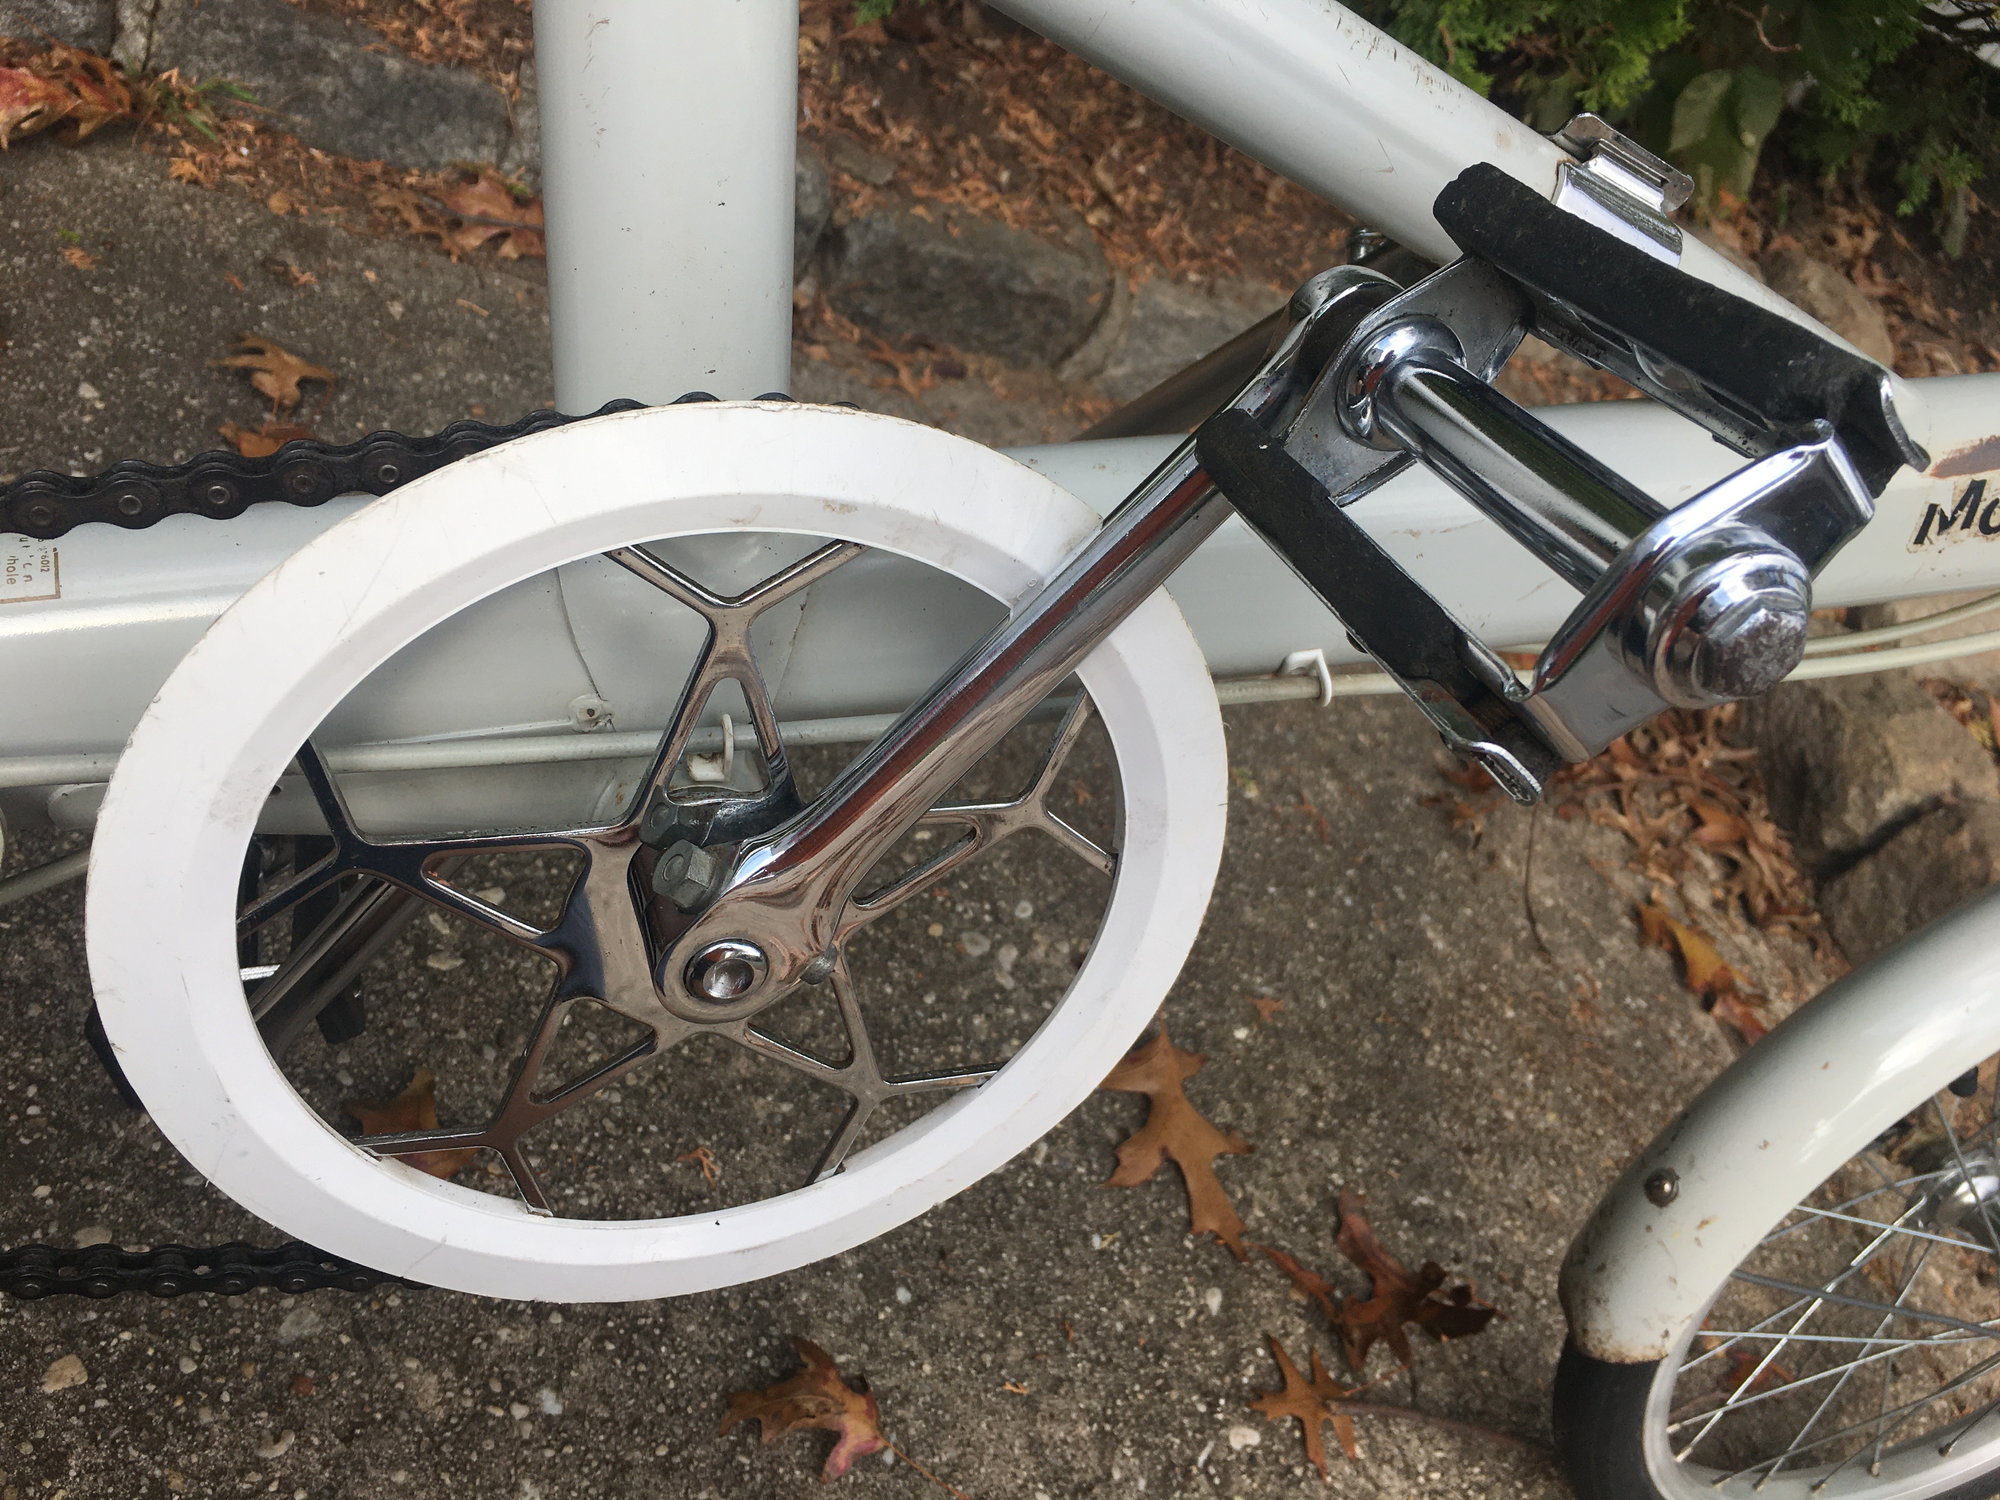
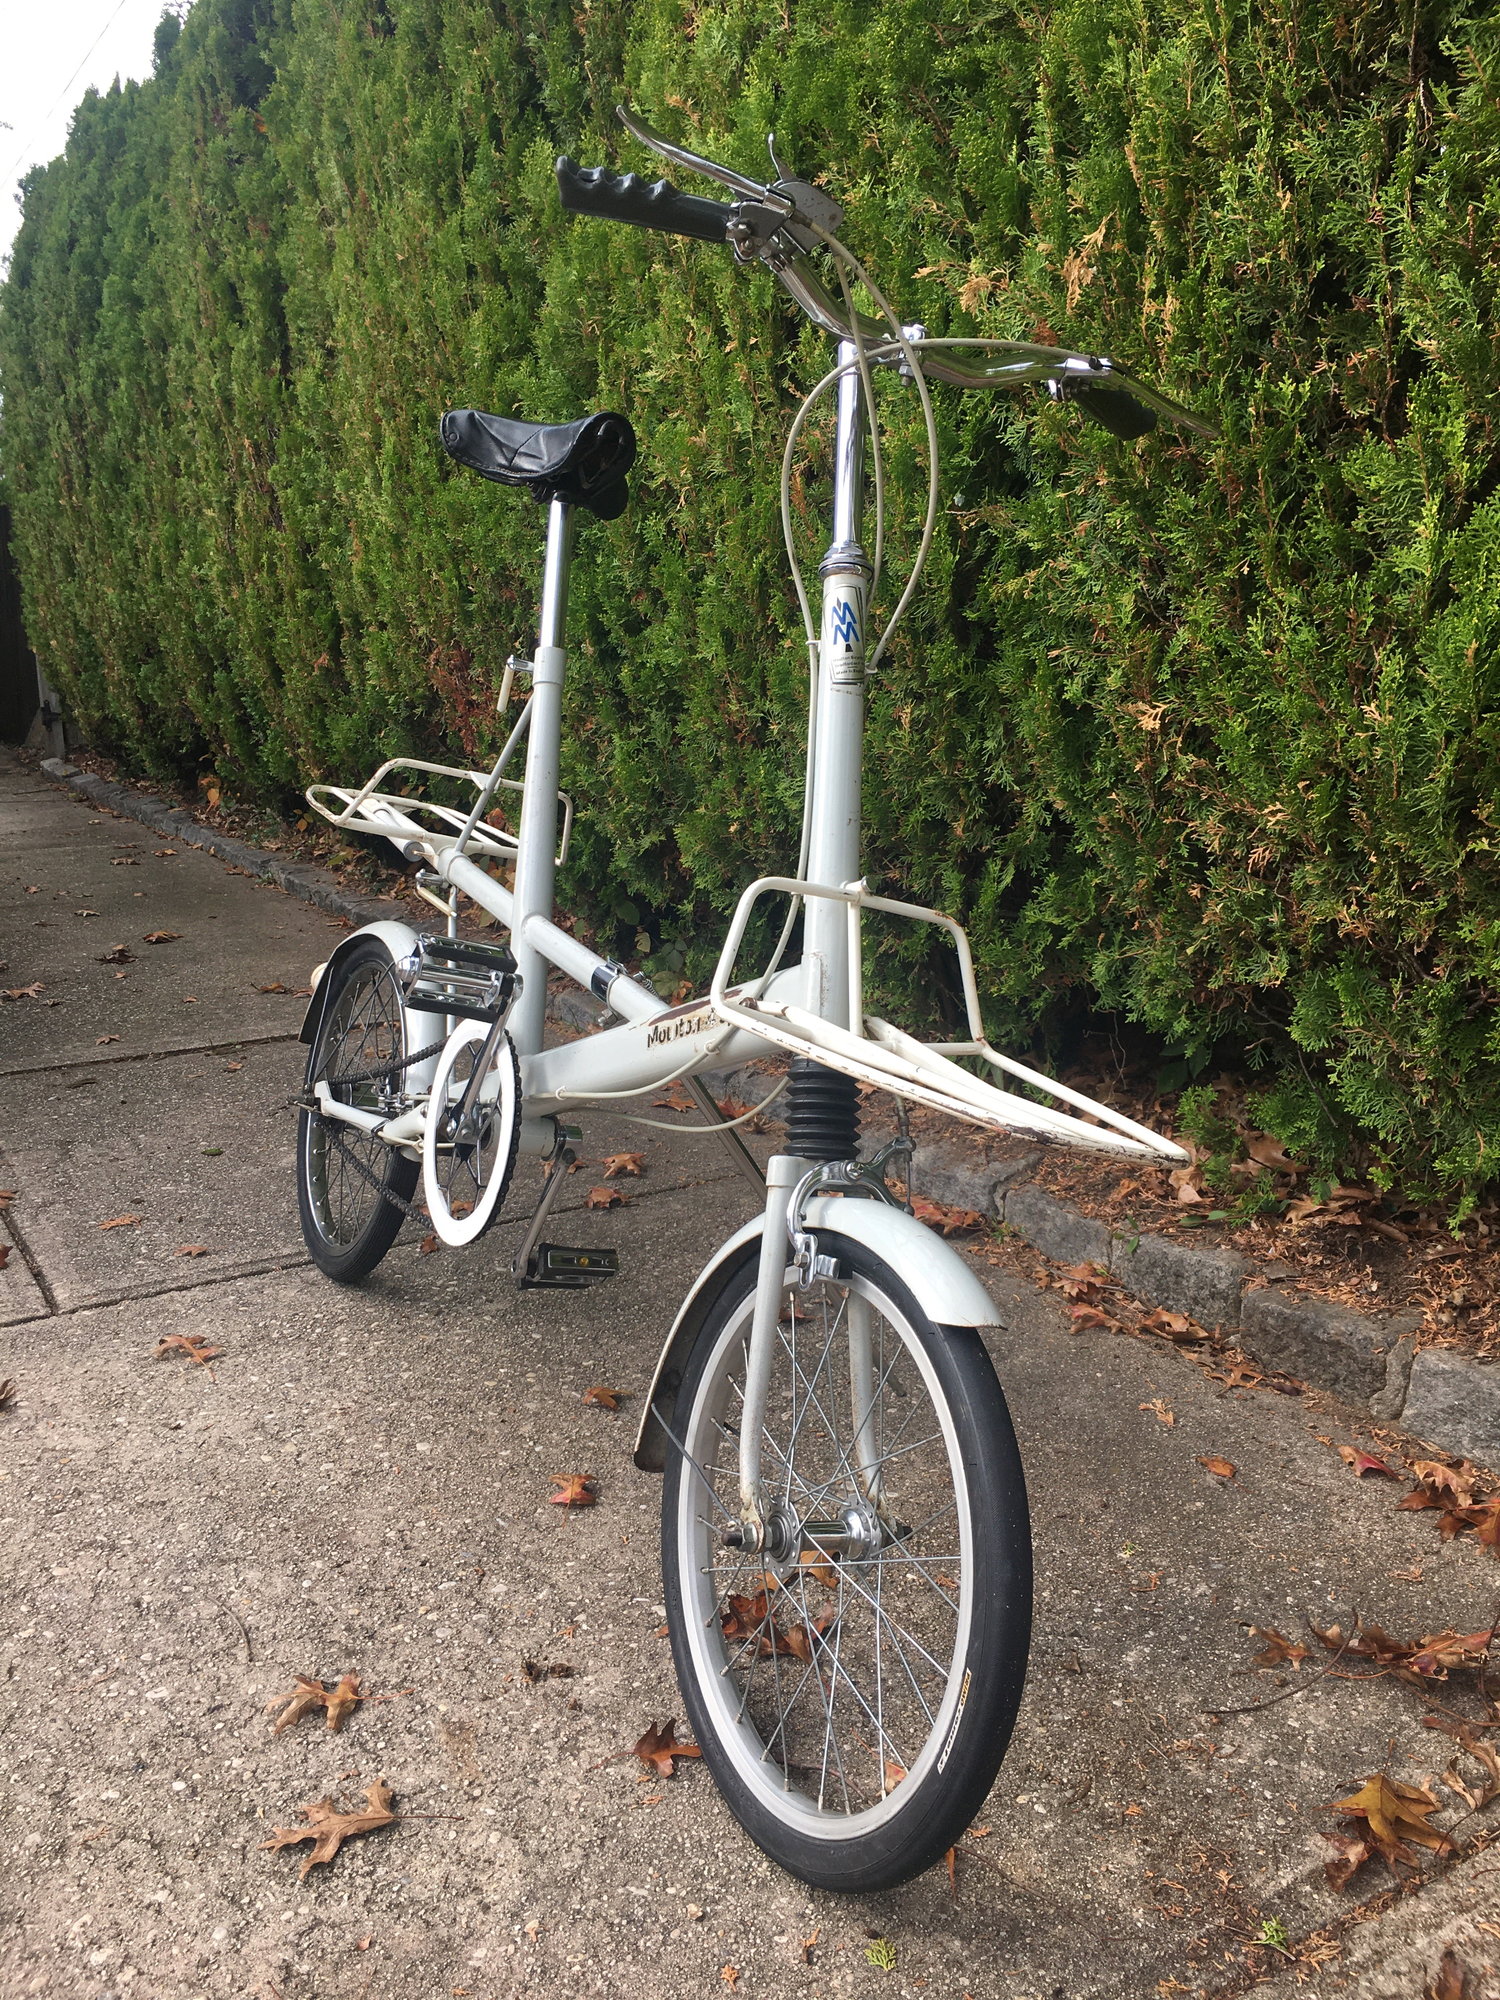
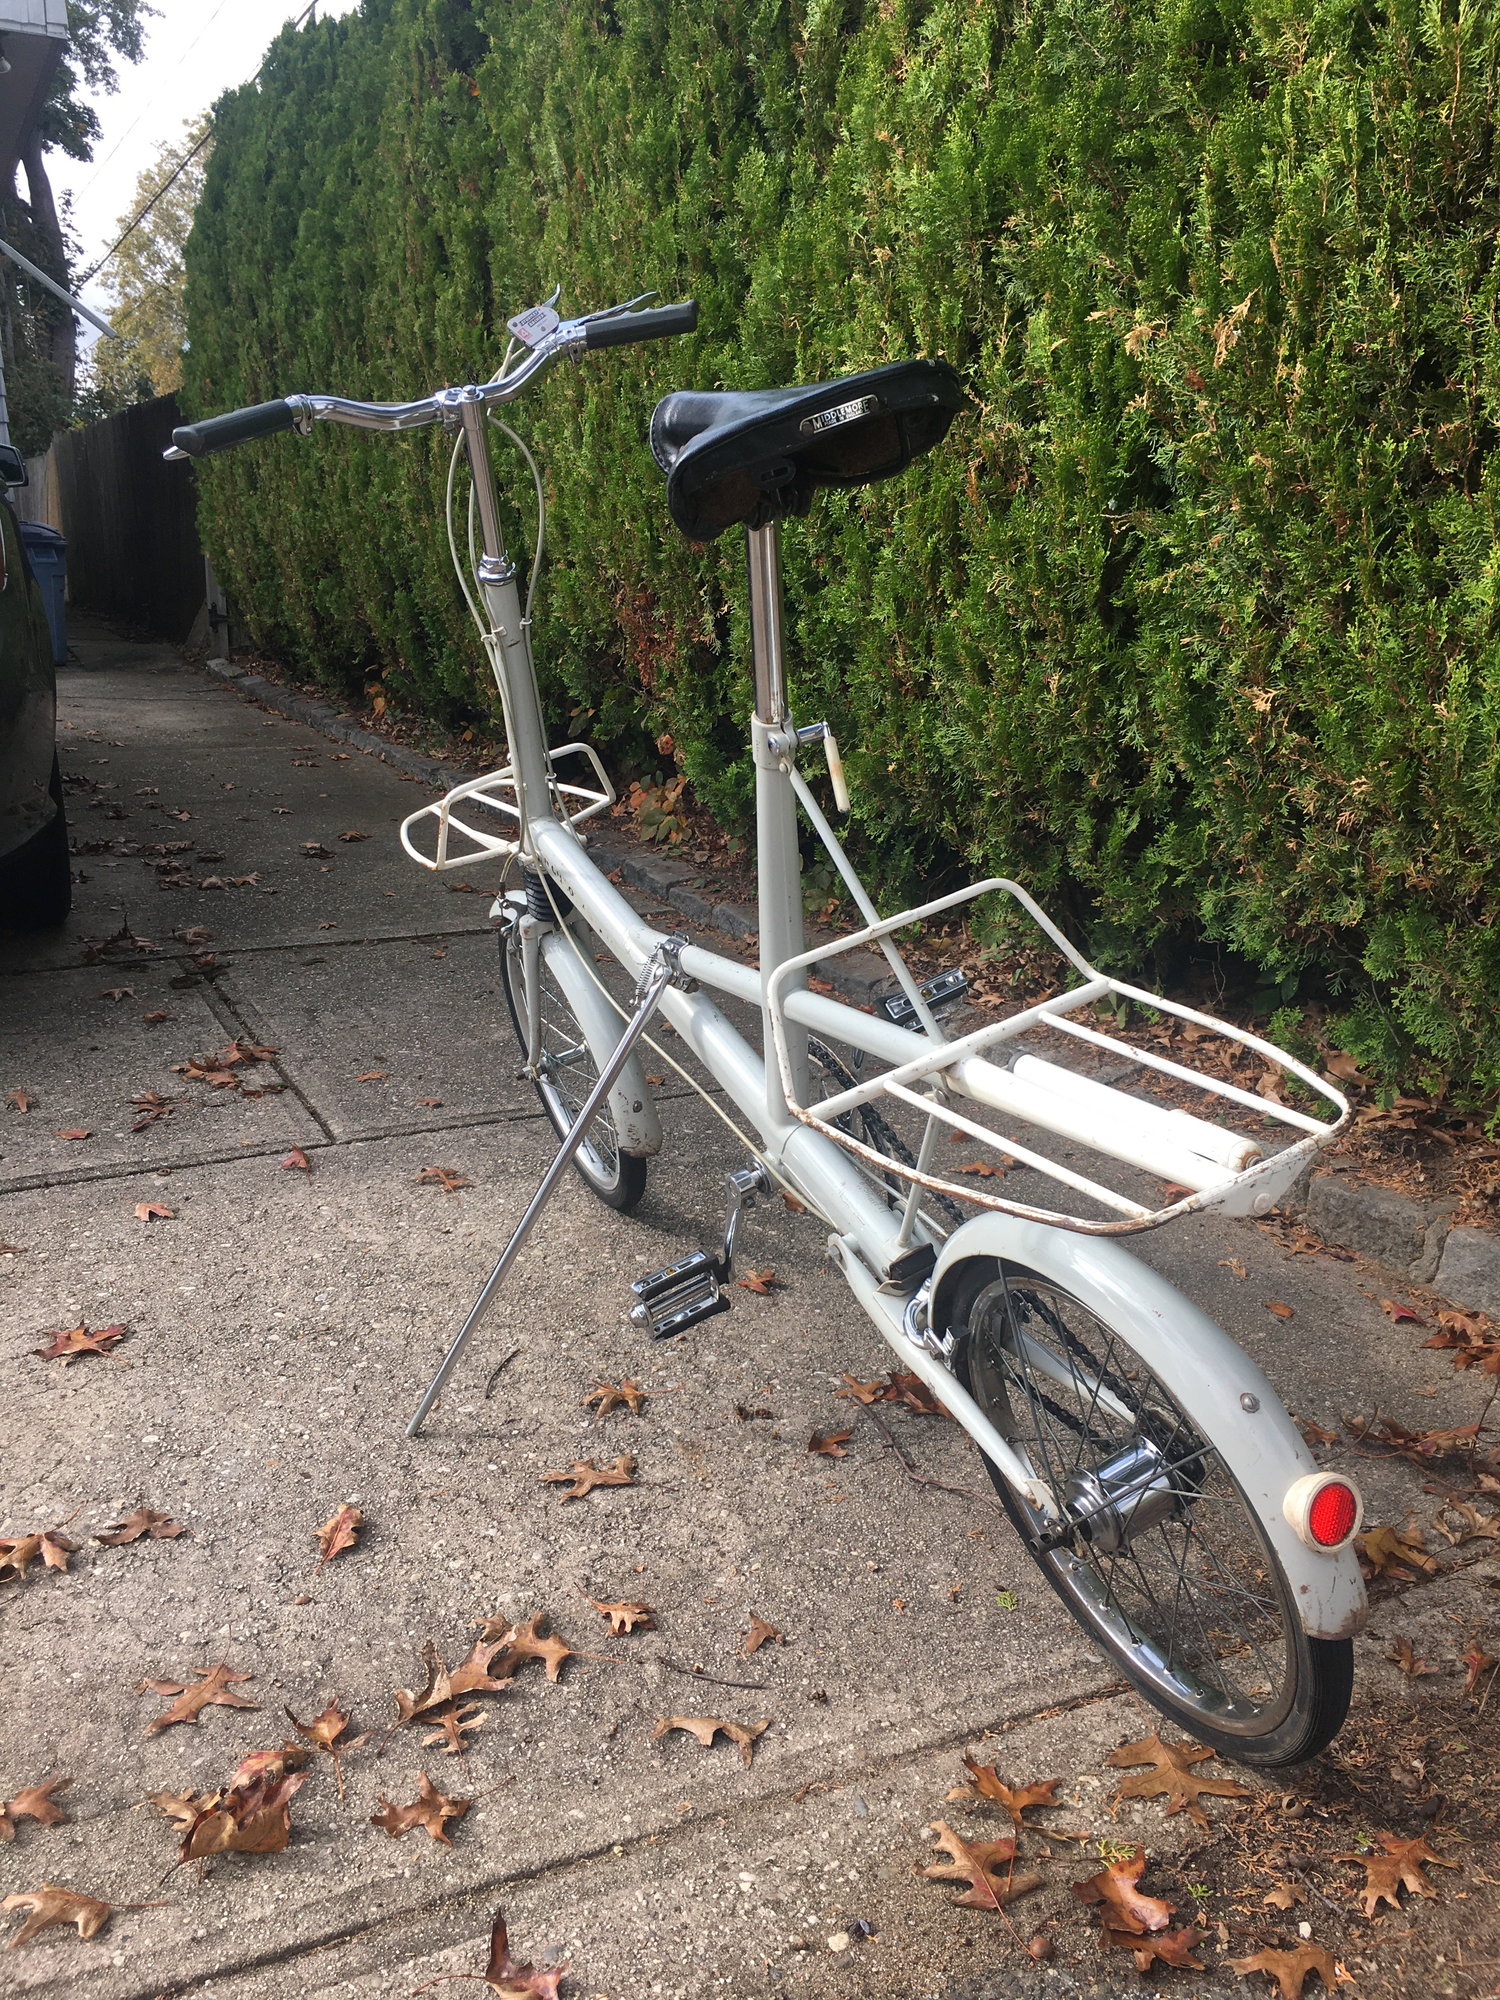
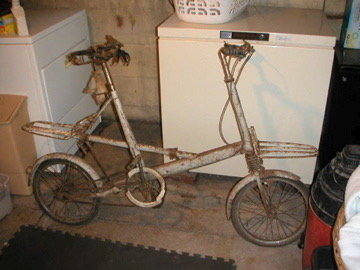
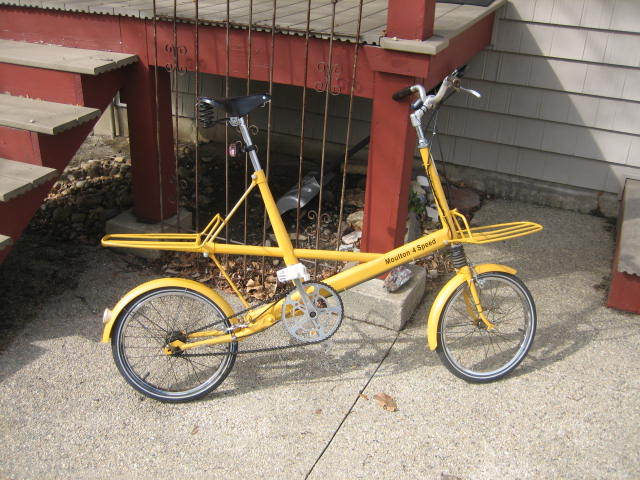
Here's my 1965 F version. Front wheel had been replaced when I bought it. All else is original (and took hours and hours to get looking this way).
10-23-20, 11:29 PM
#38
Senior Member

Join Date: Jun 2010
Location: Medford MA
Posts: 2,089
Bikes: Ron Cooper touring, 1959 Jack Taylor 650b ladyback touring tandem, Vitus 979, Joe Bell painted Claud Butler Dalesman, Colin Laing curved tube tandem, heavily-Dilberted 1982 Trek 6xx, Ren� Herse tandem
Mentioned: 80 Post(s)
Tagged: 0 Thread(s)
Quoted: 964 Post(s)
Liked 1,451 Times
in
723 Posts
Those bolts are probably 5/16-26, British Standard Cycle thread.
You can get old seat binder and stem bolts from Raleighs to match, probably. But as you say, they look fine.
You can get old seat binder and stem bolts from Raleighs to match, probably. But as you say, they look fine.
__________________
Owner & co-founder, Cycles Ren� Hubris. Unfortunately attaching questionable braze-ons to perfectly good frames since about 2015. With style.
Owner & co-founder, Cycles Ren� Hubris. Unfortunately attaching questionable braze-ons to perfectly good frames since about 2015. With style.
Likes For rhenning:
10-24-20, 10:06 AM
#40
Member
Thread Starter
10-24-20, 10:09 AM
#41
Member
Thread Starter
Likes For Noossab:
10-24-20, 10:17 AM
#42
Member
Thread Starter

Vinyl Lettering
Sku: t661- Material: Standard Vinyl Colors
- Color: Black (Won't Show On Tinted Windows)
- Size: 7.250" x 0.760"
Quantity:: 2Unit Price:: $8.24Total:: $16.48
 10-24-20, 09:17 PM
#44
PeopleCode delaminator

Love the progress so far!
10-26-20, 09:04 AM
#45
Member
Thread Starter
Visited Pro Weld over the weekend. He agreed to straighten the front rack for a nominal fee. He will be done in a few days. Fortunately, he has a bead blaster that I can use for all the frame parts. When I come by to pick up the rack. I will bring all the frame, mudguard, and rack parts for blasting.
I�m going to Jet Bicycle Wheels to have the old hubs laced into new rims. The owner, Charles Wells is know as �The World�s Slowest Wheel Builder.� There is a cool article about him if you search �Wheel Building with Jet Bicycle Wheels at NAHBS�. jetbicyclewheels dot com
I decided to go with powder coating the frame, forks, and fenders. I was going to use an artisan bicycle painting specialist, but their base price for painting a bike is $600. The cost for this bike would be higher due to the number of parts (F frame, 2 forks, 2 fenders, and 2 racks).
I spray painted the QR levers, cranks, and brake lever parts with chrome color. After the specified wait time, The paint does not hold up when touched. It worked well on the QR levers because the plastic covering protects the handles. I stripped the paint off of the other parts with mineral spirits.
10-26-20, 09:06 AM
#46
Member
Thread Starter
Weinmann makes a 16" 36H rim that looks like it might work for you. 27 bucks each instead of 88.
Love the progress so far!
Love the progress so far!
10-26-20, 08:16 PM
#47
Phyllo-buster

Join Date: Jan 2010
Location: Nova Scotia
Posts: 8,847
Bikes: roadsters, club bikes, fixed and classic
Mentioned: 133 Post(s)
Tagged: 0 Thread(s)
Quoted: 2298 Post(s)
Liked 2,055 Times
in
1,255 Posts
11-08-20, 07:25 PM
#48
Member
Thread Starter
I got a set of Velocity Dyad rims. I dropped off the old wheels and the new rims at Jet Bicycle wheels. He will use a smaller gauge stainless spokes, chamfered surfaces on the rim, and he will polish up the hubs. He should be done soon.
The front rack has been reshaped and looks great. We troubleshot the blasting cabinet and found a clog in the nozzle. I started with the rear fork and learned a lot about blasting in the process. Then, I started on the frame. The trick is to take your time and make sure all the discolored metal is gone. Then, look at your work outside the cabinet and use a marker where more blasting is needed. Over the next couple of days, I continued blasting the frame, front fork, racks, and mud guards. I completed all the blasting touching up where needed. It was very cool to see the brazing under the old paint and rust.
I dropped the frame pieces off at ElectroTech Powder Coating. They do at least a thousand bicycles per year. He quoted $200 for the whole job (all seven pieces). Cool! Paint color GR230 which is not exactly the Dupont 93774 color I was looking for, but very close. That job should be done soon.
I may consider re-chroming after I get everything back together and see how the bicycle looks overall. New chrome would be costly. The old chrome cleaned up really well on most everything.
11-08-20, 07:38 PM
#49
Member
Thread Starter
Through the Moulton Bicycle club, I found Julian Kowalewski who sells authentic head badges for 6 GBP to members only. I am now a member. The posted information says to send a large envelope with return postage. He provided only a mailing address (in England). I wasn't sure how to do this. I could exchange $ for GBP at Foreign Currency Exchange in Mission Valley. I could send the envelope and a few extra GBPs to cover the postage to the US, but that would be cash. Fortunately, I found his email address elsewhere in the Moultoneers web site. I sent him an email to find out if he uses PayPal and if he can ship a head badge to the US. He wrote back with an affirmative response along with his PayPal identity. He also said he would post it as soon as I send him 6 GBPs and let me know the cost of postage. I transferred the money and within a day, he wrote that he needs 1.42 GBPs for the postage. Done! Awesome! I am waiting for the head badge.
I attached a photo of one of the stickers that I forgot to send earlier.
Soon, I'll be reassembling the bike.
I attached a photo of one of the stickers that I forgot to send earlier.
Soon, I'll be reassembling the bike.
11-08-20, 09:09 PM
#50
Junior Member
Join Date: Jan 2018
Location: Morris Cty, NJ
Posts: 20
Mentioned: 2 Post(s)
Tagged: 0 Thread(s)
Quoted: 12 Post(s)
Likes: 0
Liked 3 Times
in
3 Posts
Your attention to detail is impressive. I keep a crusty old Raleigh 20 at work to ride to the post office, but would replace it pretty quick if a Moulton came my way.
-Carl