


Allternatives for Removal of a Dropout Adjusting Screw ?
 07-17-20, 08:19 AM
#1

Friendship is Magic
Thread Starter

Join Date: Nov 2010
Location: Sacramento, CA
Posts: 22,984
Bikes: old ones
Mentioned: 304 Post(s)
Tagged: 0 Thread(s)
Quoted: 26415 Post(s)
Liked 10,380 Times
in
7,208 Posts
Allternatives for Removal of a Dropout Adjusting Screw ?
.
...I have done maybe a dozen of these over the years, and I confess that my record of success is only about 60/40. For the ones that have some usable stub remaining, I've had success with double nutting the exterior portion, cutting off the interior part, and backing out the remains using heat and penetrating oil to free up the frozen ones. I've drilled a couple, but have no drill press. One of my sadder failures involved successfully drilling out the screw stub, but them managing to snap off a part of the hardened steel tap I was using to clean up the threads. Which was a stupid mistake, because I was doing it while tired, late in the evening. Dumb.
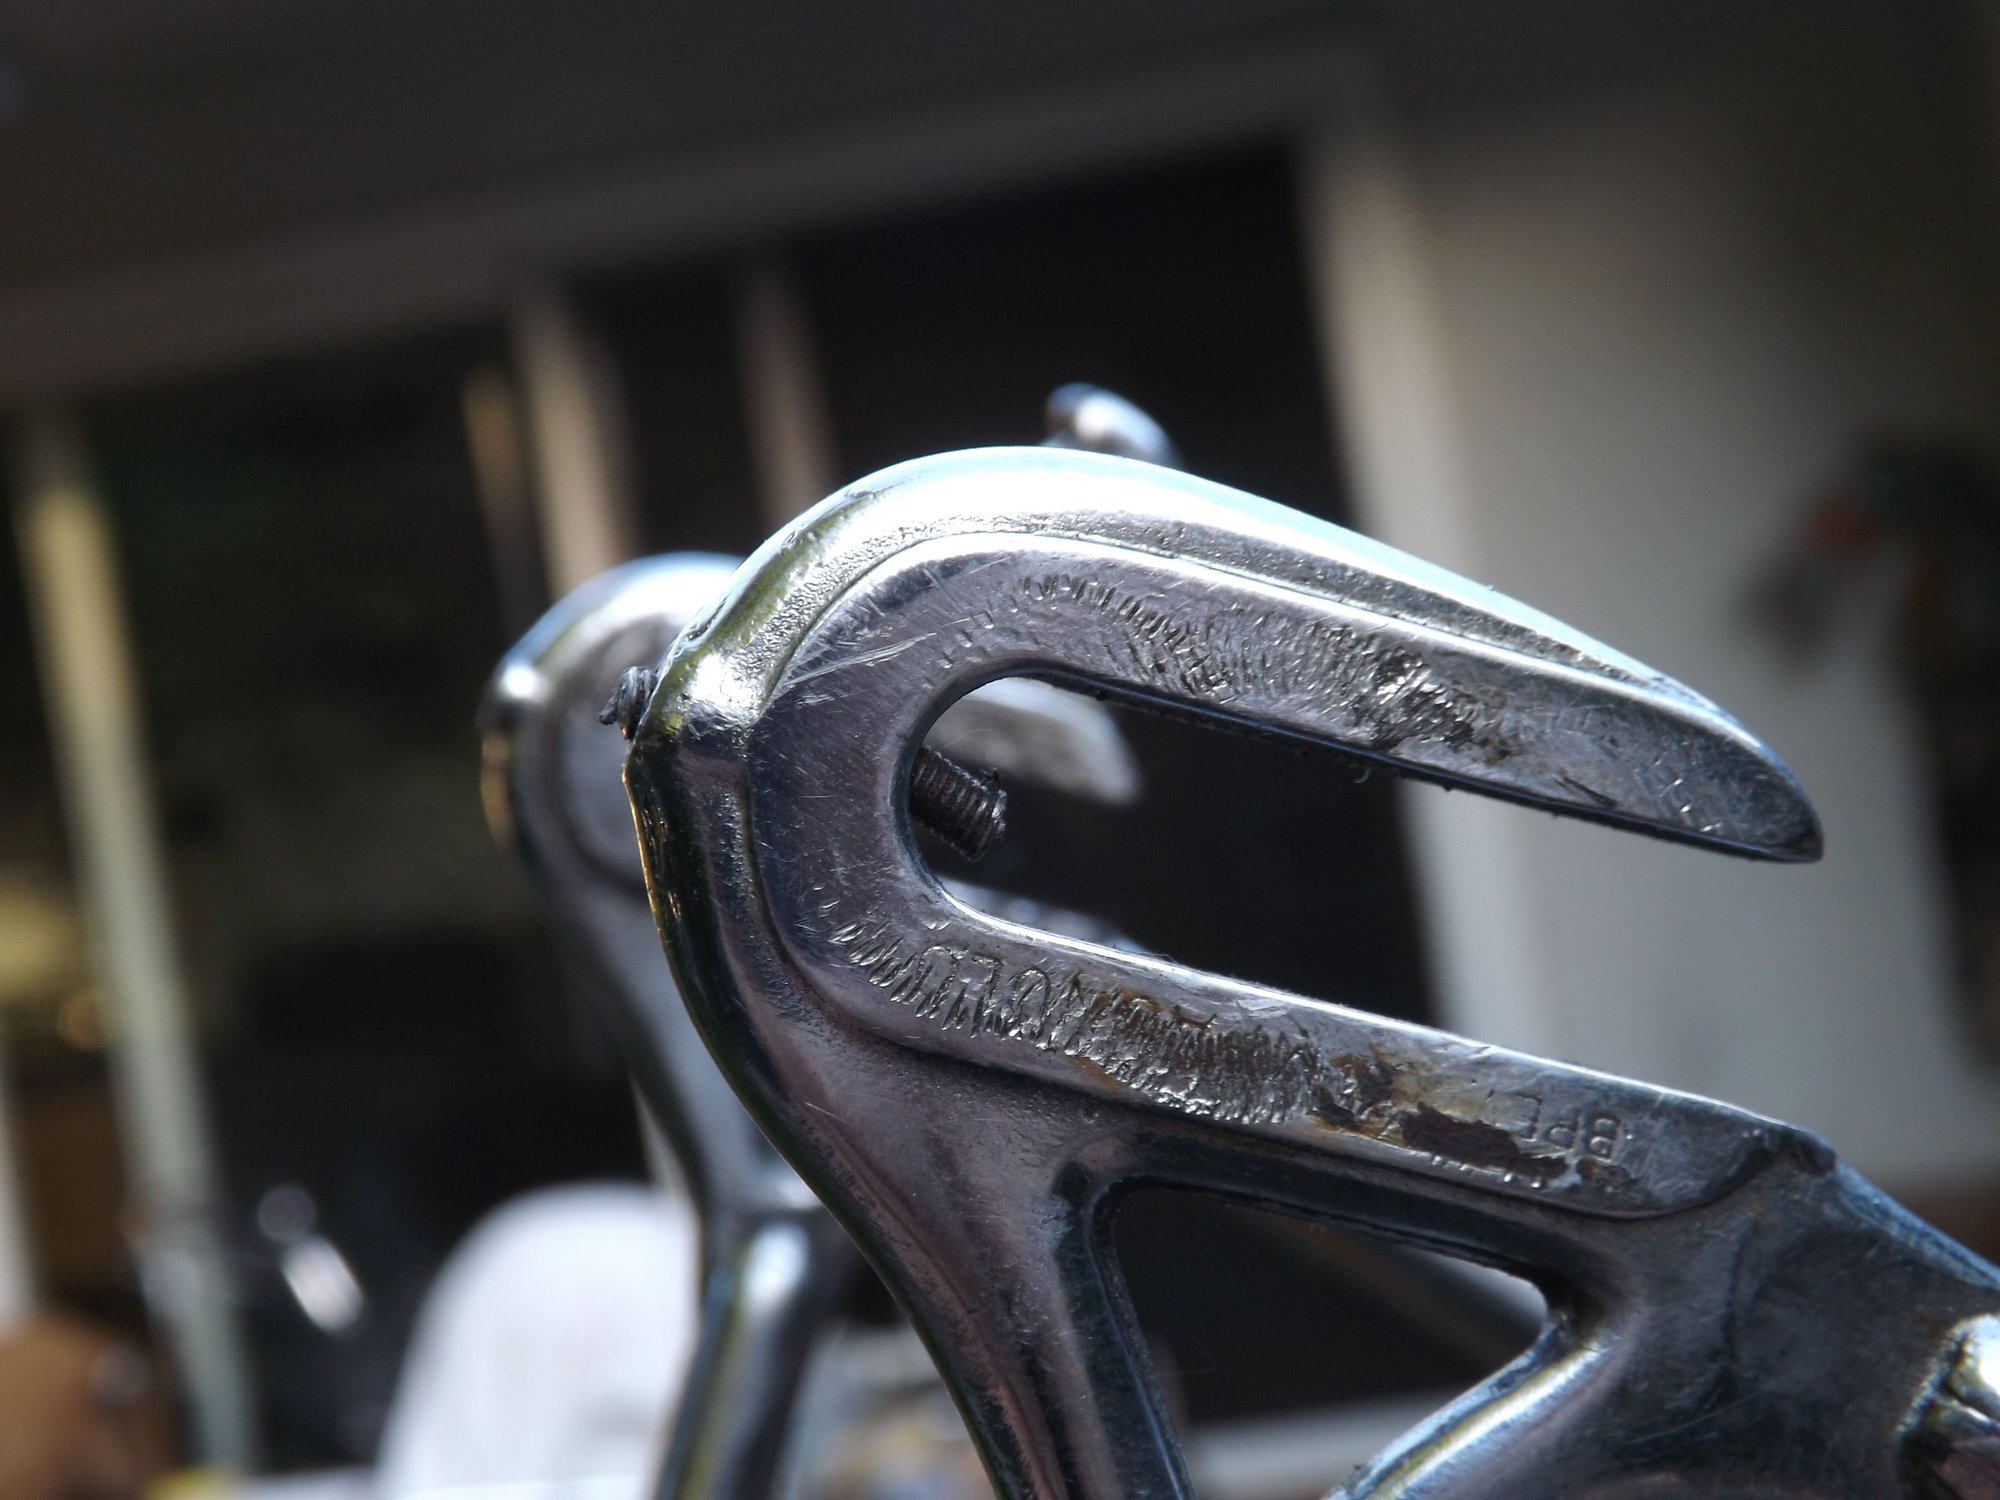
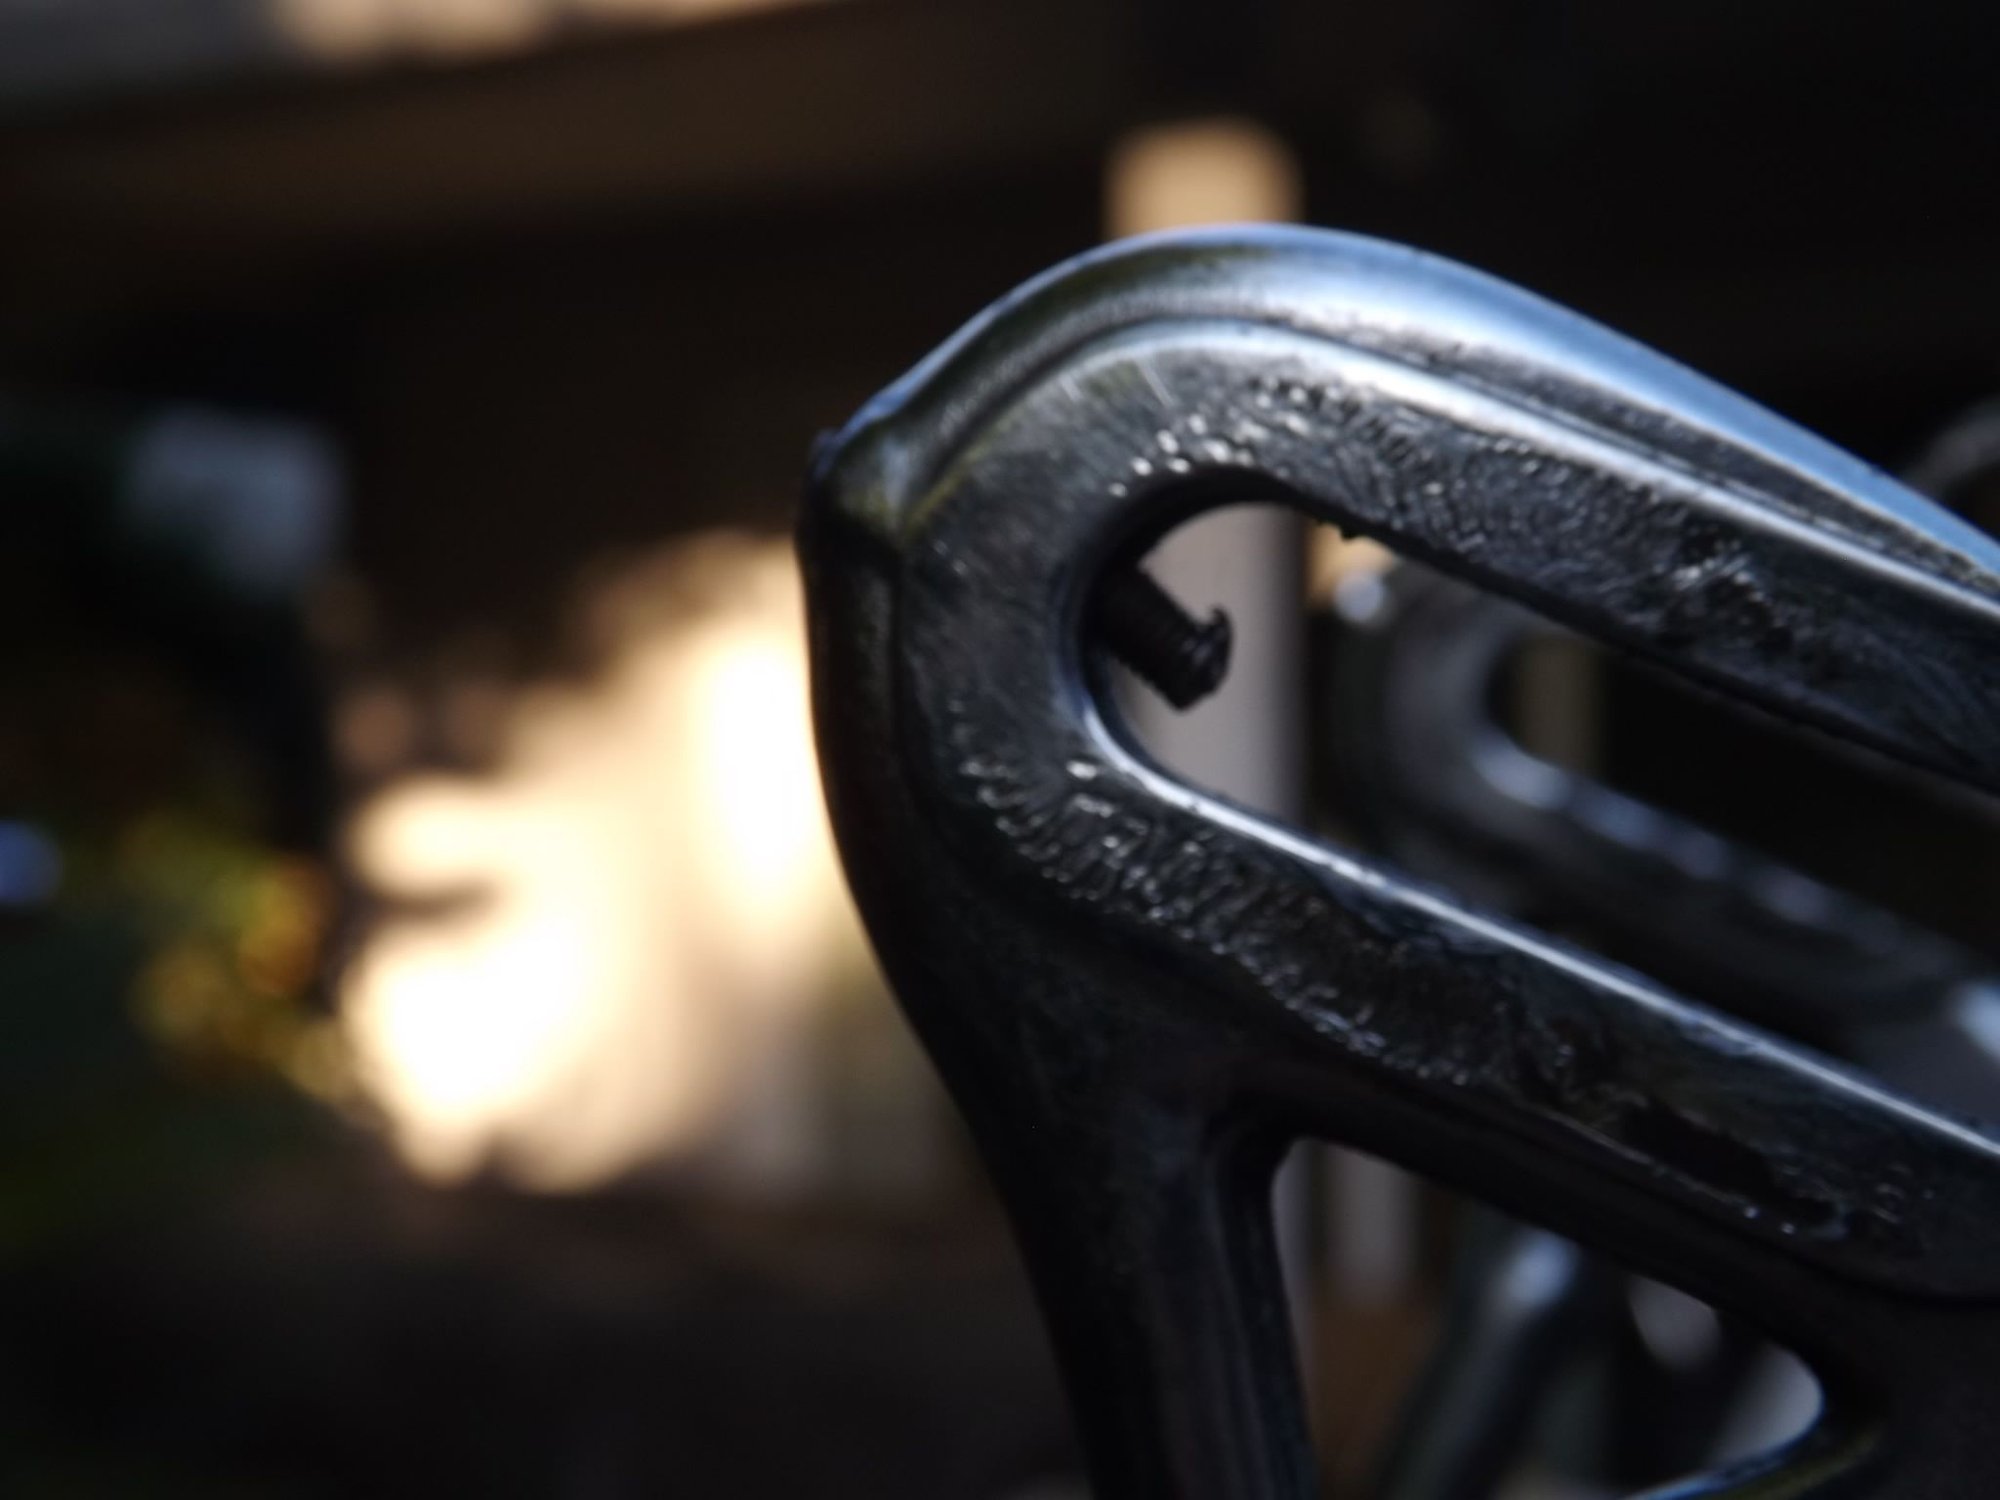
Plan B is to just use one of those screw clapm adjusters on this side, and a screw on the other side, which is fine. That screw is out now. This one doesn't leave much to work with, but there is a crooked stub on the inside (see photos), which might be amenable to gentle straightening and cutting a small slot in the end so I can use a screwdriver, with some heat and ATF/acetone mix.
Consider this a solicitation for suggestions or advice on your favorite method for doing this. Maybe I'm missing something ? I know a machine shop is probably a good option, but am trying to avoid that additional expense if I can.
I think that interior stub is the flattened end of a dropout screw that was inserted backwards. It's not the remains of a screw head. And that's threading, not the remains of a spring. So in the absence of something better, I will eventually try the straighten/cut slot/screwdriver method. Hoping this thread will yield the magic solution, because I run into it a lot lately.


...I have done maybe a dozen of these over the years, and I confess that my record of success is only about 60/40. For the ones that have some usable stub remaining, I've had success with double nutting the exterior portion, cutting off the interior part, and backing out the remains using heat and penetrating oil to free up the frozen ones. I've drilled a couple, but have no drill press. One of my sadder failures involved successfully drilling out the screw stub, but them managing to snap off a part of the hardened steel tap I was using to clean up the threads. Which was a stupid mistake, because I was doing it while tired, late in the evening. Dumb.
Plan B is to just use one of those screw clapm adjusters on this side, and a screw on the other side, which is fine. That screw is out now. This one doesn't leave much to work with, but there is a crooked stub on the inside (see photos), which might be amenable to gentle straightening and cutting a small slot in the end so I can use a screwdriver, with some heat and ATF/acetone mix.
Consider this a solicitation for suggestions or advice on your favorite method for doing this. Maybe I'm missing something ? I know a machine shop is probably a good option, but am trying to avoid that additional expense if I can.
I think that interior stub is the flattened end of a dropout screw that was inserted backwards. It's not the remains of a screw head. And that's threading, not the remains of a spring. So in the absence of something better, I will eventually try the straighten/cut slot/screwdriver method. Hoping this thread will yield the magic solution, because I run into it a lot lately.
 07-17-20, 08:38 AM
#2
Senior Member
No magic solution here. Really depends on the bike. I have a Trek 400 that had one which would not come out, broke off so I left it. If it was a nice, high end bike like yours I would give it the professional treatment.
07-17-20, 08:59 AM
#3
The dropped

Join Date: Oct 2018
Location: Columbus, OH
Posts: 2,144
Bikes: Pake C'Mute Touring/Commuter Build, 1989 Kona Cinder Cone, 1995 Trek 5200, 1973 Raleigh Super Course FG, 1960/61 Montgomery Ward Hawthorne "thrift" 3 speed, by Hercules (sold) : 1966 Schwinn Deluxe Racer (sold)
Mentioned: 10 Post(s)
Tagged: 0 Thread(s)
Quoted: 1739 Post(s)
Liked 1,014 Times
in
696 Posts
Use the force (patience). If that bit coming out the back of the dropout is alright. I'd start by using the bent portion to slowly back it out with pliers. If it's not moving easily, penetrating oil and time, then pliers and a gentle hand.
I've only done one, but it had a pretty severe bend after the dropout, and moved freely. I just straightened the bolt and ran a die over it to un**** the threads in the bend. Then I ran a tap through the dropout to straighten any threads there.
Light some incense, breathe deeply, clear your mind, and feel the Zen. Then solve the problem with peace. 😌
Likes For Unca_Sam:
07-17-20, 09:32 AM
#4
Friendship is Magic
Thread Starter
Join Date: Nov 2010
Location: Sacramento, CA
Posts: 22,984
Bikes: old ones
Mentioned: 304 Post(s)
Tagged: 0 Thread(s)
Quoted: 26415 Post(s)
Liked 10,380 Times
in
7,208 Posts
+1
Use the force (patience). If that bit coming out the back of the dropout is alright. I'd start by using the bent portion to slowly back it out with pliers. If it's not moving easily, penetrating oil and time, then pliers and a gentle hand.
I've only done one, but it had a pretty severe bend after the dropout, and moved freely. I just straightened the bolt and ran a die over it to un**** the threads in the bend. Then I ran a tap through the dropout to straighten any threads there.
Light some incense, breathe deeply, clear your mind, and feel the Zen. Then solve the problem with peace. 😌
 I'm going for a ride.
Likes For 3alarmer:
07-17-20, 09:34 AM
#5
The dropped
Join Date: Oct 2018
Location: Columbus, OH
Posts: 2,144
Bikes: Pake C'Mute Touring/Commuter Build, 1989 Kona Cinder Cone, 1995 Trek 5200, 1973 Raleigh Super Course FG, 1960/61 Montgomery Ward Hawthorne "thrift" 3 speed, by Hercules (sold) : 1966 Schwinn Deluxe Racer (sold)
Mentioned: 10 Post(s)
Tagged: 0 Thread(s)
Quoted: 1739 Post(s)
Liked 1,014 Times
in
696 Posts
Likes For Unca_Sam:
07-17-20, 09:35 AM
#6
Friendship is Magic
Thread Starter
Join Date: Nov 2010
Location: Sacramento, CA
Posts: 22,984
Bikes: old ones
Mentioned: 304 Post(s)
Tagged: 0 Thread(s)
Quoted: 26415 Post(s)
Liked 10,380 Times
in
7,208 Posts
.
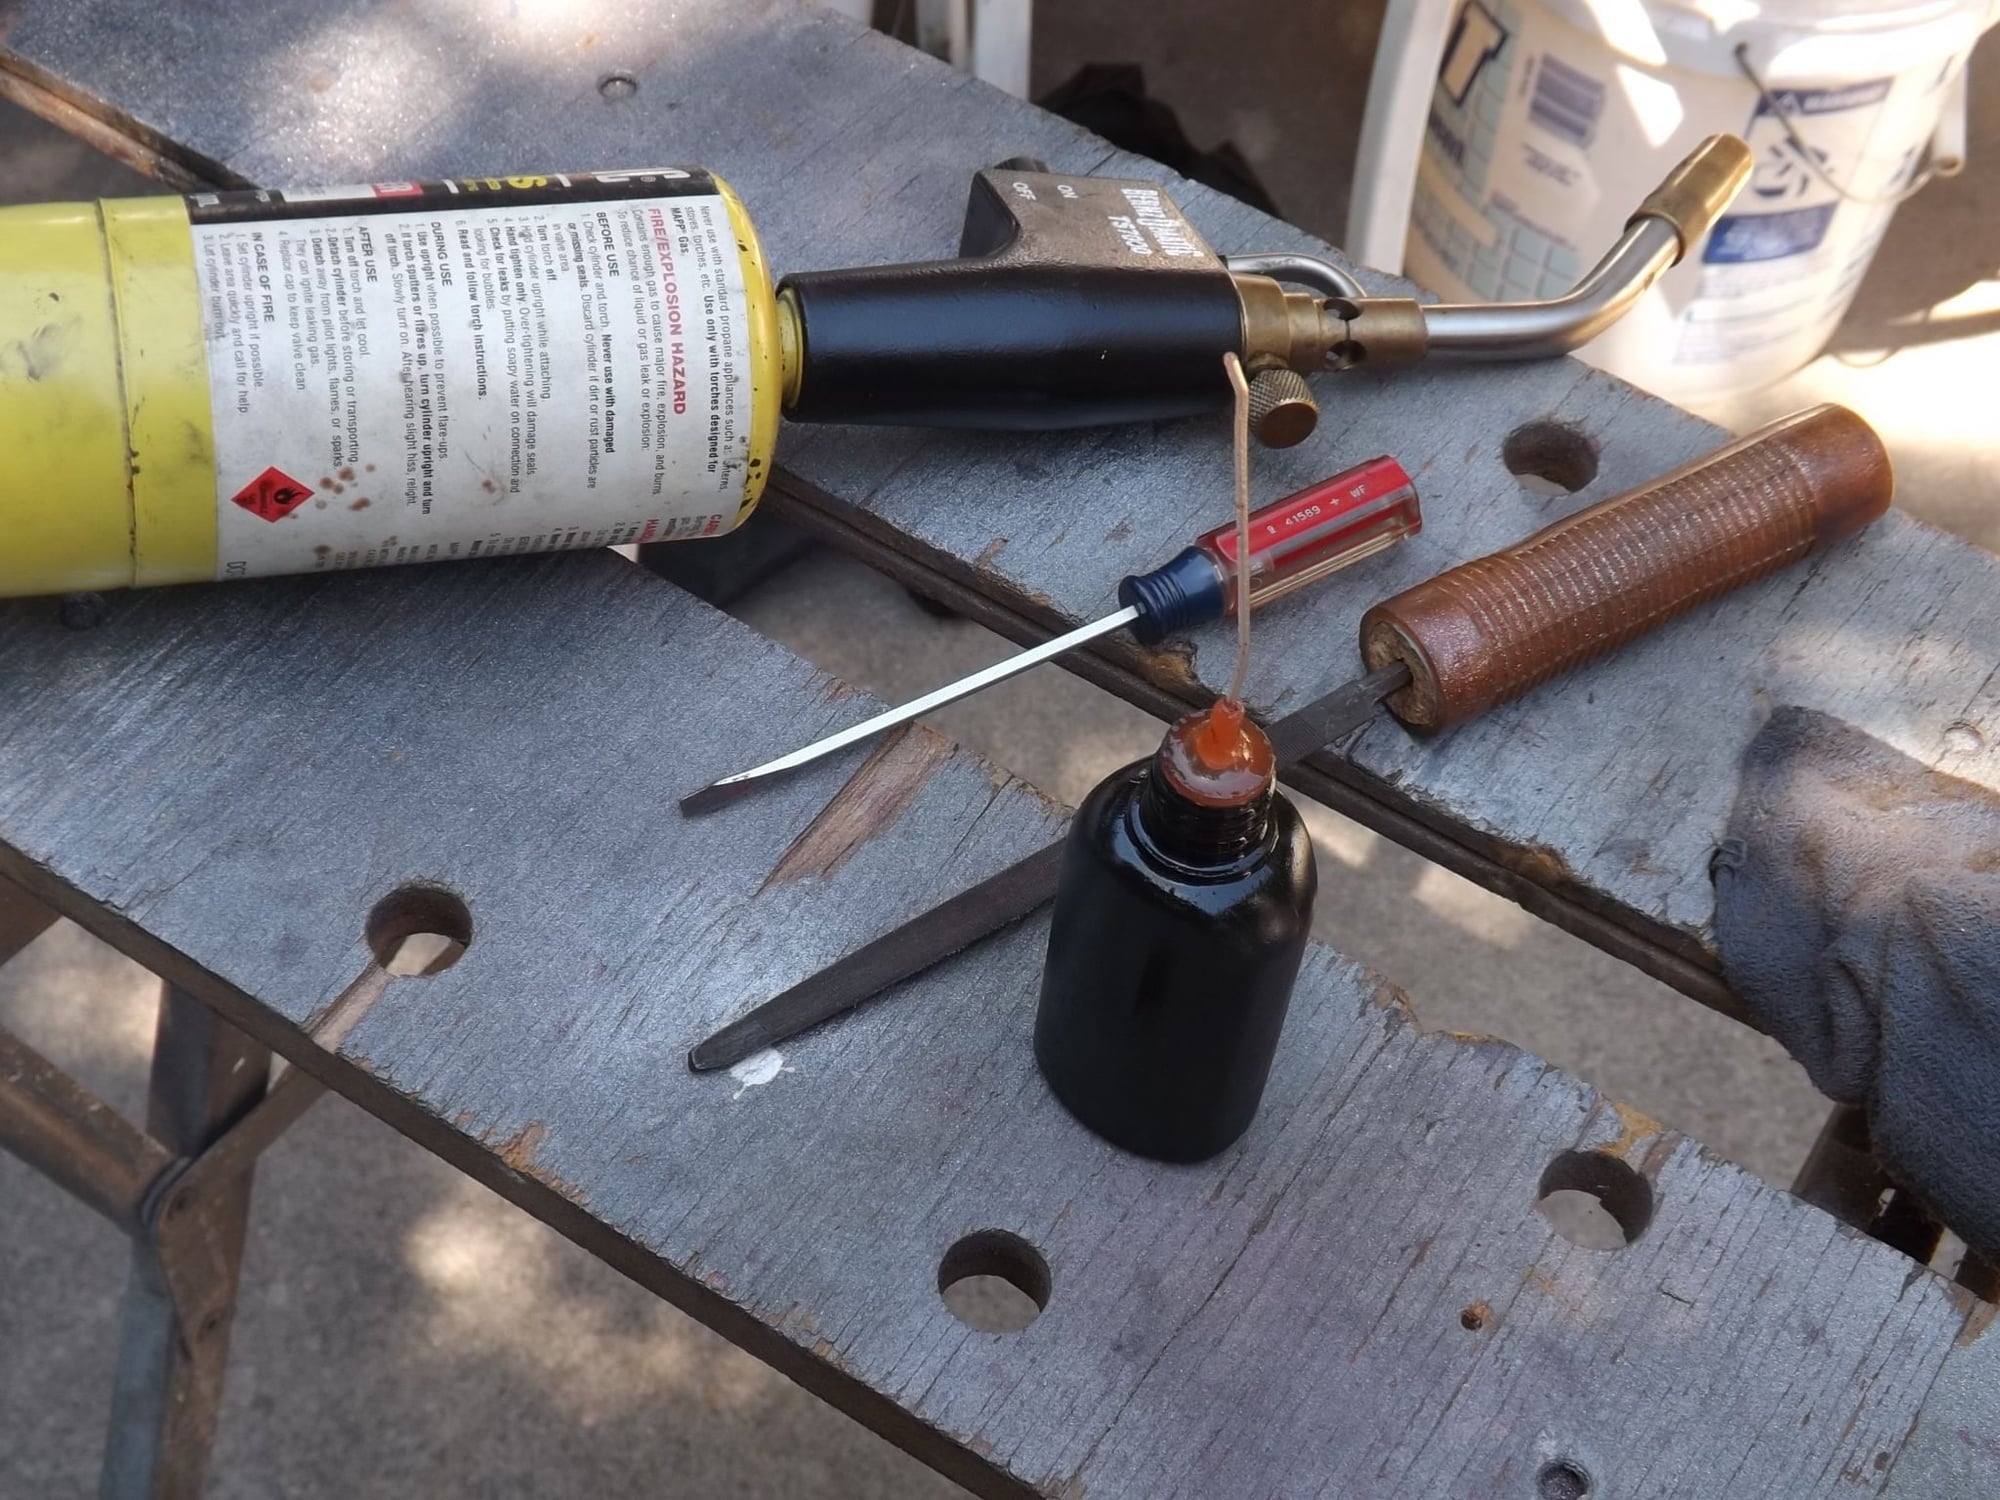
...I did play a torch on it, dribbled in some ATF/acetone, and gently (with the Buddha uppermost in mind) straightened the stub. It did not break, so the Force is thus far with me.
...I did play a torch on it, dribbled in some ATF/acetone, and gently (with the Buddha uppermost in mind) straightened the stub. It did not break, so the Force is thus far with me.
Likes For 3alarmer:
07-17-20, 09:54 AM
#7
Cat 6

Join Date: Dec 2007
Location: Mountain Brook, AL
Posts: 7,482
Mentioned: 27 Post(s)
Tagged: 0 Thread(s)
Quoted: 500 Post(s)
Liked 183 Times
in
118 Posts
e d m
(why won't it let me use caps?)
.
(why won't it let me use caps?)
.
__________________
72 Frejus (for sale), Holdsworth Record (for sale), special CNC & Gitane Interclub / 74 Italvega NR (for sale) / c80 French / 82 Raleigh Intl MkII f&f (for sale)/ 83 Trek 620 (for sale)/ 84 Bruce Gordon Chinook (for sale)/ 85 Ron Cooper / 87 Centurion IM MV (for sale) / 03 Casati Dardo / 08 BF IRO / 09 Dogma FPX / 09 Giant TCX0 / 10 Vassago Fisticuff
72 Frejus (for sale), Holdsworth Record (for sale), special CNC & Gitane Interclub / 74 Italvega NR (for sale) / c80 French / 82 Raleigh Intl MkII f&f (for sale)/ 83 Trek 620 (for sale)/ 84 Bruce Gordon Chinook (for sale)/ 85 Ron Cooper / 87 Centurion IM MV (for sale) / 03 Casati Dardo / 08 BF IRO / 09 Dogma FPX / 09 Giant TCX0 / 10 Vassago Fisticuff
07-17-20, 11:01 AM
#8
Senior Member

Join Date: Apr 2007
Location: Thunder Bay, Ontario, Canada - burrrrr!
Posts: 11,674
Bikes: 1958 Rabeneick 120D, 1968 Legnano Gran Premio, 196? Torpado Professional, 2000 Marinoni Piuma
Mentioned: 210 Post(s)
Tagged: 0 Thread(s)
Quoted: 1372 Post(s)
Likes: 0
Liked 1,751 Times
in
938 Posts
This looks like an easy fix. Begin by straightening the part of the bolt that is inside the drop. A wee screwdriver and a wee bit of leverage will do the job. Now, screw the bole in as much as you can or need to. Next, cut off the offending part or just file it down. Then simply undo the screw from inside the drop. Done this many times, including just the other day on an old Torpado...

For removal of the drop screw, above, I undo the bolt until i hit a bent section. I then use the drop as a vice (sort of) and bend the bolt pretty straight. Then, simply unscrew.
For removal of the drop screw, above, I undo the bolt until i hit a bent section. I then use the drop as a vice (sort of) and bend the bolt pretty straight. Then, simply unscrew.
__________________
"98% of the bikes I buy are projects".
"98% of the bikes I buy are projects".
Last edited by randyjawa; 07-17-20 at 11:05 AM.
Likes For randyjawa:
07-17-20, 12:40 PM
#9
Friendship is Magic
Thread Starter
Join Date: Nov 2010
Location: Sacramento, CA
Posts: 22,984
Bikes: old ones
Mentioned: 304 Post(s)
Tagged: 0 Thread(s)
Quoted: 26415 Post(s)
Liked 10,380 Times
in
7,208 Posts
.
^^^This actually works pretty well, as long as the thing is free to turn. After my torch and ATF treatment, I returned from my ride and repeated this treatment. But whoever had installed these screws did so backward, with the head on the outside. So the problem was compounded by the absence of a screw slot on the inside screw end. I managed to establish a usable (if not ideal) slot with a triangular file, and it's almost out now. Thank you.

^^^This actually works pretty well, as long as the thing is free to turn. After my torch and ATF treatment, I returned from my ride and repeated this treatment. But whoever had installed these screws did so backward, with the head on the outside. So the problem was compounded by the absence of a screw slot on the inside screw end. I managed to establish a usable (if not ideal) slot with a triangular file, and it's almost out now. Thank you.
Likes For 3alarmer:
07-17-20, 12:58 PM
#10
1/2 as far in 2x the time
Join Date: Nov 2013
Location: Northern Bergen County, NJ
Posts: 1,746
Bikes: Yes, Please.
Mentioned: 13 Post(s)
Tagged: 0 Thread(s)
Quoted: 499 Post(s)
Liked 285 Times
in
222 Posts
Way to go. I go similar to Randy... that little stub out the back I just grind down so it can't interfere. Then patience and solvent/lubricating fluids, and tap, tap, tap... on outside of drop out, if theres corrosion. I think it helps oosen everthing.
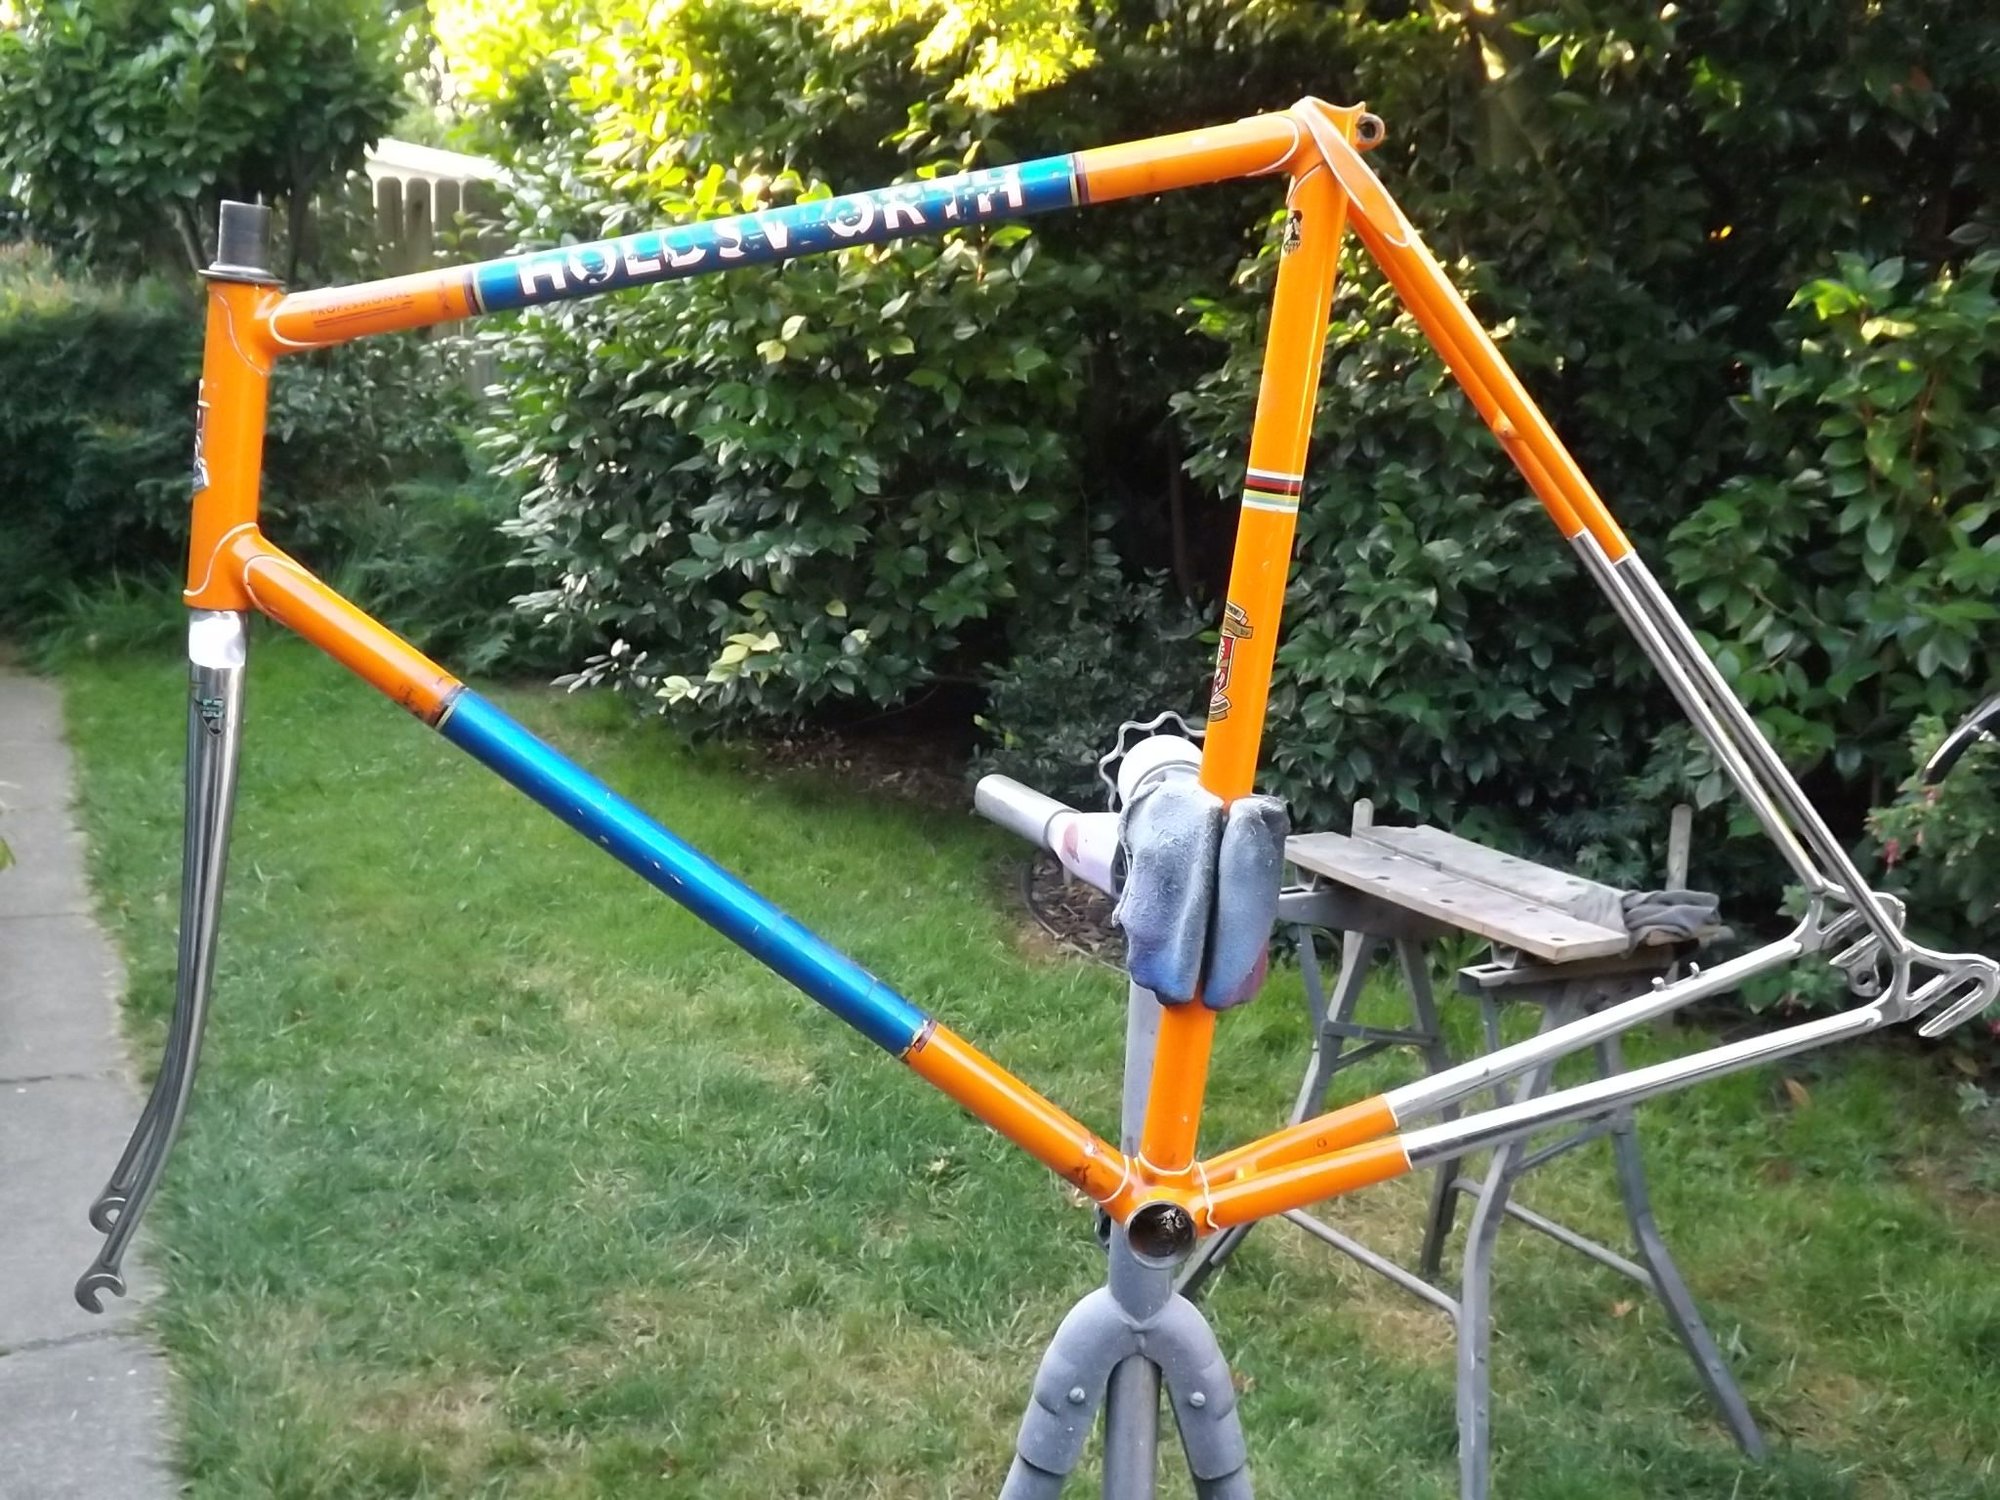
Are you getting new decals? Your paint looks nice, better than mine.
Goog luck! Eric
Decided on the build yet? I keep going back and forth.... As it came to me except for modernisms, which are already long gone...Has TA cranks and Universal centerpulls now or do I step it up to a cleaner NR group... Such problems....
__________________
I seem to have lost what little mind I had left before this all started.
I seem to have lost what little mind I had left before this all started.
Last edited by Last ride 76; 07-17-20 at 01:05 PM.
07-17-20, 02:38 PM
#11
Senior Member
Randy’s solution is what I used on my recent 74 Raleigh frame. Bring it inside till resistance, applie gentle straightening force, bring it inside again little by little you clear the back bent section. If not back it out some then file smooth then complete the removal.
Campy drop outs, gotta save them!
Campy drop outs, gotta save them!
07-17-20, 03:09 PM
#12
Senior Member

Join Date: Sep 2010
Location: La Habra, California
Posts: 788
Bikes: Italvega Super Speciales and Superlights
Mentioned: 33 Post(s)
Tagged: 0 Thread(s)
Quoted: 355 Post(s)
Liked 345 Times
in
174 Posts
Gotta make sure to do it in that order. Playing the torch after dribbling in ATF/acetone might have an unintended consequence, although the acetone probably would evaporate within a few seconds. The Force is strong with this one!
__________________
Italvega and Torpado Enthusiast
Italvega and Torpado Enthusiast
07-17-20, 07:00 PM
#13
Senior Member
Join Date: May 2019
Location: Bloomington, IN
Posts: 2,949
Bikes: Paramount, Faggin, Ochsner, Ciocc, Basso
Mentioned: 117 Post(s)
Tagged: 0 Thread(s)
Quoted: 1303 Post(s)
Liked 1,910 Times
in
1,140 Posts
Triple Alarmer,
After it comes out I always use Stainless screws as a replacement which kind of keeps the rust binding down. I also always coat the threads with a light coat of grease and use a Dualco grease gun to shoot the inside of the drop out with grease to keep binding down as well. I don't still have your addy, but if you will PM it to me I can send you a pair. New nuts are bought on e-bay from VieVelo. (I wish I has a source for those in bulk!) Lemme know, MH
After it comes out I always use Stainless screws as a replacement which kind of keeps the rust binding down. I also always coat the threads with a light coat of grease and use a Dualco grease gun to shoot the inside of the drop out with grease to keep binding down as well. I don't still have your addy, but if you will PM it to me I can send you a pair. New nuts are bought on e-bay from VieVelo. (I wish I has a source for those in bulk!) Lemme know, MH
07-17-20, 07:03 PM
#14
Friendship is Magic
Thread Starter
Join Date: Nov 2010
Location: Sacramento, CA
Posts: 22,984
Bikes: old ones
Mentioned: 304 Post(s)
Tagged: 0 Thread(s)
Quoted: 26415 Post(s)
Liked 10,380 Times
in
7,208 Posts
Way to go. I go similar to Randy... that little stub out the back I just grind down so it can't interfere. Then patience and solvent/lubricating fluids, and tap, tap, tap... on outside of drop out, if theres corrosion. I think it helps oosen everthing.
Are you getting new decals? Your paint looks nice, better than mine.
Goog luck! Eric
Decided on the build yet? I keep going back and forth.... As it came to me except for modernisms, which are already long gone...Has TA cranks and Universal centerpulls now or do I step it up to a cleaner NR group... Such problems....
The original hubs were long gone, with some kind of generic Shimano machine built wheel set. I have hubs that will fit, so probably a wheel project over the winter before it's finished. I have wheels I can stick on there in the meantime, if I get it painted and put back together.
The guy I bought it from has had it for a while, and said it was a dump find (by a friend of his) down near a military base not too far from Modesto.
There were a lot of nice bikes brought back during the Air Force flying days in the Central Valley. I guess this might be one of those.
07-17-20, 07:12 PM
#15
Friendship is Magic
Thread Starter
Join Date: Nov 2010
Location: Sacramento, CA
Posts: 22,984
Bikes: old ones
Mentioned: 304 Post(s)
Tagged: 0 Thread(s)
Quoted: 26415 Post(s)
Liked 10,380 Times
in
7,208 Posts
Triple Alarmer,
After it comes out I always use Stainless screws as a replacement which kind of keeps the rust binding down. I also always coat the threads with a light coat of grease and use a Dualco grease gun to shoot the inside of the drop out with grease to keep binding down as well. I don't still have your addy, but if you will PM it to me I can send you a pair. New nuts are bought on e-bay from VieVelo. (I wish I has a source for those in bulk!) Lemme know, MH
After it comes out I always use Stainless screws as a replacement which kind of keeps the rust binding down. I also always coat the threads with a light coat of grease and use a Dualco grease gun to shoot the inside of the drop out with grease to keep binding down as well. I don't still have your addy, but if you will PM it to me I can send you a pair. New nuts are bought on e-bay from VieVelo. (I wish I has a source for those in bulk!) Lemme know, MH
07-17-20, 07:23 PM
#16
1/2 as far in 2x the time
Join Date: Nov 2013
Location: Northern Bergen County, NJ
Posts: 1,746
Bikes: Yes, Please.
Mentioned: 13 Post(s)
Tagged: 0 Thread(s)
Quoted: 499 Post(s)
Liked 285 Times
in
222 Posts
HLloyd def seems to be the go-to. Interesting life history there. Mine came from the daughter of the original owner.
She used it to commute for years to college and grad. school. Career lead to car and
a modern bike. Lucky me.
Want to sell/trade a dozen of those screws? I have some but need more...
She used it to commute for years to college and grad. school. Career lead to car and
a modern bike. Lucky me.
Want to sell/trade a dozen of those screws? I have some but need more...
__________________
I seem to have lost what little mind I had left before this all started.
I seem to have lost what little mind I had left before this all started.
07-17-20, 09:14 PM
#17
Friendship is Magic
Thread Starter
Join Date: Nov 2010
Location: Sacramento, CA
Posts: 22,984
Bikes: old ones
Mentioned: 304 Post(s)
Tagged: 0 Thread(s)
Quoted: 26415 Post(s)
Liked 10,380 Times
in
7,208 Posts
HLloyd def seems to be the go-to. Interesting life history there. Mine came from the daughter of the original owner.
She used it to commute for years to college and grad. school. Career lead to car and
a modern bike. Lucky me.
Want to sell/trade a dozen of those screws? I have some but need more...
She used it to commute for years to college and grad. school. Career lead to car and
a modern bike. Lucky me.
Want to sell/trade a dozen of those screws? I have some but need more...
If you have no luck, PM me and tell me what sort of length you are looking for. Otherwise, I might send you something that is too long for your intended use.
07-17-20, 09:42 PM
#18
1/2 as far in 2x the time
Join Date: Nov 2013
Location: Northern Bergen County, NJ
Posts: 1,746
Bikes: Yes, Please.
Mentioned: 13 Post(s)
Tagged: 0 Thread(s)
Quoted: 499 Post(s)
Liked 285 Times
in
222 Posts
Thx, I'll do that. I usually just don't bother, I'm not paying up for annoying repro stuff. I'm not exactly doing "seconds count" type wheel changes, my thumbs are sufficient, but it's time to put some stuff up for sale... I'm a dab hand with a cutoff wheel, and dremel.
If you happen to know of, or find paint or enamel that matches Holdsworth orange, please LMK. Matching colors is not one of my strong suits, I usually do ok eventually, more from stubbornness than skill.
If you happen to know of, or find paint or enamel that matches Holdsworth orange, please LMK. Matching colors is not one of my strong suits, I usually do ok eventually, more from stubbornness than skill.
__________________
I seem to have lost what little mind I had left before this all started.
I seem to have lost what little mind I had left before this all started.
07-17-20, 10:41 PM
#19
www.theheadbadge.com

Join Date: Sep 2005
Location: Southern Florida
Posts: 28,513
Bikes: https://www.theheadbadge.com
Mentioned: 124 Post(s)
Tagged: 0 Thread(s)
Quoted: 2422 Post(s)
Liked 4,395 Times
in
2,092 Posts
Sorry to be late to the party and to sidetrack the conversation - but in 3alarmer's case, there appeared to be just enough adjuster screw there to tack weld a 5 or 6mm nut onto it with a MIG welder - and then pray a deep socket will give you enough leverage as it tries to bend and twist coming out.
Not an option if you don't have the welder, but an alternate thought. Might be a valid idea for a really stuck one.
-Kurt
Not an option if you don't have the welder, but an alternate thought. Might be a valid idea for a really stuck one.
-Kurt
__________________


07-18-20, 10:05 AM
#20
Senior Member
hey! did you just get that out near Modesto!  beat me to it! if you ever get bored of her...
beat me to it! if you ever get bored of her...
Likes For jetboy:
07-18-20, 10:37 AM
#21
Senior Member

Join Date: Oct 2014
Location: GWN
Posts: 2,538
Mentioned: 27 Post(s)
Tagged: 0 Thread(s)
Quoted: 1858 Post(s)
Liked 606 Times
in
403 Posts
Thx, I'll do that. I usually just don't bother, I'm not paying up for annoying repro stuff. I'm not exactly doing "seconds count" type wheel changes, my thumbs are sufficient, but it's time to put some stuff up for sale... I'm a dab hand with a cutoff wheel, and dremel.
If you happen to know of, or find paint or enamel that matches Holdsworth orange, please LMK. Matching colors is not one of my strong suits, I usually do ok eventually, more from stubbornness than skill.
If you happen to know of, or find paint or enamel that matches Holdsworth orange, please LMK. Matching colors is not one of my strong suits, I usually do ok eventually, more from stubbornness than skill.
https://paintref.com/cgi-bin/colorco...=50&size=large
Last edited by Wileyone; 07-18-20 at 10:54 AM.
07-18-20, 11:00 AM
#22
Bike Butcher of Portland

Join Date: Jul 2014
Location: Portland, OR
Posts: 11,637
Bikes: It's complicated.
Mentioned: 1299 Post(s)
Tagged: 0 Thread(s)
Quoted: 4680 Post(s)
Liked 5,798 Times
in
2,283 Posts
I was able to drill out a set of these, once. I was extremely lucky. Once I got about halfway the bit caught the screw and turned it out.
I also once used a rolled up bath towel and snapped the head off a fly in mid-flight.
I think the odds of repeating both are the same order of magnitude.
I also once used a rolled up bath towel and snapped the head off a fly in mid-flight.
I think the odds of repeating both are the same order of magnitude.
__________________
If someone tells you that you have enough bicycles and you don't need any more, stop talking to them. You don't need that kind of negativity in your life.
If someone tells you that you have enough bicycles and you don't need any more, stop talking to them. You don't need that kind of negativity in your life.
Likes For gugie:
07-18-20, 06:08 PM
#23
Old fart

Join Date: Nov 2004
Location: Appleton WI
Posts: 24,784
Bikes: Several, mostly not name brands.
Mentioned: 153 Post(s)
Tagged: 0 Thread(s)
Quoted: 3587 Post(s)
Liked 3,400 Times
in
1,934 Posts
+1 this. https://en.wikipedia.org/wiki/Electr...arge_machining
If you really need to get those out and are willing to spend a little, EDM is the way to go.
Otherwise, those bolts serve little practical purpose outside of competitive racing, where they facilitate quick wheel changes. Break 'em off flush with the dropout and pretend they never existed.
If you really need to get those out and are willing to spend a little, EDM is the way to go.
Otherwise, those bolts serve little practical purpose outside of competitive racing, where they facilitate quick wheel changes. Break 'em off flush with the dropout and pretend they never existed.
07-18-20, 06:56 PM
#24
Friendship is Magic
Thread Starter
Join Date: Nov 2010
Location: Sacramento, CA
Posts: 22,984
Bikes: old ones
Mentioned: 304 Post(s)
Tagged: 0 Thread(s)
Quoted: 26415 Post(s)
Liked 10,380 Times
in
7,208 Posts
07-19-20, 04:22 AM
#25
Senior Member
Join Date: Oct 2014
Location: GWN
Posts: 2,538
Mentioned: 27 Post(s)
Tagged: 0 Thread(s)
Quoted: 1858 Post(s)
Liked 606 Times
in
403 Posts
...thanks for this. I was just experimenting with some colors I have on hand, and the closest I could get was an undercoat of light yellow with a final coat of true orange, both from Rustoleum. But if I can get something that is not quite so iffy in terms of ease of application, that's gonna be a lot better.
