


The Dockless Donor: The 1980 Raleigh Sports will live again
 11-16-19, 07:58 PM
#101

www.theheadbadge.com
Thread Starter

Join Date: Sep 2005
Location: Southern Florida
Posts: 28,513
Bikes: https://www.theheadbadge.com
Mentioned: 124 Post(s)
Tagged: 0 Thread(s)
Quoted: 2422 Post(s)
Liked 4,395 Times
in
2,092 Posts
I might ruin it some more and change out the rear fender for some kind of bike share looking fender with big advertising skirts on it though. I figure it'll help to hide the shiny, theft-magnet of a hub that doesn't work that well
 .
.That, and the original rear fender is a BIG pain in the butt for removing the rear wheel - the stays are not long enough to properly space it from the tire, and it makes installation and removal a nightmare.
-Kurt
P.S.: Didn't have time to work on any of the other bikes today, because of this:
__________________


Likes For cudak888:
11-22-19, 03:34 AM
#102
Overdoing projects

Join Date: Oct 2011
Location: Rotterdam, former republic of the Netherlands
Posts: 2,397
Bikes: Batavus Randonneur GL, Gazelle Orange Excellent, Gazelle Super Licht, Gazelle Grand Tourist, Gazelle Lausanne, Gazelle Tandem, Koga-Miyata SilverAce, Koga-Miyata WorldTraveller
Mentioned: 58 Post(s)
Tagged: 0 Thread(s)
Quoted: 784 Post(s)
Liked 1,238 Times
in
686 Posts
I'm still open to the idea if the NL sources you found still have both the left and right versions. If not, I might spring for the black ones, which - IIRC - were available both left and right.
[...]
What brand of dynamo hub is on that Gazelle? It looks like a Sturmey GH6, but the details aren't right. I wouldn't mind putting one of those on the Bottecchia.
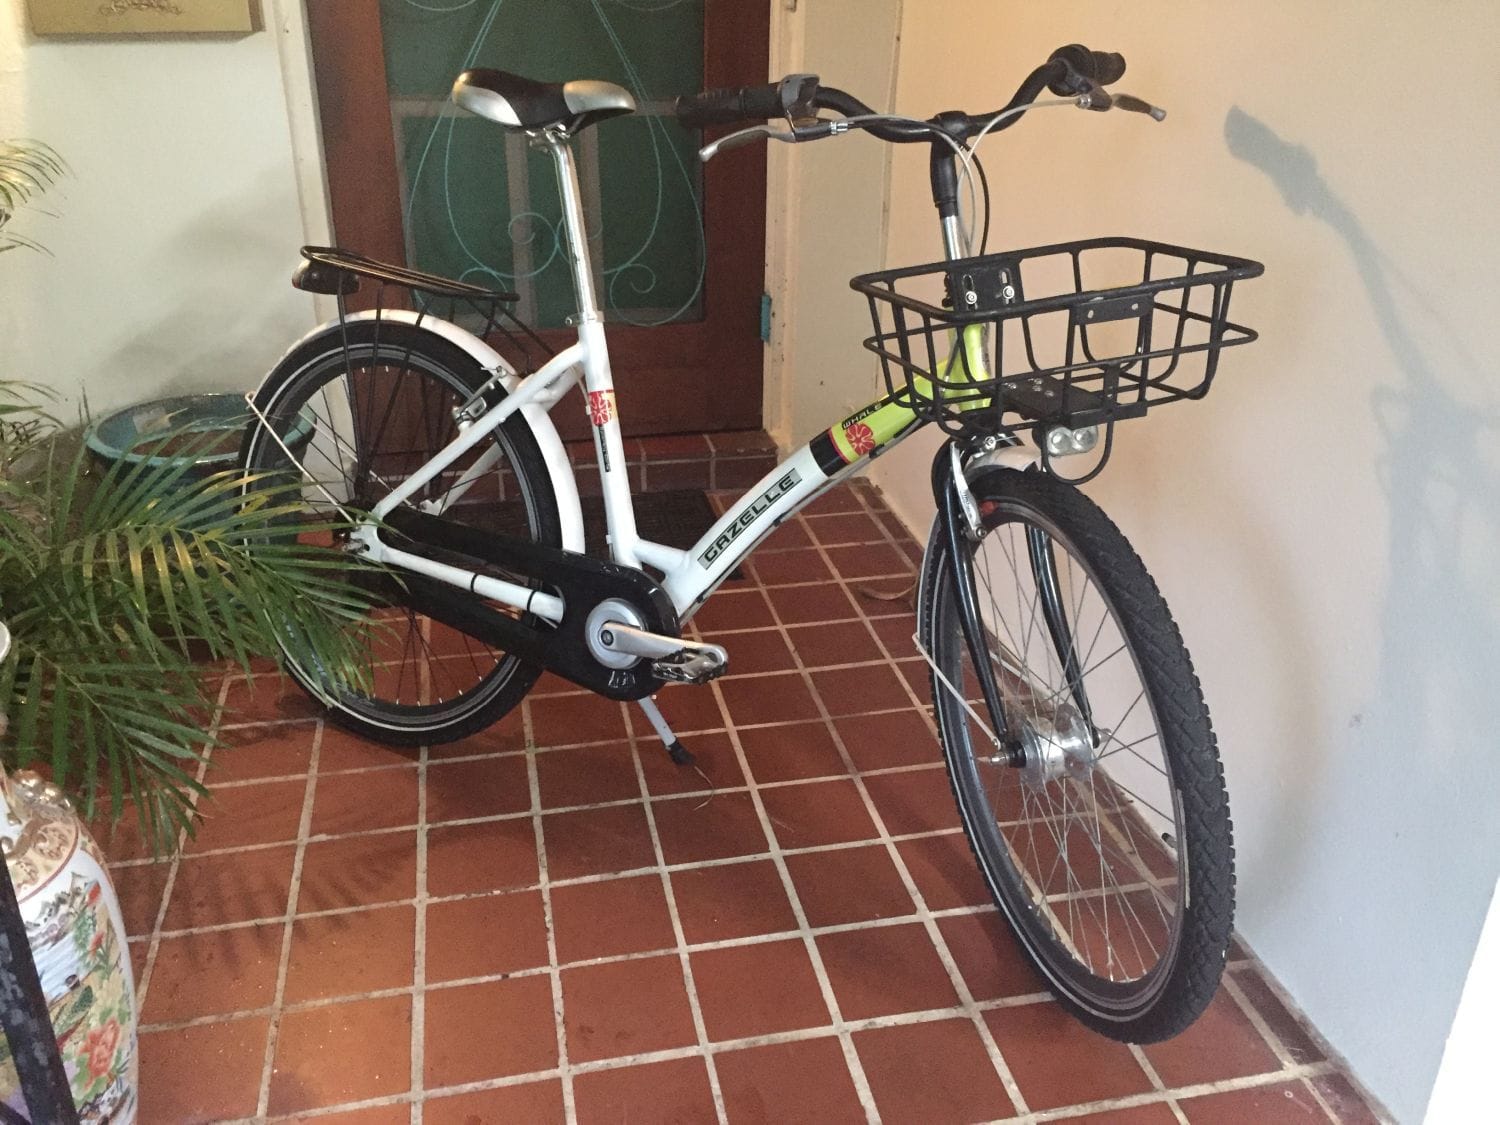
I never realized the Gazelle Whale was a children's bike with 26 inch wheels over here. I even found one in the same color scheme when I looked for them on Marktplaats.
The addition of a basket and different chaincase do change the bike for the better.

Let's see this weekend about those brake levers.
Likes For JaccoW:
11-22-19, 06:12 AM
#103
www.theheadbadge.com
Thread Starter
Join Date: Sep 2005
Location: Southern Florida
Posts: 28,513
Bikes: https://www.theheadbadge.com
Mentioned: 124 Post(s)
Tagged: 0 Thread(s)
Quoted: 2422 Post(s)
Liked 4,395 Times
in
2,092 Posts
It has a simple sidewall dynamo. You're partially right. It has 70's steel drum brakes which happen to share most parts with the GH6 dynohub.
I never realized the Gazelle Whale was a children's bike with 26 inch wheels over here. I even found one in the same color scheme when I looked for them on Marktplaats.
The addition of a basket and different chaincase do change the bike for the better.
Let's see this weekend about those brake levers.
Yep, kiddie bike. Looks a bit ridiculous with such a long seatpost, but it's a nice rider. Haven't had time to rip through the rear wheel, as I'm busy on Leo, the Bottecchia right now (also an IGH project):
-Kurt
__________________
Likes For cudak888:
11-24-19, 09:30 PM
#104
www.theheadbadge.com
Thread Starter
Join Date: Sep 2005
Location: Southern Florida
Posts: 28,513
Bikes: https://www.theheadbadge.com
Mentioned: 124 Post(s)
Tagged: 0 Thread(s)
Quoted: 2422 Post(s)
Liked 4,395 Times
in
2,092 Posts
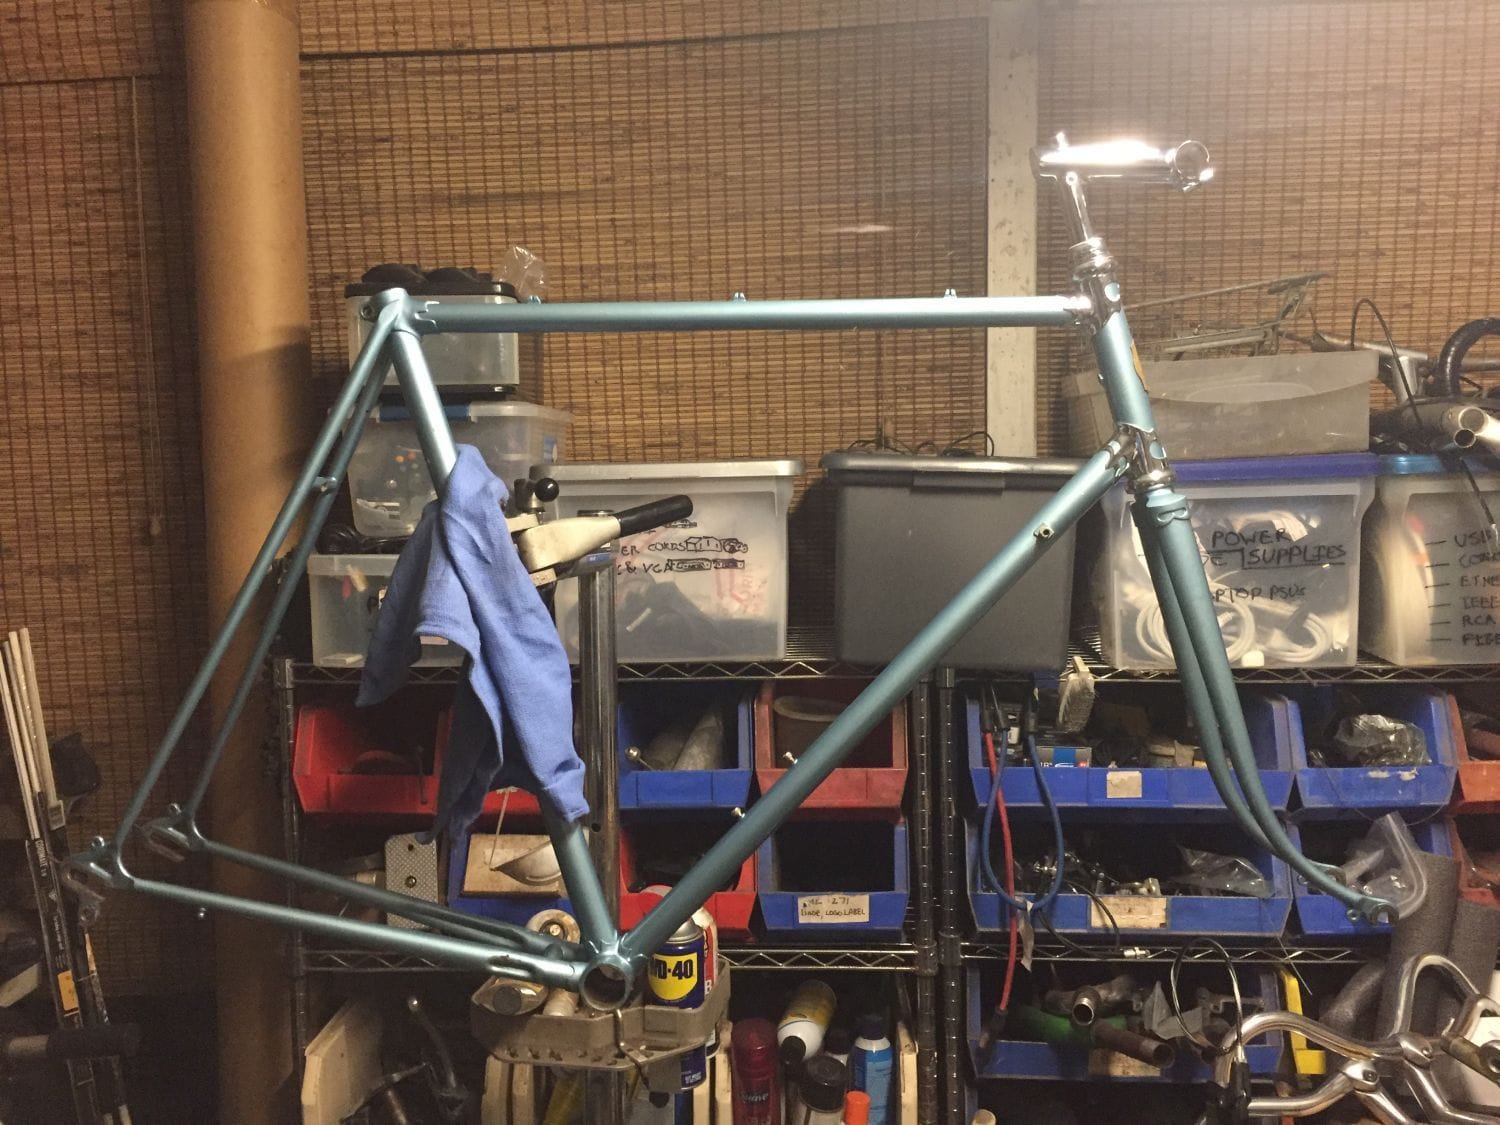
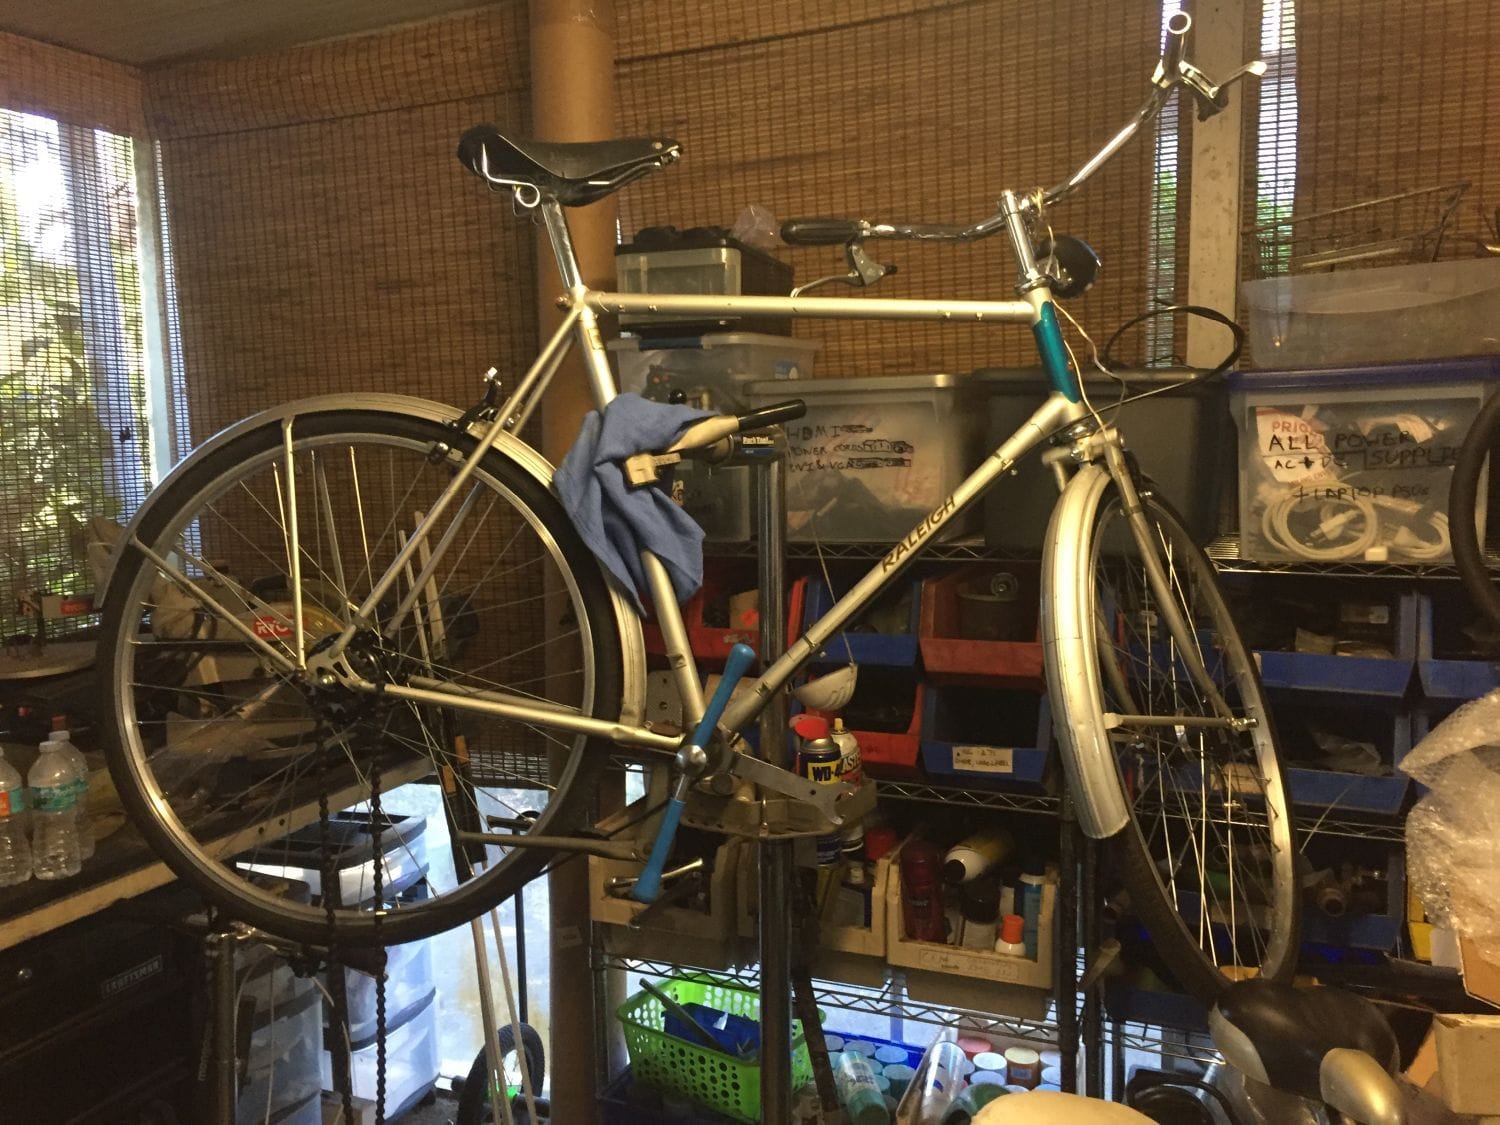
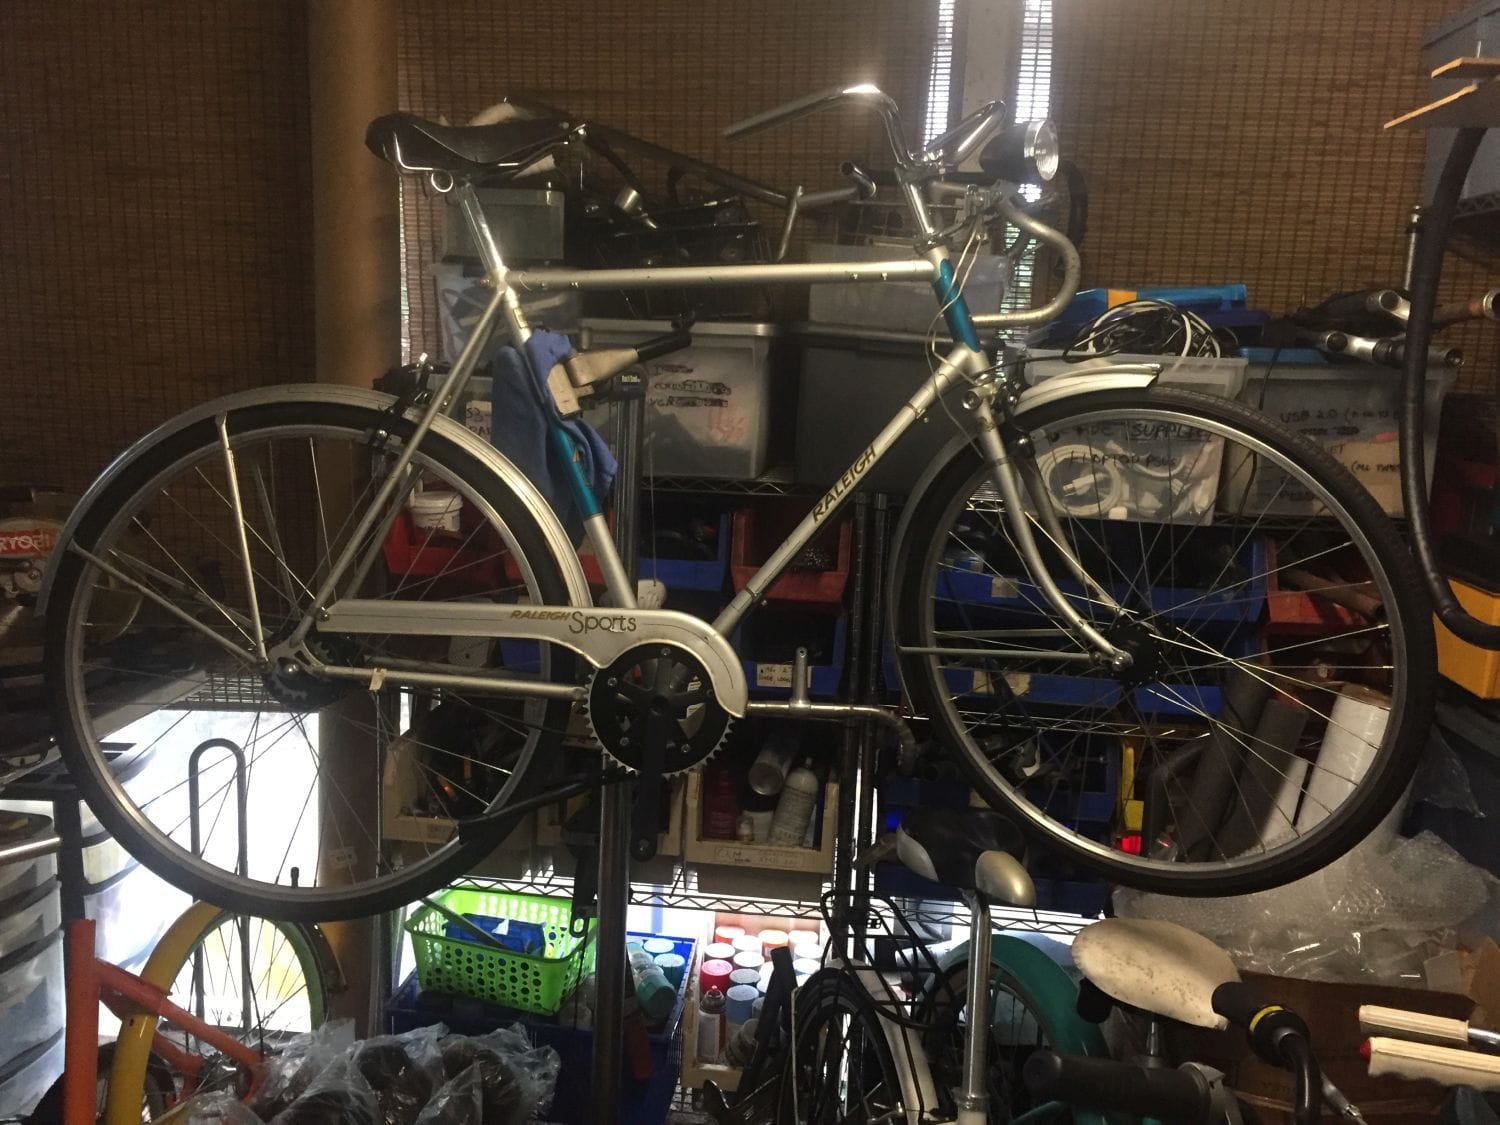
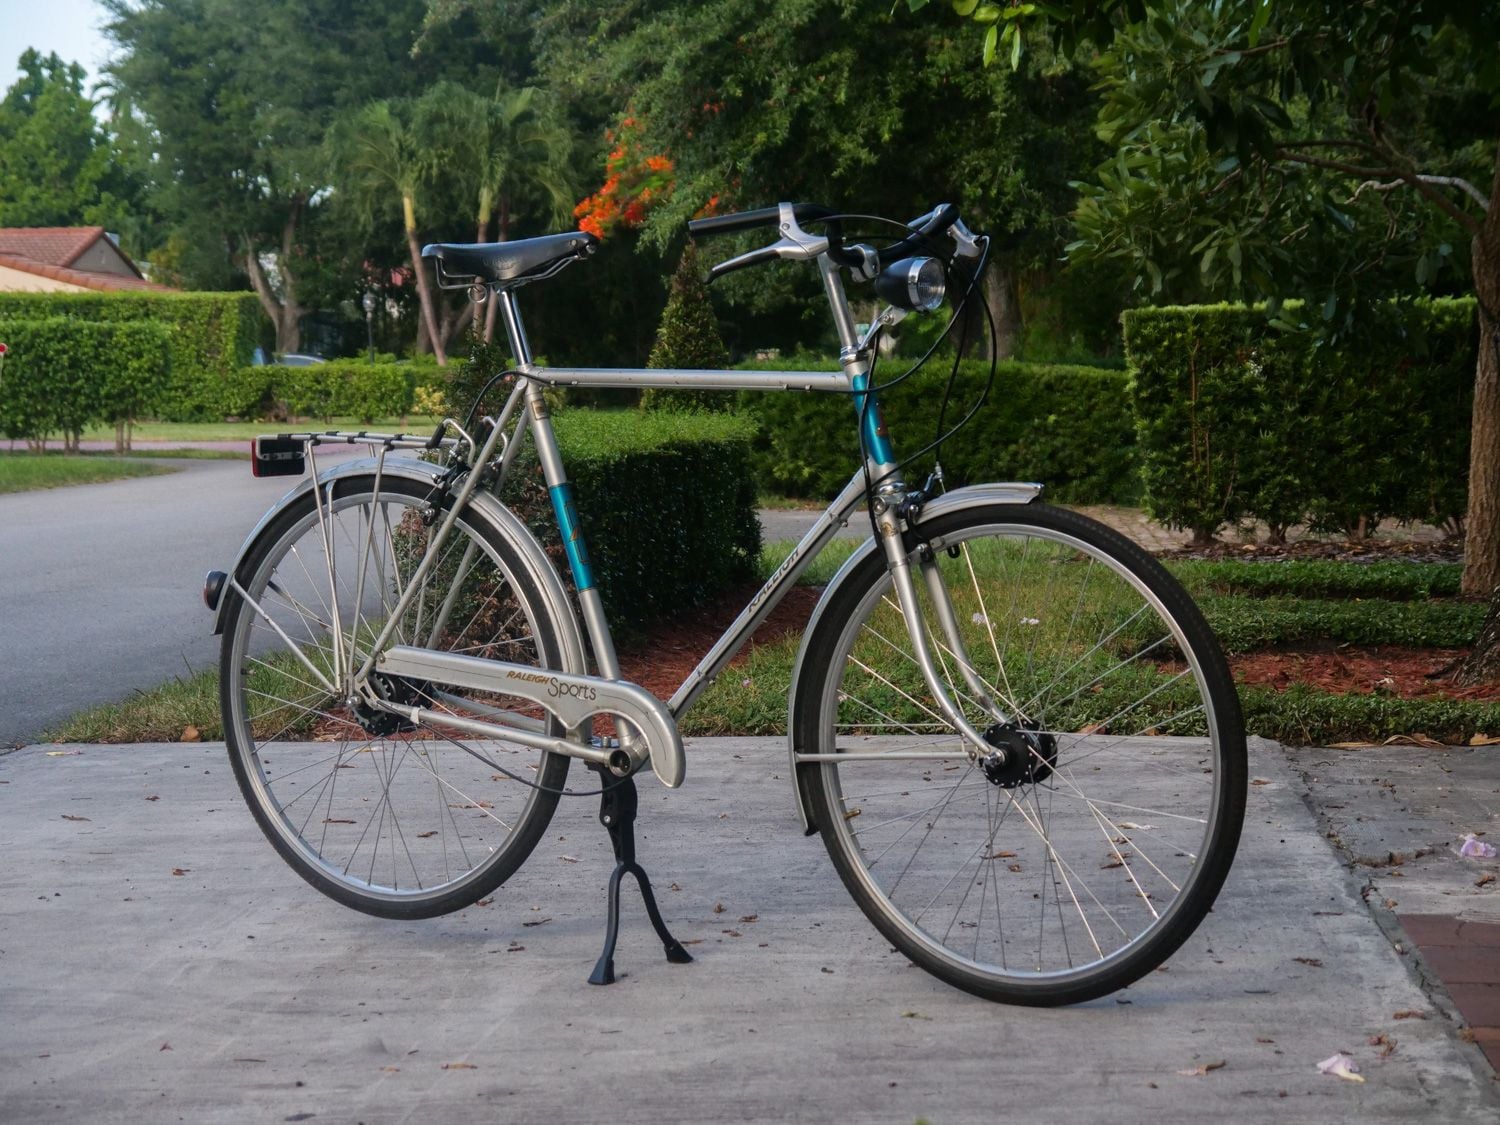
The lighting so happened to be just right, so I snapped this with the mirrorless while shuffling bikes:
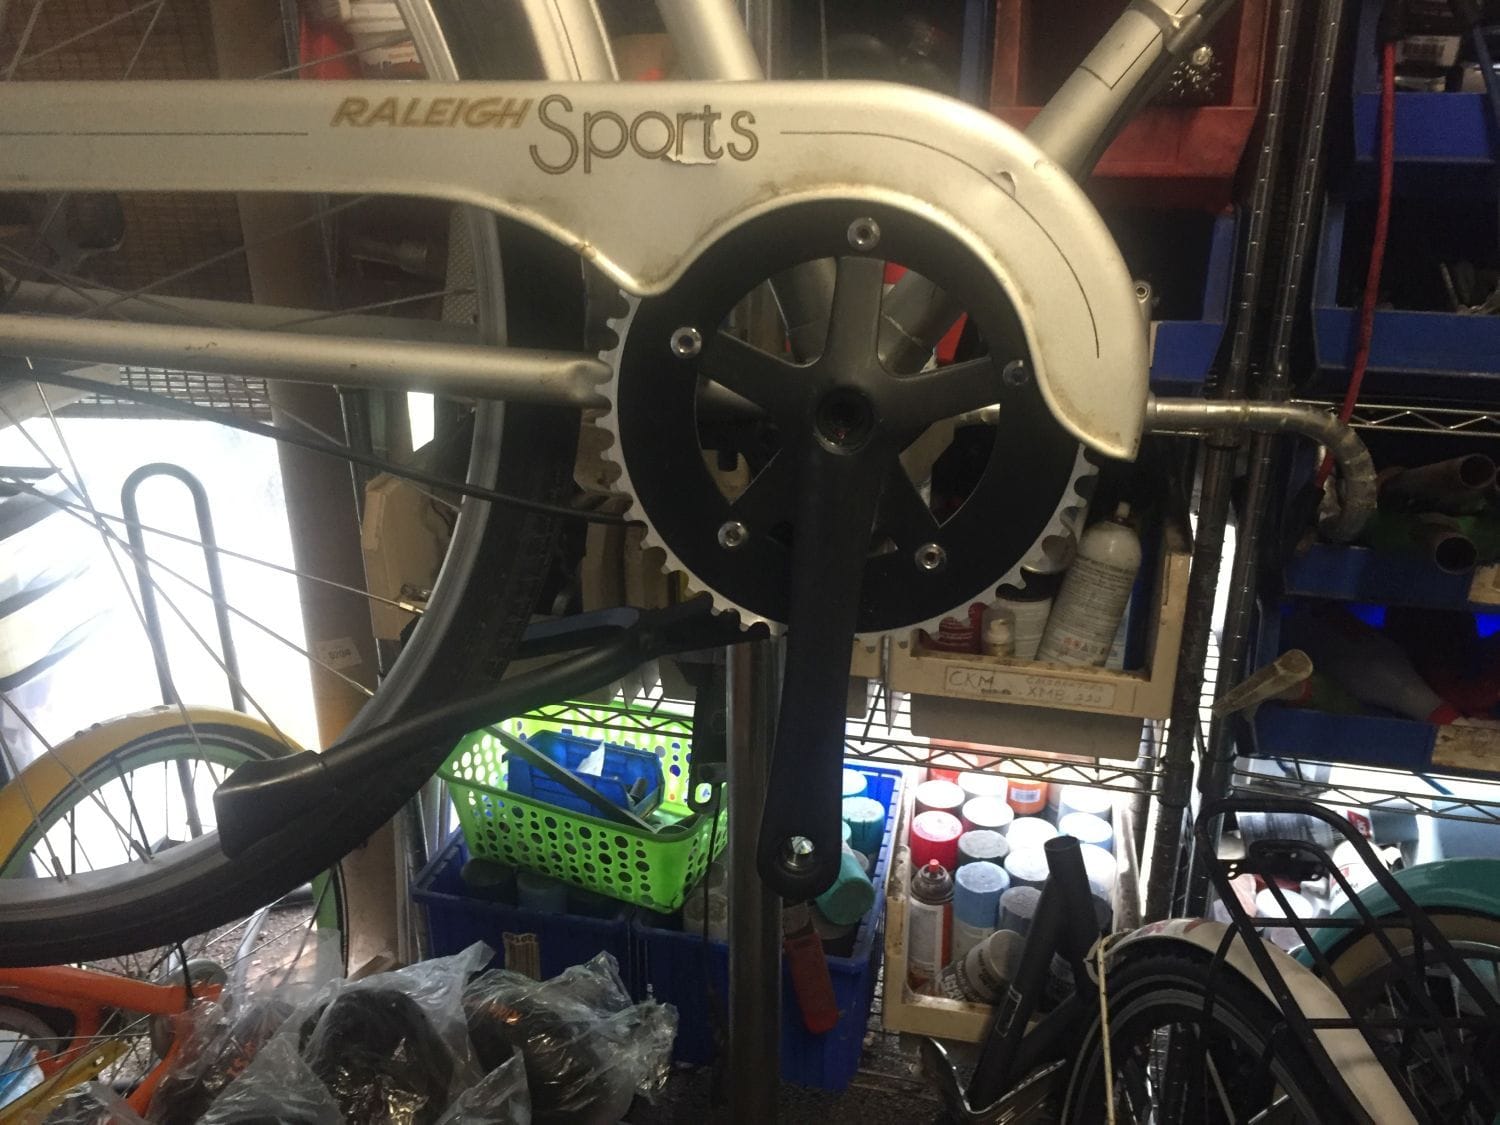
Still very much on the fence about what to do with the crank. I double-checked the BB to be sure, and it's 26 TPI - the one constant despite the myriad of small modernizations on these later frames.
Tempted to put on TA 175mm arms if I can find a really interesting single chainring that looks more like the ring on a cottered crank than the usual six-spoke design. I'm much more partial to a three-pin crank though; I might have expressed this already.
-Kurt
__________________
11-28-19, 10:55 AM
#105
www.theheadbadge.com
Thread Starter
Join Date: Sep 2005
Location: Southern Florida
Posts: 28,513
Bikes: https://www.theheadbadge.com
Mentioned: 124 Post(s)
Tagged: 0 Thread(s)
Quoted: 2422 Post(s)
Liked 4,395 Times
in
2,092 Posts
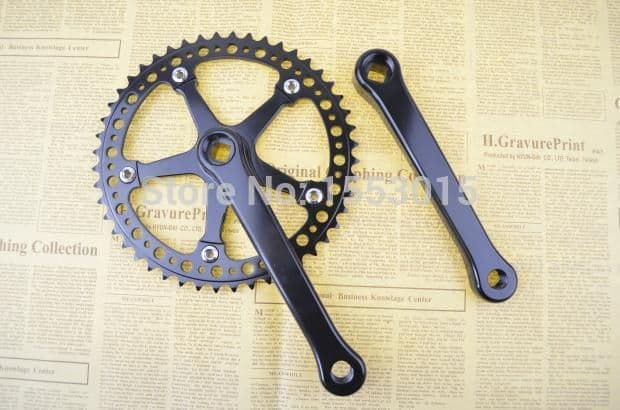
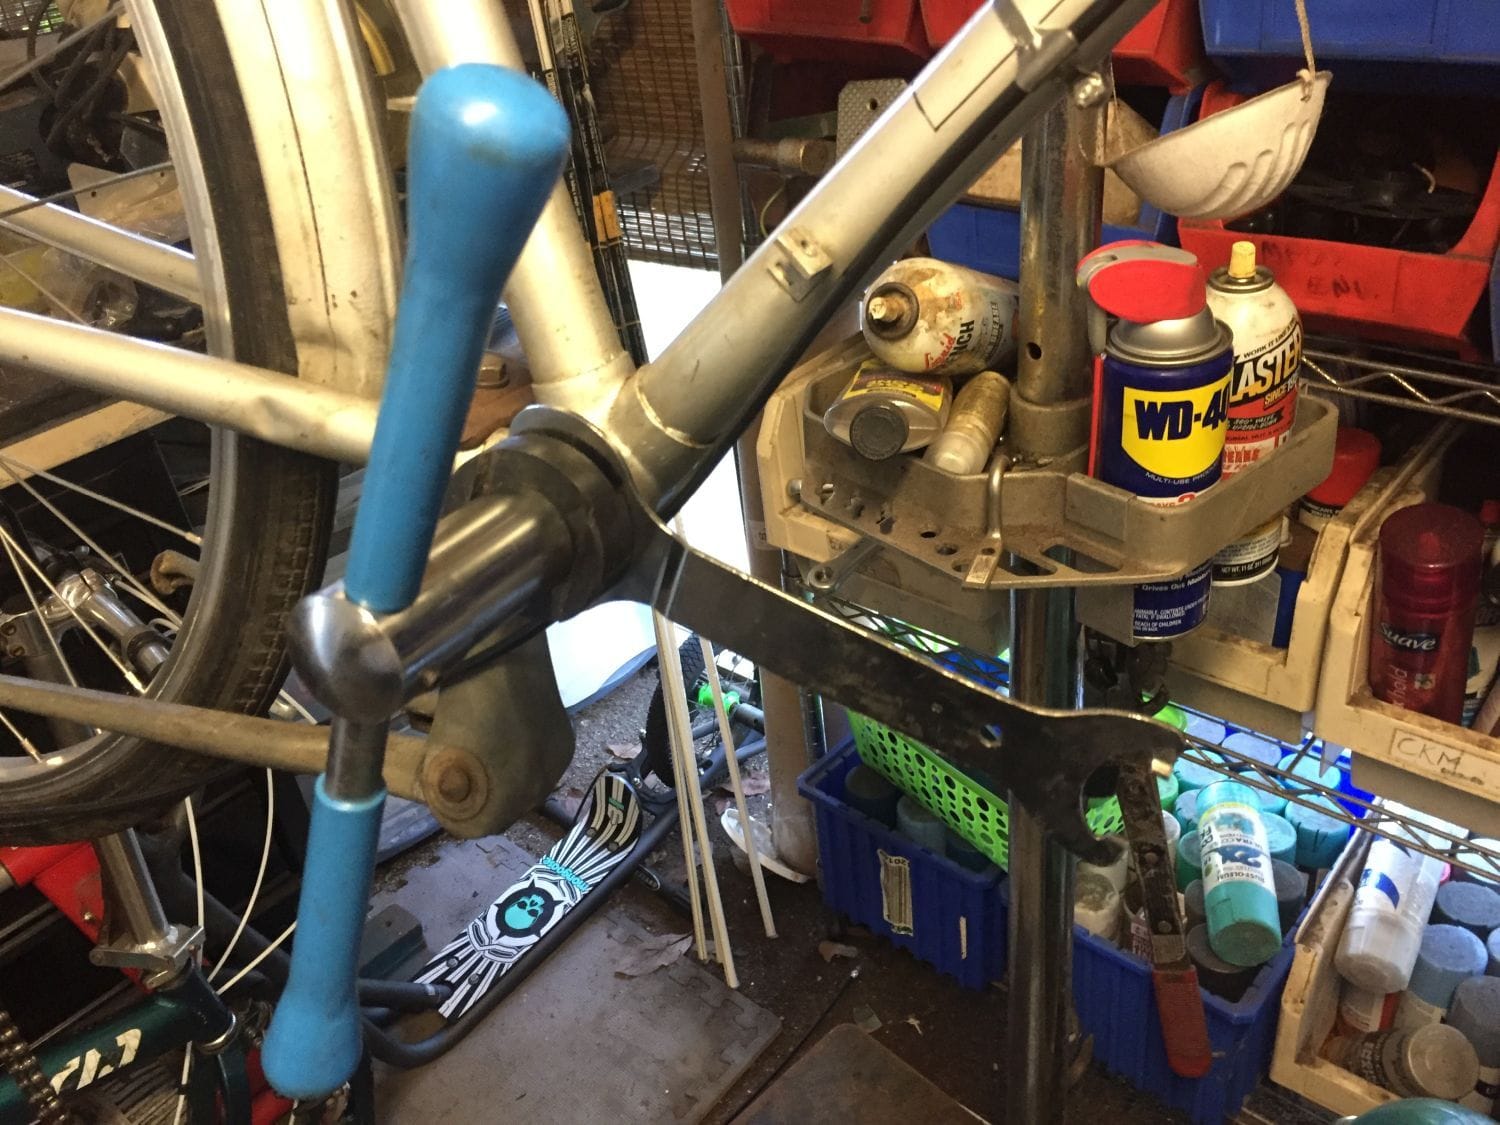
No more procrastinating. Saw this crank on AliExpress and decided this project is going down the square taper rabbit hole. Not keen on the chainring, but I love the fluteless Nuovo Record crank copy.
Decided to tap the frame to 24tpi too with my VAR BB tool. Drive side cup didn't fight me too much on the removal either. (Why do some keep calling it a fixed cup? It's threaded. Just because it is painted along with the frame and is a PITA to remove doesn't make it fixed).
The three-threads engagement crowd can play conspiracy theorist on this all they want - it's done.
Removing the fixed cup when you don't have the exact adapter necessary on your VAR drive side cup tool..
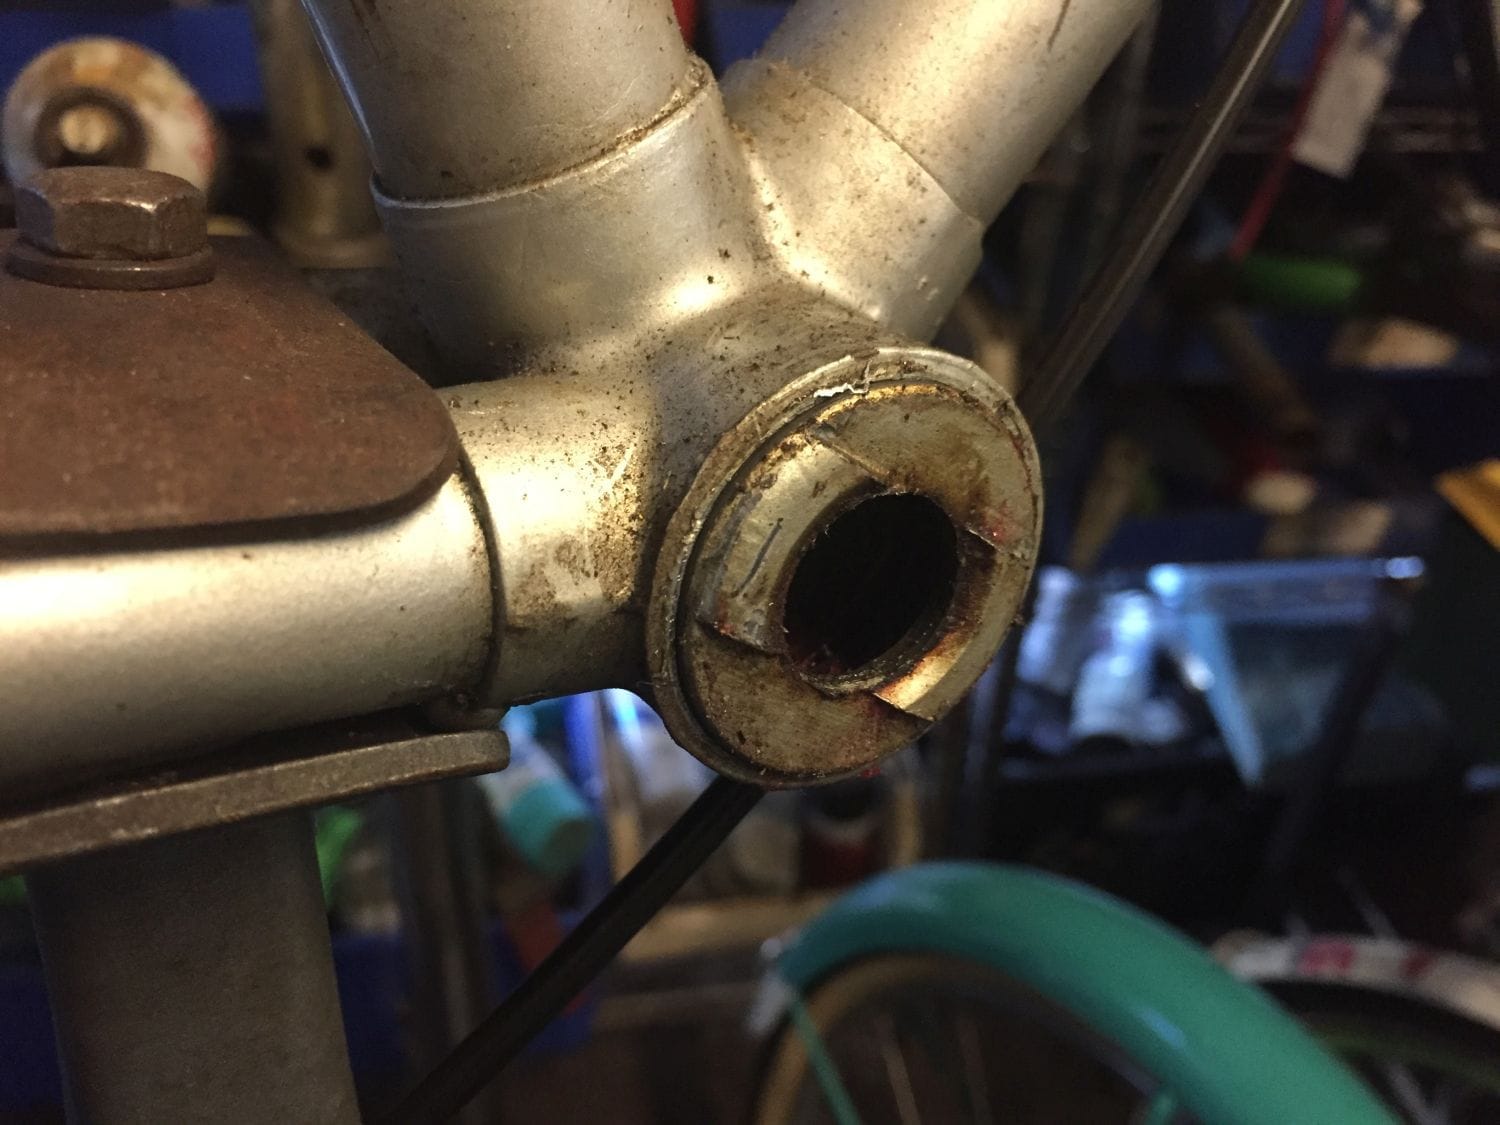
Threaded. Also faced the BB afterwards.
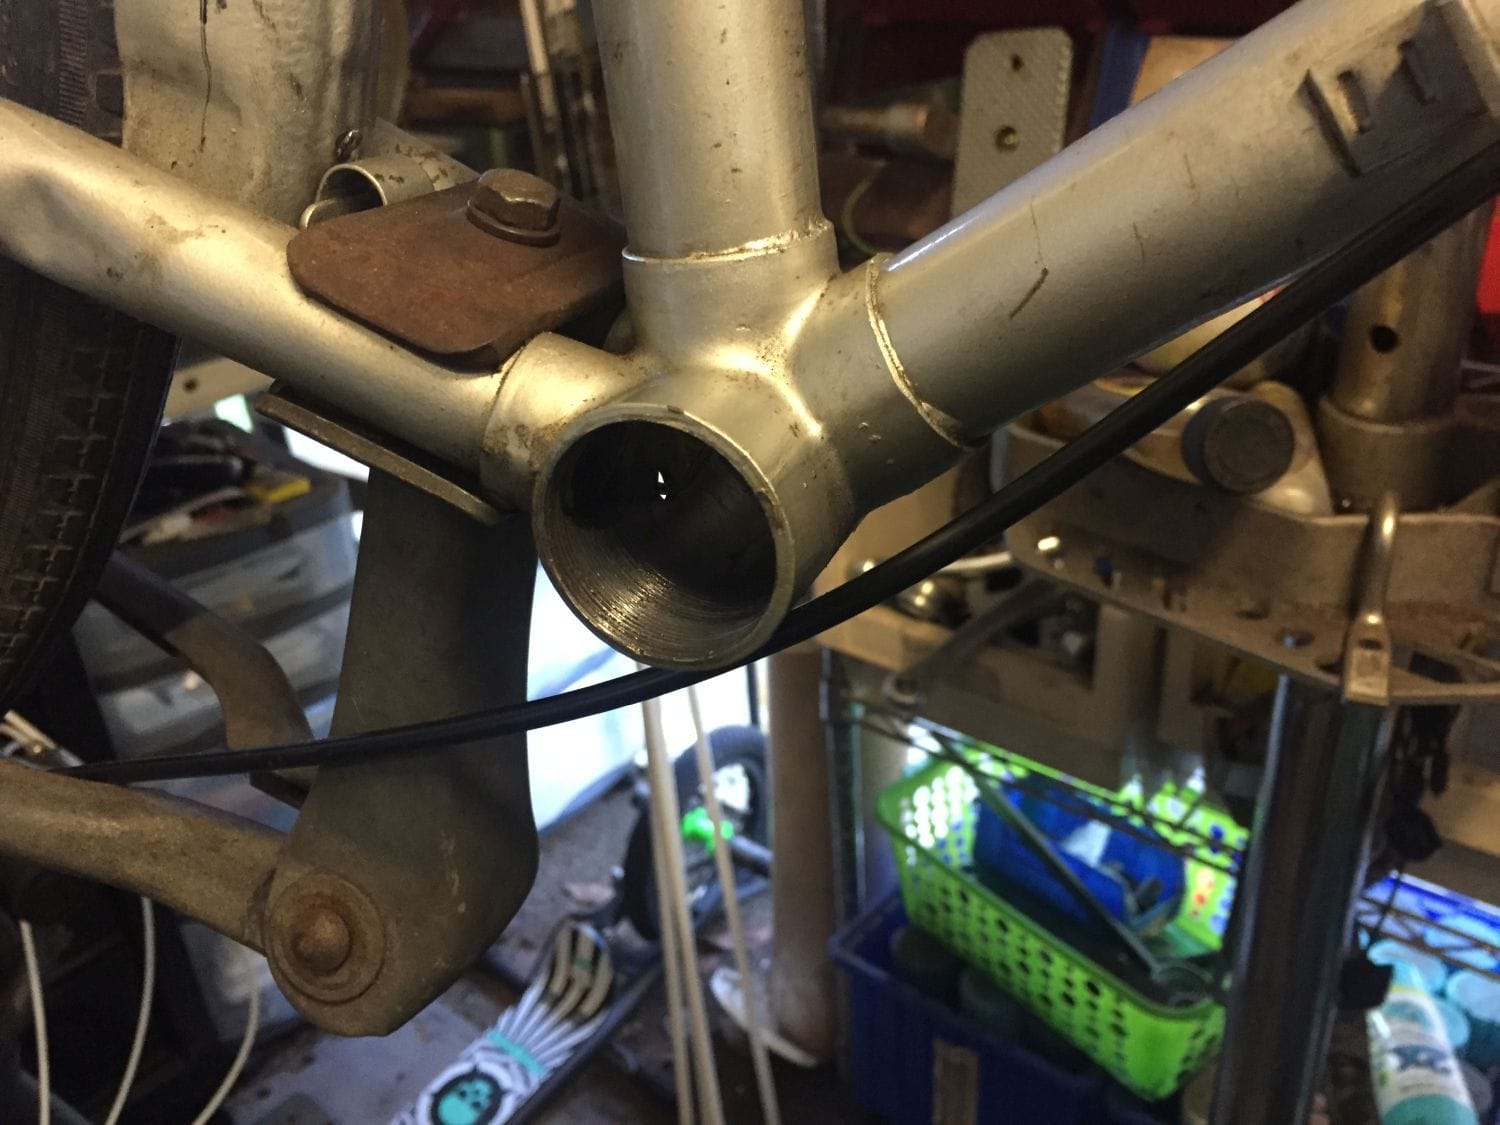
BB is installed temporarily; will put it in with some Loctite once I have everything set where I want it.

-Kurt
Decided to tap the frame to 24tpi too with my VAR BB tool. Drive side cup didn't fight me too much on the removal either. (Why do some keep calling it a fixed cup? It's threaded. Just because it is painted along with the frame and is a PITA to remove doesn't make it fixed).
The three-threads engagement crowd can play conspiracy theorist on this all they want - it's done.
Removing the fixed cup when you don't have the exact adapter necessary on your VAR drive side cup tool..
Threaded. Also faced the BB afterwards.
BB is installed temporarily; will put it in with some Loctite once I have everything set where I want it.
-Kurt
__________________
Likes For cudak888:
11-30-19, 11:37 PM
#106
www.theheadbadge.com
Thread Starter
Join Date: Sep 2005
Location: Southern Florida
Posts: 28,513
Bikes: https://www.theheadbadge.com
Mentioned: 124 Post(s)
Tagged: 0 Thread(s)
Quoted: 2422 Post(s)
Liked 4,395 Times
in
2,092 Posts
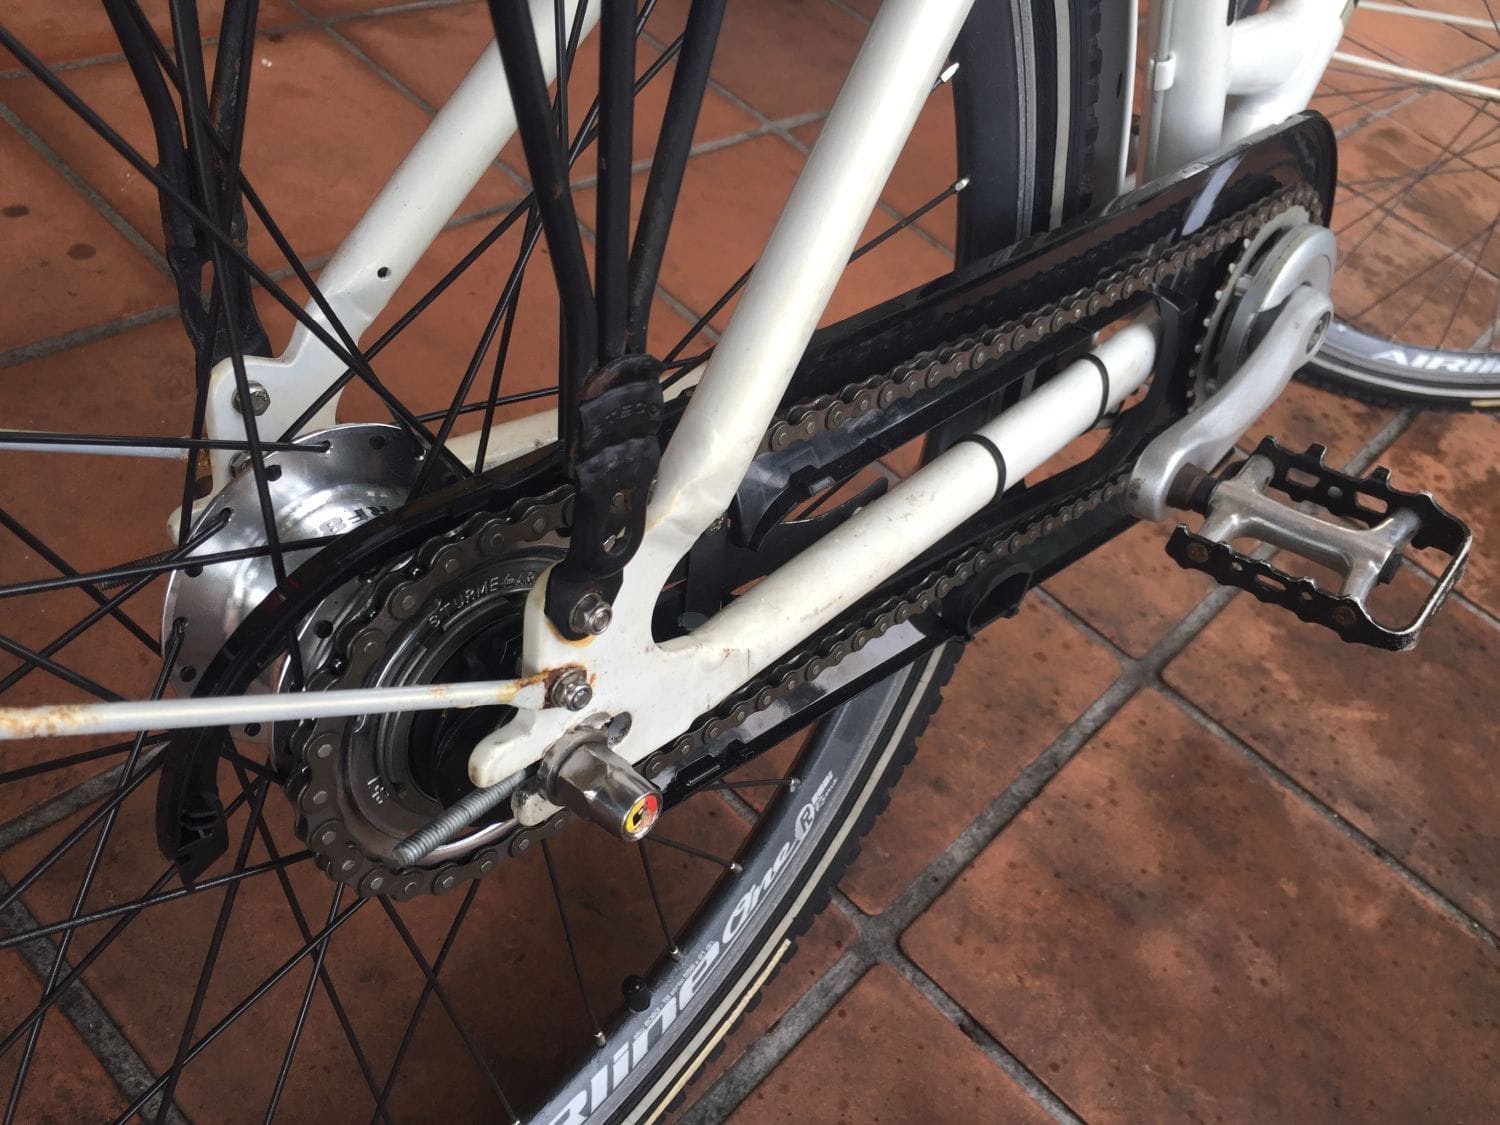
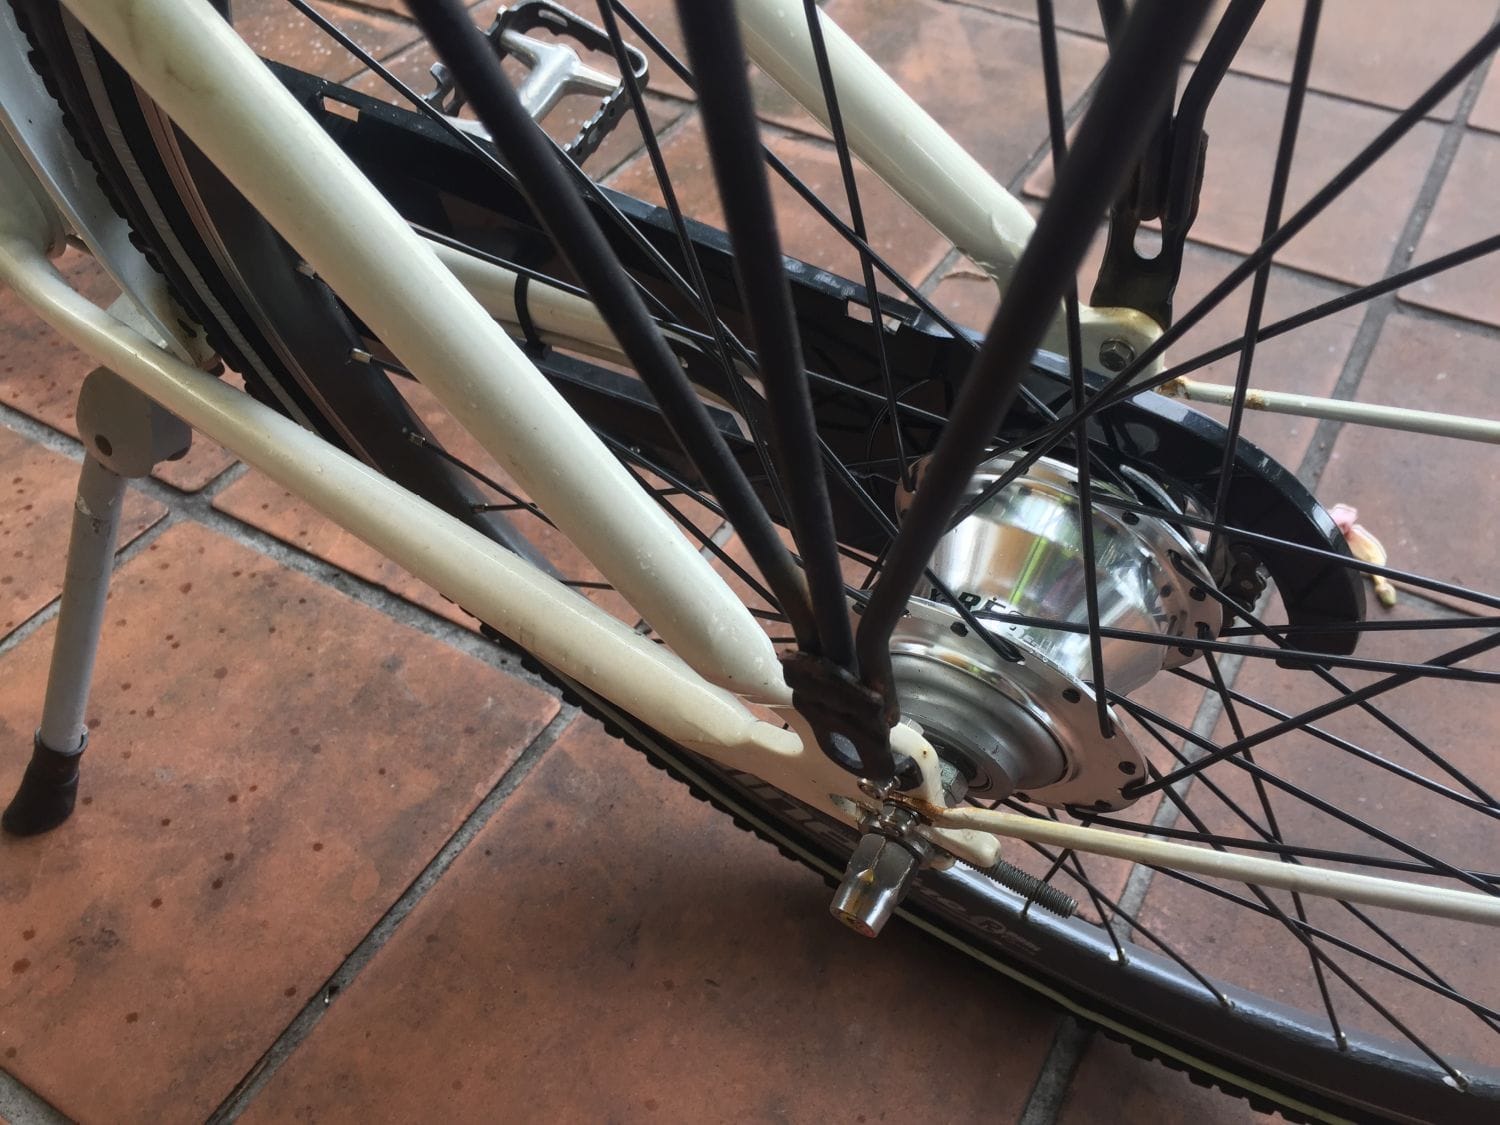
Back to the Gazelle again. Started tearing into the first-gen X-RF8 hub from dweenk to find out what's amiss with 4th and 6th gear - mostly 4th.
One thing you've got to love about Sturmey is that their bearing cones haven't changed a bit. I could throw this cone on a 1936 AW if I wanted.
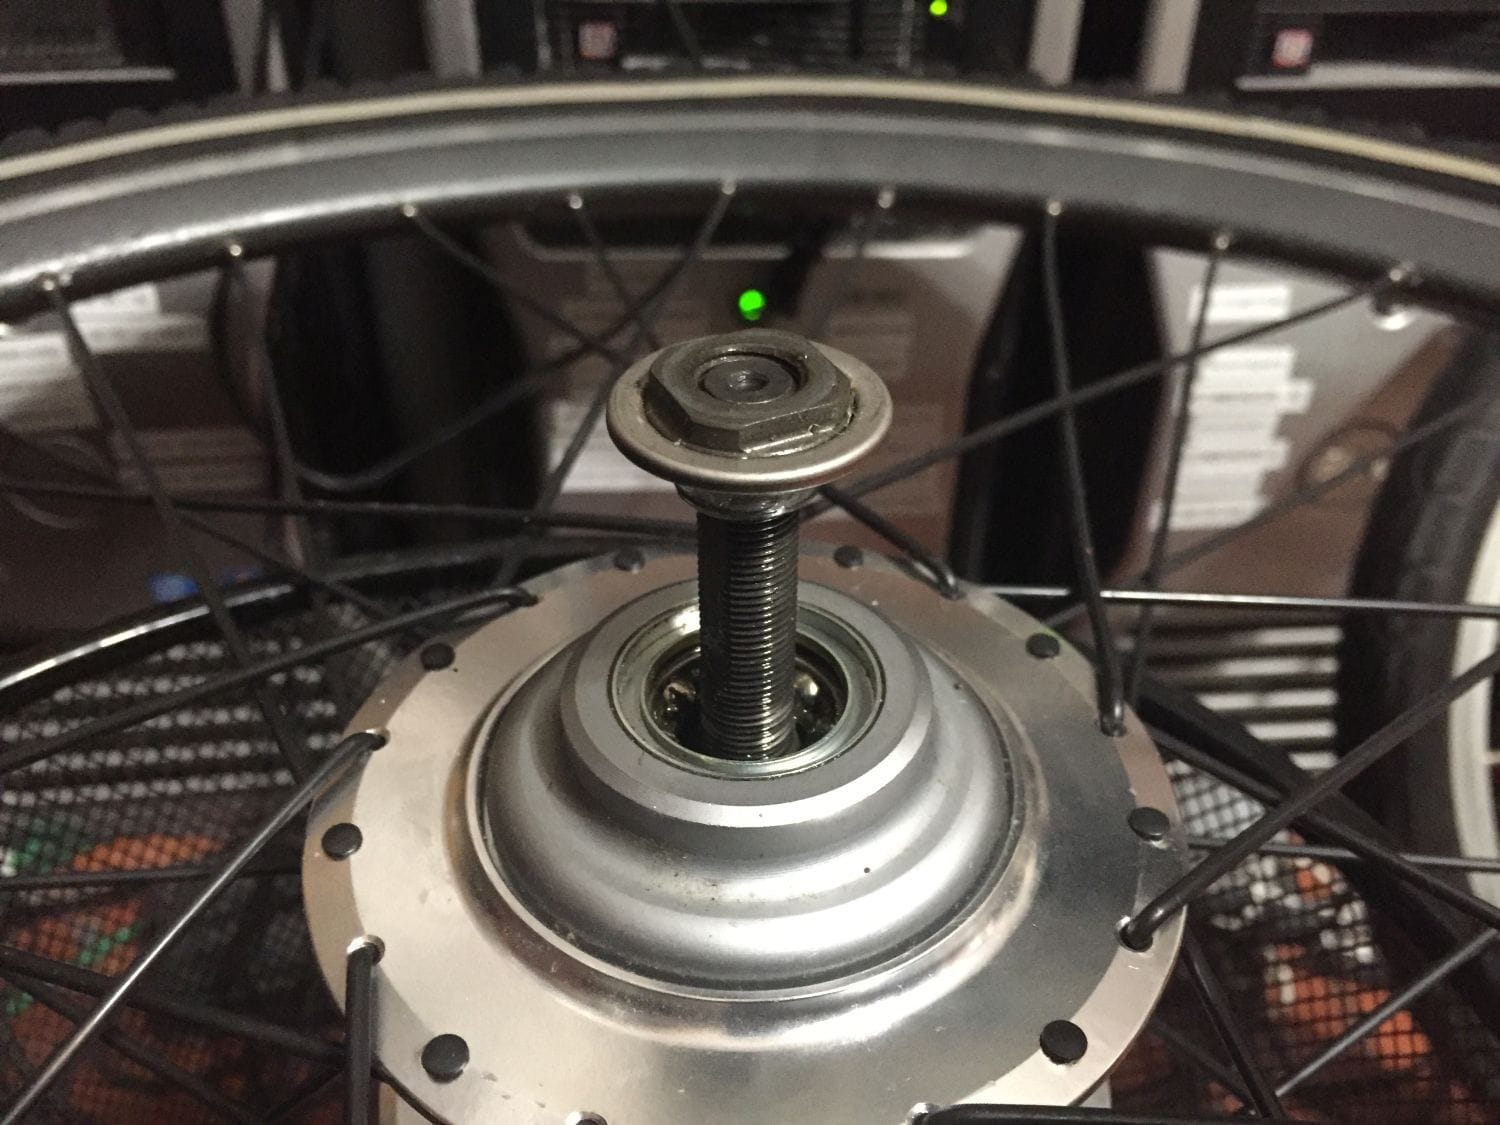
And for the second time in a week, I have another Sturmey-Archer washer-not-in-the-manual rant: Those following my "Leo the Bottecchia" thread, would have read my complaint about the failure of Sturmey-Archer to document a single - but critical - washer used in the pre-1952 GH6 Dynohub.
Well, sure enough, guess what? They did it again:

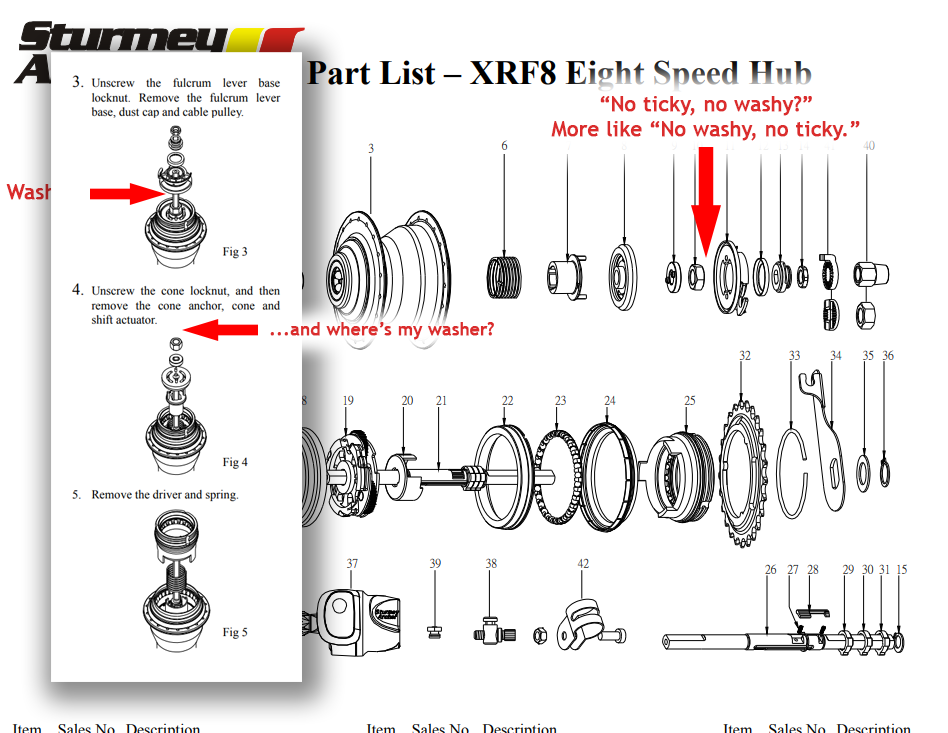
I've got it torn down to the ball ring now. These 8-speed ball ring tools seem to be fairly elusive, so I'm just going to take some scrap steel tomorrow, drill a hole for the axle in the middle, and drill/tap another pair of holes to put screws through - creating a big 'ol pin spanner. I want to avoid hammering it if I can.
Also, the manual says the ball ring unscrews clockwise (with left hand threads). Back in 2009, our very own rhm brought this up in his X-RF8 overhauling thread, but he also pointed out that the manual didn't cite the left-hand threads. The .PDF manual I have states "Loosen the ball ring clockwise," so Sturmey presumably revised this error. At any rate, I'm ready for anything...

-Kurt
One thing you've got to love about Sturmey is that their bearing cones haven't changed a bit. I could throw this cone on a 1936 AW if I wanted.
And for the second time in a week, I have another Sturmey-Archer washer-not-in-the-manual rant: Those following my "Leo the Bottecchia" thread, would have read my complaint about the failure of Sturmey-Archer to document a single - but critical - washer used in the pre-1952 GH6 Dynohub.
Well, sure enough, guess what? They did it again:
I've got it torn down to the ball ring now. These 8-speed ball ring tools seem to be fairly elusive, so I'm just going to take some scrap steel tomorrow, drill a hole for the axle in the middle, and drill/tap another pair of holes to put screws through - creating a big 'ol pin spanner. I want to avoid hammering it if I can.
Also, the manual says the ball ring unscrews clockwise (with left hand threads). Back in 2009, our very own rhm brought this up in his X-RF8 overhauling thread, but he also pointed out that the manual didn't cite the left-hand threads. The .PDF manual I have states "Loosen the ball ring clockwise," so Sturmey presumably revised this error. At any rate, I'm ready for anything...
-Kurt
__________________
Likes For cudak888:
12-01-19, 01:47 PM
#107
www.theheadbadge.com
Thread Starter
Join Date: Sep 2005
Location: Southern Florida
Posts: 28,513
Bikes: https://www.theheadbadge.com
Mentioned: 124 Post(s)
Tagged: 0 Thread(s)
Quoted: 2422 Post(s)
Liked 4,395 Times
in
2,092 Posts
Hub guts are out, and it looks virtually new inside. Zero chipped sun or pinion gears, or the gear rings. However, I did find one smoking gun, in the form of this tiny sliver of steel that popped out of the hub:
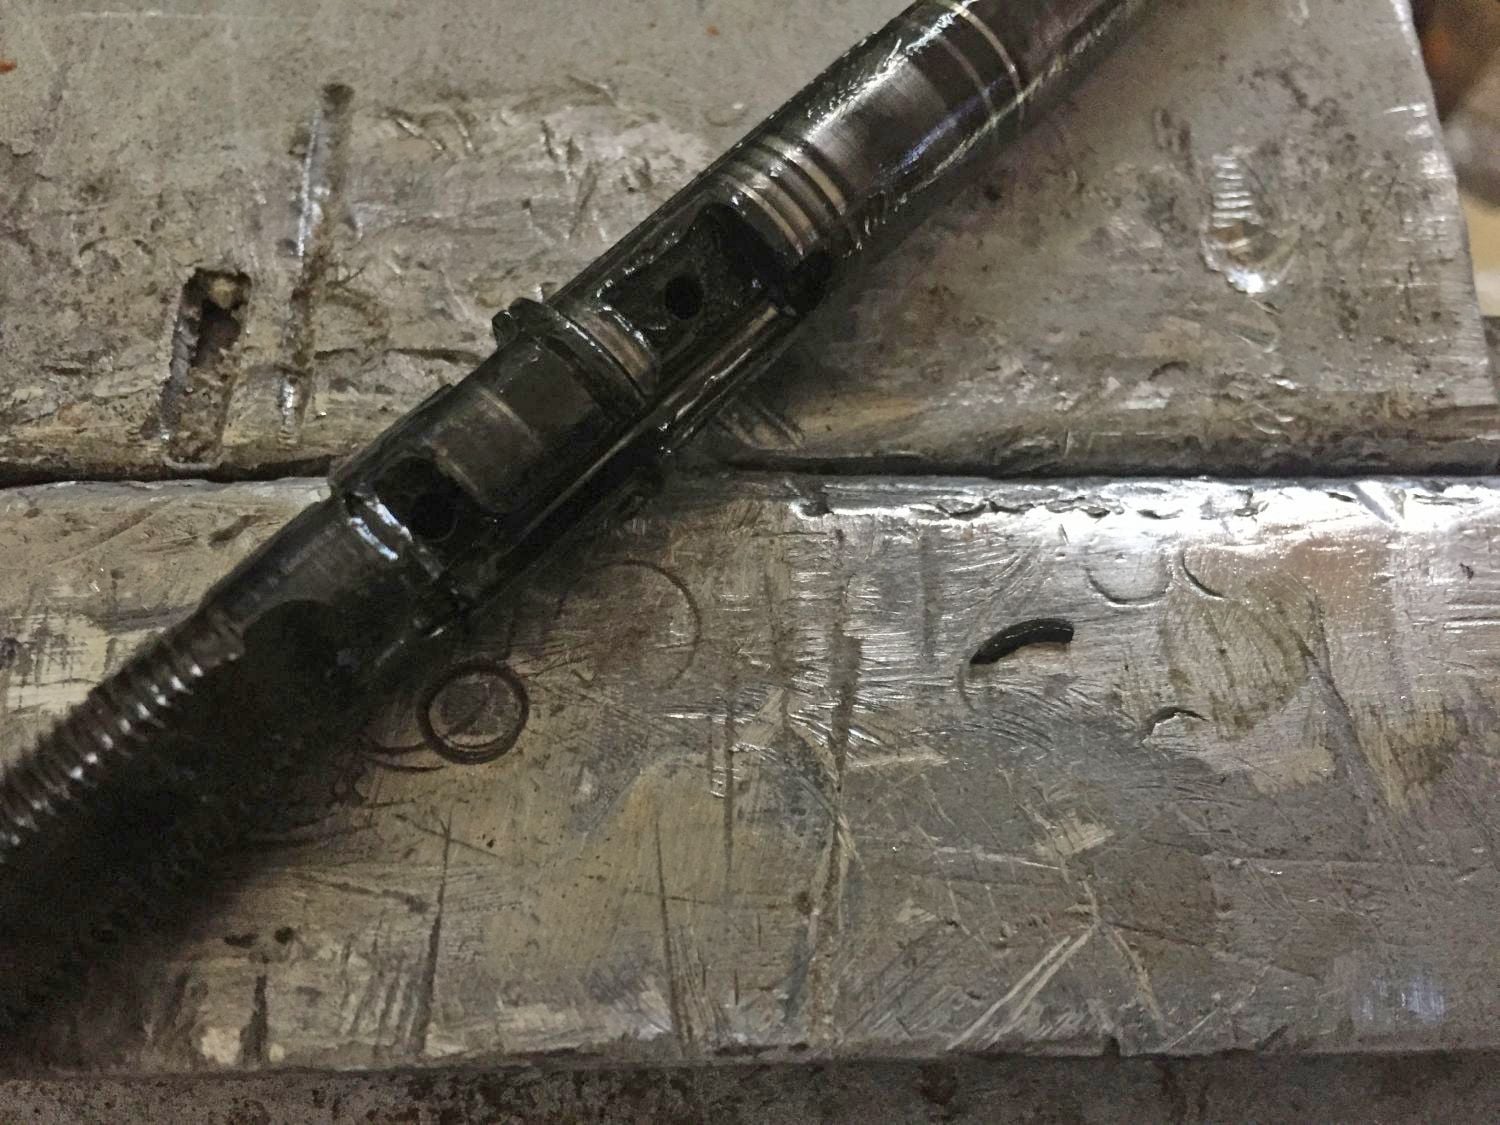
The problem is: Where did it shear off from? I've looked at the planet cages for 15 minutes on end and STILL haven't found any evidence of any damage.
-Kurt
The problem is: Where did it shear off from? I've looked at the planet cages for 15 minutes on end and STILL haven't found any evidence of any damage.
-Kurt
__________________
12-17-19, 08:56 PM
#108
www.theheadbadge.com
Thread Starter
Join Date: Sep 2005
Location: Southern Florida
Posts: 28,513
Bikes: https://www.theheadbadge.com
Mentioned: 124 Post(s)
Tagged: 0 Thread(s)
Quoted: 2422 Post(s)
Liked 4,395 Times
in
2,092 Posts
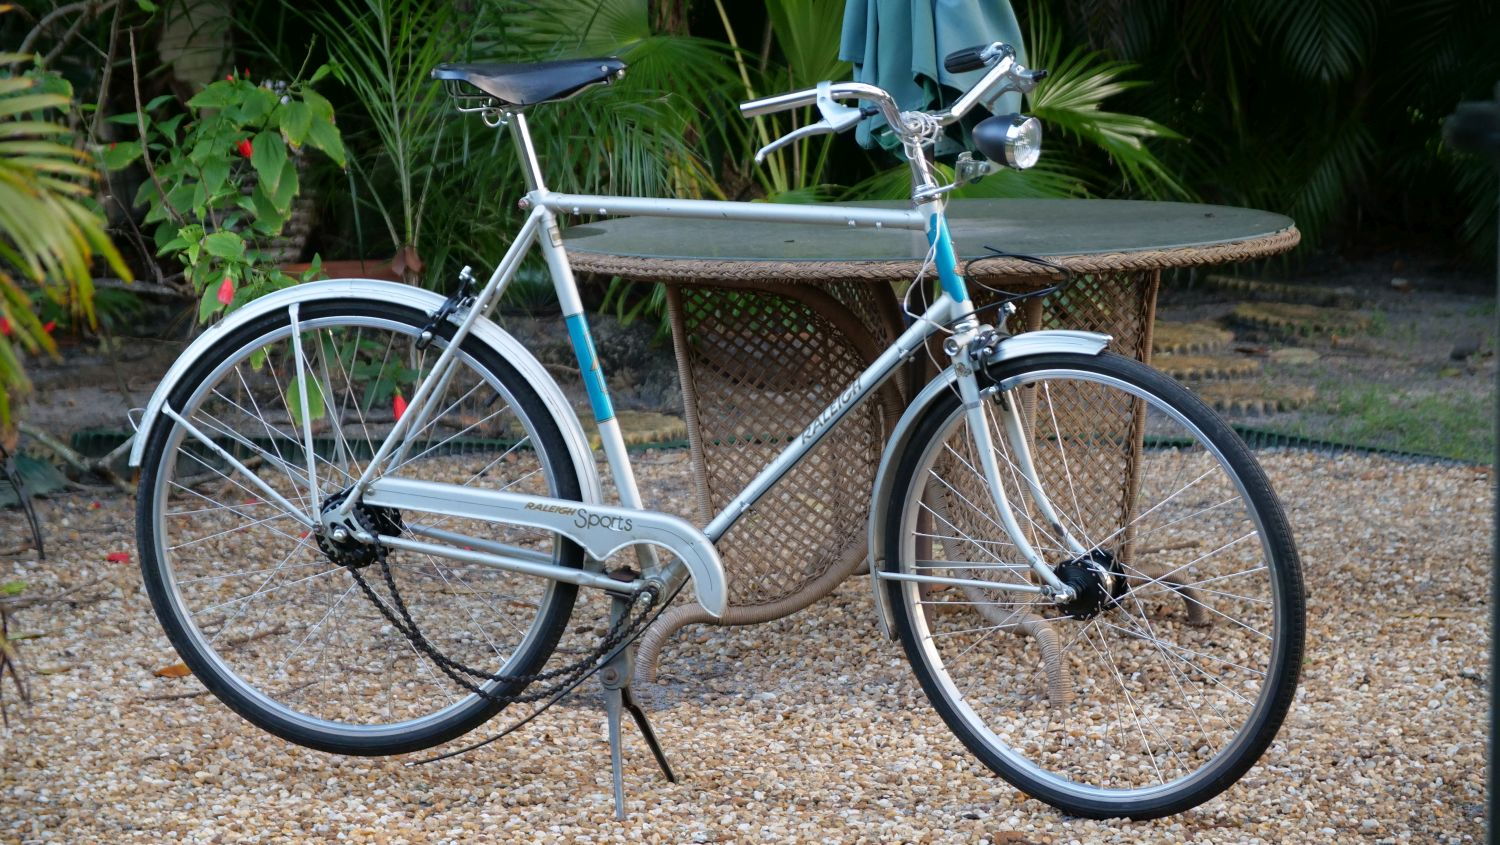
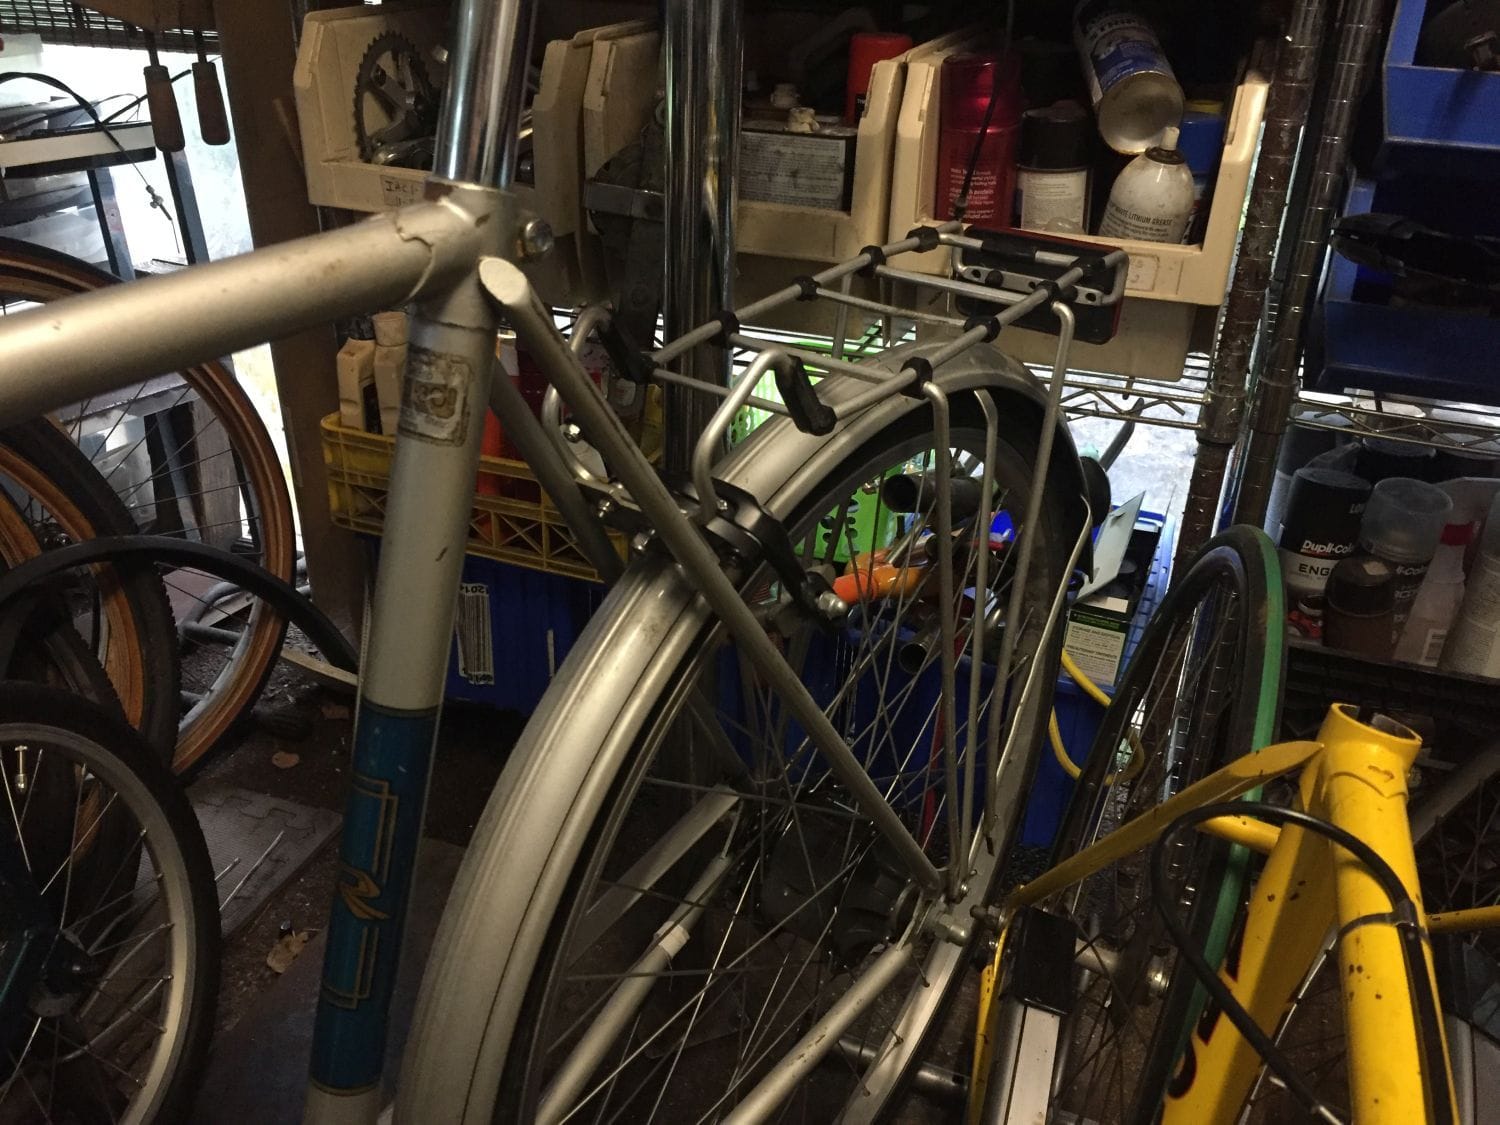
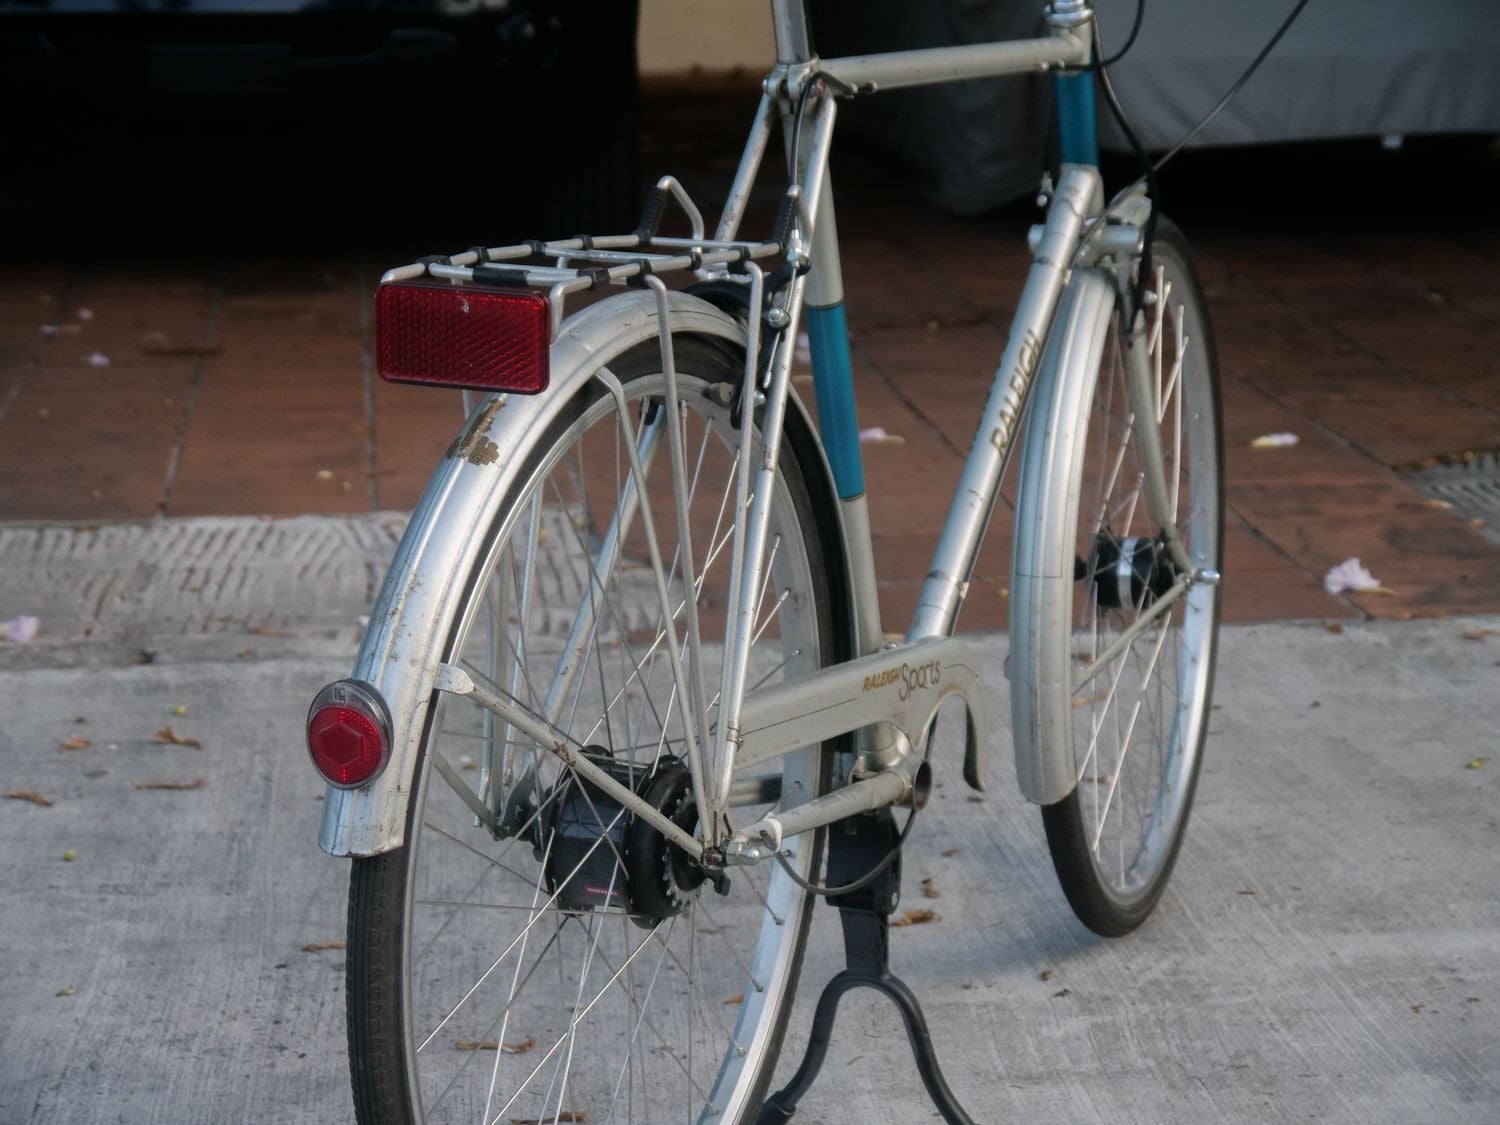
Back to the Sports. Been throwing my fun money every which way recently, so the '80 Sports and its crankset has taken a back seat.
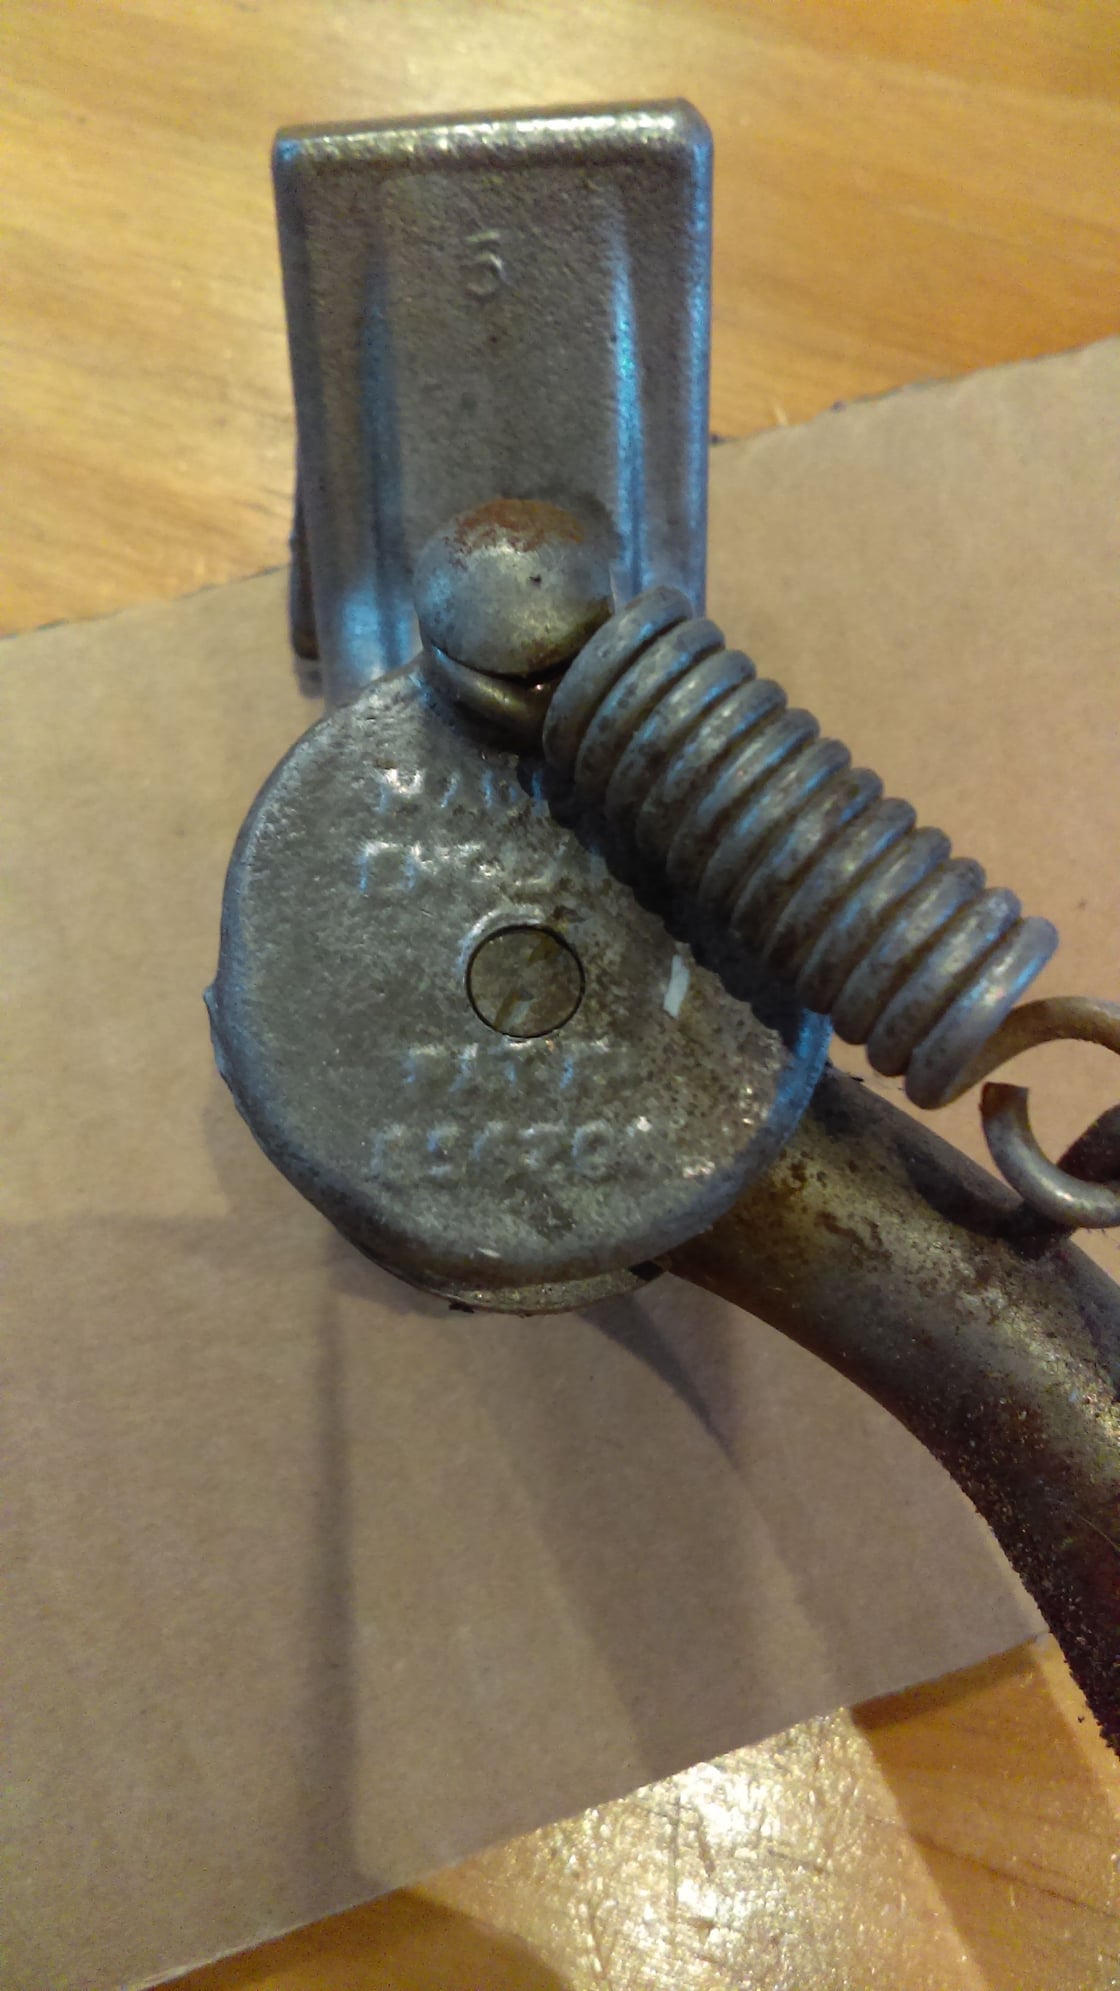
In the meantime though, it finally earned something worthy of it's "Dockless Donor" name (seeing that the original ofo Sturmey 3-speed idea didn't work out): I wound up with a few modern, double-leg kickstands during the process of getting 80 donated Spins fixed up (story here if you haven't read about it), as a few of said Spins had broken chainstay bridges.
Since I was never enamored with the way the Trygg center stand bolted onto the bike in the first place, I decided to swap it with one of the Spin stands. This also gave me a chance to delete the rusty, stamped steel Trygg top plate, which had long ago put squash marks in the tubing:
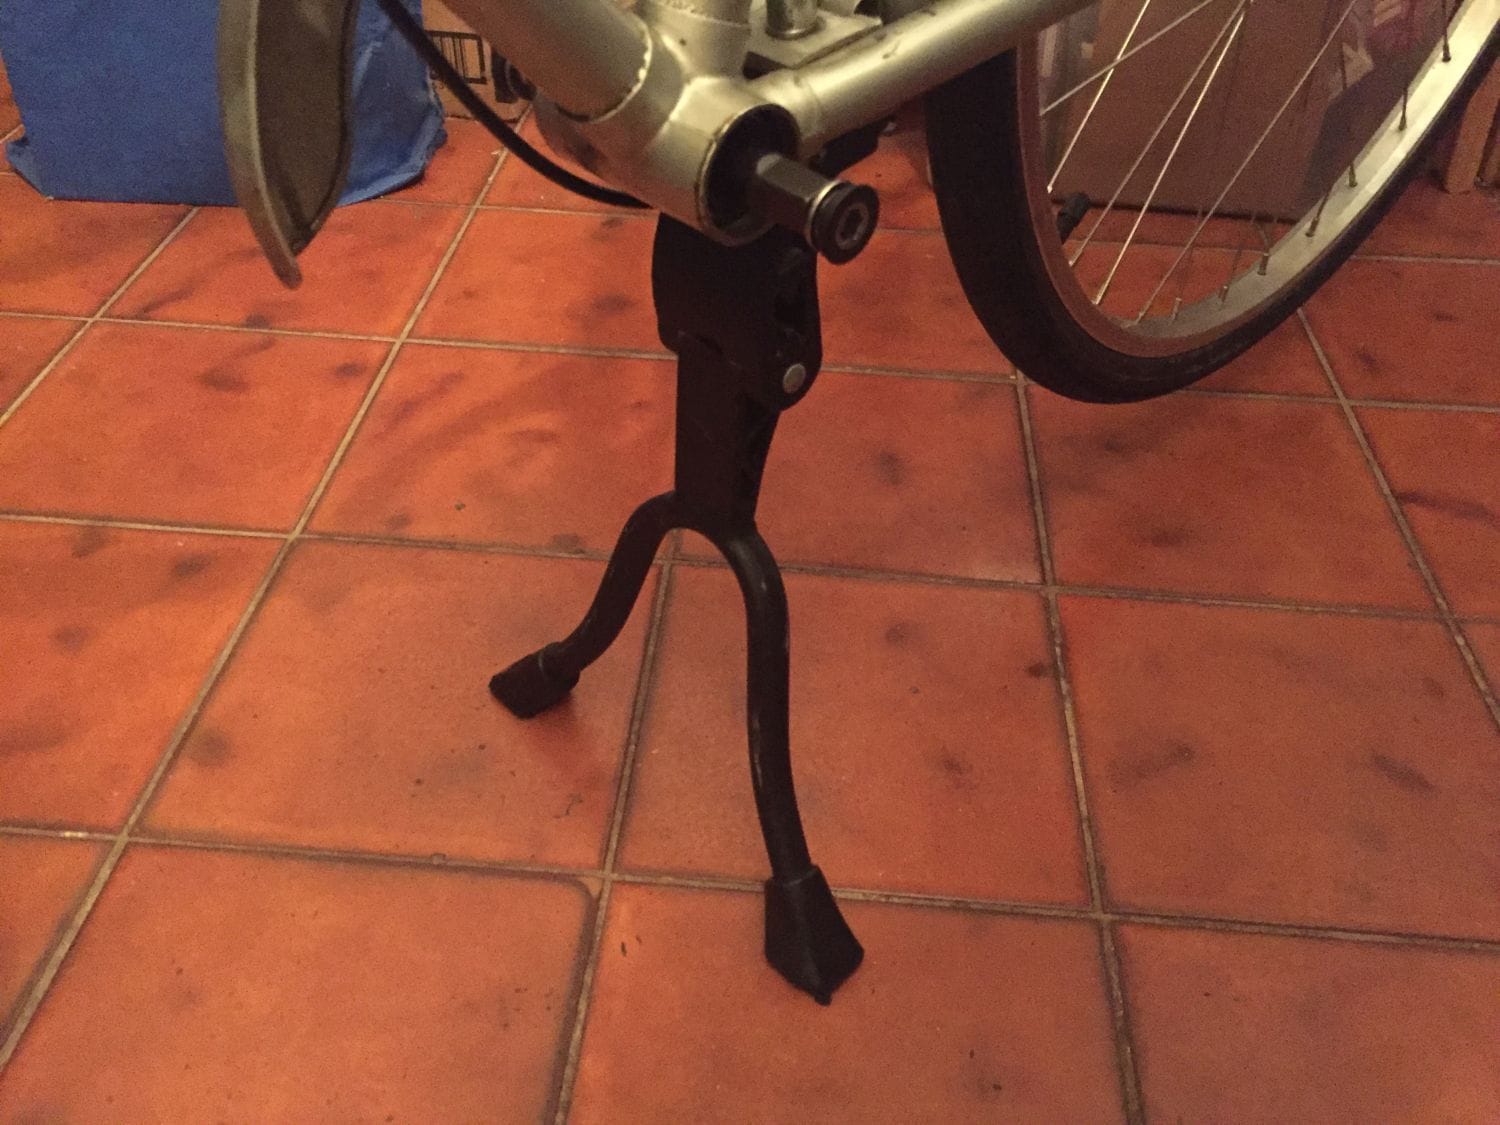
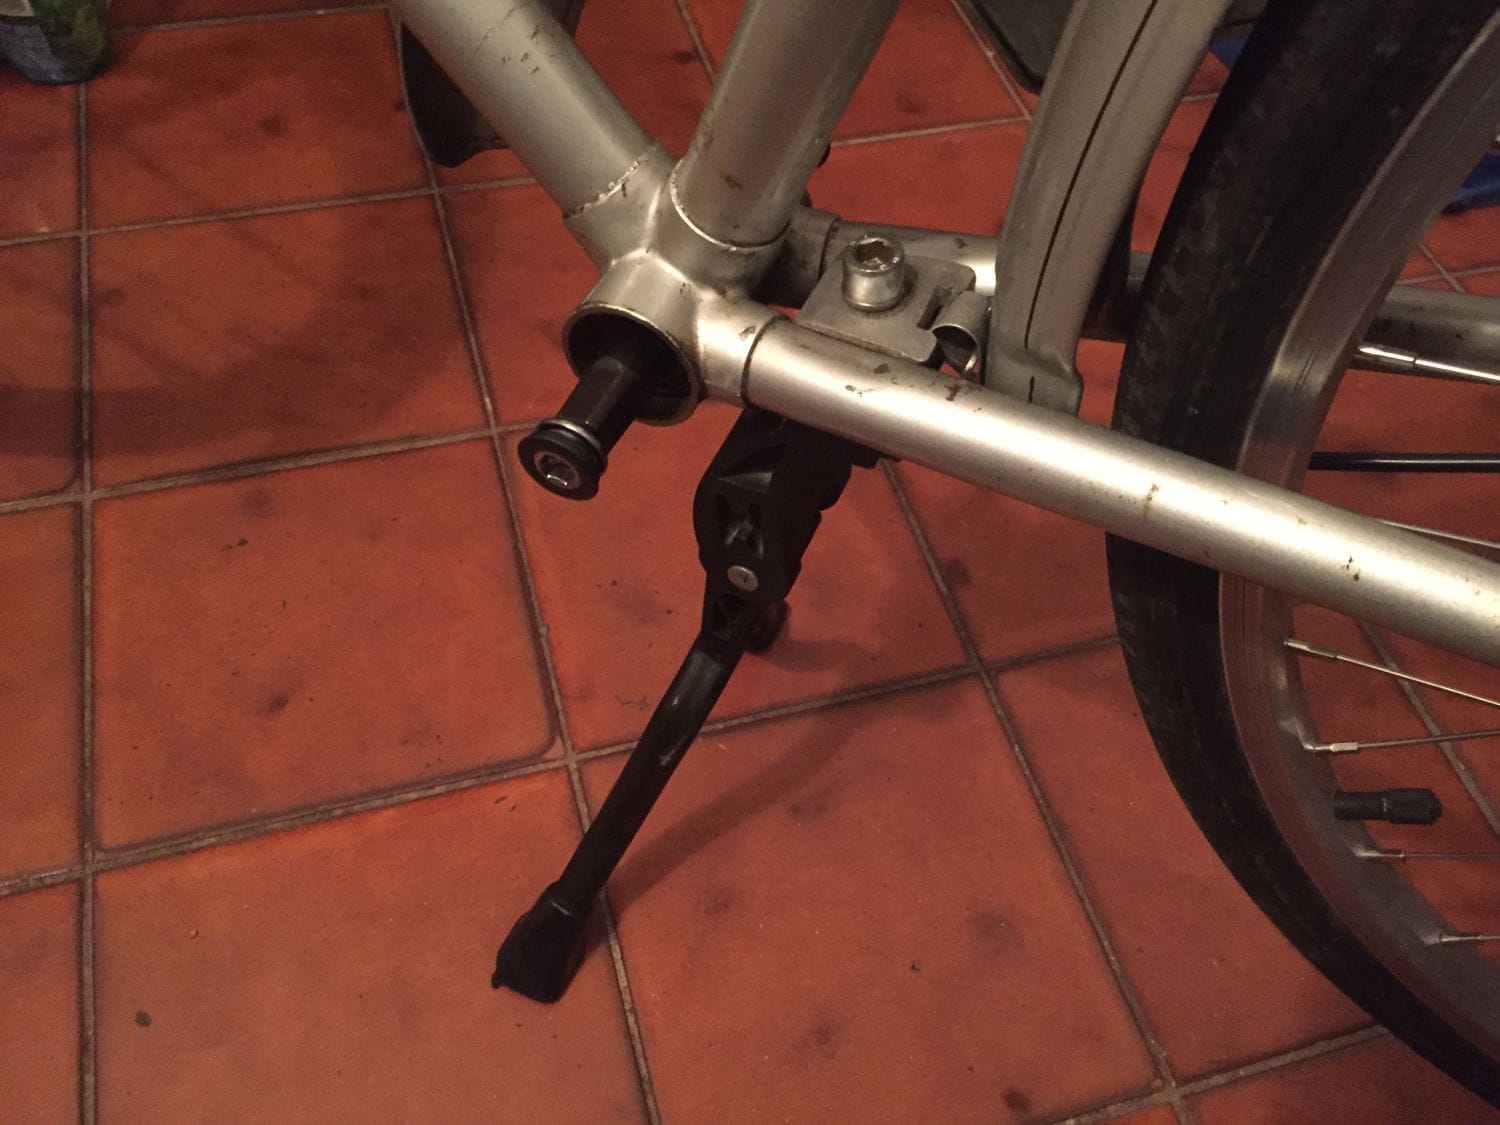
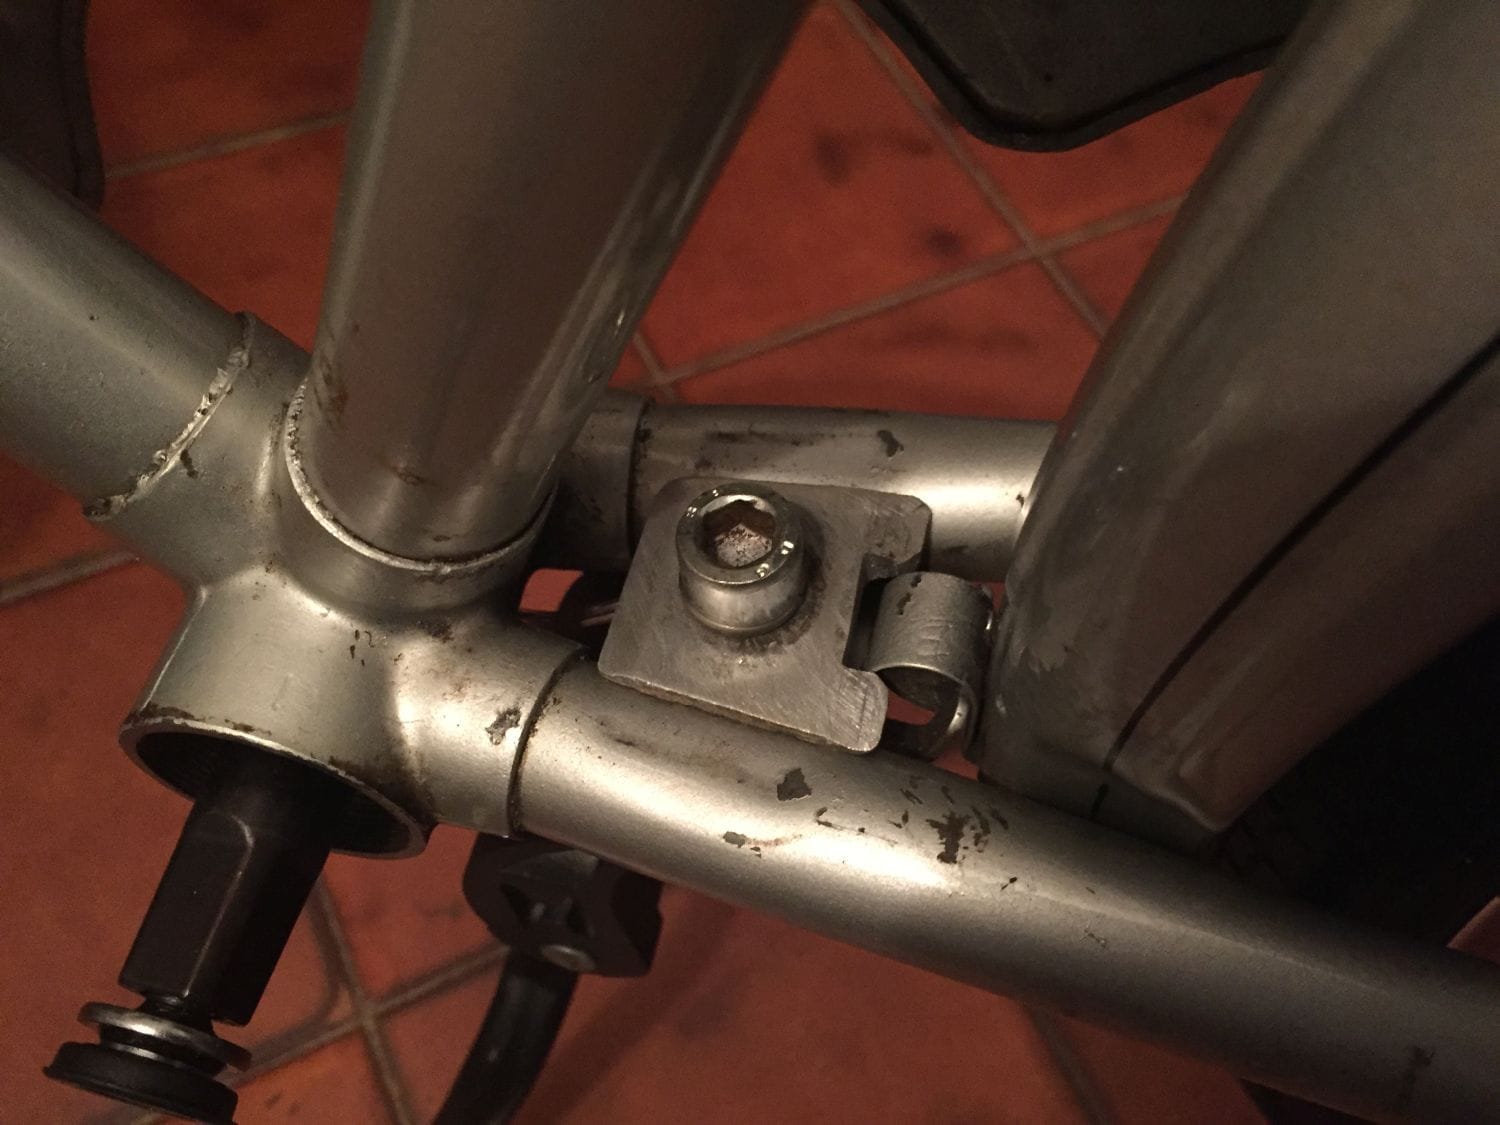
The top plate isn't from the Spin stand (nor is the Allen bolt), but it's my favorite sandwich-style plate to use. The design conforms to the curve of the tubing on the inside of the stays, causing minimal damage to the tubing (not that it helps much given the damage already caused by the Trygg) and helps to keep the stand rigid. I tried installing it just through the chainstay bridge (the '80 Sports has a flat chainstay bridge, not tubular like pre-1978 models), and it wasn't anything as stiff as it is now.
I don't know what kickstand these top plates come from, but I have one on my '51 Raleigh as well, and one spare. The '80 Sports required a small notch in the back for the fender clip.
In the meantime, the Trygg found its way onto the 1951 Sports, where it looks much more fitting. It's also using the same top plate between the stays too (which required that I re-tap the Trygg for a slightly larger bolt thread).
-Kurt
In the meantime though, it finally earned something worthy of it's "Dockless Donor" name (seeing that the original ofo Sturmey 3-speed idea didn't work out): I wound up with a few modern, double-leg kickstands during the process of getting 80 donated Spins fixed up (story here if you haven't read about it), as a few of said Spins had broken chainstay bridges.
Since I was never enamored with the way the Trygg center stand bolted onto the bike in the first place, I decided to swap it with one of the Spin stands. This also gave me a chance to delete the rusty, stamped steel Trygg top plate, which had long ago put squash marks in the tubing:
The top plate isn't from the Spin stand (nor is the Allen bolt), but it's my favorite sandwich-style plate to use. The design conforms to the curve of the tubing on the inside of the stays, causing minimal damage to the tubing (not that it helps much given the damage already caused by the Trygg) and helps to keep the stand rigid. I tried installing it just through the chainstay bridge (the '80 Sports has a flat chainstay bridge, not tubular like pre-1978 models), and it wasn't anything as stiff as it is now.
I don't know what kickstand these top plates come from, but I have one on my '51 Raleigh as well, and one spare. The '80 Sports required a small notch in the back for the fender clip.
In the meantime, the Trygg found its way onto the 1951 Sports, where it looks much more fitting. It's also using the same top plate between the stays too (which required that I re-tap the Trygg for a slightly larger bolt thread).
-Kurt
__________________
Last edited by cudak888; 12-17-19 at 09:30 PM.
12-18-19, 06:51 AM
#109
Senior Member
Join Date: Aug 2013
Posts: 2,321
Mentioned: 35 Post(s)
Tagged: 0 Thread(s)
Quoted: 767 Post(s)
Liked 1,898 Times
in
889 Posts
I have the stand that fits that top cap. XPT
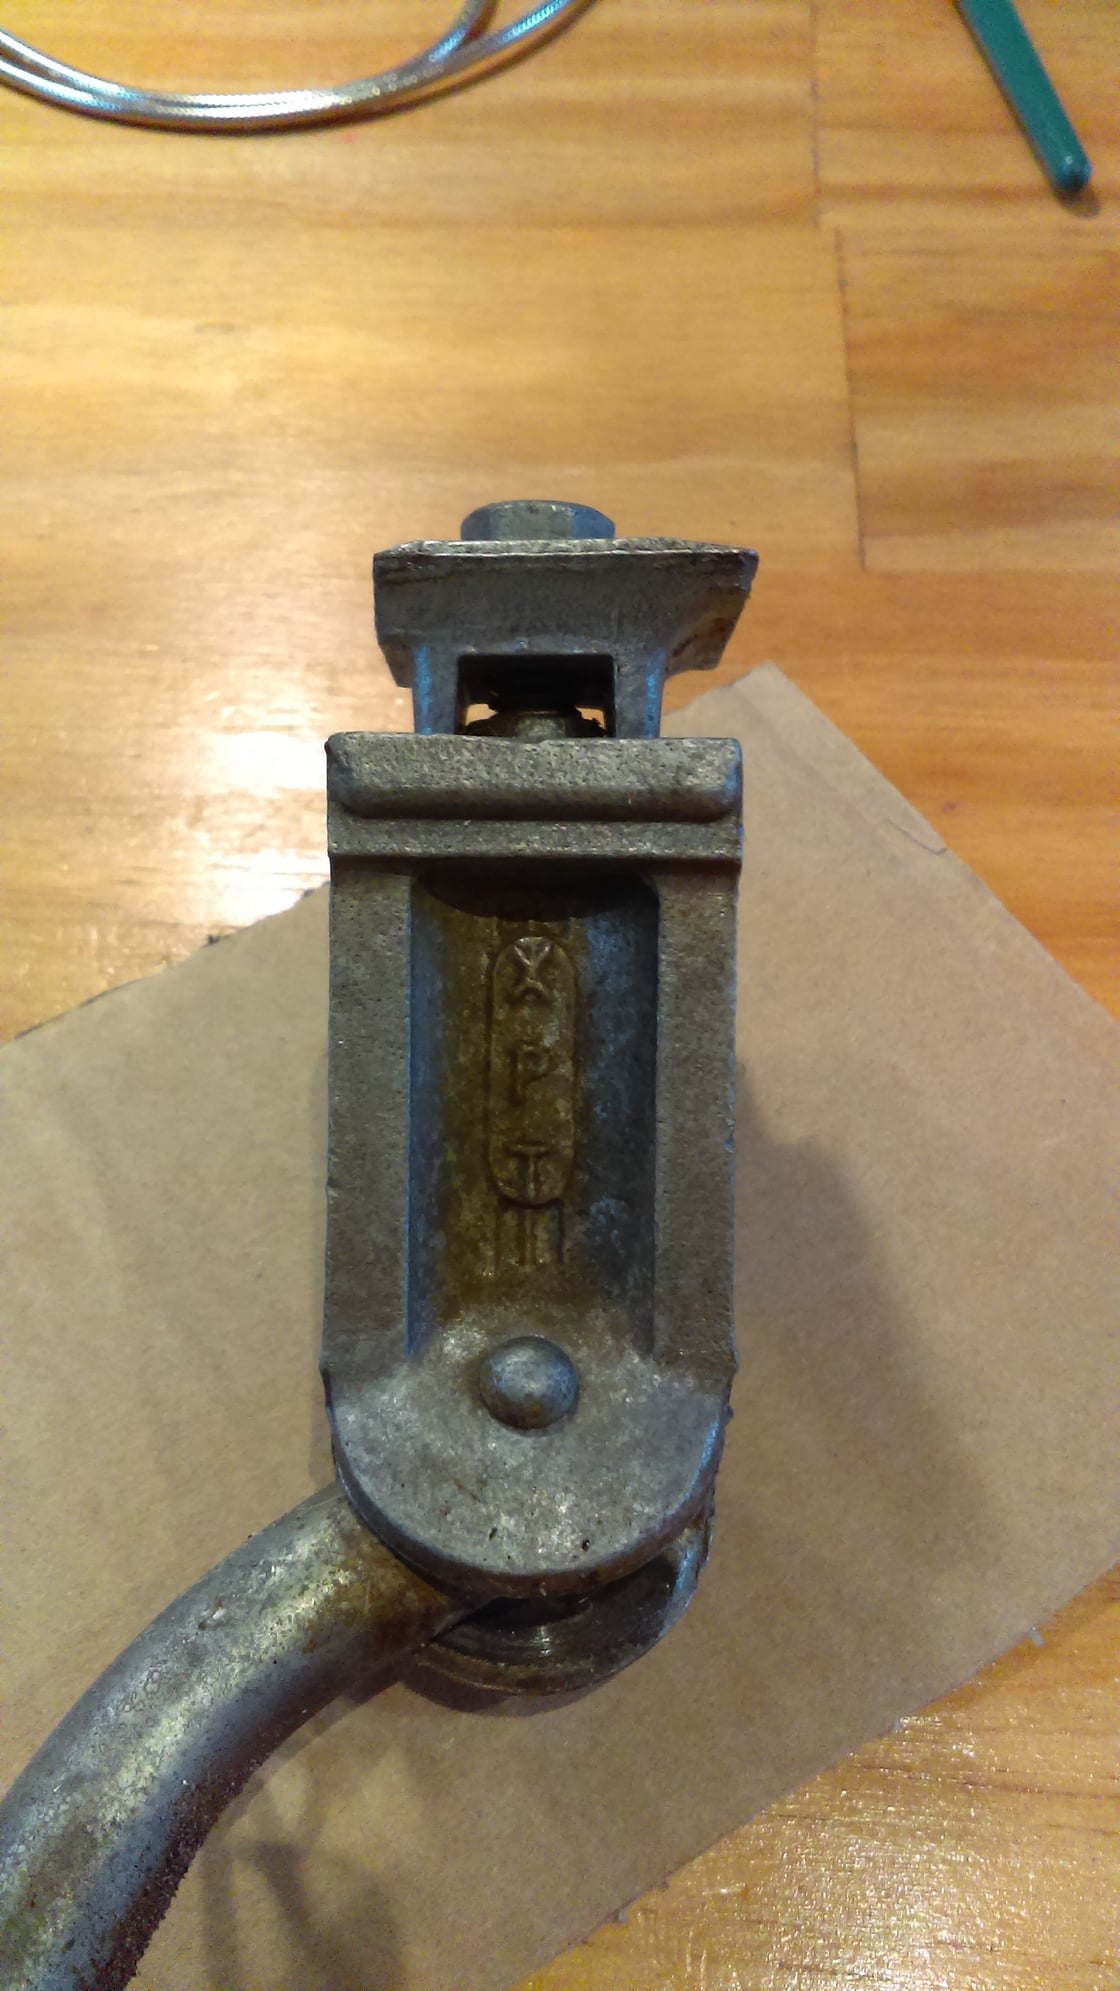
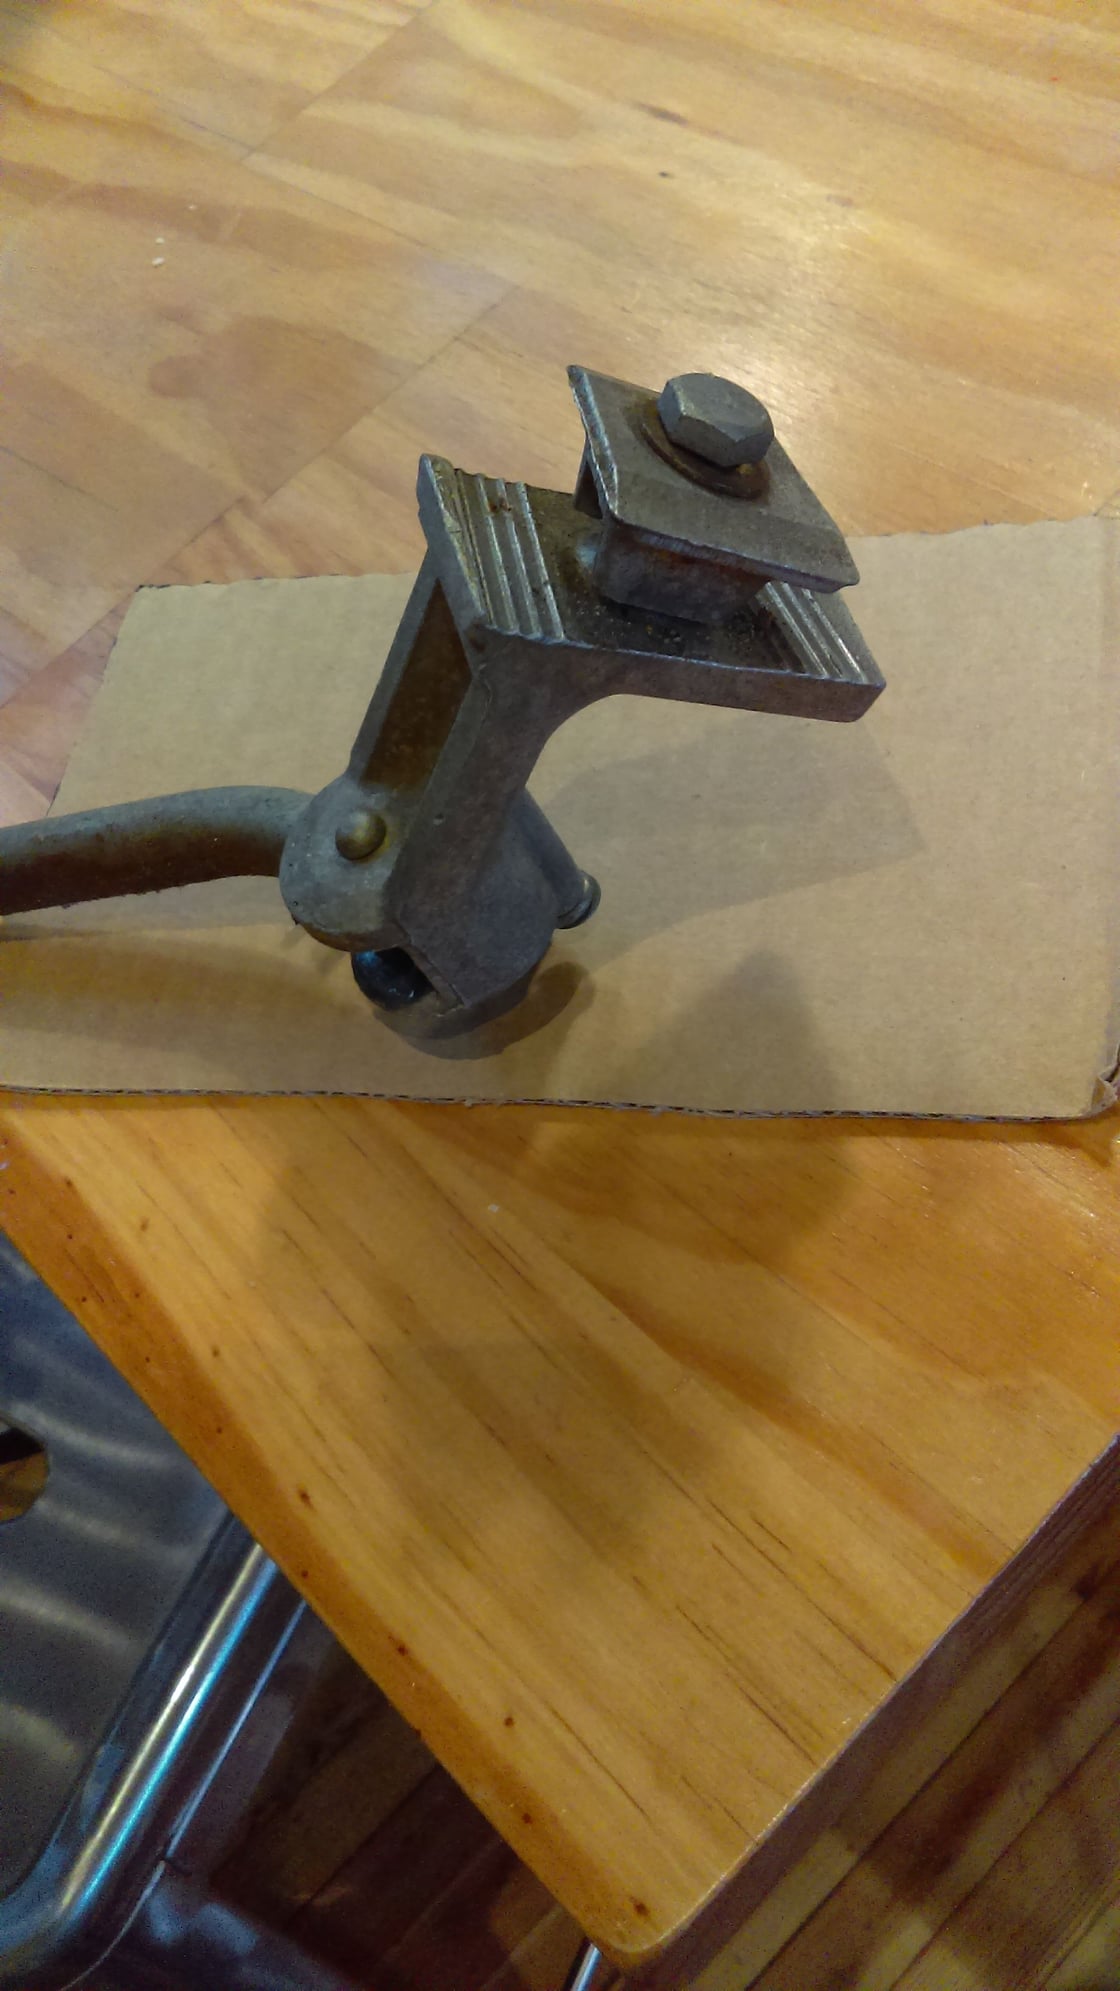
It's a nice kickstand, but is rather short. This one came on the 1964 Huffy Sportsman my wife found a few years ago.
It's a nice kickstand, but is rather short. This one came on the 1964 Huffy Sportsman my wife found a few years ago.
12-18-19, 05:03 PM
#110
www.theheadbadge.com
Thread Starter
Join Date: Sep 2005
Location: Southern Florida
Posts: 28,513
Bikes: https://www.theheadbadge.com
Mentioned: 124 Post(s)
Tagged: 0 Thread(s)
Quoted: 2422 Post(s)
Liked 4,395 Times
in
2,092 Posts
-Kurt
__________________
12-20-19, 09:14 PM
#111
www.theheadbadge.com
Thread Starter
Join Date: Sep 2005
Location: Southern Florida
Posts: 28,513
Bikes: https://www.theheadbadge.com
Mentioned: 124 Post(s)
Tagged: 0 Thread(s)
Quoted: 2422 Post(s)
Liked 4,395 Times
in
2,092 Posts
I spent the evening re-assembling the XRF8, which went surprisingly smooth until I got to the rotary gear selector / shift actuator (not called so in the parts list, just to make it interesting). Despite Dan Burkhart's excellent writeups and documentation of the later XRF8(w), there's precious little written about it's little PITA predecessor, so I had to do a bit of investigation.
What I found was that - regardless of how well I followed the assembly manual - the pins of the driver (HSA 623 "Gear Change") were not under full tension once I installed the right hand cone and cone anchor. Without this tension, the rotary gear selector won't snap back into 8th gear.
The instructions say the following:
If you follow the directions verbatim, you'll easily line up the cone anchor "spots" (more like a pair of depressions in the cone that engage with a thick, keyed washer [HMW 525 "Cone Anchor"]) with the flats on the axle, but you will NOT put tension tension on the spring (through the driver pins) when you do so. Consequently, the rotary assembly won't work - at best, you'll get some very minor tension half a turn through the rotation.
What it doesn't say is that you are supposed to turn the cone counterclockwise...until tension is felt, then continue turning until the cone depressions are lined up with the flats on the axle. It takes a bit of finger force to make this extra half turn happen, and you'll need to be ready with the HMW 525 cone anchor already on the axle - it'll be easier to snap it in place (to lock down the cone) this way.
Ironically, the XRD8 (XRF8 with a drum brake) manual has an error stating that the right hand cone needs to be turned clockwise - but the hub internals are identical to the XRF8 and there's no reason for this. I tried it on the XRF8 and clockwise doesn't work.
Also, that extra washer I found inside the hub does nothing but add unnecessary wiggle room between the rotary assembly and the fulcrum arm ("lever") next to it. It almost seems as if it was put there as a kludge to reduce the possibility of the rotary assembly binding on the fulcrum arm. I'm just going to remove the washer and coat the contact area of the rotary arm with silicone oil.
Tagging dweenk as he may be interested to know the progress. Hub gets reinstalled tomorrow...
-Kurt
What I found was that - regardless of how well I followed the assembly manual - the pins of the driver (HSA 623 "Gear Change") were not under full tension once I installed the right hand cone and cone anchor. Without this tension, the rotary gear selector won't snap back into 8th gear.
The instructions say the following:
Fit the cone ensuring that the two columns of the shift actuator are through the two slots of the cone. Turn the cone counterclockwise until two spots are parallel with the milling surface of the axle. Locate the cone anchor and screw the cone locknut.
What it doesn't say is that you are supposed to turn the cone counterclockwise...until tension is felt, then continue turning until the cone depressions are lined up with the flats on the axle. It takes a bit of finger force to make this extra half turn happen, and you'll need to be ready with the HMW 525 cone anchor already on the axle - it'll be easier to snap it in place (to lock down the cone) this way.
Ironically, the XRD8 (XRF8 with a drum brake) manual has an error stating that the right hand cone needs to be turned clockwise - but the hub internals are identical to the XRF8 and there's no reason for this. I tried it on the XRF8 and clockwise doesn't work.
Also, that extra washer I found inside the hub does nothing but add unnecessary wiggle room between the rotary assembly and the fulcrum arm ("lever") next to it. It almost seems as if it was put there as a kludge to reduce the possibility of the rotary assembly binding on the fulcrum arm. I'm just going to remove the washer and coat the contact area of the rotary arm with silicone oil.
Tagging dweenk as he may be interested to know the progress. Hub gets reinstalled tomorrow...
-Kurt
__________________
Last edited by cudak888; 12-20-19 at 09:20 PM.
Likes For cudak888:
12-21-19, 04:07 PM
#112
www.theheadbadge.com
Thread Starter
Join Date: Sep 2005
Location: Southern Florida
Posts: 28,513
Bikes: https://www.theheadbadge.com
Mentioned: 124 Post(s)
Tagged: 0 Thread(s)
Quoted: 2422 Post(s)
Liked 4,395 Times
in
2,092 Posts
Ok, the XRF-8 v1 may look great, but it's just not going to work out.
I gave it a test ride today and verified cable adjustment multiple times over - but I could never get fourth gear reliably. I think it is engaging a gear when doing so, but my cadence can't match it to tell (and I didn't do any 4th-gear-from-a-stop tests). About 5% of any shift to fourth actually wound up engaging 4th. The rest of the gears would shift correctly about 90% of the time, but many shifts require backing off the pedals a lot more than any other IGH hub I've ever ridden. Even then, you might get two other gears to momentarily engage during pedal rotation before your preferred gear finally engages.
I differed from Sturmey's recommendation by reassembling it with ATF inside (as Dan Burkhart did with his XRF8w/v2) and NGLI #2 marine grease for the bearings (which I tested, and ATF won't wash it away). Everything operated exceptionally freely and the hub internals are in exceptional shape (they look virtually new), so I have no reason to believe that this hub is malfunctioning from abuse. If anything, it reminds me of some of the reports of the shifting issues with the Shimano Al-not-so-fine 11's.
I read somewhere here that the rotary shifter design on these hubs - shared in part with the rotary version of the SRF3 - dates back to a 1970 Sturmey-Archer patent, even though Sturmey never released such a thing in the 1970's. I have a feeling the design doesn't lend itself to the tolerances required of an 8-speed hub. Either that, or I'm missing something entirely, but there's not much out there about the first-gen XRF8.
On a more positive note, I calculated that a Nexus 7-speed would use the same length spokes, so at least it'll be easy enough to fix.
-Kurt
__________________
Last edited by cudak888; 12-21-19 at 04:15 PM.
02-01-20, 06:09 PM
#113
www.theheadbadge.com
Thread Starter
Join Date: Sep 2005
Location: Southern Florida
Posts: 28,513
Bikes: https://www.theheadbadge.com
Mentioned: 124 Post(s)
Tagged: 0 Thread(s)
Quoted: 2422 Post(s)
Liked 4,395 Times
in
2,092 Posts
Well, this project hasn't been moving at all, starting with a black Nuovo Record-copycat crankset from AliExpress that never shipped and was automatically refunded. But at least the brake levers are on their way from the NL courtesy of JaccoW, so progress is still happening, albeit slowly.
Anyway, I almost broke down and installed this sinfully ugly crankset a few days ago when I realized it had a 46t ring. Thankfully, it didn't fit the BB and I didn't press (pun not intended) the issue.
-Kurt
Anyway, I almost broke down and installed this sinfully ugly crankset a few days ago when I realized it had a 46t ring. Thankfully, it didn't fit the BB and I didn't press (pun not intended) the issue.
-Kurt
__________________
03-01-20, 04:36 PM
#114
www.theheadbadge.com
Thread Starter
Join Date: Sep 2005
Location: Southern Florida
Posts: 28,513
Bikes: https://www.theheadbadge.com
Mentioned: 124 Post(s)
Tagged: 0 Thread(s)
Quoted: 2422 Post(s)
Liked 4,395 Times
in
2,092 Posts
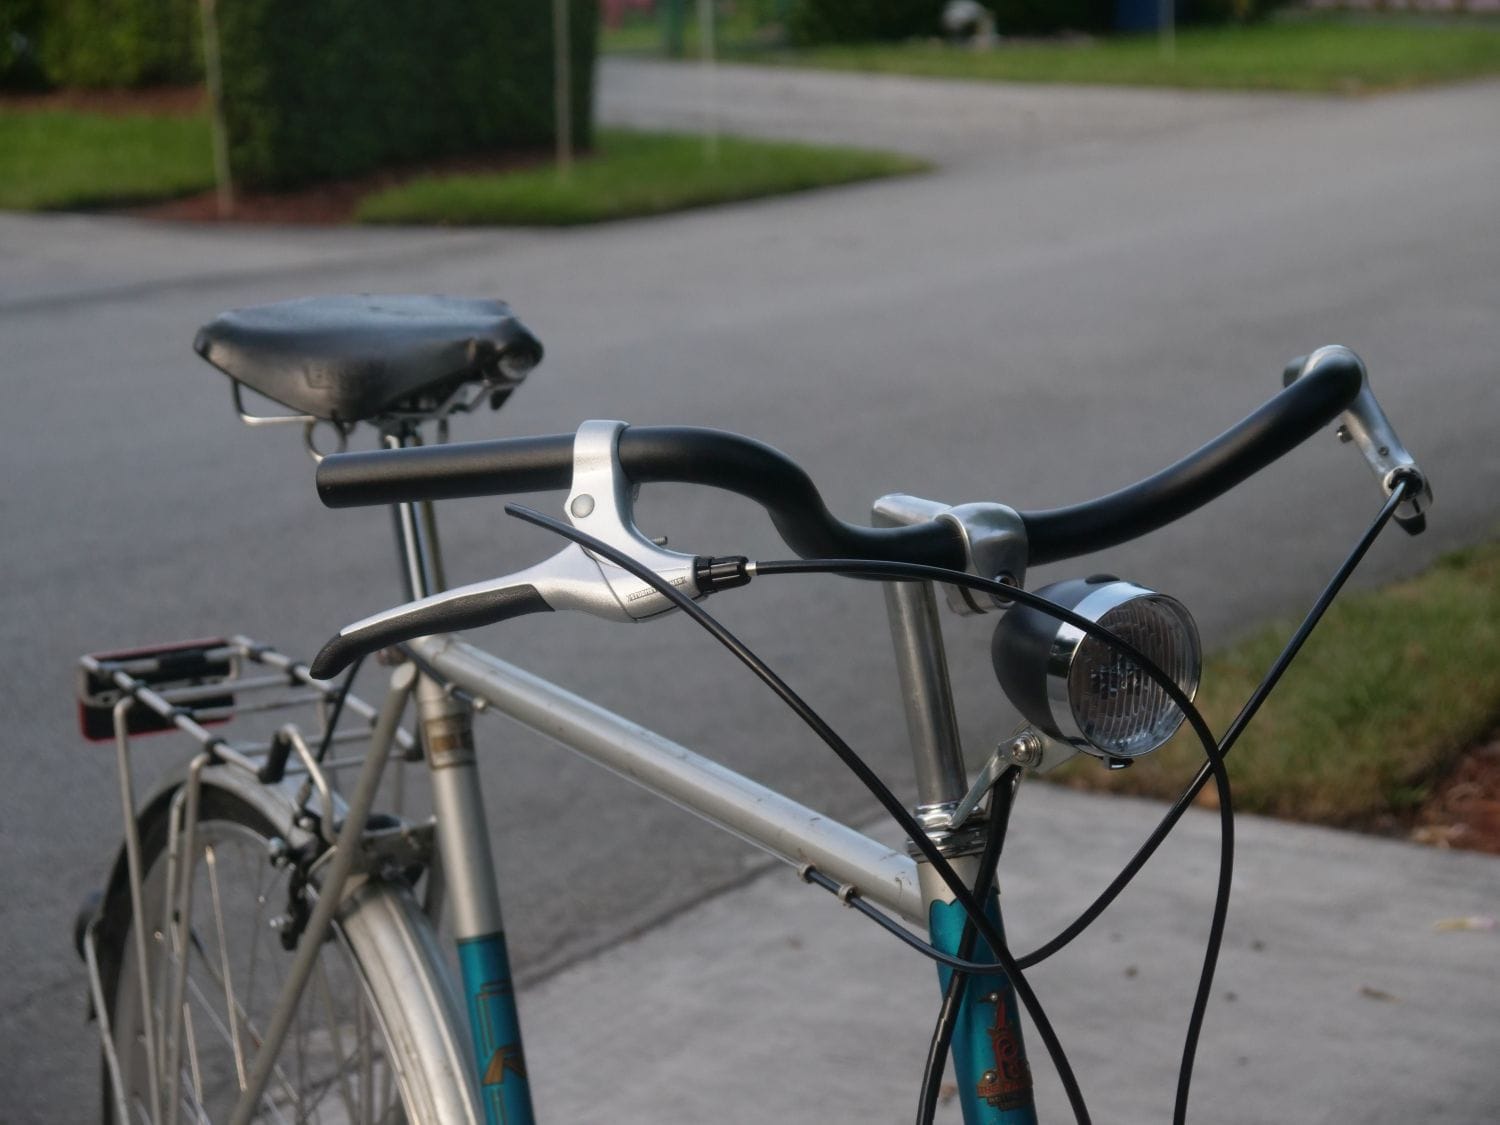
This project is back under way again. Thanks to JaccoW, Sturmey-Archer couldn't keep their international-only brake levers out of my grubby little hands, so I now have a pair of gorgeous, silver and black BLS92 brake levers. They're also HUGE.

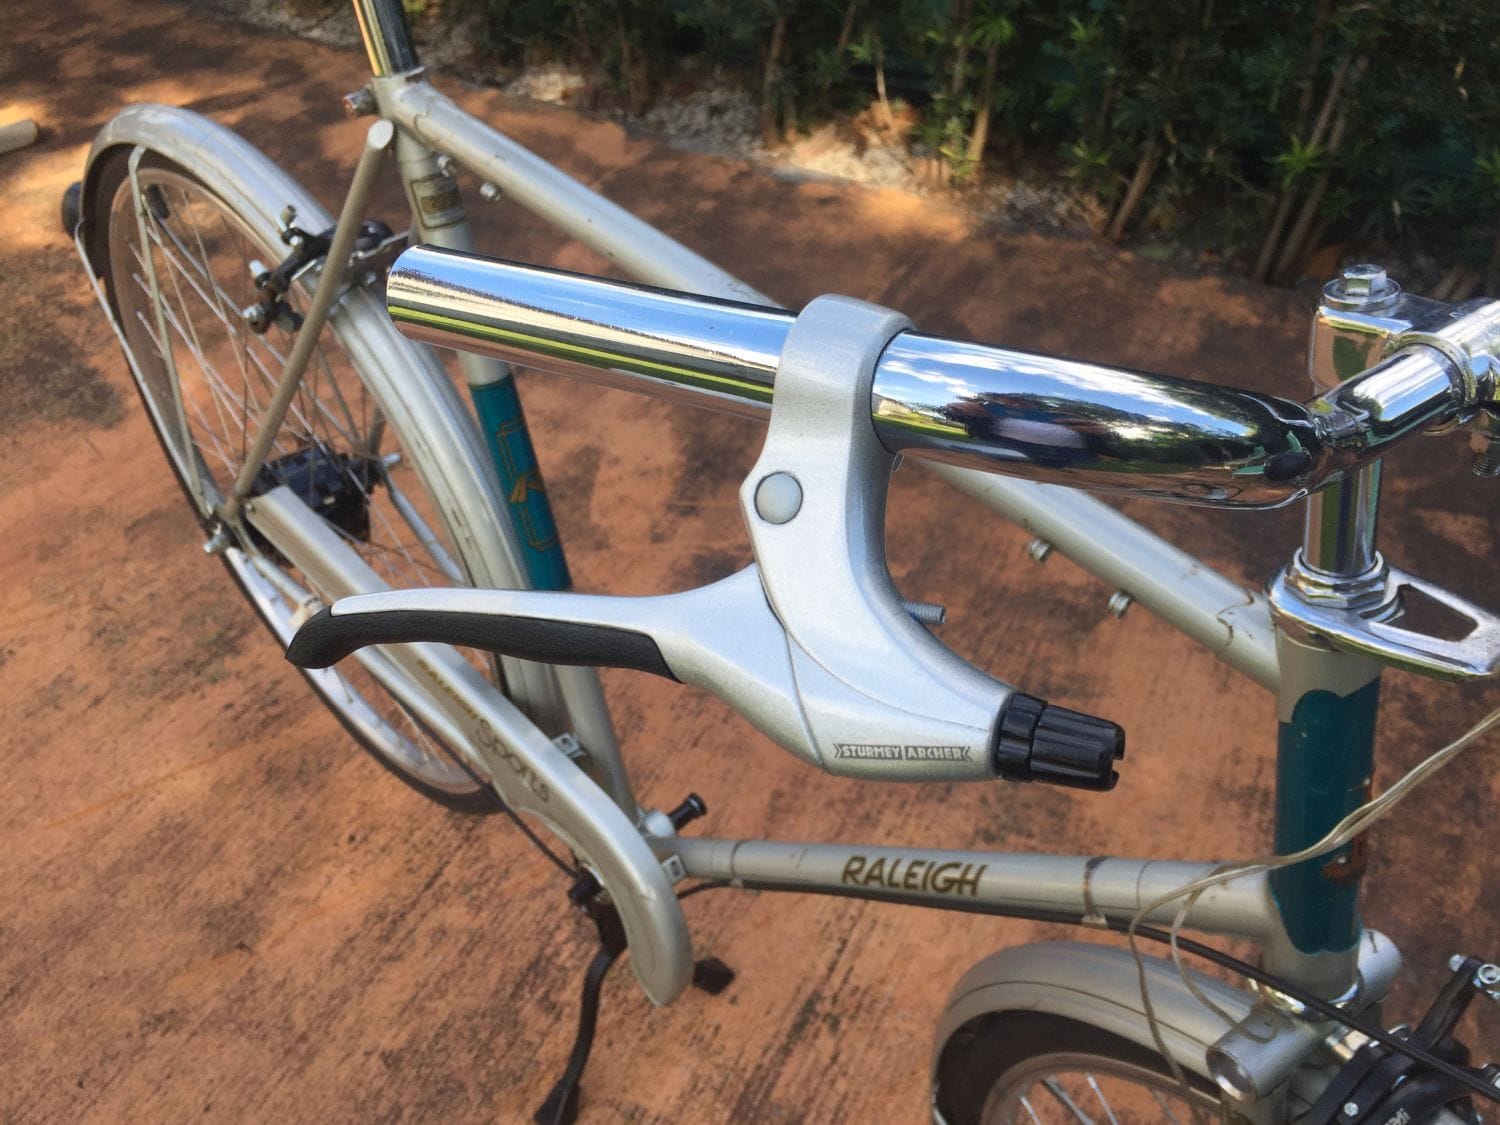
I think I finally have to come to grips - pun not intended - with the idea of putting an alternate set of longer North Roads on this bike. These are too short for the levers alone, much less figuring out how to shove a shifter on there. With the right bars, I may be able to mount the original G9 shifter too.
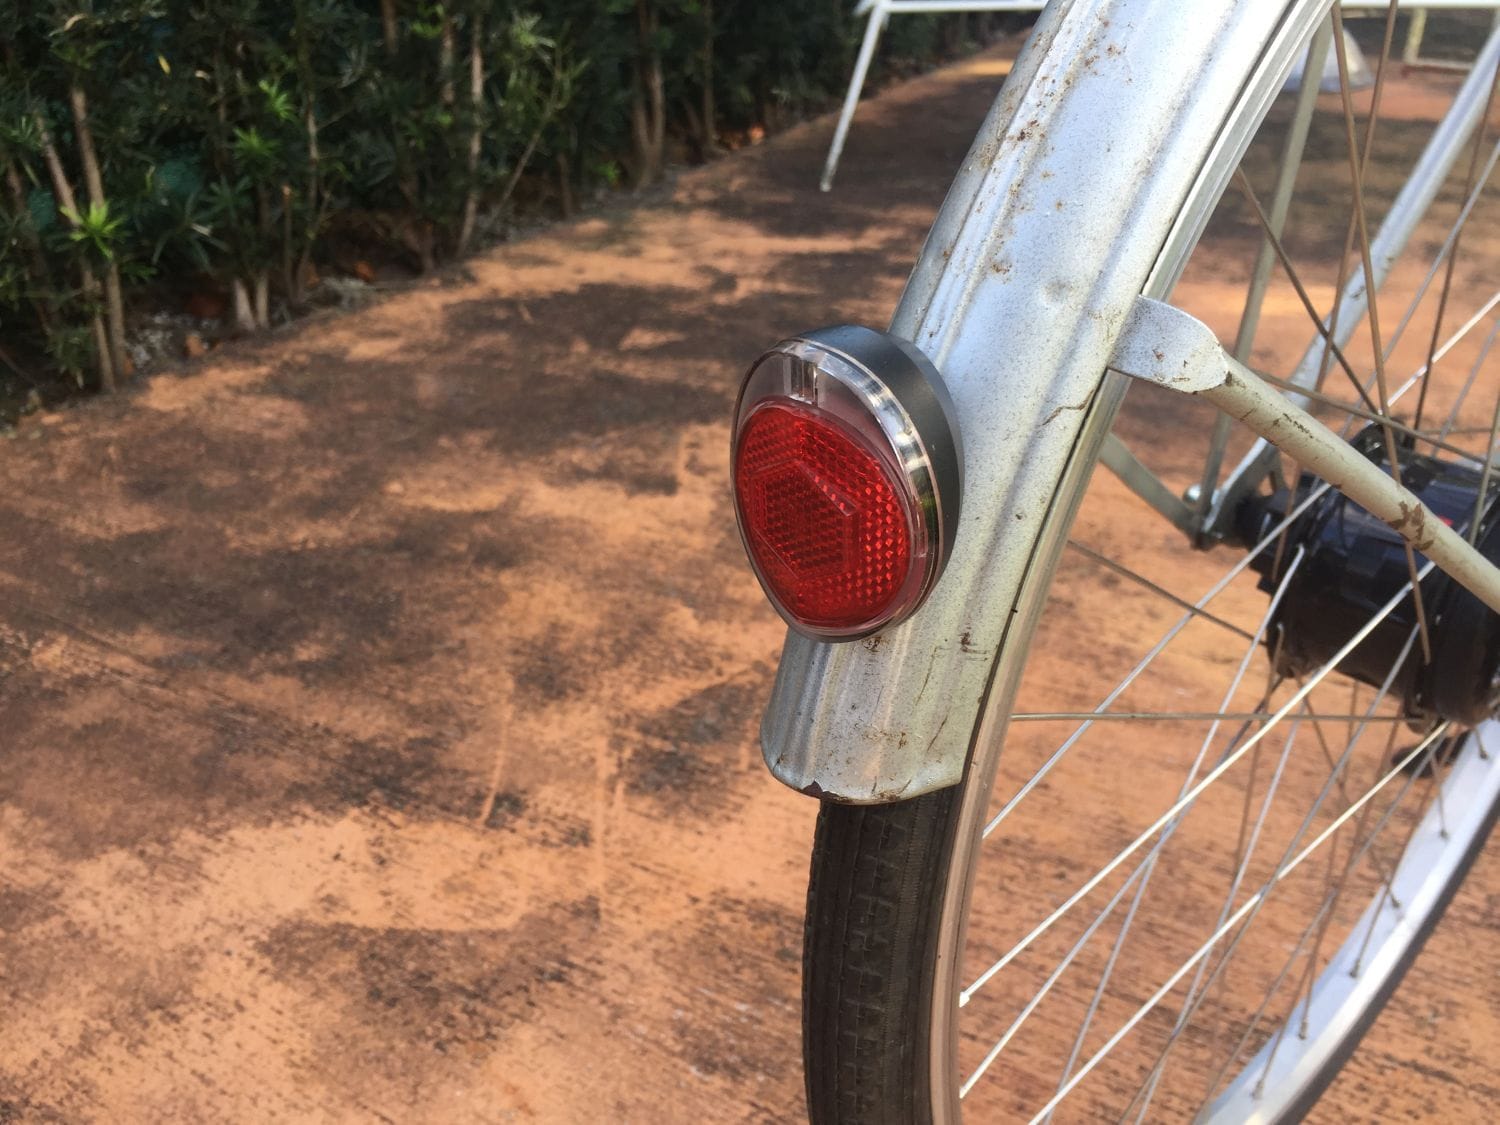
Also wound up getting one of these little beauts for the rear. It's not a Secula, but is the light I had in mind in the first place. It looks the part too. I still have to work out the rat's nest of wiring around the headtube, but the functional part is finally sorted.

Incidentally, with my Spin commuter doing just fine as an office bike, I've decided to refit the stock bits to the Gazelle Whale in preparation for getting rid of it.
In lieu of re-relacing the 8-speed rear wheel, I repurposed a bent rear wheel off a Spin Gen 3 by re-lacing the hub and spokes into an Alexrims DH20. The DH20 shares the same internal diameter as the Spin rim, so it was a direct swapover. I'll probably lace up a replacement for the front too, as I still like that front hub.
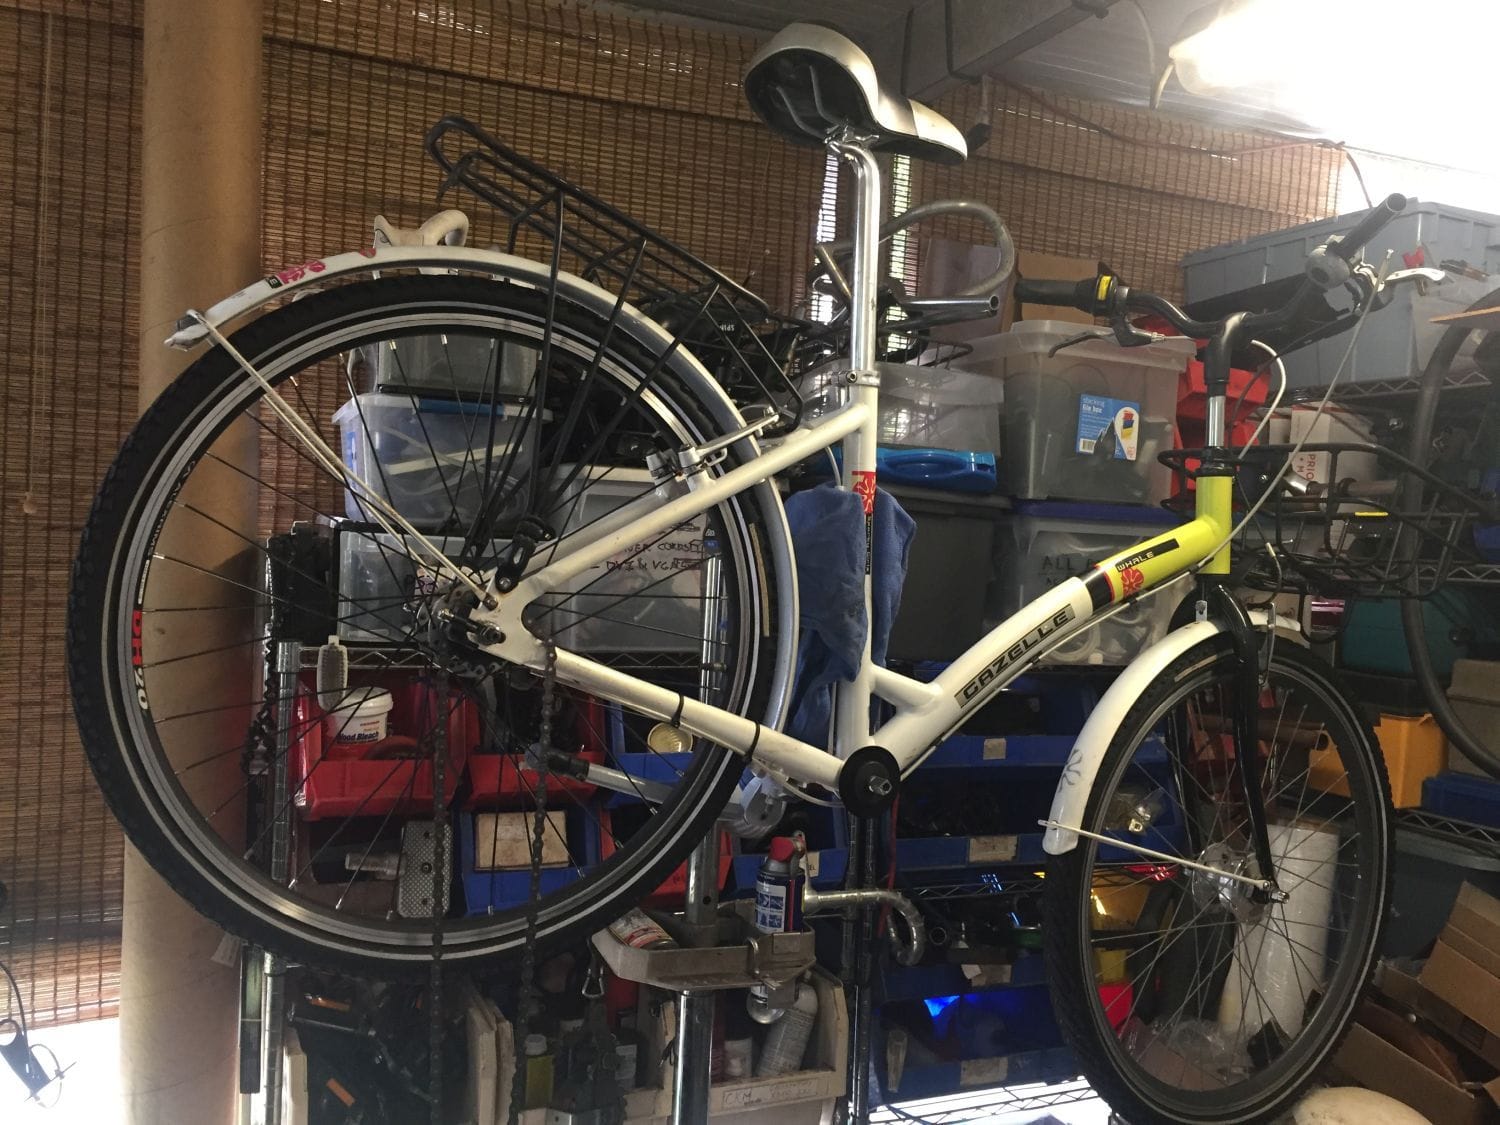
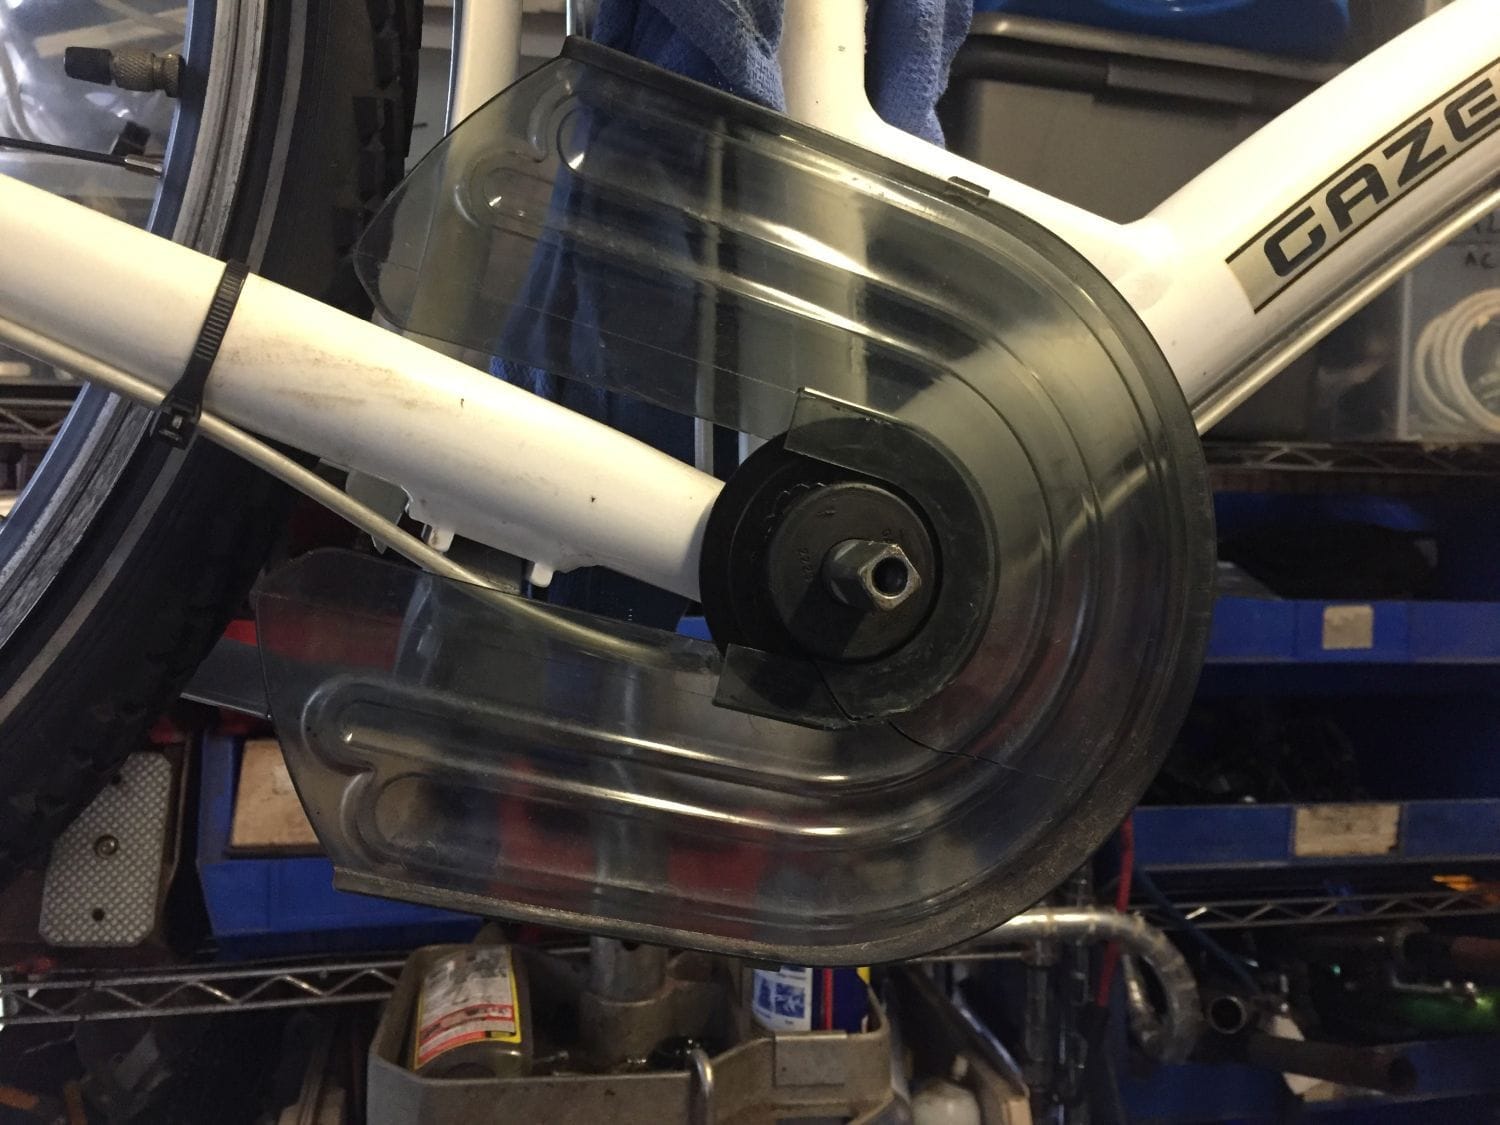
It was a PAIN to find a thin 3" washer that would hold the original chainguard in place; found something suitable in a reducing washer for electrical applications. Even then, I still had to MIG a bead of weld around its inside diameter to get it down to the Gazelle cup size though.
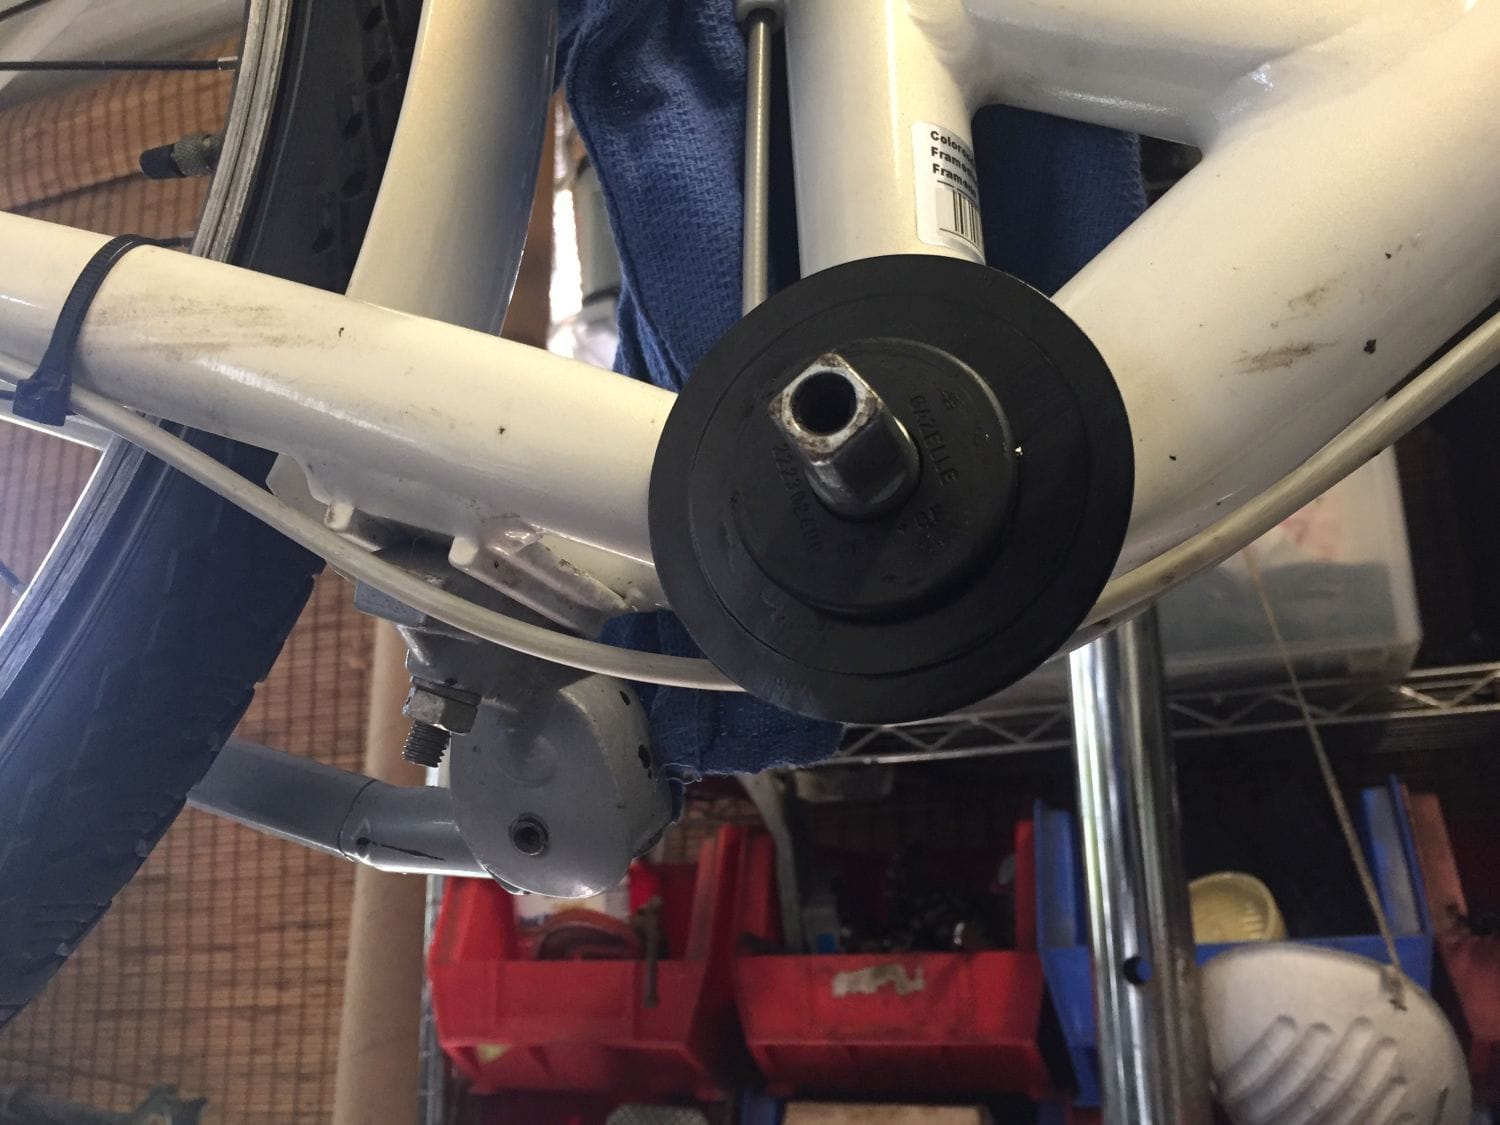
It works. And yes, the inner guard had cracked before I tried shoving it into the 3" washer. It is what it is - it'll stay like that, as the outer section holds it together perfectly.
-Kurt
I think I finally have to come to grips - pun not intended - with the idea of putting an alternate set of longer North Roads on this bike. These are too short for the levers alone, much less figuring out how to shove a shifter on there. With the right bars, I may be able to mount the original G9 shifter too.
Also wound up getting one of these little beauts for the rear. It's not a Secula, but is the light I had in mind in the first place. It looks the part too. I still have to work out the rat's nest of wiring around the headtube, but the functional part is finally sorted.
Incidentally, with my Spin commuter doing just fine as an office bike, I've decided to refit the stock bits to the Gazelle Whale in preparation for getting rid of it.
In lieu of re-relacing the 8-speed rear wheel, I repurposed a bent rear wheel off a Spin Gen 3 by re-lacing the hub and spokes into an Alexrims DH20. The DH20 shares the same internal diameter as the Spin rim, so it was a direct swapover. I'll probably lace up a replacement for the front too, as I still like that front hub.
It was a PAIN to find a thin 3" washer that would hold the original chainguard in place; found something suitable in a reducing washer for electrical applications. Even then, I still had to MIG a bead of weld around its inside diameter to get it down to the Gazelle cup size though.
It works. And yes, the inner guard had cracked before I tried shoving it into the 3" washer. It is what it is - it'll stay like that, as the outer section holds it together perfectly.
-Kurt
__________________
Last edited by cudak888; 03-01-20 at 04:44 PM.
Likes For cudak888:
03-01-20, 10:21 PM
#115

Senior Member
Join Date: Jun 2006
Posts: 20,305
Mentioned: 130 Post(s)
Tagged: 0 Thread(s)
Quoted: 3464 Post(s)
Liked 2,831 Times
in
1,997 Posts
Stop crack drill hole suggestion
works on metal and plastic
or you could melt a hole with a lightweight soldiering iron.
works on metal and plastic
or you could melt a hole with a lightweight soldiering iron.
03-01-20, 10:38 PM
#116
www.theheadbadge.com
Thread Starter
Join Date: Sep 2005
Location: Southern Florida
Posts: 28,513
Bikes: https://www.theheadbadge.com
Mentioned: 124 Post(s)
Tagged: 0 Thread(s)
Quoted: 2422 Post(s)
Liked 4,395 Times
in
2,092 Posts
Can't really give it too much time at this point. Full up with all the rough Spins and a few other bikes at the moment. Too many bikes in the work area.
-Kurt
__________________
03-02-20, 06:52 AM
#117
Overdoing projects
Join Date: Oct 2011
Location: Rotterdam, former republic of the Netherlands
Posts: 2,397
Bikes: Batavus Randonneur GL, Gazelle Orange Excellent, Gazelle Super Licht, Gazelle Grand Tourist, Gazelle Lausanne, Gazelle Tandem, Koga-Miyata SilverAce, Koga-Miyata WorldTraveller
Mentioned: 58 Post(s)
Tagged: 0 Thread(s)
Quoted: 784 Post(s)
Liked 1,238 Times
in
686 Posts
This project is back under way again. Thanks to JaccoW, Sturmey-Archer couldn't keep their international-only brake levers out of my grubby little hands, so I now have a pair of gorgeous, silver and black BLS92 brake levers. They're also HUGE.
They certainly match up pretty well with the bike. I ran into something similar with the SA BLS81 and the VO Porteur bars. Though mine is more of a gripshifter problem. I'll probably swap it out for a trigger or thumb-shifter.
If you're looking for North Road bars, check out this one (DutchBikeBits).
I used the stainless steel version upside-down on the Gazelle Lausanne and it has a huge grip area:

 03-02-20, 01:34 PM
#118
aka Tom Reingold

Join Date: Jan 2009
Location: New York, NY, and High Falls, NY, USA
Posts: 40,503
Bikes: 1962 Rudge Sports, 1971 Raleigh Super Course, 1971 Raleigh Pro Track, 1974 Raleigh International, 1975 Viscount Fixie, 1982 McLean, 1996 Lemond (Ti), 2002 Burley Zydeco tandem
Mentioned: 511 Post(s)
Tagged: 0 Thread(s)
Quoted: 7348 Post(s)
Liked 2,474 Times
in
1,437 Posts
Kurt, I have aluminum north road bars with a huge grip area. I nearly sawed the ends off. I'm not using the bars any more, so ...
__________________
Tom Reingold, tom@noglider.com
New York City and High Falls, NY
Blogs: The Experienced Cyclist; noglider's ride blog
�When man invented the bicycle he reached the peak of his attainments.� � Elizabeth West, US author
Please email me rather than PM'ing me. Thanks.
Tom Reingold, tom@noglider.com
New York City and High Falls, NY
Blogs: The Experienced Cyclist; noglider's ride blog
�When man invented the bicycle he reached the peak of his attainments.� � Elizabeth West, US author
Please email me rather than PM'ing me. Thanks.
03-02-20, 10:50 PM
#119
www.theheadbadge.com
Thread Starter
Join Date: Sep 2005
Location: Southern Florida
Posts: 28,513
Bikes: https://www.theheadbadge.com
Mentioned: 124 Post(s)
Tagged: 0 Thread(s)
Quoted: 2422 Post(s)
Liked 4,395 Times
in
2,092 Posts
Looking good Kurt!
They certainly match up pretty well with the bike. I ran into something similar with the SA BLS81 and the VO Porteur bars. Though mine is more of a gripshifter problem. I'll probably swap it out for a trigger or thumb-shifter.
If you're looking for North Road bars, check out this one (DutchBikeBits).
I used the stainless steel version upside-down on the Gazelle Lausanne and it has a huge grip area:
I've even considered continuing the blackout treatment to the bars, given that the stem has to be swapped out as well (7/8" Raleigh clamp) and the aluminum will not match the chrome.
The longer straight sweep will require a slightly longer stem too - been looking about at the 40 and 50mm stems out there and haven't been thrilled by the options.
-Kurt
__________________
03-03-20, 07:18 AM
#120
aka Tom Reingold
Join Date: Jan 2009
Location: New York, NY, and High Falls, NY, USA
Posts: 40,503
Bikes: 1962 Rudge Sports, 1971 Raleigh Super Course, 1971 Raleigh Pro Track, 1974 Raleigh International, 1975 Viscount Fixie, 1982 McLean, 1996 Lemond (Ti), 2002 Burley Zydeco tandem
Mentioned: 511 Post(s)
Tagged: 0 Thread(s)
Quoted: 7348 Post(s)
Liked 2,474 Times
in
1,437 Posts
I can measure later. Here they were on my bike four years ago.


__________________
Tom Reingold, tom@noglider.com
New York City and High Falls, NY
Blogs: The Experienced Cyclist; noglider's ride blog
�When man invented the bicycle he reached the peak of his attainments.� � Elizabeth West, US author
Please email me rather than PM'ing me. Thanks.
Tom Reingold, tom@noglider.com
New York City and High Falls, NY
Blogs: The Experienced Cyclist; noglider's ride blog
�When man invented the bicycle he reached the peak of his attainments.� � Elizabeth West, US author
Please email me rather than PM'ing me. Thanks.
03-03-20, 10:08 PM
#121
www.theheadbadge.com
Thread Starter
Join Date: Sep 2005
Location: Southern Florida
Posts: 28,513
Bikes: https://www.theheadbadge.com
Mentioned: 124 Post(s)
Tagged: 0 Thread(s)
Quoted: 2422 Post(s)
Liked 4,395 Times
in
2,092 Posts
Looks like a winner. Email sent.
-Kurt
-Kurt
__________________
06-04-20, 04:06 PM
#122
www.theheadbadge.com
Thread Starter
Join Date: Sep 2005
Location: Southern Florida
Posts: 28,513
Bikes: https://www.theheadbadge.com
Mentioned: 124 Post(s)
Tagged: 0 Thread(s)
Quoted: 2422 Post(s)
Liked 4,395 Times
in
2,092 Posts
This project seems to have landed on the back burner, but the recent acquisition of the Union-badged Polycarbonex donor bike just put it back on the map.
The Polycarbonex came with a short-reach, long quill SR stem which solves two problems: Replacing the original 7/8" clamp stem for a 25.4 North Road, and getting the handlebars up a bit more - being hunched over is a problem I have on my '51. Since this is more or less a duplicate bike, I'd like to avoid that.
The stem isn't polished just yet - it's still full of sandpaper marks. Polishing the pits out of these SR stems always seems like a fool's errand, but it appears as if it'll come out fairly decently in the end.
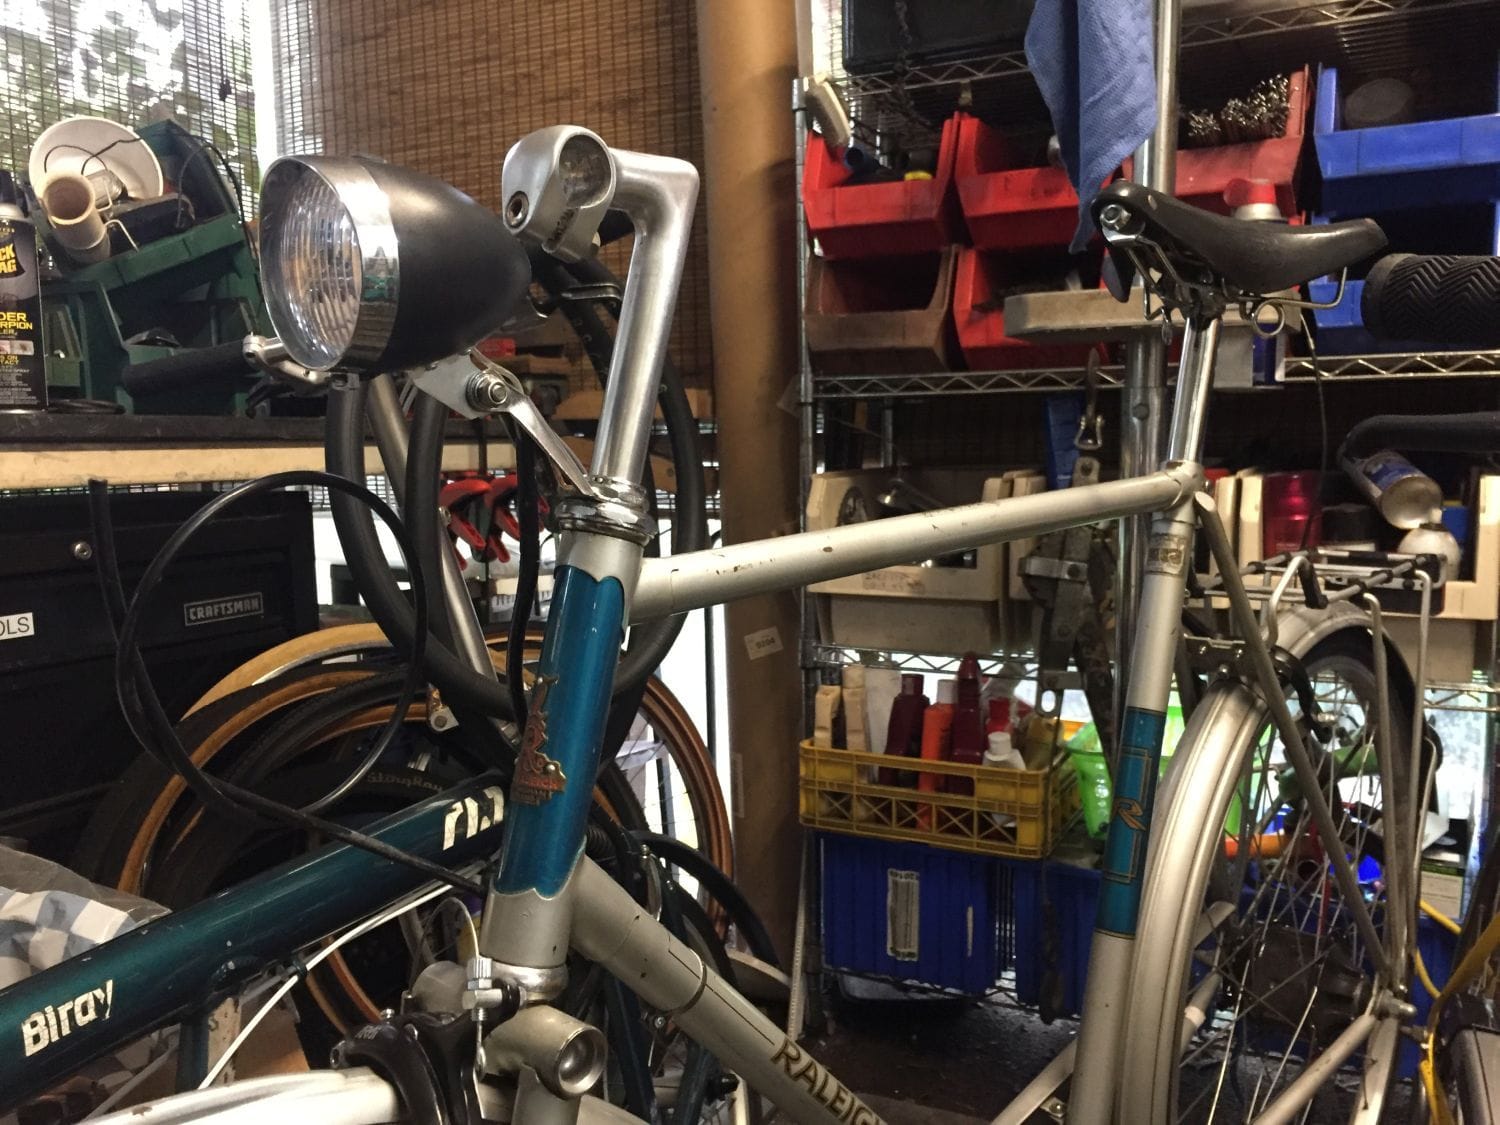
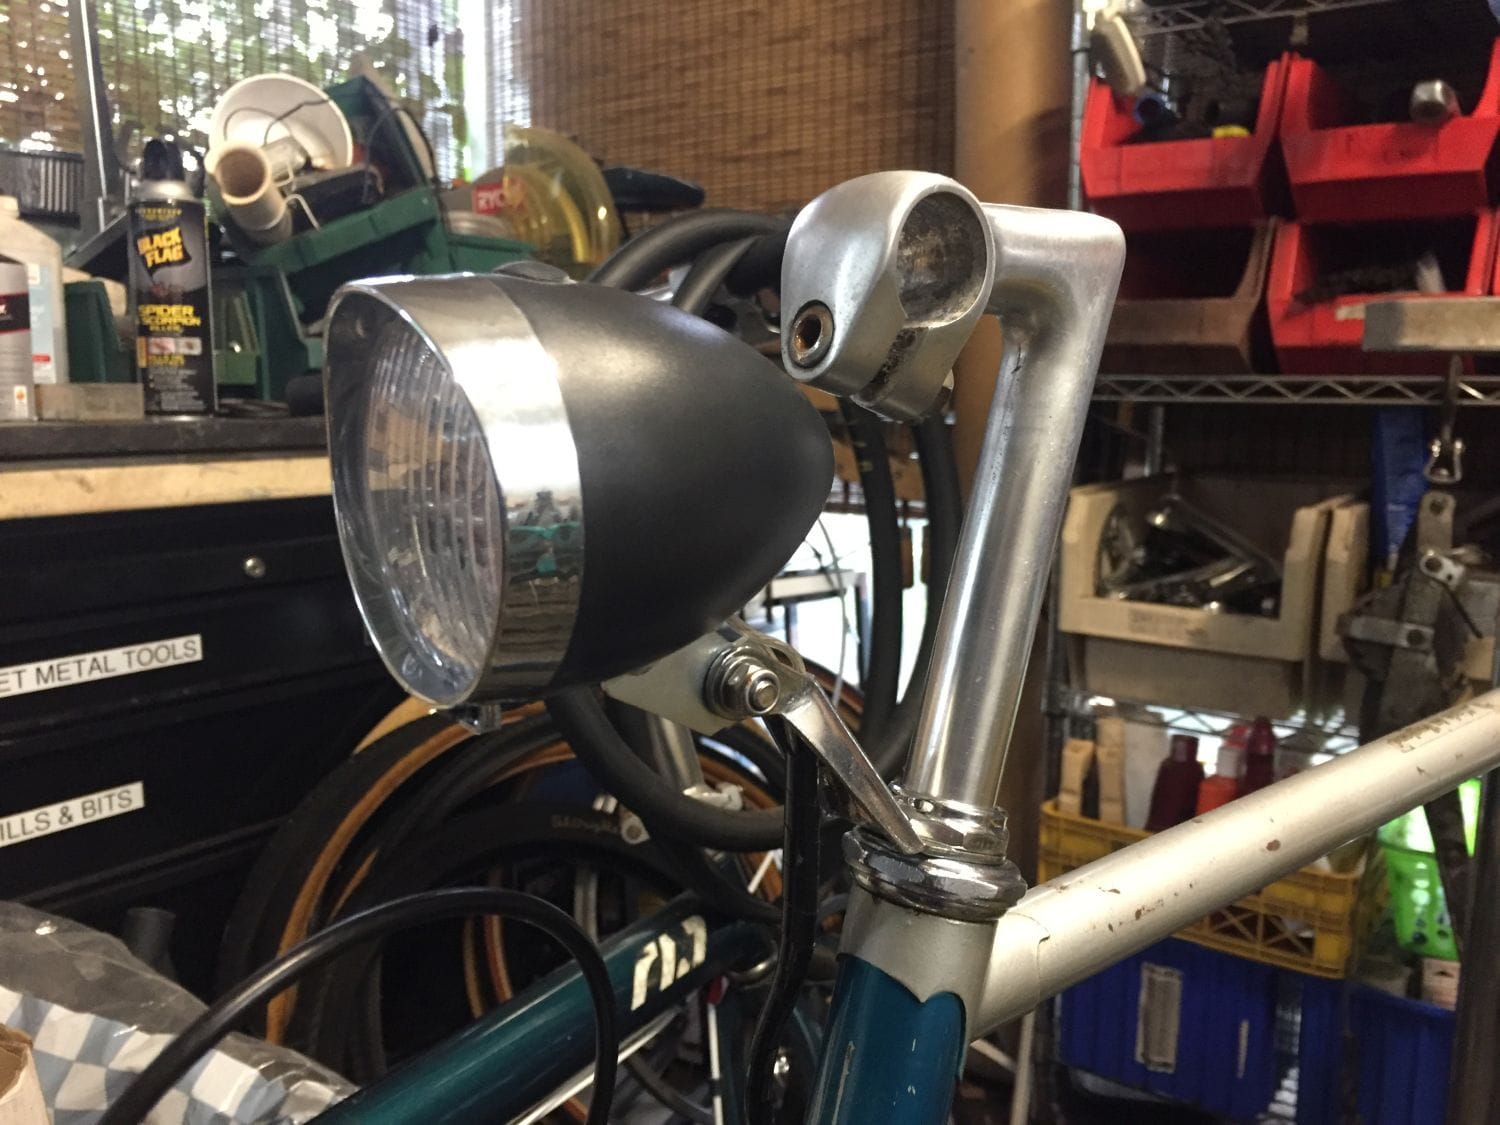
I also swapped the light mount. I was impressed by the headset bracket from the Polycarbonex - it is just as thick as an original Raleigh light mount and virtually unbendable. Swapping it not only does away with the fiddly lamp bracket clamp, but also positions the headlight higher up and closer to the frame. Looks better than propping it out halfway over the front axle.
I also mounted the rack from the Polycarbonex here. It's nor a particularly good one, but it's designed for Pletscher's proprietary brake bridge, which is built into the 1980 Sports.
-Kurt
The Polycarbonex came with a short-reach, long quill SR stem which solves two problems: Replacing the original 7/8" clamp stem for a 25.4 North Road, and getting the handlebars up a bit more - being hunched over is a problem I have on my '51. Since this is more or less a duplicate bike, I'd like to avoid that.
The stem isn't polished just yet - it's still full of sandpaper marks. Polishing the pits out of these SR stems always seems like a fool's errand, but it appears as if it'll come out fairly decently in the end.
I also swapped the light mount. I was impressed by the headset bracket from the Polycarbonex - it is just as thick as an original Raleigh light mount and virtually unbendable. Swapping it not only does away with the fiddly lamp bracket clamp, but also positions the headlight higher up and closer to the frame. Looks better than propping it out halfway over the front axle.
I also mounted the rack from the Polycarbonex here. It's nor a particularly good one, but it's designed for Pletscher's proprietary brake bridge, which is built into the 1980 Sports.
-Kurt
__________________
Likes For cudak888:
06-29-20, 07:40 PM
#123
www.theheadbadge.com
Thread Starter
Join Date: Sep 2005
Location: Southern Florida
Posts: 28,513
Bikes: https://www.theheadbadge.com
Mentioned: 124 Post(s)
Tagged: 0 Thread(s)
Quoted: 2422 Post(s)
Liked 4,395 Times
in
2,092 Posts
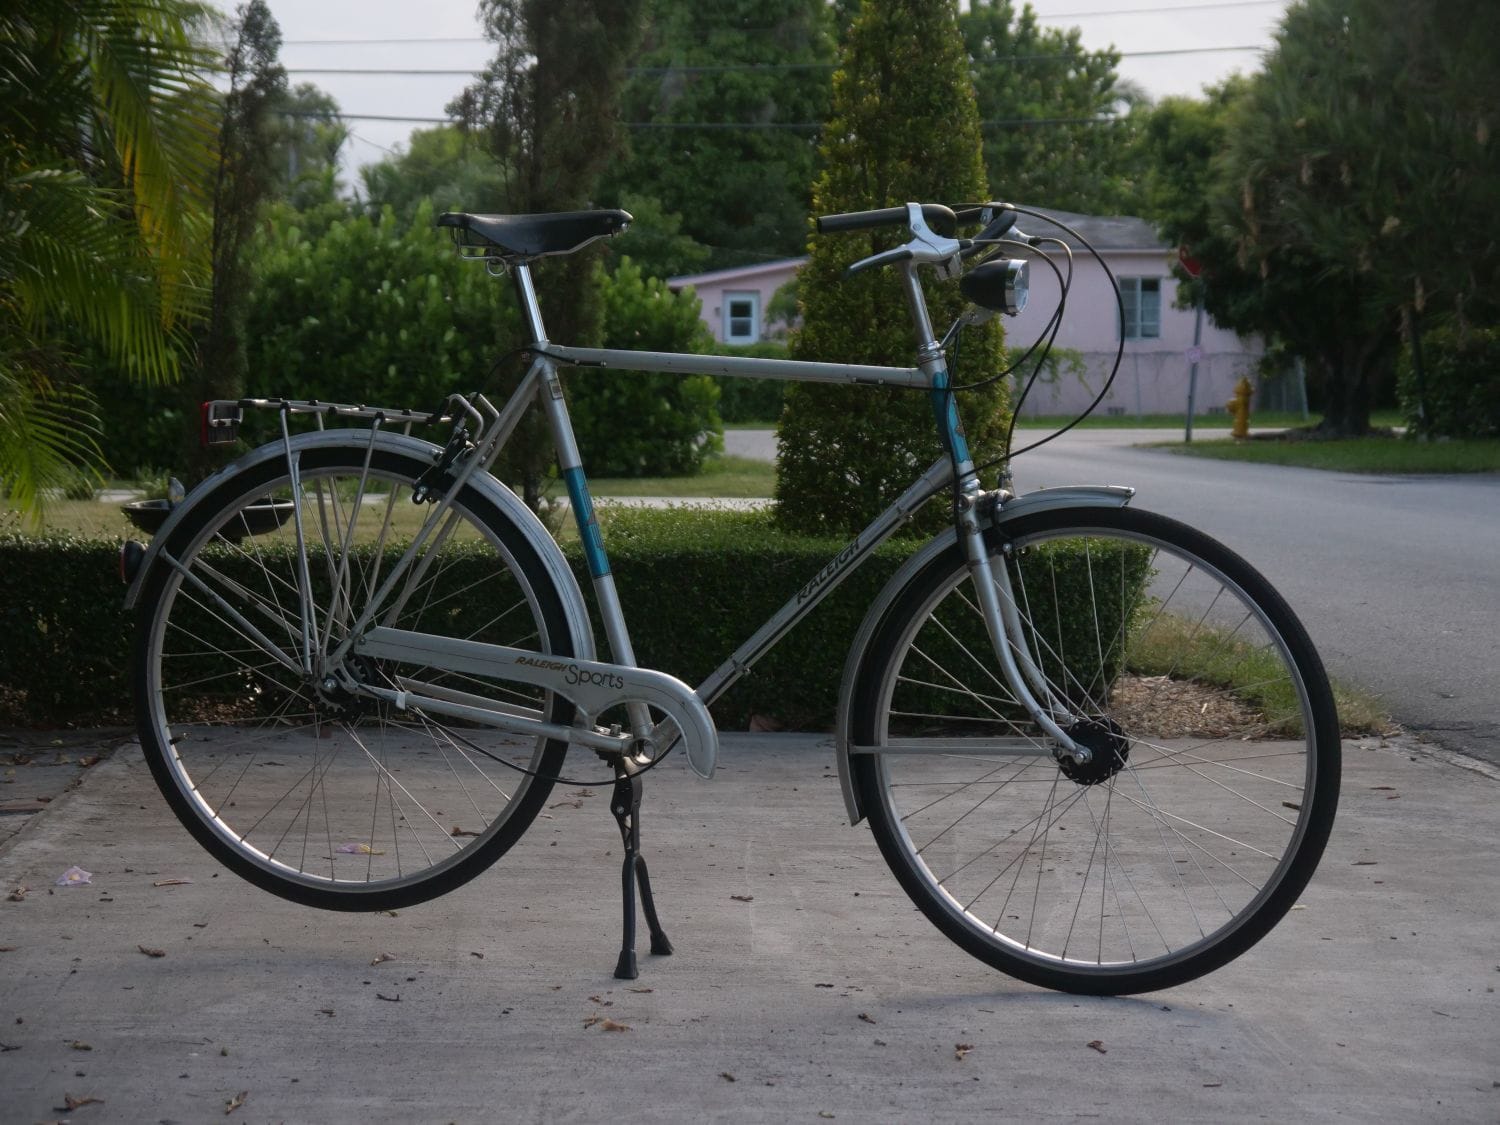
I did what I said I wouldn't do. Again.

These are inverted, flat black Soma Sparrow handlebars with the logos cleaned off. Paid more than I should have for them, but they came with Cane Creek reverse brake levers that I plan to use on some porteur bars, and some disc calipers which I'll make use of on another project.
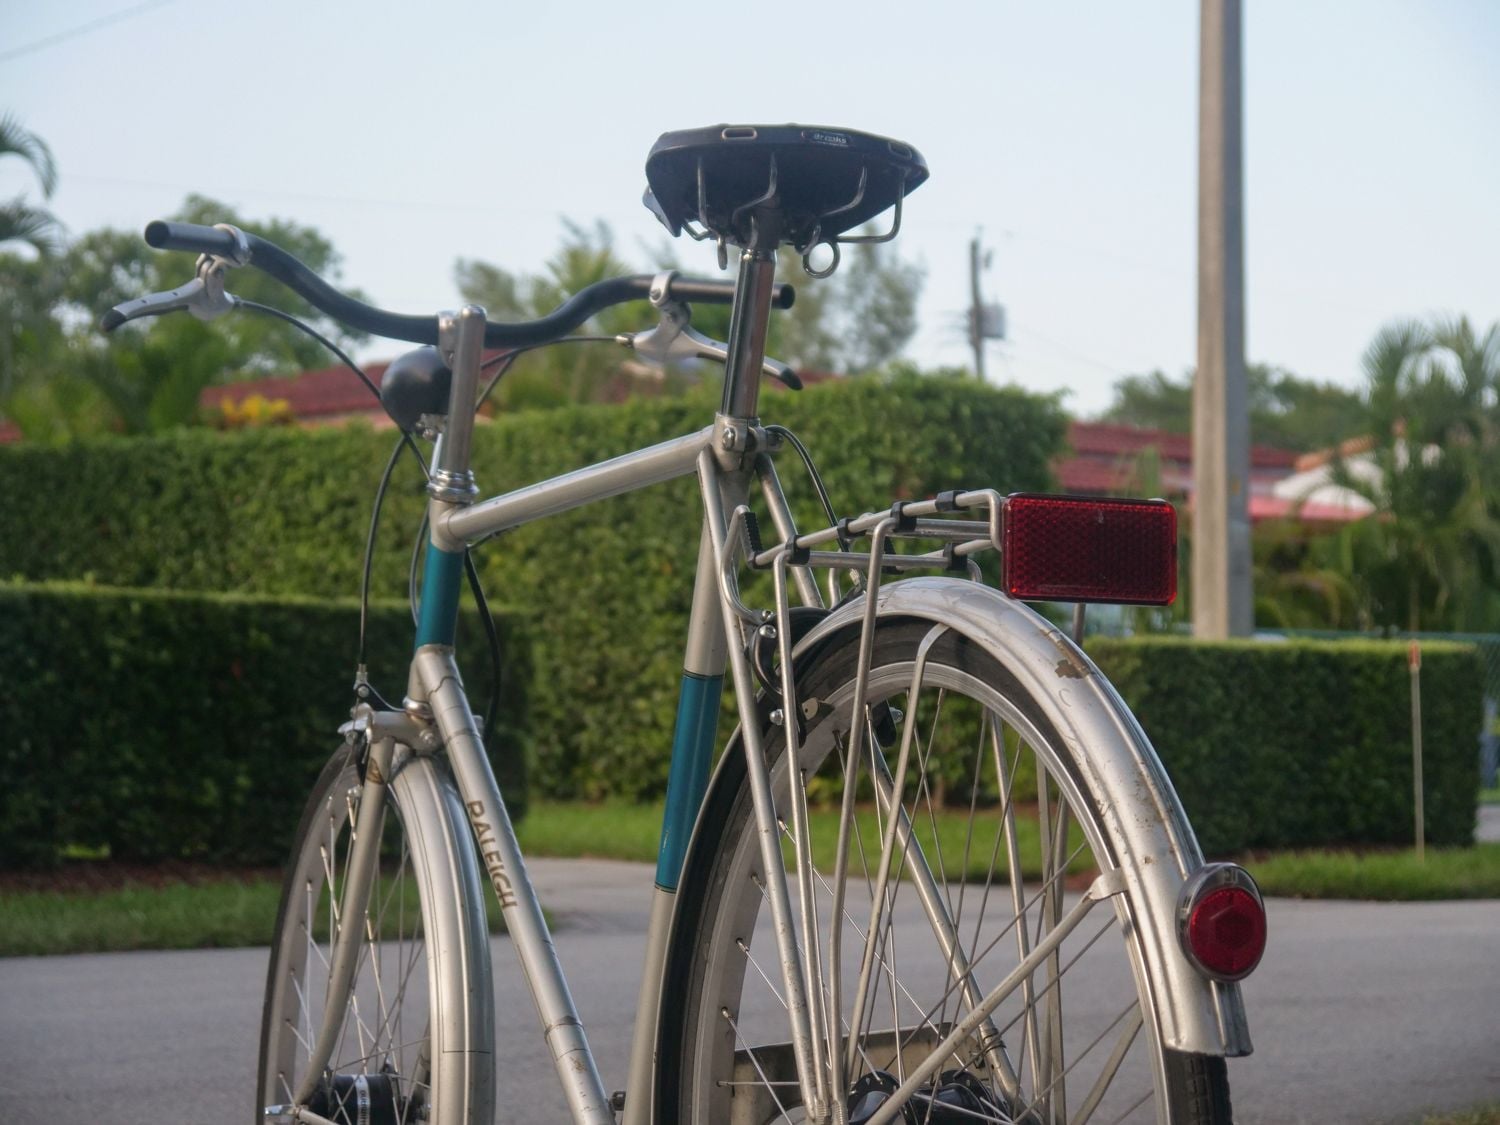
I love how the Dutch-market headlamp bracket re-positioned the headlamp high and proud up front. It breaks up the Technomic-level of quill length which would look unsightly otherwise.
I'm thrilled with the way the Sturmey-Archer BLS92 brake levers look. They're the right tint of silver and their sweeping curves have the elegance necessary to harmonize with a classic English roadster. JaccoW, once again, a million thanks for facilitating these "non-US market" Sturmey levers.
Now, I'm sure by now, someone has spotted the omission of something quite important. Yep, the SRAM 9-speed shifter didn't fit. Again.
I think I've found a solution in forcing a SRAM X-5 onto the handlebar, which is the most compact SRAM shifter I can shove in there. Reports say the cable pull is the same between the G9 IGH and the 1:1 derailers. And if it isn't, I'll just have to try to transplant the detents from the G9 shifter into the X-5 - unless that also doesn't fit.
I also solved the loose wiring for the lighting by putting some heatshrink over the clamped sections. Problem solved. I'd even go so far to say that it looks like a kludge that Tube Industries might have done back in the day. Good enough.

One concession to originality has got to go - every last RAMPAR "R" logo - including the one on the seattube - is going to go. I hate this logo with a passion. Repop Heron badges will take their place.
Here's one of the other problem points. After going through all the effort of jettisoning the Love at First Bite Reflector from the back end, I now have this wart to contend with.
I have no problem removing it, but I'm not sure a rack with two empty holes on the back would be ideal either. The Gazelle (which I ultimately sold, with different wheels and the original chaincase) had an AA-battery powered taillight that bolted into this same pattern.
Jacco - if you're reading this, do you know of any Dutch-market bolt-ins for this design?
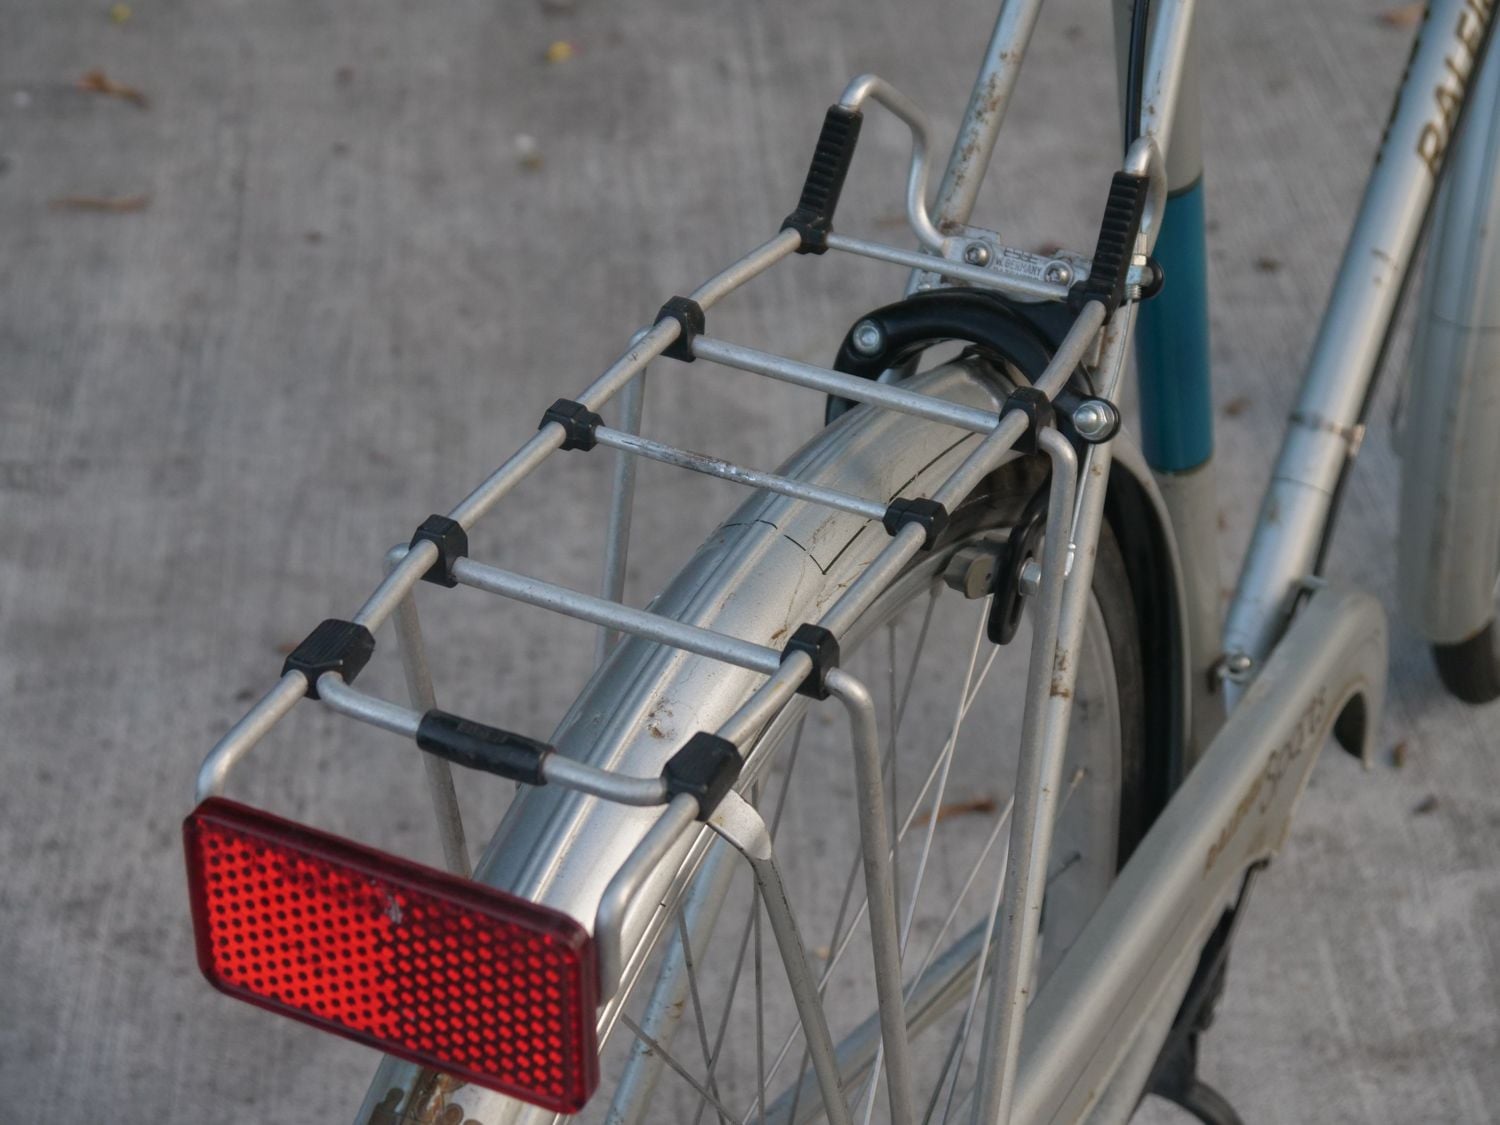
One of the other issues I have to work with are the rack mounts. It's an interesting split design that allows the rack to be leveled, but they may be just a tad short to meet the Raleigh eyelets (and one strut is bent, easy enough fix).
Even if I can get it to fit at the original eyelets, the Raleigh studs (yes, this one has studs and a nut rather than a bolt and a nut) aren't long enough for the sandwich-style rack hardware.
It's fitting though, I'll admit that.
I'm thinking the bars do look a bit off with the black split by the silver levers though. Might need to dig up some grey grips to go with it.
-Kurt
These are inverted, flat black Soma Sparrow handlebars with the logos cleaned off. Paid more than I should have for them, but they came with Cane Creek reverse brake levers that I plan to use on some porteur bars, and some disc calipers which I'll make use of on another project.
I love how the Dutch-market headlamp bracket re-positioned the headlamp high and proud up front. It breaks up the Technomic-level of quill length which would look unsightly otherwise.
I'm thrilled with the way the Sturmey-Archer BLS92 brake levers look. They're the right tint of silver and their sweeping curves have the elegance necessary to harmonize with a classic English roadster. JaccoW, once again, a million thanks for facilitating these "non-US market" Sturmey levers.
Now, I'm sure by now, someone has spotted the omission of something quite important. Yep, the SRAM 9-speed shifter didn't fit. Again.
I think I've found a solution in forcing a SRAM X-5 onto the handlebar, which is the most compact SRAM shifter I can shove in there. Reports say the cable pull is the same between the G9 IGH and the 1:1 derailers. And if it isn't, I'll just have to try to transplant the detents from the G9 shifter into the X-5 - unless that also doesn't fit.
I also solved the loose wiring for the lighting by putting some heatshrink over the clamped sections. Problem solved. I'd even go so far to say that it looks like a kludge that Tube Industries might have done back in the day. Good enough.
One concession to originality has got to go - every last RAMPAR "R" logo - including the one on the seattube - is going to go. I hate this logo with a passion. Repop Heron badges will take their place.
Here's one of the other problem points. After going through all the effort of jettisoning the Love at First Bite Reflector from the back end, I now have this wart to contend with.
I have no problem removing it, but I'm not sure a rack with two empty holes on the back would be ideal either. The Gazelle (which I ultimately sold, with different wheels and the original chaincase) had an AA-battery powered taillight that bolted into this same pattern.
Jacco - if you're reading this, do you know of any Dutch-market bolt-ins for this design?
One of the other issues I have to work with are the rack mounts. It's an interesting split design that allows the rack to be leveled, but they may be just a tad short to meet the Raleigh eyelets (and one strut is bent, easy enough fix).
Even if I can get it to fit at the original eyelets, the Raleigh studs (yes, this one has studs and a nut rather than a bolt and a nut) aren't long enough for the sandwich-style rack hardware.
It's fitting though, I'll admit that.
I'm thinking the bars do look a bit off with the black split by the silver levers though. Might need to dig up some grey grips to go with it.
-Kurt
__________________
Last edited by cudak888; 06-29-20 at 08:28 PM.
06-30-20, 07:30 AM
#124
Not lost wanderer.

Join Date: Jan 2013
Location: Lititz, Pa
Posts: 3,331
Bikes: In USA; 73 Raleigh Super Course dingle speed, 72 Raleigh Gran Sport SS, 72 Geoffry Butler, 81 Centurion Pro-Tour, 74 Gugie Grandier Sportier
Mentioned: 73 Post(s)
Tagged: 0 Thread(s)
Quoted: 886 Post(s)
Liked 998 Times
in
525 Posts
Here is my Gazelle I now found a nice LED light at a junk bike shop here in Cambodia, I will get a picture tomorrow.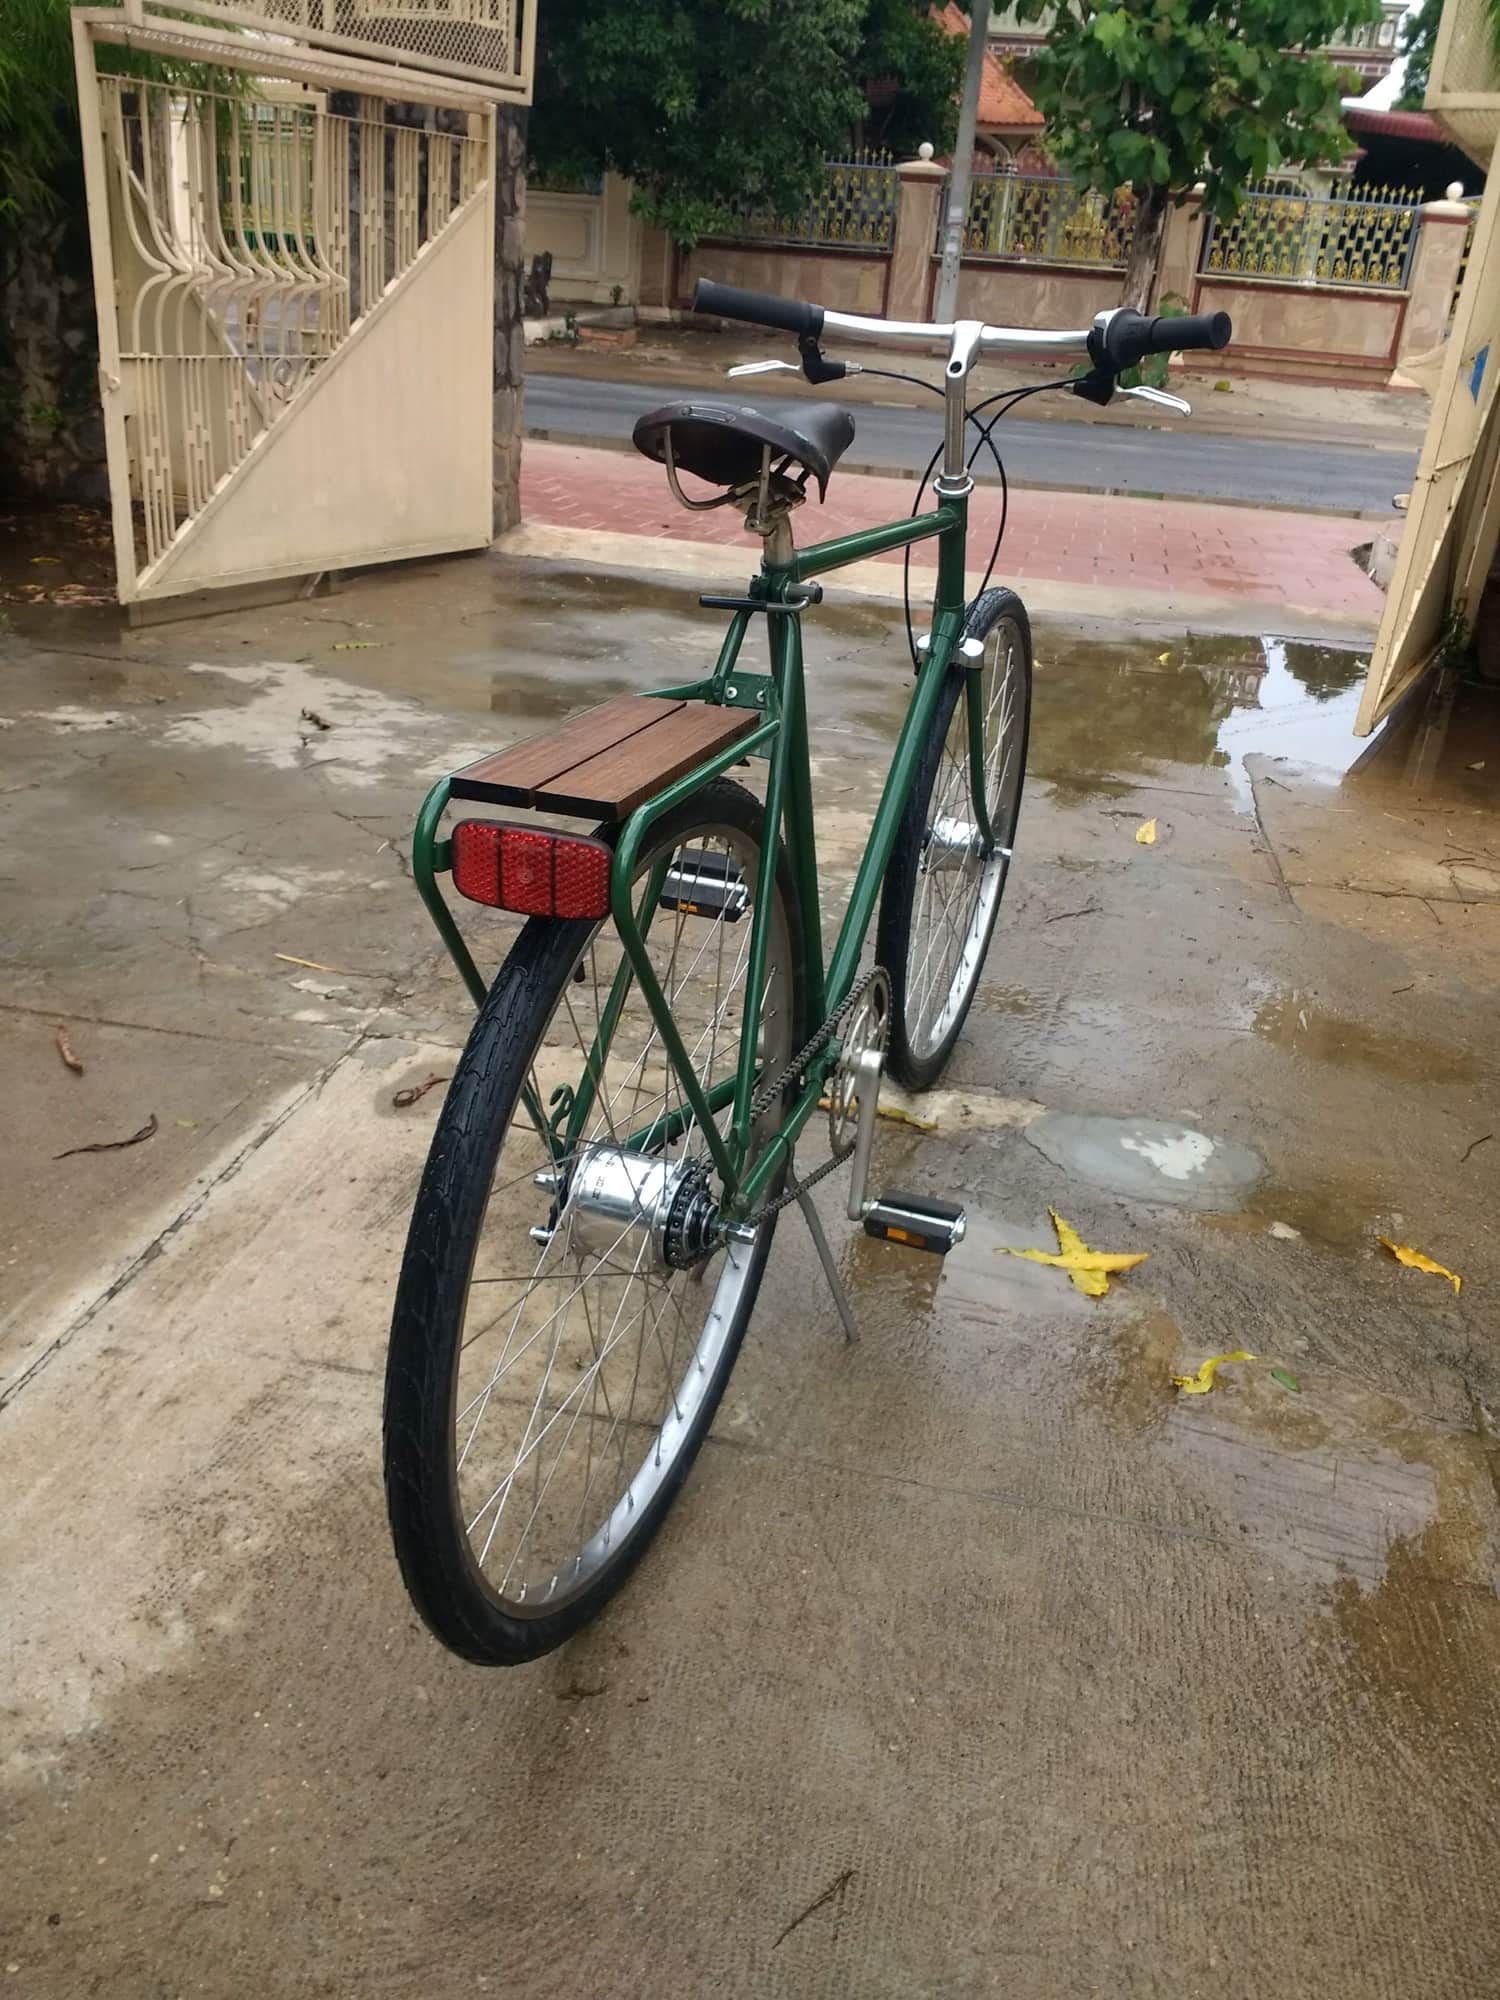
 06-30-20, 08:26 AM
#125
www.theheadbadge.com
Thread Starter
Join Date: Sep 2005
Location: Southern Florida
Posts: 28,513
Bikes: https://www.theheadbadge.com
Mentioned: 124 Post(s)
Tagged: 0 Thread(s)
Quoted: 2422 Post(s)
Liked 4,395 Times
in
2,092 Posts