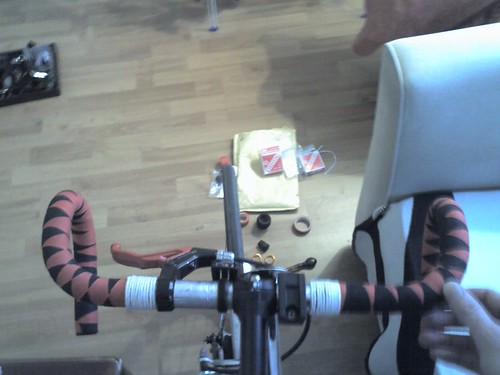
Leather Handlebar Tape
 09-07-07, 09:46 AM
#1
Senior Member
Thread Starter
Join Date: Aug 2007
Location: St. Paul, Minnesota
Posts: 52
Bikes: 1984 Trek 720, 1985 Trek 770
Mentioned: 0 Post(s)
Tagged: 0 Thread(s)
Quoted: 0 Post(s)
Likes: 0
Liked 0 Times
in
0 Posts
Leather Handlebar Tape
Hello all, I just purchased an 84 Trek 720 and am going to retape the bars. I am going to put leather tape on them but am bothered by the black tape to secure the tape at the top end. Isn't there a better way to do this? Can it be done with piece of the leather tape? Any suggestions?
Thanks, Ben
Thanks, Ben
 09-07-07, 09:51 AM
#2
Senior Member
Join Date: Mar 2007
Location: Saskatchewan
Posts: 2,465
Mentioned: 0 Post(s)
Tagged: 0 Thread(s)
Quoted: 3 Post(s)
Likes: 0
Liked 6 Times
in
5 Posts
Wayyyyy back in the 80's I did this.
I bought some extra large heat shrink tube and cut 35mm pieces for the end of the wrap.
I slid it up over the wrap and used a small butane torch to shrink it.
Viola! A neat one piece way of securing the wrap.
I bought some extra large heat shrink tube and cut 35mm pieces for the end of the wrap.
I slid it up over the wrap and used a small butane torch to shrink it.
Viola! A neat one piece way of securing the wrap.
Last edited by ricohman; 09-07-07 at 05:25 PM.
09-07-07, 04:18 PM
#3
The Wheel is Turning

Join Date: May 2006
Location: Virgil Kansas
Posts: 540
Bikes: '05 Novara (REI) Bonanza
Mentioned: 0 Post(s)
Tagged: 0 Thread(s)
Quoted: 0 Post(s)
Likes: 0
Liked 0 Times
in
0 Posts
Thank You for the great idea!!
09-07-07, 04:52 PM
#4

Dropped

Hello all, I just purchased an 84 Trek 720 and am going to retape the bars. I am going to put leather tape on them but am bothered by the black tape to secure the tape at the top end. Isn't there a better way to do this? Can it be done with piece of the leather tape? Any suggestions?
Thanks, Ben
Thanks, Ben
Bar Tape Tricks
Over the years many of our customers have asked us how we get our bar taping to look so clean. Well, here it is for everyone. The trick is, you guessed it, "Superglue." I'll do my best with this considering that I don't have pictures to go along with this treatise.
First, we almost always use Cinelli Cork tape. I like the way it feels and works especially well when the sweat gets bad. I am aware that it does not last very long. I just think that the feel is worth it. This taping method will work fine for any of the padded stretchy tapes out there anyway. Second, I should say that the purpose here is not really to have a tape job that works any better than any other. I just like making them look good. It sucks if you deliver a wonderful new bike with a crappy tape job. The basic concept is to end up with what appears to be one continuous tape wrap that looks as though it goes right through the control levers without wrapping around them. Also, we want to eliminate any of that silly Cinelli electricians' tape for the end of the tape at the stem.
Materials and tools needed: Cinelli Cork bar tape, a straight edge razor or Exacto knife, Super Glue'(the Permatex stuff works well) and 3"X 10" piece of cardboard.
Before starting to wrap, peel back your control lever gum hoods. They should remain on the bodies, but you can peel them forward easily from their rear edges. Ergo lever hoods need to be peeled over the release levers as you go. You can hold the bike best if you straddle the front wheel while facing the rear of the bike. This way, you can grip the front wheel with your knees.
Start your wrap at the end of either side of the bar making sure that your wrap goes over the top towards the outside of the bar, not the inside. This will assure that once you are finishing up at the stem, the tape will be wrapping over the top away from you as you ride. Do not try to start the wrap exactly at the end of the bar. Start it so that there is at least half of the tape width overhanging the end of the bar. This way you will be able to trim the excess with your razor later for a clean look. The yellow paper strip comes off as you wrap to expose the double sided tape As you wrap, keep the tape tight enough to prevent any looseness gaps, but not so tight that it tears. Also, as a rule of thumb, you want to overlap the previous wrap by about one third of the width of the tape. Less, and you risk gaps, more, and you risk running out of tape. Watch out around the bends as you will need to tighten up the wrap width to prevent gaps.
As you approach the bottom of the control lever, try to time your wraps so that the last wrap just barely hits the bottom of the control lever. If you have to make that last wrap with a bit more overlap, no problem. No one will notice. As your wrap goes past the bottom of the control lever, continue your wrap parallel to the previous one till you run into the control lever body. At this point, you want to use the razor to cut the tape at a point so that it can be glued to the control lever body, but not so long that the body hood can not easily get over it. Usually, this works out to about 12-15mm onto the body. Apply two small drops to the inside surface of the tape end you have just cut. WARNING: DO NOT GET THE GLUE ONTO ANY PART OF YOURSELF! Stretch the tape a bit as you stick it to the lever body, locating it so that tape wrap appears even with the previous wraps. You have about two or three seconds to get the location right as SuperGlue sticks really fast once air can not get to it. Hold the glued end of the tape onto the body tightly for about ten seconds. That is enough.
Your next steps is to take the short extra piece of tape supplied with your kit, and trim the ends of it to fit your control lever. This short piece is one of the "tricks" to this tape job. You are using it to apply a tape wrap, which appears to go right through the control lever body. So before you remove the paper backing, hold the short piece in place overlapping a third of the last wrap and parallel to it. You will notice that for clean ends of this piece, you will want to trim their ends diagonally so that once the tape is applied, the ends will be cut vertically. The Shimano levers do not require that you cut with much precision. Campy levers do require it however. With Campy levers the lower cut should be done so that the tape fits onto the short part of the body just behind the ridge. This will give you only about three millimeters to stick it to. It works, just cut accurately so that the cut angle keeps the short piece of tape parallel to the previous one. Your top cut of this short piece just needs to be located so that the piece will have a good sticking area well inside the lever hood. Once you are satisfied with the short piece shape, peal off the paper backing, apply SMALL amounts of glue to the ends and stick the LOWER end to the inside of the control lever. Hold it tight for about ten seconds and then stretch the piece around to the outside while holding the inner end and stick the outer end to the body . Give the short piece a minute or two to set up.
Now for the last piece, start above but still overlapping the inside end of the short piece. Again, trim the end (if necessary) so that the first wrap will be parallel to the short piece. If you have Campy levers, you will need to make a more complex cut to get around the release lever. Be careful to keep any tape away from that release lever. Apply glue to the end, stick it in place, wait ten seconds or so and start to wrap. At this point, you should be wrapping over the top AWAY from the rider. Keep wrapping, keeping the warps even so that you won't look like a geek. When you get to the Ferule (Cinelli bars) or bulge (everyone else's), stop. Here is where the final trick comes in. You have already thrown away the end tape, didn't you?
OK. The tape will be coming over the top of the bar towards you but somewhat diagonally. With the paper backing still on, place your piece of cardboard behind the tape, supported by the top of the bar. Decide where you want the tape to end when you are all done wrapping. On Cinelli bars, this is usually right at the ferule. With most other bars it will be at the start of the bulge. If you use clip-ons, you will probably need to end further out. Use your razor to carefully cut the tape perpendicular to the bars. This will give you a tape end shaped like a sharp dagger, tapering to a point. The cut itself is usually about 5" long. Peel back the remainder of the paper, apply your glue in that last 5" of tape, right up to the tip. Without gluing yourself to the tape or your bike, finish the wrap so that the tape appears to blend into itself and disappear without any lumps. Pretty Cool. Don't worry; you'll get the hang of it after you do it a couple of times.
Now to finish. Pull the lever cover back in place. With Campy covers you will need to clear the release lever and kind of stretch and wiggle it at the bottom to get it to click into place. Next, take your razor and carefully trim the floppy end of the bar tape where you started at the bar end. You want to cut it so that it is flush with the bar end. If you use Cinelli bars, just stick the end plugs in making sure that the Cinelli logo is upright (not cool otherwise). With most other bars, you need to stick a bit of leftover tape (a 1cm. piece) onto the plug tabs before using the plugs. The inside diameter of those bars is a bit too big for the plugs. DONE - at least for the first side. Now just do the other side. If you get really screwed up doing this, I just hope you had the smarts to try it on your friend's bike first. Then you can do it right on your own bike.
 09-07-07, 05:50 PM
#5
Sasquatch Crossing

Join Date: Apr 2005
Location: Portlandia
Posts: 414
Mentioned: 0 Post(s)
Tagged: 0 Thread(s)
Quoted: 0 Post(s)
Likes: 0
Liked 0 Times
in
0 Posts
You could also use leather cord (available at bead or craft stores) to finish them according to the twine method. Then you'll have leather all around and could find a shade to match.
09-10-07, 12:35 PM
#7


The Improbable Bulk

Join Date: Jul 2005
Location: Wilkes-Barre, PA
Posts: 8,379
Bikes: Many
Mentioned: 0 Post(s)
Tagged: 0 Thread(s)
Quoted: 5 Post(s)
Likes: 0
Liked 7 Times
in
7 Posts
If anyone has used Tom Kellogg's method for cork tape, what do you do when it is time to change tape?
I have to admit the 70's bike boom plastic tape starting at the stem and stuffing any remainder in the end of the bar was the cleanest look, and easiest to do.
However, it was also about the least functional wrap!
If I were to go through the expense of leather bar tape, I would opt for the sewn on...
__________________
Slow Ride Cyclists of NEPA
People do not seem to realize that their opinion of the world is also a confession of character.
- Ralph Waldo Emerson
Slow Ride Cyclists of NEPA
People do not seem to realize that their opinion of the world is also a confession of character.
- Ralph Waldo Emerson
09-12-07, 07:50 PM
#8
Senior Member
Thread Starter
Join Date: Aug 2007
Location: St. Paul, Minnesota
Posts: 52
Bikes: 1984 Trek 720, 1985 Trek 770
Mentioned: 0 Post(s)
Tagged: 0 Thread(s)
Quoted: 0 Post(s)
Likes: 0
Liked 0 Times
in
0 Posts
Hey, I jsut got some Brooks leather handlebar tape and did not realize that it was perforated! All the photos I have seen of it online on bikes shows it NOT preforated. What's the deal? Are they only making perf now?
Thanks
Thanks
09-13-07, 01:39 PM
#9
Junior Member
Join Date: Feb 2007
Posts: 11
Mentioned: 0 Post(s)
Tagged: 0 Thread(s)
Quoted: 0 Post(s)
Likes: 0
Liked 0 Times
in
0 Posts
they are only making the perforated stuff now. but it comes with wooden plugs, where the non-perf stuff came with plastic. i was a bit upset at first too, but now really like it. oh, and the seems are welded instead of stitched where they use more than one piece of leather.
09-17-07, 06:28 AM
#10
Tinkerer since 1980
Join Date: Sep 2006
Location: London
Posts: 922
Bikes: Coppi racer, Old school BMX, some random a fixed wheel convertion
Mentioned: 0 Post(s)
Tagged: 0 Thread(s)
Quoted: 0 Post(s)
Likes: 0
Liked 1 Time
in
1 Post
I 2nd the twine method, looks good and clean. I use it with dimond wraped bars. I first secure the bar tape with electrical tape for security then do the twine wrap over the top for looks.