


Ultegra 6703 Pedal Arm Won't Saty On
 05-30-20, 07:30 PM
#1
Full Member
Thread Starter
Ultegra 6703 Pedal Arm Won't Saty On
in 2013..,i posted about trouble with getting my FC 6703 crank on to my 2007 specialized Roubaix with a BB 6700 installed.
https://www.bikeforums.net/bicycle-m...wrong-one.html
Basically.., with the spacer in place, the spindle did not seem to protrude far enough through the BB to securely fasten the non-drive side crank arm. The cap that pre-loads the bearings only barely engages with the threads on the spindle.
Anyway, i rode it for 1000's of miles.., eventually replaced the chain rings because i wore them out.., and rode it for many miles again...
now, this season.., the crank arm will not stay on
At this point.., I am pretty sure I have stripped the splines or ridges inside the hole on the crank arm.., so i am ordering a new one. It looks like the splines on the spindle are fine.
I am thinking of installing it without the spacer - the crank arm will fully mate with the spindle without the spacer.
In fact - there is a little play without the spacer, and I am afraid it will lead to poor shifting, as the chain rings could move in and out slightly. So, maybe i could get a washer that is thinner than the spacer and use it instead.
any suggestions?
 05-31-20, 08:44 AM
#2
Senior Member
Join Date: Jan 2009
Location: San Diego, CA
Posts: 3,671
Mentioned: 10 Post(s)
Tagged: 0 Thread(s)
Quoted: 836 Post(s)
Liked 1,061 Times
in
745 Posts
Here is a diagram of your crankset with spacers and their widths listed. Check that yours has all the proper parts and installed in order. BB for double and triple are the same. It should fit if everything is correct. https://si.shimano.com/pdfs/ev/EV-FC-6703-2979A.pdf
Last edited by Crankycrank; 05-31-20 at 08:48 AM.
05-31-20, 06:41 PM
#4
Senior Member
Join Date: May 2004
Location: Southern California
Posts: 2,191
Mentioned: 1 Post(s)
Tagged: 0 Thread(s)
Quoted: 114 Post(s)
Liked 119 Times
in
92 Posts
One thing i never understood, is the role of part #4 in that diagram - the "plate". What does it do?
06-01-20, 02:16 PM
#7
Senior Member
Join Date: Jan 2009
Location: San Diego, CA
Posts: 3,671
Mentioned: 10 Post(s)
Tagged: 0 Thread(s)
Quoted: 836 Post(s)
Liked 1,061 Times
in
745 Posts
it's difficult to see how #4 could do that very well... there is a tiny tab on it that i guess is supposed to go in the hole on the spindle - but it seems too small to do anything.
is that how it's supposed to work?
is that how it's supposed to work?
06-01-20, 02:21 PM
#8
Full Member
Thread Starter
Here is a diagram of your crankset with spacers and their widths listed. Check that yours has all the proper parts and installed in order. BB for double and triple are the same. It should fit if everything is correct. https://si.shimano.com/pdfs/ev/EV-FC-6703-2979A.pdf
I have measured my BB width with a micrometer - it's 91.3 - 91.4 mm.., does that seem right?
This seems to me to be a possible source of my problem - if the BB when mounted on the bike is too wide, then the spindle will be too short...
 06-01-20, 03:00 PM
#9
Full Member
Thread Starter
My part #4 - the stopper plate is plastic, and is cracked - it is apparently also missing a metal pin
is it supposed to look like the one in this ebay ad?
https://www.ebay.com/itm/Shimano-Hol...oAAOSw50VeAkRU
it doesn't seem possible that this tiny pin could really hold it on - my arm comes off when i am out of the saddle climbing a hill - so really loading the pedal arm up...
In any case - on my bike, that little metal pin is not going to be near the tiny hole on the crank - at least i don't think it will - because i can't get the arm on the spindle far enough with the spacer in place
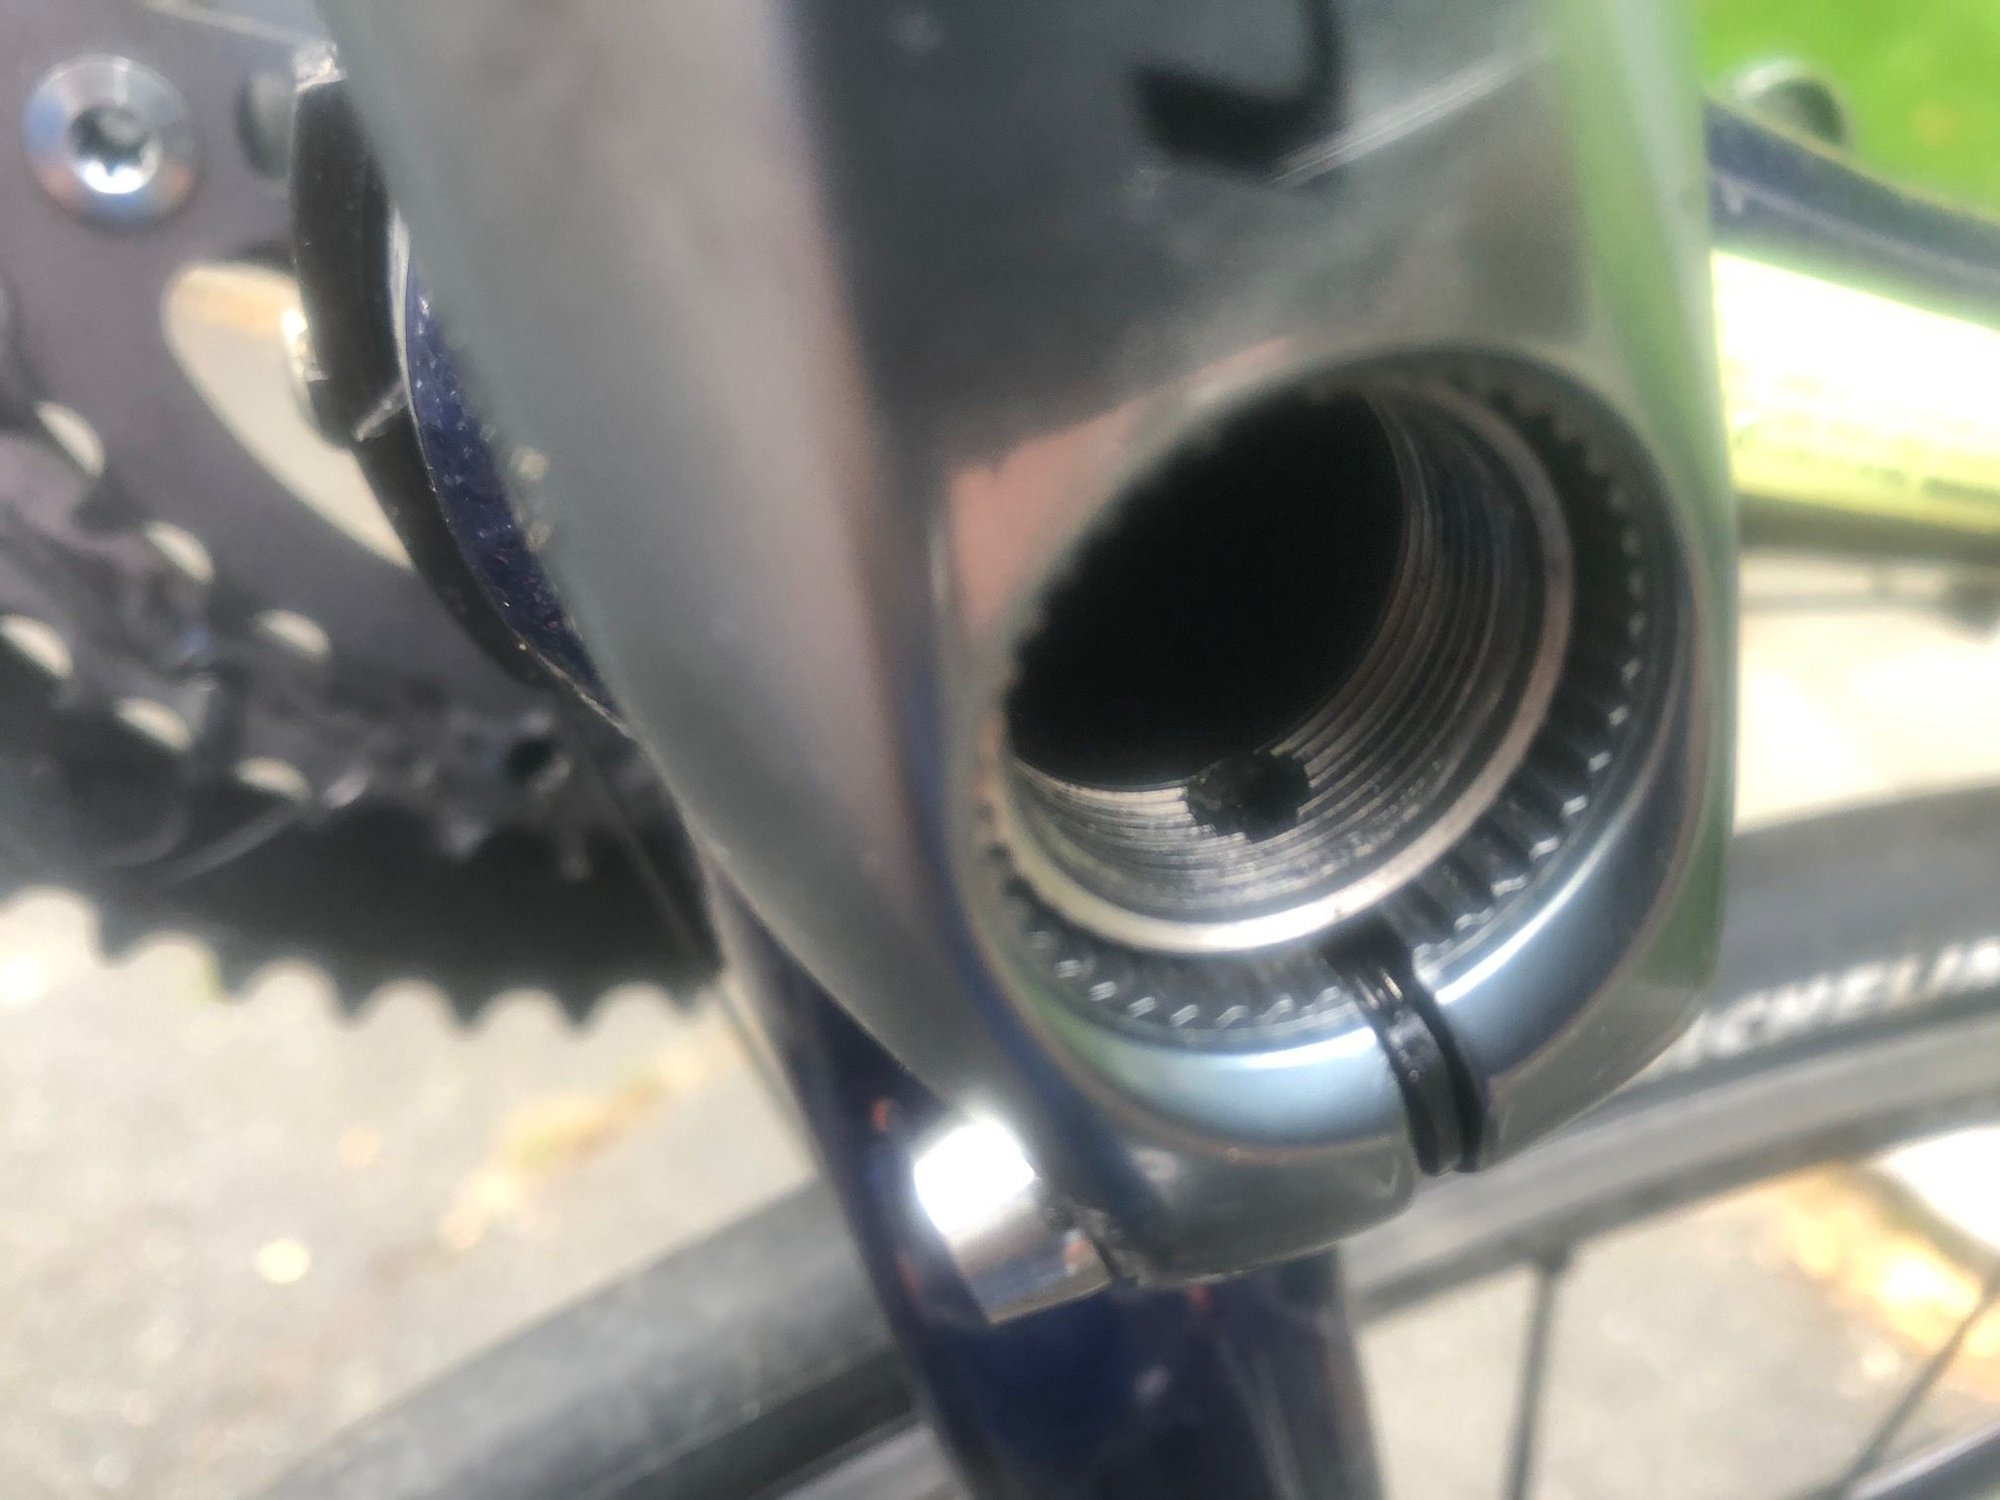
Here is a picture showing the arm fully seated on the spindle with the 3mm spacer in place - note how the end of the spindle is recessed into the arm. I believe the little metal pin on the stopper plate would be outboard of that hole.
is it supposed to look like the one in this ebay ad?
https://www.ebay.com/itm/Shimano-Hol...oAAOSw50VeAkRU
it doesn't seem possible that this tiny pin could really hold it on - my arm comes off when i am out of the saddle climbing a hill - so really loading the pedal arm up...
In any case - on my bike, that little metal pin is not going to be near the tiny hole on the crank - at least i don't think it will - because i can't get the arm on the spindle far enough with the spacer in place
Here is a picture showing the arm fully seated on the spindle with the 3mm spacer in place - note how the end of the spindle is recessed into the arm. I believe the little metal pin on the stopper plate would be outboard of that hole.
07-09-20, 08:16 AM
#10
Full Member
Thread Starter
well, I am still having trouble - the crank arm will not stay on
i did manage to lengthen the interval between failure though.
So, i experimented with simply removing the 3mm spacer, to get more of the pedal arm over the drive side spindle. It was obvious that this would not work because the spindle was now about 1/2mm too long - with the crank arm on as far as it would go, there was a tiny gap. The spindle would be free to slide back and forth, and the with the chain rings moving in and out by 1/2mm, the shifting would not be very good.
I fact, one of the first signs that the arm is coming off is that i can no longer shift to the large chain ring - as the pedal arm loosens and begins to slip off, the chain rings move outboard, and the large ring gets beyond the limit stop.
anyway, i next experimented with a home-made spacer of about 1/2mm, made from a takeout food container, installed without the 3mm spacer. This seemed to work better - certainly I got the pedal arm on to the spindle much further. It was tight and shifting was good.
I then found these delrin spacers made for shimano BB's by Wheels Manufacturing
https://wheelsmfg.com/products/botto...-brackets.html
they have a 1mm and a 1/2mm spacer.
I installed a 1mm spacer in place of the 3mm spacer.
I also bought a new part #4 , and a new crank arm
on closer inspection of the crank arm and spindle it seems they are fine, so i did not use the new crank arm yet.
everything goes on fine - i get the arm seated well on to the spindle. Shifting is good.
but after say 100-150miles, i notice the shifting problem - it gets hard, then impossible, to shift to the large chain ring, as the arm begins to slip off the spindle and the whole crank is free to move side-to-side a bit.
I carry the tools, and can fix it on my ride - but it sure is a pain.
I am thinking of trying the new crank arm.
07-10-20, 06:26 AM
#11
Expired Member

Join Date: Jun 2007
Location: TN
Posts: 11,538
Mentioned: 37 Post(s)
Tagged: 0 Thread(s)
Quoted: 3671 Post(s)
Liked 5,424 Times
in
2,756 Posts
Seeing the pic in post 9, I'm not surprised the arm came off. What's surprising is that you thought it was OK to ride it that way. My advice is to take it to a shop before you waste any more time or money. Clearly this isn't something you need to be messing with yourself.
My advice is to take it to a shop before you waste any more time or money. Clearly this isn't something you need to be messing with yourself.
Likes For shelbyfv:
 07-10-20, 01:17 PM
#13
Full Member
Thread Starter
Seeing the pic in post 9, I'm not surprised the arm came off. What's surprising is that you thought it was OK to ride it that way. My advice is to take it to a shop before you waste any more time or money. Clearly this isn't something you need to be messing with yourself.
My advice is to take it to a shop before you waste any more time or money. Clearly this isn't something you need to be messing with yourself.in any case, it doesn't look like that anymore - with the narrower 1mm spacer.., the pedal arm is seated quite far on to the spindle - about as far as it will go. recall that with no spacer, it doesn't go all the way on...,
Likes For jgf310:
07-10-20, 10:11 PM
#14
Generally bewildered

Join Date: Aug 2015
Location: Eastern PA, USA
Posts: 3,037
Bikes: 2014 Trek Domane 6.9, 1999 LeMond Zurich, 1978 Schwinn Superior
Mentioned: 20 Post(s)
Tagged: 0 Thread(s)
Quoted: 1152 Post(s)
Liked 341 Times
in
251 Posts
Yeah, that spacing in post 9 seems way off.
You might find the Park Tool's video by Calvin Jones useful:
https://www.parktool.com/blog/repair...ession-slotted
You might find the Park Tool's video by Calvin Jones useful:
https://www.parktool.com/blog/repair...ession-slotted
