


I need advice on restoring a vintage Schwinn
 02-01-20, 05:19 PM
#1
Fixed on the plains.
Thread Starter
I need advice on restoring a vintage Schwinn
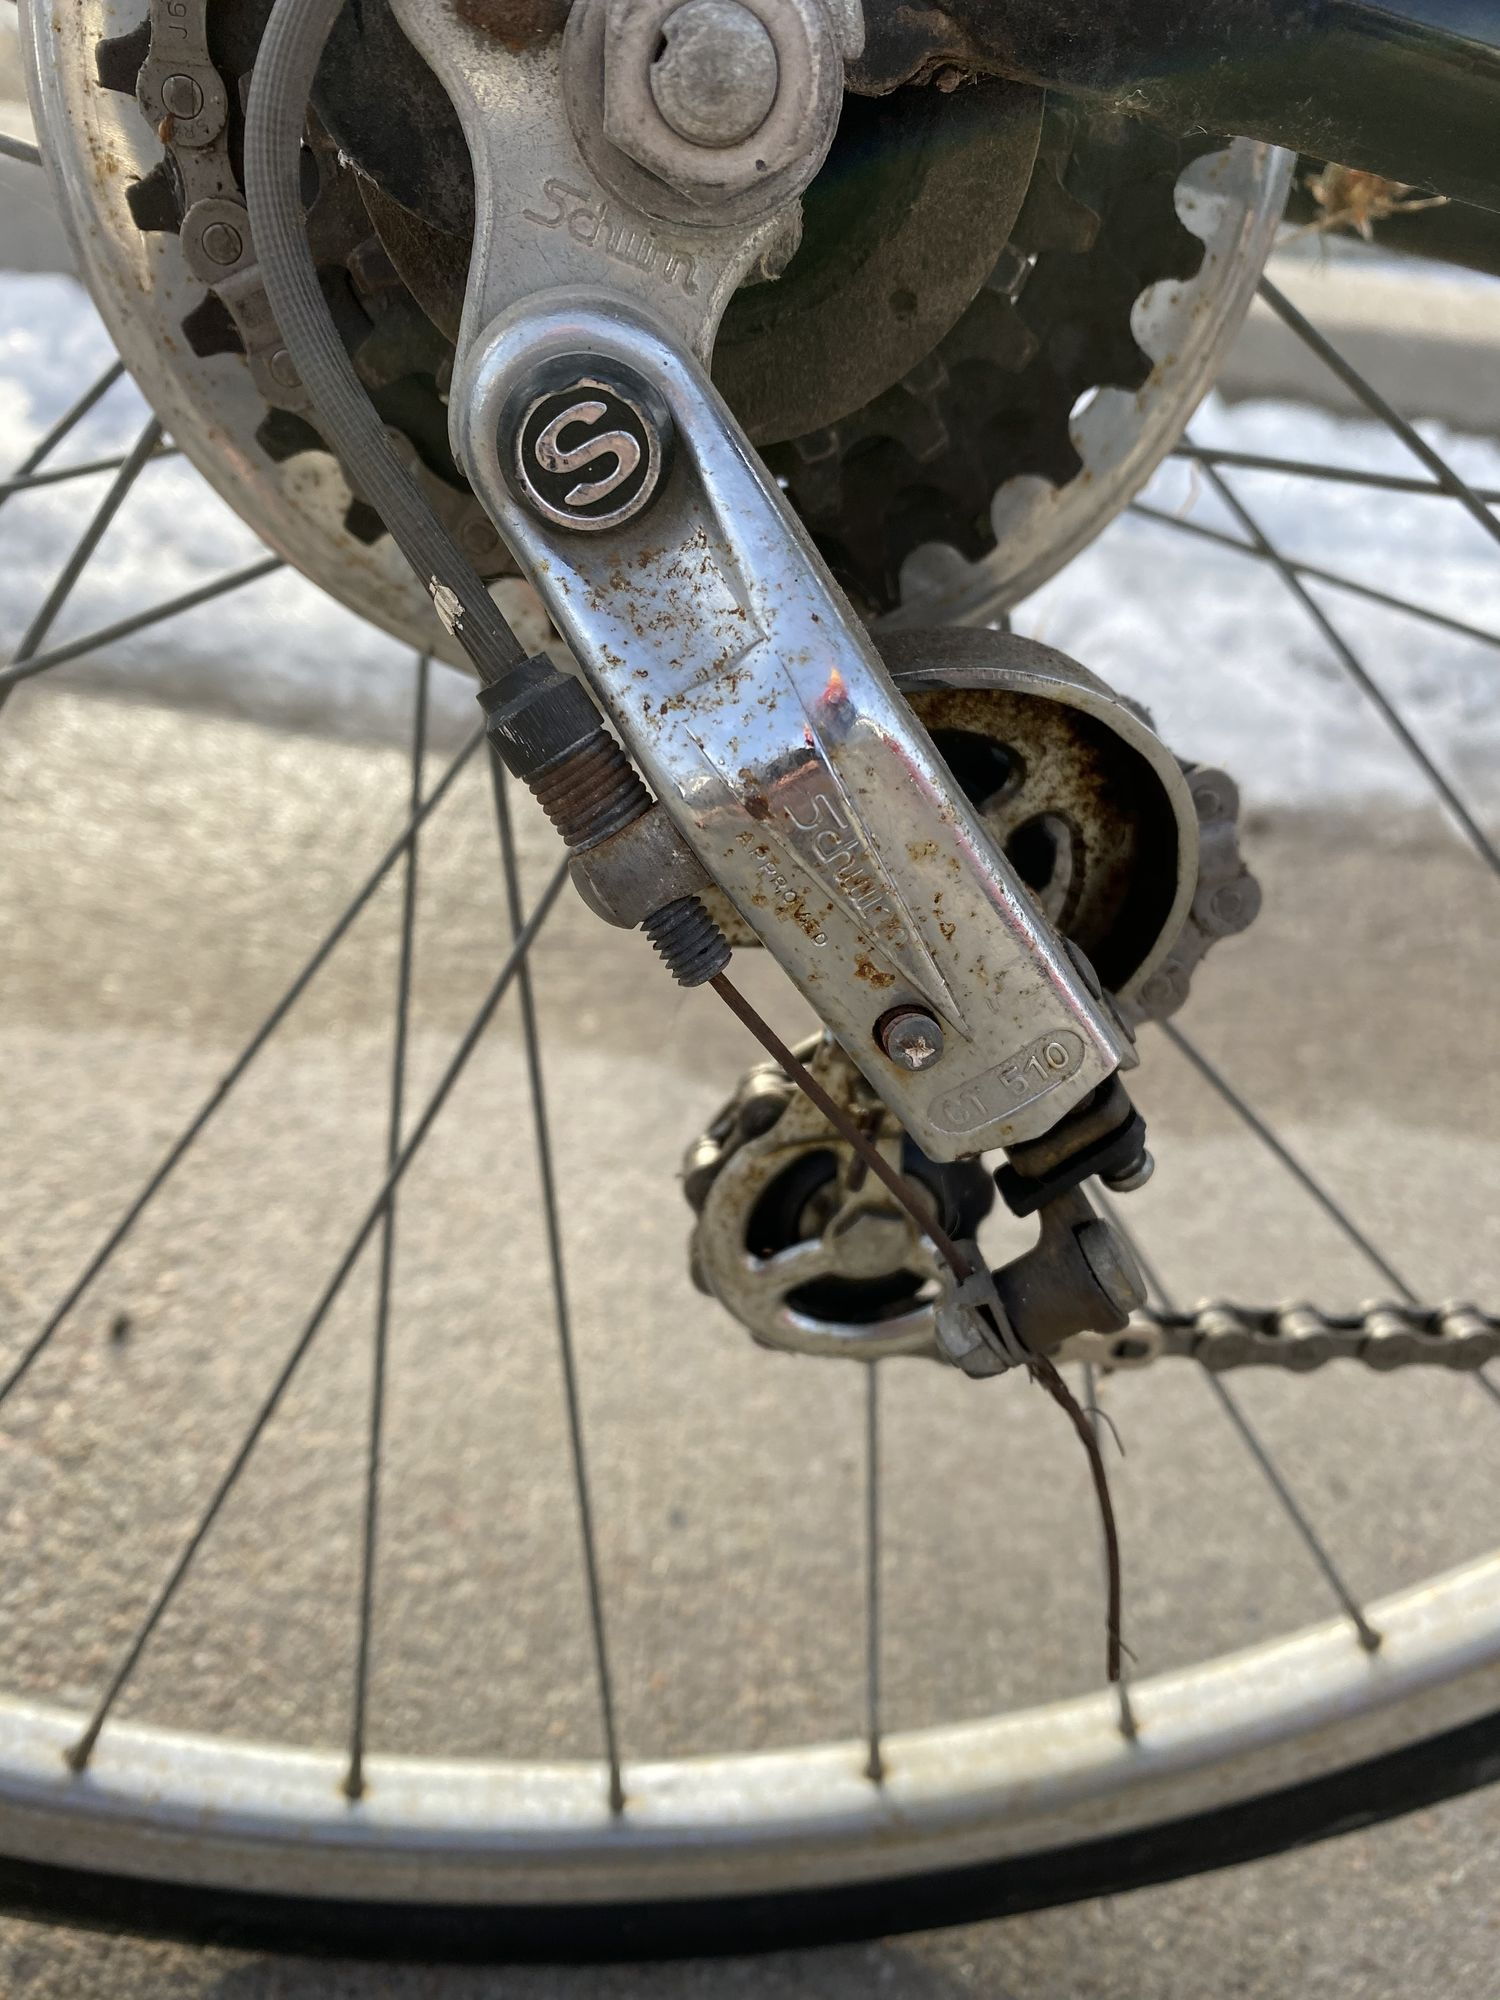
It belonged to my uncle who recently passed and I intend to give it to his son. I apologize I tried to upload some pictures but since I have less than 10 posts it wouldn’t let me. I can tell you that it’s likely from the 80s, has steerer shifters, drop bars and either a Ct or gt 510 rear mech that’s branded Schwinn. Any advice would be super appreciated because I’m not really sure where to start.

Likes For LNKFixed:
02-01-20, 05:30 PM
#2
Senior Member
I don't know how to do it but there are some members here that can post your pictures for you until you get 10 posts. To get the 10 introduce yourself and comment on a few threads. There are some Schwinn experts here so don't give up.
02-01-20, 05:31 PM
#3
Fixed on the plains.
Thread Starter
I’ll just have to roam around I’ve been meaning to be more active.
02-01-20, 06:29 PM
#4

Semper Fi
Join Date: Jan 2008
Posts: 12,942
Mentioned: 89 Post(s)
Tagged: 0 Thread(s)
Quoted: 1172 Post(s)
Liked 358 Times
in
241 Posts
Welcome aboard the C&V, belatedly. Glad to have you around the place.
The 510 RD was used on the Varsity and Continental models, as were the stem mounts shifters. Just hang out and post some, maybe some in the Introductions Forum, at the top of the Home Page for the Forums.
As said above, someone will be along that can help you with the pics now, its how friendly this forum can be.
__________________
Semper Fi, USMC, 1975-1977
I Can Do All Things Through Him, Who Gives Me Strength. Philippians 4:13
Semper Fi, USMC, 1975-1977
I Can Do All Things Through Him, Who Gives Me Strength. Philippians 4:13

Likes For CO_Hoya:
02-01-20, 06:43 PM
#6
Senior Member
Join Date: Jan 2010
Location: se MIch.
Posts: 2,312
Bikes: 1938 claud butler,1983 Basso,teledyne titan,teocali super,nrs,1993 stumpjumper fsr,Paramountain,Paramount Buell(sold),4 banger,Zaskar LE,Colnago Master Ibex MTB,1987ish,.etc....
Mentioned: 7 Post(s)
Tagged: 0 Thread(s)
Quoted: 803 Post(s)
Liked 2,981 Times
in
1,498 Posts
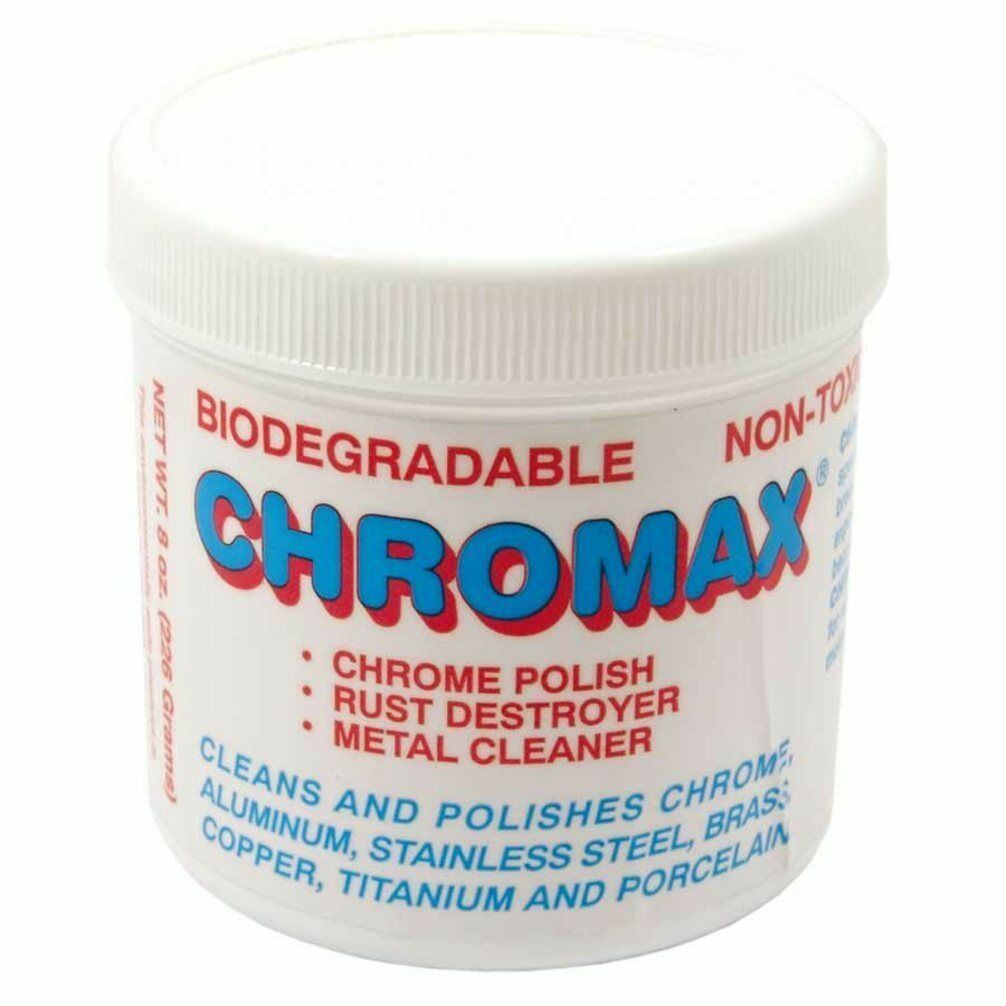
your Uncle would be proud. start with a good polish then move on to the mechanicals like bearing servicing.chromax has a non scratch abrasive that cuts rust on chrome very well.take your time.
https://www.ebay.com/i/274202411791?...iABEgKMNvD_BwE
https://www.ebay.com/i/274202411791?...iABEgKMNvD_BwE
02-01-20, 07:11 PM
#7

Senior Member
Join Date: Jun 2006
Posts: 20,305
Mentioned: 130 Post(s)
Tagged: 0 Thread(s)
Quoted: 3464 Post(s)
Liked 2,829 Times
in
1,995 Posts
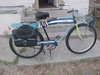
Looks like a Continental or a varsity with a replacement fork.
plenty there to work with- needs most probably a full bearing repack-
if you live near a bike co-op there would be hands on knowledge and tools to assist.
plenty there to work with- needs most probably a full bearing repack-
if you live near a bike co-op there would be hands on knowledge and tools to assist.
Likes For repechage:
02-01-20, 07:27 PM
#8
Fixed on the plains.
Thread Starter
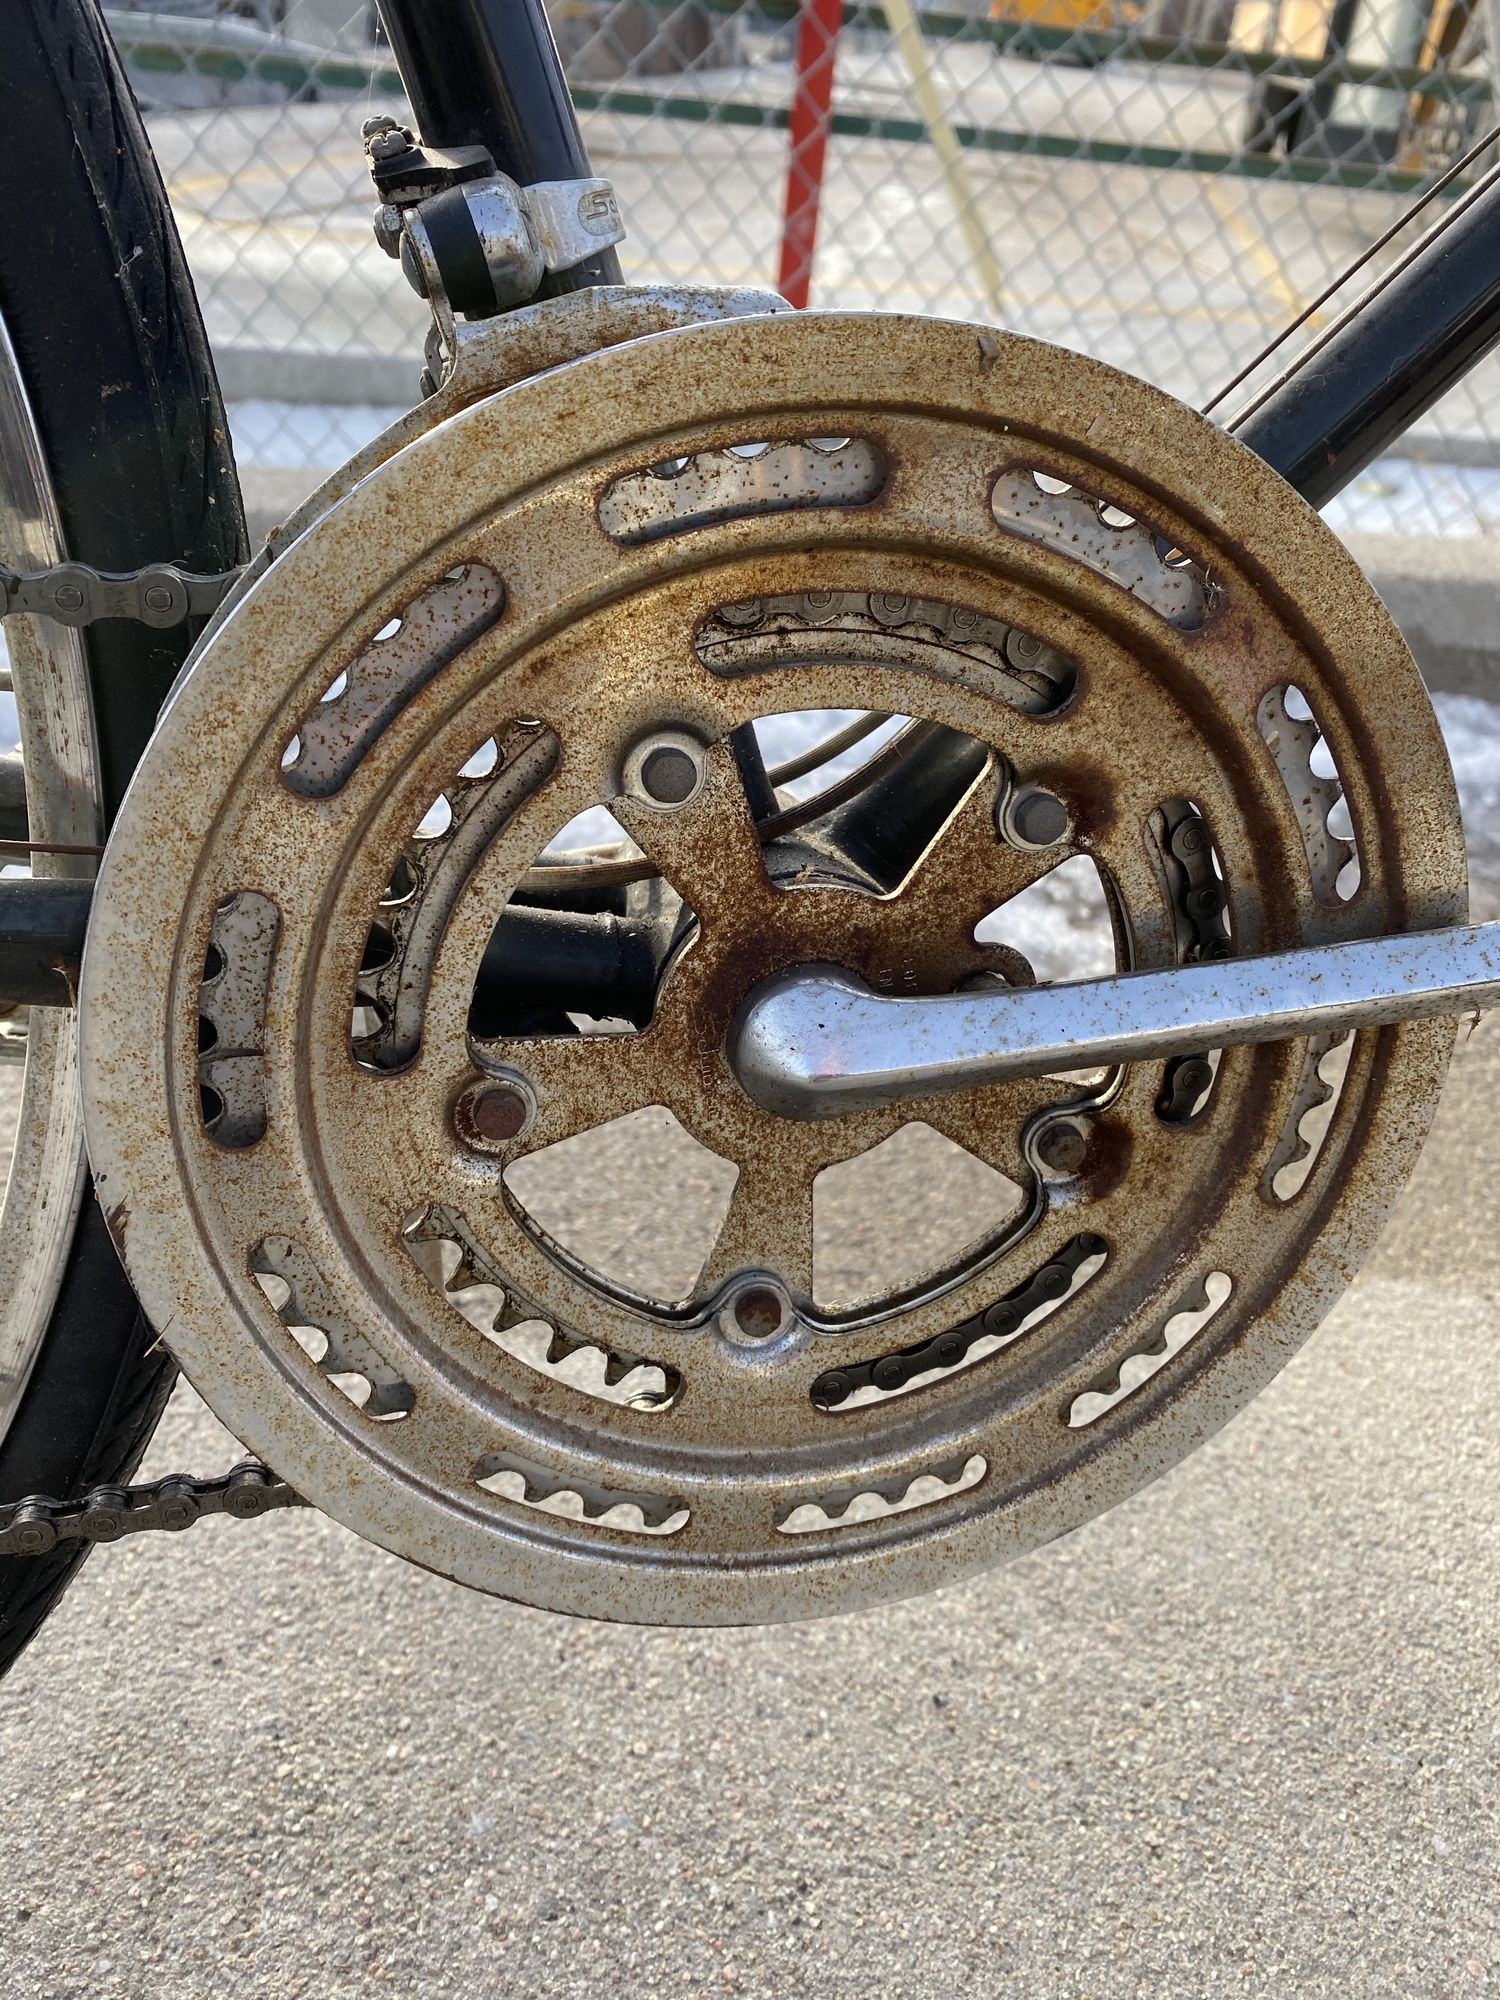
I’m pretty comfortable with wrenching on my own but repairing derailleurs, brakes and things like that aren’t anything I’ve attempted yet. One thing I’m concerned about is that bottom bracket.
02-01-20, 07:31 PM
#9
Fixed on the plains.
Thread Starter
Oh! If it helps with identification it looks like there may have been a stripe around the seat tube a couple inches below the seat stays
02-01-20, 07:51 PM
#10
seńor miembro

Join Date: Dec 2018
Location: Pac NW
Posts: 6,624
Bikes: '70s - '80s Campagnolo
Mentioned: 92 Post(s)
Tagged: 0 Thread(s)
Quoted: 3887 Post(s)
Liked 6,482 Times
in
3,206 Posts
On restoring  or refurbishing
  a Varsity or Continental ...
Invest $100 and a dozen hours of work, and you might reap the reward of a bicycle worth $120.
or refurbishing a Varsity or Continental ...Invest $100 and a dozen hours of work, and you might reap the reward of a bicycle worth $120.
02-01-20, 07:54 PM
#11
Senior Member
Join Date: Jul 2006
Location: Milwaukee
Posts: 597
Bikes: Fred cycles
Mentioned: 1 Post(s)
Tagged: 0 Thread(s)
Quoted: 34 Post(s)
Liked 18 Times
in
16 Posts
Schwinn 'Electroforged' frame. Centerpull brakes, aluminum stem and bars: = Continental, a higher-trim version of the Varsity.
This bike is easy to service, requiring about as few special tools as any bike. Check out Sheldon Brown's extensive site. (Sheldon passed on some time ago, but the Harris Cyclery staff maintains it.) https://www.sheldonbrown.com/
The bottom bracket is a 'one piece crank'. Unscrew the pedal on the left side, then take off the nut and bearing cone. Both are left threaded, I believe. Then you can remove the one-piece crank with chainrings attached.
The freewheel hole is big enough you can service the rear wheel bearings without removing it. If you want to remove it, a current bike shop mechanic may not have the tool. Might be this tool:
Bicycle Research Maillard/Normandy/Schwinn Freewheel Remover CT-3 -- https://www.harriscyclery.net/produc...-ct-3-2846.htm
Out of stock and I bet they're not made any more; you may have to look to eBay or other resellers to find one. I think I have one in my tool stash.
Likes For duffer1960:
02-01-20, 07:57 PM
#12
Semper Fi
Join Date: Jan 2008
Posts: 12,942
Mentioned: 89 Post(s)
Tagged: 0 Thread(s)
Quoted: 1172 Post(s)
Liked 358 Times
in
241 Posts
Schwinn 'Electroforged' frame. Centerpull brakes, aluminum stem and bars: = Continental, a higher-trim version of the Varsity.
This bike is easy to service, requiring about as few special tools as any bike. Check out Sheldon Brown's extensive site. (Sheldon passed on some time ago, but the Harris Cyclery staff maintains it.) https://www.sheldonbrown.com/
The bottom bracket is a 'one piece crank'. Unscrew the pedal on the left side, then take off the nut and bearing cone. Both are left threaded, I believe. Then you can remove the one-piece crank with chainrings attached.
The freewheel hole is big enough you can service the rear wheel bearings without removing it. If you want to remove it, a current bike shop mechanic may not have the tool. Might be this tool:
Bicycle Research Maillard/Normandy/Schwinn Freewheel Remover CT-3 -- https://www.harriscyclery.net/produc...-ct-3-2846.htm
Out of stock and I bet they're not made any more; you may have to look to eBay or other resellers to find one. I think I have one in my tool stash.
This bike is easy to service, requiring about as few special tools as any bike. Check out Sheldon Brown's extensive site. (Sheldon passed on some time ago, but the Harris Cyclery staff maintains it.) https://www.sheldonbrown.com/
The bottom bracket is a 'one piece crank'. Unscrew the pedal on the left side, then take off the nut and bearing cone. Both are left threaded, I believe. Then you can remove the one-piece crank with chainrings attached.
The freewheel hole is big enough you can service the rear wheel bearings without removing it. If you want to remove it, a current bike shop mechanic may not have the tool. Might be this tool:
Bicycle Research Maillard/Normandy/Schwinn Freewheel Remover CT-3 -- https://www.harriscyclery.net/produc...-ct-3-2846.htm
Out of stock and I bet they're not made any more; you may have to look to eBay or other resellers to find one. I think I have one in my tool stash.
Bill
__________________
Semper Fi, USMC, 1975-1977
I Can Do All Things Through Him, Who Gives Me Strength. Philippians 4:13
Semper Fi, USMC, 1975-1977
I Can Do All Things Through Him, Who Gives Me Strength. Philippians 4:13
02-01-20, 08:02 PM
#13
Fixed on the plains.
Thread Starter
02-01-20, 08:04 PM
#14
Senior Member
Join Date: Jul 2006
Location: Milwaukee
Posts: 597
Bikes: Fred cycles
Mentioned: 1 Post(s)
Tagged: 0 Thread(s)
Quoted: 34 Post(s)
Liked 18 Times
in
16 Posts
As far as history & nostalgia, here's a good article: https://www.sheldonbrown.com/varsity-shaddox.html
Good recent thread: https://www.bikeforums.net/classic-v...tal-build.html
Last edited by duffer1960; 02-01-20 at 08:29 PM.
02-01-20, 09:39 PM
#15

Insane Bicycle Mechanic

Join Date: Mar 2008
Location: other Vancouver
Posts: 9,837
Mentioned: 34 Post(s)
Tagged: 0 Thread(s)
Quoted: 805 Post(s)
Liked 706 Times
in
377 Posts
Yep. As others said, the tubular fork and the centerpull brakes identify it as a Continental. That's one step up from a Varsity.
You can find the serial number on the front of the head tube, just above the lower bearing cup. Once you find it, you can punch it in here: https://bikehistory.org/serial-number.html and find the year. It's probably a 1978 or 1979.
The paint should clean up nicely. The chrome has some surface rust which should be easy to remove. O2NRS pointed to a non-toxic chrome cleaner. It sound similar to a product I sold when I worked in a Schwinn shop: https://quick-glo.com/
Here's the 1978 catalog page:
__________________
Jeff Wills
Comcast nuked my web page. It will return soon..
Jeff Wills
Comcast nuked my web page. It will return soon..
02-02-20, 01:31 AM
#16
Senior Member
Join Date: Oct 2015
Location: PDX
Posts: 13,041
Bikes: Merz x 5 + Specialized Merz Allez x 2, Strawberry/Newlands/DiNucci/Ti x3, Gordon, Fuso/Moulton x2, Bornstein, Paisley,1958-74 Paramounts x3, 3rensho, 74 Moto TC, 73-78 Raleigh Pro's x5, Marinoni x2, 1960 Cinelli SC, 1980 Bianchi SC, PX-10 X 2
Mentioned: 267 Post(s)
Tagged: 0 Thread(s)
Quoted: 4511 Post(s)
Liked 6,378 Times
in
3,667 Posts
 02-02-20, 02:40 AM
#17
Senior Member
Join Date: Jun 2019
Posts: 641
Mentioned: 16 Post(s)
Tagged: 0 Thread(s)
Quoted: 346 Post(s)
Likes: 0
Liked 398 Times
in
260 Posts
That circa 1978 Continental is a durable bicycle except for the hunk of junk Huret rear deraileur(GT-510 schwinn approved rear derailleur).
Get rid of that GT-510 (Huret) rear derailleur and REPLACE IT WITH SOMETHING LIKE A USED Shimano produced GT-120 schwinn approved rear derailleur which was fitted to 5 SPEED Collegiate and 5 SPEED Suburban bikes from early 1974 through at least 1977. The SHIMANO EAGLE rear derailleur of the period of circa 1972 through at least 1976 or 1977 is very much like the GT-120 except the bashguard style differs. Sheldon Brown found that the Shimano Eagle was perhaps the best shifting and most durable of the rear derailleurs of that era. It is essentially a Lark / Skylark with a cable saver set up that was learned from consulting with Schwinn engineers during the design of the GT-100 for SCHWINN which came to market in 1970. The large bashguard was also something that Shimano took from Schwinn engineers demands for the Schwinn product. Sure, the Eagle was standard equipment on all of those no-name Kmart 10 speeds from 1972, and it was heavier due to the large bashguard and among Shimano's economy rear derailleur offerings but unlike the European trash (Huret, Simplex, Campagnolo) that was fitted to upscale expensive bikes in 1972, the base level Shimano Eagle was a great unit. There is a reason that nearly everyone in the world went Japanese by 1977.
Japanese = GREAT and European = Not So Good!
Maeda SUN TOUR essentially took the best French practical design and perfected it by removing the junky material and building the Simplex design better and getting their own patent from that. Shimano Lark from 1967 and by 1970 getting Schwinn to have a Shimano built rear derailleur on the 5 speed Collegiates/5 speed Suburbans (GT-100 see Bicycling Magazine March 1970 for article that declared the GT-100 as the most durable rear derailleur ever built up to that point in time)
Have you ever wondered why the heck that you didn't really see many 32 teeth first gear sprockets before Shimano and Suntour (JAPANESE)???
Well, the junkier European engineering had not been able to get a reliable REAR DERAILLEUR design that could handle much anything greater than a 28 teeth first gear sprocket. Leave it to the Japanese to come in and study and copy or base their design on their improvements to a conglomeration of existing designs but with a design and quality level that did not exist before.
The front derailleurs from most all manufacturers were okay, such that something from Huret or Campagnolo is very decent, but as far as rear derailleurs this is not the case and if it isn't Shimano or Suntour, it ain't _ _ _ _ !
Some folks like the old SUNTOUR Spirt and several later SUNTOUR front derailleurs that give you the opposite(reverse) up and back shift lever position. You can still find NEW (NOS , new old stock) 1" one inch 25.4mm clamp diameter that would be needed.
In fact, SCHWINN had an electro forged "varsity-clone" in circa 1977 and 1978 called 'SPORTABOUT' which was essentially the same bike as varsity EXCEPT THAT the SPORTABOUT had SUNTOUR rear derailleur and a Spirt front derailleur................so essentially it was a SUNTOUR equipped varsity called SPORTABOUT. There was also an upright tourist version, that was Suntour equipped called the RUNABOUT with spring saddle and the 7881 handlebars of the Suburban/Collegiate/Speedster, etc. All of those had the Ashtabula ONE PIECE AMERICAN crank like the Varsity/Continental/Super Sport of the seventies/and other Schwinns typically had.
It is super simple to service the hanger set (BOTTOM BRACKET) on those one piece Schwinns.
The #64 bearings (caged bearings) are just a few dollars each, BUT YOU SHOULD KNOW THAT THE original stamped SCHWINN caged bearings are constructed from better materials than the current manufacture replacement #64 bearings. This does not mean that the current replacement bearings are crummy, as that isn't the case. They will function fine and the quality control is decent, however the plating-material isn't as hard or pit resistant/corrosion resistant.
You will find that IF YOUR original SCHWINN #64 caged CRANK BEARINGS are not exhibiting any pitting or wear--------and are functioning properly, NO TICKING or KNOCKING with each revolution......... that you can JUST remove them and SOAK THEM IN A CUT IN HALF COKE or BEER CAN THAT HAS BEEN FILLED WITH FORMULA 87. You may want to keep the bearings in the orientation that they were removed from the bicycle, so they go back exactly the same, so I'd suggest using two coke or beer cans each filled with Formula 87. Let the bearings soak in FORMULA 87 for at least four hours. DO THIS OUTSIDE, AWAY FROM PETS AND AWAY FROM CHILDREN AND AWAY FROM SPARKS, FLAMES... Formula 87 is the regular 87 octane gasoline from your lawnmower gas can.
You need to soak the #64 caged bearings in Formula 87 long enough to dissolve the old grease and grime and remove all grit.
Some folks like to then take the cleaned #64 caged bearings and using a piece of coat hanger or just your finger if you don't mind........THEN DUNK THE CAGED #64 BEARING INTO another small can filled with FRESH NEW AUTOMOTIVE MOTOR OIL...............the weight/viscosity doesn't matter and it could be el-cheapo or Mobil 1, it does not matter................because all you're doing is DUNKING IT and letting all the oil drip off BEFORE YOU PACK THE HECK OUT OF IT WITH NEW FRESH AUTOMOTIVE/ MARINE Wheel Bearing grease. Any brand that is sold at an auto parts store such as Advance, O'Reilly's, Autozone, NAPA, or from Tractor Supply, West Marine, or the auto parts section at Wal-mart. A small canister for a grease gun will last for probably a hundred bicycles and will likely be less than $10. Just re-cap the canister with aluminum foil and heavy rubber bands, and use a plastic spoon to goop out the needed grease out of the cannister.
Use as much grease as you can get into the caged bearing and the "cup" on each side of the One piece bottom bracket.
It is super simple. You need only a LARGE CRESCENT WRENCH for the large nut. You need a 15mm wrench to remove the LEFT side pedal, so you can remove the crank out the right side. Since the 10 speeds Do Not Have a Chainguard like the 5 speeds, 3 speeds, and single speeds, YOU DON'T HAVE TO REMOVE THAT FIRST. You'll want to have your bicycle in the 5th gear sprocket (smallest at rear) so that you can easily move/pivot the rear derailleur forward with your hand to slacken the chain enough to remove it from the FRONT CHAINWHEEL to remove the Front Chainwheel Crank Assembly.
There are many YOUTUBE videos. RJ The Bike guy has a decent one, and there are others that are even better depicted and explained.
I highly recommend that you obtain a $4 FREE SHIPPING ebay sourced copy of GLENN'S COMPLETE BICYCLE MANUAL 338 pages 8 1/2 x 11 softbound (c) 1973
Don't pay more than $5 FREE SHIPPING for this book as there are 3/4 of a million copies in circulation and the mega used booksellers all have many copies of this book, usually ex-library books. Those mega used book sellers also because they sell hundreds of thousands of books, have economy of scale as to shipping cost and aquisition cost that they routinely sell this book title for between $3.50 free shipping and $5 free shipping. The lone ebayer that might have this title likely will not be aware that there is a special book rate (media rate) that the US Postal service offers for shipping books and other qualifying items. The weight of said book and its 338 or 340 pages will weigh enough that at First class postage, it the postage would exceed what you can buy it, including free shipping from those mega- usedbook sellers.
You can pay more, but you don't have to pay more than $5 free shipping to locate this book.
Speaking of the durabilty of these electro-forged SCHWINN heavy "LIGHTWEIGHTS", these old VARSITY-CONTINENTALS make outstanding upright tourist bicycles just like the old Varsity Tourist model (last year was 1969) or the SUBURBAN(first year 1970) or the 597mm-26 inch wheeled COLLEGIATE and SPEEDSTER-BREEZE models. You'll find that the 7881 Schwinn handlebars are probably the most perfect handlebars and you'll FIND THEM ON THOSE MODELS THAT I JUST MENTIONED ABOVE. The handlebars will be marked 7881- 67 for 1967, and 7881-75 for 1975, and 7881-63 for 1963.......you get the idea........ These are great handlebars for upright tourist duty and you can find them in perfect condition with perfect chrome for about $24 total including shipping, or slightly less from many sellers on ebay. Because it likely costs around $10 to $12 to ship these, that $24 total (or $13 and $11 shipping...however it is presented....) is an acceptable cost for these bars if the chrome is perfect and there are no dents. You will not find anyone that manufactures handlebars of this quality today. It is impossible to re-chrome such a handlebar for less than $100 and even then you're probably not going to have the same quality of chrome plating that these Schwinn bars had originally.
Yes, there are some very nice aluminum tourist bars that are available NEW in the aftermarket, but none have a better overall shape and rise/width in my opinion than these old 7881 Schwinn bars. Assuming that you were to change the bars to a tourist set up, you would need to source the WEINMANN levers that were fitted to the tourist bars as the Ebay sellers break-up and sell everything individually. I recommend the old WEINMANN brand aluminum alloy levers as Schwinns had but heck Diacompe copies or even steel levers that were on old British/ Italian/French/Austrian/German/US bicycles could be used if they are 22.2mm (7/8)attachment clamp.
You can even use the Eye-Poker versions from the early sixties without the round ball shape at the end of the lever that all of them from the mid-late sixties and later have.
Those ancient old WEINMANN levers are durable and nearly ageless if they appear to be in good shape, even if you see some chrome pitting-loss or corrosion on their mounting band. Others might disagree but WEINMANN levers for tourist style bikes from the sixties and seventies are great. RED DOT eye poker, RED DOT, GOLD DOT, etc can be a thing if someone is trying to match year/model as seen originally on certain bicycle models etc..
New cables, brake pads, and tubes and tires are widely available and very inexpensive.
Schwinn and most other American made bicycles of the seventies, sixties, fifties, etc had SEATS that came with a 5/8 seat post clamp.................thus the top of the seatposts in those days were 5/8 diameter. TODAY, nearly all aftermarket seats that you'd find at TARGET/WALMART or from Bicycle WEB SELLERS-web bike stores are 7/8 seat post clamp for such tourist and basic bicycles. WALD makes several different part numbers for SEAT POSTS that have the 13/16" SCHWINN SEAT POST TUBE DIAMETER and a 7/8 Top Part where the SEAT MOUNTS on to. I believe WALD #940 is just one of those, and there are about four other part numbers, each differs in length, etc........WALD also makes the exact original 13/16" size with the original 5/8 top part in several lengths and I believe in chrome plated and non-plated versions. There are new aftermarket 5/8 seat clamps that one can buy, and place on a new aftermarket seat instead of the 7/8 seat clamp that comes with the new seat. Still one can do as many folks do, and just turn the original 13/16 seatpost upside down in the seat tube such that 13/16 is at the top........this is close enough to 7/8 to make it work fine, but when one does this, you essentially cannot forget that the tapered 5/8 portion down the seat tube cannot count as any necessary portion needed for minimum insertion........you have to re-calculate based on from where the 13/16 diameter portion begins down in the seat tube..................this lessens the ability to raise your seat post to maximum height by about nearly two inches.-------as long as you have enough 13/16 pipe in the seat tube, you're okay.
You can achieve greater versatility and usefulness by swapping the freewheel 14-17-20-24-28 on that circa 1978 CONTINENTAL to the MODEL J freewheel from the 5 SPEED SUBURBAN and 5 SPEED COLLEGIATE which is 14-17-21-26-32. That page 18 chart that Jeff Wills posted up shows the 14-17-20-24-28 with GT-290 front and GT-500 rear derailleurs of the late seventies, and this differs only from 1971 model in that the model F freewheel for '71 Continental 14-16-20-24-28, so only second gear sprocket at rear is 17 in late seventies instead of 16.
The MODEL J freewheel of the 5 SPEED SUBURBAN and 5 SPEED COLLEGIATE is Japanese design(shimano) and is better design and incorporates a patented shimano lip seal design that shimano patented in the late sixties. Not only is that Model J freewheel a better design, you also get better hill climbing as you have a 32 tooth first gear versus the 28 tooth first gear of the Continental/Varsity.
You may also wish to know that the 1971 SUPER SPORT had that exact 14-17-21-26-32 gearing that the 1970 onward Collegiate and 5 Speed Suburbans of 1970 and later until 1977 or 1978 when the FFS appeared on the Suburban/Collegiates.
The 10 speed Suburban of 1970 through 1977 or so has the exact same JUNKY Huret rear derailleur and the same 14 to 28 freewheel as the Continental/Varsity of the same era. The FIVE SPEED version of the SUBURBAN as well as the FIVE SPEED COLLEGIATE of 1970 and later have SHIMANO built rear derailleurs (GT-100 from 1970 to early 1974 ---AND--- GT-120 from early 1974 to late seventies) and these five speed Suburbans and Collegiates of the SEVENTIES have the shimano Model J freewheel with the 14 to 32 gears. Collegiates of 1964 through 1969 have the Junky HURET rear derailleur and the french made 14 to 28 freewheel that the Continental and Varsity have.
The SUBURBAN has the tubular front fork that the Continental has--------the Suburban uses the same LS 2.4 Weinmann caliper side pull brakes as the Varsity has-----the Continental has center pulls............................electro-forged frames are otherwise the same---------Continental has alloy S stamped stem and alloy racing bars, and you have a quick release front hub.
The 26 inch wheel (597mm) Collegiate is the same electro-forged frame with LS 2.8 Weinmann caliper side pull brakes (exactly the same as Weinman model 810 side pulls.....which is what the 1968 Collegiate has stamped in their calipers) Schwinn went to their own measurement designation coding in place of the Weinmann model number from about the 1969 models forward, though the Weinmann model did not change from 1968 to 1969 and later.
There are many helpful things to know when messing about with old Schwinns.
1965 to 1966 is significant BECAUSE SCHWINN STRENGTHENED THE HEADTUBE, MAKING IT THICKER AND STRONGER FOR 1966, AND THUS REQUIRING A THINNER DIAMETER STEM FOR 1966 and Later. 1965 and earlier have a thicker stem diameter which is common to many American makes. The 1966 and later is common to SCHWINN and a few import models made specifically for SCHWINN before the Chicago end. There are millions of these parts whichever one which you might need, but that is perhaps most significant to know when mixing parts among year models.
Get rid of any rear derailleur on any Schwinn ten speed, or fifteen speed of the sixties or seventies that is made by CAMPAGNOLO or HURET as it is junk compared to Shimano or Suntour. Yes, if you've got a Paramount or maybe an early sixties Superior 15 speed, that is most valuable in stock form, keep it that way, even though the Japanese part would make it alot better rider....................................it though is foolish to ride with low quality European junk if you're gonna ride and enjoy the most durable Schwinn Continental/Varsity/Super Sport/Sports Tourer/Suburban 10 speed, etc. Just take the old C or H , hunk-O-junk, rear derailleur and remove it and place it in a Ziplock baggie for safekeeping if the bicycle becomes collectible or desireable in the future or if some Schwinn crazy fool wants to buy an all factory original bike in the future when you decide to sell it.
Other than the junky rear derailleur, that CONTI will be an excellent, extremely durable, simple to service, bicycle once you install a SHIMANO (or Maeda SUNTOUR) rear derailleur. Stay Thin Ride A Schwinn!! The extra-weight will give you a better exercise workout!!
02-02-20, 05:53 AM
#18
Senior Member
Join Date: Jul 2006
Location: Milwaukee
Posts: 597
Bikes: Fred cycles
Mentioned: 1 Post(s)
Tagged: 0 Thread(s)
Quoted: 34 Post(s)
Liked 18 Times
in
16 Posts
If you take the chainrings apart (not necessary) or otherwise have trouble with one or more of the bolts that tie the chainrings together... I bought a bags of bolts and sleeves that worked when I overhauled a Continental some years ago. I think I can find them. Let me know if you need & I'd send to you.
02-02-20, 06:52 AM
#19
SE Wis
Join Date: Apr 2005
Location: Milwaukee, WI
Posts: 10,513
Bikes: '68 Raleigh Sprite, '02 Raleigh C500, '84 Raleigh Gran Prix, '91 Trek 400, 2013 Novara Randonee, 1990 Trek 970
Mentioned: 40 Post(s)
Tagged: 0 Thread(s)
Quoted: 2747 Post(s)
Liked 3,394 Times
in
2,056 Posts
No shortage of words, but certainly is of paragraphs.
Likes For dedhed:
02-02-20, 11:33 PM
#20
Ride, Wrench, Swap, Race

Join Date: Jan 2010
Location: Northern California
Posts: 9,193
Bikes: Cheltenham-Pedersen racer, Boulder F/S Paris-Roubaix, Varsity racer, '52 Christophe, '62 Continental, '92 Merckx, '75 Limongi, '76 Presto, '72 Gitane SC, '71 Schwinn SS, etc.
Mentioned: 132 Post(s)
Tagged: 0 Thread(s)
Quoted: 1565 Post(s)
Liked 1,295 Times
in
865 Posts
The rear derailer is a Schwinn version (highly modified) of the Huret Allvit. It looks to be in top condition.
It's heavy like the rest of this bike, but will work perfectly with up to 28t sprocket size and up to five sprockets on the rear.
The Schwinn modifications, especially to the elaborate pulley cage, help prevent the sort of chain derailment from the top pulley that might damage the derailer.
One detail about the Schwinn crankset's patented chainrings, if you remove the circular trouser-guard plate, you will need to find correct-size washers to take up the space so that the bolts will still keep everything tight. Not a big deal, but I did find that of the many washers I have, none seemed to be the right size, so perhaps not such a common size.
 02-03-20, 06:32 AM
#22
Senior Member

Join Date: Feb 2012
Location: Williamsburg, VA Sebastian, FL
Posts: 1,363
Bikes: 1987 Centurion Ironman Master, 1992 Koga Miyata Exerciser, 1992 Schwinn Crosscut
Mentioned: 6 Post(s)
Tagged: 0 Thread(s)
Quoted: 209 Post(s)
Likes: 0
Liked 175 Times
in
92 Posts
I echo the recommendation to enlist a co-op, or a knowledgeable friend, to assist.
02-03-20, 11:37 AM
#23
Ride, Wrench, Swap, Race
Join Date: Jan 2010
Location: Northern California
Posts: 9,193
Bikes: Cheltenham-Pedersen racer, Boulder F/S Paris-Roubaix, Varsity racer, '52 Christophe, '62 Continental, '92 Merckx, '75 Limongi, '76 Presto, '72 Gitane SC, '71 Schwinn SS, etc.
Mentioned: 132 Post(s)
Tagged: 0 Thread(s)
Quoted: 1565 Post(s)
Liked 1,295 Times
in
865 Posts
Regular wrenching is one thing, but dismantling, re-packing, and setting bearing sets is another. The headset, bottom bracket, and axles all require special bike tools, and are also likely to be very "snug" due to time. (Use PB Blaster in advance to loosen.)
I echo the recommendation to enlist a co-op, or a knowledgeable friend, to assist.
I echo the recommendation to enlist a co-op, or a knowledgeable friend, to assist.
The screwdriver is just for turning the bearing cone to a proper adjustment (there are two slots in the face of it for this purpose).
Observe which side of each bearing retainer (cage) faces toward the center of the bottom bracket (it's the side with the balls open). It should spin quite freely after re-assembly!
Note that tightening the locknut always makes the adjustment that much tighter, but a few trial-and-error adjustments will have it perfect!
Schwinn's threaded hardware was all accurately cut from good metal, so has no tendency toward stripping. Their use of oversized 5/16" chromium balls and galvanically-favorable plating material (together with an "open" design that drains water) means that these Schwinn bottom brackets also have no tendency toward rusting out like everyone else's bottom brackets tend to do (as after outdoors exposure or immersion).
Be prepared to do a bit of wiggling getting the crank back in with the greased bearings in place, though this is actually pretty easy. I remember struggling with this the very first time that I had to put one back together when I was 11 years old, but my patience was less developed at that time. It helps to rotate the crank so that the sharp bend passes one of the internal frame tube protrusions within the bottom bracket shell, which gives generous wiggling clearance!
The right-side (drive-side) bearing cone is threaded to the arm from the inside and thus secures the chainring, so I will also check that this is tight using the 12" wrench before re-installing the crank.
----Note that the big external locknut and left-side bearing cone HAVE REVERSE TREADING, so it's righty-loosy, lefty-tighty.
----Be sure to grease the threads, and also grease the face of the nut where it contacts the washer!
----Left-side pedal also of course has left-hand threading.
An 11-year old can do all this!
A lazy or busy person can alternately simply "oil" (or aerosol lithium grease) the bottom bracket bearings from the outside of the assembled unit and then confirm proper adjustment, which keeps your hands pretty clean. This will save time in the short term, but will require periodic re-oiling, and it won't expel the old/dried/dirty grease or repel water and grit nearly as well as a proper re-greasing. Right-side bearing access is also rather obstructed by the chainring (sprocket).
Last edited by dddd; 02-03-20 at 12:11 PM.
02-03-20, 11:50 AM
#24
SE Wis
Join Date: Apr 2005
Location: Milwaukee, WI
Posts: 10,513
Bikes: '68 Raleigh Sprite, '02 Raleigh C500, '84 Raleigh Gran Prix, '91 Trek 400, 2013 Novara Randonee, 1990 Trek 970
Mentioned: 40 Post(s)
Tagged: 0 Thread(s)
Quoted: 2747 Post(s)
Liked 3,394 Times
in
2,056 Posts
Regular wrenching is one thing, but dismantling, re-packing, and setting bearing sets is another. The headset, bottom bracket, and axles all require special bike tools, and are also likely to be very "snug" due to time. (Use PB Blaster in advance to loosen.)
I echo the recommendation to enlist a co-op, or a knowledgeable friend, to assist.
I echo the recommendation to enlist a co-op, or a knowledgeable friend, to assist.
Do some google searching on Old or vintage Schwinn repair.
Vintage Bicycle Repair - Repair & Modification Basics
Likes For dedhed:
02-03-20, 11:57 AM
#25
SE Wis
Join Date: Apr 2005
Location: Milwaukee, WI
Posts: 10,513
Bikes: '68 Raleigh Sprite, '02 Raleigh C500, '84 Raleigh Gran Prix, '91 Trek 400, 2013 Novara Randonee, 1990 Trek 970
Mentioned: 40 Post(s)
Tagged: 0 Thread(s)
Quoted: 2747 Post(s)
Liked 3,394 Times
in
2,056 Posts