


wingless' Topeak Turbo Morph G Pump
 11-14-17, 10:31 PM
#1
Senior Member
Thread Starter
wingless' Topeak Turbo Morph G Pump
My frequent bike usage goes hand-in-hand w/ unexpected flat tires, so I need a way to restore normal operation on the roadside. Changing / patching the tube is "easy" enough, but I also need a high pressure air source.
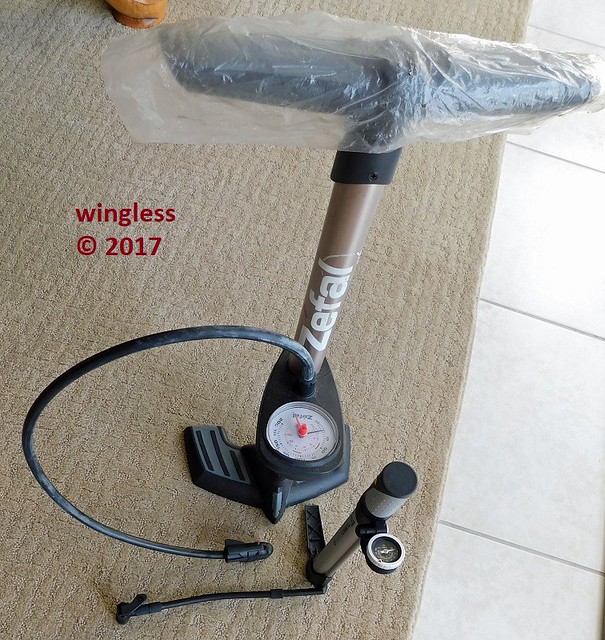
My old classic Zefal high-pressure pump works well enough, but my modern bike doesn't have the integrated post required for mounting the pump to the frame, so I cannot bring it w/ me on my rides.
All of the portable pump options were examined and I selected the Topeak Turbo Morph G Pump. The main factors leading me to this selection are: the "large" dial pressure gauge (to work w/ my decreasing reading eyesight); the ability to provide the 110 - 120 psi tire pressure on my Presta valves w/o difficulty and a frame-mount bracket. Some of the other options have in-line gauges that appeared more difficult to read, so I discounted them from consideration. Same for those w/o gauges.
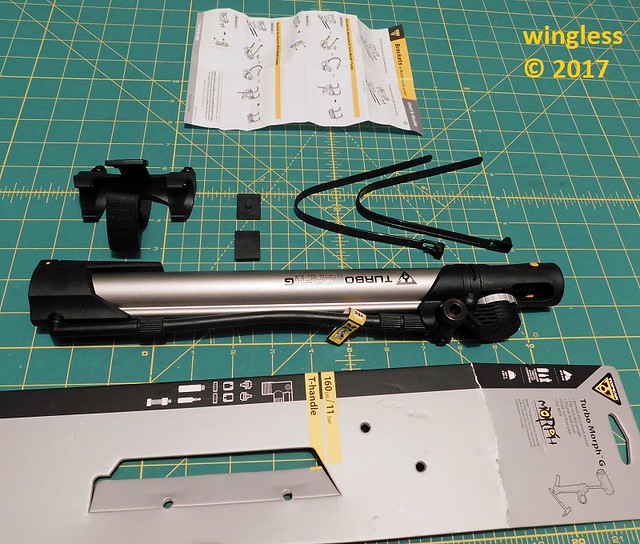
Here are the pump features:
These parts are included w/ the pump:
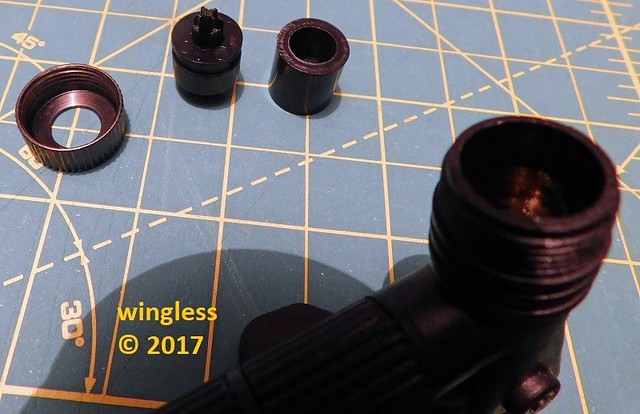
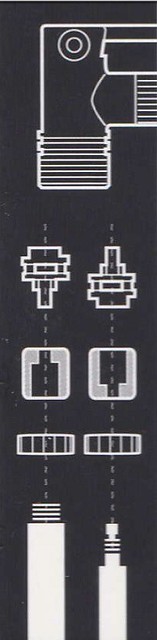
The pump includes only graphical instructions. These instruction images are very small. I needed to scan the images, then blow them up waaay large to see the instructions. One instruction was on the small (7/16" wide) yellow hose tag label. The instruction shows that the hose must be removed prior to flipping out the gauge. The other instruction shows how to configure the pump head, by unscrewing the cap, yanking out the rubber cylinder and the plastic valve actuator. These parts are reversed for the different valve types. The pump was received w/ the parts configured for Schrader valves, so I needed to disassemble, reverse the orientation and reassemble.
IMO, all this would be EASY to understand if they only used some works instead of small cross sectional line drawings that approximate the parts.
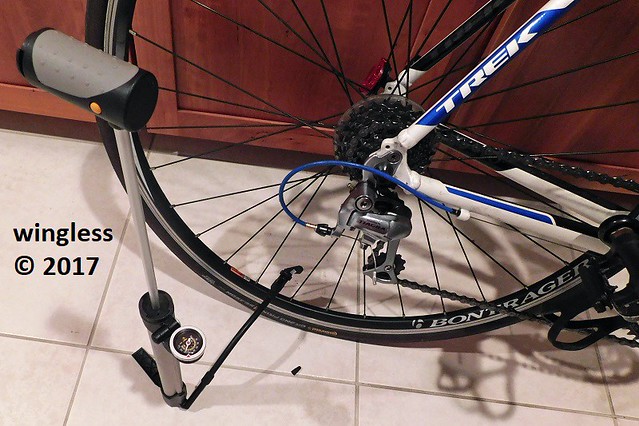
One really nice feature is the T-Handle. This flips into a tee orientation for operation, or into an in-line orientation for storage. The handle twist locks onto the body for storage.
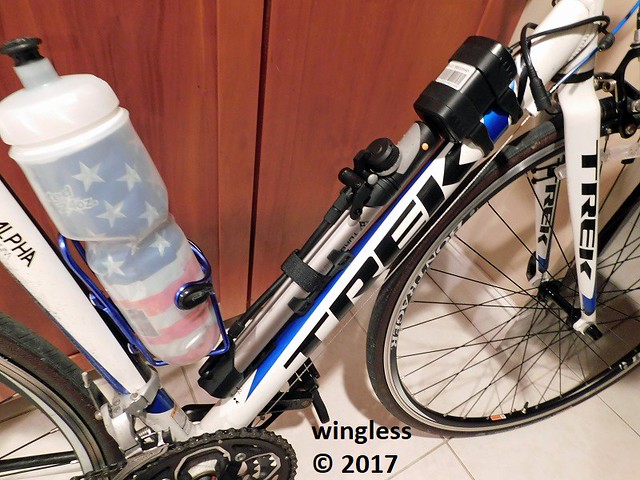
It would have been better if the mounting bracket had offset mounting holes to permit retaining the water bottle cage and using those screws for securing the bracket. The wire ties would work, but I prefer having this screwed in-place, so I gave up a water bottle cage.
The pump operation is fine. It is very usable in my application for filling to 120 psi. As would be expected this pump moves MUCH less air than my home floor pump, but this will be great when required for on-road usage.
IMO the pump is well-made, looks durable and has nice features. I would not hesitate to recommend this pump.
This product was purchased by me using cash from my pocket. I have zero affiliation and zero agreement w/ the manufacturer or w/ the vendor.
 . . . . .
My old classic Zefal high-pressure pump works well enough, but my modern bike doesn't have the integrated post required for mounting the pump to the frame, so I cannot bring it w/ me on my rides.
All of the portable pump options were examined and I selected the Topeak Turbo Morph G Pump. The main factors leading me to this selection are: the "large" dial pressure gauge (to work w/ my decreasing reading eyesight); the ability to provide the 110 - 120 psi tire pressure on my Presta valves w/o difficulty and a frame-mount bracket. Some of the other options have in-line gauges that appeared more difficult to read, so I discounted them from consideration. Same for those w/o gauges.
Here are the pump features:
- Maximum Pressure 160 psi / 11 bar
- T - Handle - Rotates to In-Line for Storage - Twist Locks to Barrel for Storage
- Compatible w/ Schrader, Presta and Woods / Dunlop Valves
- Flexible Hose w/ Two Axis Rotation
- "Large" ~1" Gauge
- Fold Out Foot Pad
- Mounting Bracket - Attaches to Water Bottle Bosses or to Tube Frame
- Aluminum Body
These parts are included w/ the pump:
- Topeak Turbo Morph G Pump - 271.3g
- Mounting Bracket w/ Velcro Retention Strap - 17.4g
- M5x15 Screws (2) - 3.0g each
- Frame Tube Mount Rubber Pads (2) - 1.1g each
- Frame Tube Mount Reusable 10" Nylon Wire Ties (2) - 3.0g each
The pump includes only graphical instructions. These instruction images are very small. I needed to scan the images, then blow them up waaay large to see the instructions. One instruction was on the small (7/16" wide) yellow hose tag label. The instruction shows that the hose must be removed prior to flipping out the gauge. The other instruction shows how to configure the pump head, by unscrewing the cap, yanking out the rubber cylinder and the plastic valve actuator. These parts are reversed for the different valve types. The pump was received w/ the parts configured for Schrader valves, so I needed to disassemble, reverse the orientation and reassemble.
IMO, all this would be EASY to understand if they only used some works instead of small cross sectional line drawings that approximate the parts.
One really nice feature is the T-Handle. This flips into a tee orientation for operation, or into an in-line orientation for storage. The handle twist locks onto the body for storage.
It would have been better if the mounting bracket had offset mounting holes to permit retaining the water bottle cage and using those screws for securing the bracket. The wire ties would work, but I prefer having this screwed in-place, so I gave up a water bottle cage.
The pump operation is fine. It is very usable in my application for filling to 120 psi. As would be expected this pump moves MUCH less air than my home floor pump, but this will be great when required for on-road usage.
IMO the pump is well-made, looks durable and has nice features. I would not hesitate to recommend this pump.
This product was purchased by me using cash from my pocket. I have zero affiliation and zero agreement w/ the manufacturer or w/ the vendor.
. . . . .
 10-11-18, 12:41 AM
#2
Senior Member
Thread Starter
The frame shape / size on my 2016 Trek Series 1.1 does not permit mounting both a water bottle cage AND this Topeak Turbo Morph G pump within the triangle frame.
My current solution is to mount this to the bottom of the left chainstay. The attachment method is to use acrylic adhesive Velcro on the bracket and on the chainstay, plus nylon wire ties.
The pump appears to be very secure.
The pump is ZERO utility to be home, when I'm stuck on the side of the road w/ a flat. Now I can patch, pump and go again.
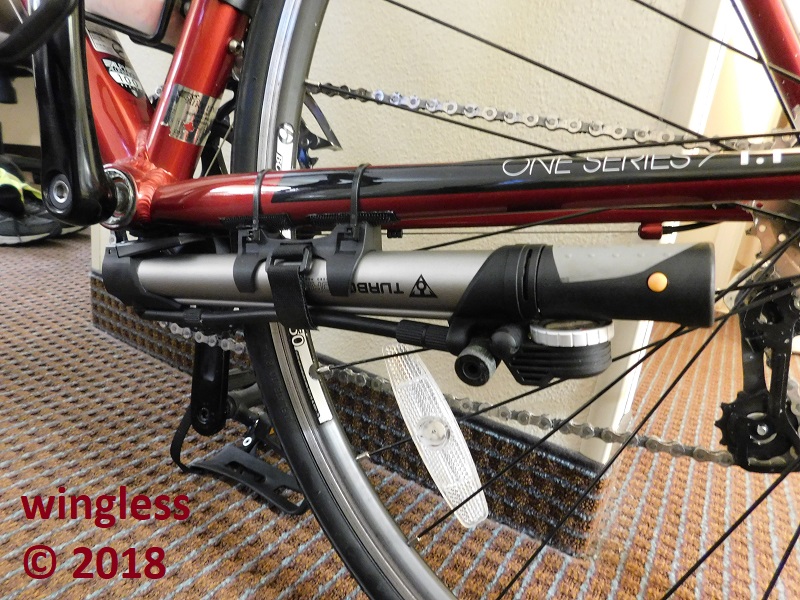

