


What would you do? TT to ST tube diameters
 08-18-20, 02:13 AM
#51
Senior Member
Join Date: Dec 2019
Posts: 956
Mentioned: 3 Post(s)
Tagged: 0 Thread(s)
Quoted: 321 Post(s)
Liked 263 Times
in
212 Posts
I have a homemade jig but I don't use it for the rear triangle. I get better precision like this:
1. Weld BB shell to ST
2. Draw a straight line on the table (for the frame centre line) and a line at right angles to it (this will be the axis of the BB shell)
3. Weld a couple of M10 nuts to a big piece of square tube, so that you can hold a piece of threaded rod a few inches off the top of the table.
4. Put your threaded rod in there, tighten it down, and clamp it to the edge of the table. Get it centered and square with that centre line you drew earlier. I use a cheap laser level gauge that can shoot out long perpendicular laser lines. You can get these for about �40 from the usual scumbags.
6. Clamp some angle iron in front of where the BB shell goes to stop it moving away from the rear axle and hold it square.
7. Cut and mitre the CS to the right length from your design. The main priority is get them exactly the same as each other.
8. Put the BB shell plus ST up against the angle iron, centred on the centre line (mark the centre of the BB shell with a sharpie). Hold it up with a welding magnet. Vertical is best for now we will set the correct angle later.
9. Use the laser level box from behind to make sure the axle is completely horizontal and the ST is completely vertical. Shim if necessary.
9. Get the CS in position on the BB shell, bolt the dropouts into the threaded rod, and tack the dropouts.
10. Weld or braze out the dropouts.
11. Using math work out the correct angle of the ST to the table. Set it to that using a Chinese digital level box.
12. Hold the CS in place with magnets, clips, third hands, whatever. Tack them.
13. Check it's all still aligned.
14. Weld out CS to BB.
15. Recheck alignment. It's easy to correct it with only the CS on there and no SS.
I then make the whole front triangle and put the SS in last.

Likes For guy153:
08-18-20, 02:36 AM
#52
Member
Thread Starter
Hey! Oh cool, OK so you do the CS right after the BB-ST. What's your reason for doing the CS before the main triangle? Since I'll be following Paterek will that work for me as well you think? I'm mainly concerned about his process, checking everything on the table, cold setting if needed etc.
Thanks for the detailed explanation of your process! Definitely helps!
Thanks for the detailed explanation of your process! Definitely helps!
08-18-20, 06:37 AM
#53
Senior Member
Join Date: Dec 2019
Posts: 956
Mentioned: 3 Post(s)
Tagged: 0 Thread(s)
Quoted: 321 Post(s)
Liked 263 Times
in
212 Posts
The first few frames I did the main triangle first (which I think is more normal). But the place where you need to be most precise with alignment is the rear triangle. It's easier for me to get the rear axle in the right place relative to the ST using the method described above if the front triangle isn't attached yet.
Then once I've got the CS on I put the ST in the jig and position the HT relative to the ST. I can use the laser for this. Then I use string around the HT back to the dropouts and check the gap from the string to the ST is the same both sides.
My jig is just made out of square steel tubes and plates and things. It it not high precision but everything on it is adjustable with little screws. So I use strings and lasers to and tweak the jig as necessary.
At every opportunity I also recommend putting a true back wheel in (and try it both ways round). This is a good sanity check. With the laser I find the wheel fits. The first frame I didn't have the laser or a wheel (I didn't own any wheels with that spacing and had to file the dropouts. The second frame I used a wheel but it's still really hard sometimes to know _what's_ wrong and what adjustment you need to make. I used the laser level box on the third and fourth frames and it's a game changer.
CS to BB are also some of the trickiest welds because it's hard to reach in there. You have to use lots of stickout and foil to catch the gas. So it's also quite nice not to have the whole frame in the way at that point.
Then once I've got the CS on I put the ST in the jig and position the HT relative to the ST. I can use the laser for this. Then I use string around the HT back to the dropouts and check the gap from the string to the ST is the same both sides.
My jig is just made out of square steel tubes and plates and things. It it not high precision but everything on it is adjustable with little screws. So I use strings and lasers to and tweak the jig as necessary.
At every opportunity I also recommend putting a true back wheel in (and try it both ways round). This is a good sanity check. With the laser I find the wheel fits. The first frame I didn't have the laser or a wheel (I didn't own any wheels with that spacing
and had to file the dropouts. The second frame I used a wheel but it's still really hard sometimes to know _what's_ wrong and what adjustment you need to make. I used the laser level box on the third and fourth frames and it's a game changer.CS to BB are also some of the trickiest welds because it's hard to reach in there. You have to use lots of stickout and foil to catch the gas. So it's also quite nice not to have the whole frame in the way at that point.
Likes For guy153:
08-18-20, 11:32 AM
#54


Randomhead
Join Date: Aug 2008
Location: Happy Valley, Pennsylvania
Posts: 24,398
Mentioned: 0 Post(s)
Tagged: 0 Thread(s)
Quoted: 4 Post(s)
Liked 3,698 Times
in
2,518 Posts
I didn't read all the new posts, but I recommend you attach the chain stays and then check alignment. It's easy to move them around if there are no seat stays, but once the seat stays go on, it's nearly impossible. Through the magic of triangles
08-18-20, 12:01 PM
#55
Member
Thread Starter
Thanks guys. Ok I�ll have to decide how I want to proceed. On one hand it might be easier for me to continue on the track I�ve mentally setup for myself already but at the same time I don�t want to throw away good advice.
I�ll at least start with brazing on the ST to the BB
I�ll at least start with brazing on the ST to the BB
08-18-20, 01:25 PM
#56
Senior Member
Join Date: Dec 2019
Posts: 956
Mentioned: 3 Post(s)
Tagged: 0 Thread(s)
Quoted: 321 Post(s)
Liked 263 Times
in
212 Posts
Was watching Paul Brodie on YouTube. He is an amazing framebuilder and artist. Anyway he does DT to BB first because he figures that joint needs to be stronger. I can't fault his logic. But there's not much in it and sometimes it comes down to practical considerations and what equipment one has etc.
Likes For guy153:
08-18-20, 01:40 PM
#57
Randomhead
Join Date: Aug 2008
Location: Happy Valley, Pennsylvania
Posts: 24,398
Mentioned: 0 Post(s)
Tagged: 0 Thread(s)
Quoted: 4 Post(s)
Liked 3,698 Times
in
2,518 Posts
That's pretty interesting about Brodie. He no doubt has more relevant experience than I do, but I have seen many more ST-bb shell failures than DT-bb shell failures. I think it's because the ST bb joint is loaded in tension on the sides, whereas the DD bb joint is mostly loaded by a moment and sees little load in tension.
Likes For unterhausen:
08-18-20, 02:52 PM
#58
Senior Member
Join Date: Dec 2019
Posts: 956
Mentioned: 3 Post(s)
Tagged: 0 Thread(s)
Quoted: 321 Post(s)
Liked 263 Times
in
212 Posts
Good point about tension. In theory the welds should not be weakening anything anyway but the two alternatives will have slightly different stiffnesses in different directions due to the different shapes, if you think of the whole thing like a 3D printed part with a sort of internal gusset. I guess Brodie's method would make the DT a little bit stiffer at flexing up and down. But not so anyone would notice.
08-18-20, 03:04 PM
#59
Senior Member
Join Date: Dec 2019
Posts: 956
Mentioned: 3 Post(s)
Tagged: 0 Thread(s)
Quoted: 321 Post(s)
Liked 263 Times
in
212 Posts
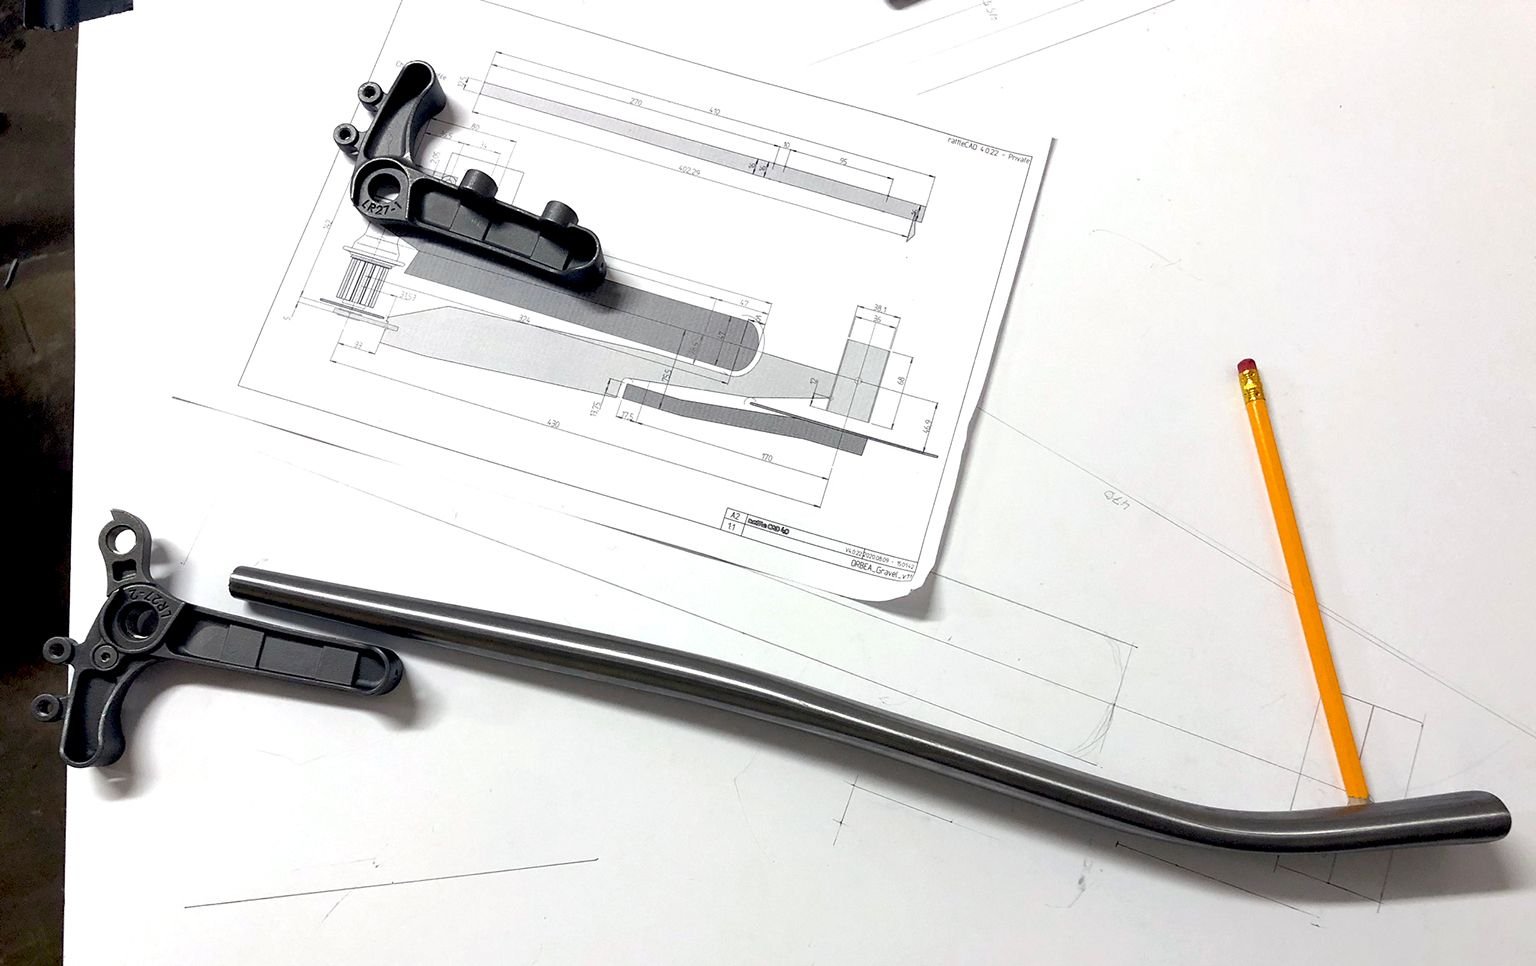
Slow but steady progress. I only get a couple of hours in the evening now and then...
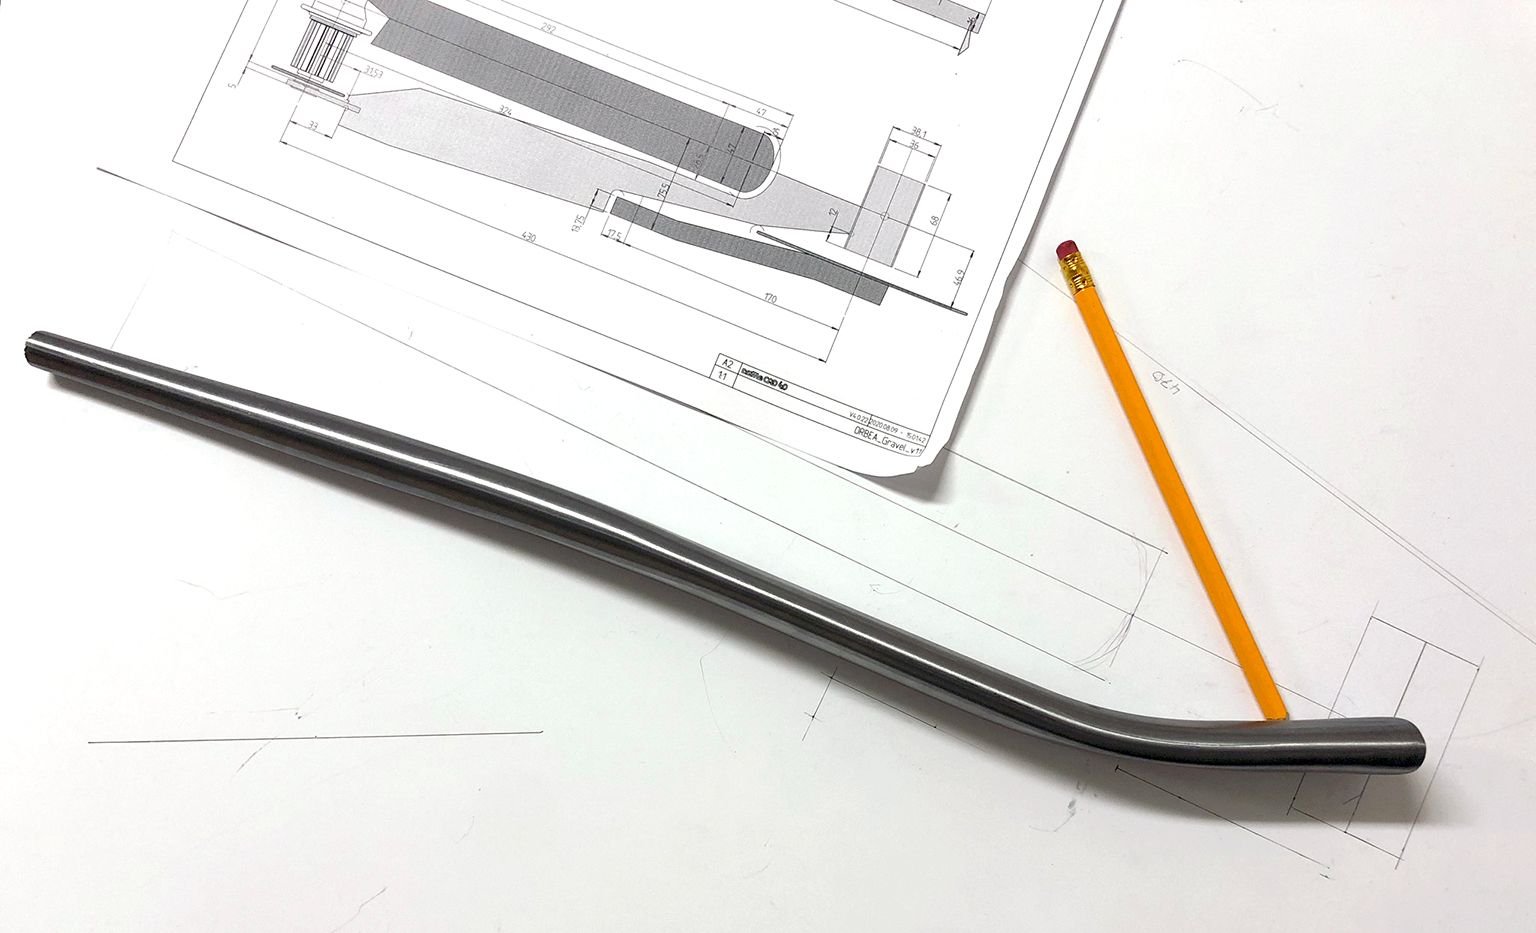
So, nothing major has been done but still big step for me. Scale drawing is done except for a detailed rear triangle drawing, not really sure how to approach that but I've checked the chain stays and the should fit OK without too much work. Other than that I've marked up the main triangle tubes and did my first miter on a proper tube!
So, nothing major has been done but still big step for me. Scale drawing is done except for a detailed rear triangle drawing, not really sure how to approach that but I've checked the chain stays and the should fit OK without too much work. Other than that I've marked up the main triangle tubes and did my first miter on a proper tube!
Paul Brodie had a video recently on how to do a scale drawing including rear triangle which like everything he made look easy. He also had an interesting way of mapping out top views of the SS and CS.
You can just use the computer for all this stuff and looks like you have but if you have a nice big flat table and a sharp pencil the old fashioned way actually doesn't look any harder.
08-18-20, 11:29 PM
#60
Member
Thread Starter
Thanks and great video. Yeah I did most of it in rattleCAD except a detailed rear triangle. Struggled with getting the CS modeled correctly with the bends etc in there. Doing it manually is fun and great practice so I�m looking forward to trying to put it all on paper
08-19-20, 02:57 AM
#61
Senior Member
Join Date: Dec 2019
Posts: 956
Mentioned: 3 Post(s)
Tagged: 0 Thread(s)
Quoted: 321 Post(s)
Liked 263 Times
in
212 Posts
Yes I think CAD works well for the basics and the front triangle but the rear has too many details on most frames to be worth trying to encode all that into the computer. So long as the rear axle is in the right place you can just take it from there by hand keeping an eye out for where the tyre and the crank are going to go.
08-19-20, 04:02 AM
#62
Senior Member
Join Date: Jan 2013
Location: South Jersey
Posts: 2,266
Mentioned: 18 Post(s)
Tagged: 0 Thread(s)
Quoted: 714 Post(s)
Liked 800 Times
in
475 Posts
This is how I lay out my chainstays. It doesn't require a complicated drawing. I just lay out a centerline with a representation of the bottom bracket and the rear axle location and then put in all the points that need clearance. I put in the tire at the proper distance from the rear axle, the chainrings that I plan to use and the location of the crankarms. The chainring locations are from measurements that I get from the Shimano or SRAM frame fit specifications. The SRAM one is on their website. The Shimano specs are harder to get, but I have a 2016 version that covers most of the current stuff.
T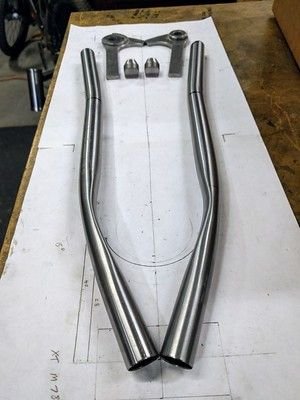
T
08-19-20, 08:24 AM
#63
Senior Member
I developed a different method (out of necessity - the rear axle portion of my jog is bent) and thus a different order of assembly. I also do all of it by hand -- hack saw and files, no mitering jig.
I use two V-blocks to set, align and assemble the BB/chainstays/dropouts. Using two lengths of angle iron I clamp the V-blocks with the V notches facing each other. One block has the BB clamped in, the other a dummy axle. This keeps them parallel, and I can set the distance for the desired chainstay length. I can use a dummy tire (using another V-block or a large tube section) for tire clearance checks*. I miter the dropout end first, clamp the spacing at the BB end, and braze the dropouts to the chainstays.
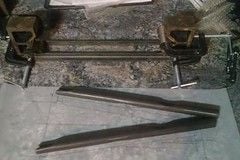
Then I miter the chainstay ends, each separately, to get the same length. Next is brazing the chainstays to the BB shell (tacking in the jig, then fully brazing in a stand). That assembly is taken to the full frame jig and I set the angle between the seat tube and the chainstays, tack, then braze in a stand.
Oftentimes I'll miter the chainstays to the BB with a low offset to alleviate potential issues at the seat tube. And I prefer the looks of the low-set chainstays and down tube, but that's just me.
* Don't worry, I do full-size drawings of every rear triangle first)
I use two V-blocks to set, align and assemble the BB/chainstays/dropouts. Using two lengths of angle iron I clamp the V-blocks with the V notches facing each other. One block has the BB clamped in, the other a dummy axle. This keeps them parallel, and I can set the distance for the desired chainstay length. I can use a dummy tire (using another V-block or a large tube section) for tire clearance checks*. I miter the dropout end first, clamp the spacing at the BB end, and braze the dropouts to the chainstays.
Then I miter the chainstay ends, each separately, to get the same length. Next is brazing the chainstays to the BB shell (tacking in the jig, then fully brazing in a stand). That assembly is taken to the full frame jig and I set the angle between the seat tube and the chainstays, tack, then braze in a stand.
Oftentimes I'll miter the chainstays to the BB with a low offset to alleviate potential issues at the seat tube. And I prefer the looks of the low-set chainstays and down tube, but that's just me.
* Don't worry, I do full-size drawings of every rear triangle first)
Likes For David Tollefson:
08-19-20, 12:06 PM
#64
Randomhead
Join Date: Aug 2008
Location: Happy Valley, Pennsylvania
Posts: 24,398
Mentioned: 0 Post(s)
Tagged: 0 Thread(s)
Quoted: 4 Post(s)
Liked 3,698 Times
in
2,518 Posts
David, that's a great idea. I have been overthinking how I would build a fixture to do that.
08-19-20, 02:19 PM
#65
Member
Thread Starter
Awesome stuff guys! Thanks!
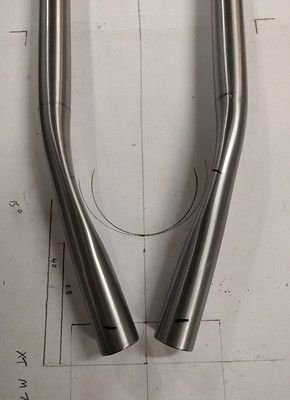
I took a stab at locating my CH and wouldn't mind some feedback. I have two pictures where the CH is clear of the chain ring and crank arm but they will attach to the BB in different spots. I'm guessing the spot closer to the edges of the BB is better so you have more space for the ST as mentioned. The dropouts as pretty big/long so that wouldn't be an issue. Is there anything else I should take into consideration? I believe I have a pretty good understanding of what I need to do but still, I'd rather ask then to **** something up =)
Oh and I do like the fact that I get more wheel clearance on the first image but maybe I have to give that up. I'd rather not crimp anything.
08-20-20, 01:03 AM
#66
Senior Member
Join Date: Dec 2019
Posts: 956
Mentioned: 3 Post(s)
Tagged: 0 Thread(s)
Quoted: 321 Post(s)
Liked 263 Times
in
212 Posts
Both look good You also don't want the CS too far to the edge of the BB because you don't want to start welding into the BB faces. I leave a minimum of 5mm either side. Probably something similar applies if you're brazing.
You also don't want the CS too far to the edge of the BB because you don't want to start welding into the BB faces. I leave a minimum of 5mm either side. Probably something similar applies if you're brazing.
Likes For guy153:
08-28-20, 09:39 AM
#67
Member
Thread Starter
Tiny update.
Started with the main triangle anyway since I was mentally prepared to do that first and I think I have a good plan on how to attack the rear triangle thanks to you guys.
ao I started with the BB to ST. My plan was to only tack it but then I got �feeling� and wanted to try and tin it all around. Didn�t really go as planned and only managed to do a proper running on 1/4th if the tube. The rest is a bit heavy so I�ll have to miter around that I guess or file it down a little. Here�s a picture.
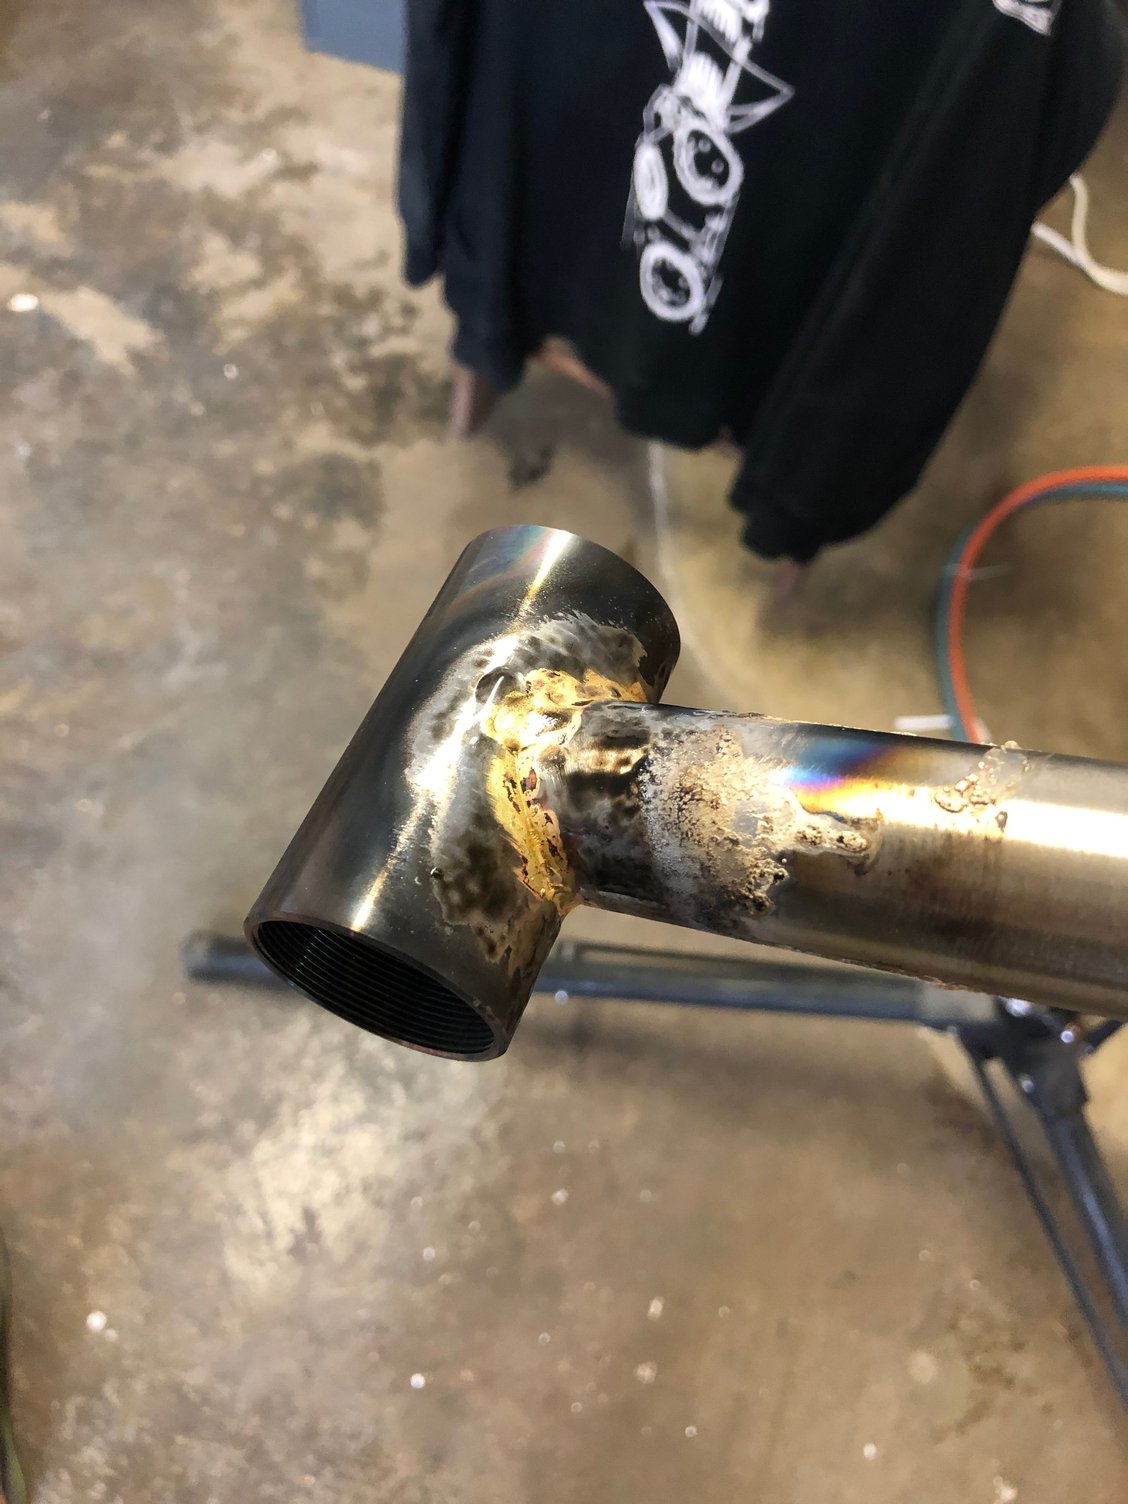
At least the tube is straight 😊
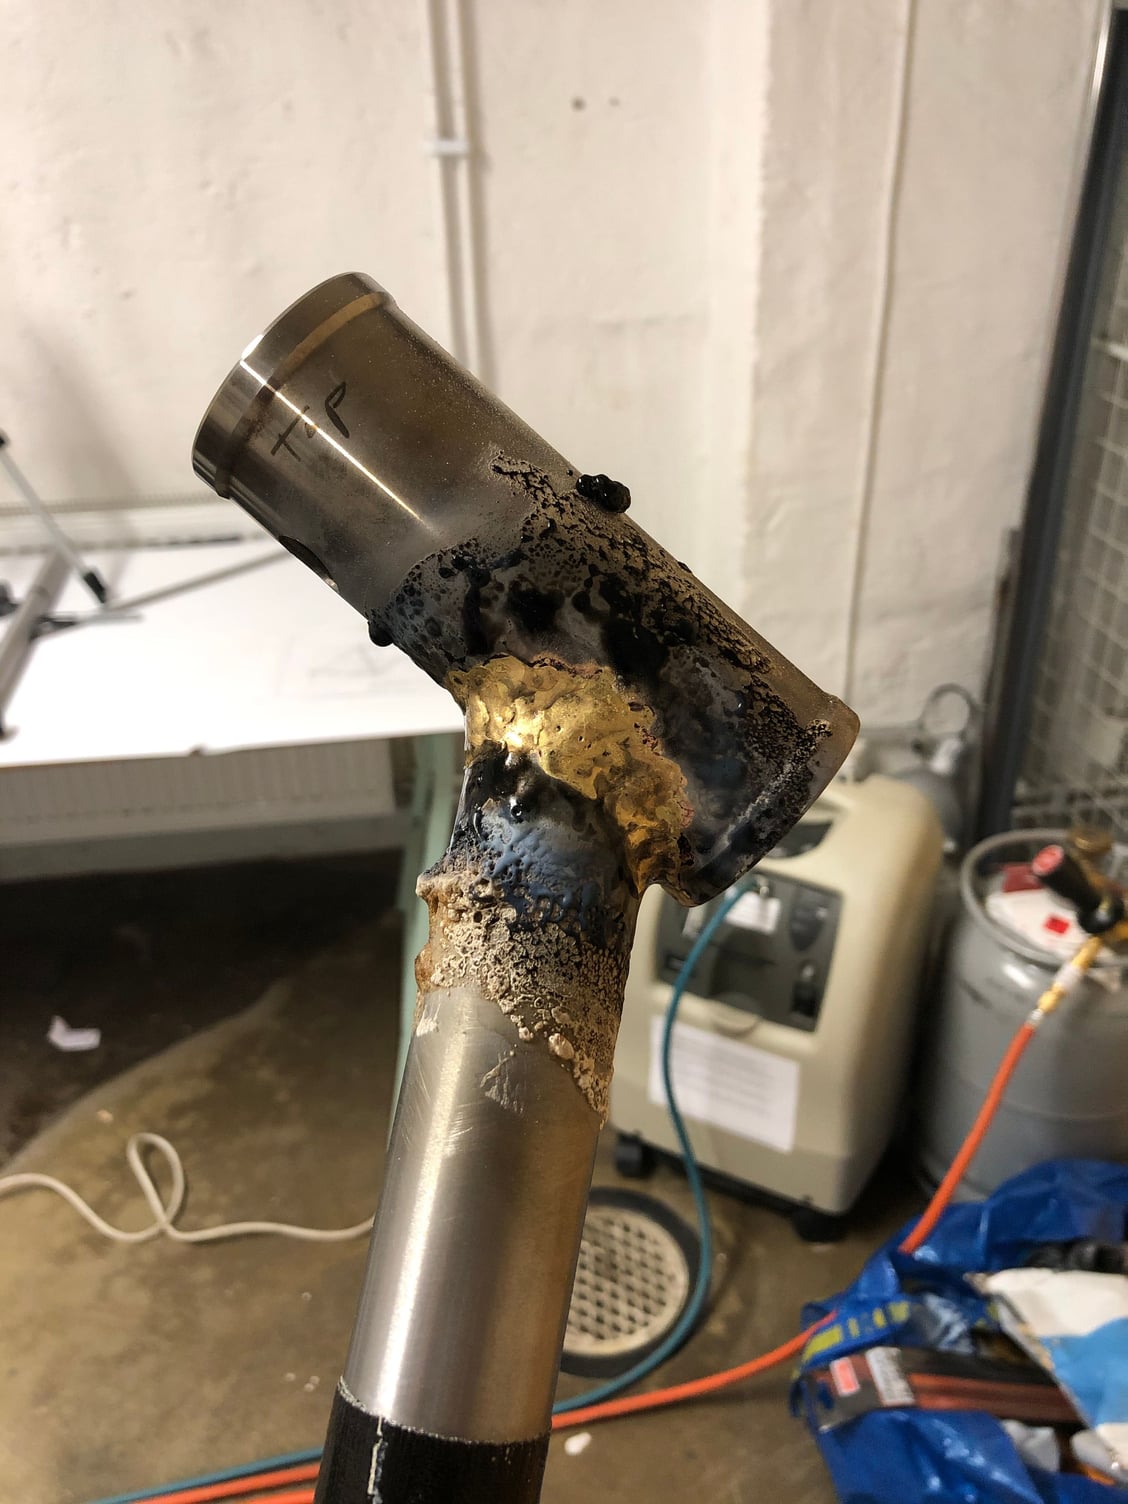
I then moved on to the HT to DT which was tricky but fun to get straight! Was worried the angle would be wrong, which it was when I checked it against the drawing during brazing. Tried to apply strategic heating during brazing and managed to get it almost perfect. Maybe the fillet is a bit small under the DT?
And yes, not the best looking brazing but I�m fairly happy with it even though I need lots of practice of course.
Started with the main triangle anyway since I was mentally prepared to do that first and I think I have a good plan on how to attack the rear triangle thanks to you guys.
ao I started with the BB to ST. My plan was to only tack it but then I got �feeling� and wanted to try and tin it all around. Didn�t really go as planned and only managed to do a proper running on 1/4th if the tube. The rest is a bit heavy so I�ll have to miter around that I guess or file it down a little. Here�s a picture.
At least the tube is straight 😊
I then moved on to the HT to DT which was tricky but fun to get straight! Was worried the angle would be wrong, which it was when I checked it against the drawing during brazing. Tried to apply strategic heating during brazing and managed to get it almost perfect. Maybe the fillet is a bit small under the DT?
And yes, not the best looking brazing but I�m fairly happy with it even though I need lots of practice of course.
Likes For Aldatroid:
08-28-20, 01:51 PM
#68
Randomhead
Join Date: Aug 2008
Location: Happy Valley, Pennsylvania
Posts: 24,398
Mentioned: 0 Post(s)
Tagged: 0 Thread(s)
Quoted: 4 Post(s)
Liked 3,698 Times
in
2,518 Posts
what headtube is that?
08-28-20, 02:24 PM
#69
Member
Thread Starter
A 44mm HT from Ceeway.
Almost half way down the �what�s new� page. https://www.framebuilding.com/what.htm
Almost half way down the �what�s new� page. https://www.framebuilding.com/what.htm
08-28-20, 02:34 PM
#70
Senior Member
Join Date: Dec 2019
Posts: 956
Mentioned: 3 Post(s)
Tagged: 0 Thread(s)
Quoted: 321 Post(s)
Liked 263 Times
in
212 Posts
A 44mm HT from Ceeway.
Almost half way down the �what�s new� page. https://www.framebuilding.com/what.htm
Almost half way down the �what�s new� page. https://www.framebuilding.com/what.htm
08-28-20, 04:50 PM
#71
Randomhead
Join Date: Aug 2008
Location: Happy Valley, Pennsylvania
Posts: 24,398
Mentioned: 0 Post(s)
Tagged: 0 Thread(s)
Quoted: 4 Post(s)
Liked 3,698 Times
in
2,518 Posts
I knew about it, but I looked at it a couple of months ago and it was pretty stale. I see they added the columbus disc stays, which was what I was looking for back then
08-28-20, 07:57 PM
#72

Senior Member
Join Date: Feb 2012
Location: Rochester, NY
Posts: 18,084
Bikes: Stewart S&S coupled sport tourer, Stewart Sunday light, Stewart Commuting, Stewart Touring, Co Motion Tandem, Stewart 3-Spd, Stewart Track, Fuji Finest, Mongoose Tomac ATB, GT Bravado ATB, JCP Folder, Stewart 650B ATB
Mentioned: 0 Post(s)
Tagged: 0 Thread(s)
Quoted: 4205 Post(s)
Liked 3,863 Times
in
2,311 Posts
Tiny update.
Started with the main triangle anyway since I was mentally prepared to do that first and I think I have a good plan on how to attack the rear triangle thanks to you guys.
ao I started with the BB to ST. My plan was to only tack it but then I got “feeling” and wanted to try and tin it all around. Didn’t really go as planned and only managed to do a proper running on 1/4th if the tube. The rest is a bit heavy so I’ll have to miter around that I guess or file it down a little. Here’s a picture.
At least the tube is straight 😊
I then moved on to the HT to DT which was tricky but fun to get straight! Was worried the angle would be wrong, which it was when I checked it against the drawing during brazing. Tried to apply strategic heating during brazing and managed to get it almost perfect. Maybe the fillet is a bit small under the DT?
And yes, not the best looking brazing but I’m fairly happy with it even though I need lots of practice of course.
__________________
AndrewRStewart
AndrewRStewart
Likes For Andrew R Stewart:
08-29-20, 04:50 AM
#73
Member
Thread Starter
I suspect after initial filing down of the fillet you find low points that need building up. That's when you can both add fillet size and further practice your heat control. How much cleaning do you do in the pre brazing prep? Also what filler and flux are you using? Andy
So you would recommend that I clean up the joint and then build it up where needed etc?
08-29-20, 06:48 PM
#74
Senior Member
Join Date: Feb 2012
Location: Rochester, NY
Posts: 18,084
Bikes: Stewart S&S coupled sport tourer, Stewart Sunday light, Stewart Commuting, Stewart Touring, Co Motion Tandem, Stewart 3-Spd, Stewart Track, Fuji Finest, Mongoose Tomac ATB, GT Bravado ATB, JCP Folder, Stewart 650B ATB
Mentioned: 0 Post(s)
Tagged: 0 Thread(s)
Quoted: 4205 Post(s)
Liked 3,863 Times
in
2,311 Posts
Reason i asked about prep, flux and cleaner is the amount of blackening in the flux. Could be from poor cleaning, too much heat or too long a heat cycle (or any combo). Andy
__________________
AndrewRStewart
AndrewRStewart
08-29-20, 07:14 PM
#75
Randomhead
Join Date: Aug 2008
Location: Happy Valley, Pennsylvania
Posts: 24,398
Mentioned: 0 Post(s)
Tagged: 0 Thread(s)
Quoted: 4 Post(s)
Liked 3,698 Times
in
2,518 Posts
The bb picture makes me wonder if some of the blackening is the flux itself. I don't like to post pictures where I used black silver flux because it looks like I cooked the crap out of the joint and it's really just the flux. The head tube got a little hot, but barely enough to precipitate copper. There is the tiniest amount.