


Latest Project
 12-28-17, 12:58 PM
#1

Senior Member
Thread Starter
Join Date: Aug 2012
Location: Seattle
Posts: 507
Mentioned: 0 Post(s)
Tagged: 0 Thread(s)
Quoted: 103 Post(s)
Liked 144 Times
in
88 Posts
Latest Project
It's been a while since someone has posted about actually building a bike so, thought I would do one.
The Backstory:
There is a velodrome in Redmond, near Seattle, and they want to add to their fleet of rental bikes for their Junior program. After talking with my accountant, insurance agent and forming an LLC, I will be building these framesets and donating them to the velodrome. This sort of sets me up to also start a business making framesets so, I've created Draper Cycles LLC. I'll go more into the expectations of that later.
A local shop is giving build kits with wheels, bars, cranks etc. and Seattle Powdercoating is giving a deal on finishing. I have had all my frames finished there and they do great work even on lugs on other details where powdercoating can obscure the details. Prices are very good and they are fast.
My previous 9 bikes have been built at a rate of about 2 per year so, now I need to ramp up to 4 framesets completed by the first week of April. At least track frames are fairly simple as there aren't braze on bits. I am having fun with the challenge of 'production-izing' my process and thinking about how to do things more consistently.
Progress so far:
The first step was a design obviously. I use RattleCAD and print out on extra large paper. I wish I could print out full sized but, I don't have a printer that large.
These bikes are for kids from 9-14 years old. The current bikes were built about 15 years ago and have horizontal top tubes which limits the sizing on the lower end. They also have 650c wheels. They want steep-ish sloping top tubes and more standard 700c wheels. The bikes will be fillet brazed as I won't have time to manipulate a bunch of lugs. I've attached the preliminary drawing. I started from other production track bike geometry and tweaked slightly to shorten them up a bit without creating too much toe overlap or making them too twitchy etc. I will be visiting the velodrome storage shed tomorrow to take measurements from their current bikes - although the current bikes are 650c wheels so, really I will only be looking at the reach and stack dimensions as well as wear patterns on dropouts and that sort of thing. From these measurements, I will finalized the drawings and may tweak other details.
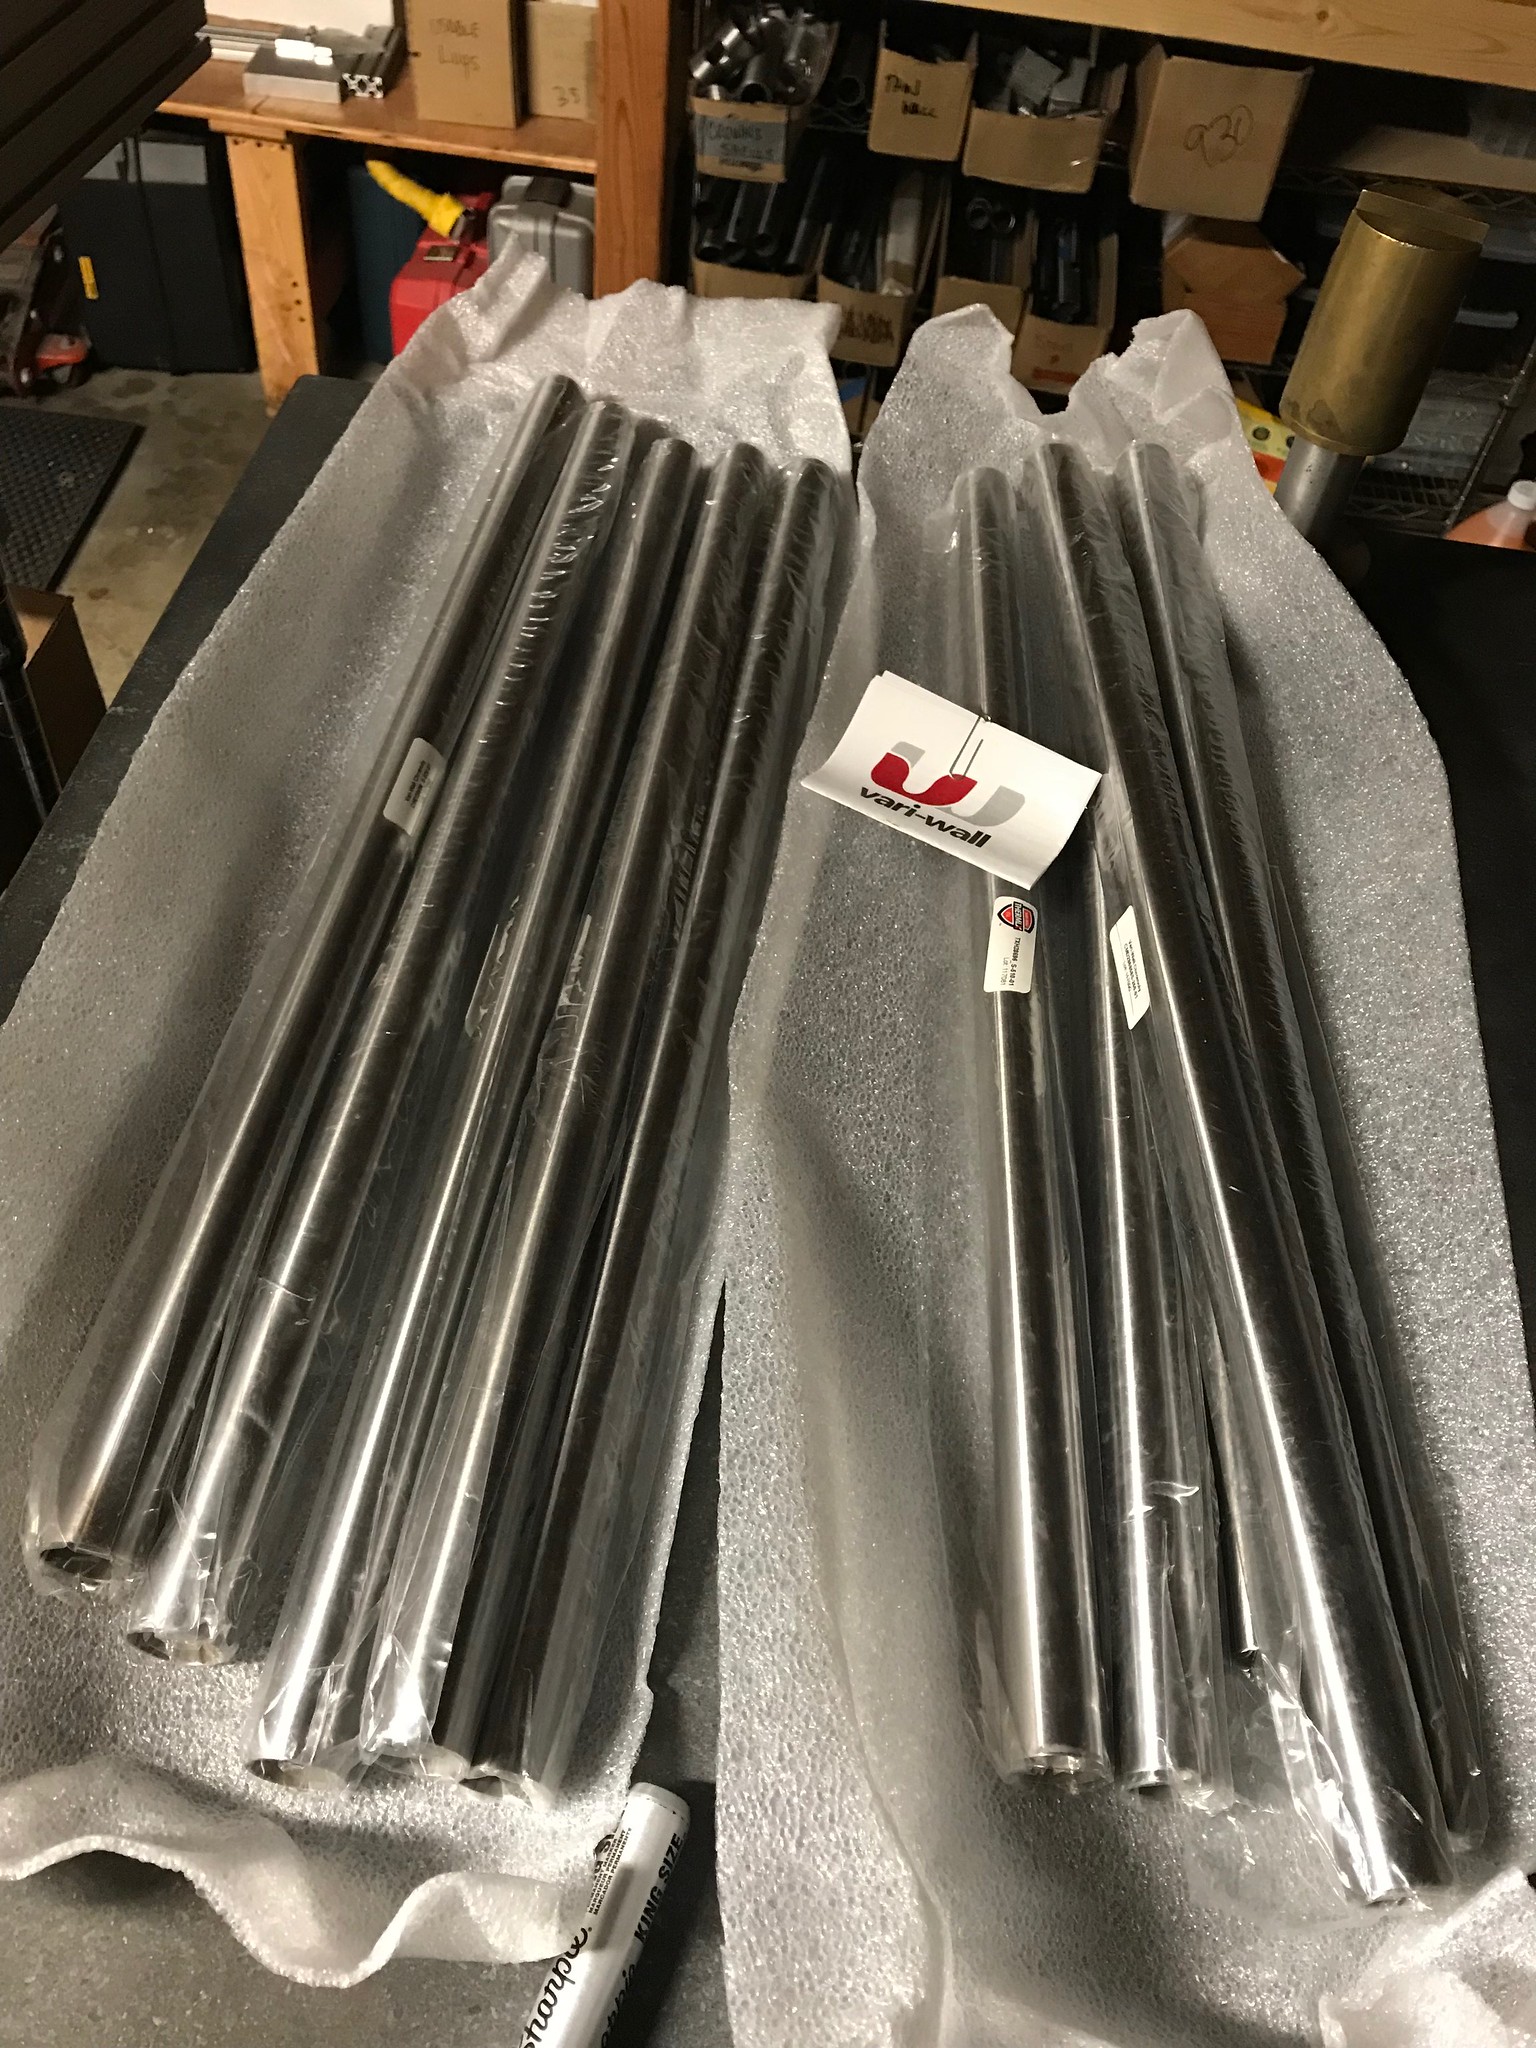
I'm using Vari-wall tubing in 1" top tube and 1-1/8" downtube with fairly thick walls so they are dent resistant. These bikes will take a beating over the years.
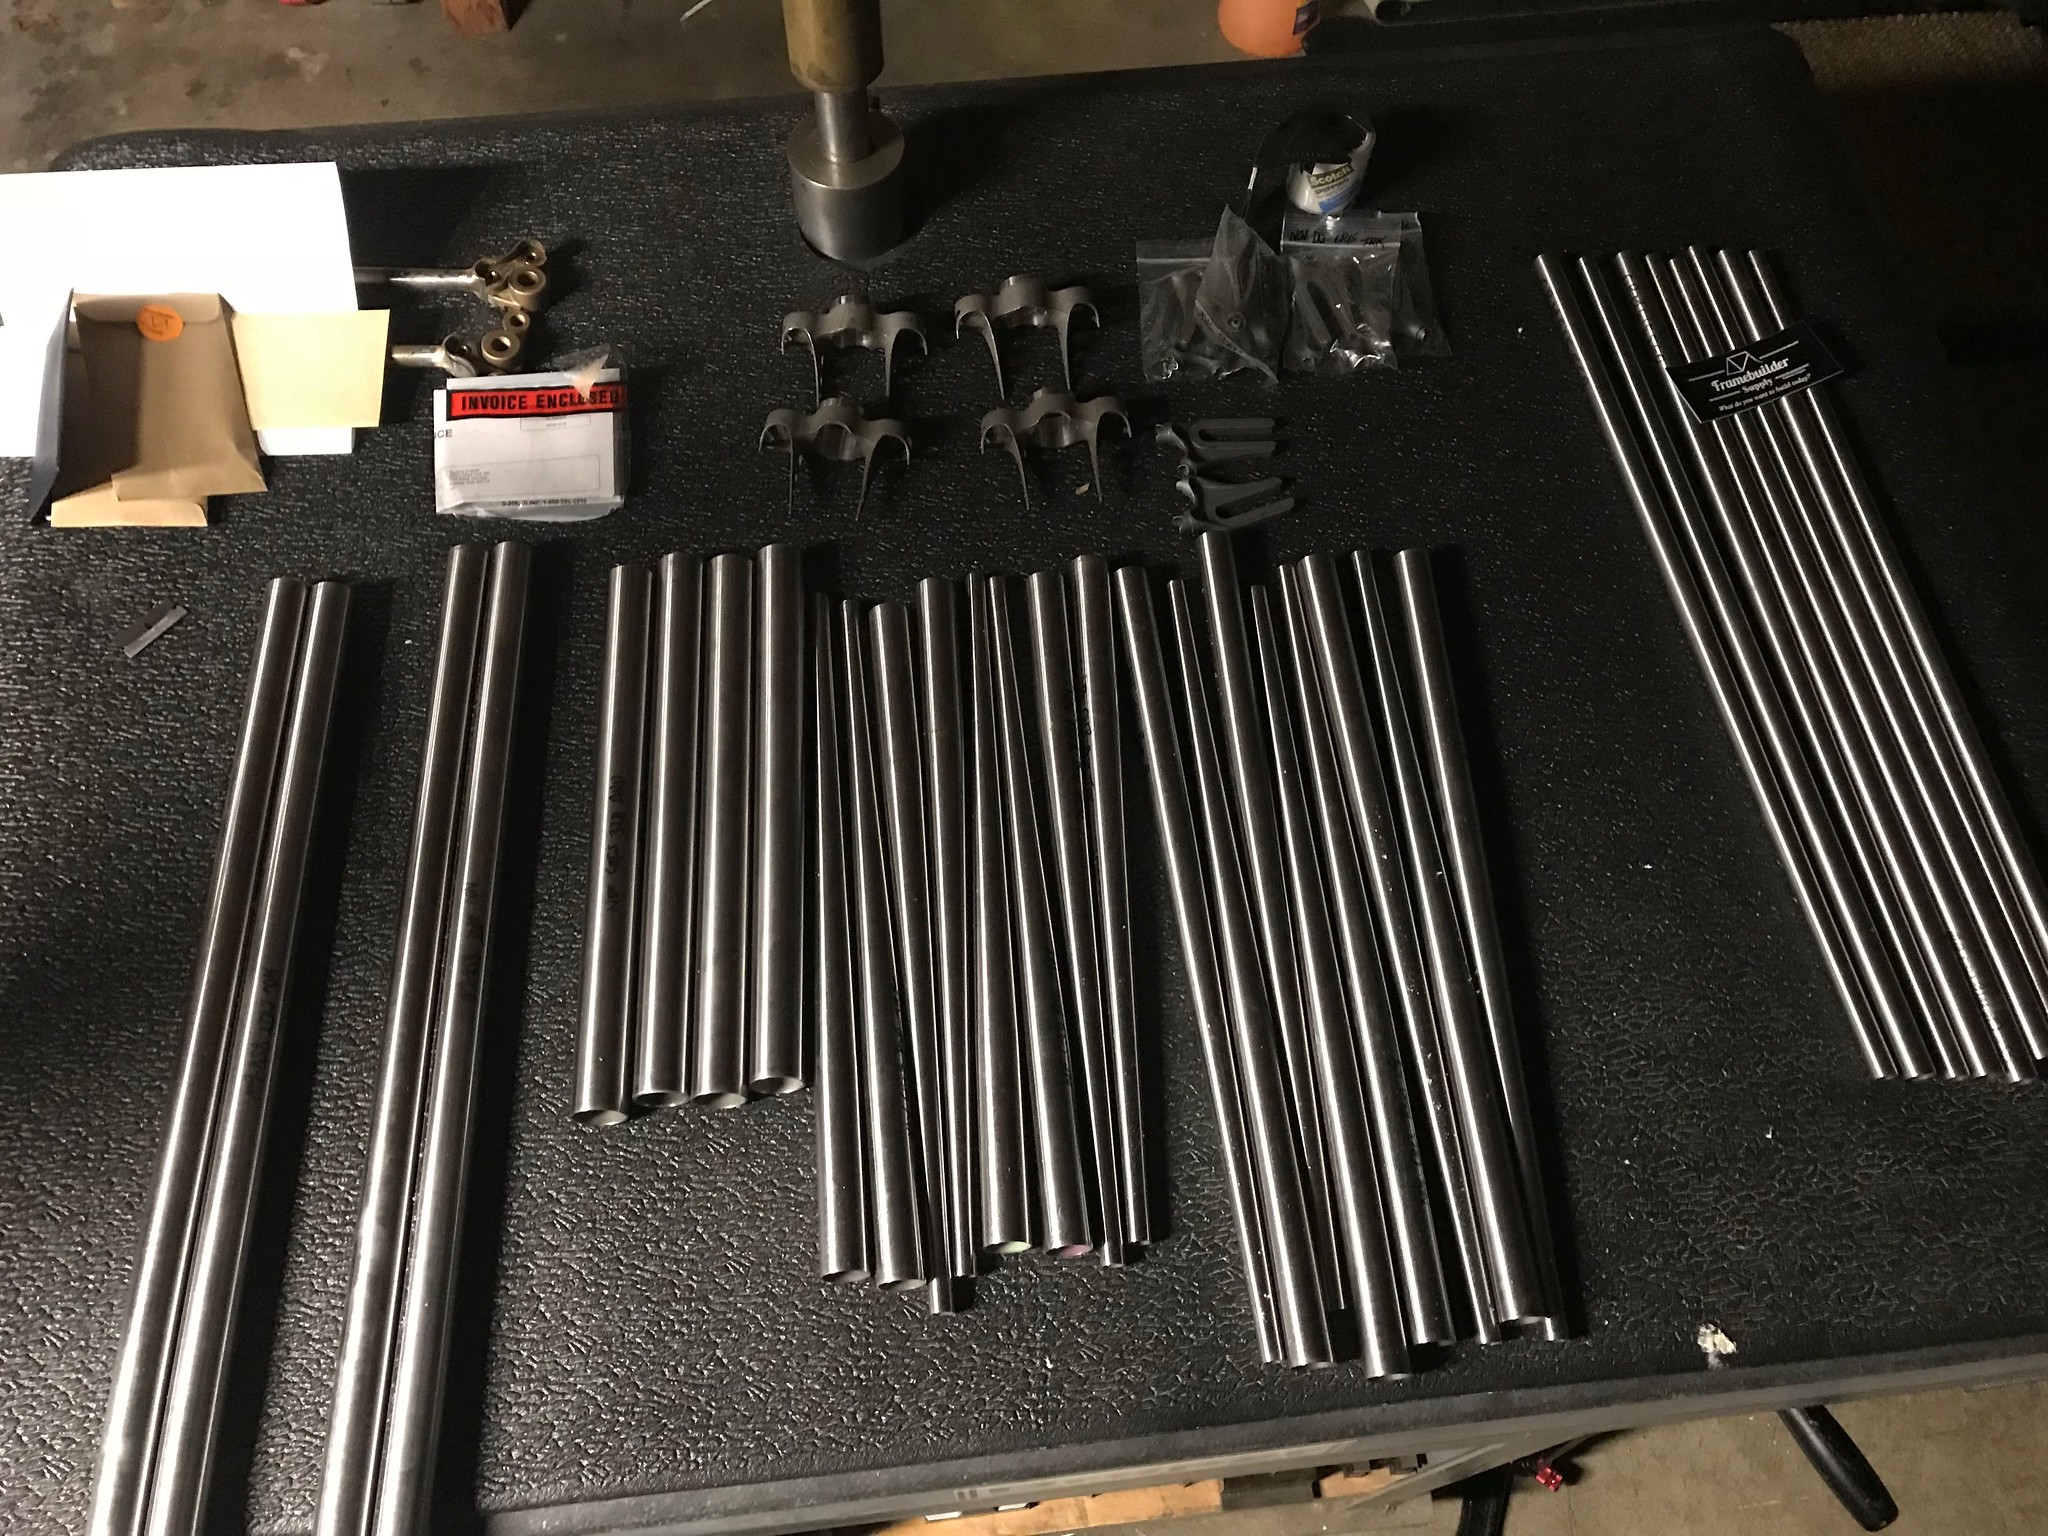
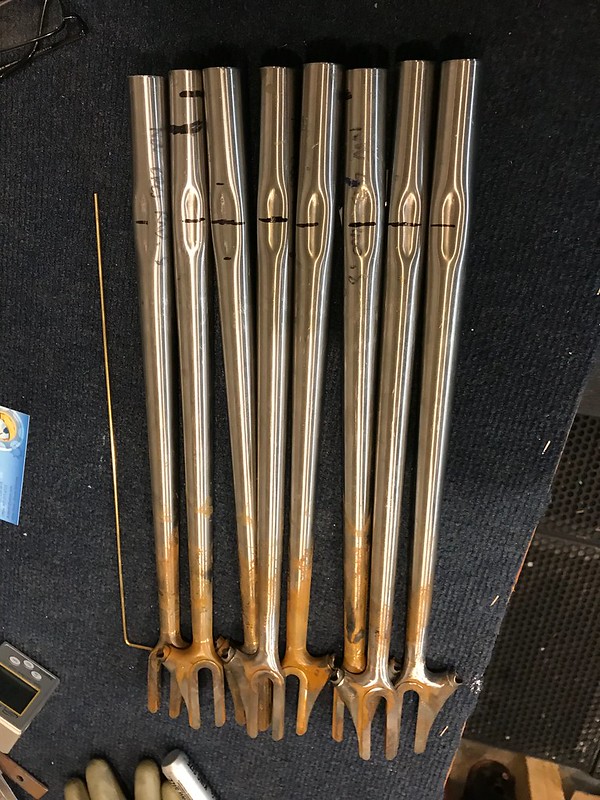
I wanted them to be somewhat traditional track frames so, I am using track crown and round blades from Nova and round stays and cast fork ends in the back.
 [/url]
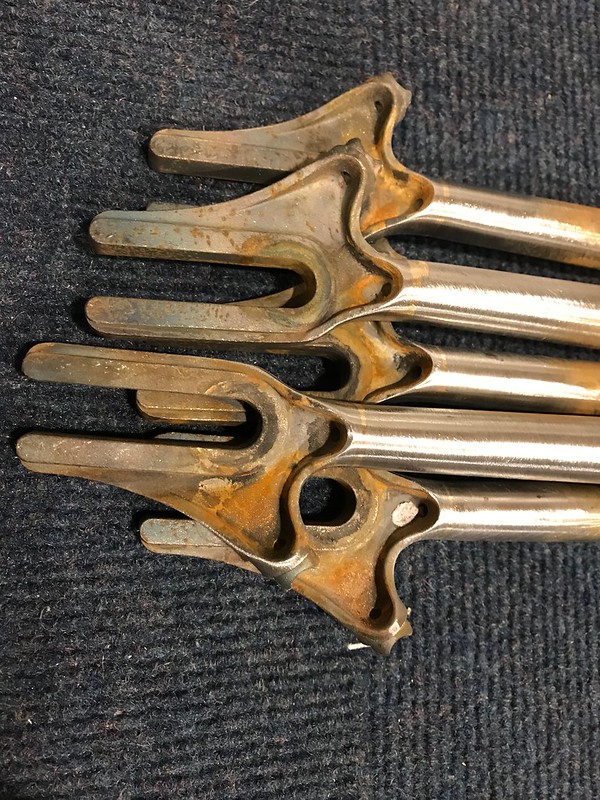
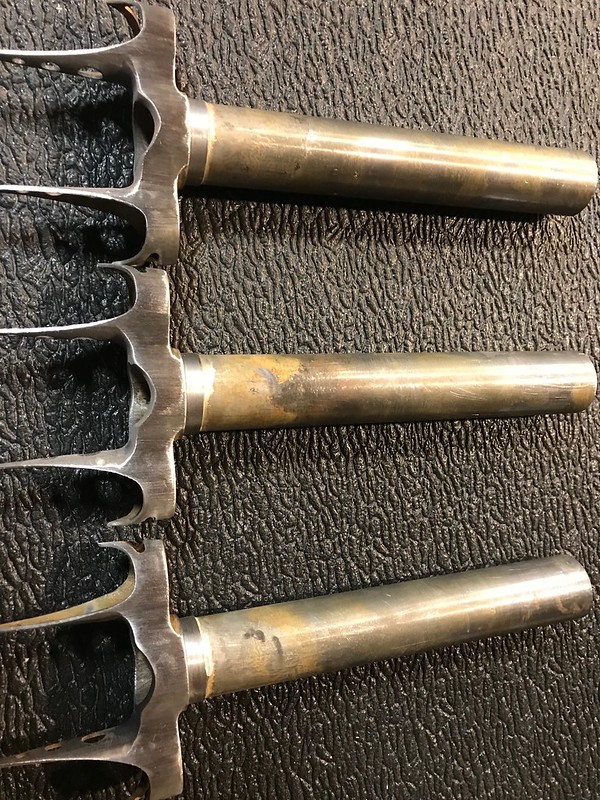
I didn't think I would have time to make and braze stainless faces on each fork end so, I found some thick fork ends that should work fine.

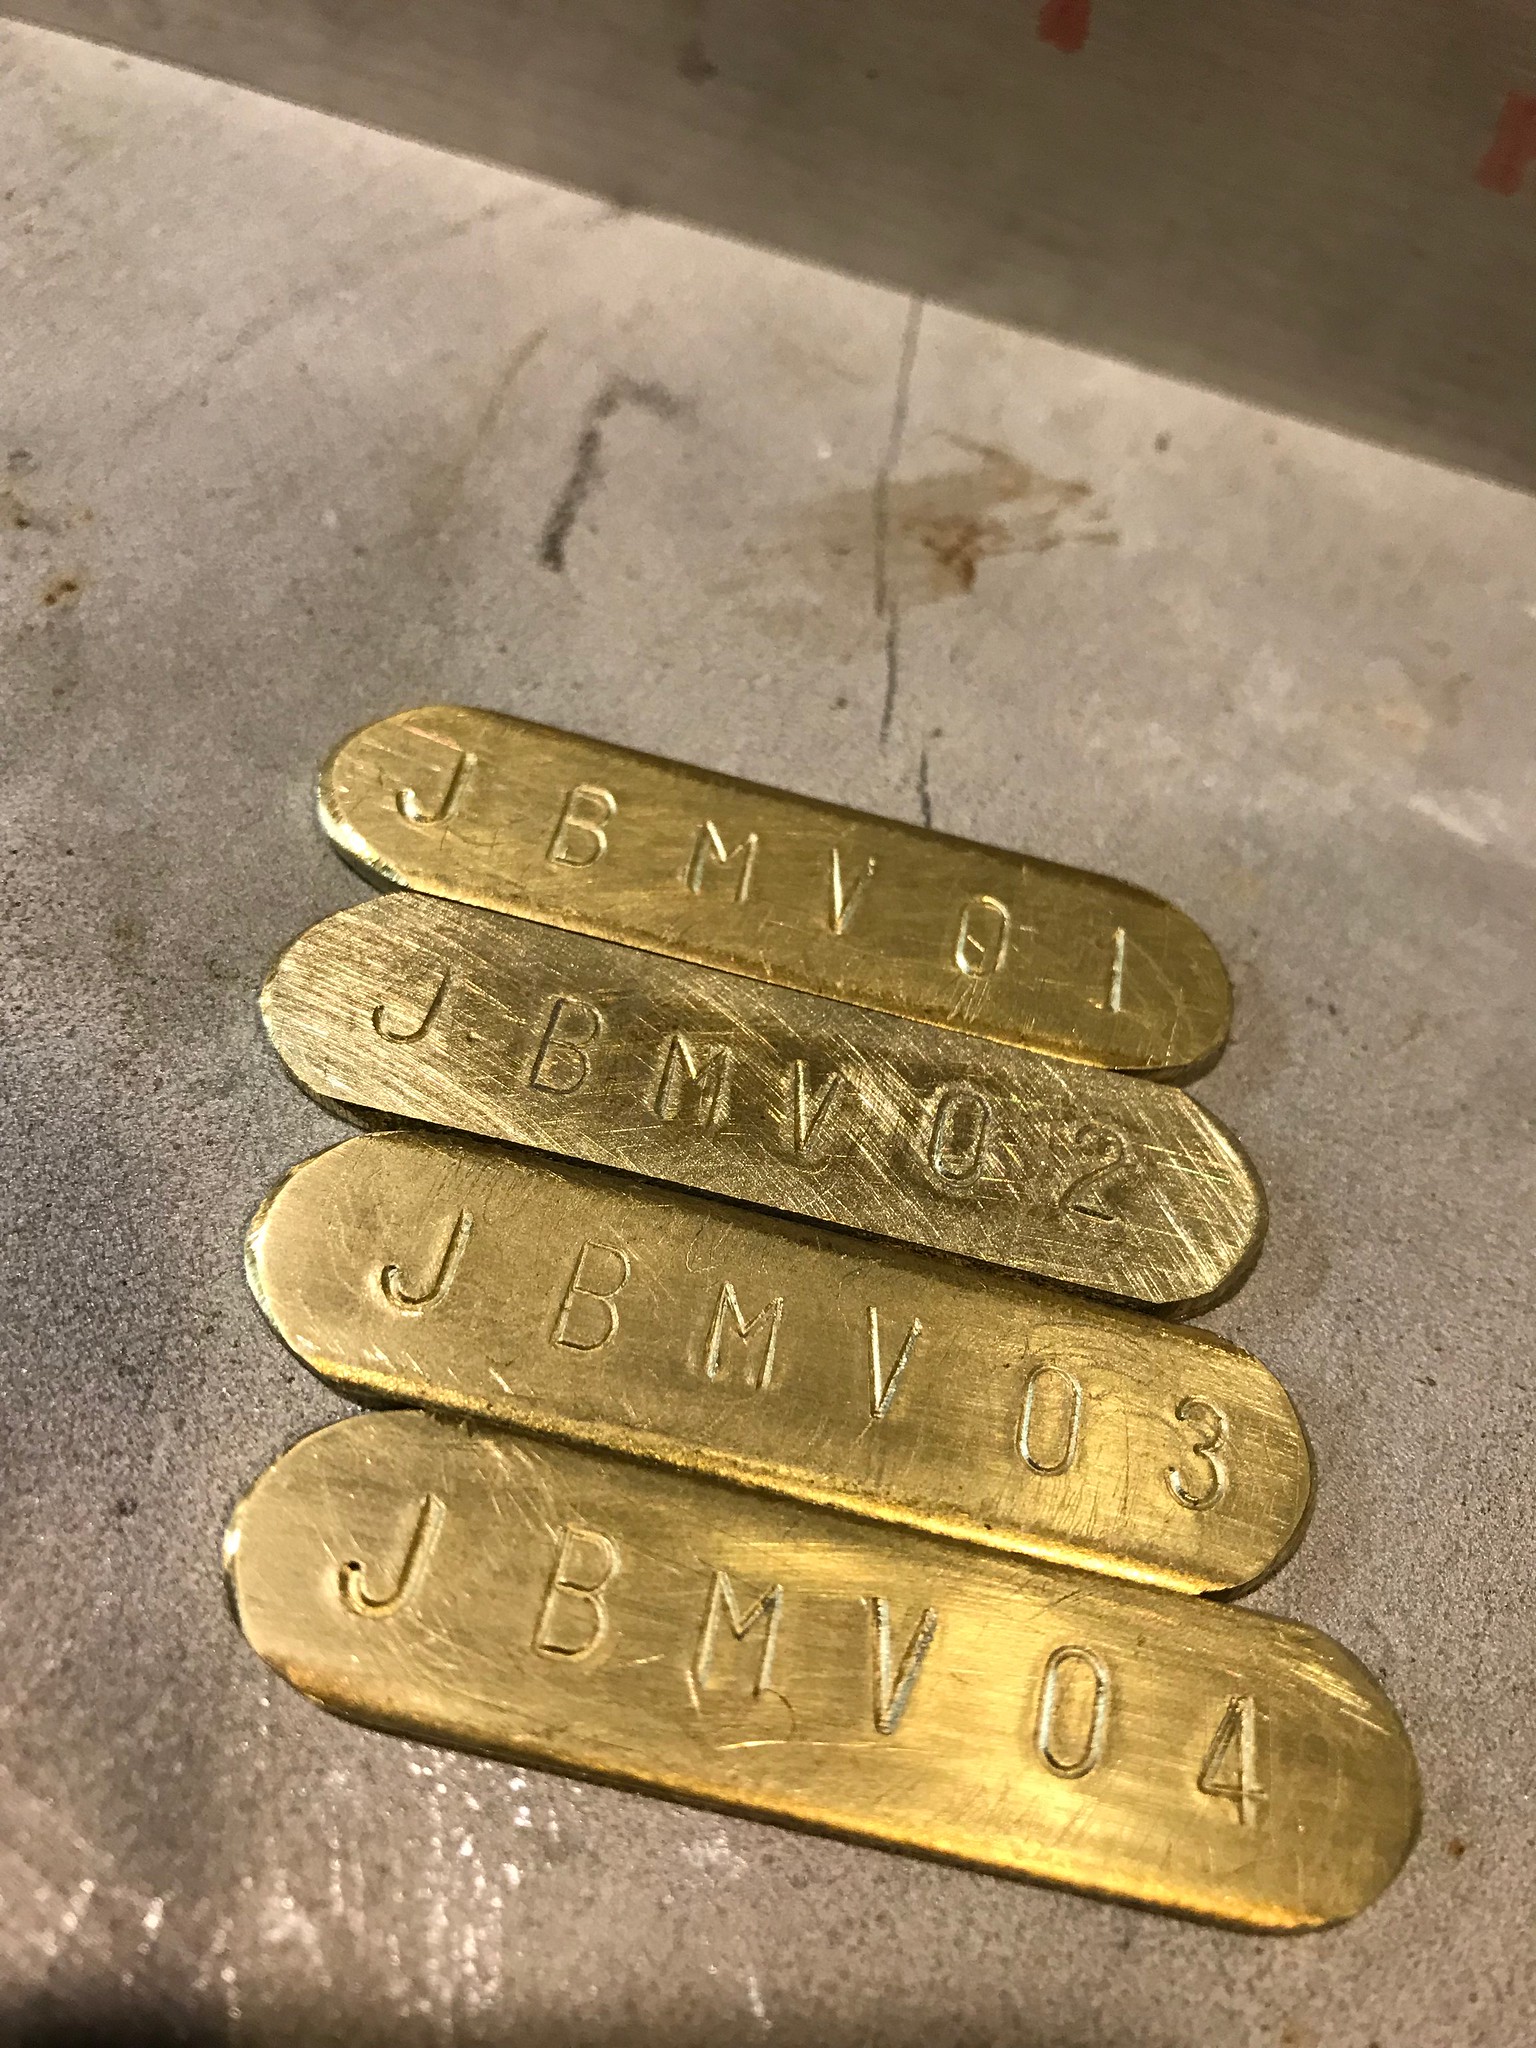
These bikes will have a separate serial number sequence. These are brazed to the left side of the seattube 5-6cm above the BB shell. They get polished up and are not coated over.
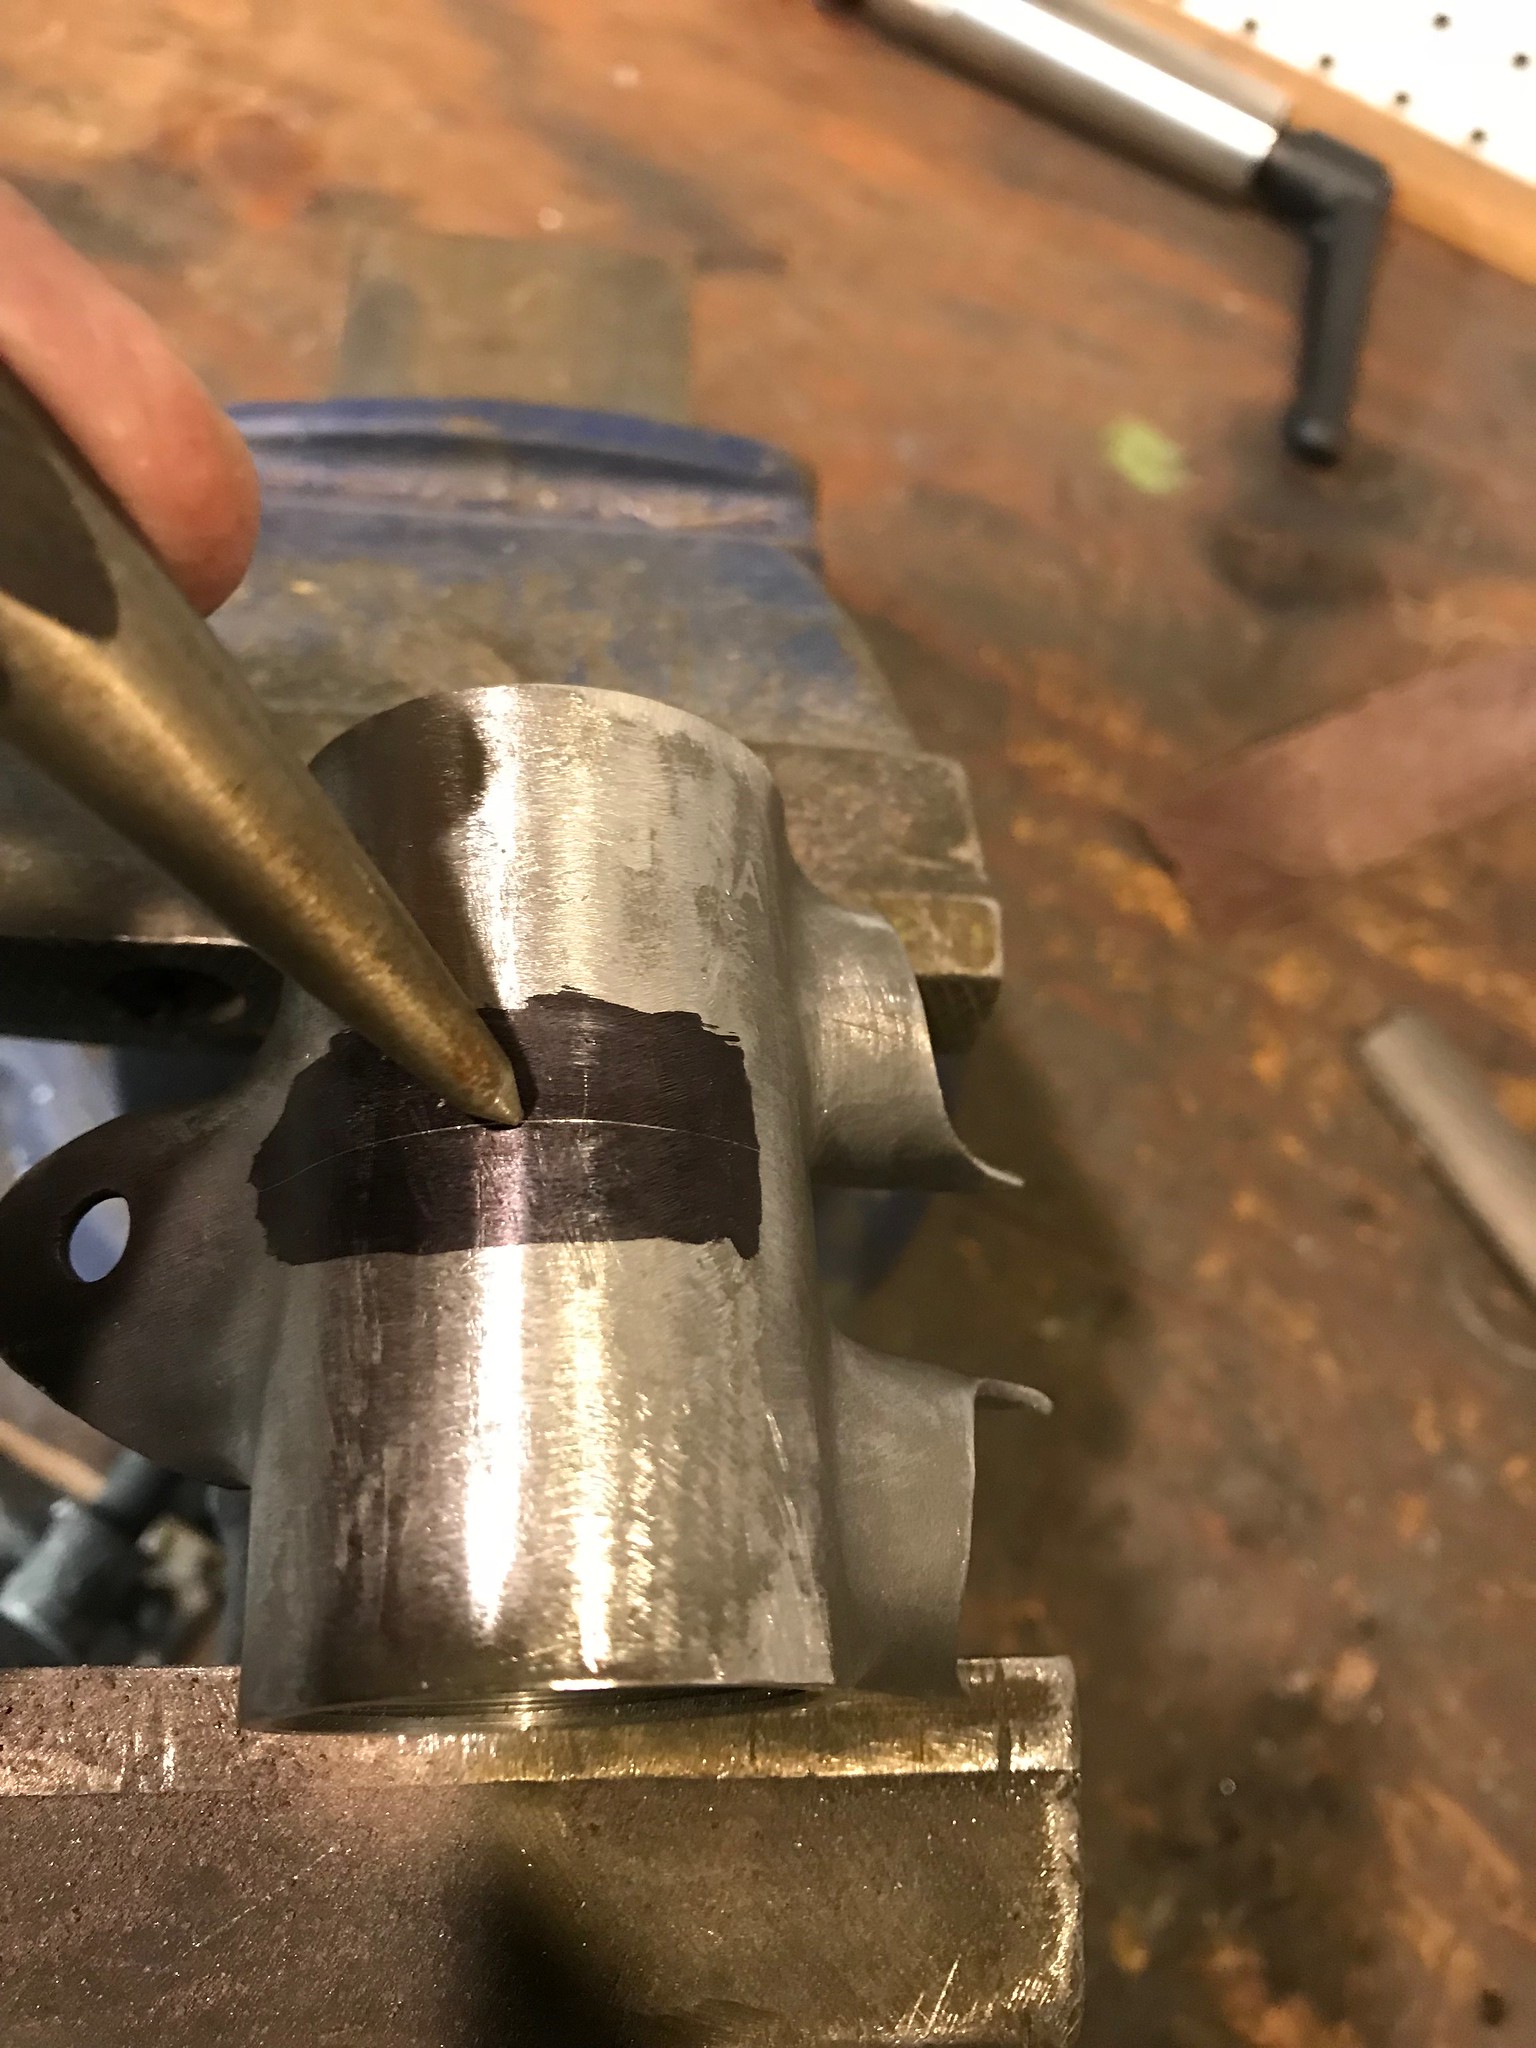
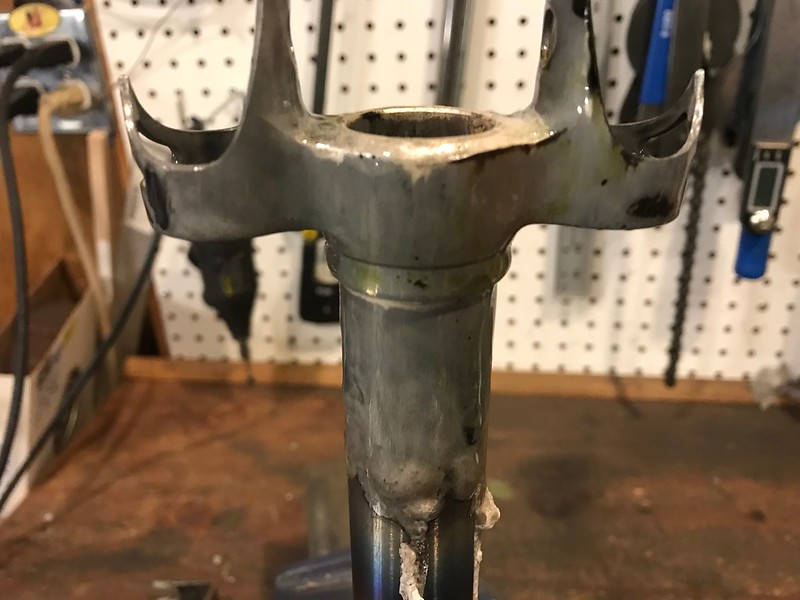
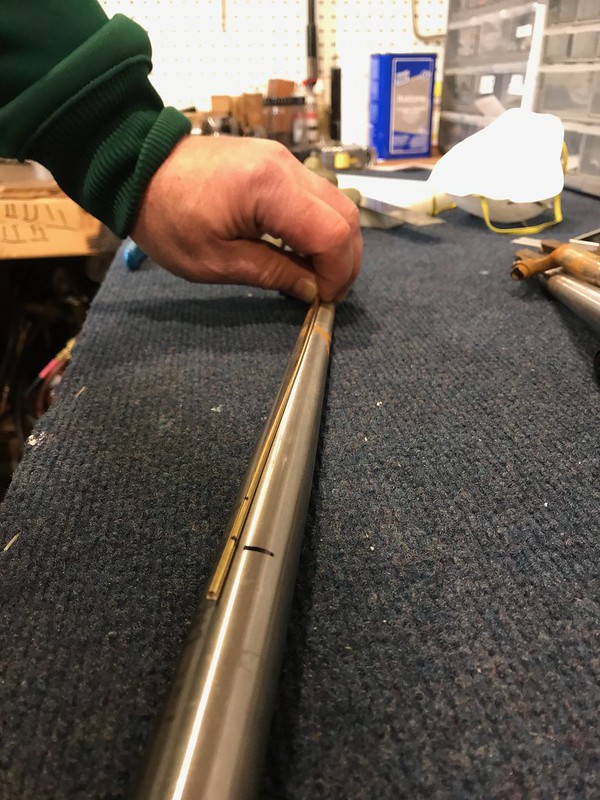
The first thing I do when I receive in materials is to 'play' with them. This includes filing off any casting marks or surface imperfections. I measure butts and just generally make sure they are what I ordered and they work together as expected or I understand what manipulations will need to happen. The first real step is to 'blueprint' the BB shell. I made a little bar that allows me to measure the insides of the shell sockets so I can identify the centerline of the frame. I scribe a mark on the outside and center punch the shell to give a reference for when the triangle eventually goes back on the alignment table. I verify the angles of the sockets. At this time I clean up shorelines and drill drain holes and add any carvings that are required.
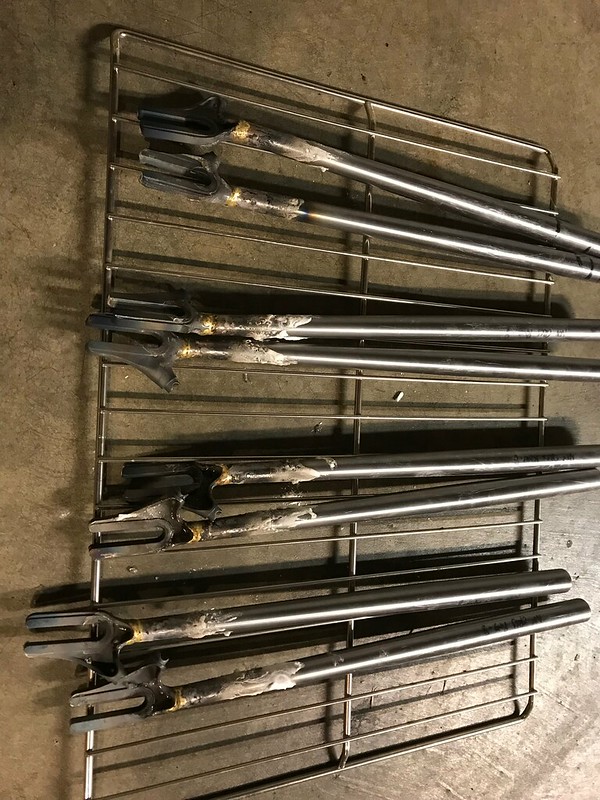
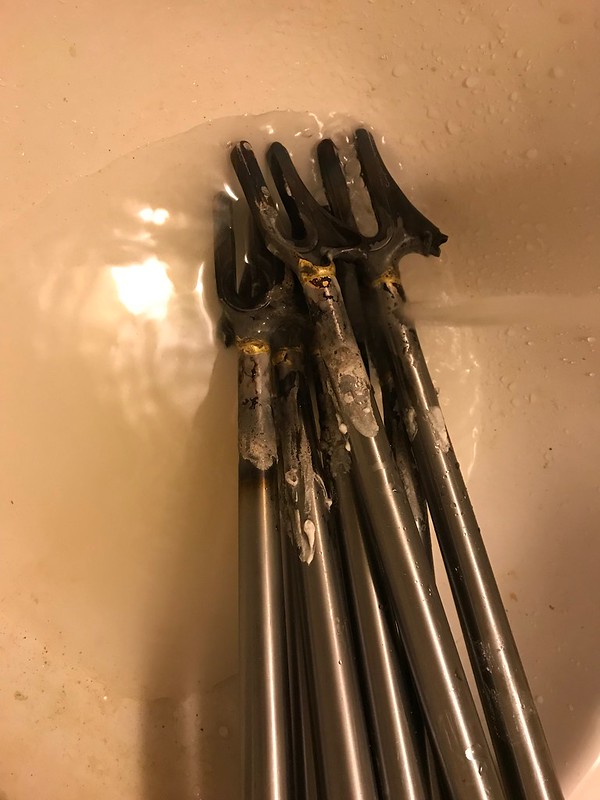
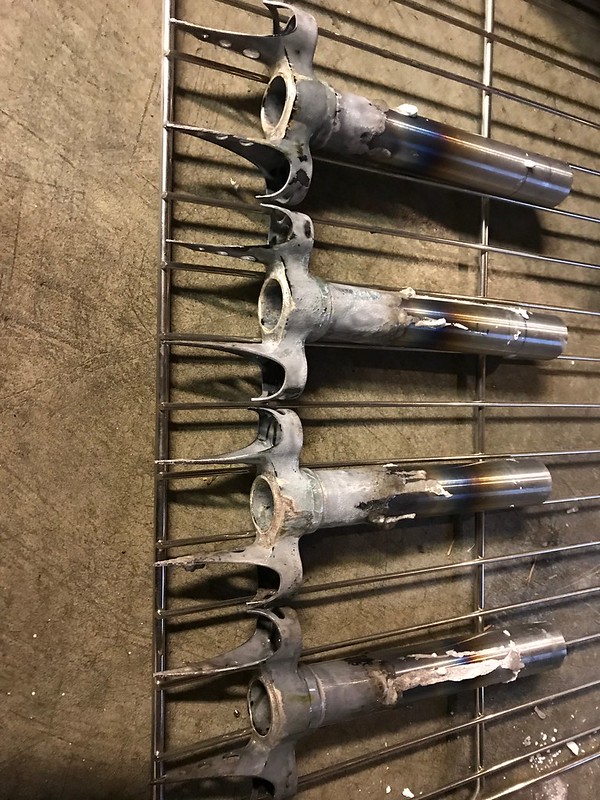
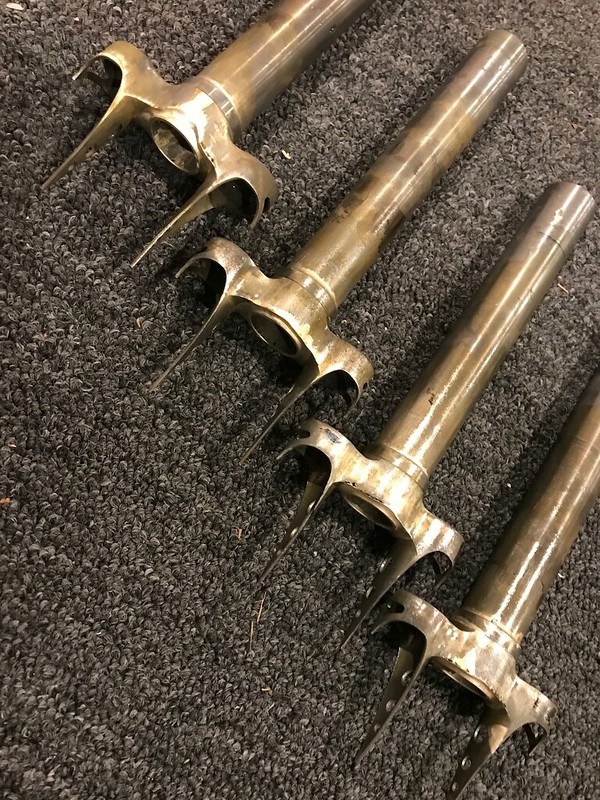
Then I do the same with the fork crown and then I build the fork.
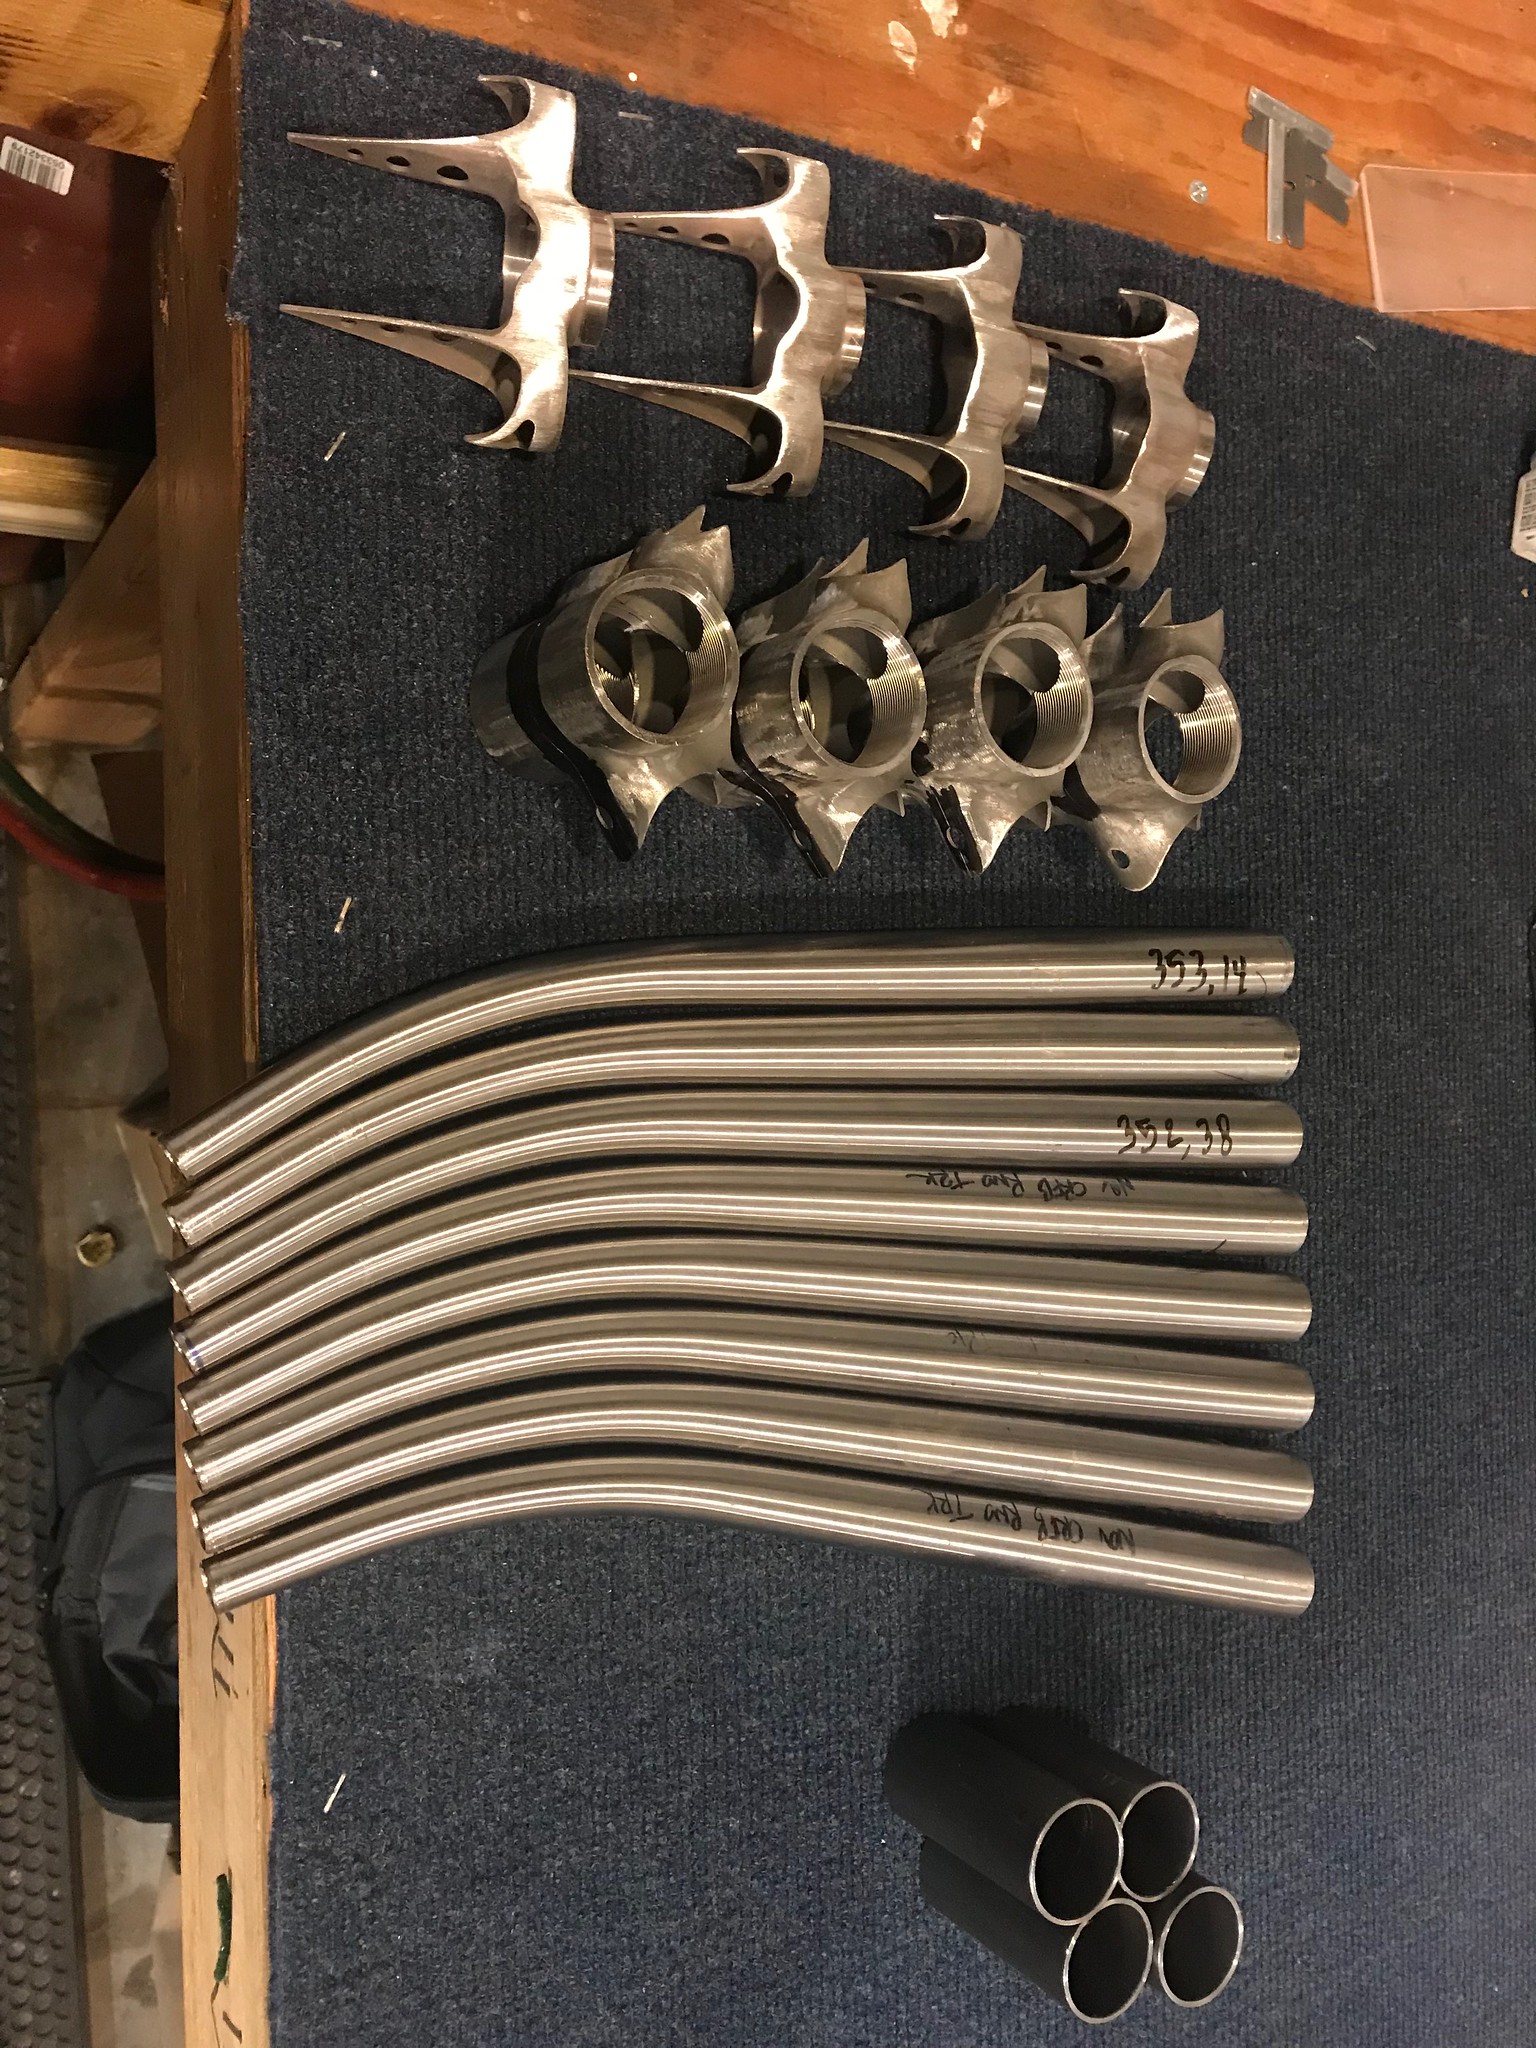

4 forks matched up and ready to be prepped and brazed.

Stay tuned.
The Backstory:
There is a velodrome in Redmond, near Seattle, and they want to add to their fleet of rental bikes for their Junior program. After talking with my accountant, insurance agent and forming an LLC, I will be building these framesets and donating them to the velodrome. This sort of sets me up to also start a business making framesets so, I've created Draper Cycles LLC. I'll go more into the expectations of that later.
A local shop is giving build kits with wheels, bars, cranks etc. and Seattle Powdercoating is giving a deal on finishing. I have had all my frames finished there and they do great work even on lugs on other details where powdercoating can obscure the details. Prices are very good and they are fast.
My previous 9 bikes have been built at a rate of about 2 per year so, now I need to ramp up to 4 framesets completed by the first week of April. At least track frames are fairly simple as there aren't braze on bits. I am having fun with the challenge of 'production-izing' my process and thinking about how to do things more consistently.
Progress so far:
The first step was a design obviously. I use RattleCAD and print out on extra large paper. I wish I could print out full sized but, I don't have a printer that large.
These bikes are for kids from 9-14 years old. The current bikes were built about 15 years ago and have horizontal top tubes which limits the sizing on the lower end. They also have 650c wheels. They want steep-ish sloping top tubes and more standard 700c wheels. The bikes will be fillet brazed as I won't have time to manipulate a bunch of lugs. I've attached the preliminary drawing. I started from other production track bike geometry and tweaked slightly to shorten them up a bit without creating too much toe overlap or making them too twitchy etc. I will be visiting the velodrome storage shed tomorrow to take measurements from their current bikes - although the current bikes are 650c wheels so, really I will only be looking at the reach and stack dimensions as well as wear patterns on dropouts and that sort of thing. From these measurements, I will finalized the drawings and may tweak other details.
I'm using Vari-wall tubing in 1" top tube and 1-1/8" downtube with fairly thick walls so they are dent resistant. These bikes will take a beating over the years.
I wanted them to be somewhat traditional track frames so, I am using track crown and round blades from Nova and round stays and cast fork ends in the back.
[/url]I didn't think I would have time to make and braze stainless faces on each fork end so, I found some thick fork ends that should work fine.
These bikes will have a separate serial number sequence. These are brazed to the left side of the seattube 5-6cm above the BB shell. They get polished up and are not coated over.
The first thing I do when I receive in materials is to 'play' with them. This includes filing off any casting marks or surface imperfections. I measure butts and just generally make sure they are what I ordered and they work together as expected or I understand what manipulations will need to happen. The first real step is to 'blueprint' the BB shell. I made a little bar that allows me to measure the insides of the shell sockets so I can identify the centerline of the frame. I scribe a mark on the outside and center punch the shell to give a reference for when the triangle eventually goes back on the alignment table. I verify the angles of the sockets. At this time I clean up shorelines and drill drain holes and add any carvings that are required.
Then I do the same with the fork crown and then I build the fork.
4 forks matched up and ready to be prepped and brazed.
Stay tuned.
Last edited by duanedr; 12-28-17 at 01:20 PM. Reason: Added pictures the correct way
 12-28-17, 02:40 PM
#2


Randomhead
Join Date: Aug 2008
Location: Happy Valley, Pennsylvania
Posts: 24,402
Mentioned: 0 Post(s)
Tagged: 0 Thread(s)
Quoted: 4 Post(s)
Liked 3,701 Times
in
2,521 Posts
that's really cool and nice of you to do.
How do you rake fork blades?
How do you rake fork blades?
12-28-17, 07:40 PM
#3
Senior Member
Thread Starter
Join Date: Aug 2012
Location: Seattle
Posts: 507
Mentioned: 0 Post(s)
Tagged: 0 Thread(s)
Quoted: 103 Post(s)
Liked 144 Times
in
88 Posts
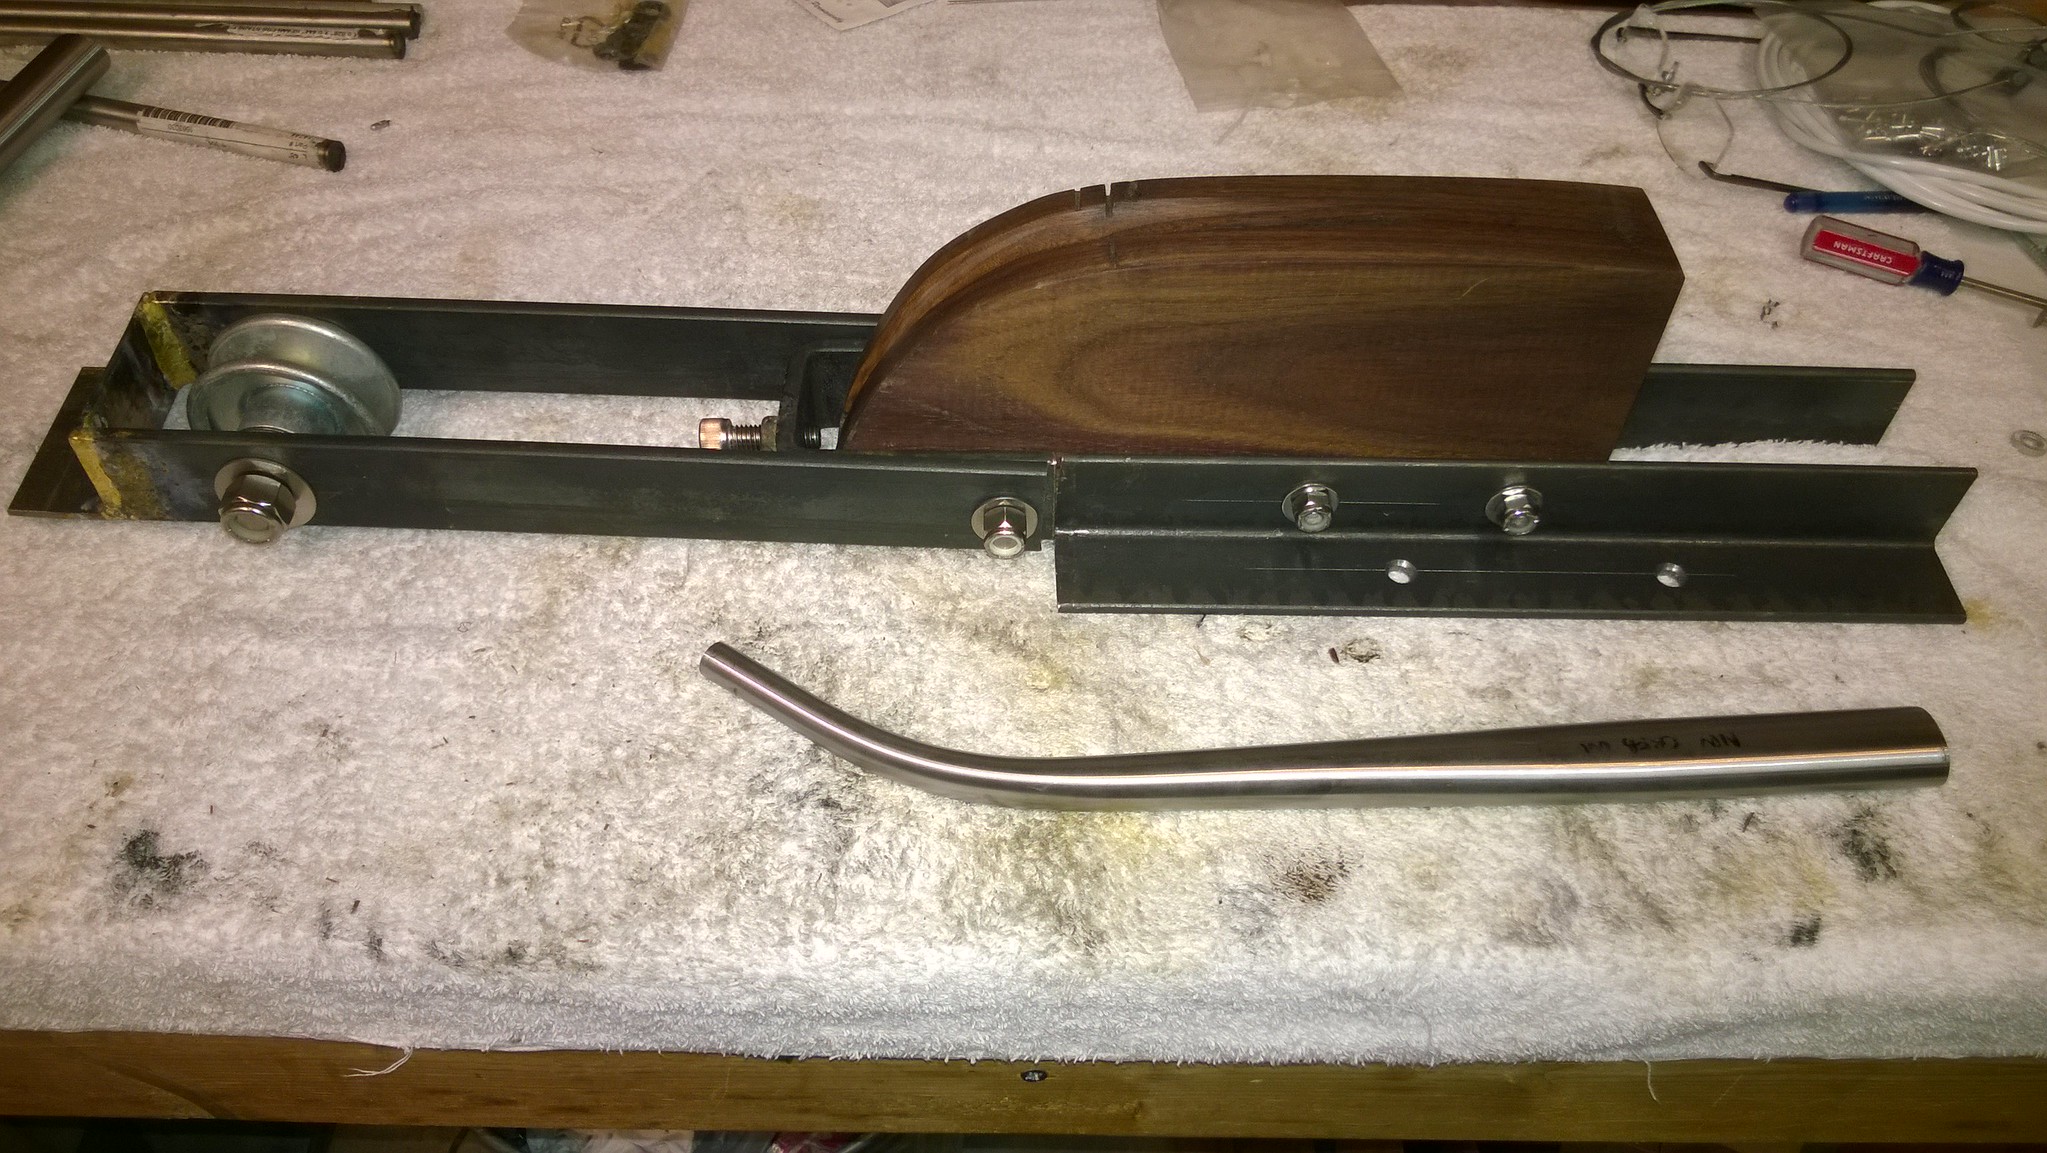
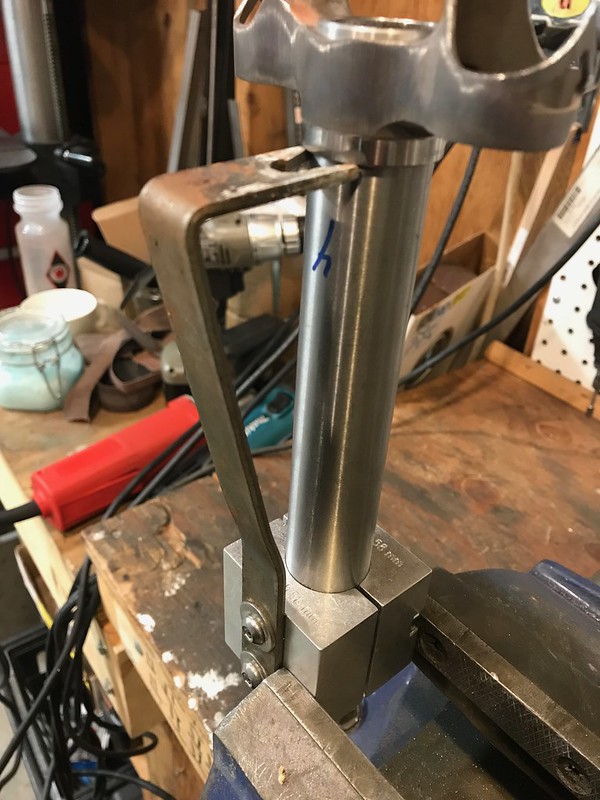
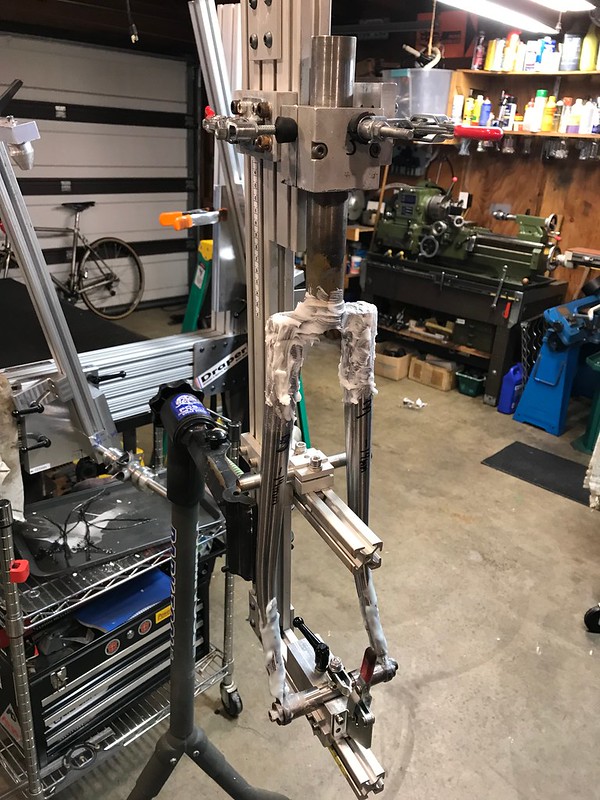
As for the fork bending, I made a rake-n-ator. It's gone through a few upgrades since these photos but you get the idea.
Upgrades include
- Addition of a 12"x12"x3/4" plate that I bolt it to when in use. The plate clamps in the vice. The plate also is used for a small work area and it holds my arbor press.
- I turned a roller on the lathe that works better than the pull pictured here
- Brazed on a longer bar for more leverage
- I made a little tip clamp thing to hold the tip without squishing it.
- I think form #3 (with #1 being furthest back in the picture) is what I used. it was unfinished in the picture. I'm still looking for the perfect bend (aren't we all??). #1 works pretty well for high rake blades.
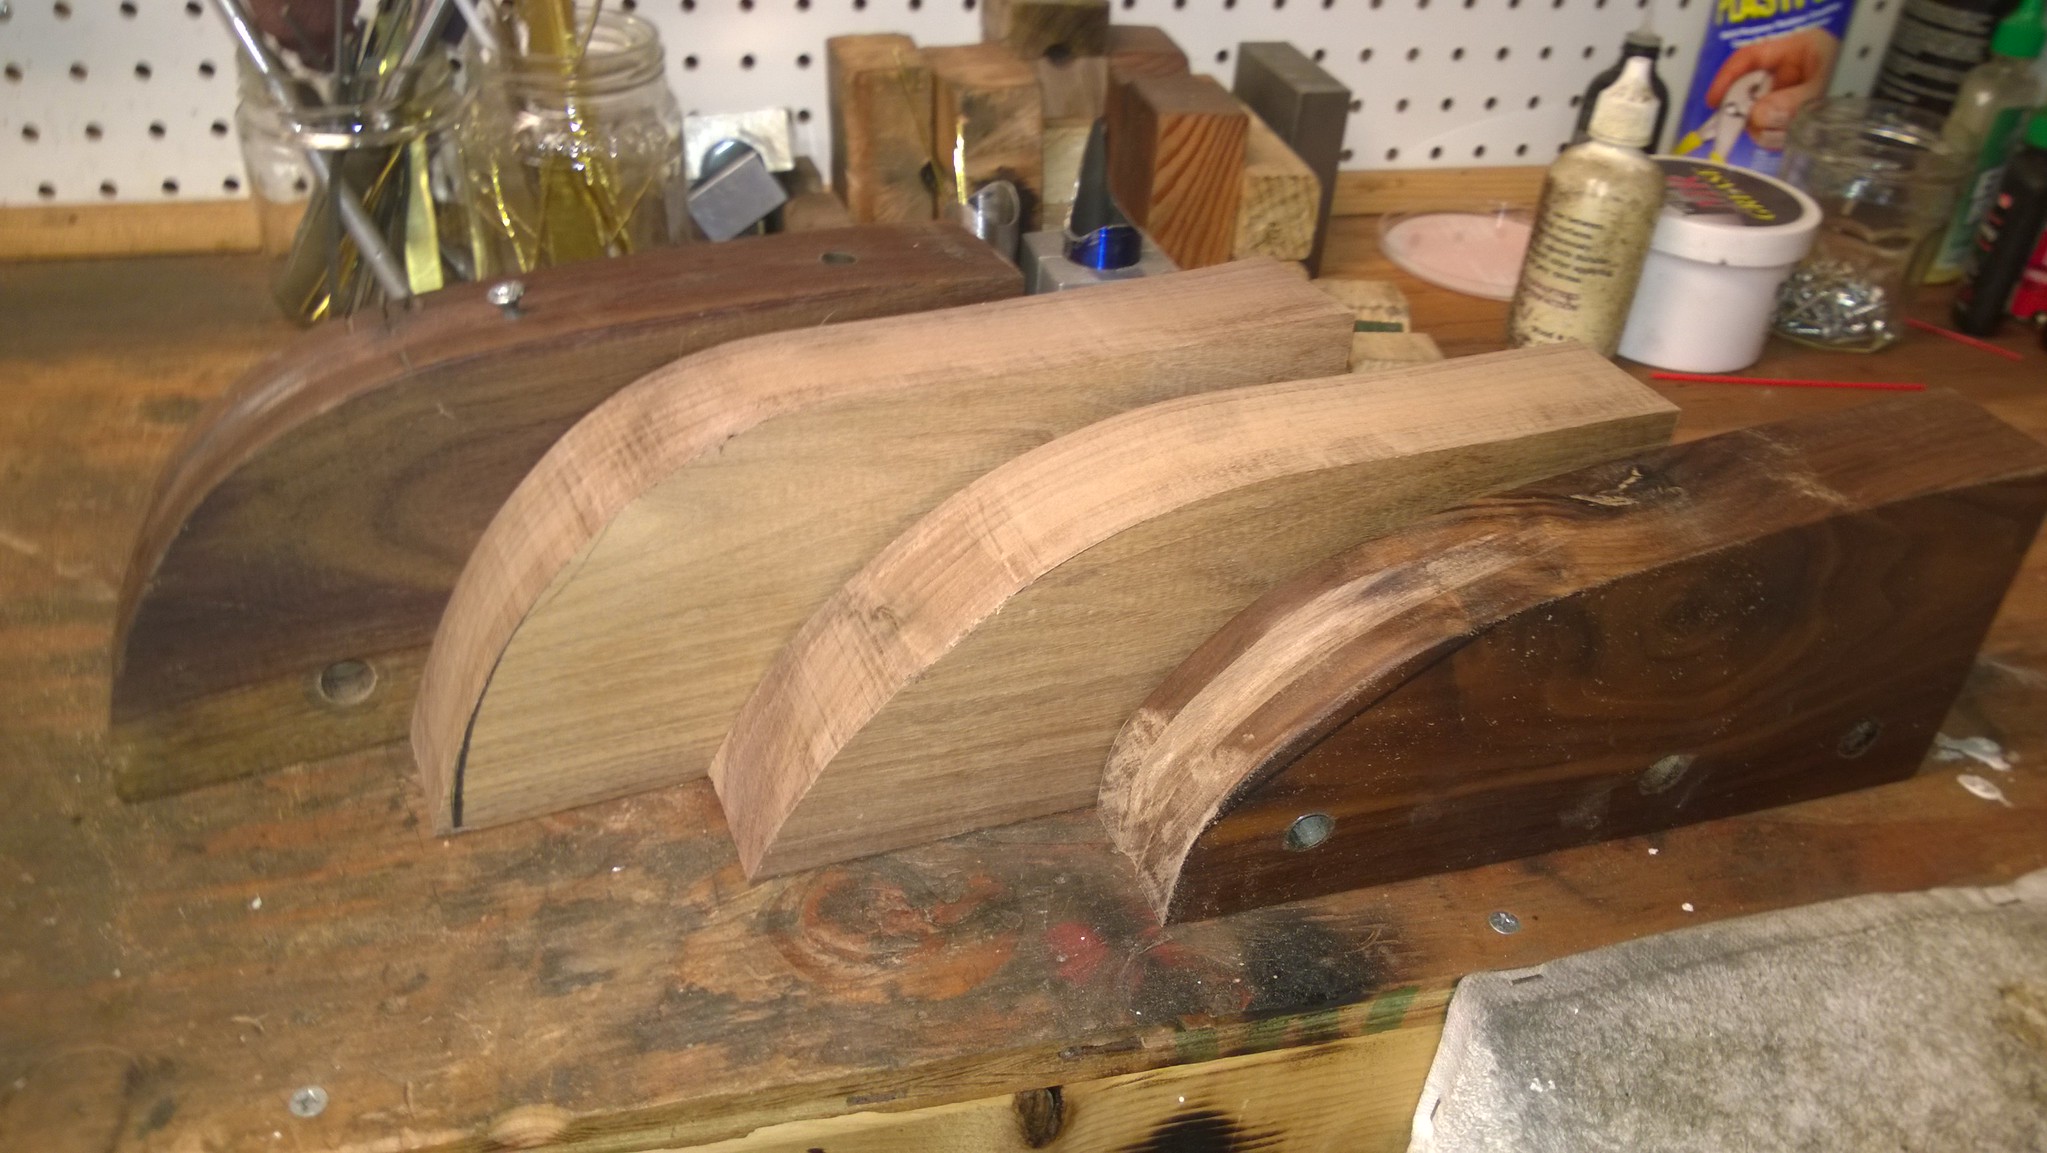
sorry for the huge pictures...I'm trying to figure out how to scale those down.
Last edited by duanedr; 12-28-17 at 07:52 PM.
12-30-17, 09:24 AM
#4
Randomhead
Join Date: Aug 2008
Location: Happy Valley, Pennsylvania
Posts: 24,402
Mentioned: 0 Post(s)
Tagged: 0 Thread(s)
Quoted: 4 Post(s)
Liked 3,701 Times
in
2,521 Posts
I usually use gimp to resize, it's free and works on most computers.
The forum used to have a plugin to downsize, but I guess the most recent software change punted that.
I know people that volunteer at velodromes, and they are always begging for bikes, so I'm sure this will be really appreciated.
I have a bender like yours, but not as nice. The first blade I bent on it was a disaster. I'm making a die for my Diacro, it's on the list of projects.
12-30-17, 06:50 PM
#5
Senior Member
Join Date: Apr 2006
Location: Tucson, AZ
Posts: 720
Bikes: Road, mountain and track bikes and tandems.
Mentioned: 4 Post(s)
Tagged: 0 Thread(s)
Quoted: 282 Post(s)
Likes: 0
Liked 18 Times
in
15 Posts
I have been a track bike user/ owner since 1977. A few years ago started using threaded/ adjuster screw track drop outs, and found them to be addicting. They are so nice to thread the adjusting screw, to adjust the wheel position versus fighting with the lock nuts. So, if possible, I would highly recommend the adjuster screw type.
12-30-17, 11:01 PM
#6
Randomhead
Join Date: Aug 2008
Location: Happy Valley, Pennsylvania
Posts: 24,402
Mentioned: 0 Post(s)
Tagged: 0 Thread(s)
Quoted: 4 Post(s)
Liked 3,701 Times
in
2,521 Posts
Brian, are you using your track bike on a track? I am not sure about the loaner bikes, but for most track racers, they are changing gears during a day at the velodrome and need easy adjustability. Not sure you get that with adjuster screws.
12-31-17, 10:20 AM
#7
Senior Member
Join Date: Feb 2012
Location: Rochester, NY
Posts: 18,099
Bikes: Stewart S&S coupled sport tourer, Stewart Sunday light, Stewart Commuting, Stewart Touring, Co Motion Tandem, Stewart 3-Spd, Stewart Track, Fuji Finest, Mongoose Tomac ATB, GT Bravado ATB, JCP Folder, Stewart 650B ATB
Mentioned: 0 Post(s)
Tagged: 0 Thread(s)
Quoted: 4211 Post(s)
Liked 3,881 Times
in
2,316 Posts
My experience with fixed gear bikes and rear axle position/tightening is that when used on a track the challenges that fixies have, when used on open roads, are largely non existent. Axle slippage isn't an issue as skidding doesn't happen very often, if at all, on the track. Mere forward pedaling forces rarely are enough to budge a well secured axle.
I'll also add (and I'll not direct this at the OP) that many road fixies run the chain WAY too tight. Too tight a chain, besides wearing hub nd BB bearings at a fast clip, can produce very high forces on the axle securement (as well as ring bolts). Andy
I'll also add (and I'll not direct this at the OP) that many road fixies run the chain WAY too tight. Too tight a chain, besides wearing hub nd BB bearings at a fast clip, can produce very high forces on the axle securement (as well as ring bolts). Andy
12-31-17, 11:00 AM
#8
Senior Member
Join Date: Apr 2006
Location: Tucson, AZ
Posts: 720
Bikes: Road, mountain and track bikes and tandems.
Mentioned: 4 Post(s)
Tagged: 0 Thread(s)
Quoted: 282 Post(s)
Likes: 0
Liked 18 Times
in
15 Posts
Yes, the whole point of the adjuster screws is easy adjustment. Another advantage is that if you do not tighten the lock nuts enough, you can not pull the wheel over, like standing start type events Like a kilo, one lap standing starts, match sprints, pursuit. At the 1974 jr worlds, Dale Stetina pulled his wheel over on the start of the pursuit, tire rubbing the whole way. What if he had adjuster screws? I know these are to kids loaner bikes and probably not a lot of chainring changing, but there is no real downside.
12-31-17, 11:18 AM
#9
Senior Member
Thread Starter
Join Date: Aug 2012
Location: Seattle
Posts: 507
Mentioned: 0 Post(s)
Tagged: 0 Thread(s)
Quoted: 103 Post(s)
Liked 144 Times
in
88 Posts
My experience with fixed gear bikes and rear axle position/tightening is that when used on a track the challenges that fixies have, when used on open roads, are largely non existent. Axle slippage isn't an issue as skidding doesn't happen very often, if at all, on the track. Mere forward pedaling forces rarely are enough to budge a well secured axle.
I'll also add (and I'll not direct this at the OP) that many road fixies run the chain WAY too tight. Too tight a chain, besides wearing hub nd BB bearings at a fast clip, can produce very high forces on the axle securement (as well as ring bolts). Andy
I'll also add (and I'll not direct this at the OP) that many road fixies run the chain WAY too tight. Too tight a chain, besides wearing hub nd BB bearings at a fast clip, can produce very high forces on the axle securement (as well as ring bolts). Andy
I agree there are few instances on the track that you're putting out high torque where a wheel might slip - assuming the wheel is tightened properly. These won't be adjusted much. Junior gearing is limited (as for road racing) and it doesn't get changed frequently like a normal track bike might. I was able to visit the track on Friday and measured the current bikes and looked them over. I'm glad I did! They have quick release seatpost clamps. I had considered that might be the case but was going to use my standard braze-on clamp. I'm looking for quick release clamps now! There didn't seem to be really any wear on the ends- even after 15 years of use - confirming that the gears aren't changed much.
It's a bit of a moot point as the ends are prepped and ready to braze. I'm hoping to have forks and chainstays complete by the time I go back to work on Tuesday.
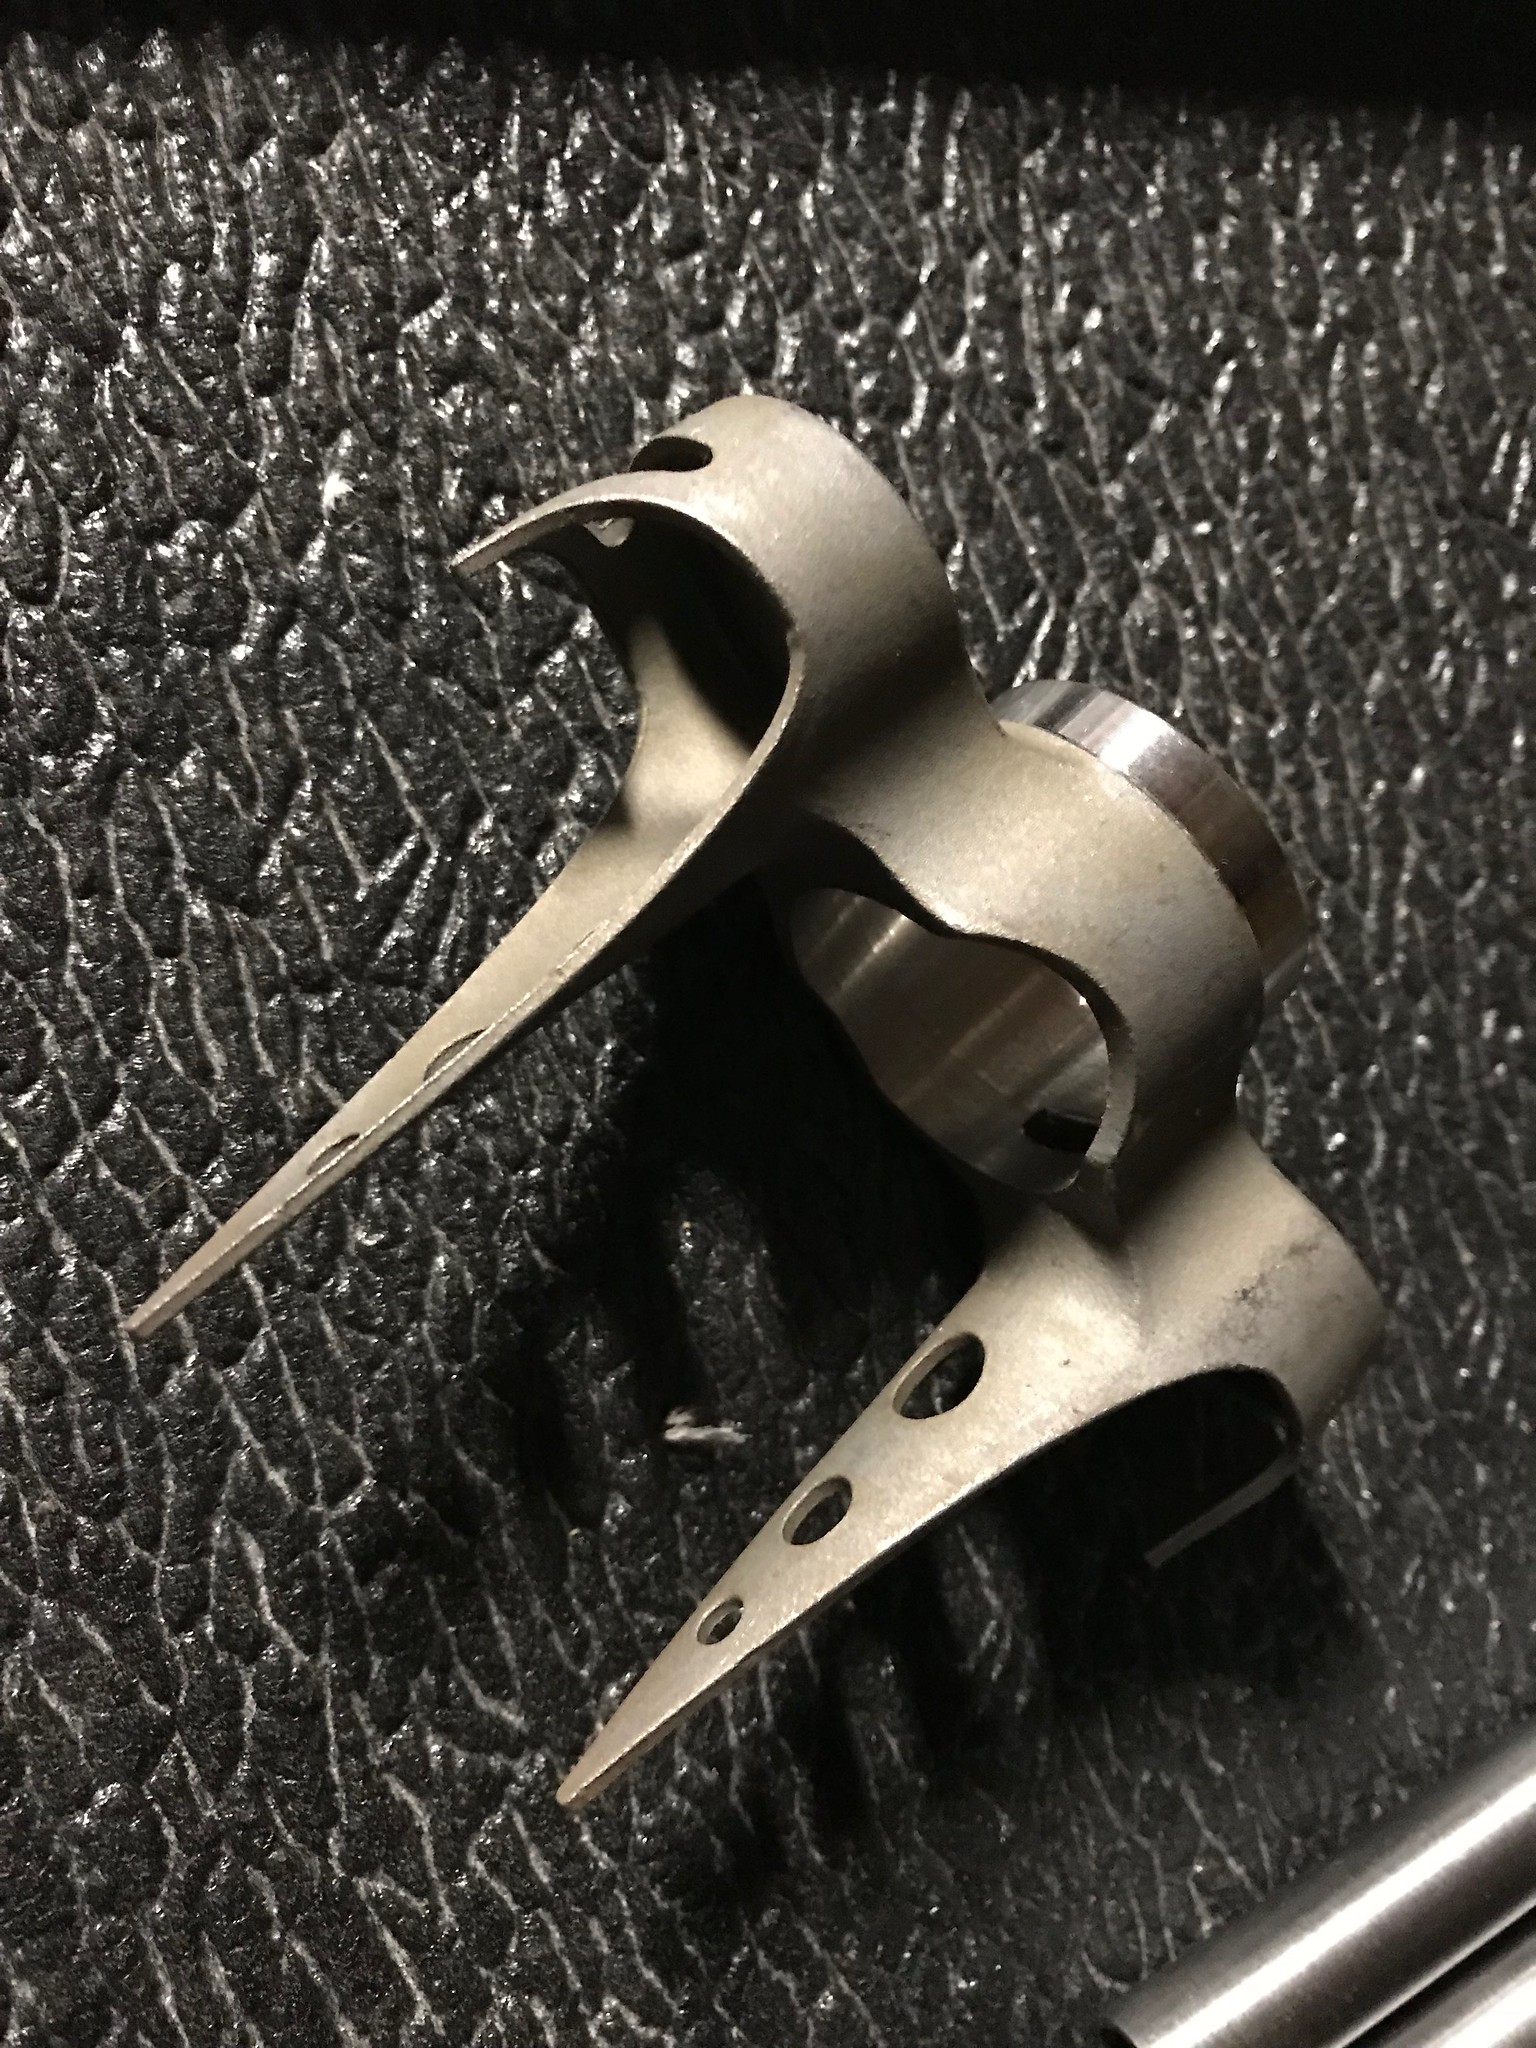
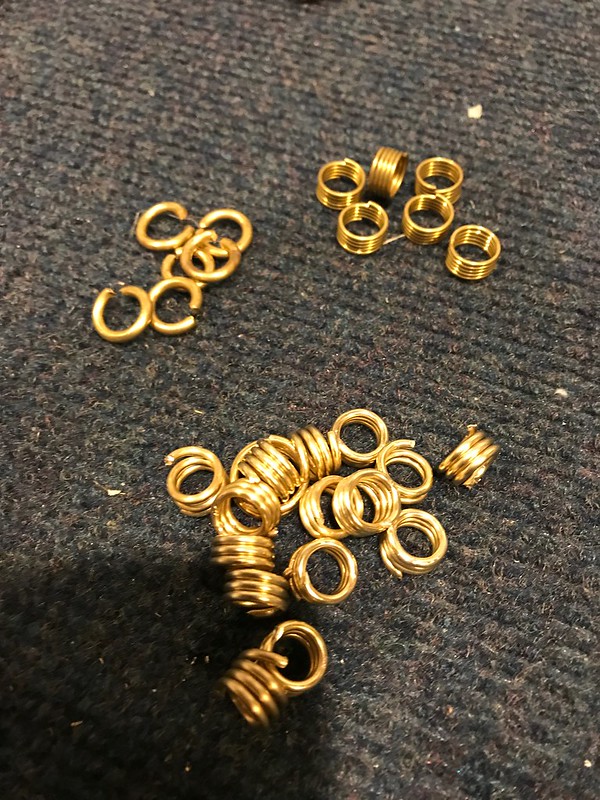
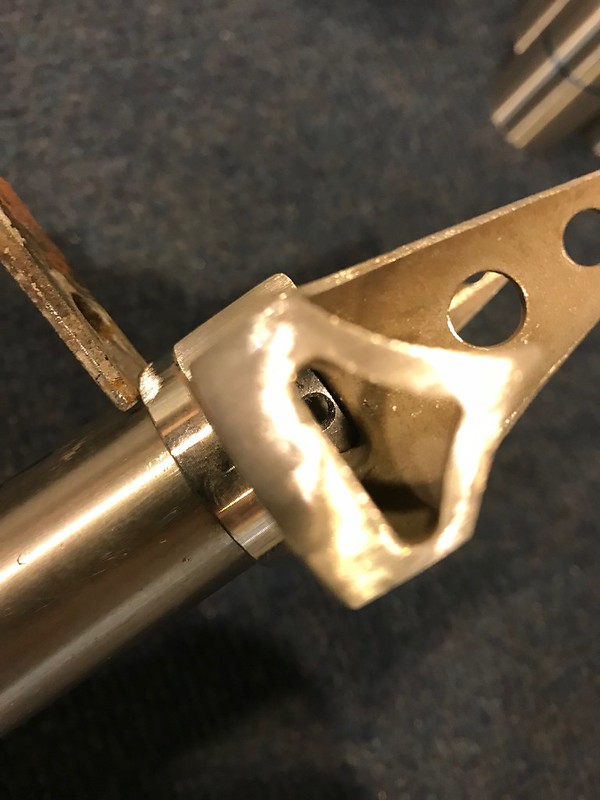
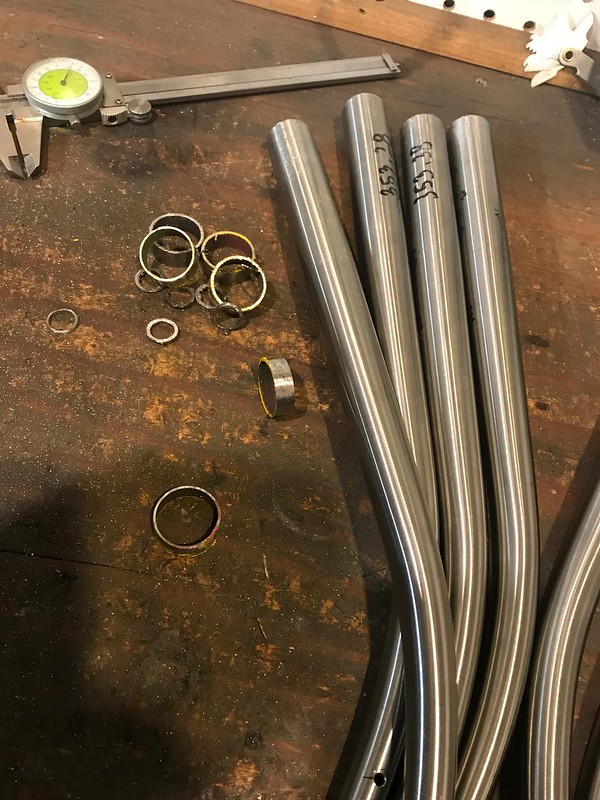
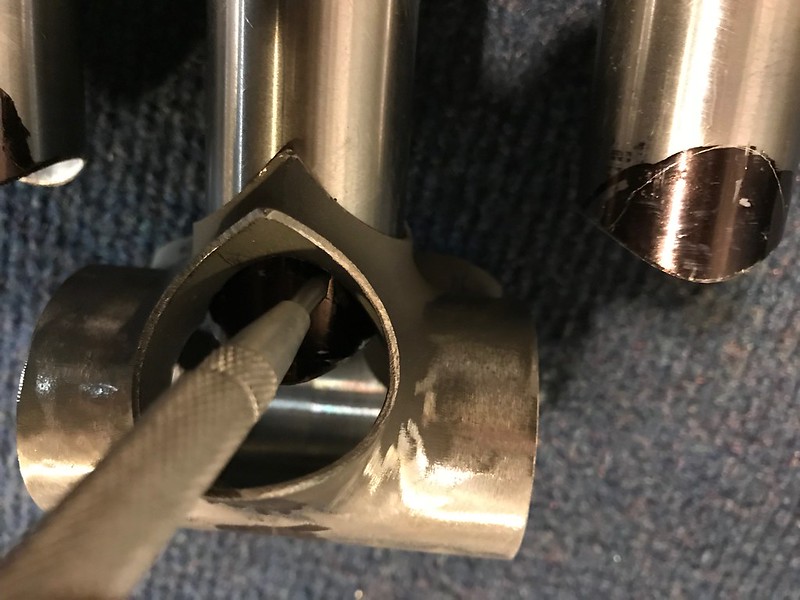
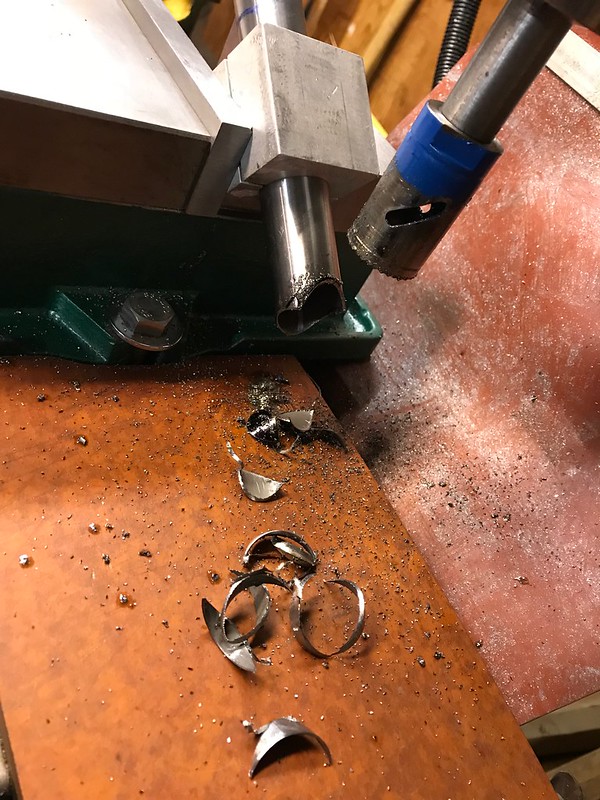
I don't use plug type fittings much but, I decided to use the LAN wishbone stay (beautifully cast!) so now each bike will have 9 joints requiring preforms. I'm doing a lot of testing with preforms including how to make them. They have to be tight fitting in the tube otherwise, heat doesn't transfer as well and the joint has to be hotter running the risk of cooking the flux inside the joint. I used hex wrenches of various sizes to make just the right size for the forks and chainstays. Andy provides rings with the wishbone casting. I will braze up another 5-10 test joints today just to check that I've got it down and then dive into the fork/chainstays. I like to practice a few before I work on the actual bike - it builds my confidence.
The small ones in the top right are from Ceeway, the others are mine.
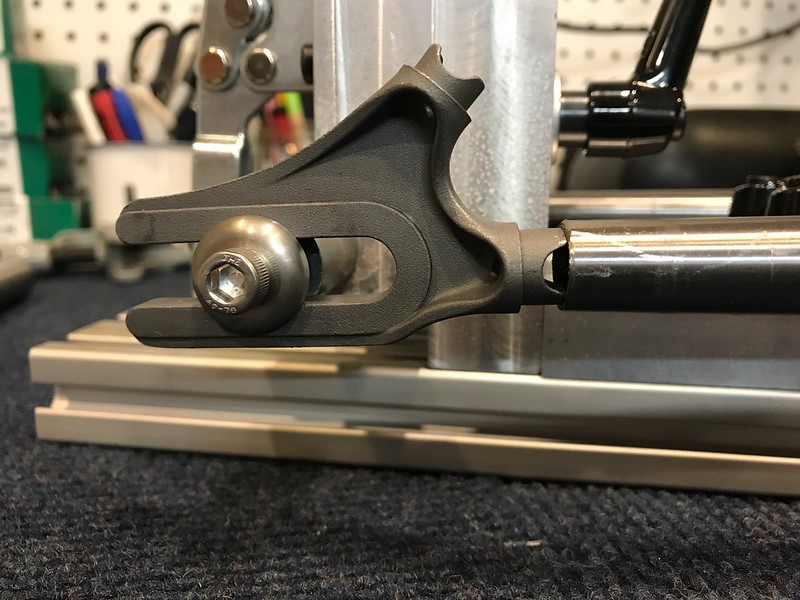
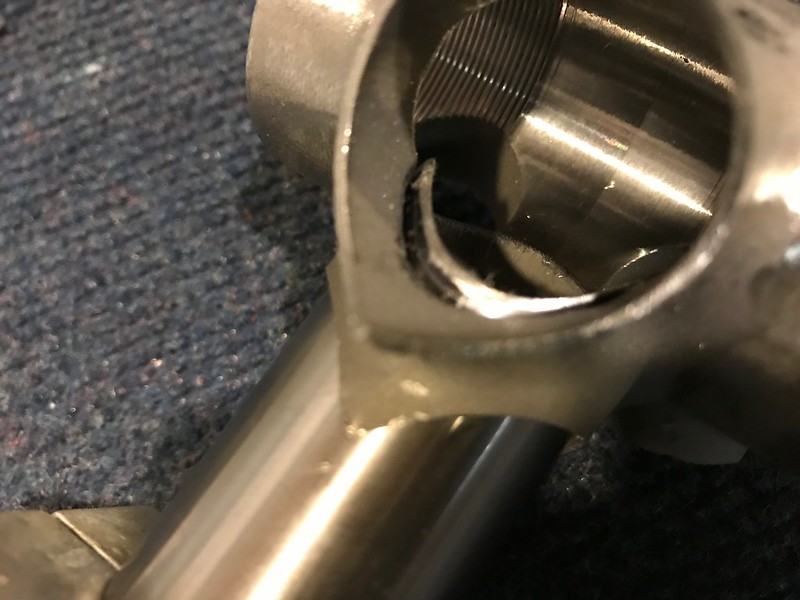
Normally, I would make the slots horizontal when installed but with these plug style ends, that requires removing too much material from the plug. These won't be horizontal. The gearing won't get changed much so that is a tradeoff I made to avoid having to do the slotting operation. If the bike was for a more typical user where they would put on warm up gearing and then change to mass start gearing and then to match sprint gearing, we wouldn't want the geometry changing for each ride so, the slots would be horizontal.
I will have to dimple the stays to comfortably fit a 23mm tire.
Last edited by duanedr; 04-01-18 at 09:22 AM.
12-31-17, 11:09 PM
#10
Randomhead
Join Date: Aug 2008
Location: Happy Valley, Pennsylvania
Posts: 24,402
Mentioned: 0 Post(s)
Tagged: 0 Thread(s)
Quoted: 4 Post(s)
Liked 3,701 Times
in
2,521 Posts
I got a small snake/boroscope camera off ebay that works well to look at plugged joints. I usually feed filler in from the outside, so post braze inspection is a good idea. I do like the fact that when you us a preform from the inside, you can go until filler flows out.
Last edited by unterhausen; 12-31-17 at 11:12 PM.
01-01-18, 09:39 AM
#11
Senior Member
Join Date: Feb 2012
Location: Rochester, NY
Posts: 18,099
Bikes: Stewart S&S coupled sport tourer, Stewart Sunday light, Stewart Commuting, Stewart Touring, Co Motion Tandem, Stewart 3-Spd, Stewart Track, Fuji Finest, Mongoose Tomac ATB, GT Bravado ATB, JCP Folder, Stewart 650B ATB
Mentioned: 0 Post(s)
Tagged: 0 Thread(s)
Quoted: 4211 Post(s)
Liked 3,881 Times
in
2,316 Posts
I've also considered a boroscope, as I see a bunch of carbon frames at work it could serve double duty
I agree with Duan in the design and use of preforms. I've had less then stellar results with the ones I've played with. The silver forms in a plugged drop out have gone well enough. With bronze forms and in small tubes (bridges) things have also gone well. But with the main frame joints I've had a bunch of partial form melts and have found the need to still feed in from the outside, especially with lugs and a must if building up a fillet. I see the main advantage of an internal preform is the confidence in getting full internal fill, not having a main frame joint completely filled.
Duan- Thanks for starting this thread. It's been a while since someone here has posted a build sequence. I think your project will give you a lot of learning and improvement in how you go about building. I've often wondered about taking up Doug Fattic in his offer to stay in the Ukraine for a few months and build the transportation bikes for the SDA outreach. I know I'd get vastly better at some skills and focus. But at 61 years old I'm not sure if I want to live a monk's life while there. Andy
01-01-18, 10:16 AM
#12
Randomhead
Join Date: Aug 2008
Location: Happy Valley, Pennsylvania
Posts: 24,402
Mentioned: 0 Post(s)
Tagged: 0 Thread(s)
Quoted: 4 Post(s)
Liked 3,701 Times
in
2,521 Posts
If you read Mark Bulgier's posts about how they used preforms on lugs at Davidson, there was a lot of heat and two torches. I think he recently posted a video. Not that there is anything wrong with a lot of heat, I just can't do it with my setup.
The really small boroscope cameras on ebay are more expensive than the one I got. IIRC, it was about $20. It really did make me a lot happier to see that I had good penetration. I wish I had thought of it sooner. There are relatively inexpensive boroscope cameras available from home improvement centers.
Unfortunately, it seems like I deleted the pics of my plugged dropout experiments, and the blades are now in forks, so I can't replicate.
Last edited by unterhausen; 01-01-18 at 10:31 AM.
01-01-18, 12:55 PM
#13
Senior Member
Thread Starter
Join Date: Aug 2012
Location: Seattle
Posts: 507
Mentioned: 0 Post(s)
Tagged: 0 Thread(s)
Quoted: 103 Post(s)
Liked 144 Times
in
88 Posts
The current bikes at the velodrome for the juniors now are TIG welded Davidsons so it is fitting (and intimidating) that my first 'public' bikes will race along side his bikes.
I have played with preforms on main mitered tubes but after an initial batch, success for me and my setup seemed unlikely so, I stopped. I could see adding them to the insides of a fillet joint. Again, the key is having it completely touch the tube and that's tricky unless you're heating the whole joint completely as Will does in the video.
With plugged dropouts and other fittings, I heat until I can see the brass flow inside the tube and then see it flow out the gap, then I run a very thin bead around the outside and give a few flicks upward to try to flow it back inward. I don't know if any flows inward and this outer bead adds to the clean up, but I don't have the little gaps that I sometimes got before I did this. When I'm using preforms, it's satisfying to see the flux bubble at the gap just before the brass flows out. I'm careful to not run the flame around the circumference. I only apply heat downward toward the butted gap. I don't want the brass to flow around the butted part of the joint and not flow all the way down the sides of the plug...if that makes sense.
About seeing the brass flow inside the tube, since the flowing brass adds mass that is slightly cooler, you can see it darken the redness in the heated tube and you can actually watch it flow down to the gap. This is also the case with lugs. This is something Bill made me aware of and it helps you see what's going on inside.
I like the idea of the boroscope. With these chainstays and straight fork blades, I have a bright pen light that I use to peer down into the tube to verify complete melting. It's pretty cold here (38* in the garage) so, it took a while to heat the dropouts and the flux started to expire in a couple little spots on the outside, inside is shiny and bright.
Chilling:
Swimming:
Cleaned Up:
__________________
https://www.flickr.com/photos/54319503@N05/
https://www.draper-cycles.com
https://www.flickr.com/photos/54319503@N05/
https://www.draper-cycles.com
Last edited by duanedr; 01-01-18 at 01:02 PM.
01-05-18, 01:25 PM
#14
Senior Member
Duane -- Awesome project. I've considered doing the same, building for the track. Never thought about some one else donating the build kits, though. That was one of the things that was holding me back, that I can't eat that cost. Were you working through Amara on this project?
I think they're doing themselves a disservice by giving up the 650c's for the young'uns. But I can understand that they don't want to have to stock multiple wheel sizes.
By the way, those rear dropouts are available from Nova in stainless.
I think they're doing themselves a disservice by giving up the 650c's for the young'uns. But I can understand that they don't want to have to stock multiple wheel sizes.
By the way, those rear dropouts are available from Nova in stainless.
Last edited by David Tollefson; 01-05-18 at 01:50 PM.
01-06-18, 09:25 PM
#15
Senior Member
Thread Starter
Join Date: Aug 2012
Location: Seattle
Posts: 507
Mentioned: 0 Post(s)
Tagged: 0 Thread(s)
Quoted: 103 Post(s)
Liked 144 Times
in
88 Posts
Duane -- Awesome project. I've considered doing the same, building for the track. Never thought about some one else donating the build kits, though. That was one of the things that was holding me back, that I can't eat that cost. Were you working through Amara on this project?
I think they're doing themselves a disservice by giving up the 650c's for the young'uns. But I can understand that they don't want to have to stock multiple wheel sizes.
By the way, those rear dropouts are available from Nova in stainless.
I think they're doing themselves a disservice by giving up the 650c's for the young'uns. But I can understand that they don't want to have to stock multiple wheel sizes.
By the way, those rear dropouts are available from Nova in stainless.
I think they are keeping the 650 bikes but the kids don't like them. They want "big people" bikes.
If I go all stainless and high end tubing, I won't want to give them up! I'm thinking I may make another for my 10 year old so, maybe he gets stainless.
__________________
https://www.flickr.com/photos/54319503@N05/
https://www.draper-cycles.com
https://www.flickr.com/photos/54319503@N05/
https://www.draper-cycles.com
01-07-18, 01:46 AM
#16
Senior Member
Thread Starter
Join Date: Aug 2012
Location: Seattle
Posts: 507
Mentioned: 0 Post(s)
Tagged: 0 Thread(s)
Quoted: 103 Post(s)
Liked 144 Times
in
88 Posts
Well, now I'm a week behind my schedule but I think I'm still ok.
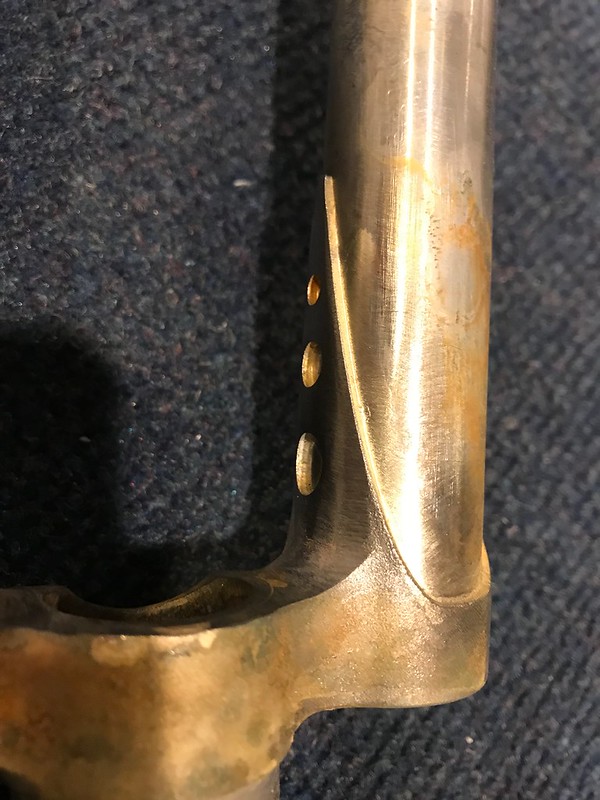
I have a strange fanaticism about getting all the flux out of the tubes to the point where I use a syringe to inject water into the tubes when I soak the flux out just to make sure they are completely full. I vent at the top and bottoms of blades/stays. I suppose i subscribe to the school of thought that air flow helps the tubes dry out after getting wet. I don't plug the vents. However, I don't really like the looks of the holes. Over the past few projects, I've thought it might make sense to drill the hole in the steerer where it would match up to the ports in the crown. I tried that on this build and I think I like it.
[img]https://farm5.staticflickr.com/4727/39410323622_b2670771b8_c.jpg[/img
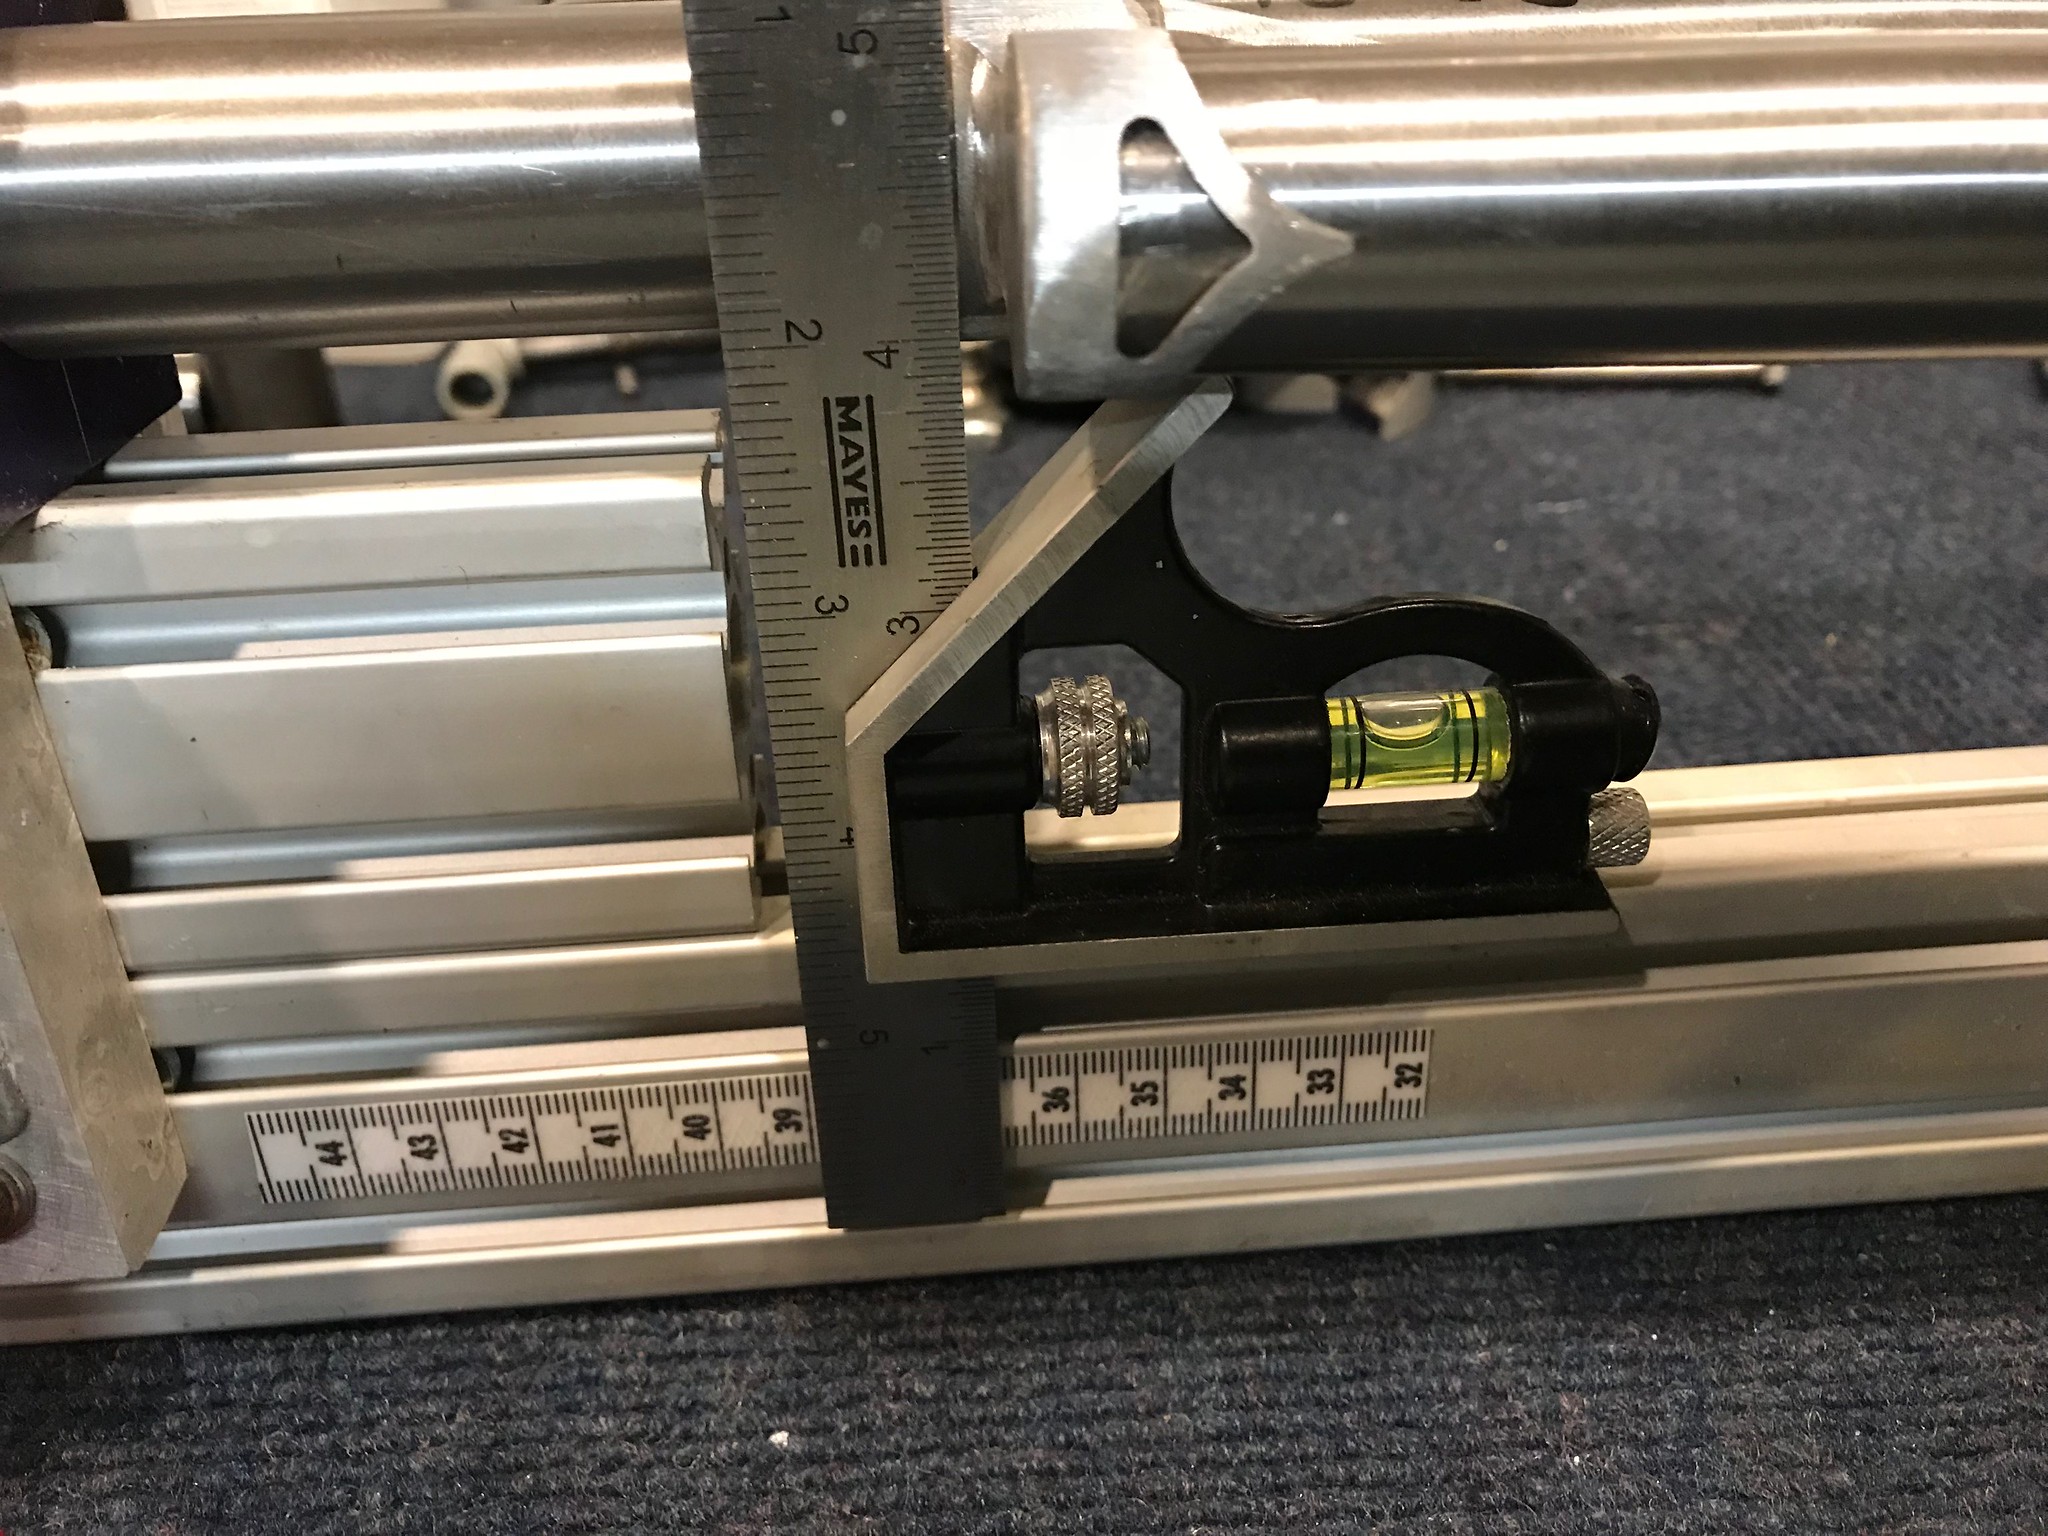
Here's a shot of me testing out the fixture and positioning - with the venting through the steerer, this is more critical.
Like the glazing on a donut
Still wet from the bath
Cutting the races:
I cut the races on a lathe and recently purchased a new 25-50mm micrometer. I don't know if I verified it's accuracy or not but after finishing the cutting, I slid a race down onto one and realized that I had undersized the race seat!! Turns out the mic is reading about 0.03mm too big! Luckily only one will need to be redone. I didn't take them all down to 30.02mm, i stayed more in the middle of the range (Cane Creek says 30.015-30.075). Grrr...VERIFY!
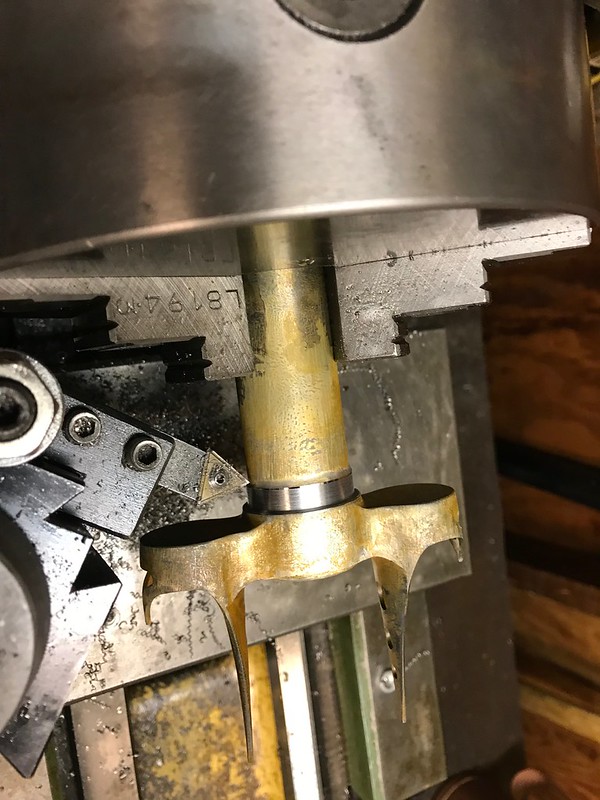
Well, a track crown has to have the little arch

I leave the steerer poking through the underside of the crown so i can see the silver flow out and I can blend it in a bit easier.
After cleaning up the underside of the crown:
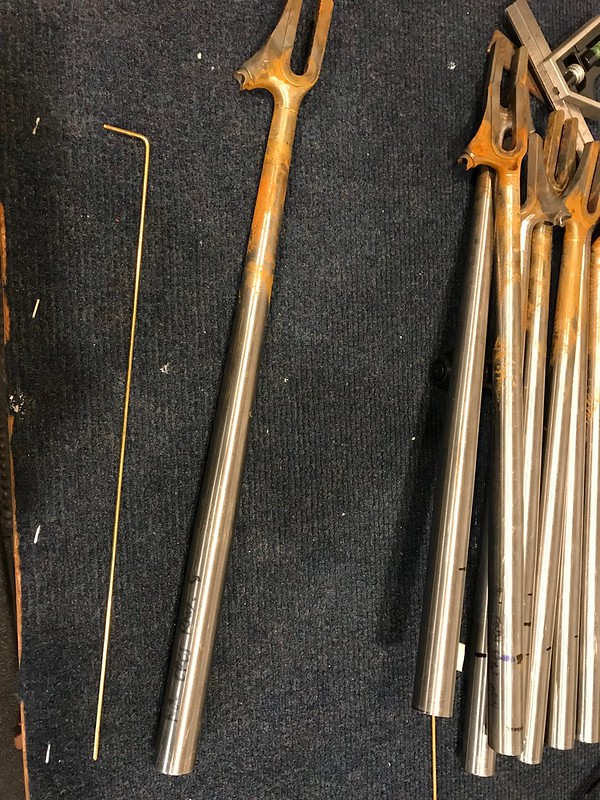
After some final trimming of the blades to get down to 355mm ATC:
Tomorrow I hope to get the forks brazed up and aligned so I can move on to mitering tubes for the frames.
Thanks for following along.
I have a strange fanaticism about getting all the flux out of the tubes to the point where I use a syringe to inject water into the tubes when I soak the flux out just to make sure they are completely full. I vent at the top and bottoms of blades/stays. I suppose i subscribe to the school of thought that air flow helps the tubes dry out after getting wet. I don't plug the vents. However, I don't really like the looks of the holes. Over the past few projects, I've thought it might make sense to drill the hole in the steerer where it would match up to the ports in the crown. I tried that on this build and I think I like it.
[img]https://farm5.staticflickr.com/4727/39410323622_b2670771b8_c.jpg[/img
Here's a shot of me testing out the fixture and positioning - with the venting through the steerer, this is more critical.
Like the glazing on a donut
Still wet from the bath
Cutting the races:
I cut the races on a lathe and recently purchased a new 25-50mm micrometer. I don't know if I verified it's accuracy or not but after finishing the cutting, I slid a race down onto one and realized that I had undersized the race seat!! Turns out the mic is reading about 0.03mm too big! Luckily only one will need to be redone. I didn't take them all down to 30.02mm, i stayed more in the middle of the range (Cane Creek says 30.015-30.075). Grrr...VERIFY!
Well, a track crown has to have the little arch
I leave the steerer poking through the underside of the crown so i can see the silver flow out and I can blend it in a bit easier.
After cleaning up the underside of the crown:
After some final trimming of the blades to get down to 355mm ATC:
Tomorrow I hope to get the forks brazed up and aligned so I can move on to mitering tubes for the frames.
Thanks for following along.
__________________
https://www.flickr.com/photos/54319503@N05/
https://www.draper-cycles.com
https://www.flickr.com/photos/54319503@N05/
https://www.draper-cycles.com
01-07-18, 07:37 AM
#17
Randomhead
Join Date: Aug 2008
Location: Happy Valley, Pennsylvania
Posts: 24,402
Mentioned: 0 Post(s)
Tagged: 0 Thread(s)
Quoted: 4 Post(s)
Liked 3,701 Times
in
2,521 Posts
I know if I was a better machinist, taking the crown race seat down to final dimension would be better done on the lathe. What I do is take it down close to the final dimension and then cut it with a crown race tool. Maybe when I get a DRO on the lathe I'll just go to final dimension on the lathe.
I have never had a steerer slip. Maybe I'm just lucky. I have seen people pin that joint, which always seemed to be a bit much. I like your fixture
I have never had a steerer slip. Maybe I'm just lucky. I have seen people pin that joint, which always seemed to be a bit much. I like your fixture
01-07-18, 11:25 AM
#18
Senior Member
Thread Starter
Join Date: Aug 2012
Location: Seattle
Posts: 507
Mentioned: 0 Post(s)
Tagged: 0 Thread(s)
Quoted: 103 Post(s)
Liked 144 Times
in
88 Posts
I have done it both ways. I wanted to finish these in one operation rather than cut them and then finish with the seat cutter after the forks were complete. Only the one is outside of tolerances (variances?) so I can do something with it and use it on a personal bike for the kids. Chris King sells undersized races for his headsets so, that's another option for personal use.
Same thing here. The fixture is just to hold the crown at the right spot on the steerer when vertical as I am brazing. I like brazing with the steerer vertical rather than horizontal. It just helps the filler flow in the right direction better. I also prep the crown bore and steerer so that the grain of the sanding and filing are in line with the steerer to help the filler flow through better. I flow filler down one side and then slide the steerer/crown up a bit in the fixture so the tips of the finger don't get soldered into the mix. Then I finish flowing the filler down the rest of the circumference.
Same thing here. The fixture is just to hold the crown at the right spot on the steerer when vertical as I am brazing. I like brazing with the steerer vertical rather than horizontal. It just helps the filler flow in the right direction better. I also prep the crown bore and steerer so that the grain of the sanding and filing are in line with the steerer to help the filler flow through better. I flow filler down one side and then slide the steerer/crown up a bit in the fixture so the tips of the finger don't get soldered into the mix. Then I finish flowing the filler down the rest of the circumference.
__________________
https://www.flickr.com/photos/54319503@N05/
https://www.draper-cycles.com
https://www.flickr.com/photos/54319503@N05/
https://www.draper-cycles.com
01-07-18, 04:21 PM
#19
Randomhead
Join Date: Aug 2008
Location: Happy Valley, Pennsylvania
Posts: 24,402
Mentioned: 0 Post(s)
Tagged: 0 Thread(s)
Quoted: 4 Post(s)
Liked 3,701 Times
in
2,521 Posts
yes, I braze them with the steerer held vertically. Never had one slip. Not going to say I haven't worried about the possibility though. And I never thought about just holding it in place with something simple like your fixture. My next fork may have a hole in the steerer, so I might adopt your idea
01-08-18, 08:10 AM
#20
Senior Member
I've always vented the steerer into the crown (or blade for unicrown, or cross-pieces for segmented). Might not be so much of an issue for a track bike (not ridden in the rain, supposedly), but condensation while stored in the trailer might be a consideration.
01-08-18, 12:51 PM
#21
Senior Member
Join Date: Feb 2012
Location: Rochester, NY
Posts: 18,099
Bikes: Stewart S&S coupled sport tourer, Stewart Sunday light, Stewart Commuting, Stewart Touring, Co Motion Tandem, Stewart 3-Spd, Stewart Track, Fuji Finest, Mongoose Tomac ATB, GT Bravado ATB, JCP Folder, Stewart 650B ATB
Mentioned: 0 Post(s)
Tagged: 0 Thread(s)
Quoted: 4211 Post(s)
Liked 3,881 Times
in
2,316 Posts
I use to use "hidden" vents to a fault said more then one painter. Now I either seal them if they're on the outsides or make them big enough to properly drain through. Andy
01-08-18, 06:38 PM
#22
Senior Member
Thread Starter
Join Date: Aug 2012
Location: Seattle
Posts: 507
Mentioned: 0 Post(s)
Tagged: 0 Thread(s)
Quoted: 103 Post(s)
Liked 144 Times
in
88 Posts
Well, at least at JBMV, they won't be ridden if there is any moisture on the track - the surface is too slick; and the storage is a bit better than the old trucking containers they had! I use framesaver so, I like the vents.
__________________
https://www.flickr.com/photos/54319503@N05/
https://www.draper-cycles.com
https://www.flickr.com/photos/54319503@N05/
https://www.draper-cycles.com
01-12-18, 11:14 AM
#23
Senior Member
Thread Starter
Join Date: Aug 2012
Location: Seattle
Posts: 507
Mentioned: 0 Post(s)
Tagged: 0 Thread(s)
Quoted: 103 Post(s)
Liked 144 Times
in
88 Posts
Got in some more work over the past few days. I usually use tall thin chainstays but after some measuring, I realized the round stays would need dimples.
Line them up and cut my Hirose inspired measuring device to the correct length:
Measure and mark the midpoint of the dimple:
Use the proprietary Draper Dimpl-o-matic (TM)(C)(R)
<<No Pictures>>
Dimples!
Sorry, I put my Dimpl-o-matic away before I took pictures. It's a little arbor press that I made a form and a depth stop for. I'll post pics next time it's set up.
Also, key learning from brazing up multiple forks at once is keep the flux contained to where you need it. I walked out of the shop after completing the forks and I was covered from head to toe in flux. It had dripped on my shoes, my bench, the floor. The hardened flux also messes up fitting the next piece into the fixture. I don't know that I will do a lot of production work like this but, we'll put that into the knowledge bank. I think I tend to use more than the average and maybe dialing that back a bit would help too. I have found that I like to have a ring of flux somewhat outside of the brazing area that I can drag down into the brazing to maintain coverage. I'm sure the guys who do this every day get in and out fast enough that they don't need to but, I'm a bit slow still.
__________________
https://www.flickr.com/photos/54319503@N05/
https://www.draper-cycles.com
https://www.flickr.com/photos/54319503@N05/
https://www.draper-cycles.com
01-12-18, 01:37 PM
#24
Randomhead
Join Date: Aug 2008
Location: Happy Valley, Pennsylvania
Posts: 24,402
Mentioned: 0 Post(s)
Tagged: 0 Thread(s)
Quoted: 4 Post(s)
Liked 3,701 Times
in
2,521 Posts
my philosophy is you can never have too much flux, especially if there are photographers around. But you might have proven me wrong.
01-16-18, 09:17 PM
#25
Senior Member
Thread Starter
Join Date: Aug 2012
Location: Seattle
Posts: 507
Mentioned: 0 Post(s)
Tagged: 0 Thread(s)
Quoted: 103 Post(s)
Liked 144 Times
in
88 Posts
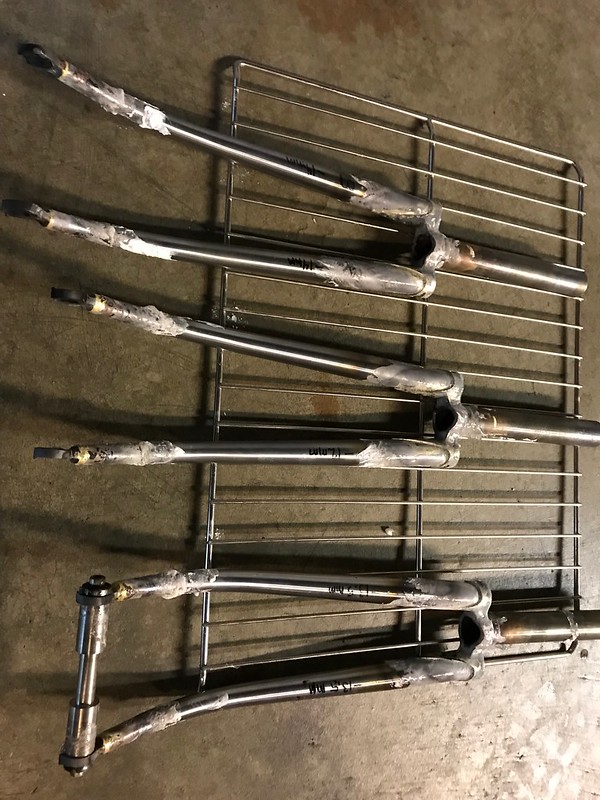
Over the long MLK weekend, I was able to spend some good time in the garage. I completed the 4 forks:
Loads of flux!
I found a picture of my dimpl-o-matic in action as well:
I'm pretty pleased with the forks. I think they look good and I'm happy with the brazing. I'm still bothered by having to adjust the dropouts on a couple of them. On the last fork I did, I tacked both legs in the crown before fully brazing and that seemed to fix it.
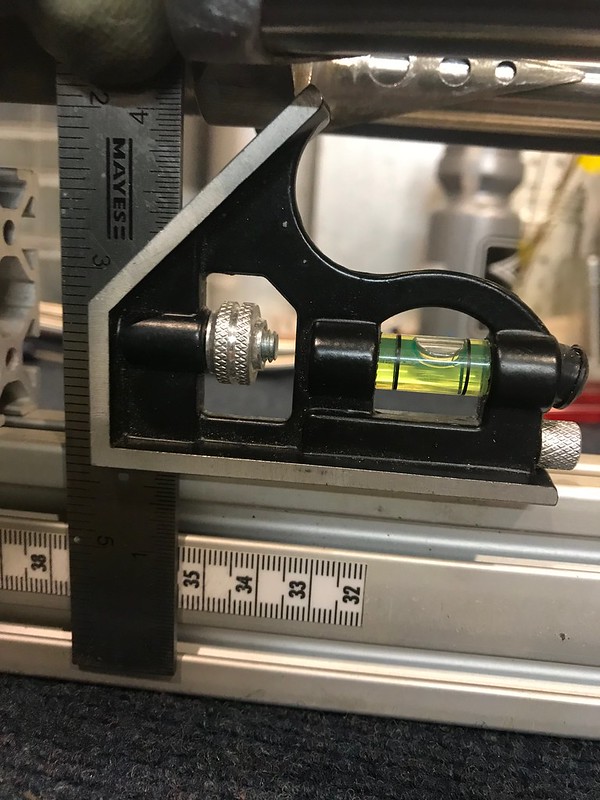
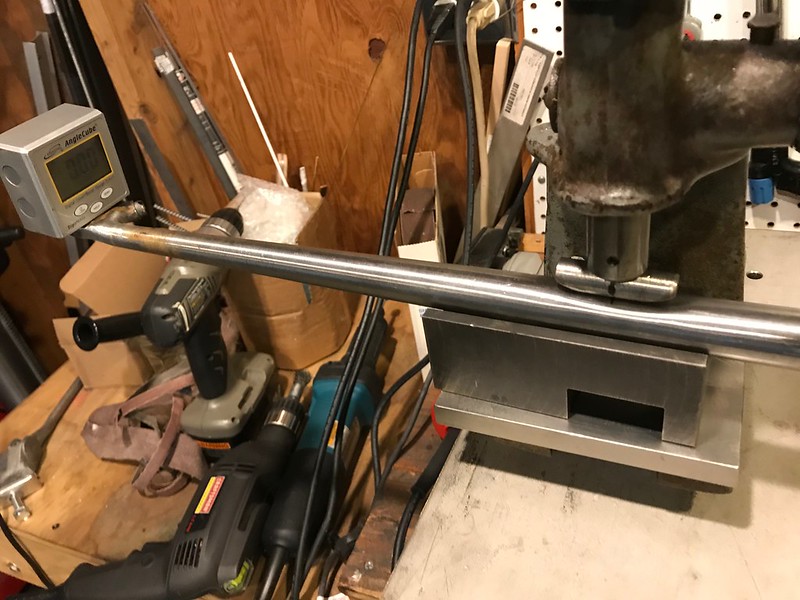
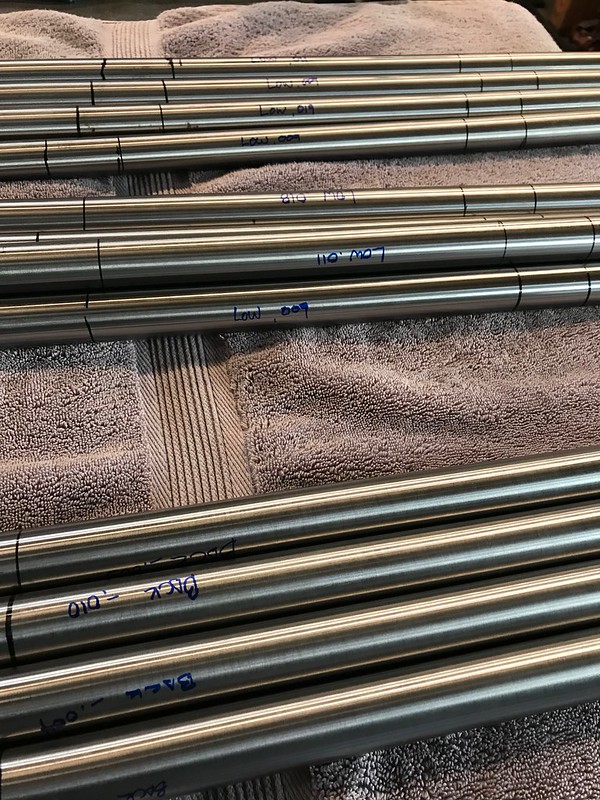
With the forks complete, I moved on to the main tubes. I start by measuring butts and bows:

Measuring bowing in the tubes:
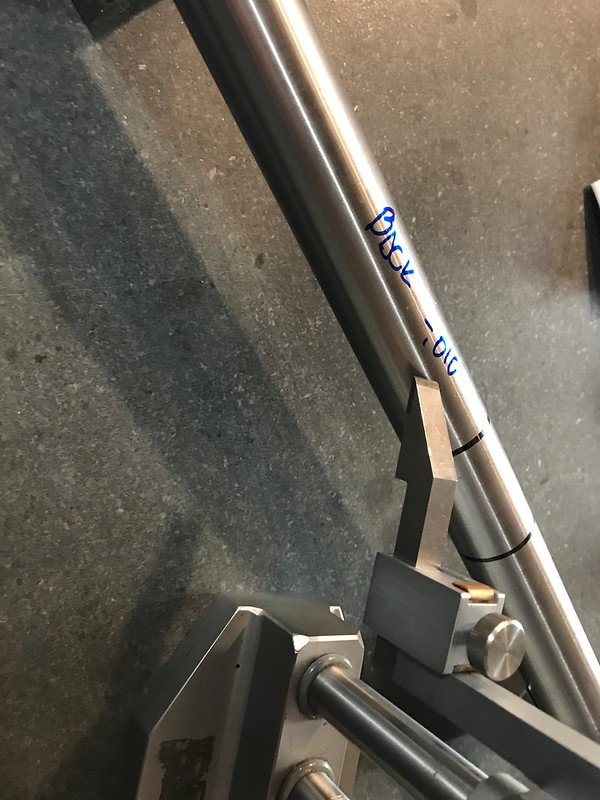
I was happy with how straight the Vari-wall tubes were. I like to mark the top of the bow as the front/top and then measure how low the bottom/back is. The tubing with the most bow measured 0.019" from top to bottom so, that's 0.0095" out.
My next step is tubing blocks and then miters on the mill. Here's my sequence for the seattube to lugged BB:
Miter the main axis. Then insert the tube to the BB, so it protrudes slightly into the shell and scribe a line where the downtube will meet the ST.
Miter it on the mill about 1-2mm back from the scribe line so that when it's brazed into place, there is a very small shelf that the DT will nestle into to increase surface area of the braze and lock those two tubes together.
Seattubes are mitered at the bottom bracket now and I picked up sleeve material from Online Metals today so, sleeves are my next step. These will have aluminum quick release seatpost clamps so, I don't have to worry about keeping the clamp boss in phase with the BB. I will when I cut the slot at the end.
Loads of flux!
I found a picture of my dimpl-o-matic in action as well:
I'm pretty pleased with the forks. I think they look good and I'm happy with the brazing. I'm still bothered by having to adjust the dropouts on a couple of them. On the last fork I did, I tacked both legs in the crown before fully brazing and that seemed to fix it.
With the forks complete, I moved on to the main tubes. I start by measuring butts and bows:
Measuring bowing in the tubes:
I was happy with how straight the Vari-wall tubes were. I like to mark the top of the bow as the front/top and then measure how low the bottom/back is. The tubing with the most bow measured 0.019" from top to bottom so, that's 0.0095" out.
My next step is tubing blocks and then miters on the mill. Here's my sequence for the seattube to lugged BB:
Miter the main axis. Then insert the tube to the BB, so it protrudes slightly into the shell and scribe a line where the downtube will meet the ST.
Miter it on the mill about 1-2mm back from the scribe line so that when it's brazed into place, there is a very small shelf that the DT will nestle into to increase surface area of the braze and lock those two tubes together.
Seattubes are mitered at the bottom bracket now and I picked up sleeve material from Online Metals today so, sleeves are my next step. These will have aluminum quick release seatpost clamps so, I don't have to worry about keeping the clamp boss in phase with the BB. I will when I cut the slot at the end.
__________________
https://www.flickr.com/photos/54319503@N05/
https://www.draper-cycles.com
https://www.flickr.com/photos/54319503@N05/
https://www.draper-cycles.com