


Smooth Presta valve rim stop desired
 06-10-20, 02:52 PM
#1
Senior Member
Thread Starter
Join Date: Oct 2005
Location: SW Ohio
Posts: 3,682
Bikes: Puch Marco Polo, Saint Tropez, Masi Gran Criterium
Mentioned: 25 Post(s)
Tagged: 0 Thread(s)
Quoted: 1163 Post(s)
Liked 442 Times
in
315 Posts
Smooth Presta valve rim stop desired
I have been using latex Presta tubes on my 2 clincher road bikes going on 3 seasons now to good effect.
Unfortunately my system of checking tire pressures before each ride has caused me to create unrepairable valve leaks on 2 different Vittoria latex tubes in this past year. You see I have been using a Lezyne digital tire gauge to check pressures before each ride. Latex is great, but as most of us already know - latex tubes loose enough air overnight to require topping up before every ride. I was having great fun daring to run a bit lower pressure both front and rear, exploring 70-80 psi front and 80-90 rear for my local chipseal and my 200# body weight.
You see, to get a decent reading from the Lezyne, the pressure gauge has to be pushed firmly onto the valve stem. Threaded stems that allow you to use the knurled nut against the rim would prevent the valve stem from pushing in. Unfortunately, from what I can tell all of the available brands of latex tubes use similar “smooth” brass or aluminum valve stems.
Does anyone one know anyone has ever made a little nylon or even wooden “stop” that fits over a Presta valve stem and has a side set screw to make it remain in place? If no such widget exists, it appears I will be prototyping said widget myself.
Anyone experience a similar issue where your own pumping or tire pressure technique irreparably ruins tubes?
Last edited by masi61; 06-10-20 at 05:24 PM.
 06-10-20, 03:16 PM
#2

Senior Member
Join Date: Feb 2012
Location: Rochester, NY
Posts: 18,088
Bikes: Stewart S&S coupled sport tourer, Stewart Sunday light, Stewart Commuting, Stewart Touring, Co Motion Tandem, Stewart 3-Spd, Stewart Track, Fuji Finest, Mongoose Tomac ATB, GT Bravado ATB, JCP Folder, Stewart 650B ATB
Mentioned: 0 Post(s)
Tagged: 0 Thread(s)
Quoted: 4206 Post(s)
Liked 3,869 Times
in
2,314 Posts
I assume your pump has no gage on it? Once inflated to what the pump's gage suggests is correct the valve should be able to be pushed on firmly without sliding into the rim.
But to answer the question, no I know of no valve stem clamp, I suspect no one else has needed one. certainly in 45+ years of shop wrenching I've not had a request for one.It would be fairly simple to make one. I would use metal, Al, for it as this would provide a more dimensionally stable clamp. The first way I think of is much like a frame building block but very small. A rectangle of Al with three holes. the middle hole is for the valve. The tow outer ones ate through the different long sides and are sized to be the tap pilot for a couple of pinch bolts. Saw the block in half so the valve hole is split. Tap with the pinch bolt's thread on one half, through those two outer holes, and clearance drill the other half's pinch bolt holes. Now you have a split collar with two pinch bolts that will secure this clamp onto the valve's stem. Andy
But to answer the question, no I know of no valve stem clamp, I suspect no one else has needed one. certainly in 45+ years of shop wrenching I've not had a request for one.It would be fairly simple to make one. I would use metal, Al, for it as this would provide a more dimensionally stable clamp. The first way I think of is much like a frame building block but very small. A rectangle of Al with three holes. the middle hole is for the valve. The tow outer ones ate through the different long sides and are sized to be the tap pilot for a couple of pinch bolts. Saw the block in half so the valve hole is split. Tap with the pinch bolt's thread on one half, through those two outer holes, and clearance drill the other half's pinch bolt holes. Now you have a split collar with two pinch bolts that will secure this clamp onto the valve's stem. Andy
__________________
AndrewRStewart
AndrewRStewart
Likes For Andrew R Stewart:
06-10-20, 03:17 PM
#3
Senior Member
Join Date: Feb 2012
Location: Rochester, NY
Posts: 18,088
Bikes: Stewart S&S coupled sport tourer, Stewart Sunday light, Stewart Commuting, Stewart Touring, Co Motion Tandem, Stewart 3-Spd, Stewart Track, Fuji Finest, Mongoose Tomac ATB, GT Bravado ATB, JCP Folder, Stewart 650B ATB
Mentioned: 0 Post(s)
Tagged: 0 Thread(s)
Quoted: 4206 Post(s)
Liked 3,869 Times
in
2,314 Posts
I assume your pump has no gage on it? Once inflated to what the pump's gage suggests is correct the valve should be able to be pushed on firmly without sliding into the rim.
But to answer the question, no I know of no valve stem clamp, I suspect no one else has needed one. certainly in 45+ years of shop wrenching I've not had a request for one.It would be fairly simple to make one. I would use metal, Al, for it as this would provide a more dimensionally stable clamp. The first way I think of is much like a frame building block but very small. A rectangle of Al with three holes. the middle hole is for the valve. The tow outer ones ate through the different long sides and are sized to be the tap pilot for a couple of pinch bolts. Saw the block in half so the valve hole is split. Tap with the pinch bolt's thread on one half, through those two outer holes, and clearance drill the other half's pinch bolt holes. Now you have a split collar with two pinch bolts that will secure this clamp onto the valve's stem. Andy
But to answer the question, no I know of no valve stem clamp, I suspect no one else has needed one. certainly in 45+ years of shop wrenching I've not had a request for one.It would be fairly simple to make one. I would use metal, Al, for it as this would provide a more dimensionally stable clamp. The first way I think of is much like a frame building block but very small. A rectangle of Al with three holes. the middle hole is for the valve. The tow outer ones ate through the different long sides and are sized to be the tap pilot for a couple of pinch bolts. Saw the block in half so the valve hole is split. Tap with the pinch bolt's thread on one half, through those two outer holes, and clearance drill the other half's pinch bolt holes. Now you have a split collar with two pinch bolts that will secure this clamp onto the valve's stem. Andy
__________________
AndrewRStewart
AndrewRStewart
06-10-20, 03:30 PM
#4
Senior Member

Join Date: Sep 2010
Location: Roswell, GA
Posts: 8,319
Bikes: '93 Trek 750, '92 Schwinn Crisscross, '93 Mongoose Alta
Mentioned: 30 Post(s)
Tagged: 0 Thread(s)
Quoted: 1438 Post(s)
Liked 1,092 Times
in
723 Posts
Here's an item I designed for a different purpose (MCX RF connectors) which should work if you change the center hole diameter to suit your valve stems, like 0.230" or so: Make it whatever height suits you. It is easier to drill hex stock than round
06-10-20, 03:43 PM
#5
LR�P=HR
Join Date: Sep 2019
Location: SF Bay Area
Posts: 2,180
Bikes: 1981 Holdsworth Special, 1993 C-dale MT3000 & 1996 F700CAD3, 2018 Cervelo R3 & 2022 R5, JustGo Runt, Ridley Oval, Kickr Bike 8-)
Mentioned: 2 Post(s)
Tagged: 0 Thread(s)
Quoted: 867 Post(s)
Liked 1,205 Times
in
694 Posts
Likes For Barry2:
06-10-20, 03:57 PM
#6
Senior Member

Join Date: Feb 2015
Location: Mission Viejo
Posts: 5,806
Bikes: 1986 Cannondale SR400 (Flat bar commuter), 1988 Cannondale Criterium XTR, 1992 Serotta T-Max, 1995 Trek 970
Mentioned: 20 Post(s)
Tagged: 0 Thread(s)
Quoted: 1944 Post(s)
Liked 2,164 Times
in
1,323 Posts
A 6mm shaft split collar might work. Grainger has aluminum ones, but I imagine you can find them elsewhere.
John
John
06-10-20, 03:59 PM
#7
Old fart

Join Date: Nov 2004
Location: Appleton WI
Posts: 24,786
Bikes: Several, mostly not name brands.
Mentioned: 153 Post(s)
Tagged: 0 Thread(s)
Quoted: 3588 Post(s)
Liked 3,400 Times
in
1,934 Posts
I just use a needle-nose vise-grip pliers to prevent the valve stem from sinking into the rim. You only need to secure the stem when the tube is dead-flat; once there's some pressure in the tube, it's less apt to sink into the rim.
06-10-20, 04:27 PM
#8
Senior Member
Thread Starter
Join Date: Oct 2005
Location: SW Ohio
Posts: 3,682
Bikes: Puch Marco Polo, Saint Tropez, Masi Gran Criterium
Mentioned: 25 Post(s)
Tagged: 0 Thread(s)
Quoted: 1163 Post(s)
Liked 442 Times
in
315 Posts
But a couple of the 6mm locking collars may be more of the long term ticket to latex tube pressure gauge happiness though. Thanks for your help everybody!
06-10-20, 05:02 PM
#9
Old fart
Join Date: Nov 2004
Location: Appleton WI
Posts: 24,786
Bikes: Several, mostly not name brands.
Mentioned: 153 Post(s)
Tagged: 0 Thread(s)
Quoted: 3588 Post(s)
Liked 3,400 Times
in
1,934 Posts
It doesn't have to be super-tight; just enough to prevent the stem from sinking into the rim.
Likes For JohnDThompson:
06-10-20, 09:06 PM
#10
Senior Member
Join Date: Jun 2014
Location: Ontario, Canada
Posts: 4,624
Bikes: iele Latina, Miele Suprema, Miele Uno LS, Miele Miele Beta, MMTB, Bianchi Model Unknown, Fiori Venezia, Fiori Napoli, VeloSport Adamas AX
Mentioned: 16 Post(s)
Tagged: 0 Thread(s)
Quoted: 1324 Post(s)
Liked 927 Times
in
640 Posts
A lot of my butyl tubes also have smooth stems. If the tube is low on air I just squeeze the tire together at the valve area and then slide the pump head onto the valve stem.
Cheers
Cheers
Likes For Miele Man:
07-12-20, 03:57 AM
#11
Senior Member
Thread Starter
Join Date: Oct 2005
Location: SW Ohio
Posts: 3,682
Bikes: Puch Marco Polo, Saint Tropez, Masi Gran Criterium
Mentioned: 25 Post(s)
Tagged: 0 Thread(s)
Quoted: 1163 Post(s)
Liked 442 Times
in
315 Posts
I managed to purchase what I was looking for for about $5 each:
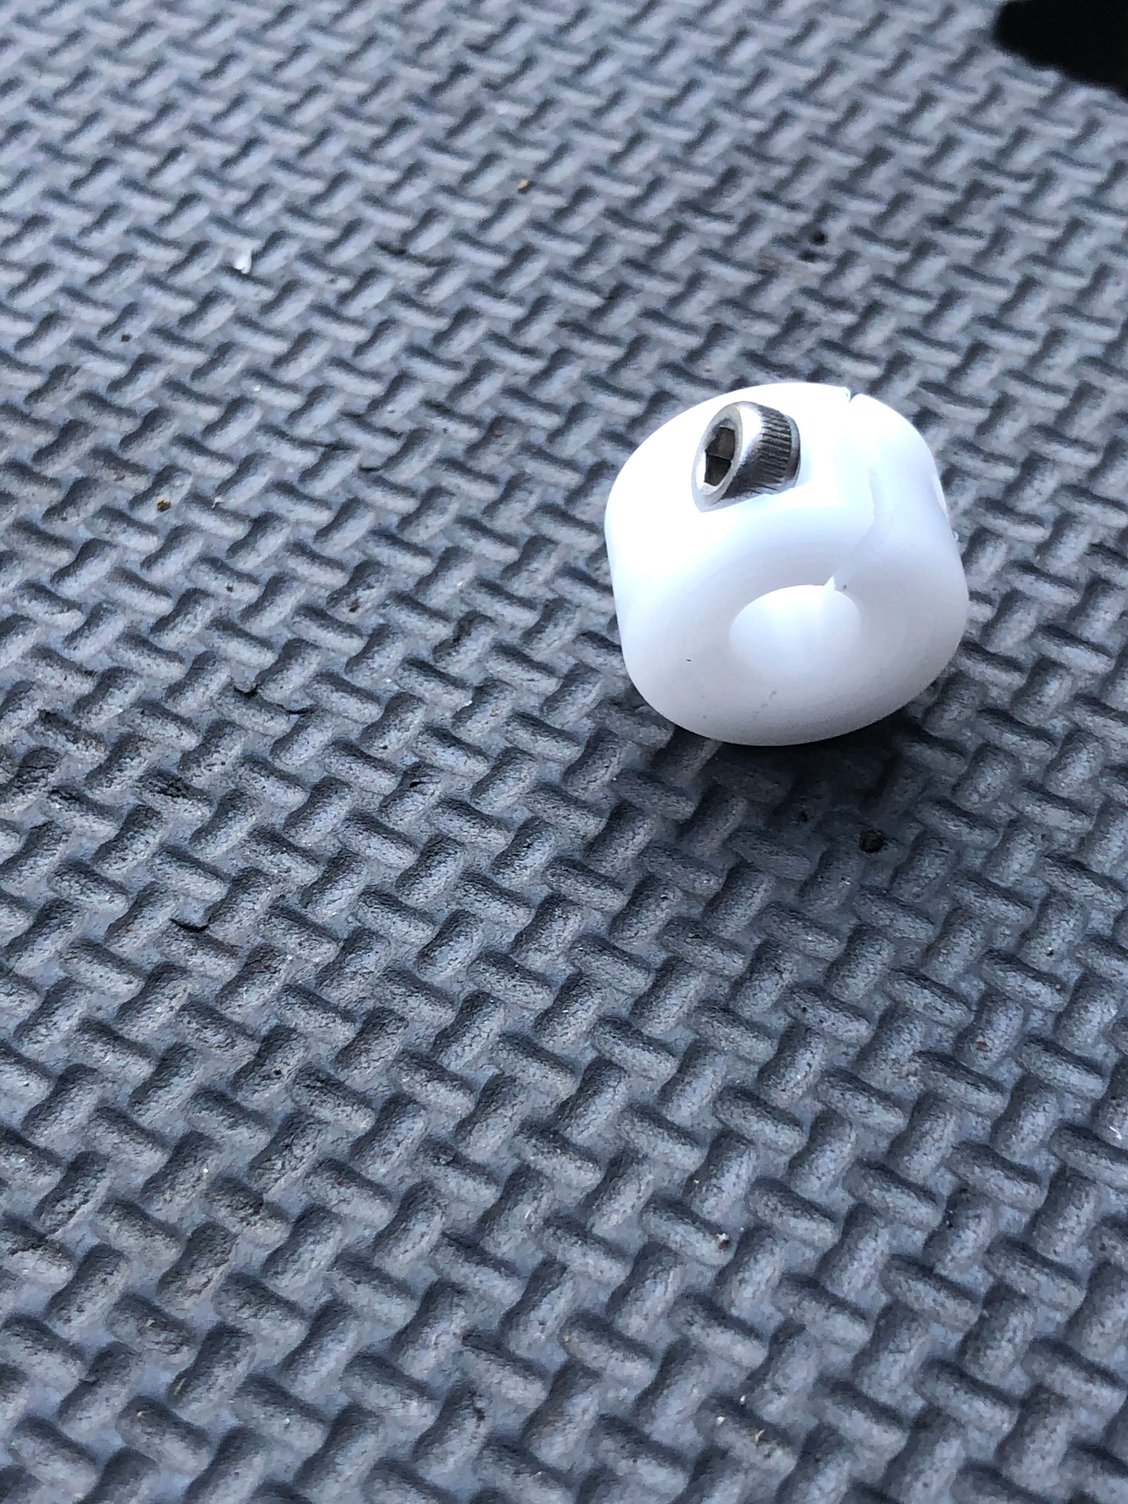
These weigh about 8g each.

I can shove my Lezyne digital tire gauge on the valve stem to get a reliable reading without excessive movement thus saving wear or premature failure of the latexinner tube.
These weigh about 8g each.
I can shove my Lezyne digital tire gauge on the valve stem to get a reliable reading without excessive movement thus saving wear or premature failure of the latexinner tube.
