


Use for frames from defunct leather saddles?
 07-17-09, 08:42 AM
#1
Tinkerer
Thread Starter
Join Date: Feb 2009
Location: Tulsa, OK
Posts: 152
Mentioned: 1 Post(s)
Tagged: 0 Thread(s)
Quoted: 2 Post(s)
Likes: 0
Liked 3 Times
in
2 Posts
Use for frames from defunct leather saddles?
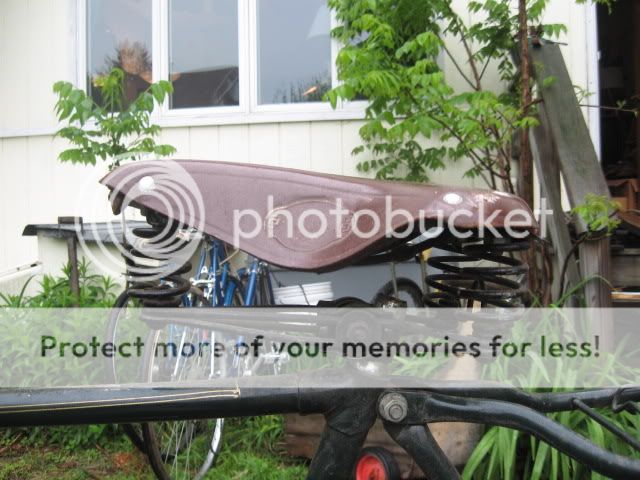
I have two brooks B72 frames and another frame from an early-60s leather saddle that came off a Schwinn. They're all in great condition but the leather is toast. Does anyone offer replacement leather covers? I thought about trying my hand at leather work, but it would be a learning experience. I hate to see these nice frames go to waste!
 07-17-09, 09:11 AM
#2

PanGalacticGargleBlaster

Join Date: Apr 2009
Location: Smugglers Notch, Vermont
Posts: 7,531
Bikes: Upright and Recumbent....too many to list, mostly Vintage.
Mentioned: 0 Post(s)
Tagged: 0 Thread(s)
Quoted: 19 Post(s)
Likes: 0
Liked 5 Times
in
4 Posts
i've seen them sell for a few bux on ebay.
07-17-09, 03:10 PM
#3
Senior Member
Join Date: Feb 2009
Location: Adelaide, Australia
Posts: 72
Mentioned: 0 Post(s)
Tagged: 0 Thread(s)
Quoted: 0 Post(s)
Likes: 0
Liked 0 Times
in
0 Posts
put some new leather on it
here are my step by step instructions
here are my step by step instructions
07-18-09, 02:14 AM
#4
wheelin in the years
Join Date: Jul 2005
Location: Kansas
Posts: 666
Bikes: Some Schwinns, a Gary Fisher, some vintage lt wts
Mentioned: 0 Post(s)
Tagged: 0 Thread(s)
Quoted: 0 Post(s)
Likes: 0
Liked 1 Time
in
1 Post
Plaster and vacume mold, genius! I had wondered how to for a buck and press it, Kudos to you Mr. V-8 AKA Clydesdale Scot.
My old Wright saddle may have a new lease on life.
My old Wright saddle may have a new lease on life.
07-18-09, 01:50 PM
#5
In the right lane

put some new leather on it
here are my step by step instructions
here are my step by step instructions
07-18-09, 03:08 PM
#6
Senior Member
Join Date: Feb 2009
Location: Adelaide, Australia
Posts: 72
Mentioned: 0 Post(s)
Tagged: 0 Thread(s)
Quoted: 0 Post(s)
Likes: 0
Liked 0 Times
in
0 Posts
just make sure your leather is really thick (mine was 6-7mm thick) and stiff. It will easily shape after being in the water and then dry out stiff again. Too thin and it will stretch quickly, too flexible and it will not shape to your body.
If you have a go post your pictures
I can post the instructions on making the vacuum pump if you want.
If you have a go post your pictures
I can post the instructions on making the vacuum pump if you want.
07-18-09, 08:22 PM
#7
Senior Member
Join Date: Dec 2005
Location: Sunny Tampa, Florida
Posts: 1,542
Mentioned: 0 Post(s)
Tagged: 0 Thread(s)
Quoted: 101 Post(s)
Liked 49 Times
in
41 Posts
I'd be interested in seeing the vacuum pump conversion. Not so much for saddle shaping, but possible carbon fiber bagging.
What sort of mad scientist are you if you can't arrange for a suitable vacuum.
What sort of mad scientist are you if you can't arrange for a suitable vacuum.
__________________
Still stupid and seriously neglected..
Still stupid and seriously neglected..
07-18-09, 09:52 PM
#8
Senior Member
Join Date: Feb 2009
Location: Adelaide, Australia
Posts: 72
Mentioned: 0 Post(s)
Tagged: 0 Thread(s)
Quoted: 0 Post(s)
Likes: 0
Liked 0 Times
in
0 Posts
The instructions (as provided by my brother in law) as to the making of a vacuum pump used to make the saddle.
The Compressor used as a vacuum pump is a refrigeration motor/compressor removed from an old household refrigerator.
A compressor from an aircon or freezer etc will also work fine.
The pipes connected to the compressor and the fridge were cut slightly to allow the gas to escape. Then both pipes cut leaving 200-300 mm attached to the compressor.
The wiring to the compressor was cut leaving as much wire attached as easily possible. Or undo terminals at nearest junction.
The power cord to the fridge is also used. Cut cord off or disconnect as long as possible.
That is all the electrics that is needed from the fridge.
Unbolt and remove the compressor from the fridge. Usually 3-4 bolts.
Take care not to tip the compressor upside down as it has oil inside it and will run out the tube pipes. We want the oil to remain in the compressor.
Cut the end of the two tubes going to the compressor off neatly so a piece of plastic tube can be �tightly� slid over the pipes.
These will become the vacuum line and the pressure line depending which tube is used.
Reconnect the wiring the correct way around in a safe manner. If you are not skilled or knowledgeable to mains wiring than best get some one who is, to reconnect the compressor to the cord from the fridge.
With wiring done.
Place both plastic tube ends in a container (such as a tub) as sometimes the compressors can blow a little oil out the pressure line.
Connect the cord to power and switch on compressor.
If you put your finger over the end of a tube it should suck on to it or feel air releasing
Now you know which tube is vacuum and which is pressure.
For use with vacuum bagging a vacuum gauge is desirable as you can never tell otherwise if you have a small pin prick hole/leak.
The gauges used are an old set of refrigeration mechanic gauges as there were the only vacuum gauges I had.
Any vacuum gauge that will read down to minus 100 kpa is fine.
Place a tee piece in the vacuum line and attach the gauge to it. Ensure all connections are sealed properly.
The use of a household water filter housing (no elements inside) in the vacuum line is to ensure no liquids get sucked down the line and into the compressor.
It is not essential to have it, if care is taken.
I use it as a safeguard when vacuum bagging fibreglass, as resin goes solid in lines and compressors.
The advantage of using a fridge compressor over a vacuum cleaner is the compressor is a more gentle source of vacuum and takes a little longer to remove the air allowing for things to be manipulated as the vacuum increases as well the negative force will be much, much greater than a vacuum cleaner. (With no leaks go down to �100Kpa)
A vacuum cleaner will suck it down too quickly and hard to work with. The motor will also run hot and burn out as there is no air going through the motor with a plastic bag attached to the hose. For this reason a vacuum cleaner not recommended.
11-10-12, 01:50 PM
#9
Newbie
Join Date: Aug 2008
Posts: 2
Bikes: novarra, lotus
Mentioned: 0 Post(s)
Tagged: 0 Thread(s)
Quoted: 0 Post(s)
Likes: 0
Liked 0 Times
in
0 Posts
Compressor question
CS,
I know this is an old thread, but maybe you are still out there? Anyway, your posts have inspired me and I wanted to ask a fairly basic question before going any further...
Let's say you got your hands on a compressor, were very excited and carried it badly, so that oil started spurting out the tubes in a fizzly, messy way, well before you cottoned on to what was happening. How bad a scenario is this? Would a small amount of oil leak ruin the beast, or could it still be run? Any danger in moving forward? It's ok if it takes forever for an answer, or if you can't offer one. Thanks for what you already have shared!
x
The instructions (as provided by my brother in law) as to the making of a vacuum pump used to make the saddle.
The Compressor used as a vacuum pump is a refrigeration motor/compressor removed from an old household refrigerator.
A compressor from an aircon or freezer etc will also work fine.
The pipes connected to the compressor and the fridge were cut slightly to allow the gas to escape. Then both pipes cut leaving 200-300 mm attached to the compressor.
The wiring to the compressor was cut leaving as much wire attached as easily possible. Or undo terminals at nearest junction.
The power cord to the fridge is also used. Cut cord off or disconnect as long as possible.
That is all the electrics that is needed from the fridge.
Unbolt and remove the compressor from the fridge. Usually 3-4 bolts.
Take care not to tip the compressor upside down as it has oil inside it and will run out the tube pipes. We want the oil to remain in the compressor.
Cut the end of the two tubes going to the compressor off neatly so a piece of plastic tube can be �tightly� slid over the pipes.
These will become the vacuum line and the pressure line depending which tube is used.
Reconnect the wiring the correct way around in a safe manner. If you are not skilled or knowledgeable to mains wiring than best get some one who is, to reconnect the compressor to the cord from the fridge.
With wiring done.
Place both plastic tube ends in a container (such as a tub) as sometimes the compressors can blow a little oil out the pressure line.
Connect the cord to power and switch on compressor.
If you put your finger over the end of a tube it should suck on to it or feel air releasing
Now you know which tube is vacuum and which is pressure.
For use with vacuum bagging a vacuum gauge is desirable as you can never tell otherwise if you have a small pin prick hole/leak.
The gauges used are an old set of refrigeration mechanic gauges as there were the only vacuum gauges I had.
Any vacuum gauge that will read down to minus 100 kpa is fine.
Place a tee piece in the vacuum line and attach the gauge to it. Ensure all connections are sealed properly.
The use of a household water filter housing (no elements inside) in the vacuum line is to ensure no liquids get sucked down the line and into the compressor.
It is not essential to have it, if care is taken.
I use it as a safeguard when vacuum bagging fibreglass, as resin goes solid in lines and compressors.
The advantage of using a fridge compressor over a vacuum cleaner is the compressor is a more gentle source of vacuum and takes a little longer to remove the air allowing for things to be manipulated as the vacuum increases as well the negative force will be much, much greater than a vacuum cleaner. (With no leaks go down to �100Kpa)
A vacuum cleaner will suck it down too quickly and hard to work with. The motor will also run hot and burn out as there is no air going through the motor with a plastic bag attached to the hose. For this reason a vacuum cleaner not recommended.
A compressor from an aircon or freezer etc will also work fine.
The pipes connected to the compressor and the fridge were cut slightly to allow the gas to escape. Then both pipes cut leaving 200-300 mm attached to the compressor.
The wiring to the compressor was cut leaving as much wire attached as easily possible. Or undo terminals at nearest junction.
The power cord to the fridge is also used. Cut cord off or disconnect as long as possible.
That is all the electrics that is needed from the fridge.
Unbolt and remove the compressor from the fridge. Usually 3-4 bolts.
Take care not to tip the compressor upside down as it has oil inside it and will run out the tube pipes. We want the oil to remain in the compressor.
Cut the end of the two tubes going to the compressor off neatly so a piece of plastic tube can be �tightly� slid over the pipes.
These will become the vacuum line and the pressure line depending which tube is used.
Reconnect the wiring the correct way around in a safe manner. If you are not skilled or knowledgeable to mains wiring than best get some one who is, to reconnect the compressor to the cord from the fridge.
With wiring done.
Place both plastic tube ends in a container (such as a tub) as sometimes the compressors can blow a little oil out the pressure line.
Connect the cord to power and switch on compressor.
If you put your finger over the end of a tube it should suck on to it or feel air releasing
Now you know which tube is vacuum and which is pressure.
For use with vacuum bagging a vacuum gauge is desirable as you can never tell otherwise if you have a small pin prick hole/leak.
The gauges used are an old set of refrigeration mechanic gauges as there were the only vacuum gauges I had.
Any vacuum gauge that will read down to minus 100 kpa is fine.
Place a tee piece in the vacuum line and attach the gauge to it. Ensure all connections are sealed properly.
The use of a household water filter housing (no elements inside) in the vacuum line is to ensure no liquids get sucked down the line and into the compressor.
It is not essential to have it, if care is taken.
I use it as a safeguard when vacuum bagging fibreglass, as resin goes solid in lines and compressors.
The advantage of using a fridge compressor over a vacuum cleaner is the compressor is a more gentle source of vacuum and takes a little longer to remove the air allowing for things to be manipulated as the vacuum increases as well the negative force will be much, much greater than a vacuum cleaner. (With no leaks go down to �100Kpa)
A vacuum cleaner will suck it down too quickly and hard to work with. The motor will also run hot and burn out as there is no air going through the motor with a plastic bag attached to the hose. For this reason a vacuum cleaner not recommended.
11-10-12, 02:30 PM
#10
Keepin it Wheel

Join Date: Aug 2011
Location: San Diego
Posts: 10,245
Bikes: Surly CrossCheck, Krampus
Mentioned: 0 Post(s)
Tagged: 0 Thread(s)
Quoted: 26 Post(s)
Liked 3,433 Times
in
2,540 Posts
What a fantastic link there Clydesdale Scot!
I have wondered why hasn't China started producing leather seats yet? Seems they should be able to clone a Brooks, and achieve economies of scale and sell them for like $50
I have wondered why hasn't China started producing leather seats yet? Seems they should be able to clone a Brooks, and achieve economies of scale and sell them for like $50


 11-12-12, 05:46 AM
#12
Senior Member
Join Date: Feb 2009
Location: Adelaide, Australia
Posts: 72
Mentioned: 0 Post(s)
Tagged: 0 Thread(s)
Quoted: 0 Post(s)
Likes: 0
Liked 0 Times
in
0 Posts
CS,
I know this is an old thread, but maybe you are still out there? Anyway, your posts have inspired me and I wanted to ask a fairly basic question before going any further...
Let's say you got your hands on a compressor, were very excited and carried it badly, so that oil started spurting out the tubes in a fizzly, messy way, well before you cottoned on to what was happening. How bad a scenario is this? Would a small amount of oil leak ruin the beast, or could it still be run? Any danger in moving forward? It's ok if it takes forever for an answer, or if you can't offer one. Thanks for what you already have shared!
x
I know this is an old thread, but maybe you are still out there? Anyway, your posts have inspired me and I wanted to ask a fairly basic question before going any further...
Let's say you got your hands on a compressor, were very excited and carried it badly, so that oil started spurting out the tubes in a fizzly, messy way, well before you cottoned on to what was happening. How bad a scenario is this? Would a small amount of oil leak ruin the beast, or could it still be run? Any danger in moving forward? It's ok if it takes forever for an answer, or if you can't offer one. Thanks for what you already have shared!
x
I will get back to you.
Philip
11-12-12, 06:56 AM
#13

multimodal commuter

Join Date: Nov 2006
Location: NJ, NYC, LI
Posts: 19,808
Bikes: 1940s Fothergill, 1959 Allegro Special, 1963? Claud Butler Olympic Sprint, Lambert 'Clubman', 1974 Fuji "the Ace", 1976 Holdsworth 650b conversion rando bike, 1983 Trek 720 tourer, 1984 Counterpoint Opus II, 1993 Basso Gap, 2010 Downtube 8h, and...
Mentioned: 584 Post(s)
Tagged: 0 Thread(s)
Quoted: 1908 Post(s)
Liked 574 Times
in
339 Posts
Xfrench, I figured out an easier way to form the leather, if you're interested. I described it in a post on this blog:
https://www.vicsclassicbikes.blogspot.com/
If anyone has saddle frames and hardware they're looking to get rid of, please let me know. I'm recovering them, one by one....
https://www.vicsclassicbikes.blogspot.com/
If anyone has saddle frames and hardware they're looking to get rid of, please let me know. I'm recovering them, one by one....
11-12-12, 07:15 AM
#14
aka Tom Reingold

Join Date: Jan 2009
Location: New York, NY, and High Falls, NY, USA
Posts: 40,503
Bikes: 1962 Rudge Sports, 1971 Raleigh Super Course, 1971 Raleigh Pro Track, 1974 Raleigh International, 1975 Viscount Fixie, 1982 McLean, 1996 Lemond (Ti), 2002 Burley Zydeco tandem
Mentioned: 511 Post(s)
Tagged: 0 Thread(s)
Quoted: 7348 Post(s)
Liked 2,471 Times
in
1,435 Posts
There's someone here in C&V who recovers saddle frames with new leather. He's quite artistic at it, too. I have one of his saddles. I don't want to expose him without permission, but he might pipe in here. I don't know if he'll do it for hire, but I suspect he would take donations of frames.
__________________
Tom Reingold, tom@noglider.com
New York City and High Falls, NY
Blogs: The Experienced Cyclist; noglider's ride blog
�When man invented the bicycle he reached the peak of his attainments.� � Elizabeth West, US author
Please email me rather than PM'ing me. Thanks.
Tom Reingold, tom@noglider.com
New York City and High Falls, NY
Blogs: The Experienced Cyclist; noglider's ride blog
�When man invented the bicycle he reached the peak of his attainments.� � Elizabeth West, US author
Please email me rather than PM'ing me. Thanks.
11-12-12, 07:16 AM
#15
aka Tom Reingold
Join Date: Jan 2009
Location: New York, NY, and High Falls, NY, USA
Posts: 40,503
Bikes: 1962 Rudge Sports, 1971 Raleigh Super Course, 1971 Raleigh Pro Track, 1974 Raleigh International, 1975 Viscount Fixie, 1982 McLean, 1996 Lemond (Ti), 2002 Burley Zydeco tandem
Mentioned: 511 Post(s)
Tagged: 0 Thread(s)
Quoted: 7348 Post(s)
Liked 2,471 Times
in
1,435 Posts
Oh, rhm and I posted at the same time, so he outed himself.
__________________
Tom Reingold, tom@noglider.com
New York City and High Falls, NY
Blogs: The Experienced Cyclist; noglider's ride blog
�When man invented the bicycle he reached the peak of his attainments.� � Elizabeth West, US author
Please email me rather than PM'ing me. Thanks.
Tom Reingold, tom@noglider.com
New York City and High Falls, NY
Blogs: The Experienced Cyclist; noglider's ride blog
�When man invented the bicycle he reached the peak of his attainments.� � Elizabeth West, US author
Please email me rather than PM'ing me. Thanks.
11-12-12, 02:24 PM
#17
Senior Member
Join Date: Feb 2009
Location: Adelaide, Australia
Posts: 72
Mentioned: 0 Post(s)
Tagged: 0 Thread(s)
Quoted: 0 Post(s)
Likes: 0
Liked 0 Times
in
0 Posts
Xfrench, the reply from my brother in law is as follows
please keep a record of your work and post it, hopefully to inspire others to tackle projects such as this. I have made a few more, and the molds are soon to be used for a few more. If you come up with different techniques, please post them.
I am experimenting with arching and flattening the cantleplate Ottusi style
As a refrigerant compressor the oil is circulated around with the gas
in a closed loop system, when we hack the compressor out and use it as a
open loop system the oil is lost over time anyway.
So to answer the question, to lose a little oil is not the end of the
world, and the compressor will still function.
Due to the oil loss over time the compressor will eventually run dry
anyway and fail in time, but from my experience this take a long time
and many, many, hours of use till a failure occurs.
There is always old fridges tossed out, and to source a replacement
compressor is easier than trying to replace the oil, as the oil is not a
standard mineral type oil like motor oil and is hard to acquire.
Im still yet to have a compressor seize up, and i have given a few a
fair flogging.
I am experimenting with arching and flattening the cantleplate Ottusi style
11-12-12, 11:48 PM
#18
Newbie
Join Date: Aug 2008
Posts: 2
Bikes: novarra, lotus
Mentioned: 0 Post(s)
Tagged: 0 Thread(s)
Quoted: 0 Post(s)
Likes: 0
Liked 0 Times
in
0 Posts
Awesome
Thank you!
Thank you Phillip for the extra info, and Thank you Rudi for the link and more info.
A couple of years ago I wanted to get a bike to ride and my neighbor helped me build one. Then I bought another one at a non-profit bike store when they moved their inventory (and another frame and forks). Somehow, I wound up getting a worn out Wright (or maybe Ideale) with frame, and asked the proprietor if putting new leather on an old seat was something people did. He responded not so much, that it was probably more trouble than it's worth, and anyway it would certainly be a "non-trivial" problem to solve (I loved his response, and it's all probably his fault, now that I think about it)...
You guys make it look easy! Anyway, low these many moons later, I have a couple beaten saddles/frames, some cow leather (Macpherson's is just up the road, but I didn't get vegetable tanned stuff, so I'll have to go back at some point) and, as of the other night, a used compressor (sans a scoosh of oil).
I'm grateful for all the info you all have shared, and if I make any headway, I will be certain to update. May take a little while, though.
x
Xfrench, the reply from my brother in law is as follows
please keep a record of your work and post it, hopefully to inspire others to tackle projects such as this. I have made a few more, and the molds are soon to be used for a few more. If you come up with different techniques, please post them.
I am experimenting with arching and flattening the cantleplate Ottusi style
