


Rod brake pad/shoe remove & insert
 03-27-20, 12:43 PM
#1
Junior Member
Thread Starter

Join Date: May 2017
Location: Saint Paul, MN
Posts: 176
Bikes: 1969 Raleigh Twenty, 1975 Raleigh DL-1, 1984 Specialized Stumpjumper Sport, 1989 Schwinn Voyageur
Mentioned: 1 Post(s)
Tagged: 0 Thread(s)
Quoted: 86 Post(s)
Liked 78 Times
in
43 Posts
Rod brake pad/shoe remove & insert
I've seen some videos on how to remove brake shoes from the metal holders on rod brakes, but I couldn't find any posts so I thought I'd post pictures on how I did it.
First, make sure to remove the shoe out the rear-ward facing side of the holder. Brake holders on rod brake bikes have one side pinched so the brake shoe does not get pushed out the front when braking.
In the picture below, the open end (the side to tap on with a punch) is toward the top of the picture. The crimped/closed end is toward the bottom of the picture, this end should be facing the front of the bike when installed.
Picture below: another look and explanation of brake shoe holder orientation.
The shoe & holder on the left are non-drive side (NDS), the shoe and holder on the right are drive side (DS). That is to say, the left shoe & holder should be installed so the visible end would be seen if looking from the back of the bike. The right shoe & holder should be installed so the visible end would be seen if looking from the front of the bike.

(In the picture above the mushrooming from the punch can be seen. To reduce that flare, drill out the shoe before trying to remove.)
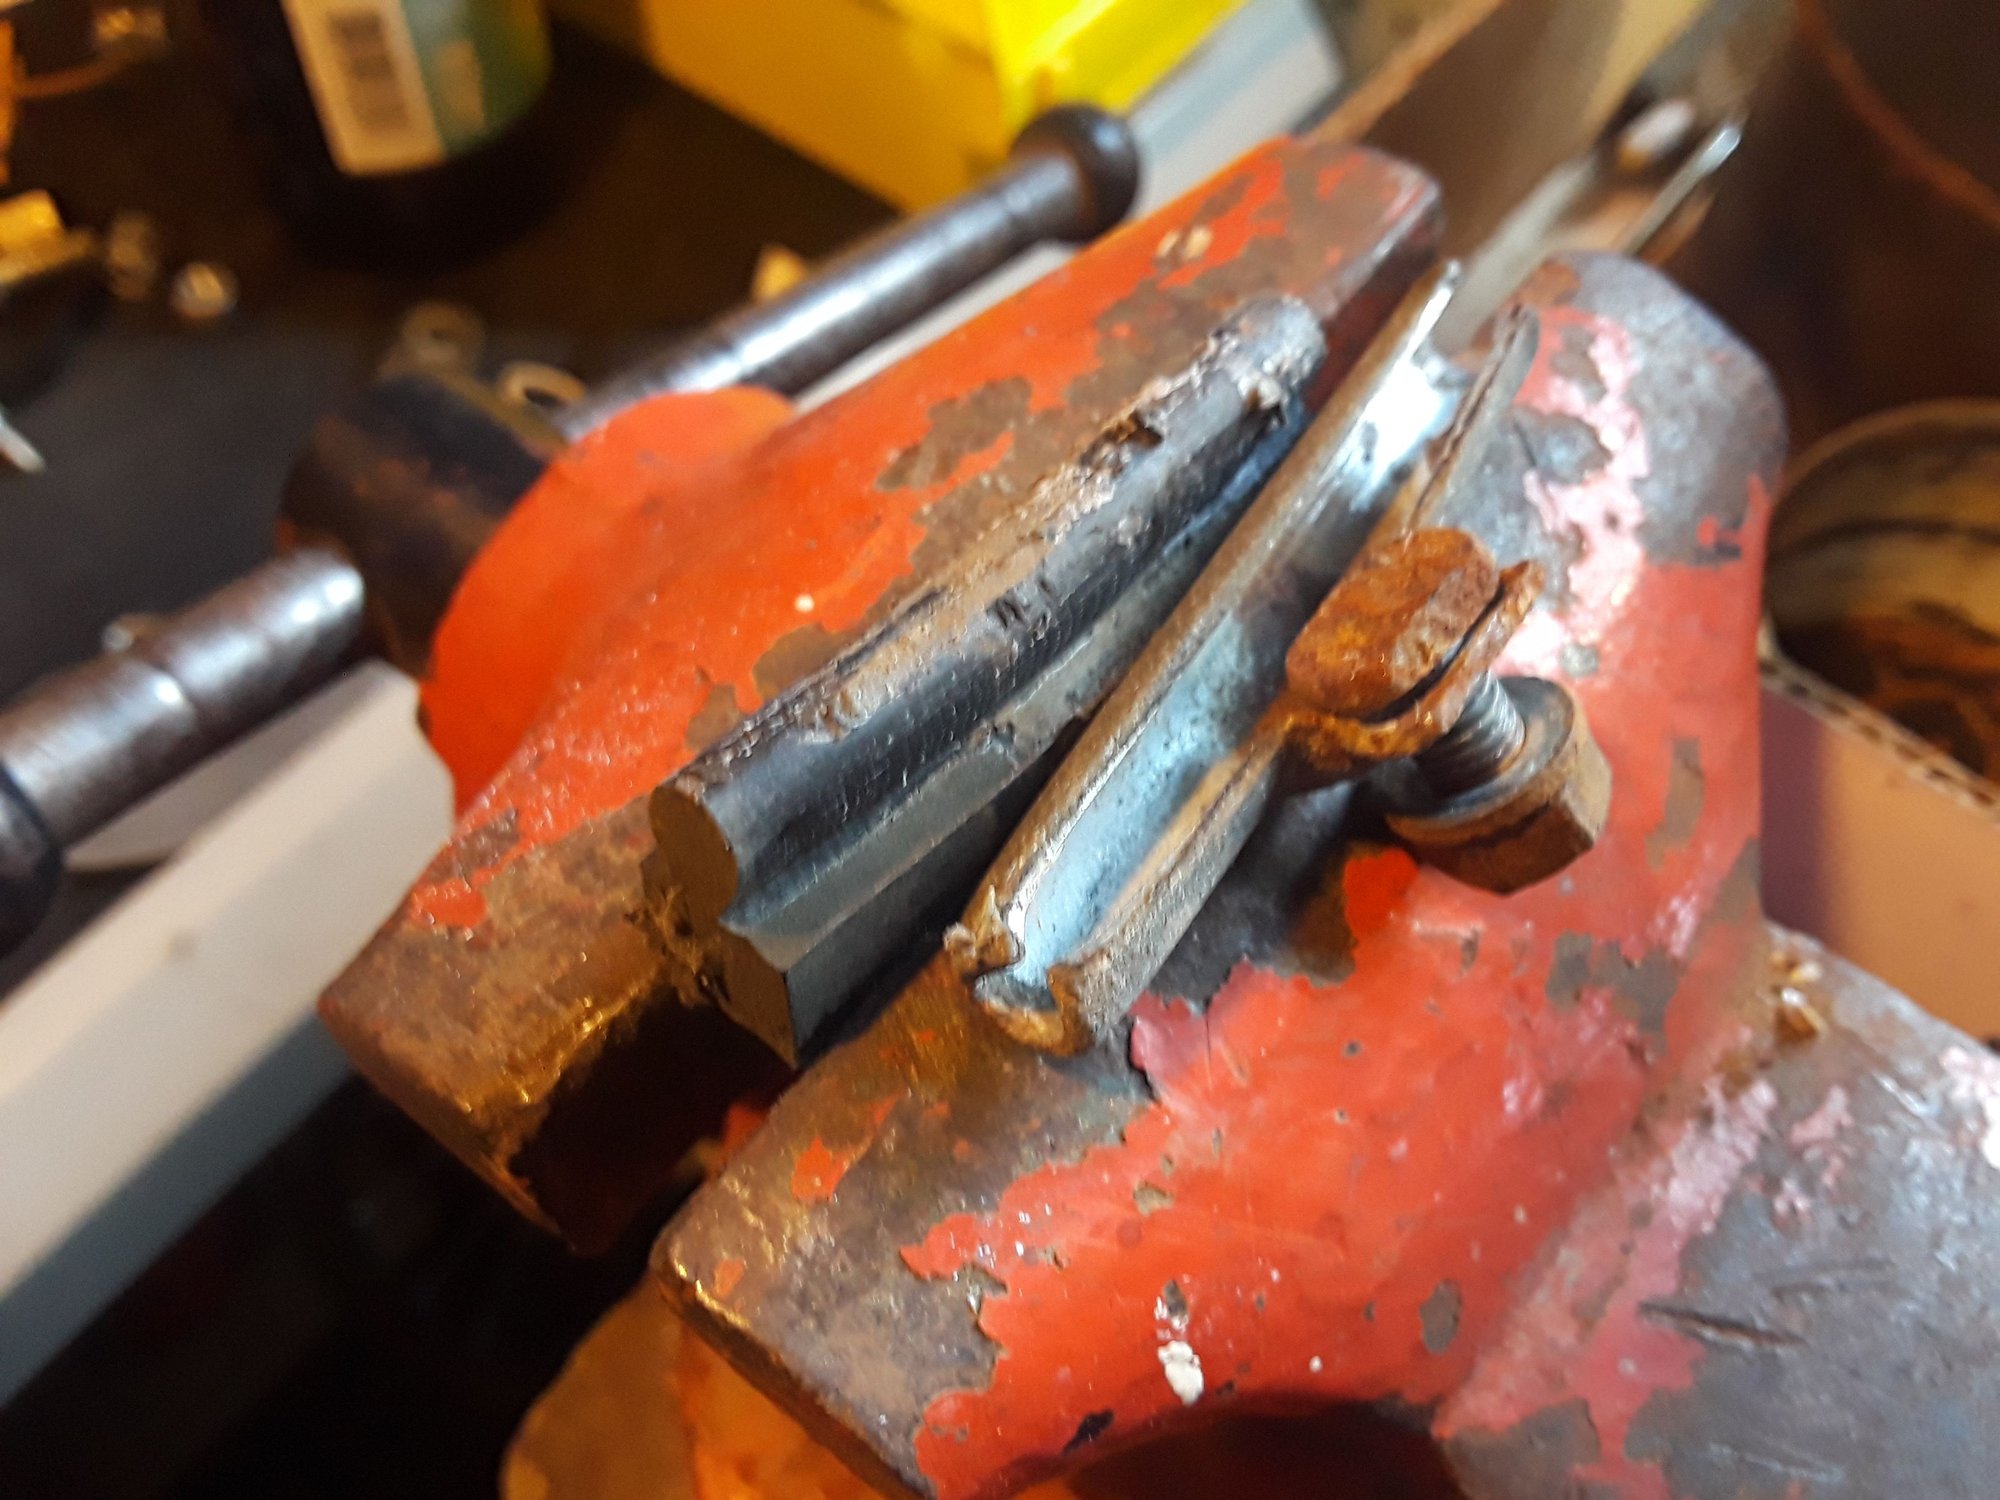
After removing the brake shoe and holder from the bike, put the pad in a vise lengthwise to get the best grip and stability for removal:

As shown above, use a punch on the metal holder to slide it off the brake shoe.
Once the holder has started moving, the punch will have to be moved as pictured below, so the shoe isn't blocking progress.

It should really slide off easily. If not much progress is made or too much force is needed to tap the punch, use a drill bit to relieve outward pressure. Drill out the part of the shoe that is inside the holder:

In retrospect, it would probably save some time and mushrooming on the holder to drill out all shoes before trying to remove them.
To install the new shoes, hold as shown below and tap the holder on to the shoe with your favorite hammer. For some reason the rear holders both needed to have the shoes drilled out and then have the open end bent open slightly to allow the new shoes to fit. For the front holders, each shoe was easy to remove from the holder and the new shoes both slid in easily.

To reinstall on the bike be sure the closed end is facing toward the front of the bike.
First, make sure to remove the shoe out the rear-ward facing side of the holder. Brake holders on rod brake bikes have one side pinched so the brake shoe does not get pushed out the front when braking.
In the picture below, the open end (the side to tap on with a punch) is toward the top of the picture. The crimped/closed end is toward the bottom of the picture, this end should be facing the front of the bike when installed.
Picture below: another look and explanation of brake shoe holder orientation.
The shoe & holder on the left are non-drive side (NDS), the shoe and holder on the right are drive side (DS). That is to say, the left shoe & holder should be installed so the visible end would be seen if looking from the back of the bike. The right shoe & holder should be installed so the visible end would be seen if looking from the front of the bike.
(In the picture above the mushrooming from the punch can be seen. To reduce that flare, drill out the shoe before trying to remove.)
After removing the brake shoe and holder from the bike, put the pad in a vise lengthwise to get the best grip and stability for removal:
As shown above, use a punch on the metal holder to slide it off the brake shoe.
Once the holder has started moving, the punch will have to be moved as pictured below, so the shoe isn't blocking progress.
It should really slide off easily. If not much progress is made or too much force is needed to tap the punch, use a drill bit to relieve outward pressure. Drill out the part of the shoe that is inside the holder:
In retrospect, it would probably save some time and mushrooming on the holder to drill out all shoes before trying to remove them.
To install the new shoes, hold as shown below and tap the holder on to the shoe with your favorite hammer. For some reason the rear holders both needed to have the shoes drilled out and then have the open end bent open slightly to allow the new shoes to fit. For the front holders, each shoe was easy to remove from the holder and the new shoes both slid in easily.
To reinstall on the bike be sure the closed end is facing toward the front of the bike.


