


1984 Benotto Modelo 3000
 07-12-20, 05:17 AM
#1
Senior Member
Thread Starter

Join Date: Jul 2018
Location: Eugene, OR
Posts: 1,326
Mentioned: 64 Post(s)
Tagged: 0 Thread(s)
Quoted: 535 Post(s)
Liked 346 Times
in
196 Posts
1984 Benotto Modelo 3000
WARNING: If restomod approaches to rare vintage Italian racing frames offend you, you may want to click your browser's back button now! This build is an account of taking such a frame, and applying such an approach. The primary goal here, being simply to build a lightweight ( ~ 20lbs), affordable machine within a reasonable amount of time, that will be a sheer joy to ride. All of this ,without apology... 
__ __ __
This bit of steel popped up for sale here a while back. It was a bit rough looking, but its condition was well documented. I think its condition scared most people away since it lingered on the sales page for approximately a year or so. The price was very fair, and at 54 cm it was just my size. I took delivery of it December 2019. Here�s a few pics after unpacking::
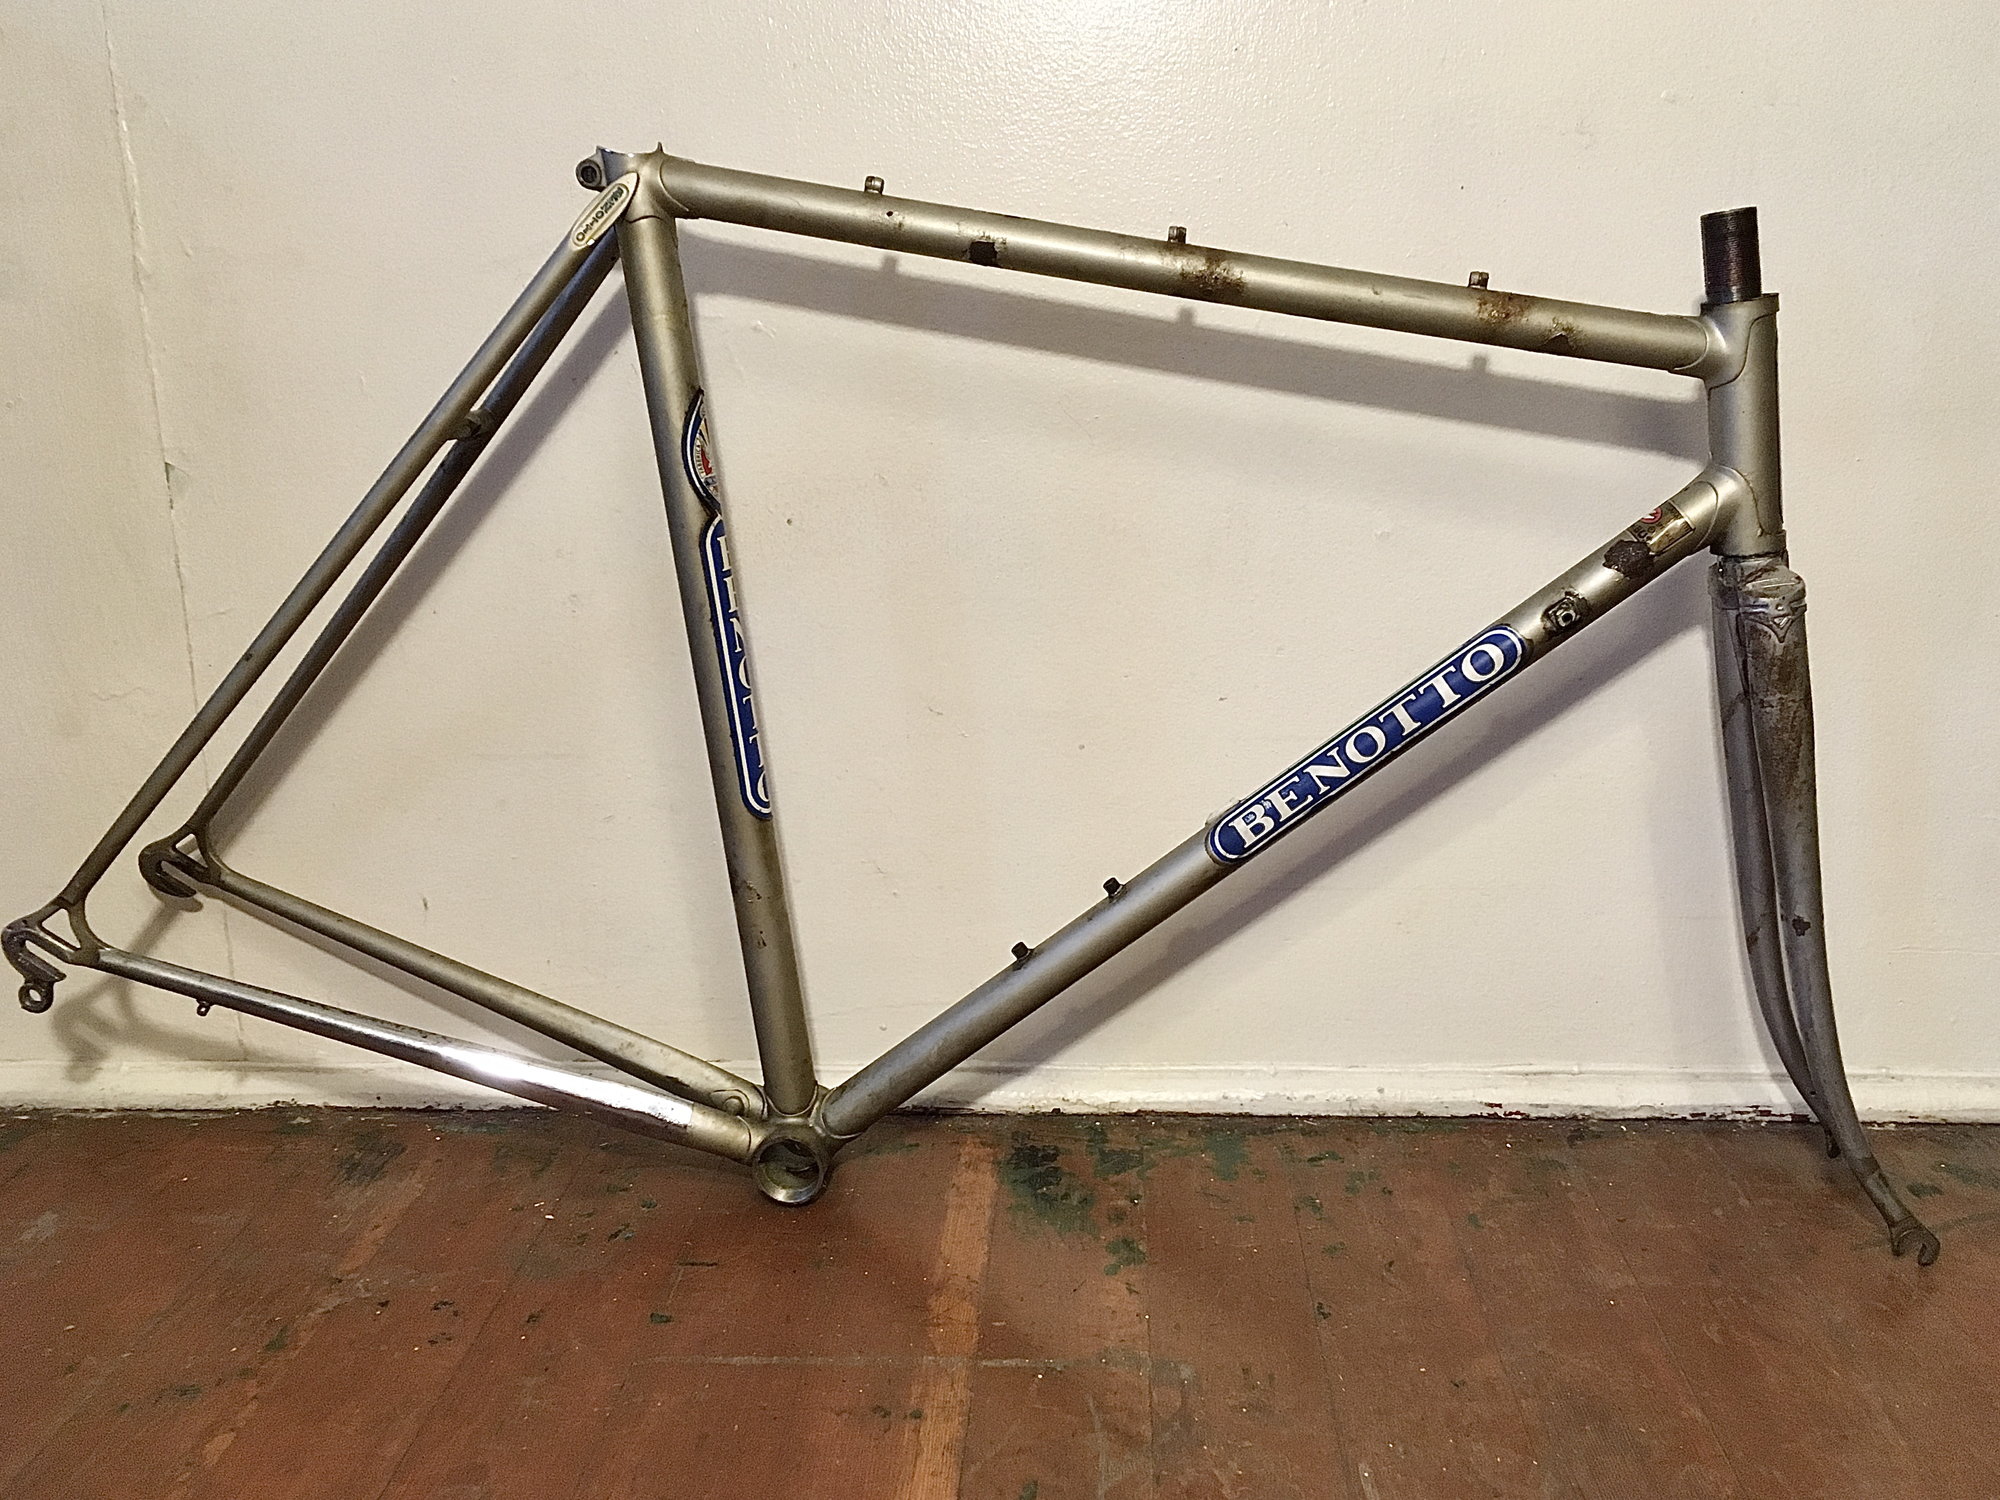
Before going any further, I�d like to thank @francophile for offering this great frame, and for working graciously with me so that I could I have a chance to put it back on the road.
� � �
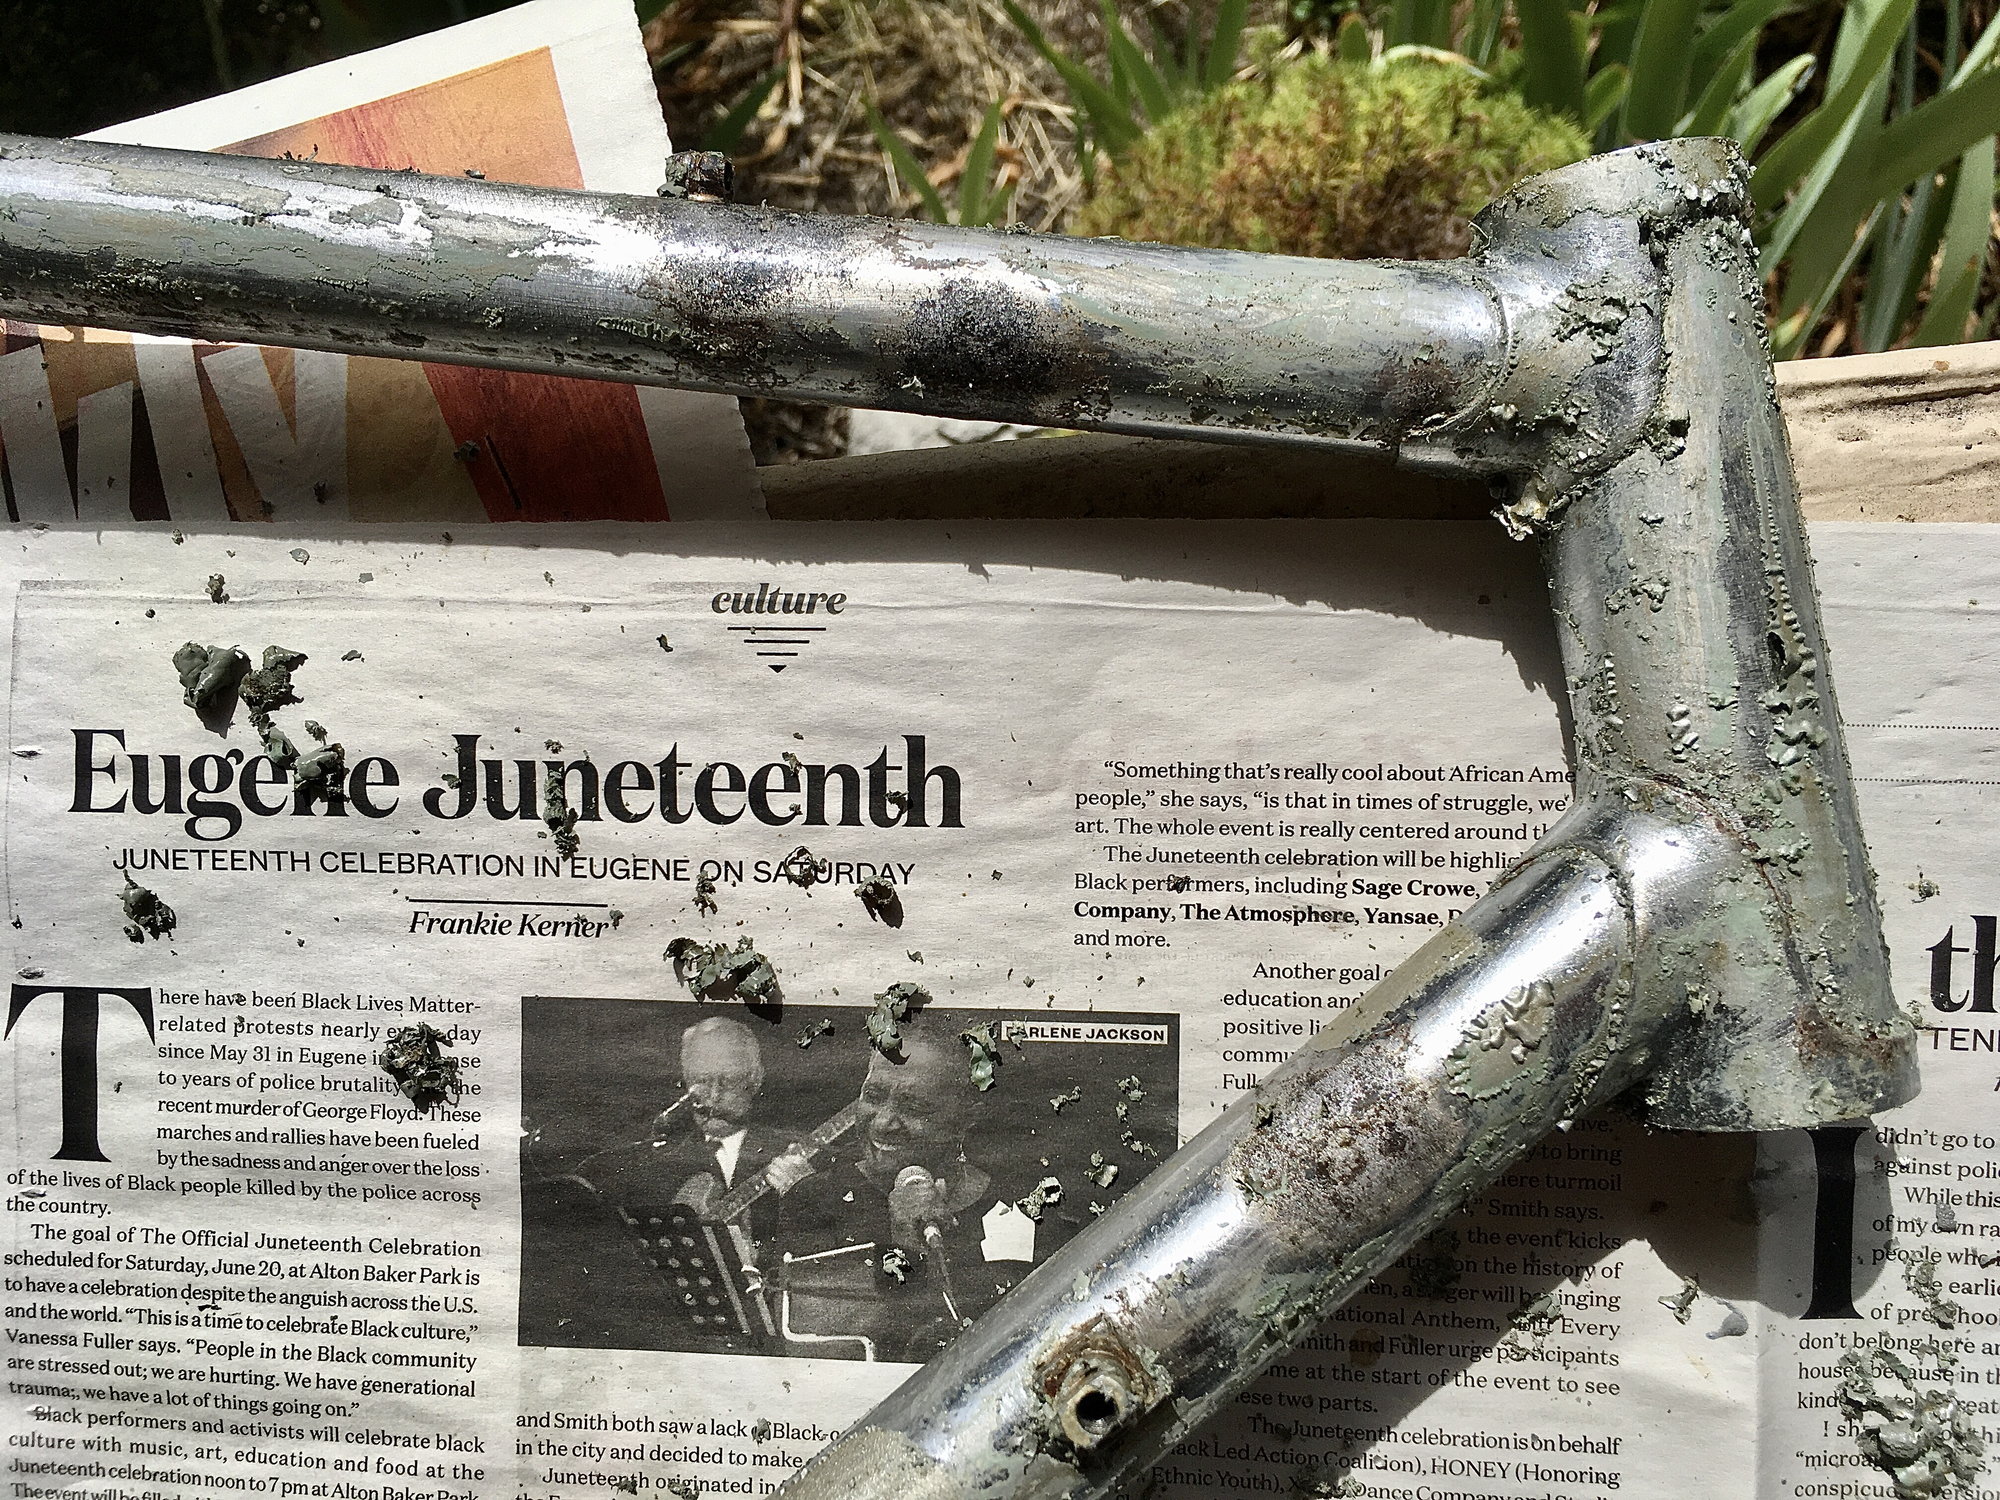
After assessing the extent of rust, and getting no where with various noninvasive interventions, I decided it was time to get drastic by going with a full strip to bare metal:
__ __ __
This bit of steel popped up for sale here a while back. It was a bit rough looking, but its condition was well documented. I think its condition scared most people away since it lingered on the sales page for approximately a year or so. The price was very fair, and at 54 cm it was just my size. I took delivery of it December 2019. Here�s a few pics after unpacking::
Before going any further, I�d like to thank @francophile for offering this great frame, and for working graciously with me so that I could I have a chance to put it back on the road.
� � �
After assessing the extent of rust, and getting no where with various noninvasive interventions, I decided it was time to get drastic by going with a full strip to bare metal:
Last edited by deux jambes; 07-13-20 at 10:54 AM.
 07-12-20, 05:27 AM
#2
Senior Member
Thread Starter
Join Date: Jul 2018
Location: Eugene, OR
Posts: 1,326
Mentioned: 64 Post(s)
Tagged: 0 Thread(s)
Quoted: 535 Post(s)
Liked 346 Times
in
196 Posts
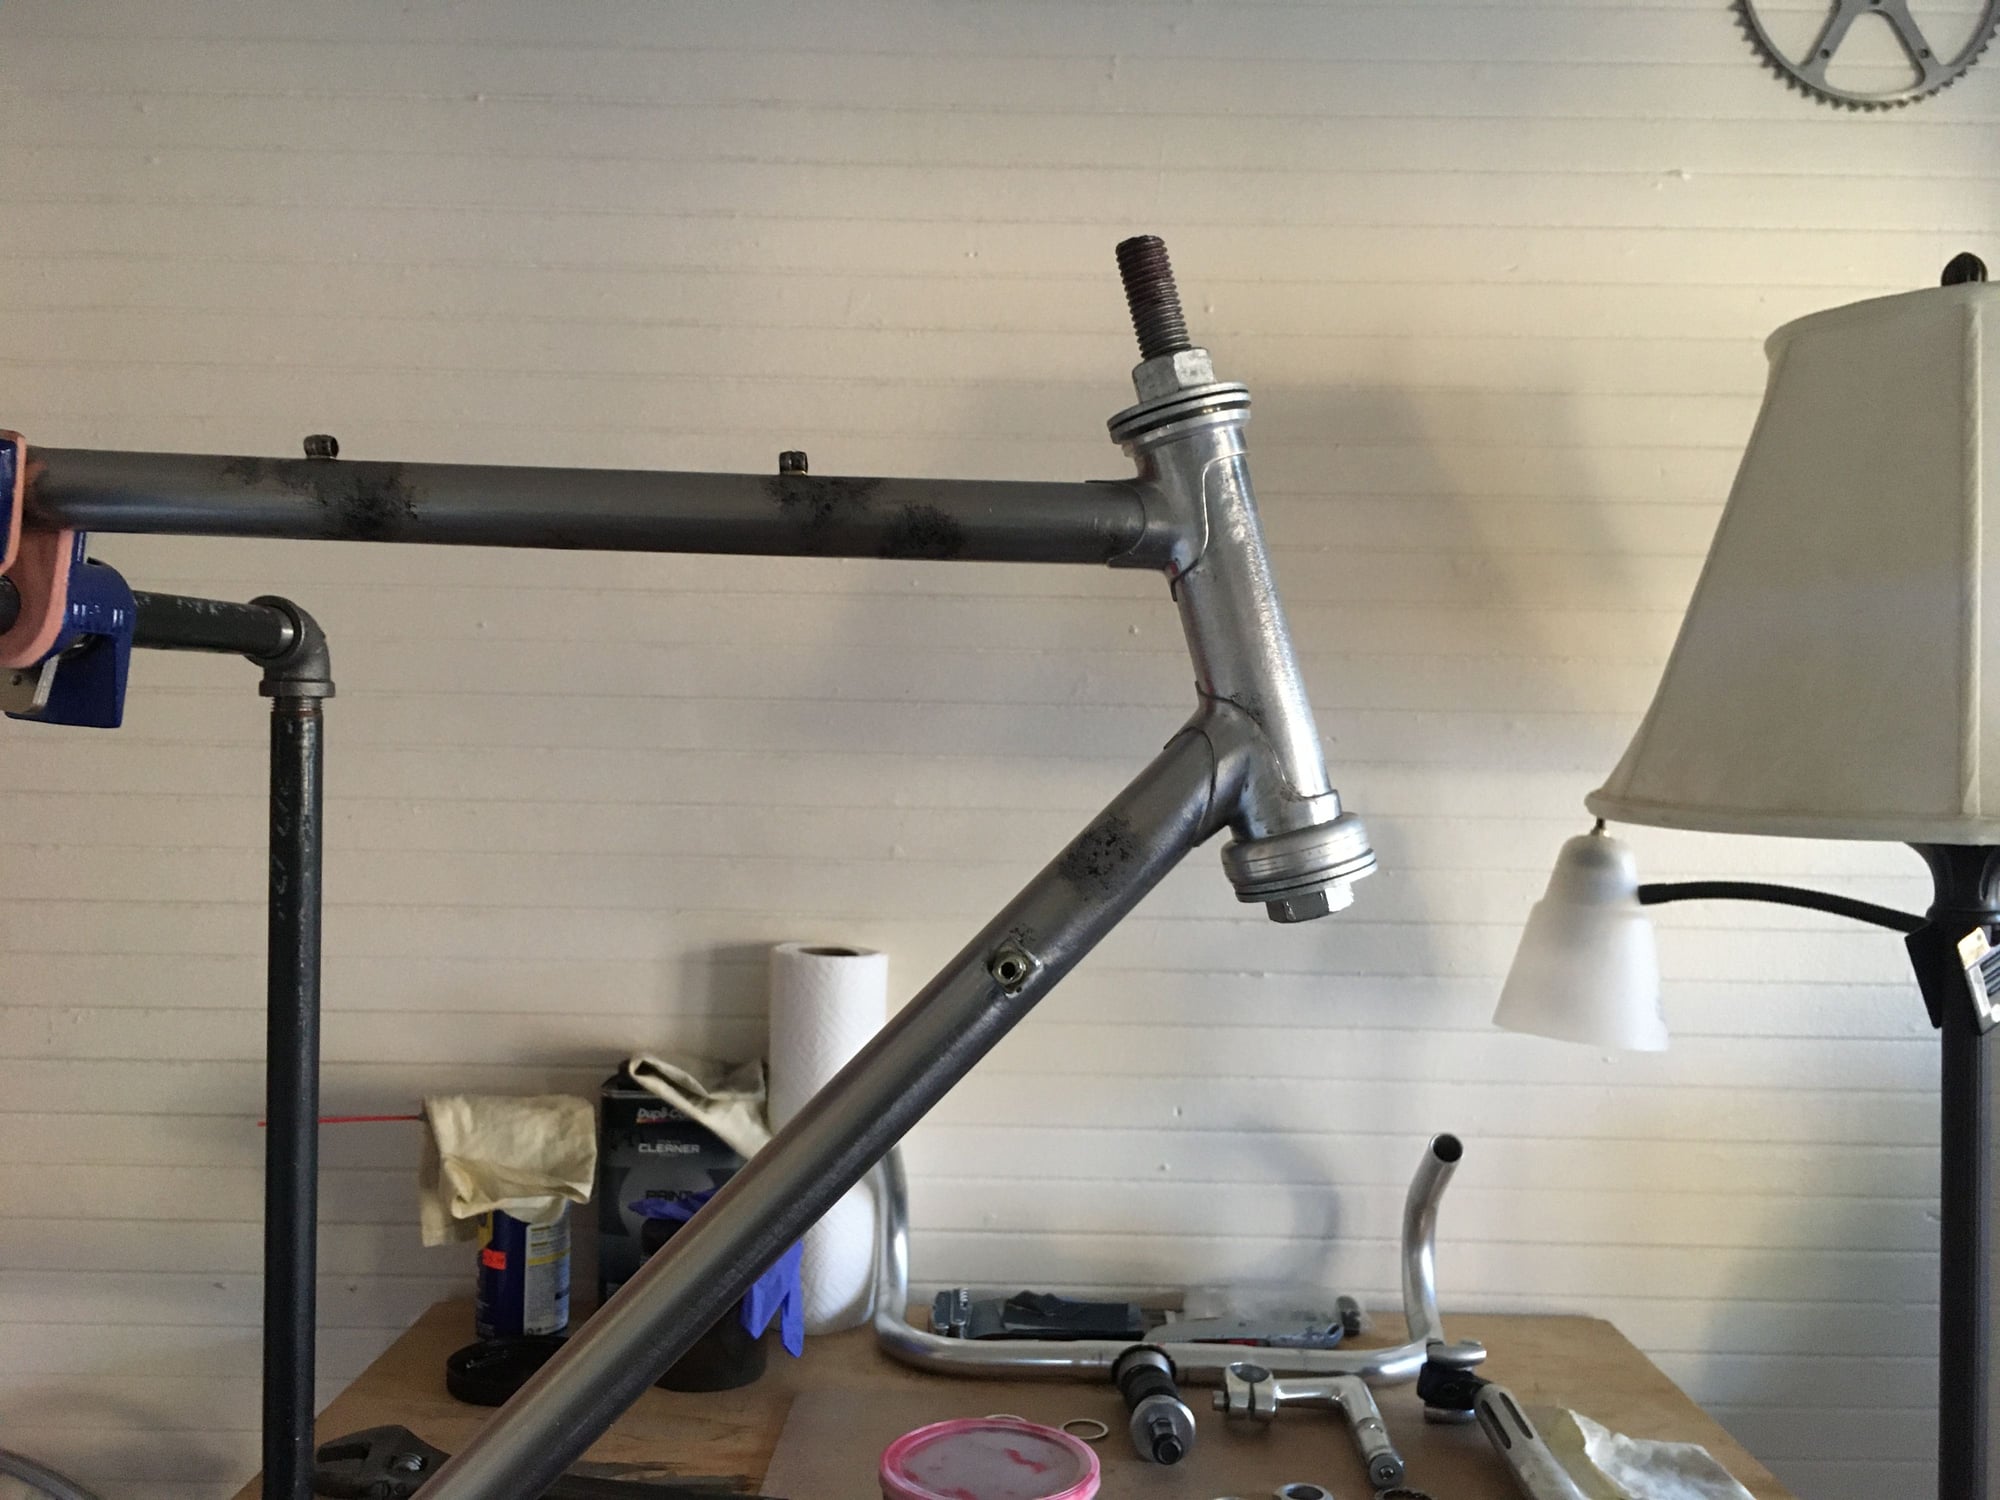
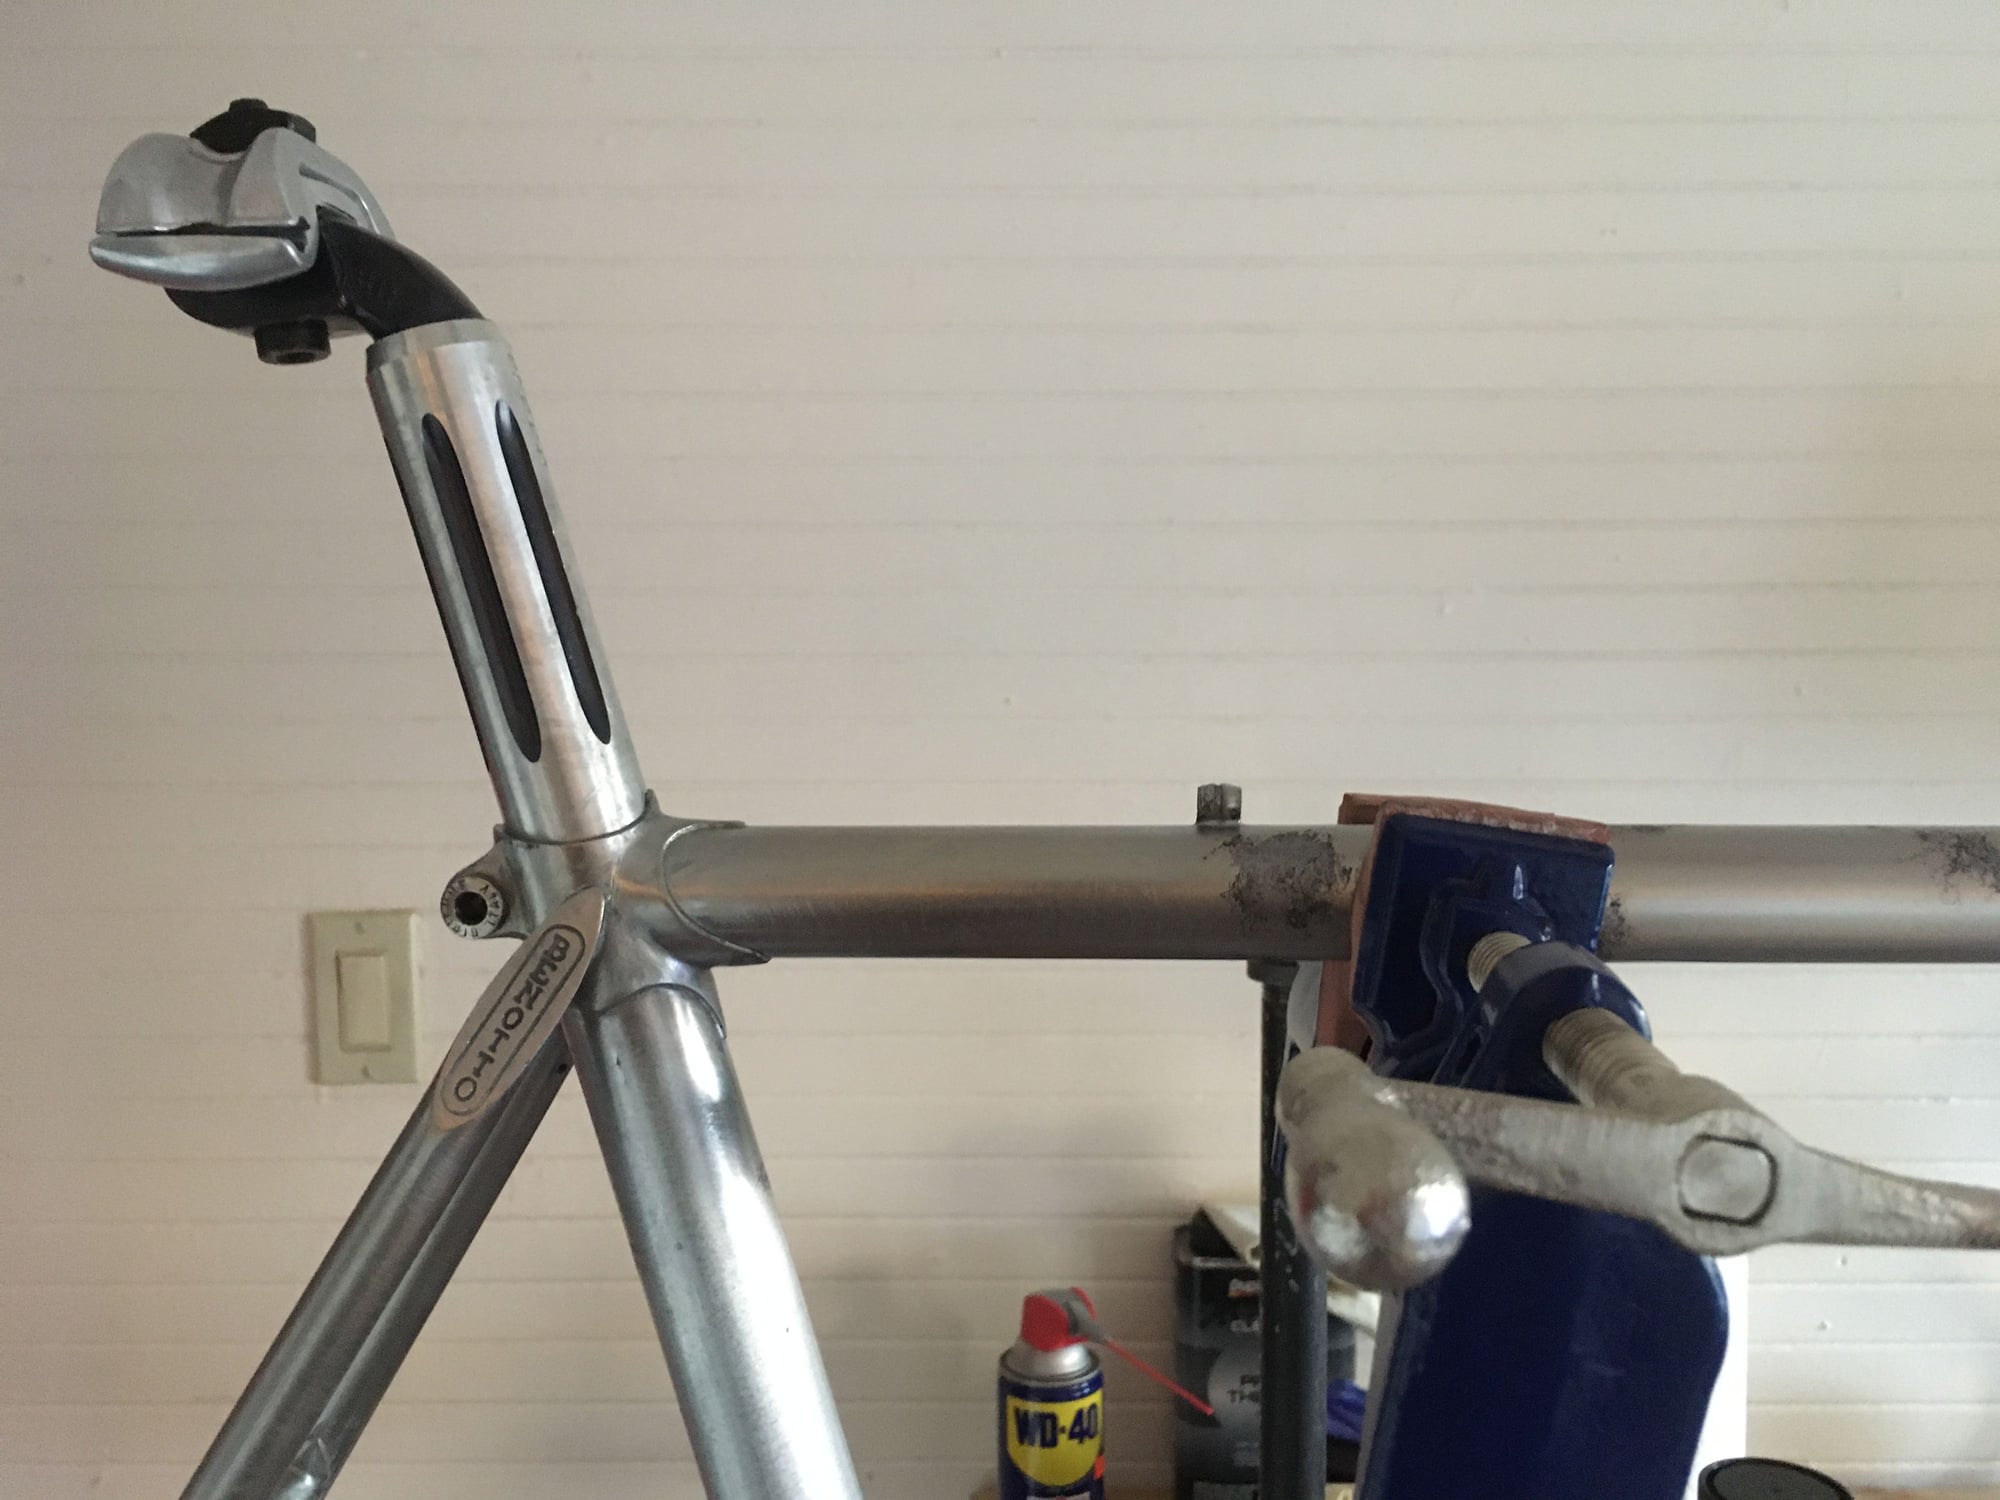
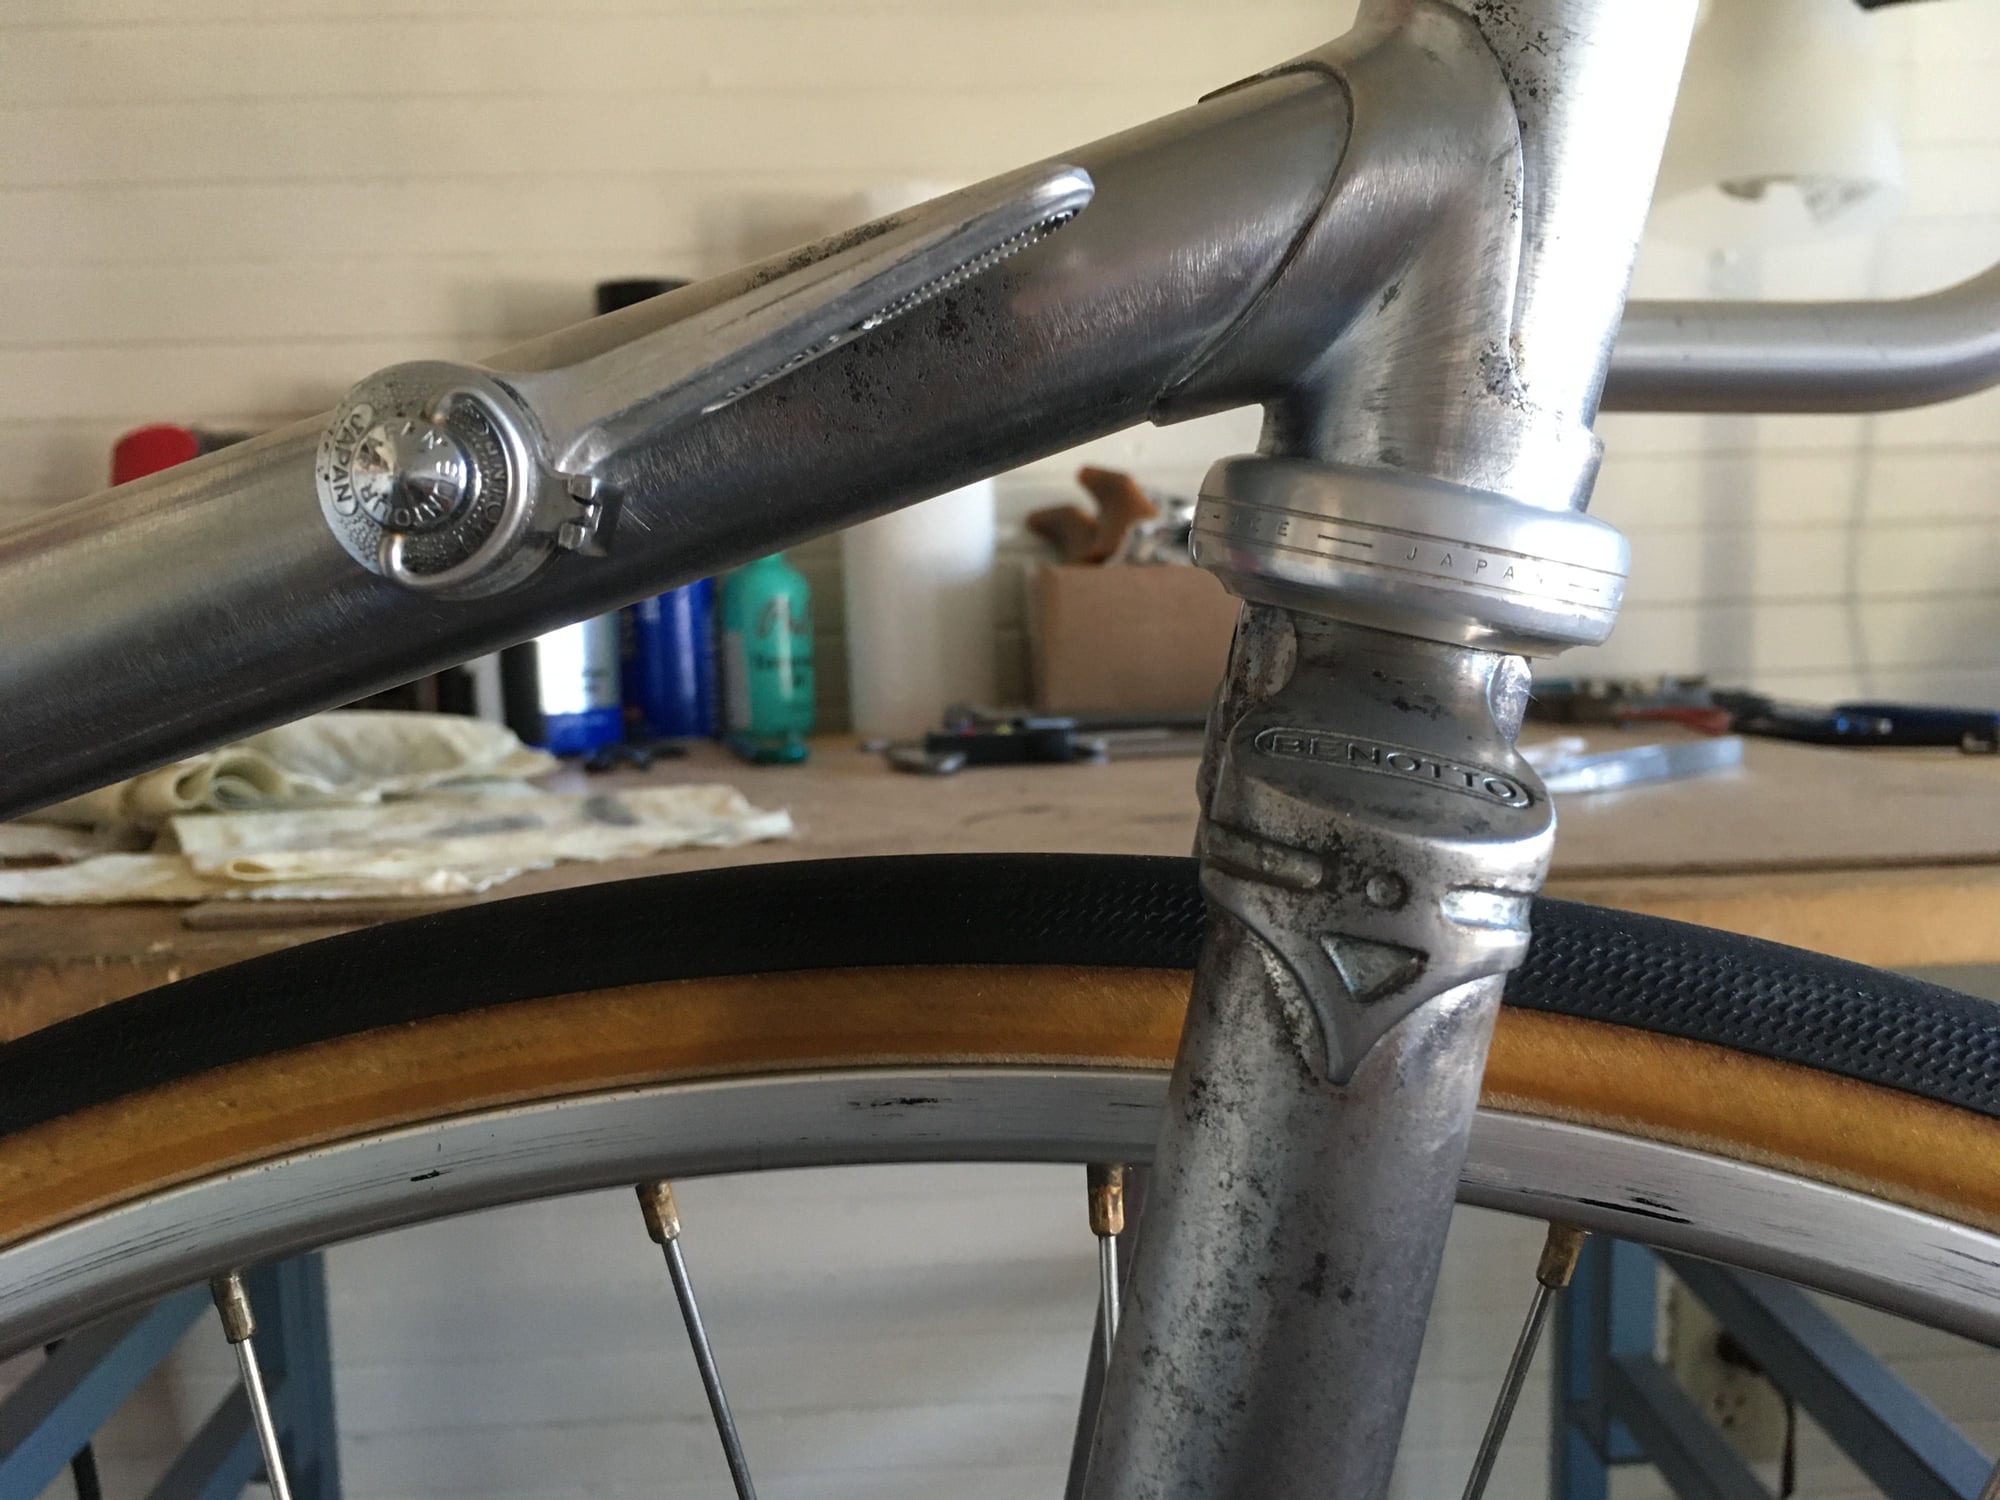
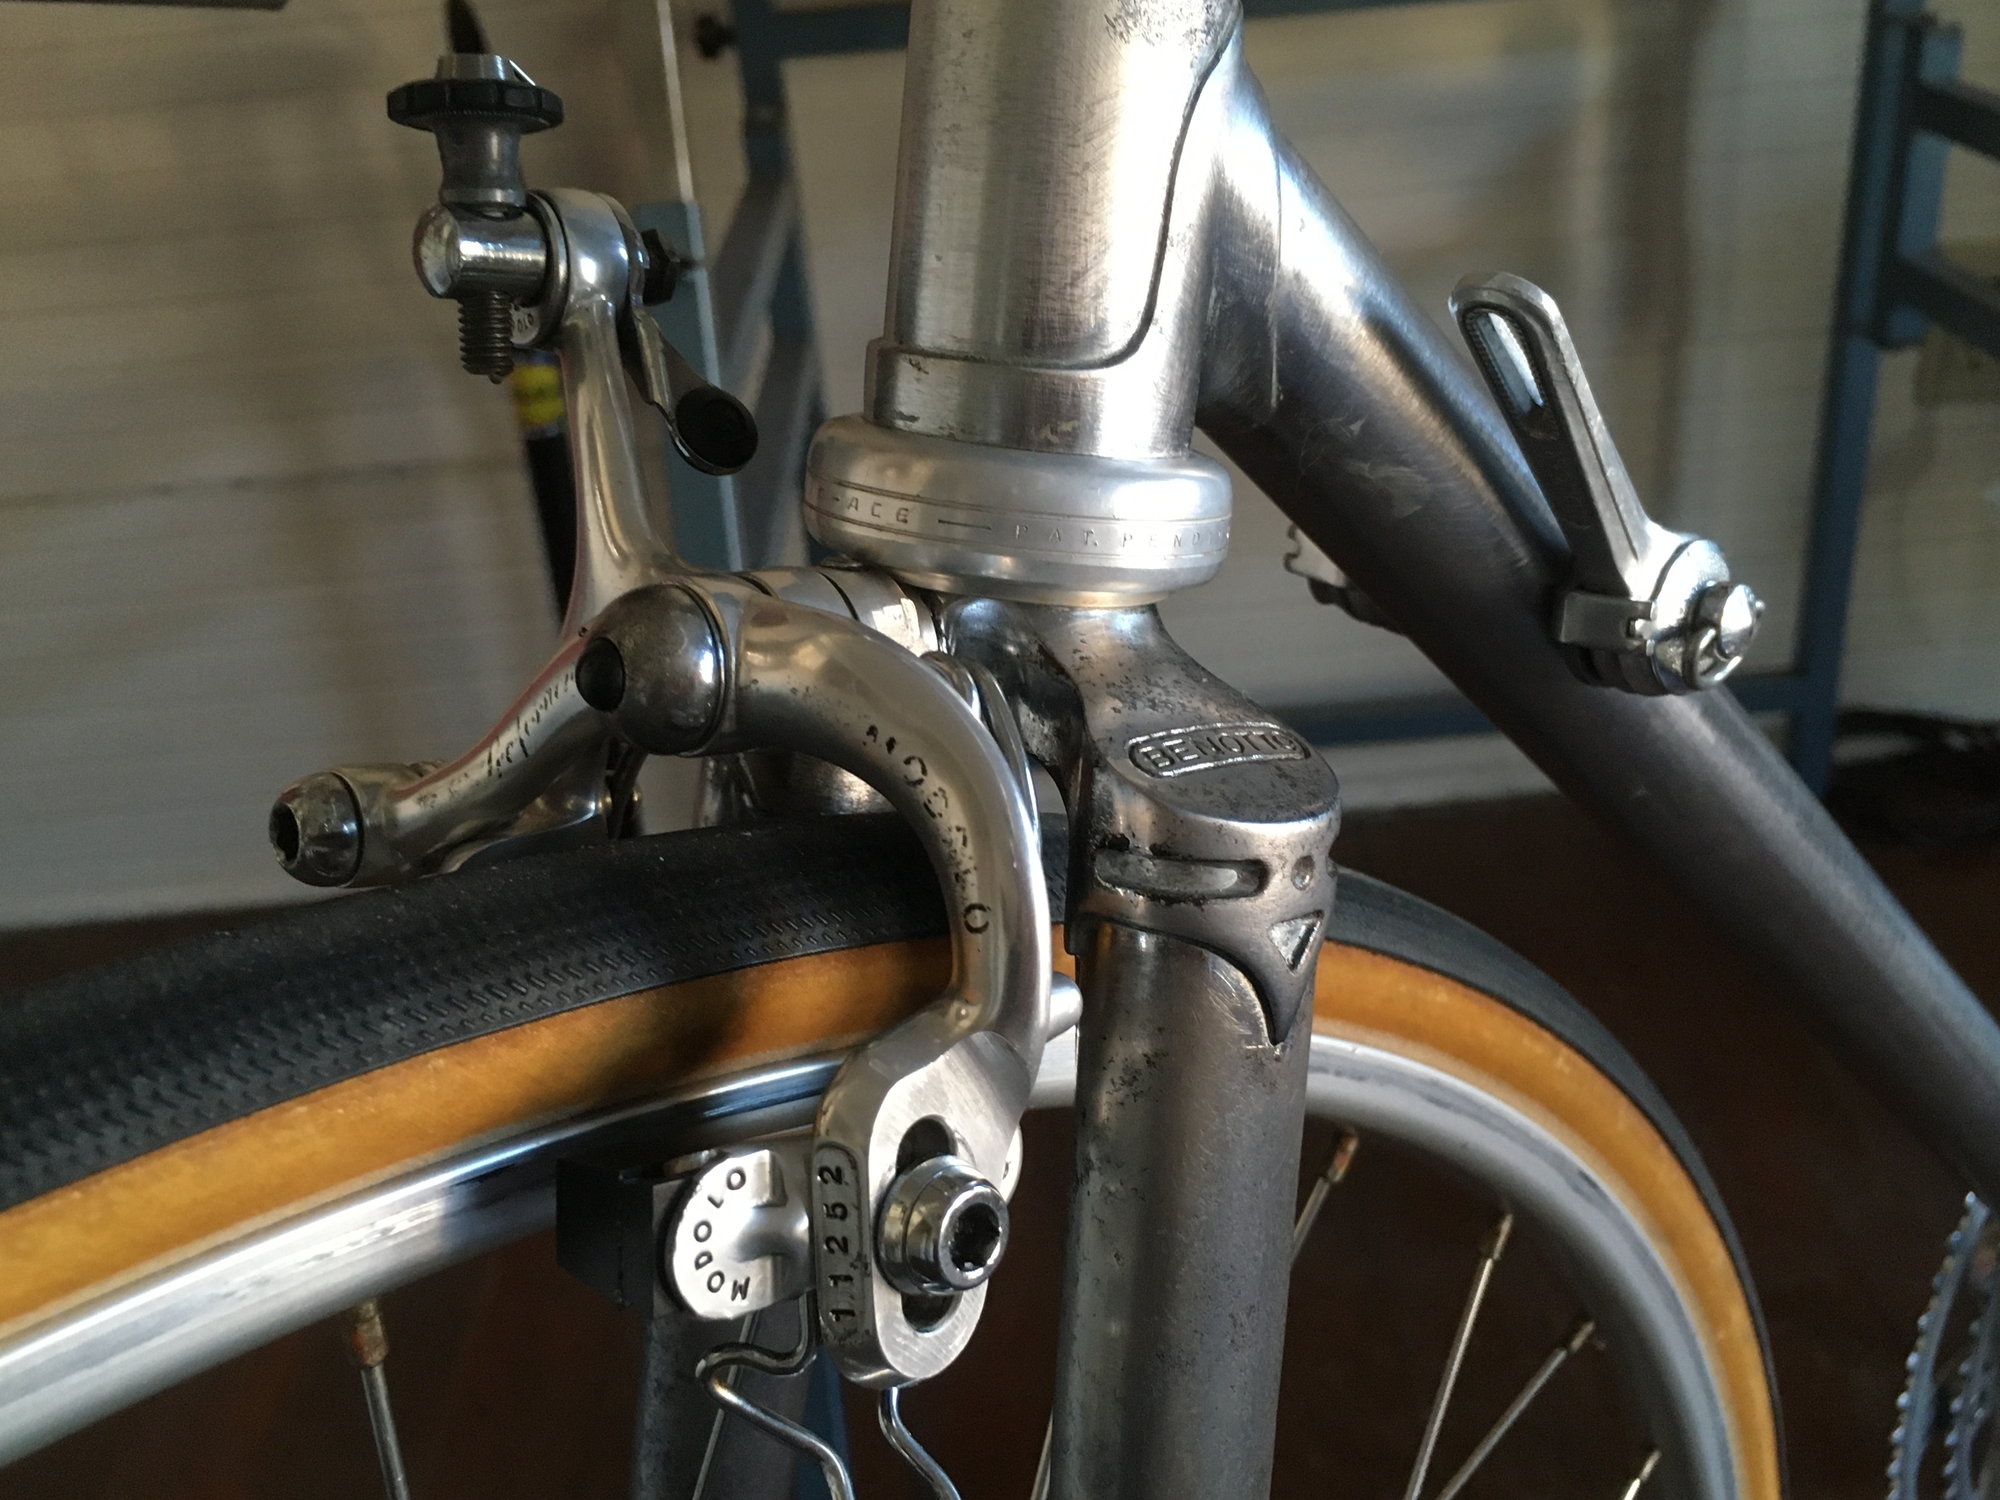
Upon getting the frame clean, it was time to fit some Dura Ace to the head tube:
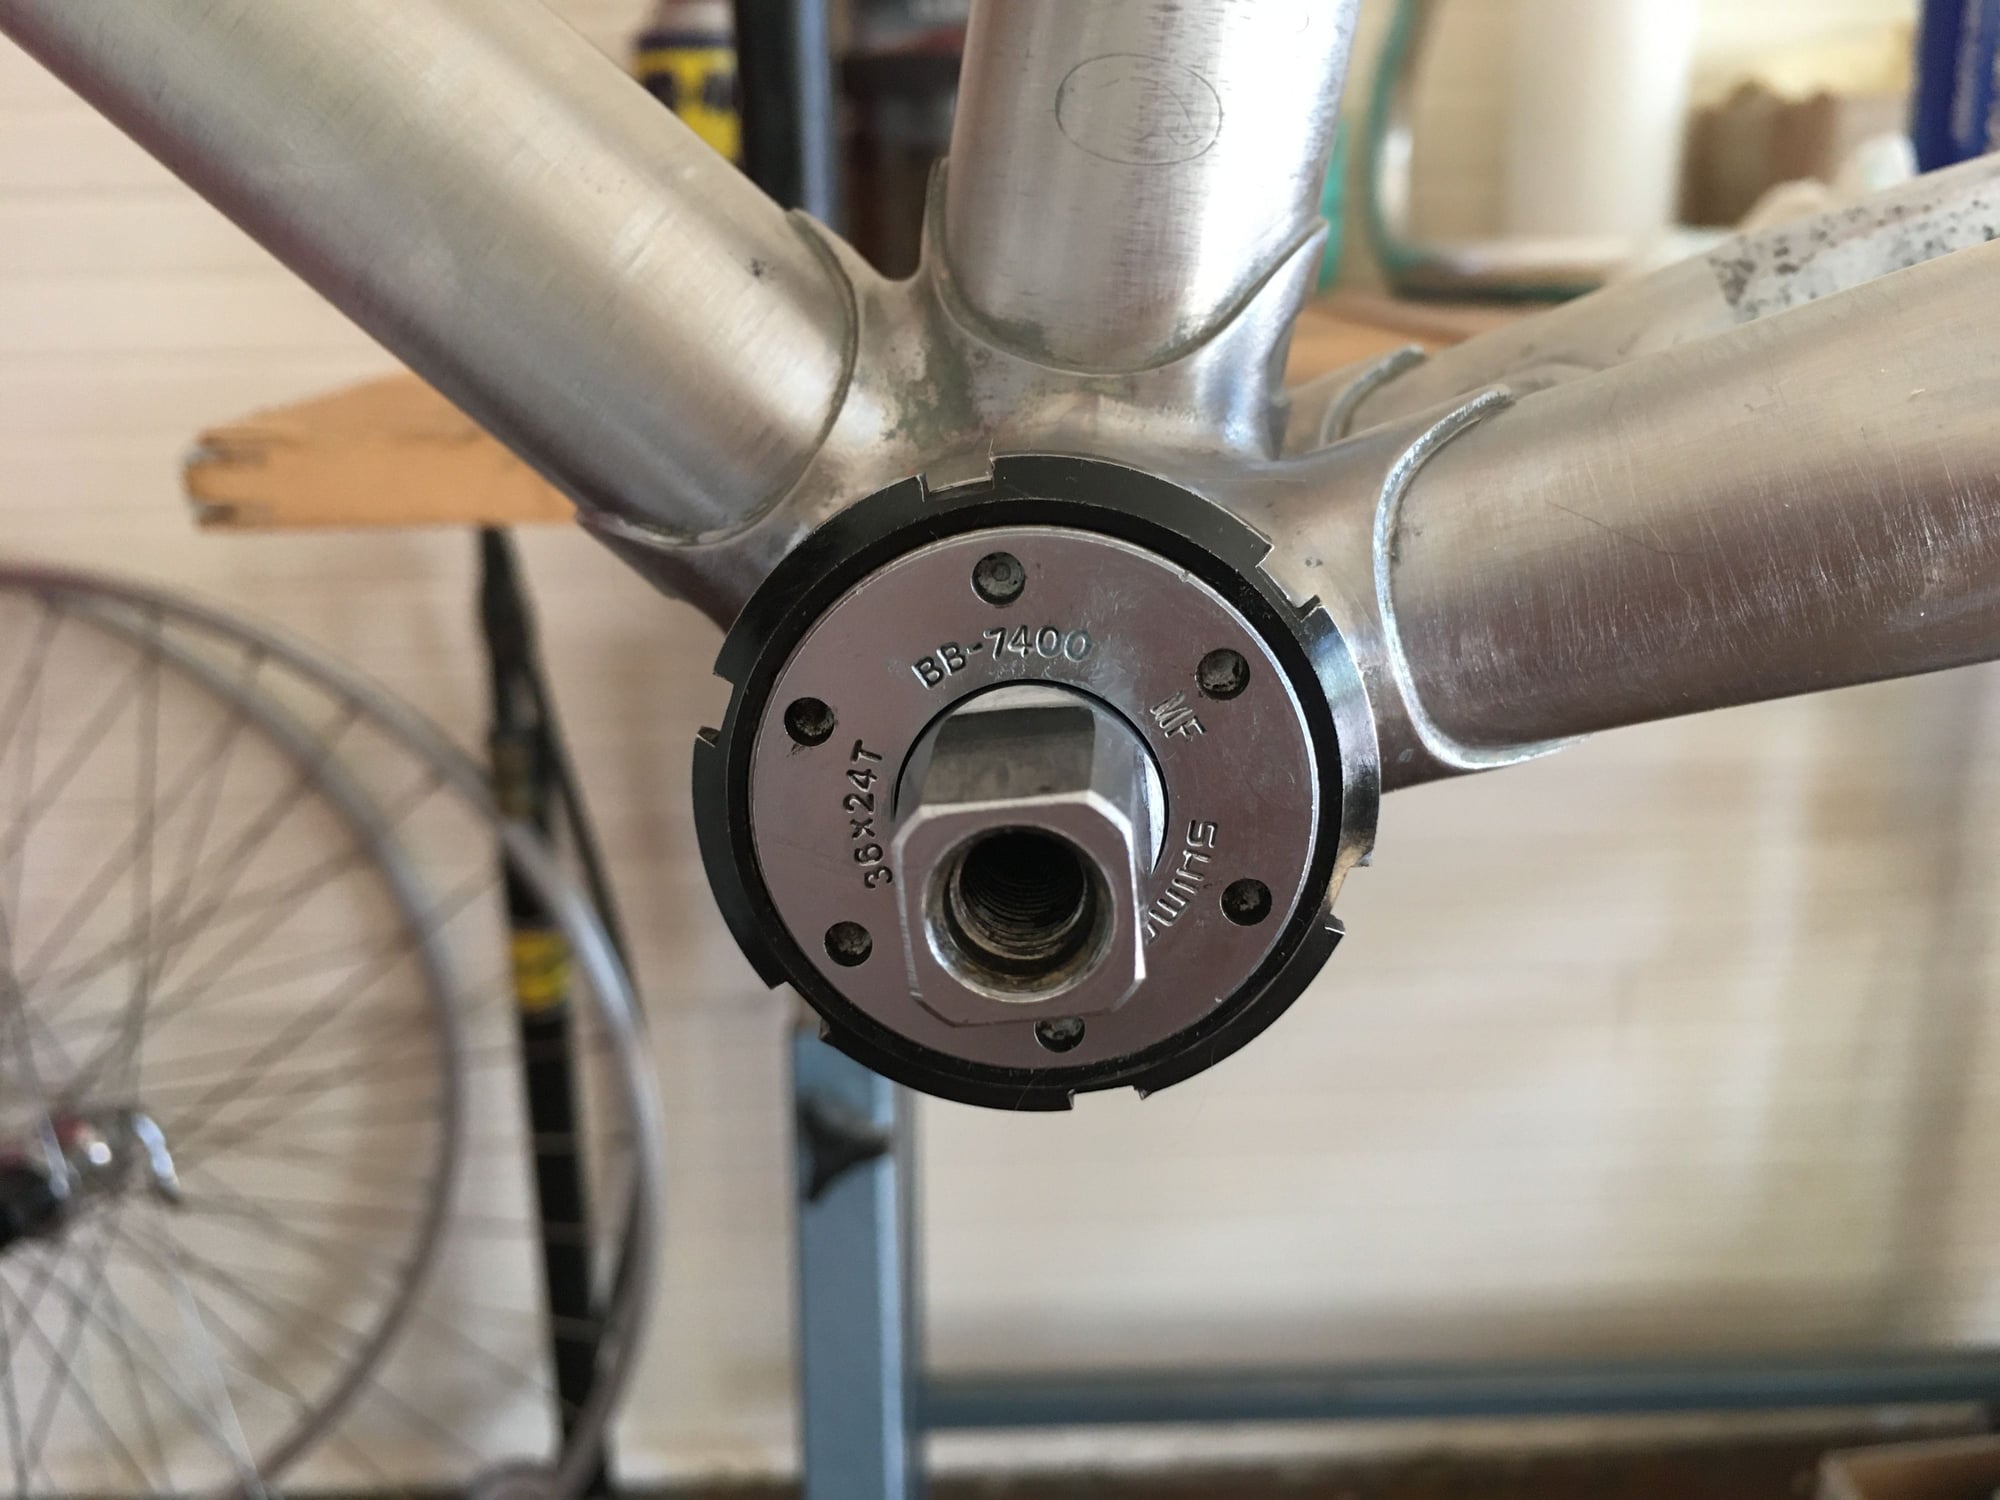
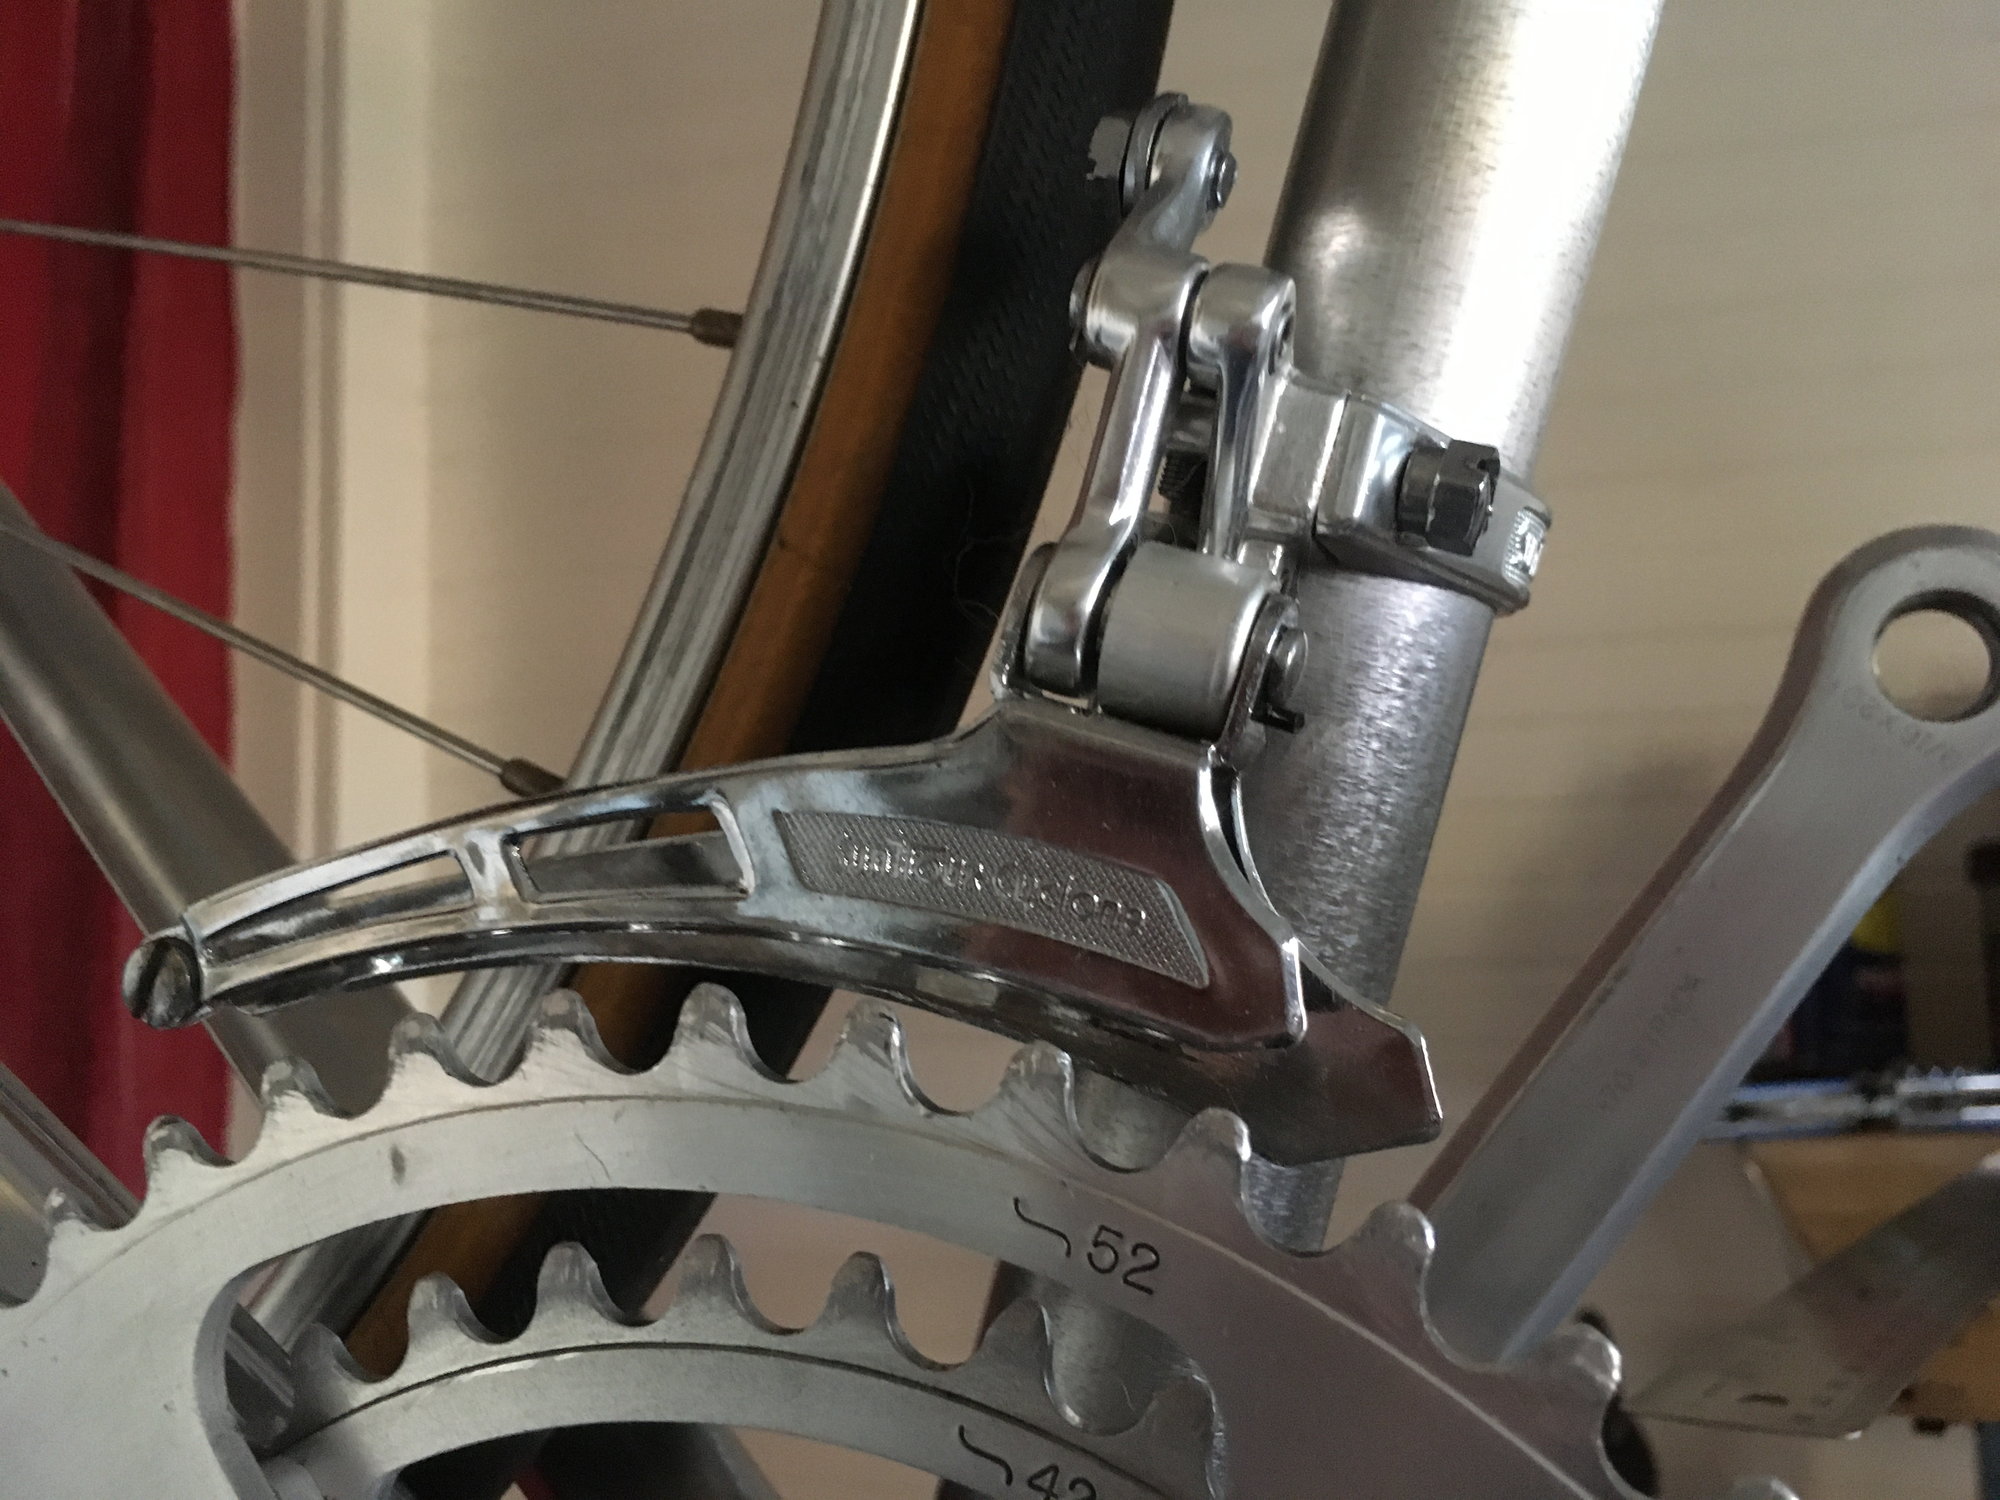
A little more Dura Ace down low:
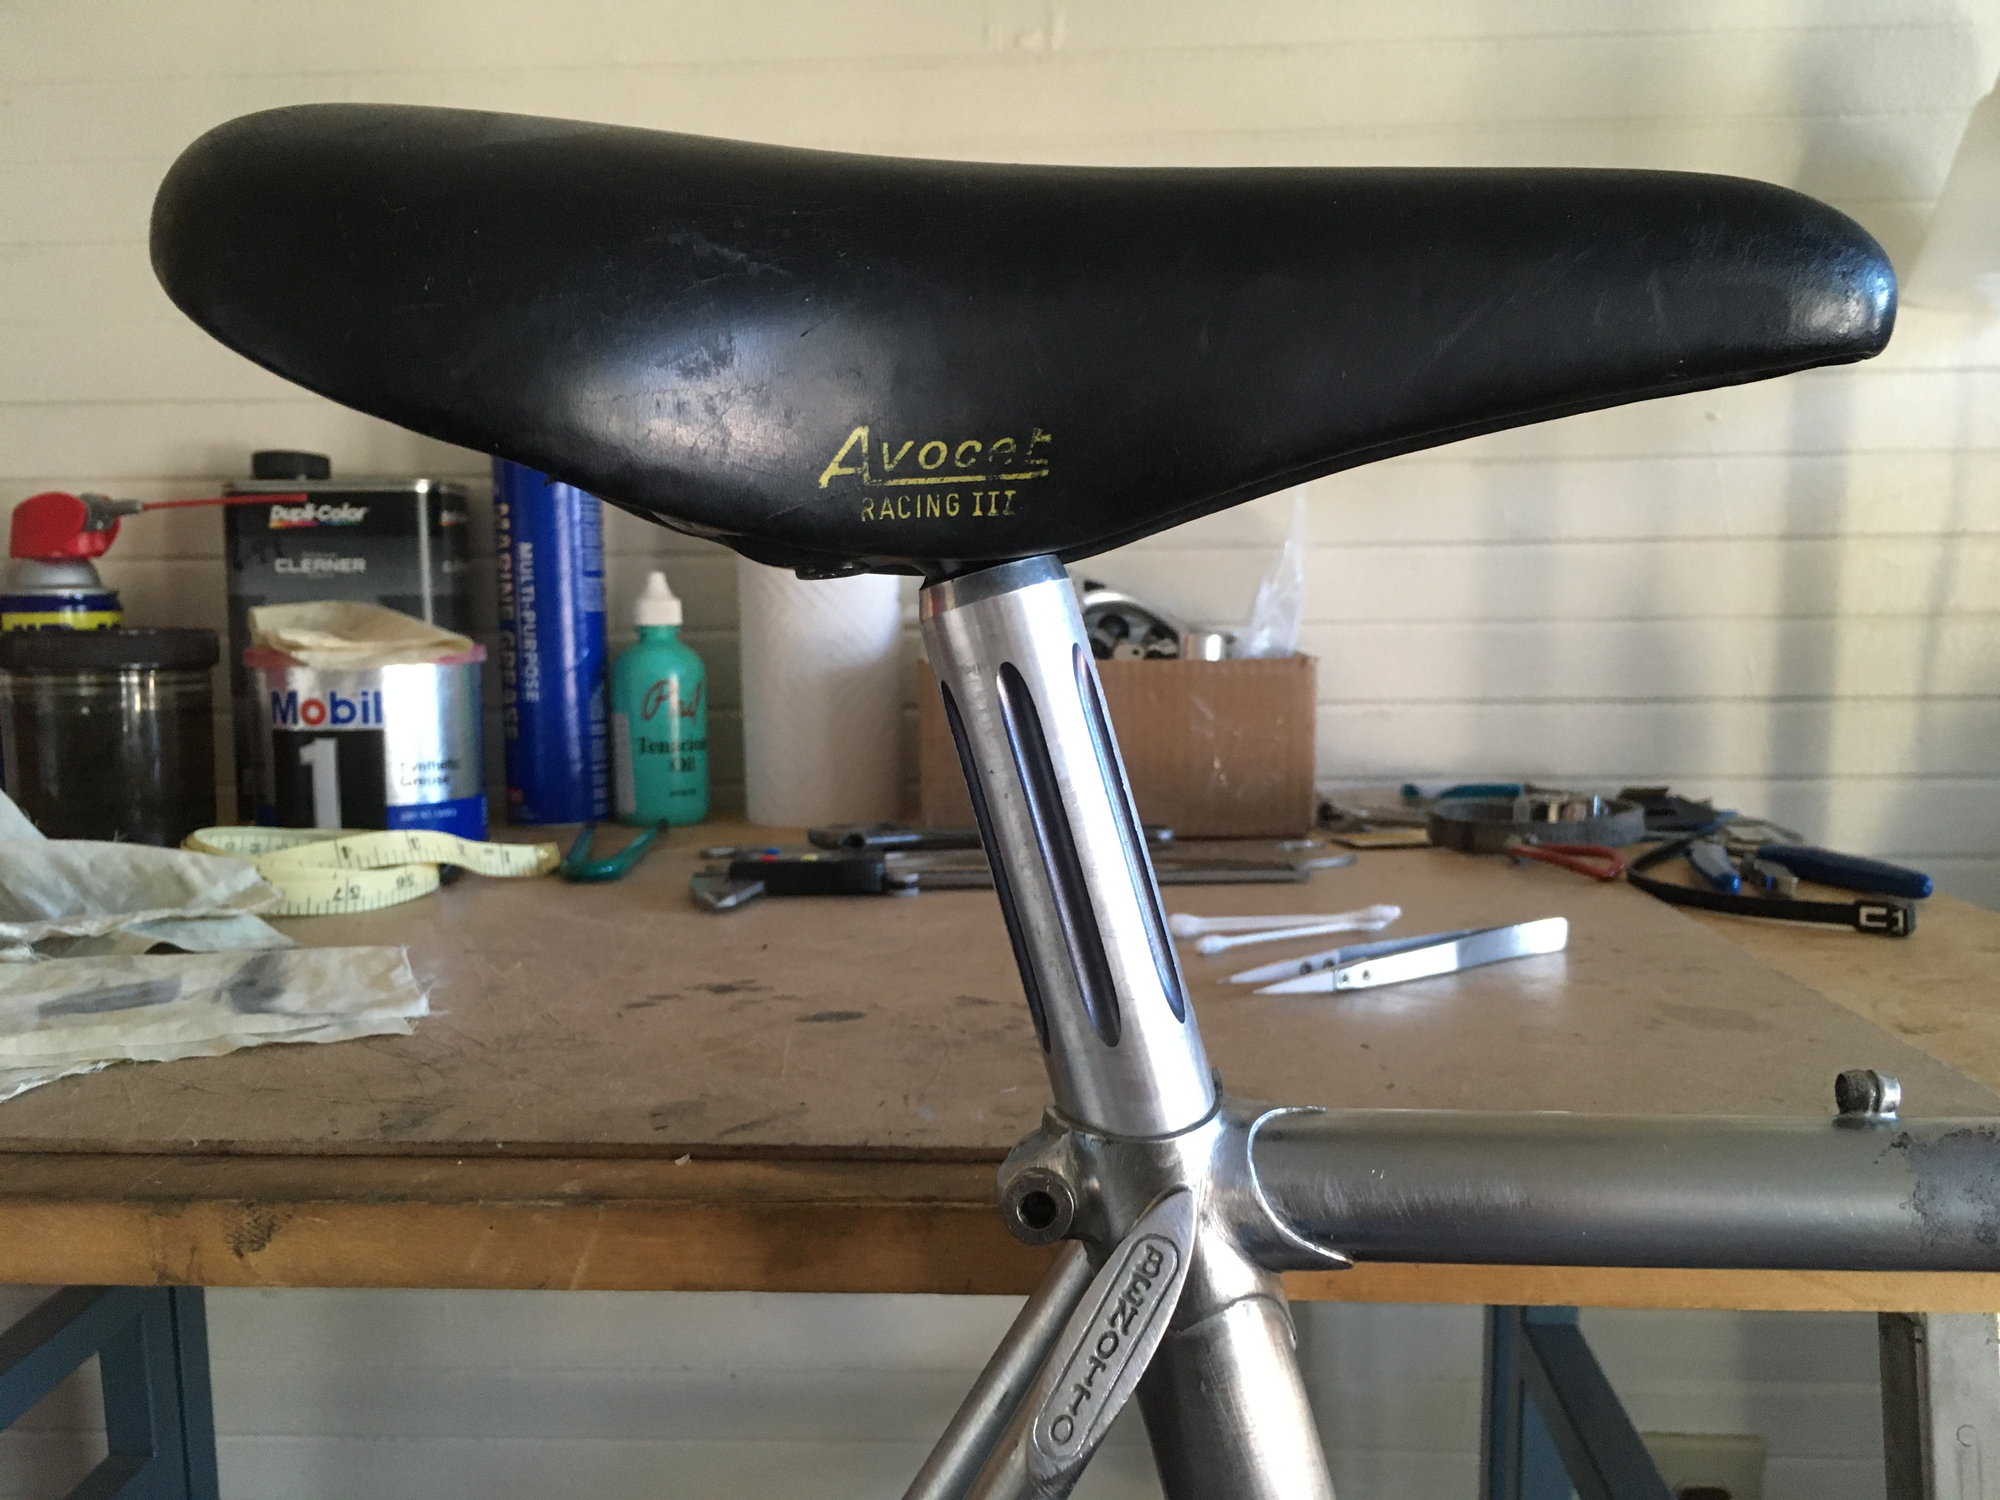
I started getting sketched out by clamping the frame in my pieced together hardware store "bike stand." Columbus SL is pretty fine stuff. Much wiser to clamp to the post... 3ttt installed:
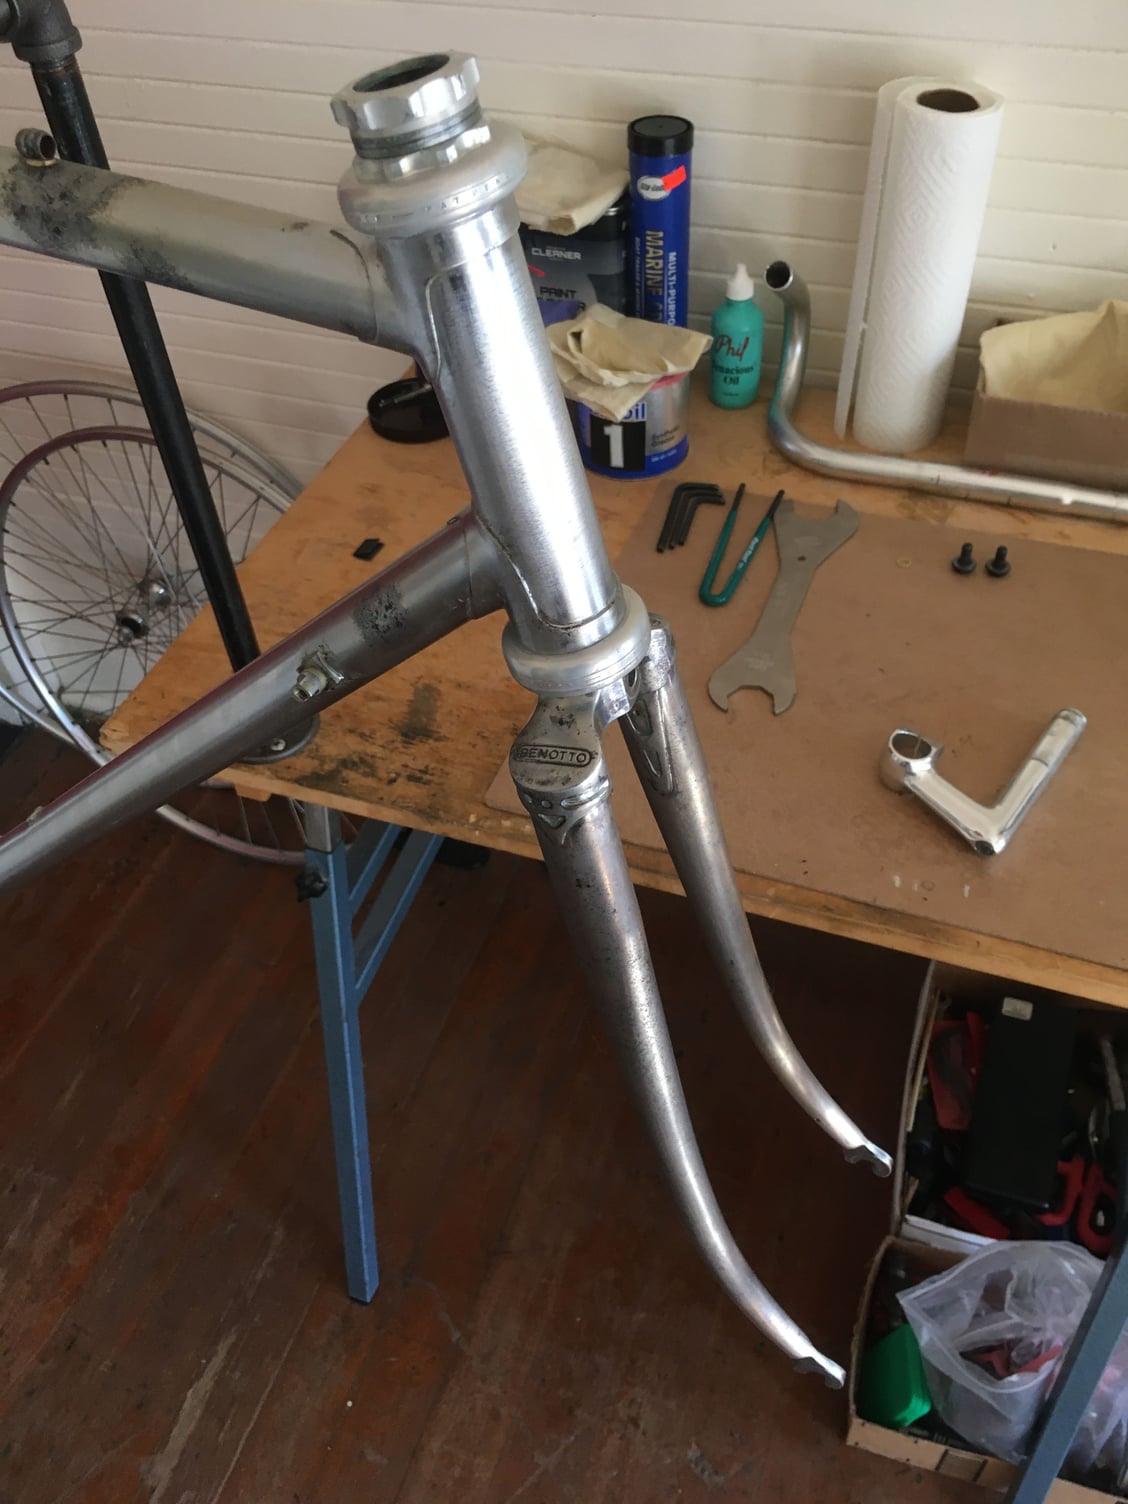
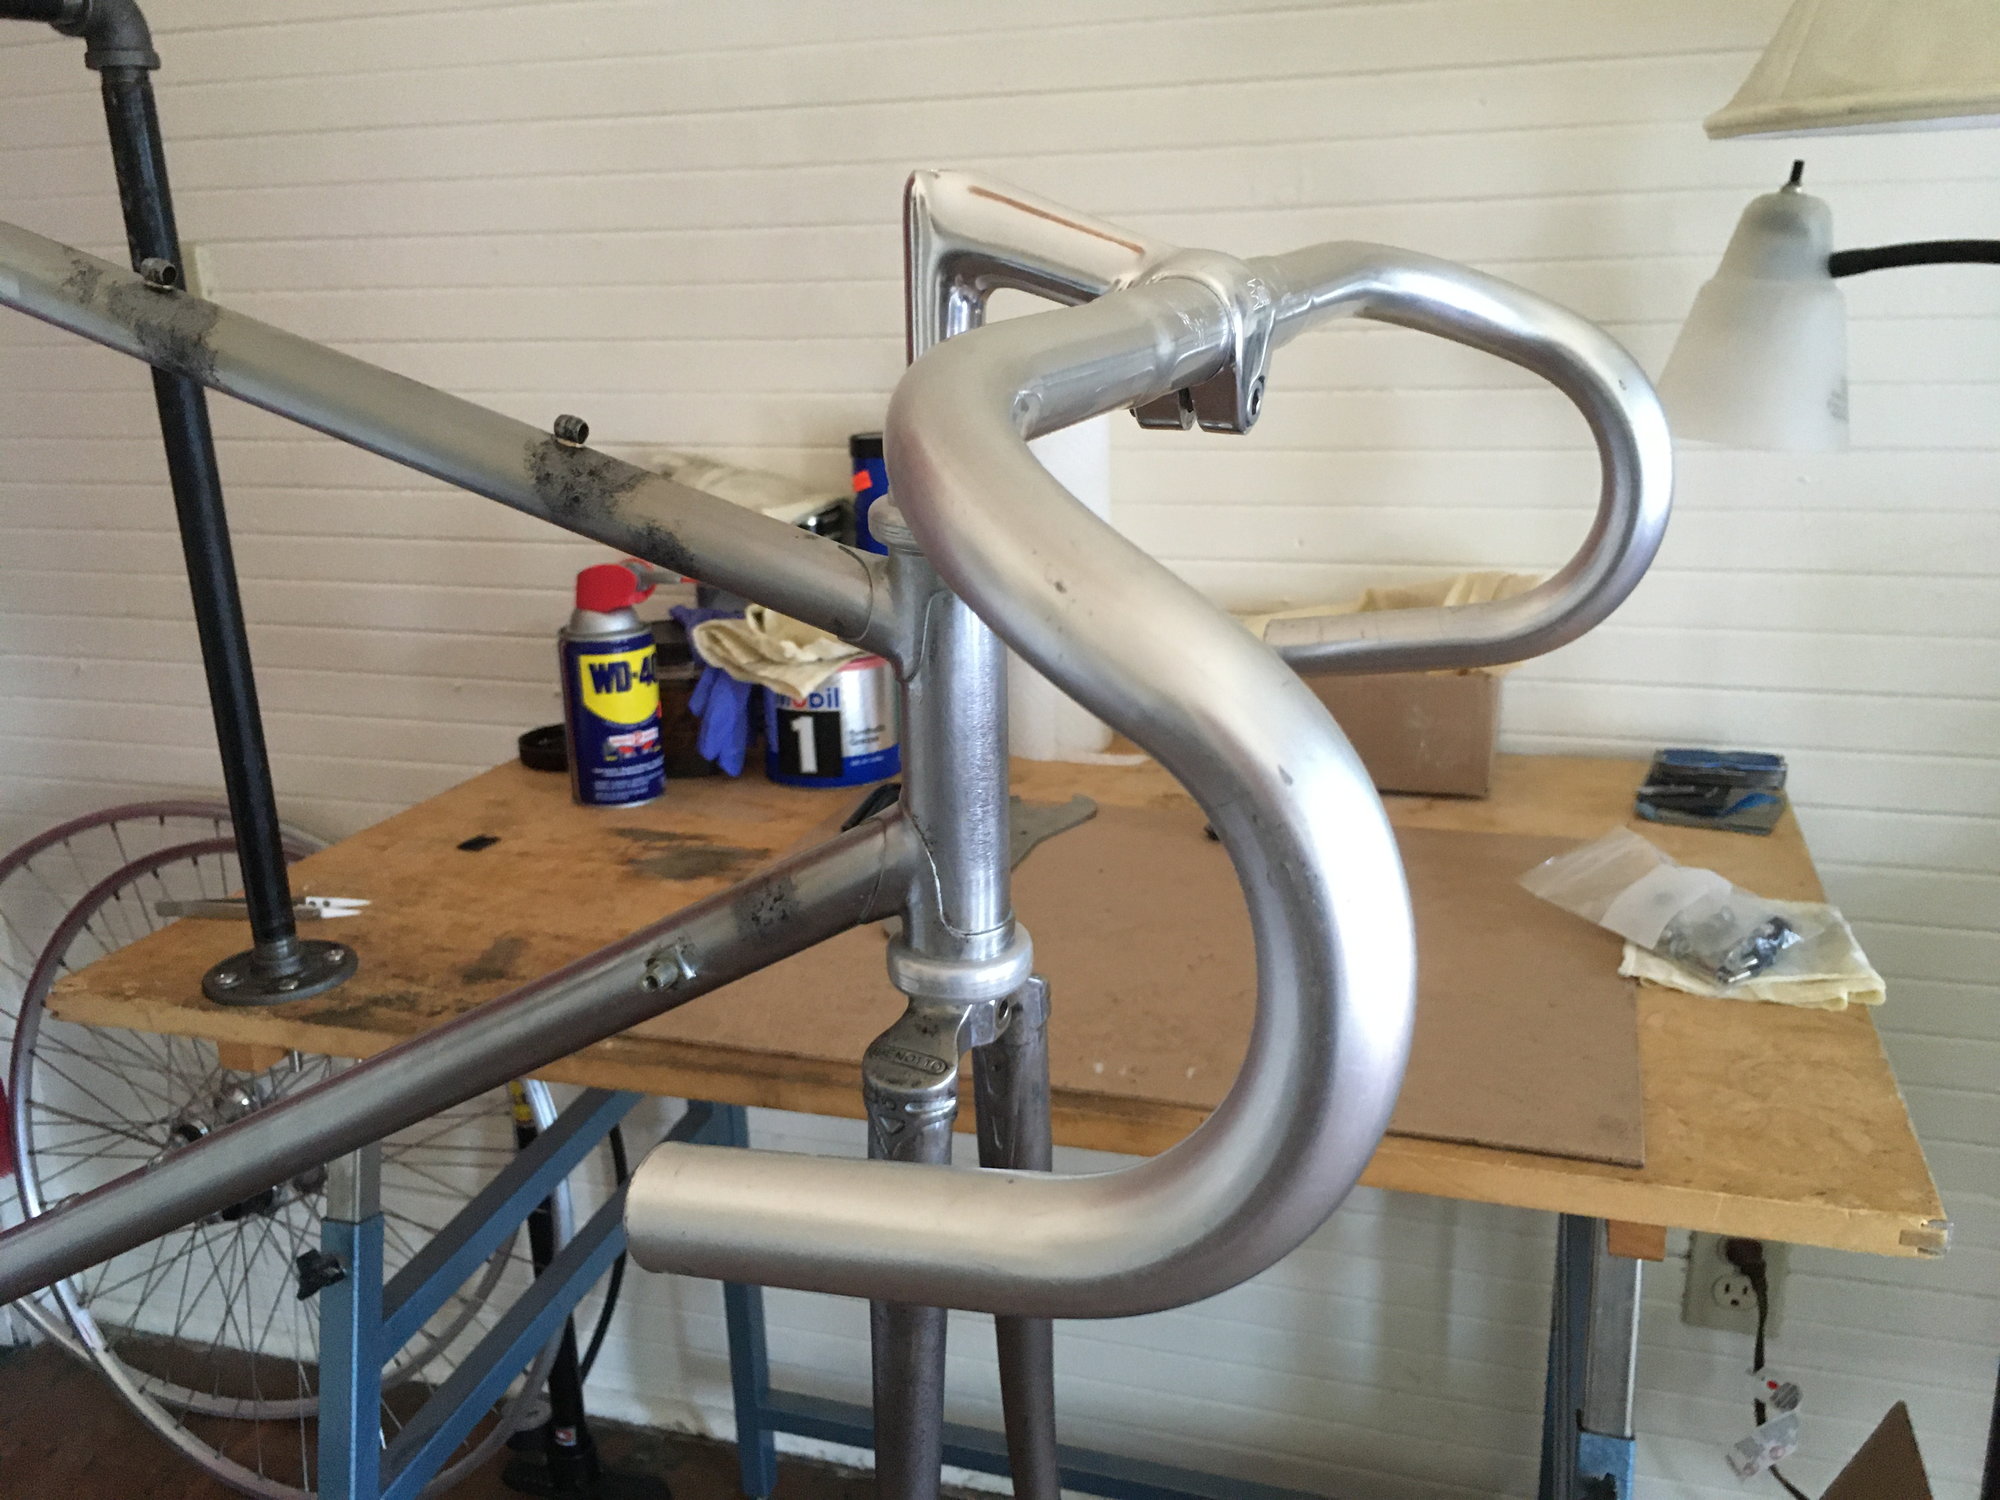
Next, the fork, followed by more 3ttt to get the cockpit started:
-- -- --
Another mention of gratitude for Nemosengineer who supplied the stem as well as a few other wonderful items to help with this project. Your generosity is not taken for granted Sir. Thank you.
A little more Dura Ace down low:
I started getting sketched out by clamping the frame in my pieced together hardware store "bike stand." Columbus SL is pretty fine stuff. Much wiser to clamp to the post... 3ttt installed:
Next, the fork, followed by more 3ttt to get the cockpit started:
-- -- --
Another mention of gratitude for Nemosengineer who supplied the stem as well as a few other wonderful items to help with this project. Your generosity is not taken for granted Sir. Thank you.
Last edited by deux jambes; 07-13-20 at 08:38 AM.
Likes For deux jambes:
07-12-20, 05:32 AM
#3
Senior Member
Thread Starter
Join Date: Jul 2018
Location: Eugene, OR
Posts: 1,326
Mentioned: 64 Post(s)
Tagged: 0 Thread(s)
Quoted: 535 Post(s)
Liked 346 Times
in
196 Posts
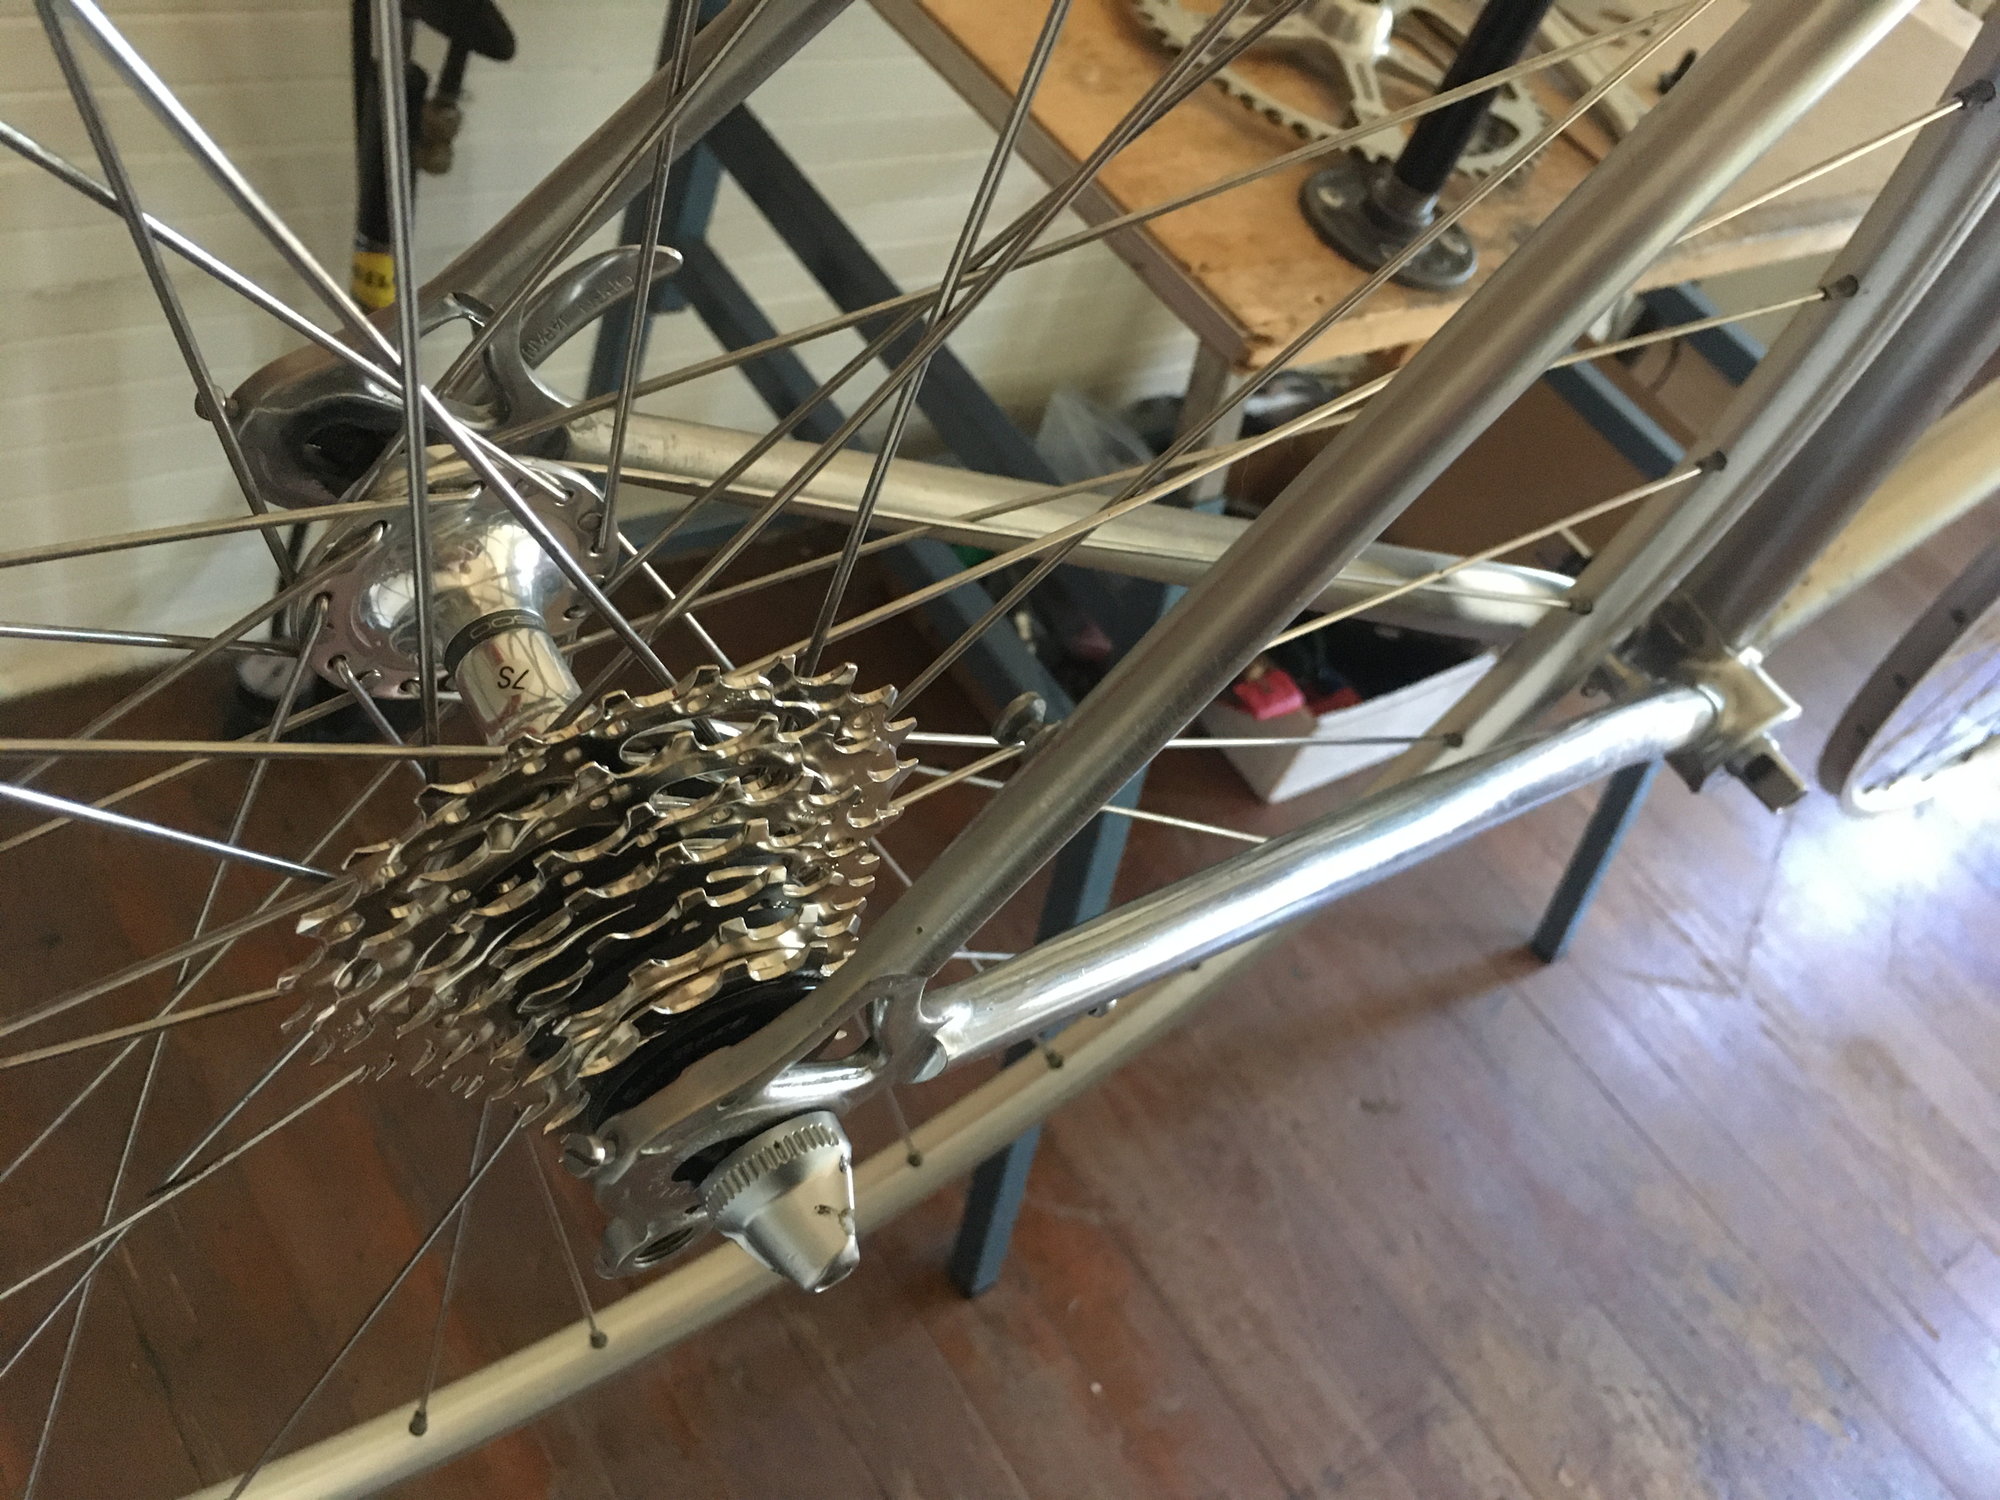
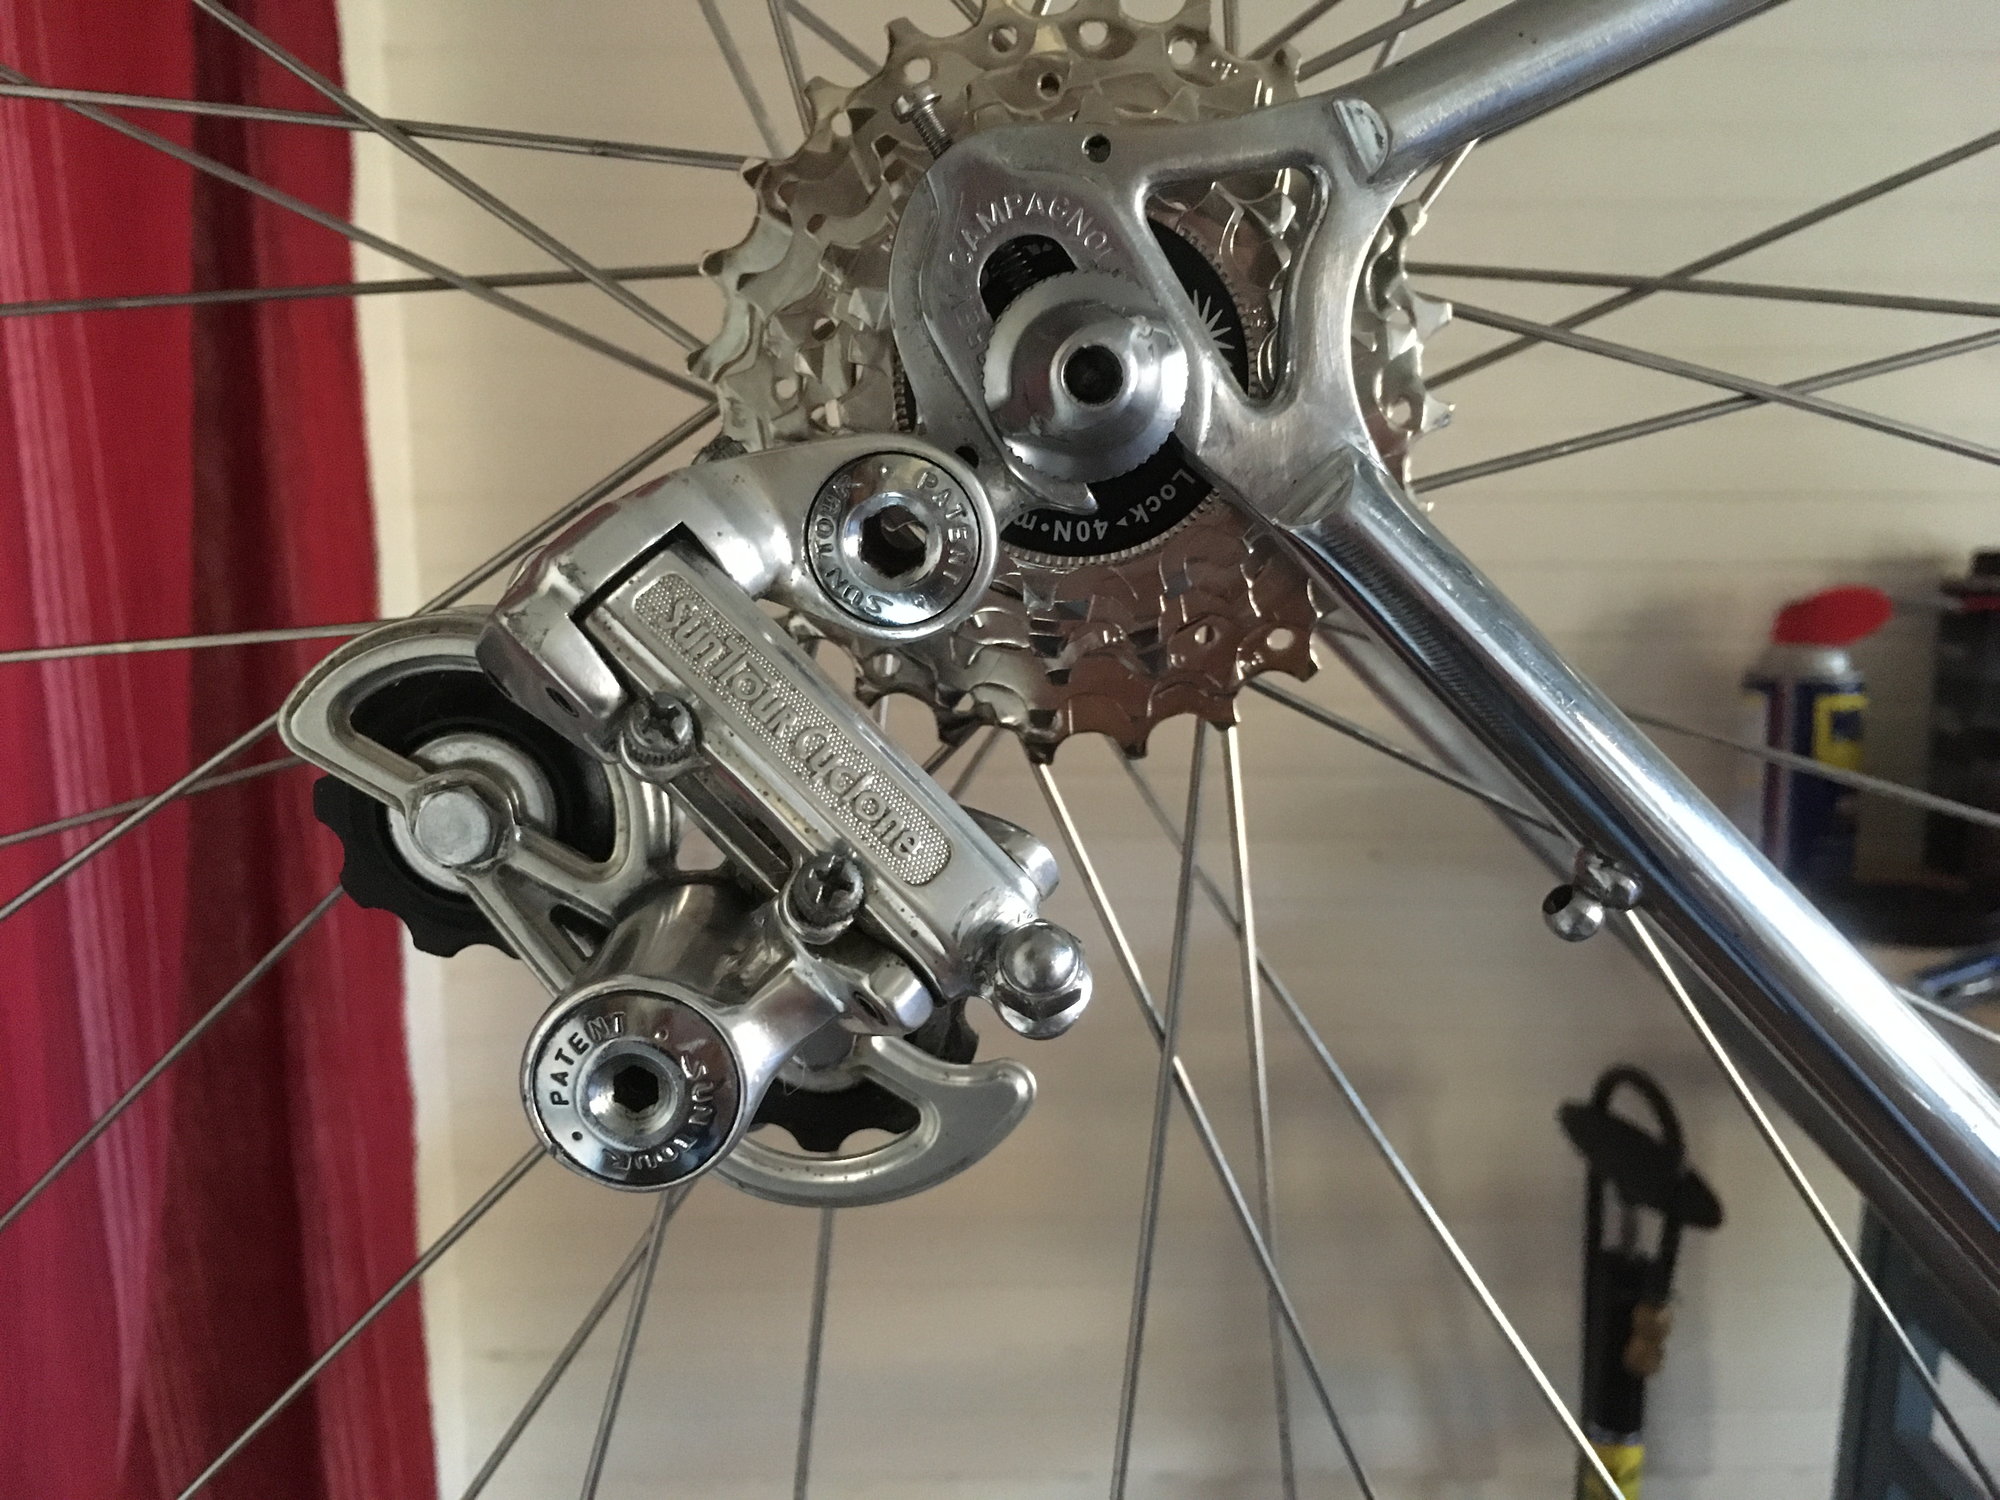
Tri Color hubs, Araya rims, and a Sunrace cassette:
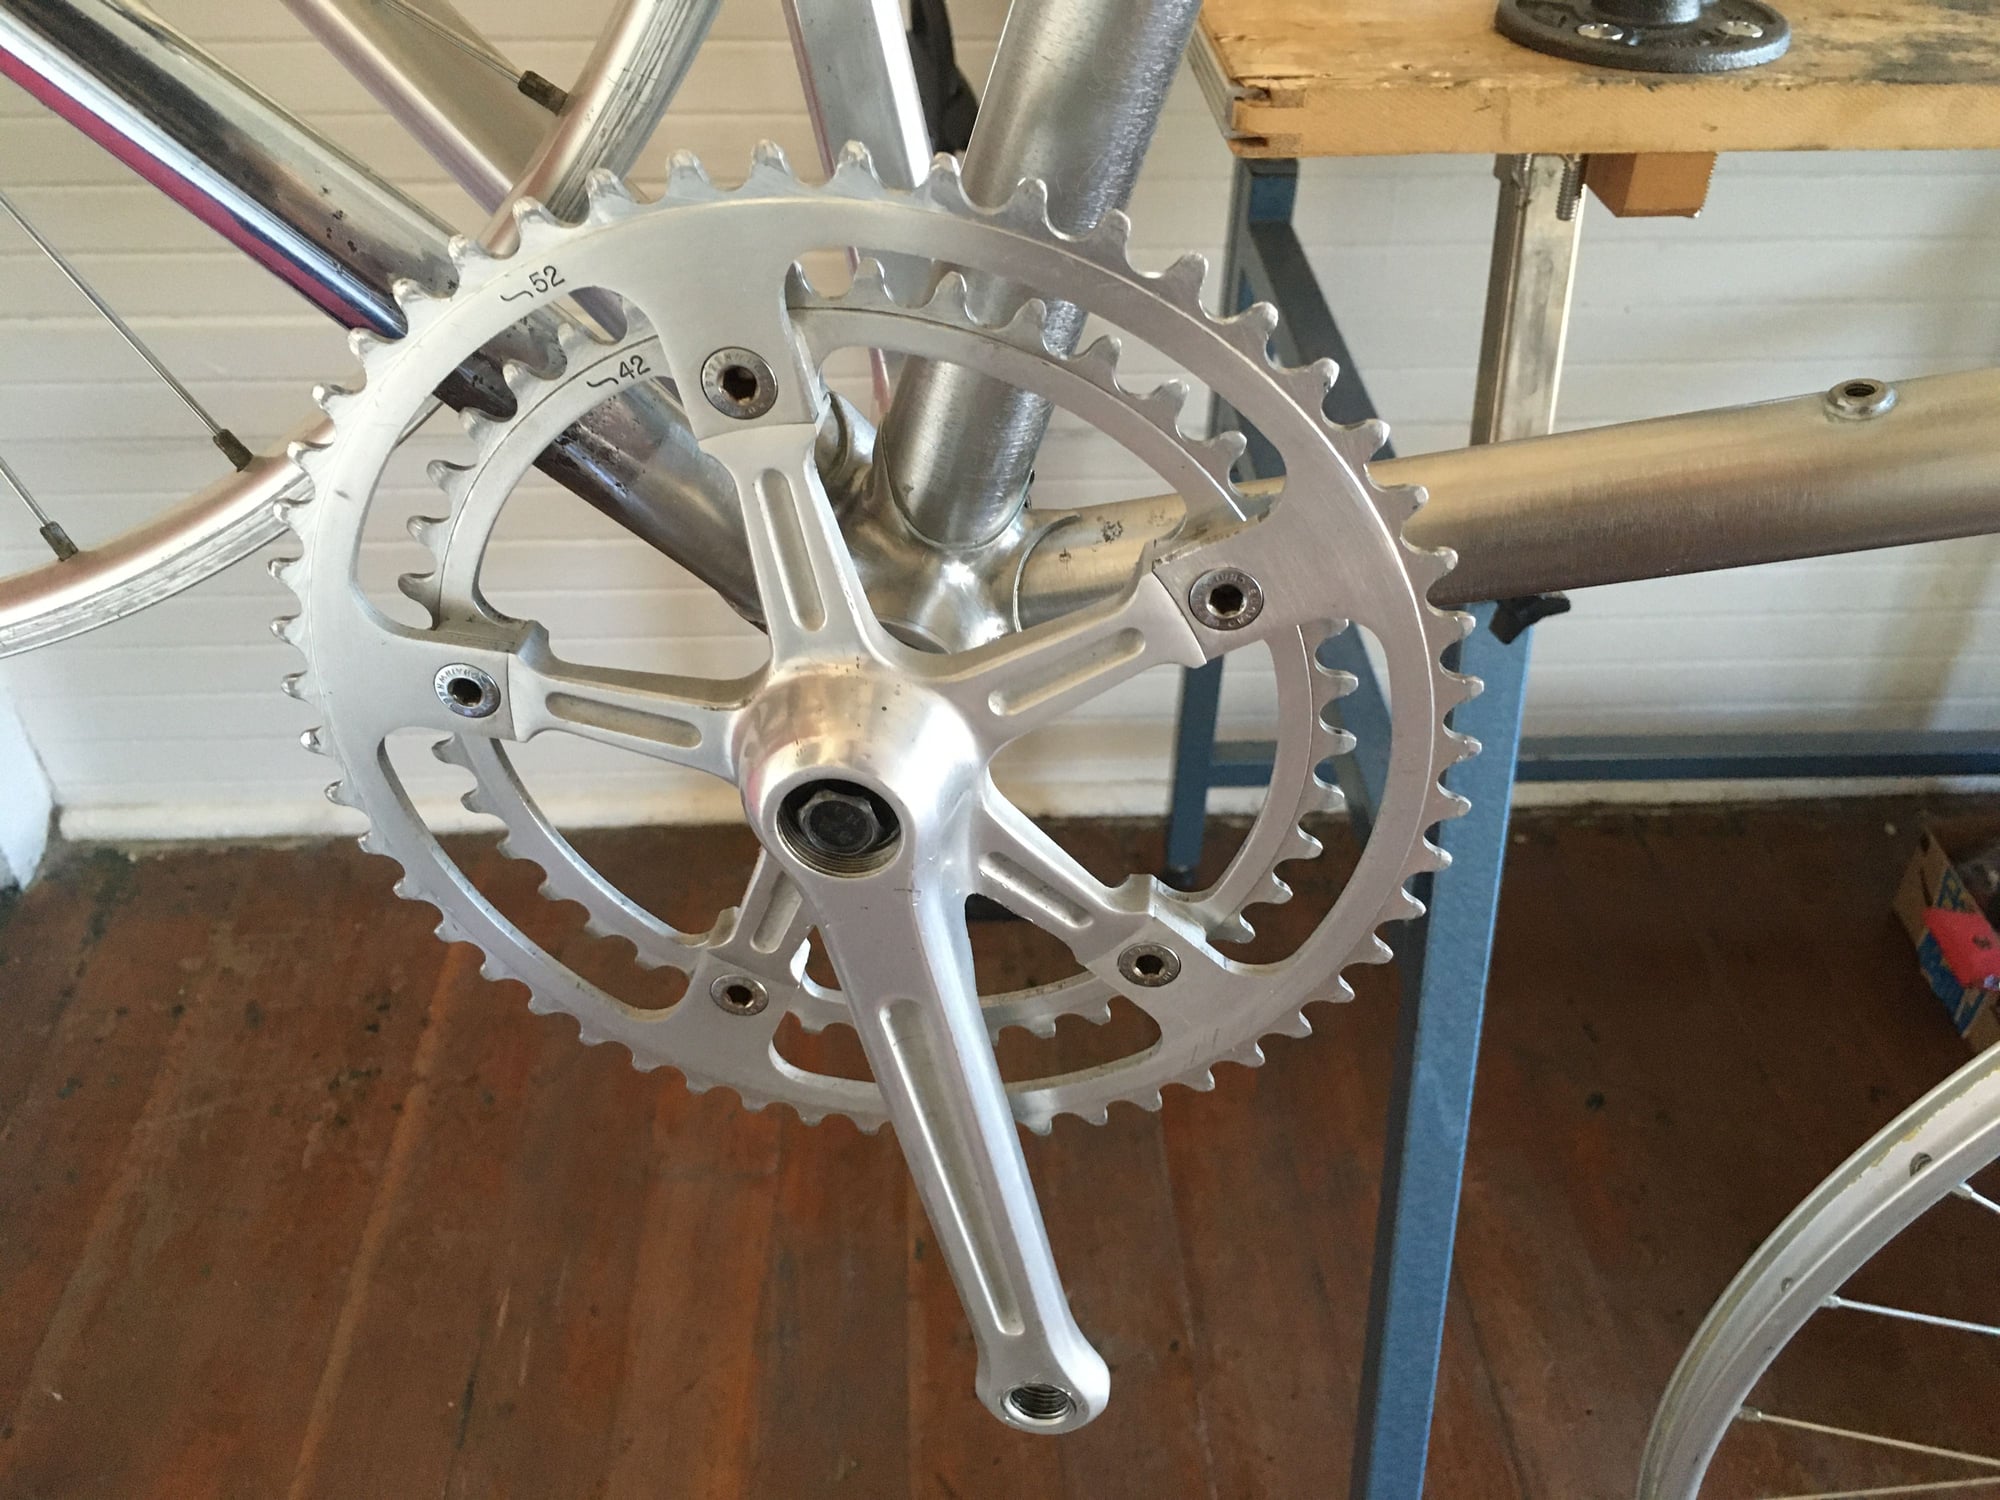
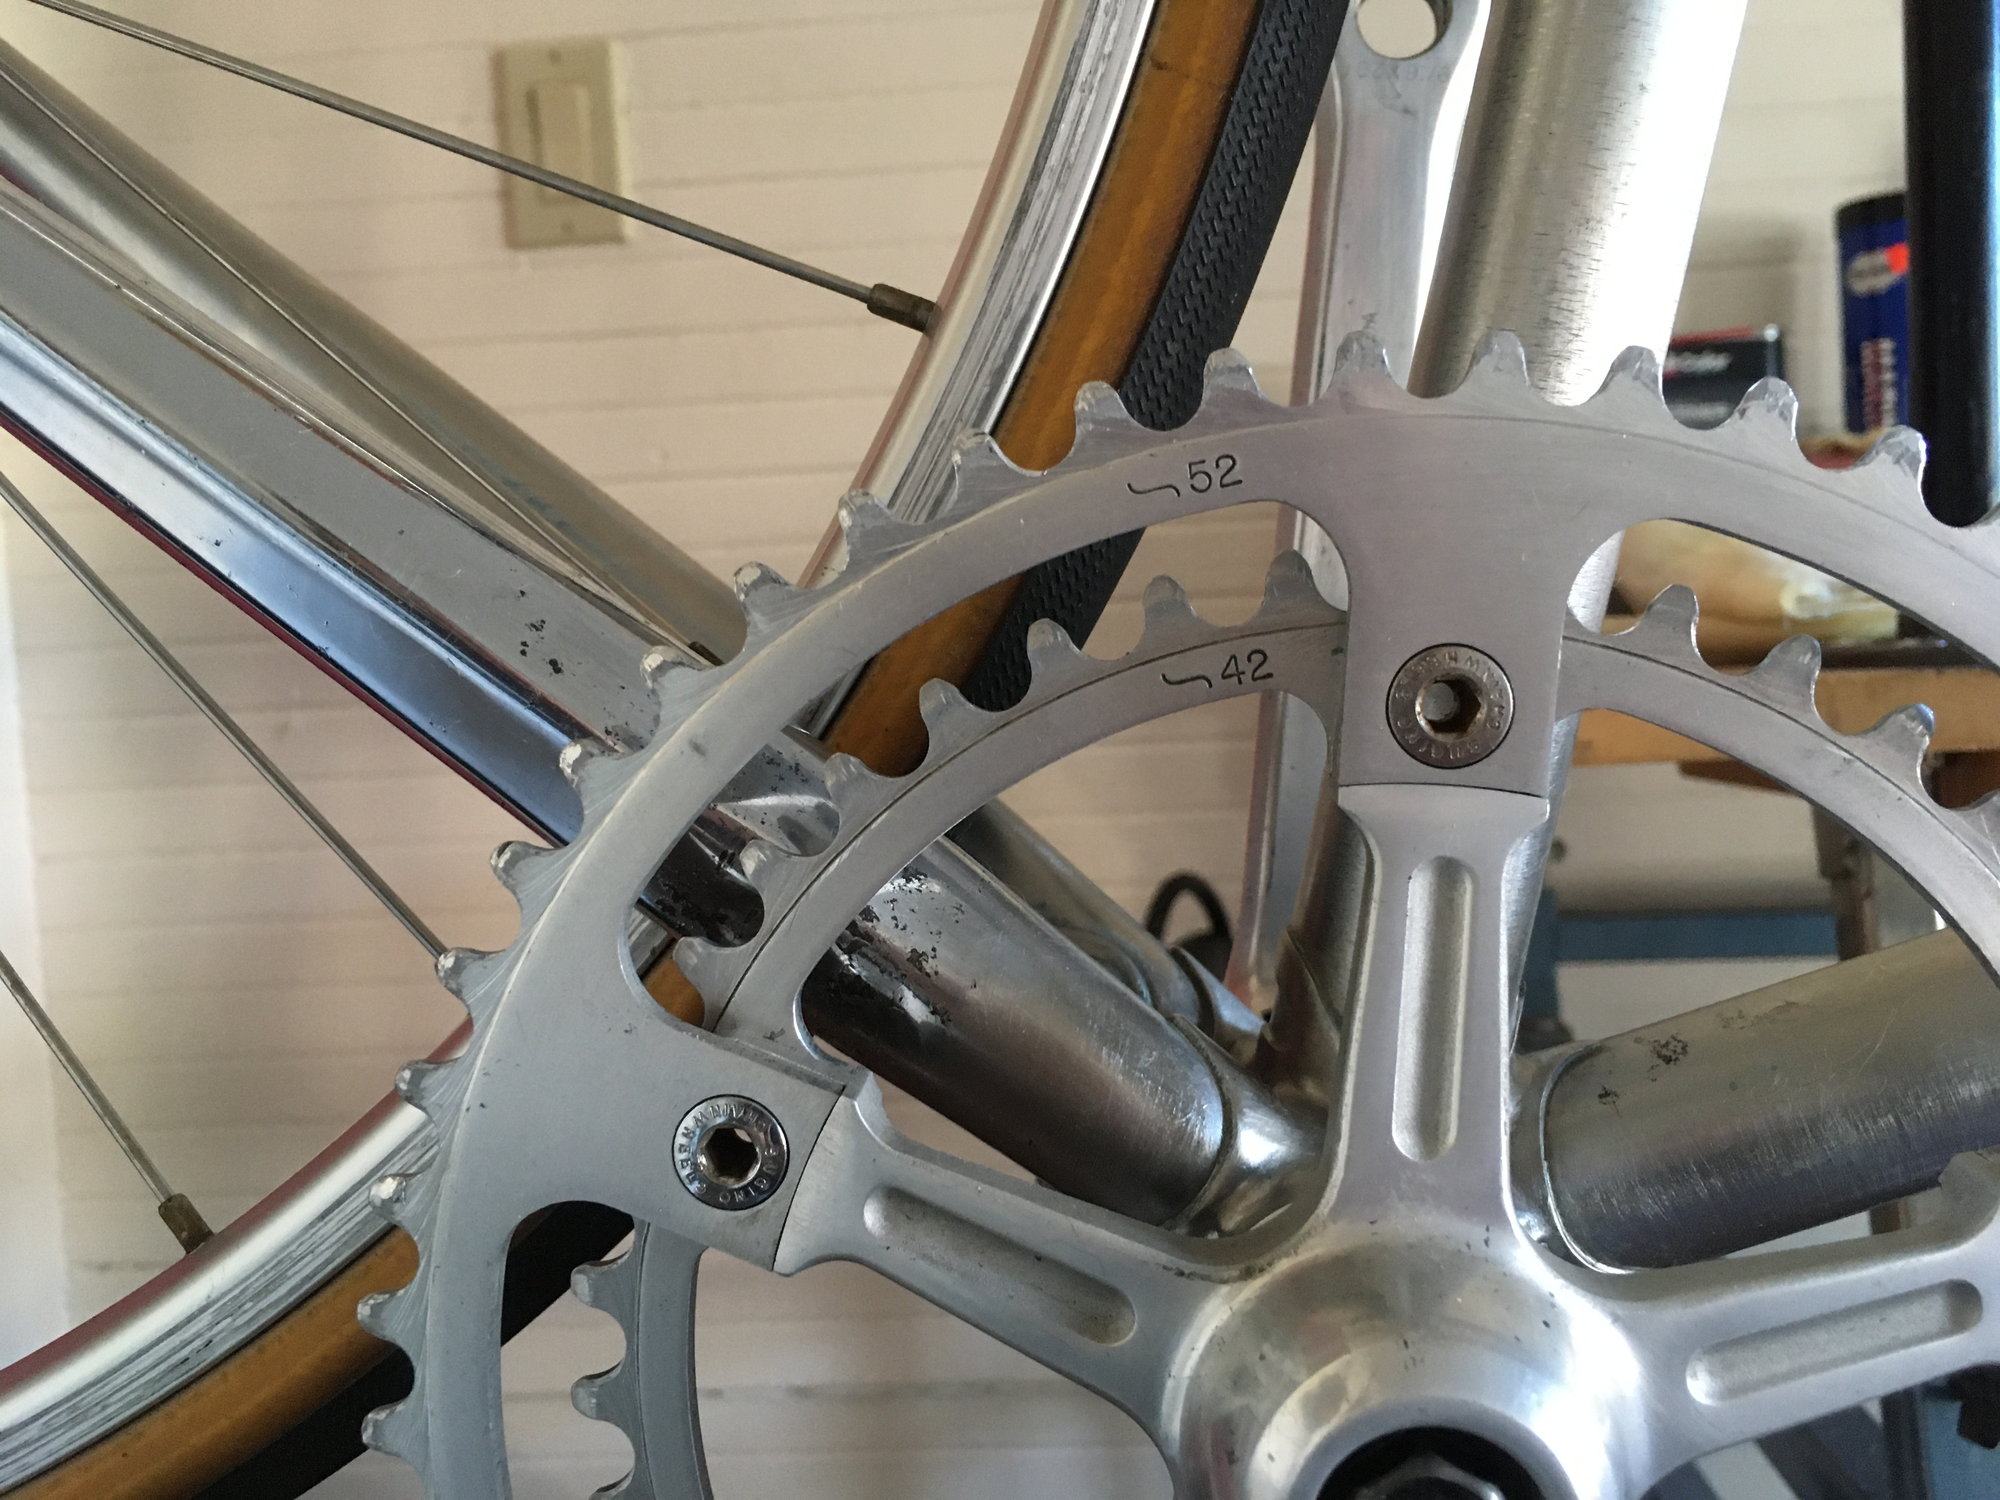
Ofmega crankset. Competizione with painted Bianche branding rubbed out (also courtesy of Francophile):
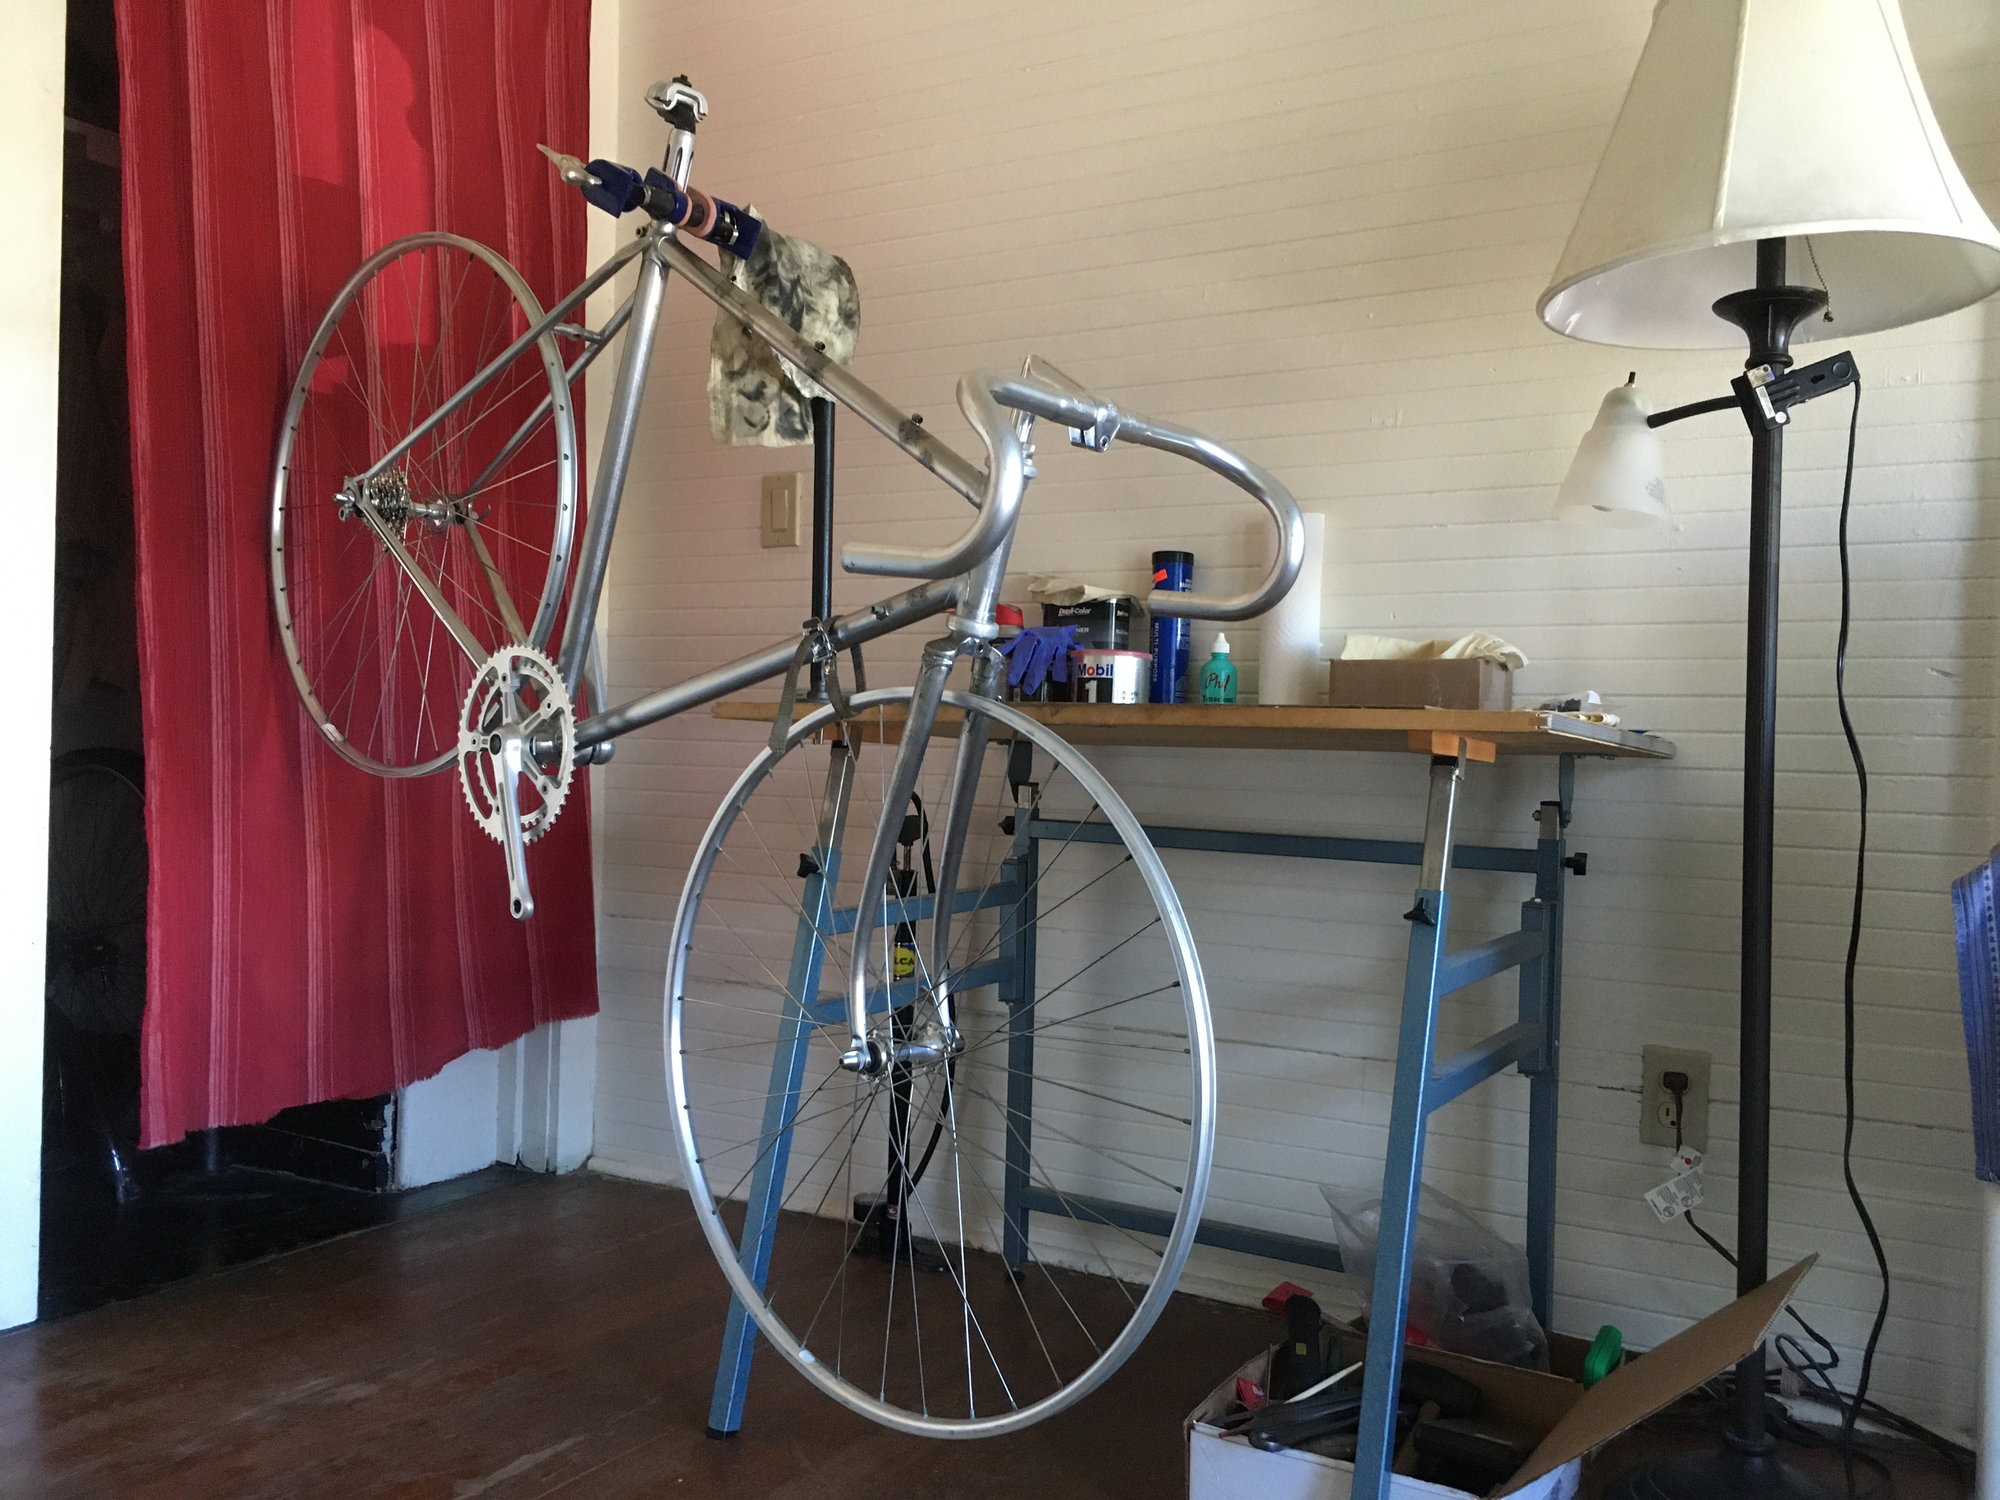
After 8 months of collecting parts, and constantly revising plans for the Benotto, it feels really good to see progress! This is where hangs until more free time comes along:
Ofmega crankset. Competizione with painted Bianche branding rubbed out (also courtesy of Francophile):
After 8 months of collecting parts, and constantly revising plans for the Benotto, it feels really good to see progress! This is where hangs until more free time comes along:
Last edited by deux jambes; 07-13-20 at 08:31 AM.
07-12-20, 05:47 AM
#4

Senior Member

Join Date: May 2008
Location: Fredericksburg, Va
Posts: 9,579
Bikes: '65 Frejus TDF, '73 Bottecchia Giro d'Italia, '83 Colnago Superissimo, '84 Trek 610, '84 Trek 760, '88 Pinarello Veneto, '88 De Rosa Pro, '89 Pinarello Montello, '94 Burley Duet, 97 Specialized RockHopper, 2010 Langster, Tern Link D8
Mentioned: 73 Post(s)
Tagged: 0 Thread(s)
Quoted: 1607 Post(s)
Liked 2,216 Times
in
1,103 Posts
deux jambes I have two singles and 1 tandem in that state and have been for several years. Thinking I should do something about it.
__________________
Bikes don't stand alone. They are two tired.
Bikes don't stand alone. They are two tired.
Likes For SJX426:
07-12-20, 07:00 AM
#5
Full Member
Join Date: Jul 2016
Location: Denver CO
Posts: 233
Bikes: 2014 Fuji Cross 2.0 LE, 1993 Santana Vision, 1993 Specialized Allez Pro, 1993 Trek 930, 1985 Panasonic DX3000
Mentioned: 0 Post(s)
Tagged: 0 Thread(s)
Quoted: 49 Post(s)
Liked 75 Times
in
56 Posts
Great job!! Look forward to your finished product 
07-12-20, 07:39 AM
#6
Full Member
This frame popped up for sale here a while back. It was a bit rough looking, but its condition was well documented. I think its condition scared most people away since it lingered on the sales page for approximately a year or so. The price was very fair, and at 54 cm it was just my size. I took delivery of it December 2019. Here�s a few pics after unpacking::
Before going any further, I�d like to thank @francophile for offering this great frame, and for working graciously with me so that I could I have a chance to put it back on the road.
After assessing the rust along with cosmetic issues, and getting nowhere with noninvasive interventions, I decided to get drastic by going with a full strip to a bare frame:
07-12-20, 08:00 AM
#7
Senior Member

Join Date: Sep 2011
Location: Baltimore MD
Posts: 3,332
Bikes: '72 Motobecane Grand Record, '72 Gitane tandem, '72 Raleigh Super Course, '73 Raleigh Gran Sport, '73 Colnago Super, '76 Fiorelli Coppi, '78 Raleigh SBDU Team Pro, '78 Trek 930, '81 Holdsworth Special 650B, '86 Masi GC, ’94 Bridgestone RB-T
Mentioned: 67 Post(s)
Tagged: 0 Thread(s)
Quoted: 786 Post(s)
Liked 520 Times
in
281 Posts
Fun project. What are your plans for paint?
__________________
The man who dies with the most toys�is dead. - Rootboy
The man who dies with the most toys�is dead. - Rootboy
 07-12-20, 08:36 AM
#8
Senior Member
Thread Starter
Join Date: Jul 2018
Location: Eugene, OR
Posts: 1,326
Mentioned: 64 Post(s)
Tagged: 0 Thread(s)
Quoted: 535 Post(s)
Liked 346 Times
in
196 Posts
Thanks, and I'm looking forward to sharing the progress.
Hopefully a fun ride too. I'm just going to maintain a coat of WD-40 on it for the time being. I've read from others here that WD holds up well and does a good job preventing rust. It'd be easy to clean it off at a later season should I decide for a repaint. I'd love to go with the original champagne and re-pro decals, but I feel that'd necessitate re-chrome, and a pristine full SR group. For now, I'm just investing in the ride.
Hopefully a fun ride too. I'm just going to maintain a coat of WD-40 on it for the time being. I've read from others here that WD holds up well and does a good job preventing rust. It'd be easy to clean it off at a later season should I decide for a repaint. I'd love to go with the original champagne and re-pro decals, but I feel that'd necessitate re-chrome, and a pristine full SR group. For now, I'm just investing in the ride.
07-12-20, 02:27 PM
#9
Senior Member
Join Date: May 2008
Location: Fredericksburg, Va
Posts: 9,579
Bikes: '65 Frejus TDF, '73 Bottecchia Giro d'Italia, '83 Colnago Superissimo, '84 Trek 610, '84 Trek 760, '88 Pinarello Veneto, '88 De Rosa Pro, '89 Pinarello Montello, '94 Burley Duet, 97 Specialized RockHopper, 2010 Langster, Tern Link D8
Mentioned: 73 Post(s)
Tagged: 0 Thread(s)
Quoted: 1607 Post(s)
Liked 2,216 Times
in
1,103 Posts
 1983 Trek 610 60 cm (24"
 , on Flickr
 119_PaTrek , on Flickr
__________________
Bikes don't stand alone. They are two tired.
Bikes don't stand alone. They are two tired.
Likes For SJX426:
07-12-20, 06:45 PM
#10
PM me your cotters

Join Date: Jun 2015
Location: ATL
Posts: 3,241
Mentioned: 80 Post(s)
Tagged: 0 Thread(s)
Quoted: 1137 Post(s)
Liked 590 Times
in
422 Posts
deux jambes this post is really a little bit of what I needed to get me out of my current funk. The 'rona hit really hard in my family and my trip to Switzerland 1st week of March proved to be catastrophic, to say the least. We're all collectively trying to recover from what's happened and this crap still isn't over yet.
I knew in my gut from the get-go I was passing this frameset along to the right BF'er, your post here confirms it. The only wisdom I'll impart is this: WD40 is a water repellent, hence the "WD" (water displacement). Not only does it displace water, it also displaces paint. Be sure to properly clean every nook ad cranny of the frame before you paint, or if you have someone else do it, warn them you applied WD to it.
Looks great, and I'm stoked to see the rust wasn't as bad as I think some folks thought. Also glad I stuck to your dibs on this. Had two others highly interested within days of you reaching out, strangely enough!
__________________
███████████████
███████████████
Likes For francophile:
07-13-20, 06:44 AM
#11
Senior Member
Thread Starter
Join Date: Jul 2018
Location: Eugene, OR
Posts: 1,326
Mentioned: 64 Post(s)
Tagged: 0 Thread(s)
Quoted: 535 Post(s)
Liked 346 Times
in
196 Posts
deux jambes this post is really a little bit of what I needed to get me out of my current funk. The 'rona hit really hard in my family and my trip to Switzerland 1st week of March proved to be catastrophic, to say the least. We're all collectively trying to recover from what's happened and this crap still isn't over yet.
I knew in my gut from the get-go I was passing this frameset along to the right BF'er, your post here confirms it. The only wisdom I'll impart is this: WD40 is a water repellent, hence the "WD" (water displacement). Not only does it displace water, it also displaces paint. Be sure to properly clean every nook ad cranny of the frame before you paint, or if you have someone else do it, warn them you applied WD to it.
Looks great, and I'm stoked to see the rust wasn't as bad as I think some folks thought. Also glad I stuck to your dibs on this. Had two others highly interested within days of you reaching out, strangely enough!
I knew in my gut from the get-go I was passing this frameset along to the right BF'er, your post here confirms it. The only wisdom I'll impart is this: WD40 is a water repellent, hence the "WD" (water displacement). Not only does it displace water, it also displaces paint. Be sure to properly clean every nook ad cranny of the frame before you paint, or if you have someone else do it, warn them you applied WD to it.
Looks great, and I'm stoked to see the rust wasn't as bad as I think some folks thought. Also glad I stuck to your dibs on this. Had two others highly interested within days of you reaching out, strangely enough!
Roger that on the WD, Plans to clean it up with lacquer thinner or acetone prior to repaint.
Hopefully I'll be riding the bike by the weekend. I'll keep it updated here! Its good to hear from you J.
Likes For deux jambes:
07-13-20, 06:48 AM
#12
Senior Member
Thread Starter
Join Date: Jul 2018
Location: Eugene, OR
Posts: 1,326
Mentioned: 64 Post(s)
Tagged: 0 Thread(s)
Quoted: 535 Post(s)
Liked 346 Times
in
196 Posts
SJX426 I've seen you post that trek before and mention WD-40. Your testimony of WD-40 working well for the bike was a big factor in my deciding to go this route as myself. Also, great looking build btw! 
07-13-20, 06:56 AM
#13
Senior Member
Thread Starter
Join Date: Jul 2018
Location: Eugene, OR
Posts: 1,326
Mentioned: 64 Post(s)
Tagged: 0 Thread(s)
Quoted: 535 Post(s)
Liked 346 Times
in
196 Posts
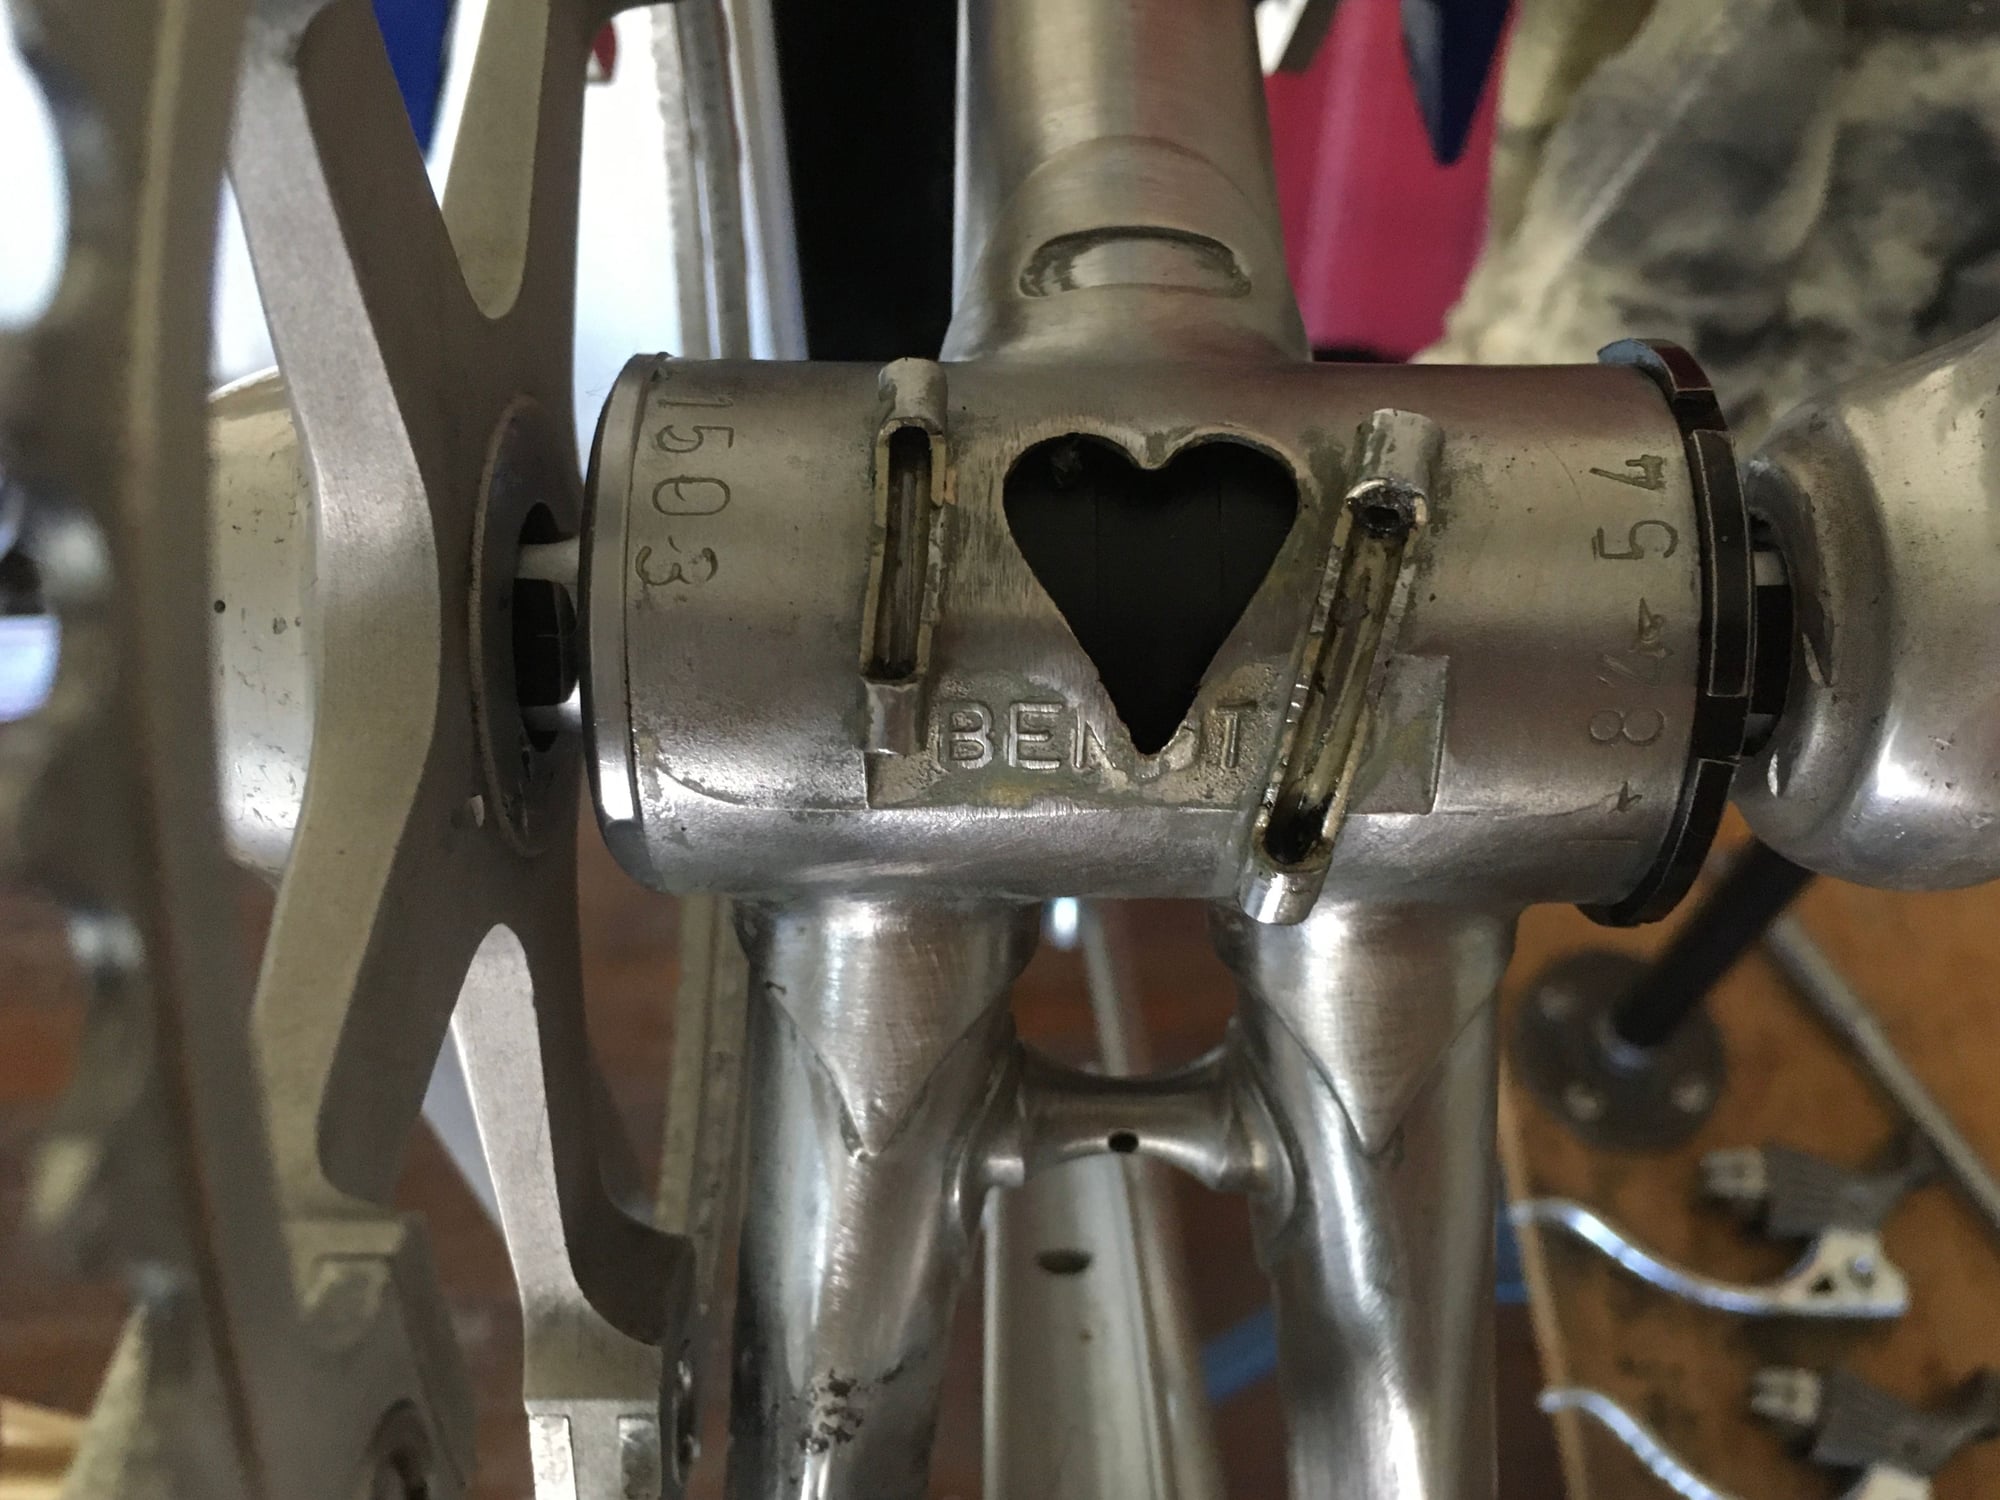
But then again, C&V isn't always black and white. This very well could be an earlier frame, just as the seller thought it was.
Last edited by deux jambes; 07-13-20 at 07:00 AM.
Likes For deux jambes:
07-16-20, 09:09 AM
#14
Senior Member
Thread Starter
Join Date: Jul 2018
Location: Eugene, OR
Posts: 1,326
Mentioned: 64 Post(s)
Tagged: 0 Thread(s)
Quoted: 535 Post(s)
Liked 346 Times
in
196 Posts
Well, my weekend has arrived. And so, it�s time to get busy on the Benotto.
�� �
I need to make a couple of mentions first however, lest I forget again:
The Dura Ace headset was a rock solid purchase from cog_nate. Thank you Sir!
And when I discovered my bottom bracket was missing a dust seal, I posted in the ISO thread looking for an orphan cup. Miele Man came to the rescue with an assortment of spare seals to help me get things squared away. Thank you kindly, friend!
�� �
OK! On to the build...
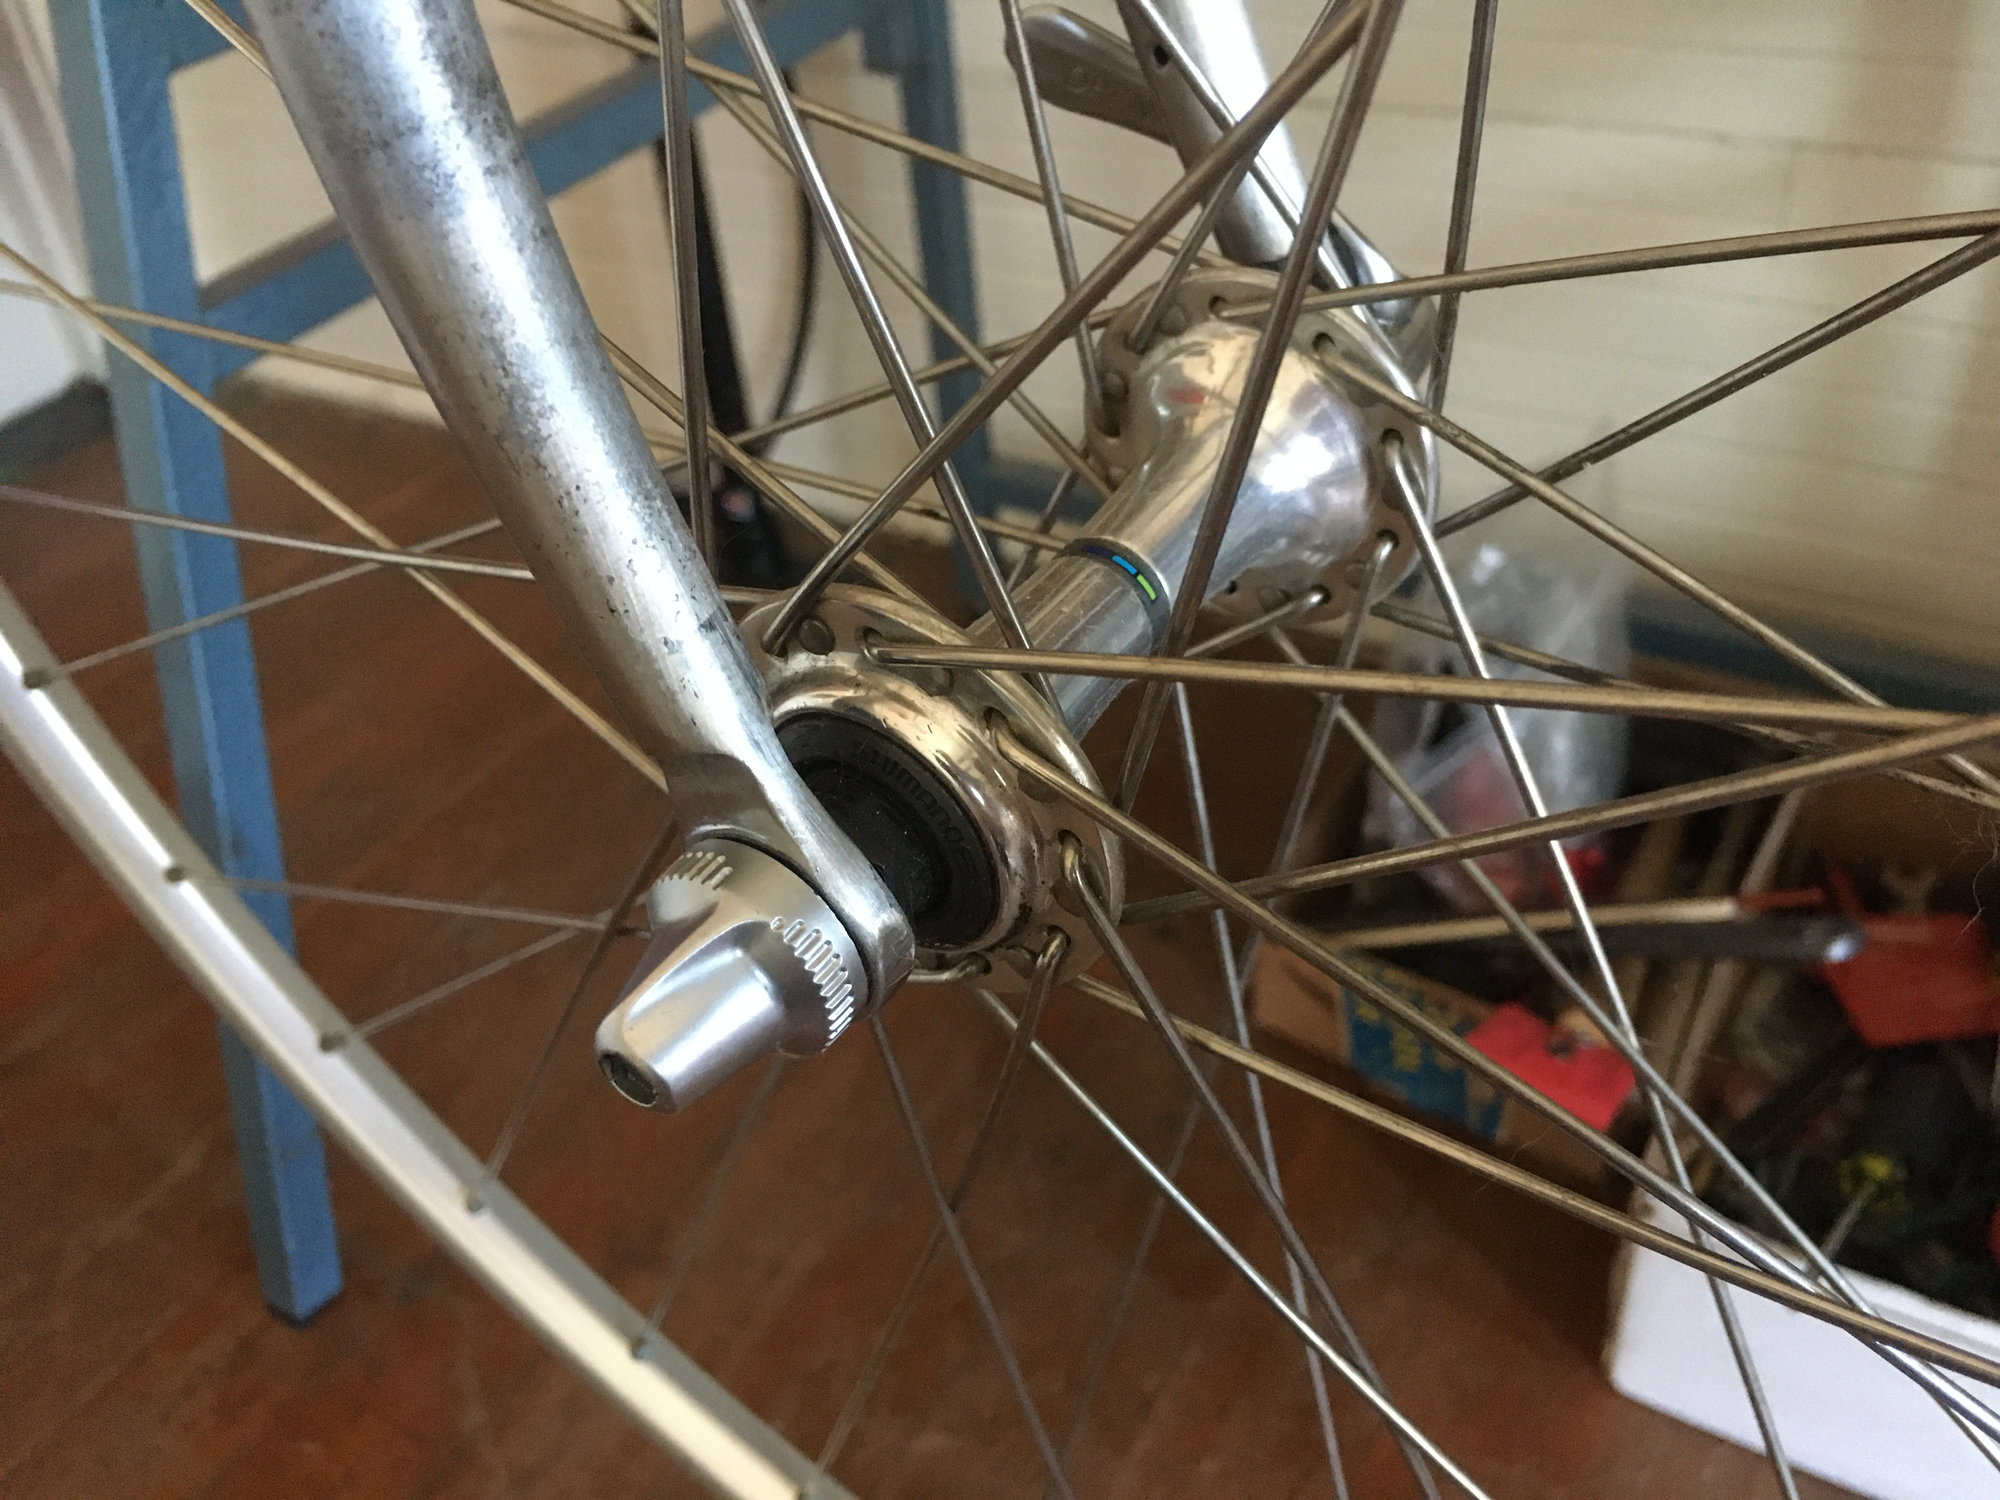
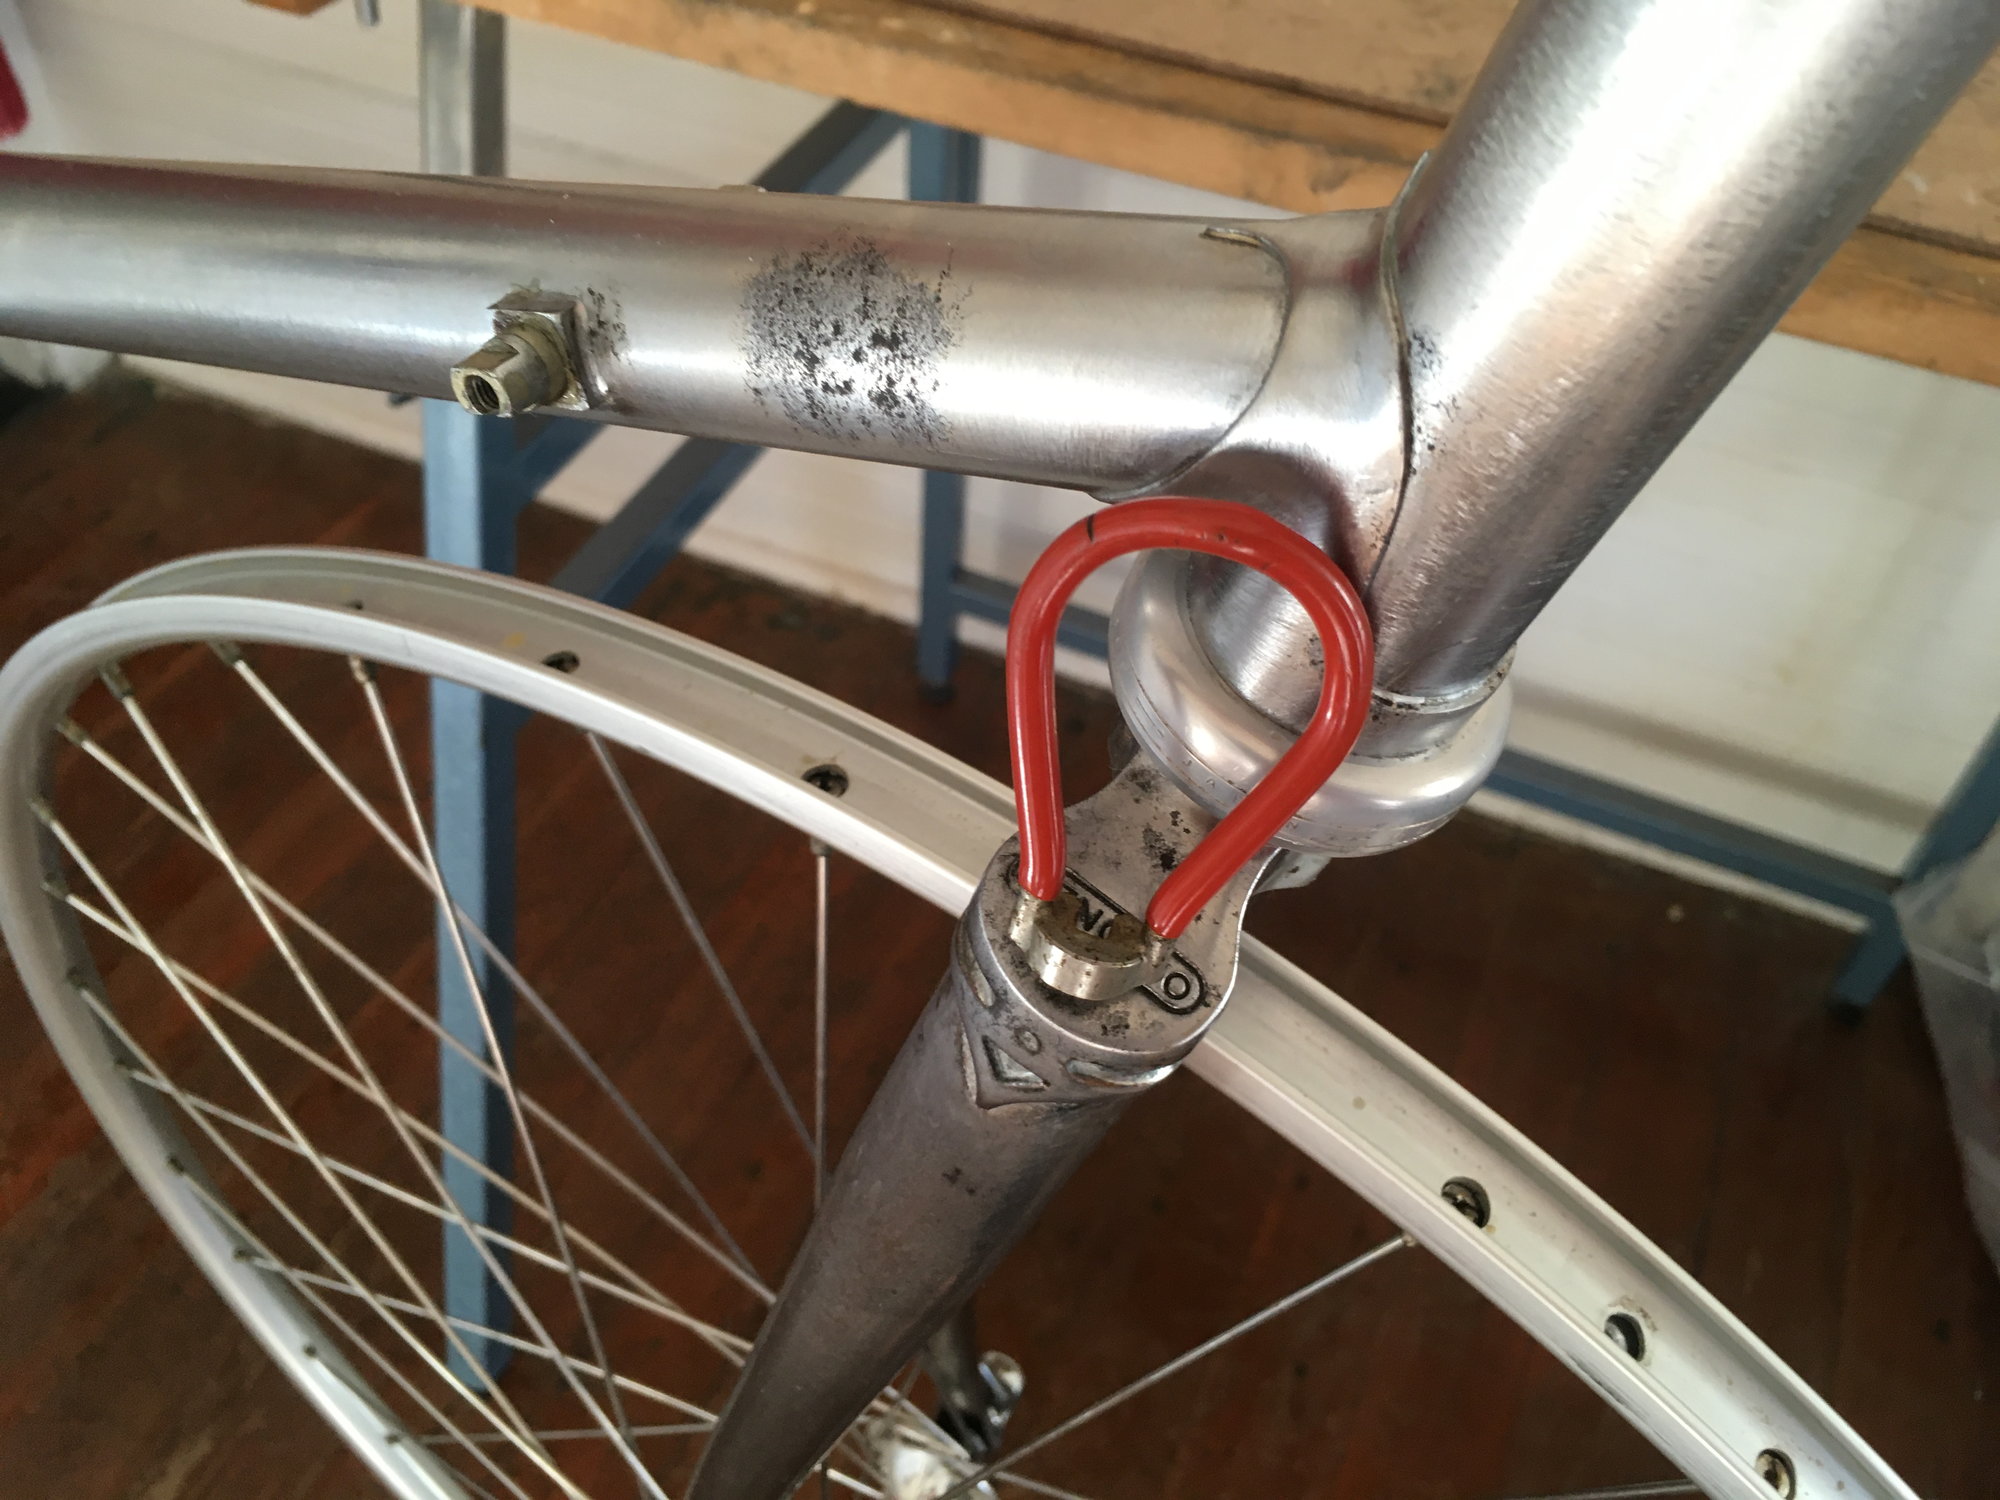
I bought a gently used Shimano/Araya wheelset locally. I swapped the Uniglide hub body out for HG to expand my cassette choice options. Otherwise, the wheels were probably good to go. But I can�t help certain worries. Noticing uneven spoke tensions, I�ve decided to slack things up back to ground zero.
Starting with the front wheel, I�m loosening each spoke nipple completely, and then bringing things back up to even tension. Trueness and dish will of course be dialed in as well.
I overhauled a Campy/Mavic set for my Eisentraut in the exact same way. A laborious task, but one that I feel is worth the time and effort.
�� �
I need to make a couple of mentions first however, lest I forget again:
The Dura Ace headset was a rock solid purchase from cog_nate. Thank you Sir!
And when I discovered my bottom bracket was missing a dust seal, I posted in the ISO thread looking for an orphan cup. Miele Man came to the rescue with an assortment of spare seals to help me get things squared away. Thank you kindly, friend!
�� �
OK! On to the build...
I bought a gently used Shimano/Araya wheelset locally. I swapped the Uniglide hub body out for HG to expand my cassette choice options. Otherwise, the wheels were probably good to go. But I can�t help certain worries. Noticing uneven spoke tensions, I�ve decided to slack things up back to ground zero.
Starting with the front wheel, I�m loosening each spoke nipple completely, and then bringing things back up to even tension. Trueness and dish will of course be dialed in as well.
I overhauled a Campy/Mavic set for my Eisentraut in the exact same way. A laborious task, but one that I feel is worth the time and effort.
07-16-20, 09:59 AM
#15
Senior Member
Thread Starter
Join Date: Jul 2018
Location: Eugene, OR
Posts: 1,326
Mentioned: 64 Post(s)
Tagged: 0 Thread(s)
Quoted: 535 Post(s)
Liked 346 Times
in
196 Posts
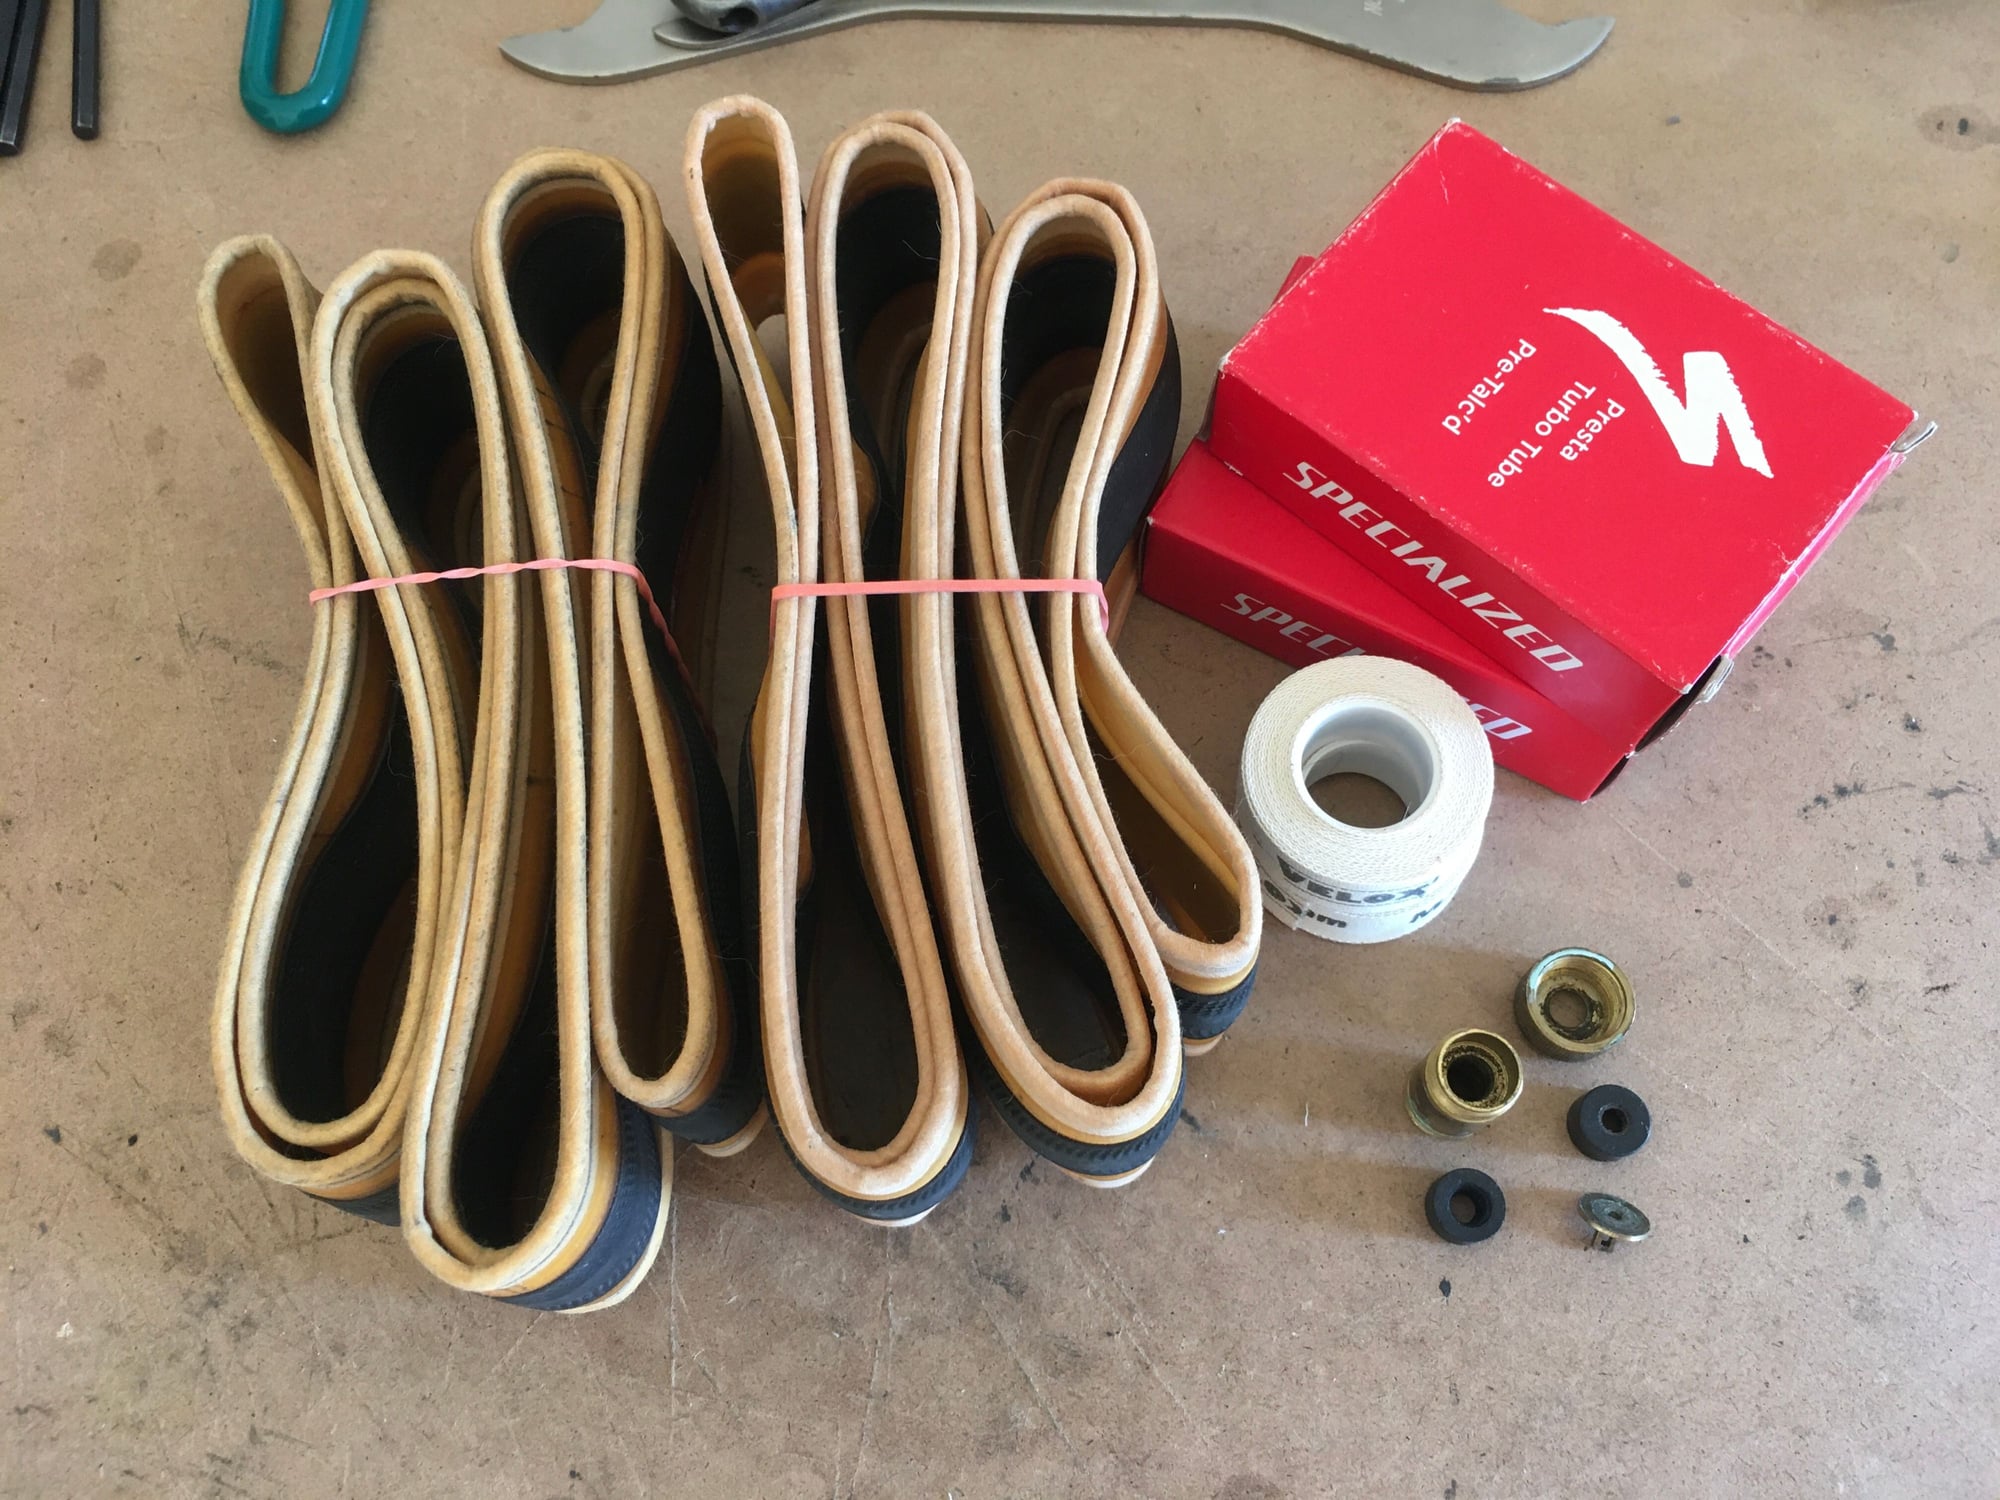
Once the wheels are in good order, I�ll tape �em up with cotton. The tires have a few minor cuts that�ll get doctored with a bit of shoe goo. And finally, I�ll need to clean this Silca chuck prior to inflation (it leaks).
07-17-20, 07:16 PM
#16
Senior Member
Thread Starter
Join Date: Jul 2018
Location: Eugene, OR
Posts: 1,326
Mentioned: 64 Post(s)
Tagged: 0 Thread(s)
Quoted: 535 Post(s)
Liked 346 Times
in
196 Posts
Corollary to Murphy's Law: "Every task shall expand so as to completely consume the time allotted for its completion."
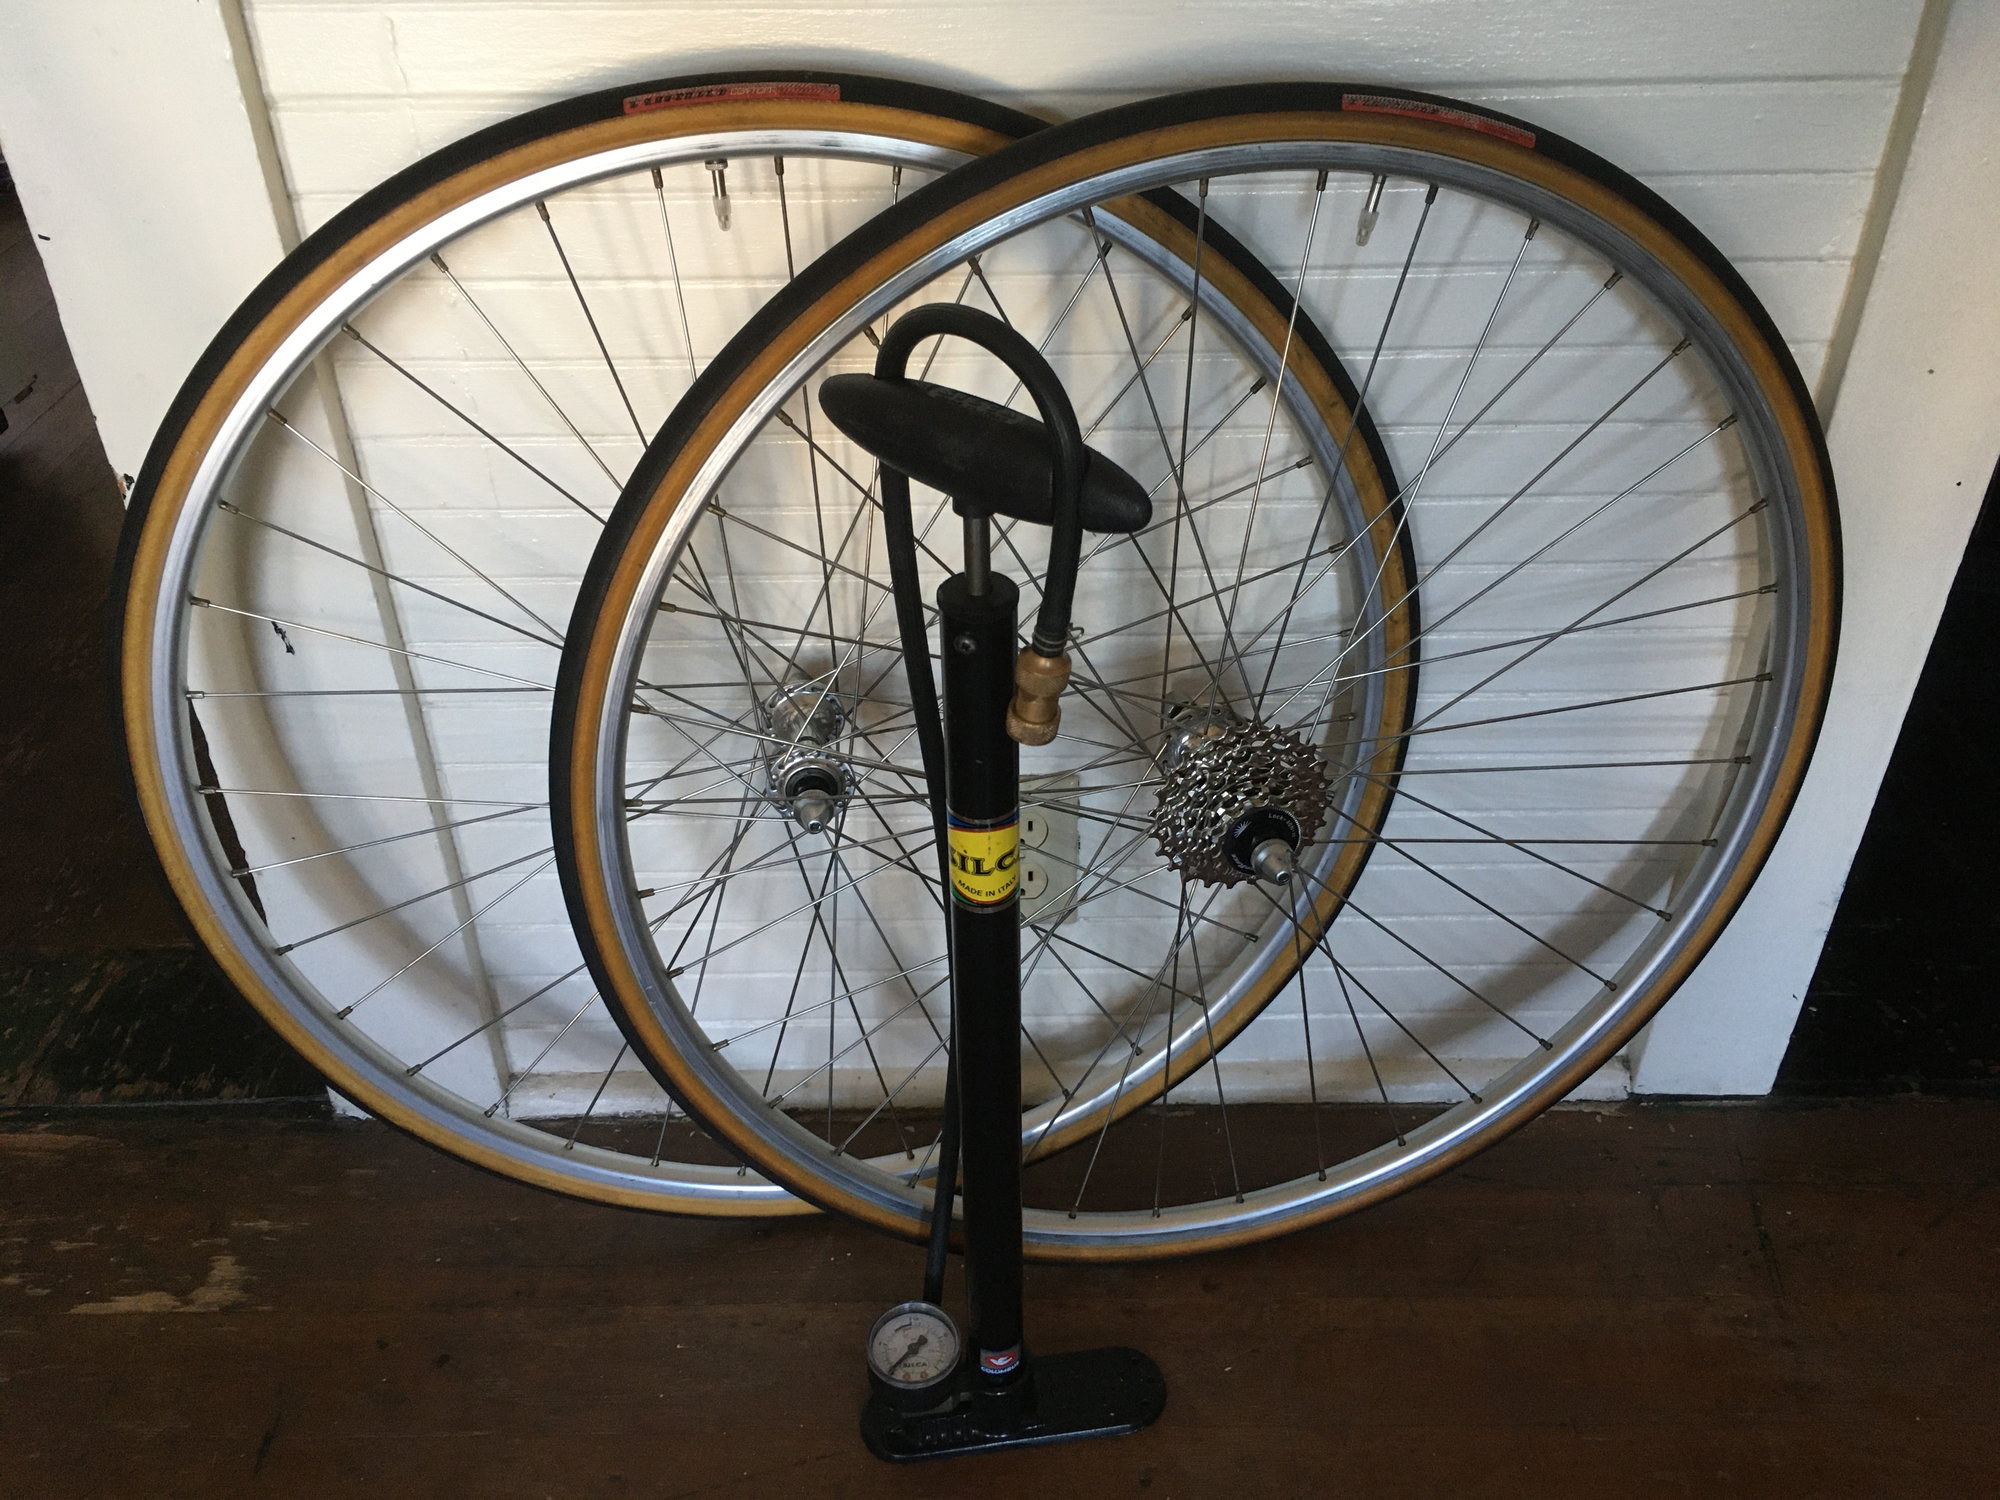
In other words, I had hoped to have the wheel �rebuilt� by yesterday, but here they are, done today. The Silca was a recent Craigslist buy. It leaked badly at the chuck. Cleaned the fittings up, and greased the seals. It works like a champ now!
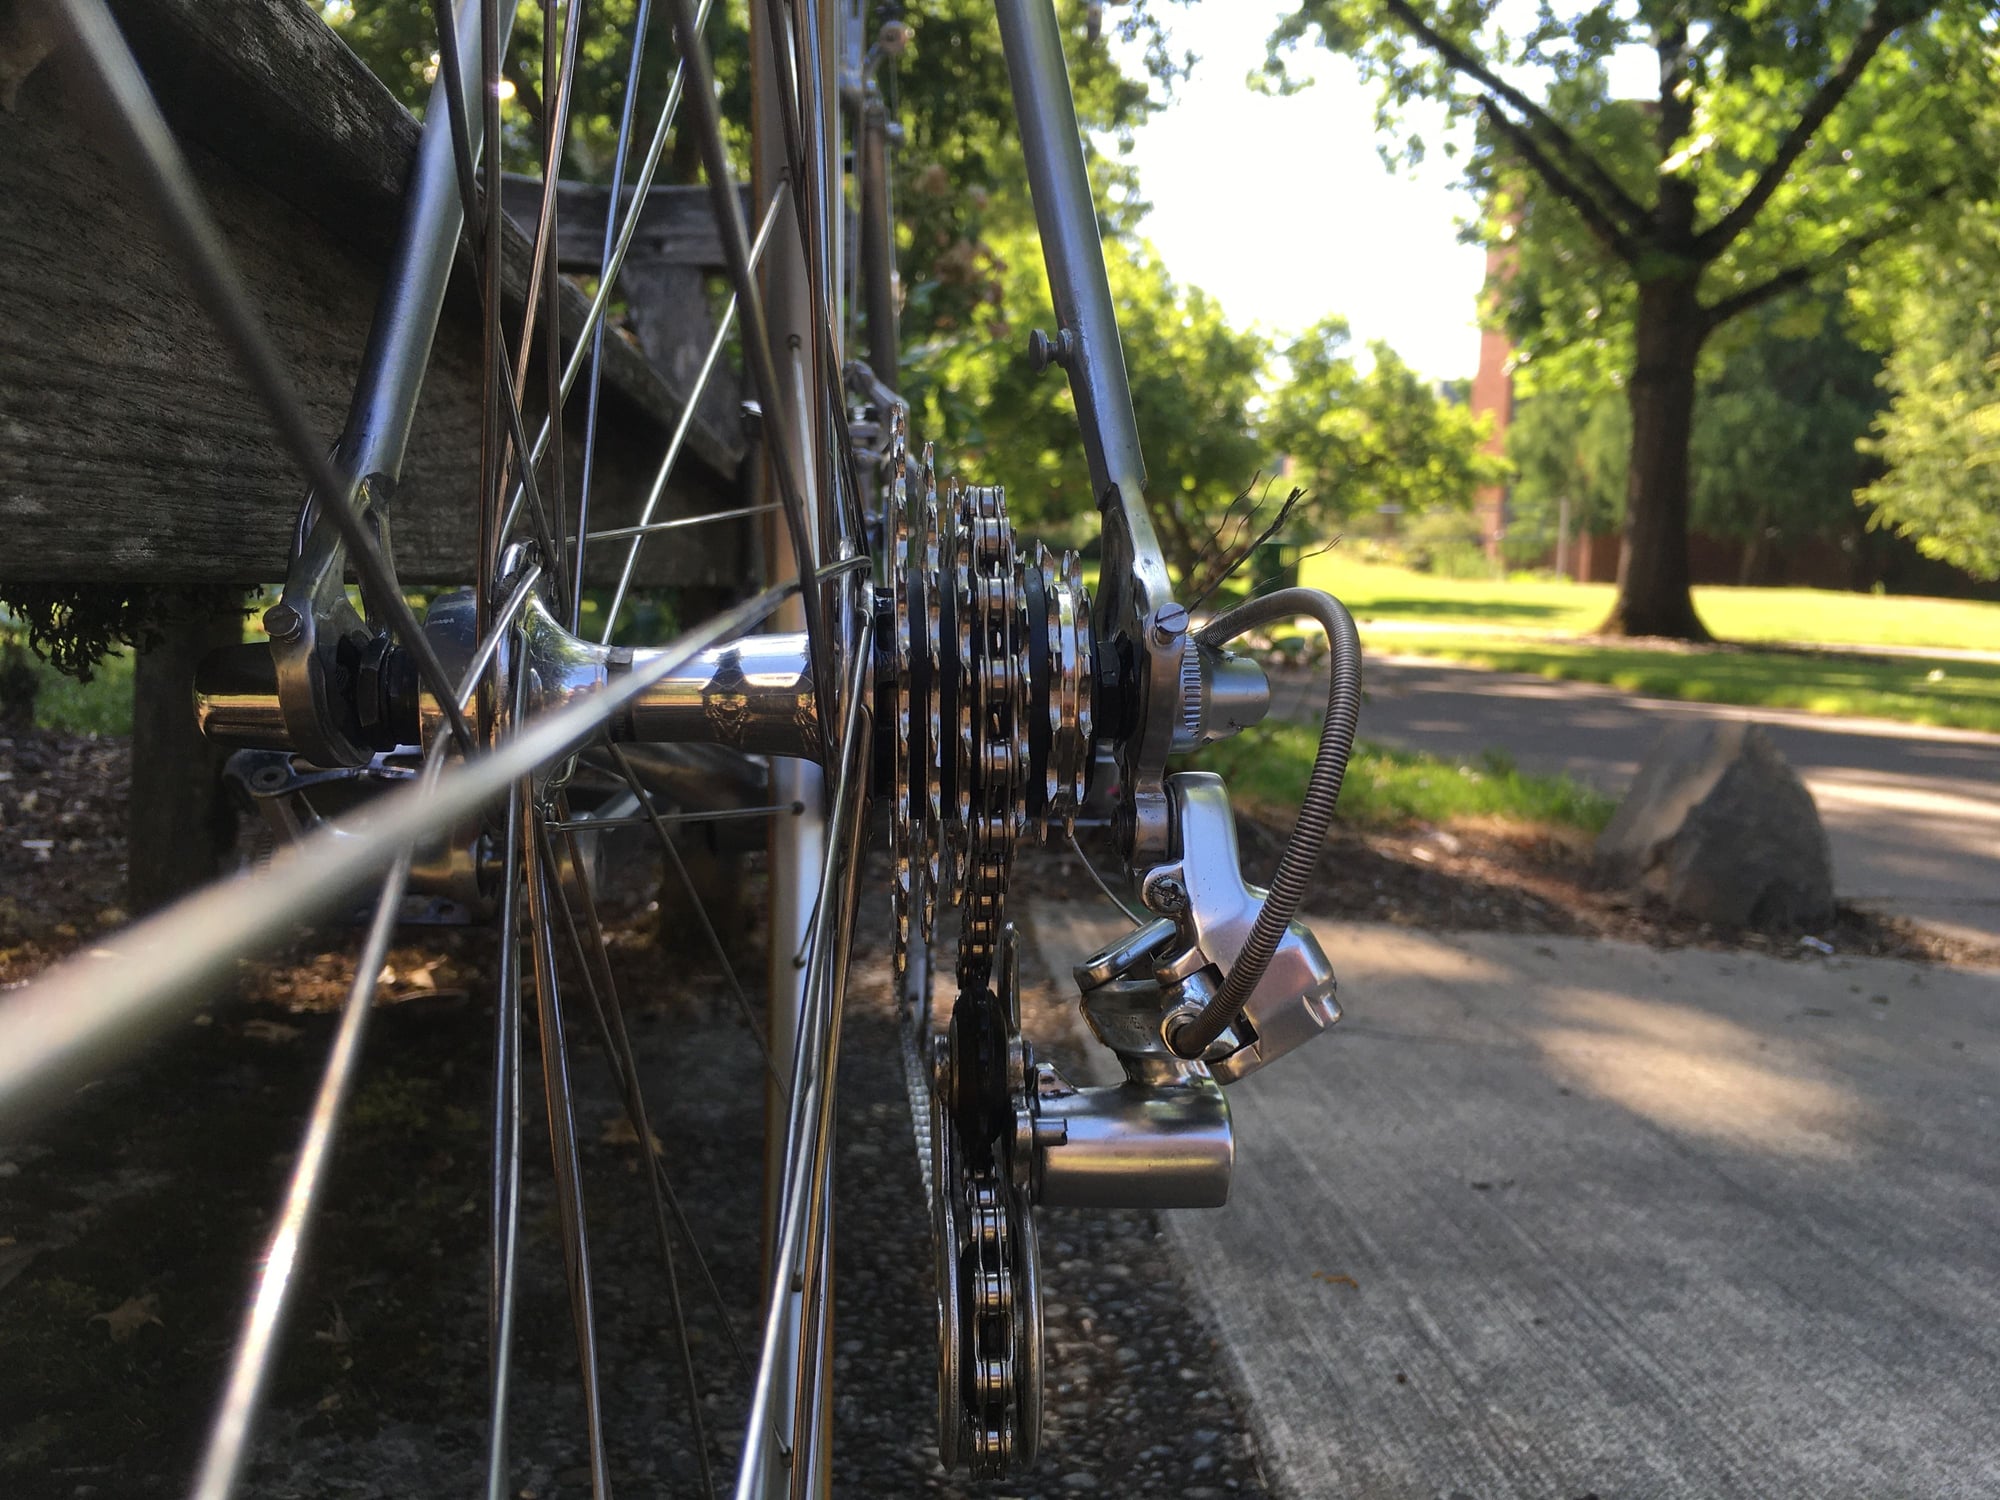
I went looking for downtube levers at the co-op one day, last spring. I dug through two 5 gallon buckets worth, and not a single pair of braze ons. Then, when checking out with another item, I spotted these SunTour specimens sitting randomly on the counter. The only pair of braze ons in the shop and they cost a whole $2!
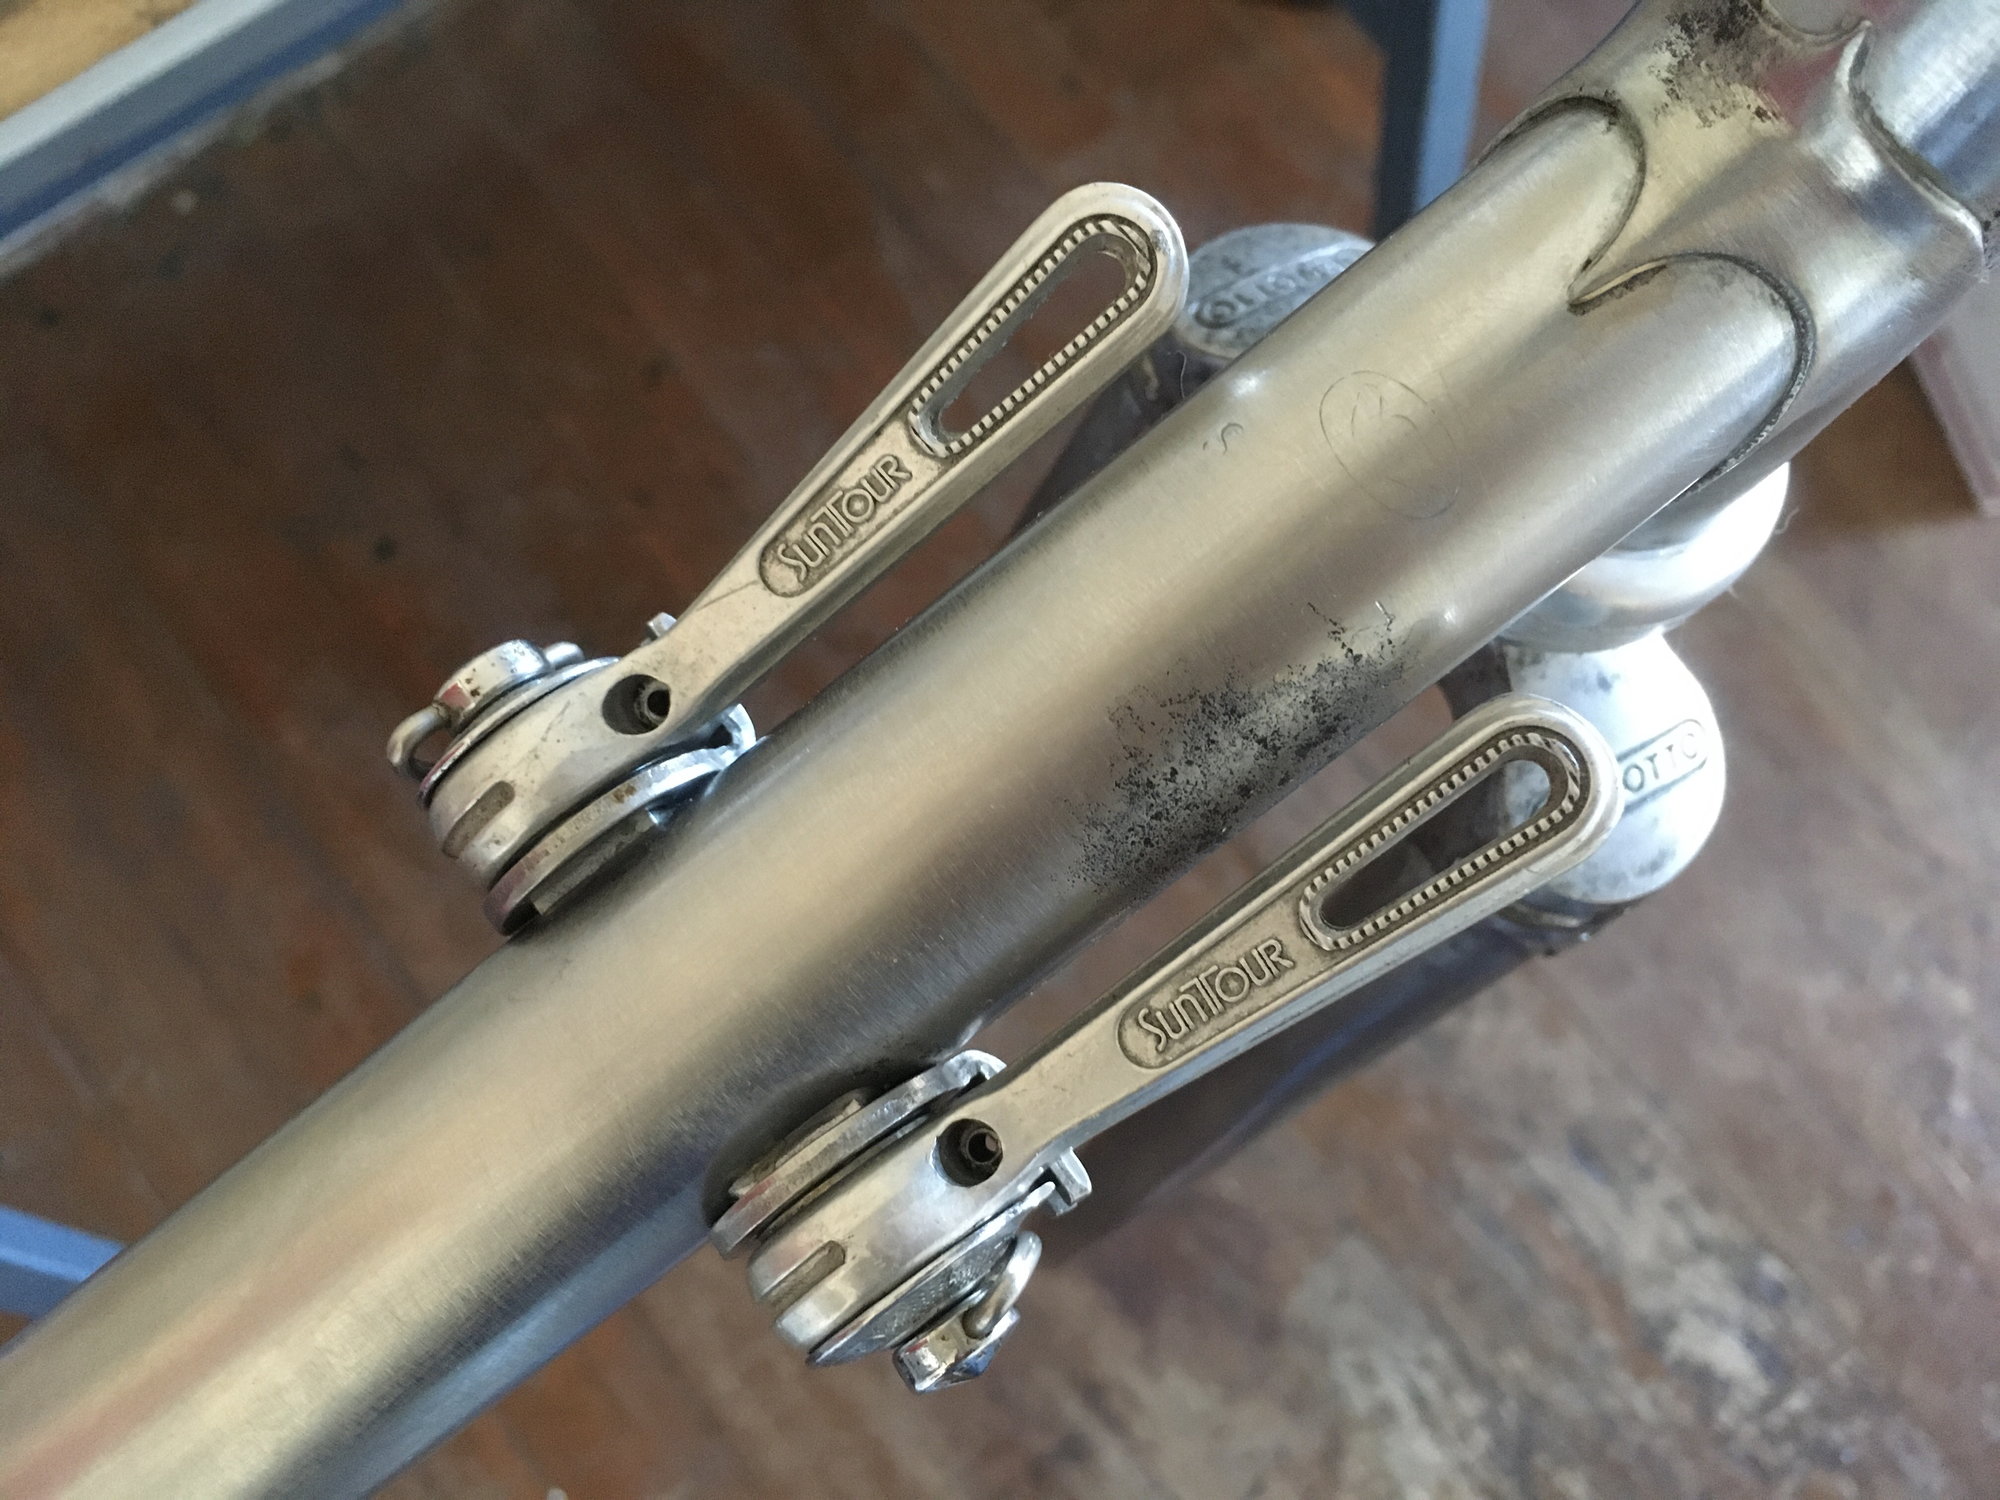
The co-op closed when the state went shelter in place last March, and sadly, its still closed.
In other words, I had hoped to have the wheel �rebuilt� by yesterday, but here they are, done today. The Silca was a recent Craigslist buy. It leaked badly at the chuck. Cleaned the fittings up, and greased the seals. It works like a champ now!
I went looking for downtube levers at the co-op one day, last spring. I dug through two 5 gallon buckets worth, and not a single pair of braze ons. Then, when checking out with another item, I spotted these SunTour specimens sitting randomly on the counter. The only pair of braze ons in the shop and they cost a whole $2!
The co-op closed when the state went shelter in place last March, and sadly, its still closed.
Last edited by deux jambes; 07-17-20 at 10:15 PM.
07-17-20, 07:35 PM
#17
Senior Member
Thread Starter
Join Date: Jul 2018
Location: Eugene, OR
Posts: 1,326
Mentioned: 64 Post(s)
Tagged: 0 Thread(s)
Quoted: 535 Post(s)
Liked 346 Times
in
196 Posts
What a great feeling to get some rubber on to a frame that�s been sitting in a closet for 8 months.
It�s starting to look like a bike!
It�s starting to look like a bike!
 07-17-20, 08:40 PM
#19
Senior Member
Thread Starter
Join Date: Jul 2018
Location: Eugene, OR
Posts: 1,326
Mentioned: 64 Post(s)
Tagged: 0 Thread(s)
Quoted: 535 Post(s)
Liked 346 Times
in
196 Posts
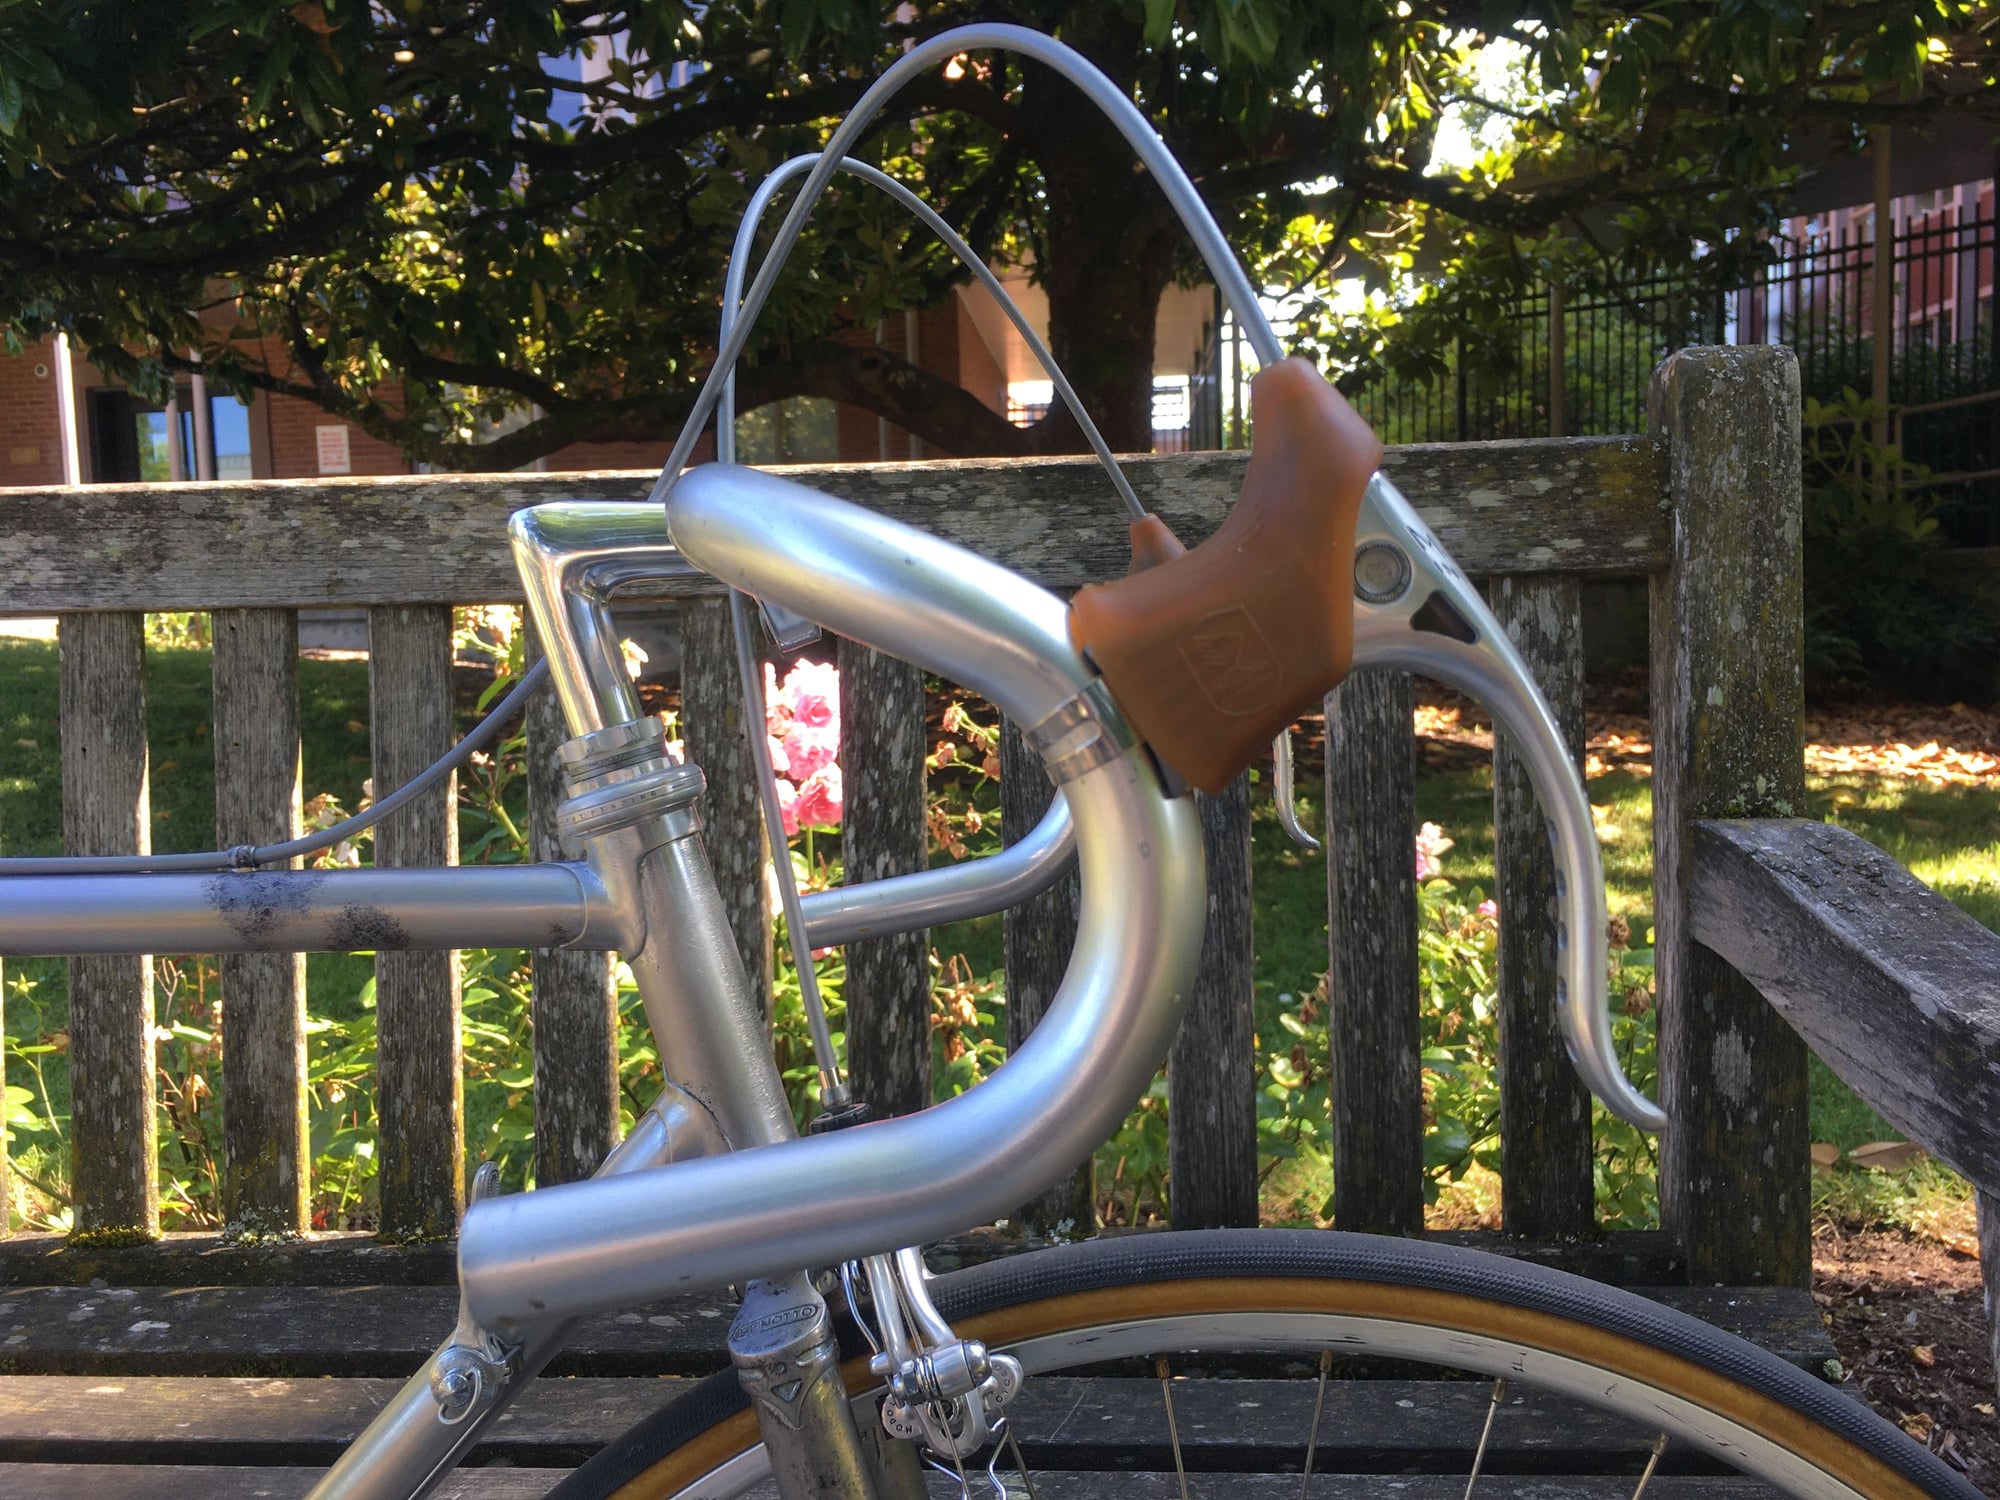
Apparently Rustine hoods were hoarded just as much as toilet paper earlier this year. So I opted for a pair from Soma. Nicely made. A bit tacky, but I guess that�s the nature of the beast. Anyhow, they fit these Modolo levers fit like a glove.
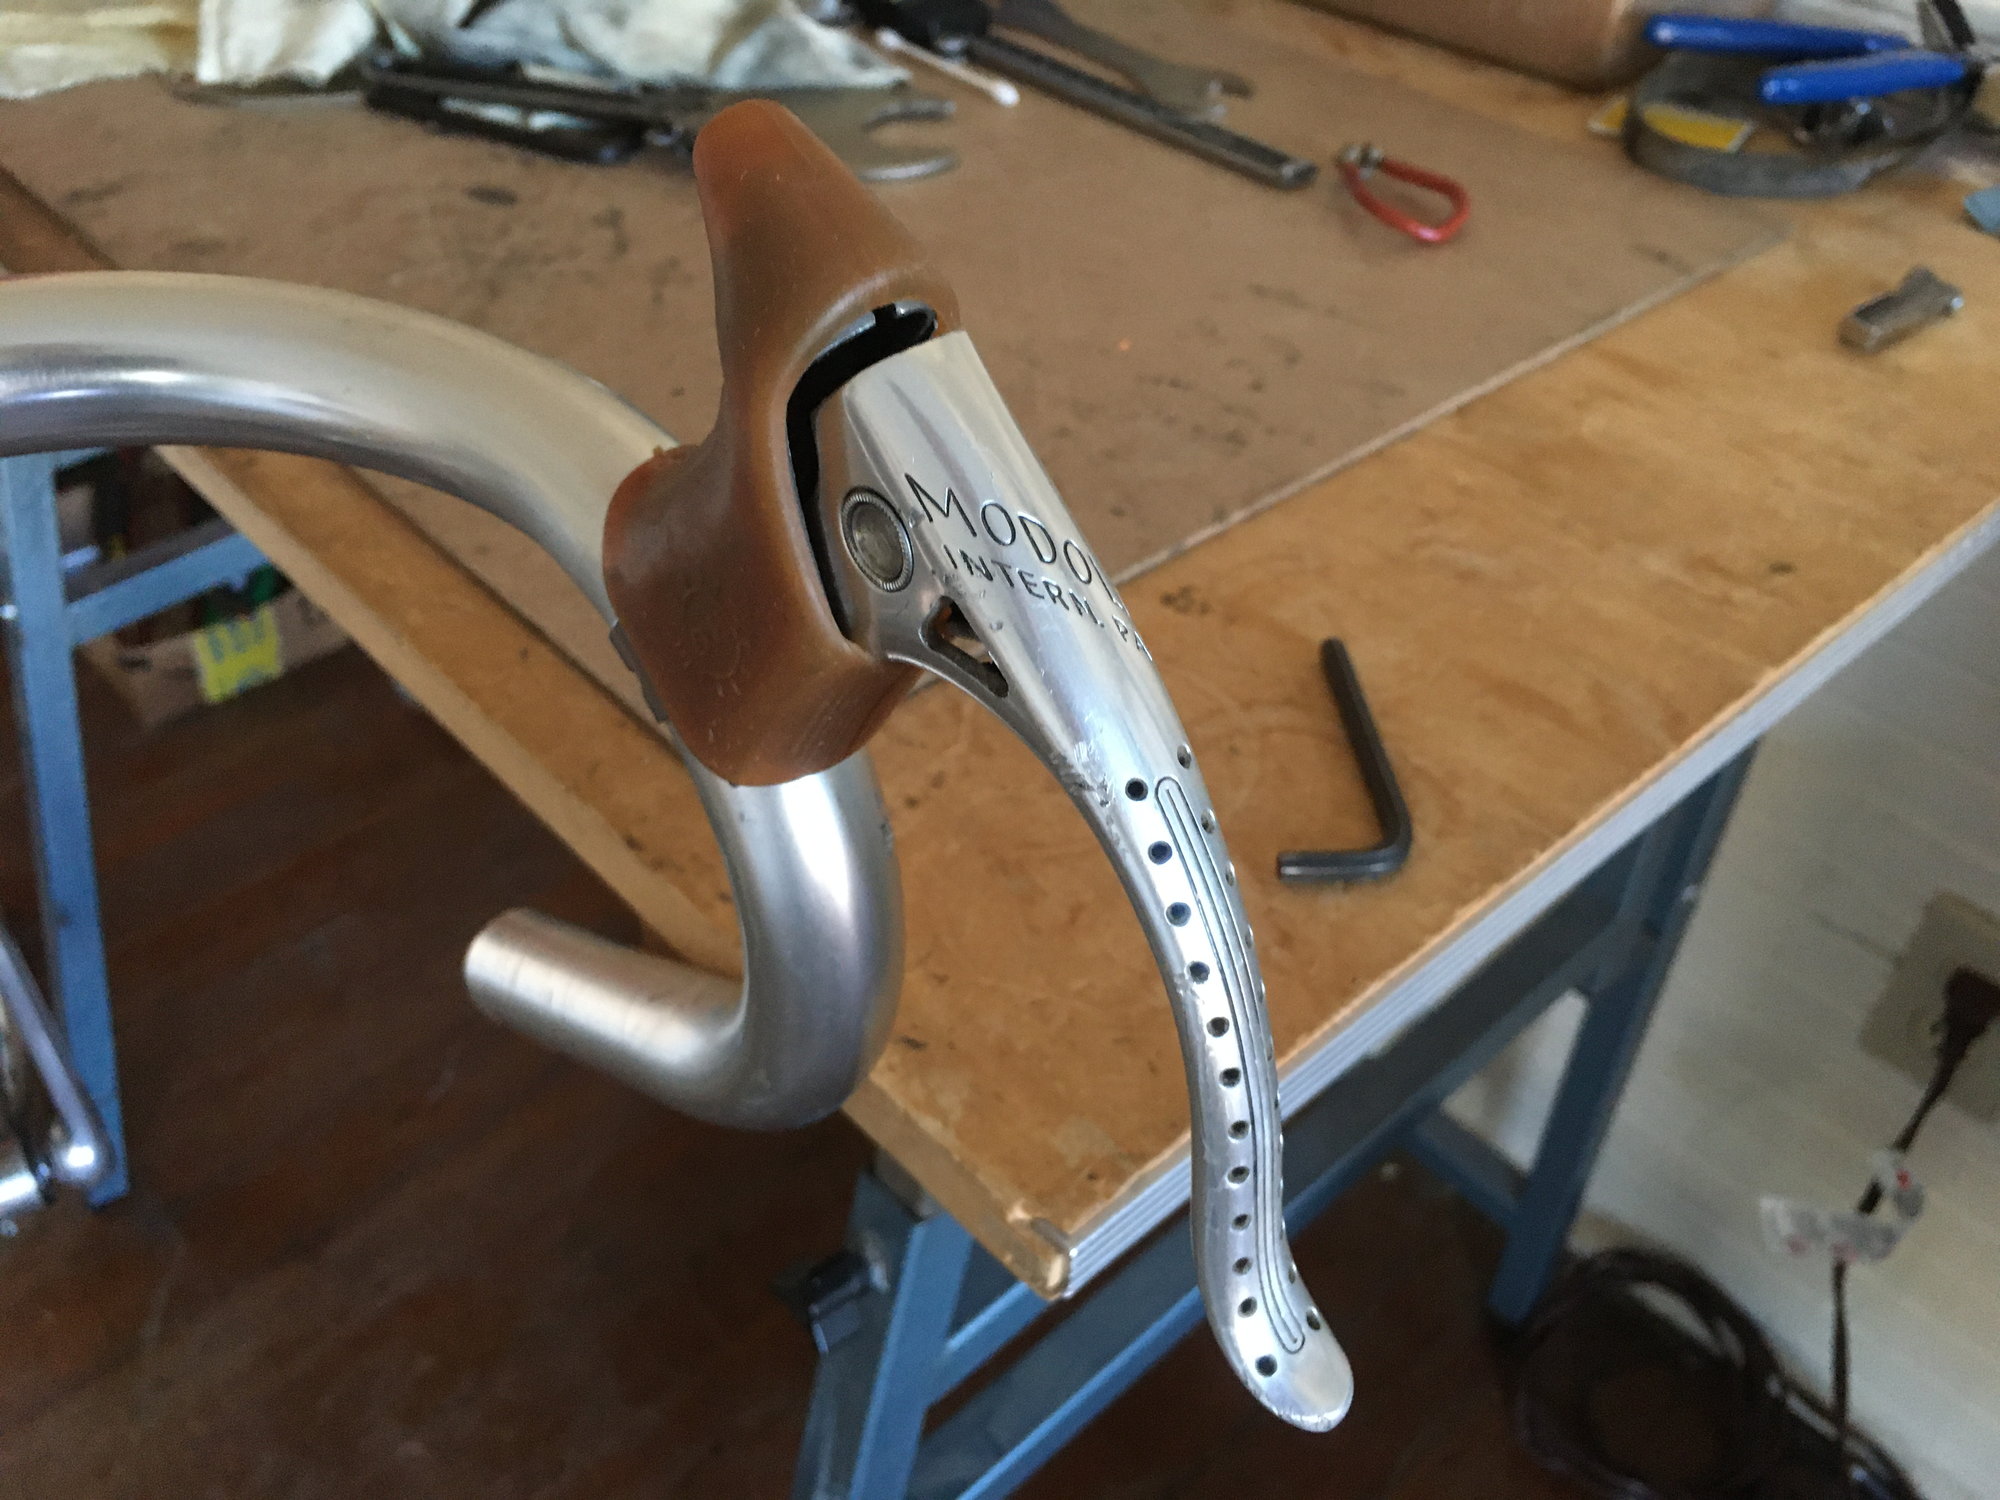
Freshly fitted with Kool Stop pads.
Freshly fitted with Kool Stop pads.
 07-18-20, 06:01 PM
#21
Senior Member
Thread Starter
Join Date: Jul 2018
Location: Eugene, OR
Posts: 1,326
Mentioned: 64 Post(s)
Tagged: 0 Thread(s)
Quoted: 535 Post(s)
Liked 346 Times
in
196 Posts
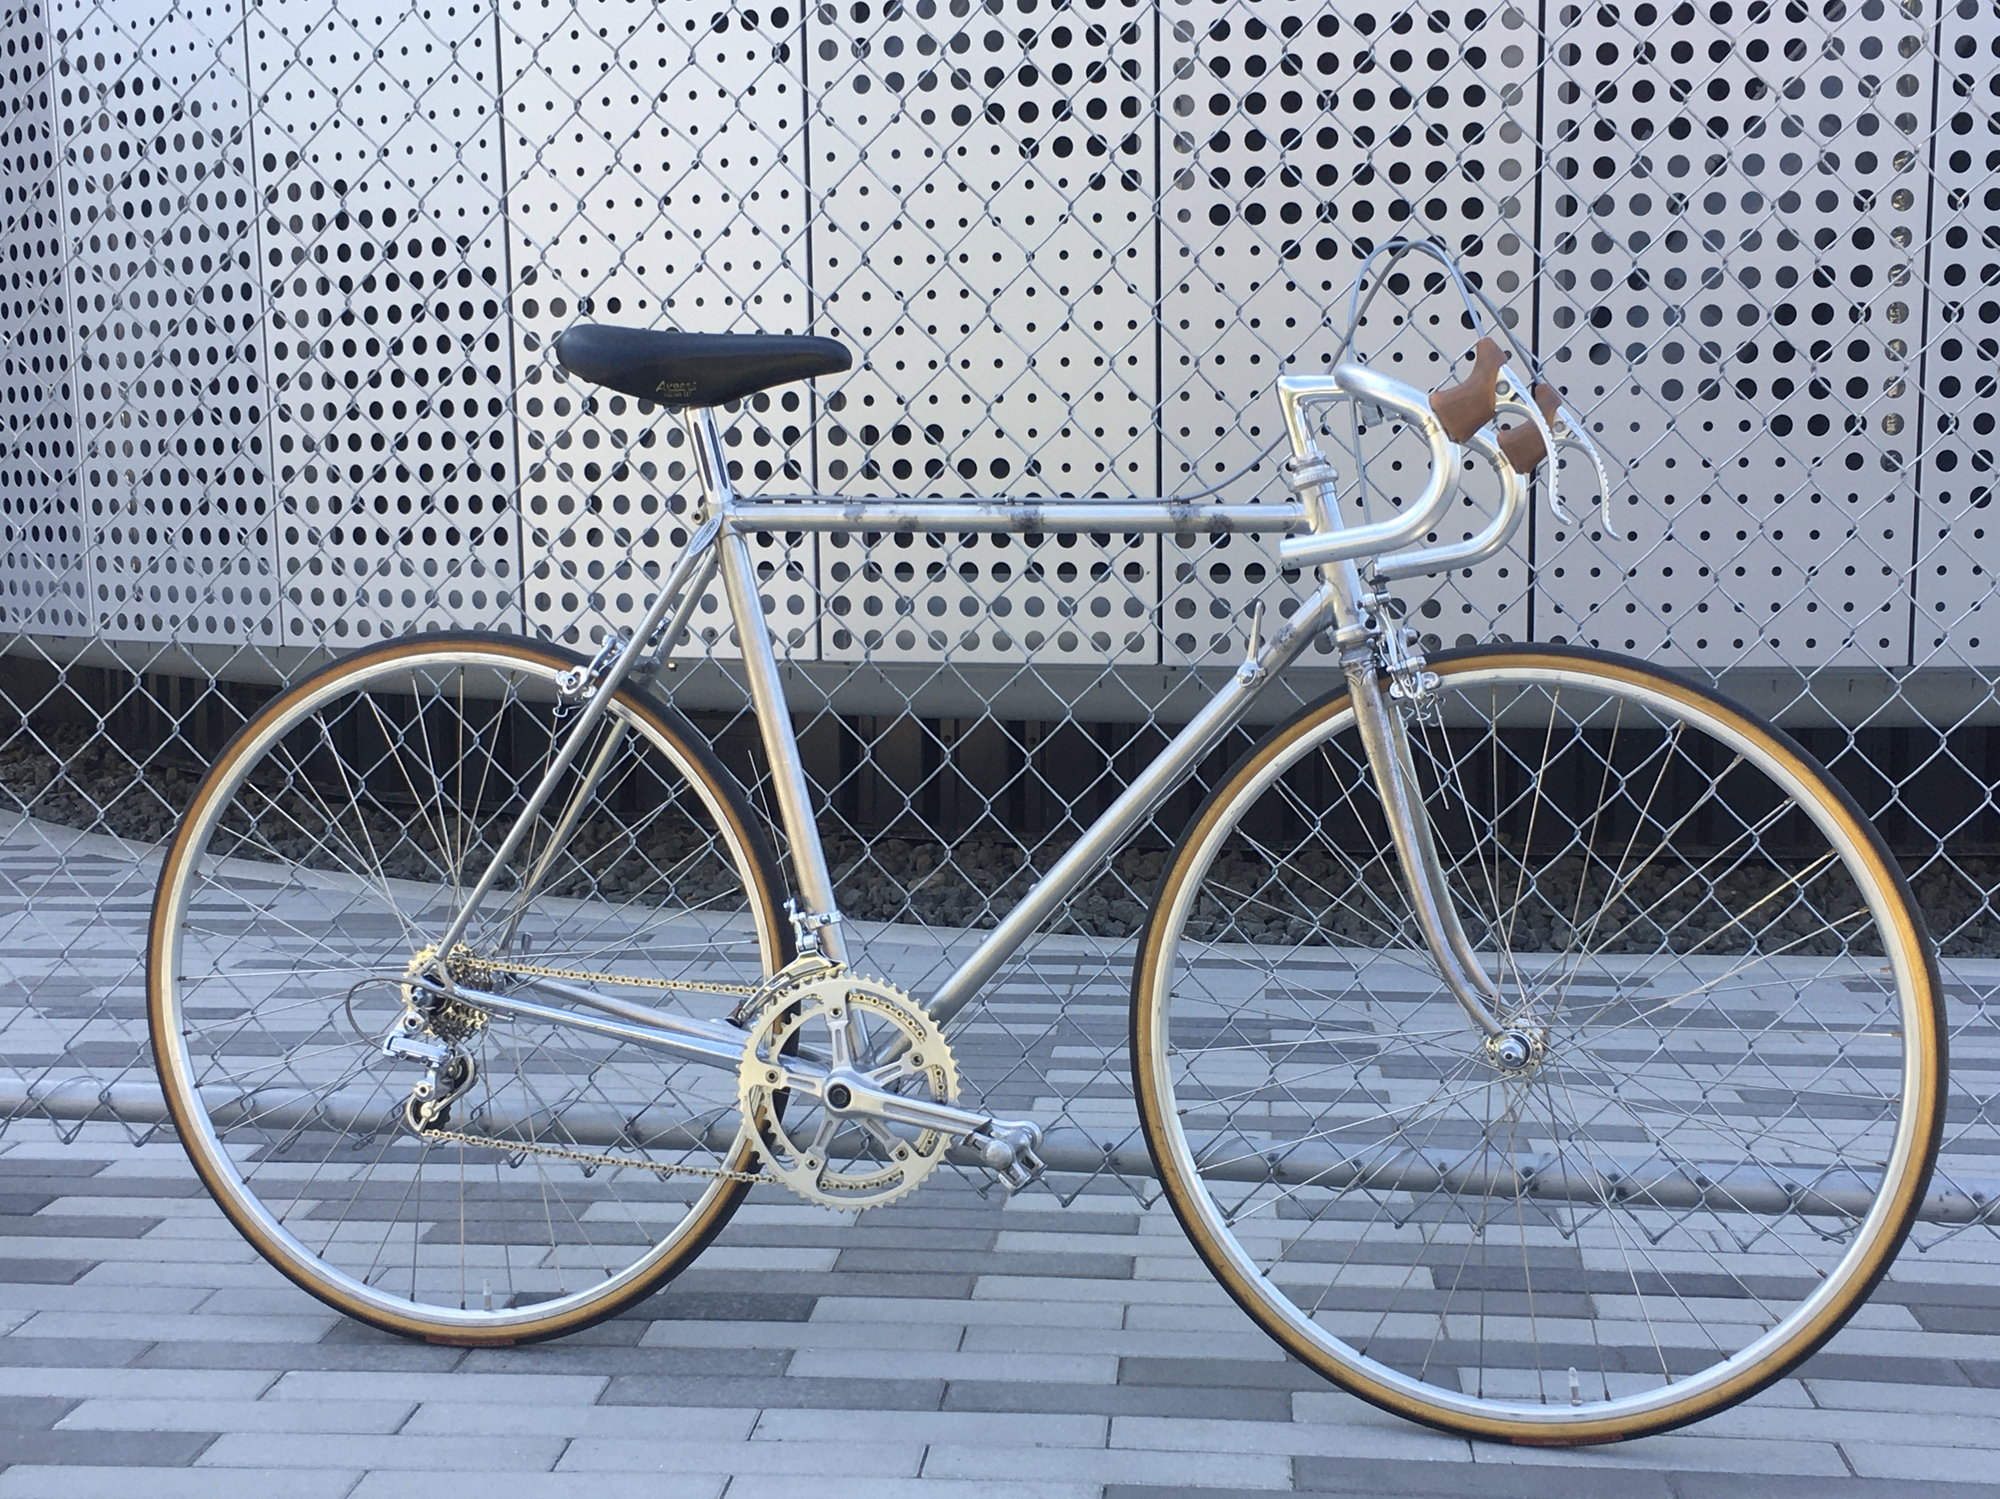
Spent the morning, and most of the afternoon buttoning things up, and then took it out for a spin. Of course I discovered a few adjustments that�ll be needed, but overall it performed very well.
The fit is good, very comfortable actually, and the ride feel is awesome. 24c Turbo Cottons turned out to be a perfect compliment for Columbus SL and right geometry.
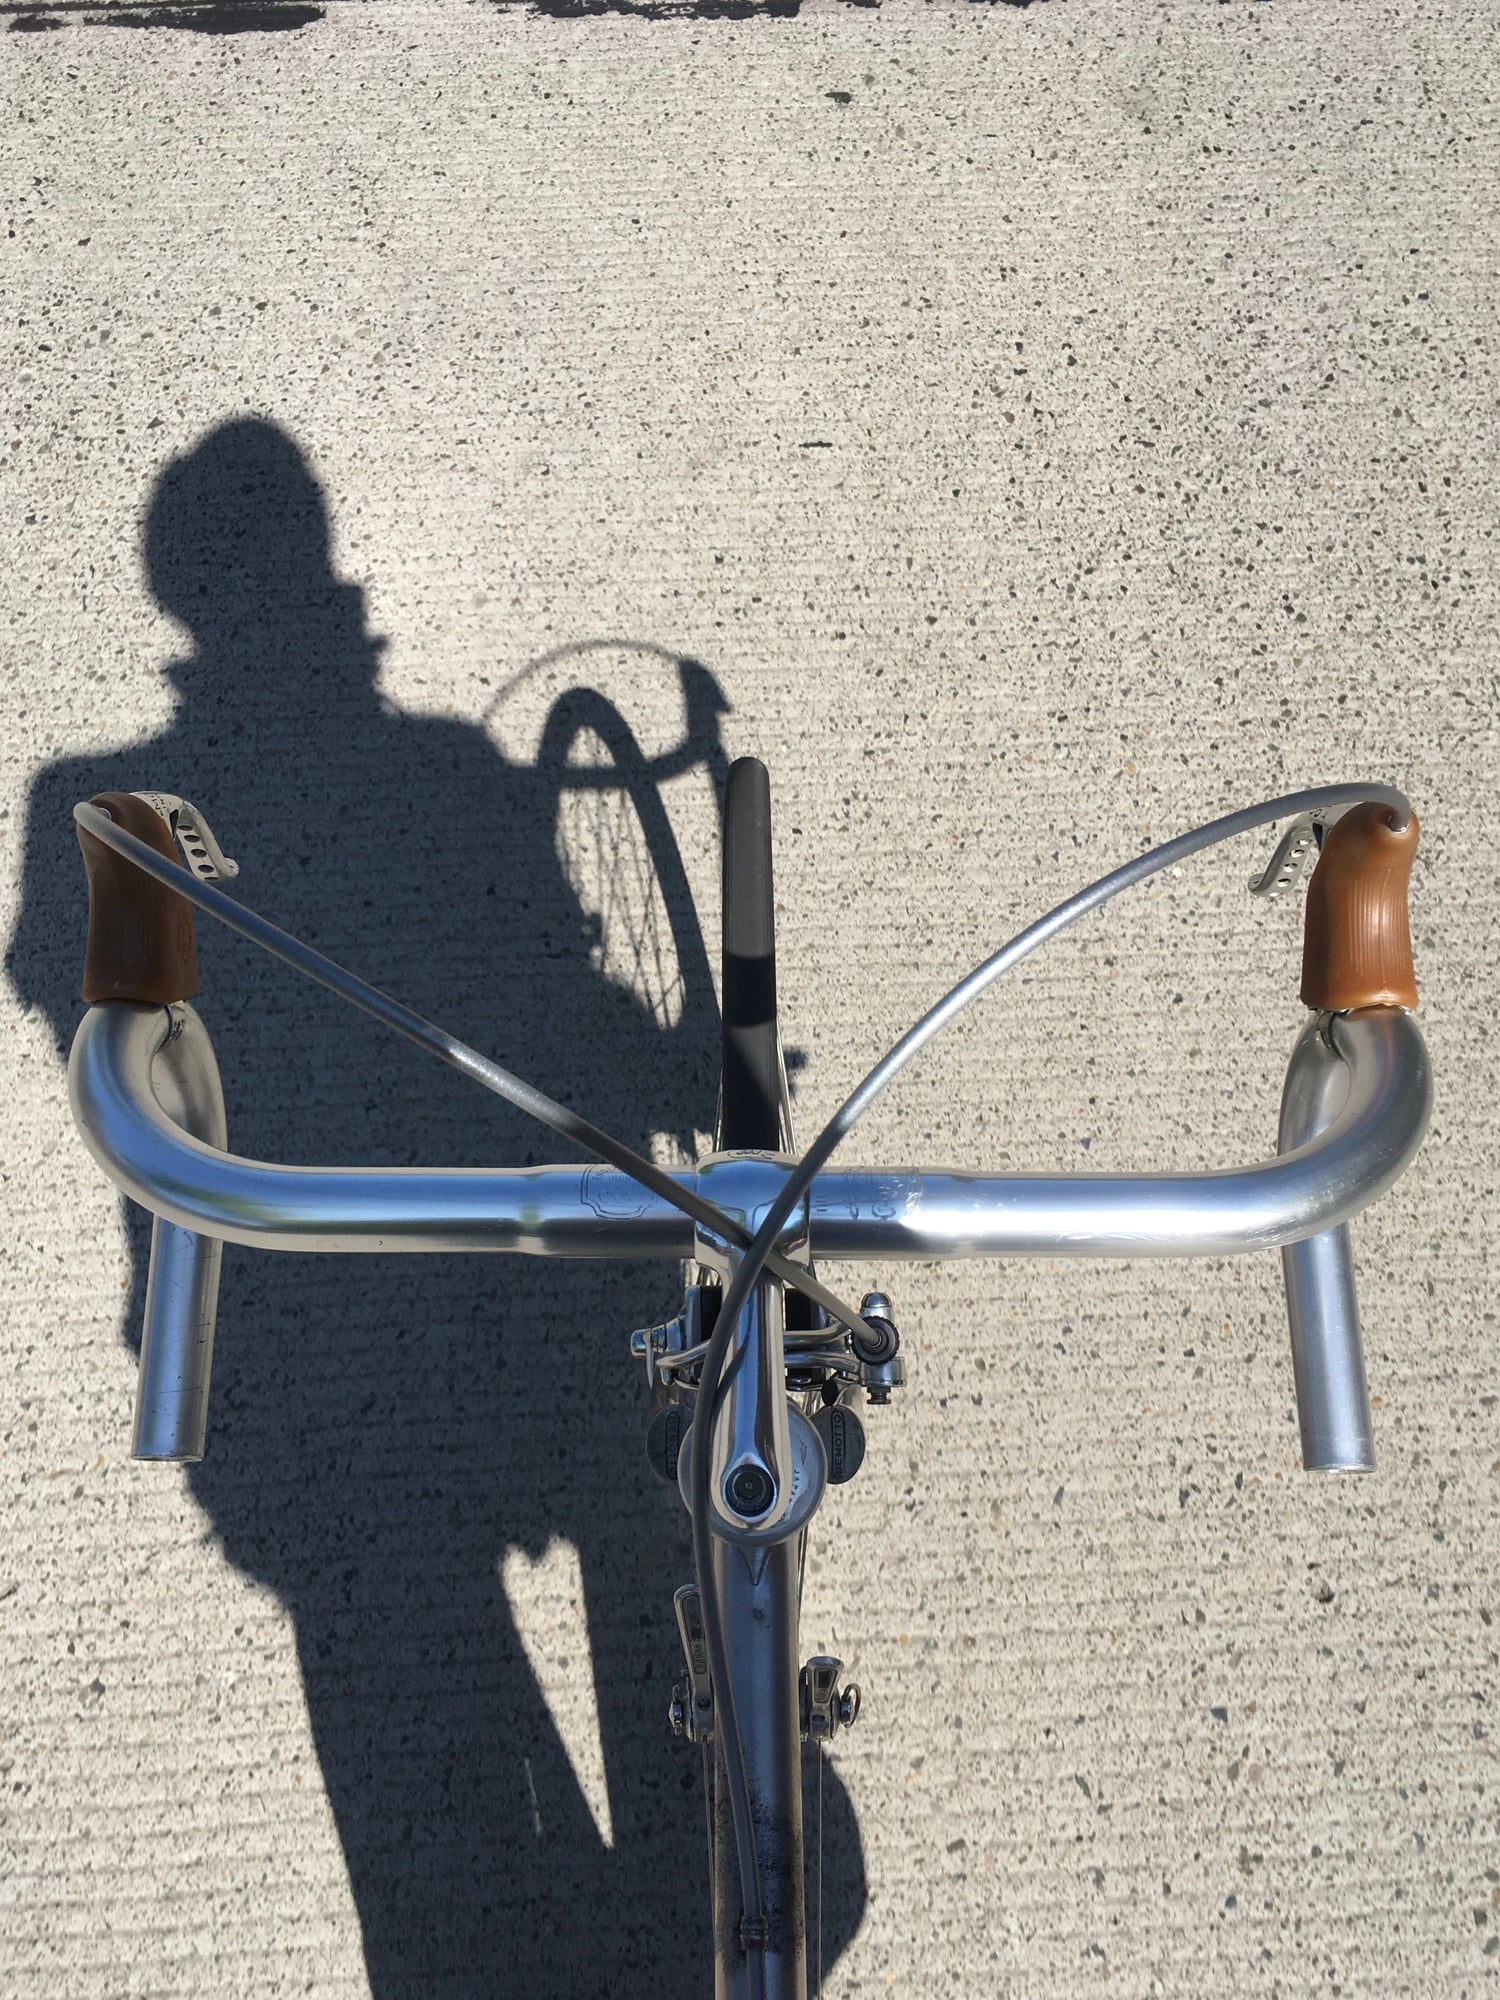
I do have a few finishing touches to make on it still, aside from adjustments, but it is a bike now! No longer a collection of parts in boxes. And built just in time to enjoy it for a few months before the rainy season kicks in again 🙂
The fit is good, very comfortable actually, and the ride feel is awesome. 24c Turbo Cottons turned out to be a perfect compliment for Columbus SL and right geometry.
I do have a few finishing touches to make on it still, aside from adjustments, but it is a bike now! No longer a collection of parts in boxes. And built just in time to enjoy it for a few months before the rainy season kicks in again 🙂
Likes For deux jambes:
Likes For 3speedslow:
07-18-20, 07:28 PM
#23
Senior Member
Thread Starter
Join Date: Jul 2018
Location: Eugene, OR
Posts: 1,326
Mentioned: 64 Post(s)
Tagged: 0 Thread(s)
Quoted: 535 Post(s)
Liked 346 Times
in
196 Posts
Thanks Law! I haven�t weighed the bike yet, but I�m going to guess it finished a little heavier than my target goal. It�s certainly light. But picking it up, it doesn�t strike me as sub 20.
Original specs with Campy SR group for a frame the same size was ~ 19 lbs. My build list should put it in the ballpark, but I think the hubs, bb, pedals, and straight gauge spokes may be culprits.
LBS was closed today, I�ll try to swing by soon to put it on a scale.
Original specs with Campy SR group for a frame the same size was ~ 19 lbs. My build list should put it in the ballpark, but I think the hubs, bb, pedals, and straight gauge spokes may be culprits.
LBS was closed today, I�ll try to swing by soon to put it on a scale.
Likes For deux jambes:
07-18-20, 07:44 PM
#24
Senior Member
Join Date: Oct 2015
Location: PDX
Posts: 13,043
Bikes: Merz x 5 + Specialized Merz Allez x 2, Strawberry/Newlands/DiNucci/Ti x3, Gordon, Fuso/Moulton x2, Bornstein, Paisley,1958-74 Paramounts x3, 3rensho, 74 Moto TC, 73-78 Raleigh Pro's x5, Marinoni x2, 1960 Cinelli SC, 1980 Bianchi SC, PX-10 X 2
Mentioned: 267 Post(s)
Tagged: 0 Thread(s)
Quoted: 4511 Post(s)
Liked 6,381 Times
in
3,669 Posts
Good job!
Likes For merziac:
07-18-20, 08:06 PM
#25
Senior Member
Thread Starter
Join Date: Jul 2018
Location: Eugene, OR
Posts: 1,326
Mentioned: 64 Post(s)
Tagged: 0 Thread(s)
Quoted: 535 Post(s)
Liked 346 Times
in
196 Posts
Thank you Van! This one was fun in that, I mostly just let the bike build itself. I didn�t invest too much �design� into it. And I�m really pleased with the result.
My to-do list is pretty short:
� Adjust front brake toe-in
� Adjust mechs
� Repack pedals
After that, it�s down to adding toe cages, a saddle bag, a bottle cage, and wrapping the bars!
In the meantime, it�s still very rideable:
My to-do list is pretty short:
� Adjust front brake toe-in
� Adjust mechs
� Repack pedals
After that, it�s down to adding toe cages, a saddle bag, a bottle cage, and wrapping the bars!
In the meantime, it�s still very rideable:
Likes For deux jambes: