


Sheared Barrell Adjust in Riveted Stop
 02-15-24, 12:32 PM
#1
Junior Member
Thread Starter
Join Date: Jan 2011
Posts: 155
Mentioned: 0 Post(s)
Tagged: 0 Thread(s)
Quoted: 21 Post(s)
Likes: 0
Liked 0 Times
in
0 Posts
Sheared Barrell Adjust in Riveted Stop
Hello bicycling friends,
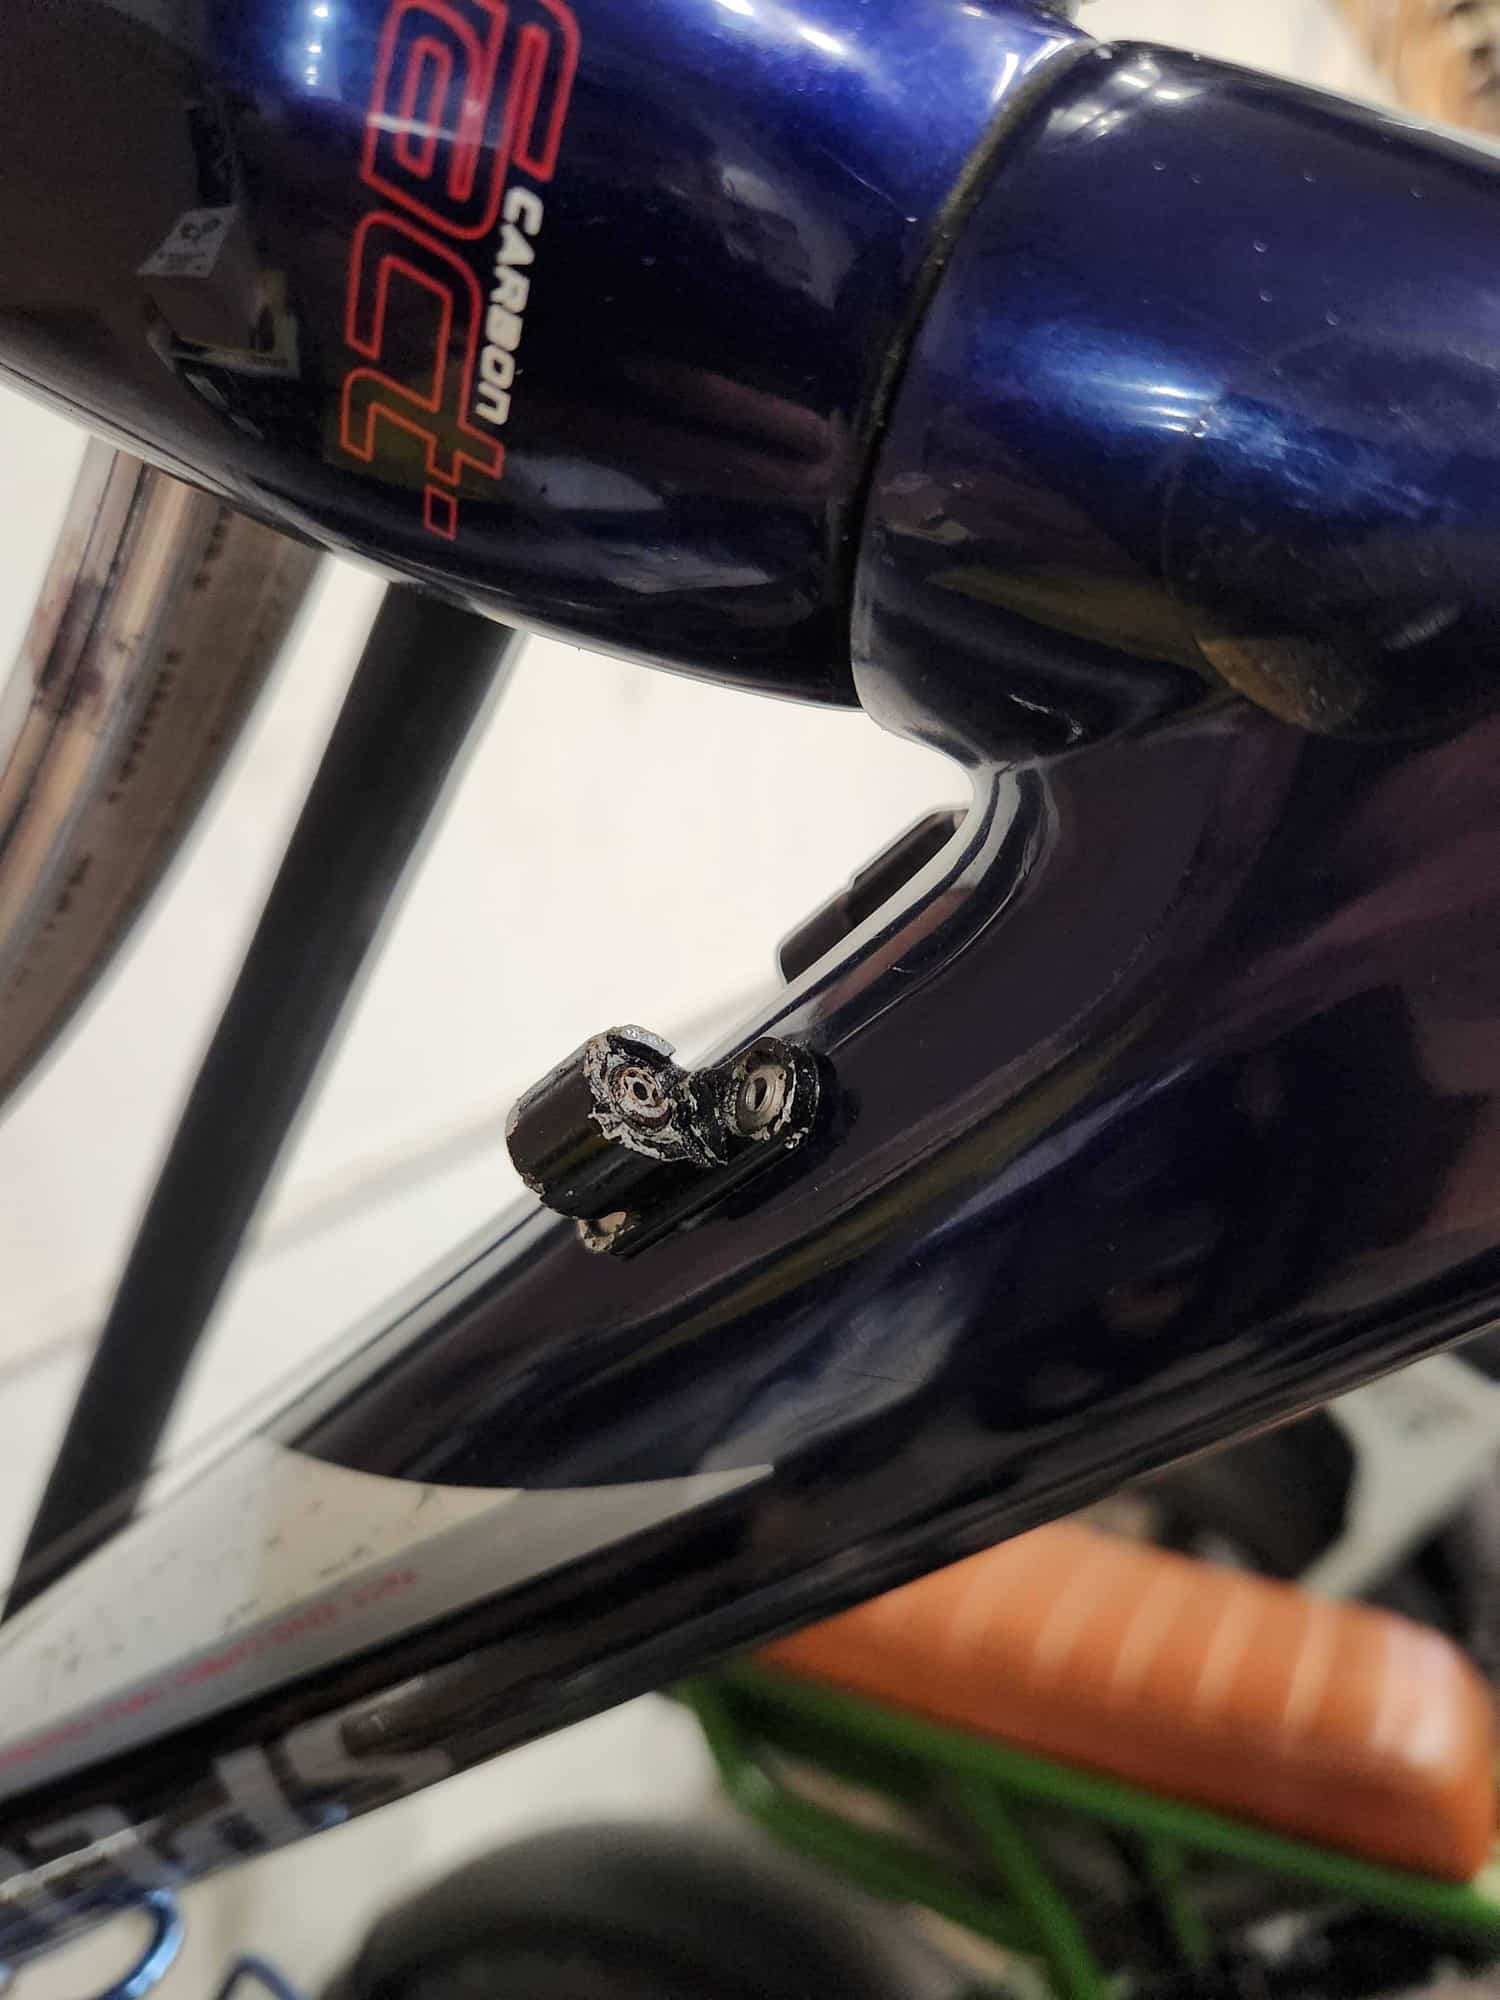
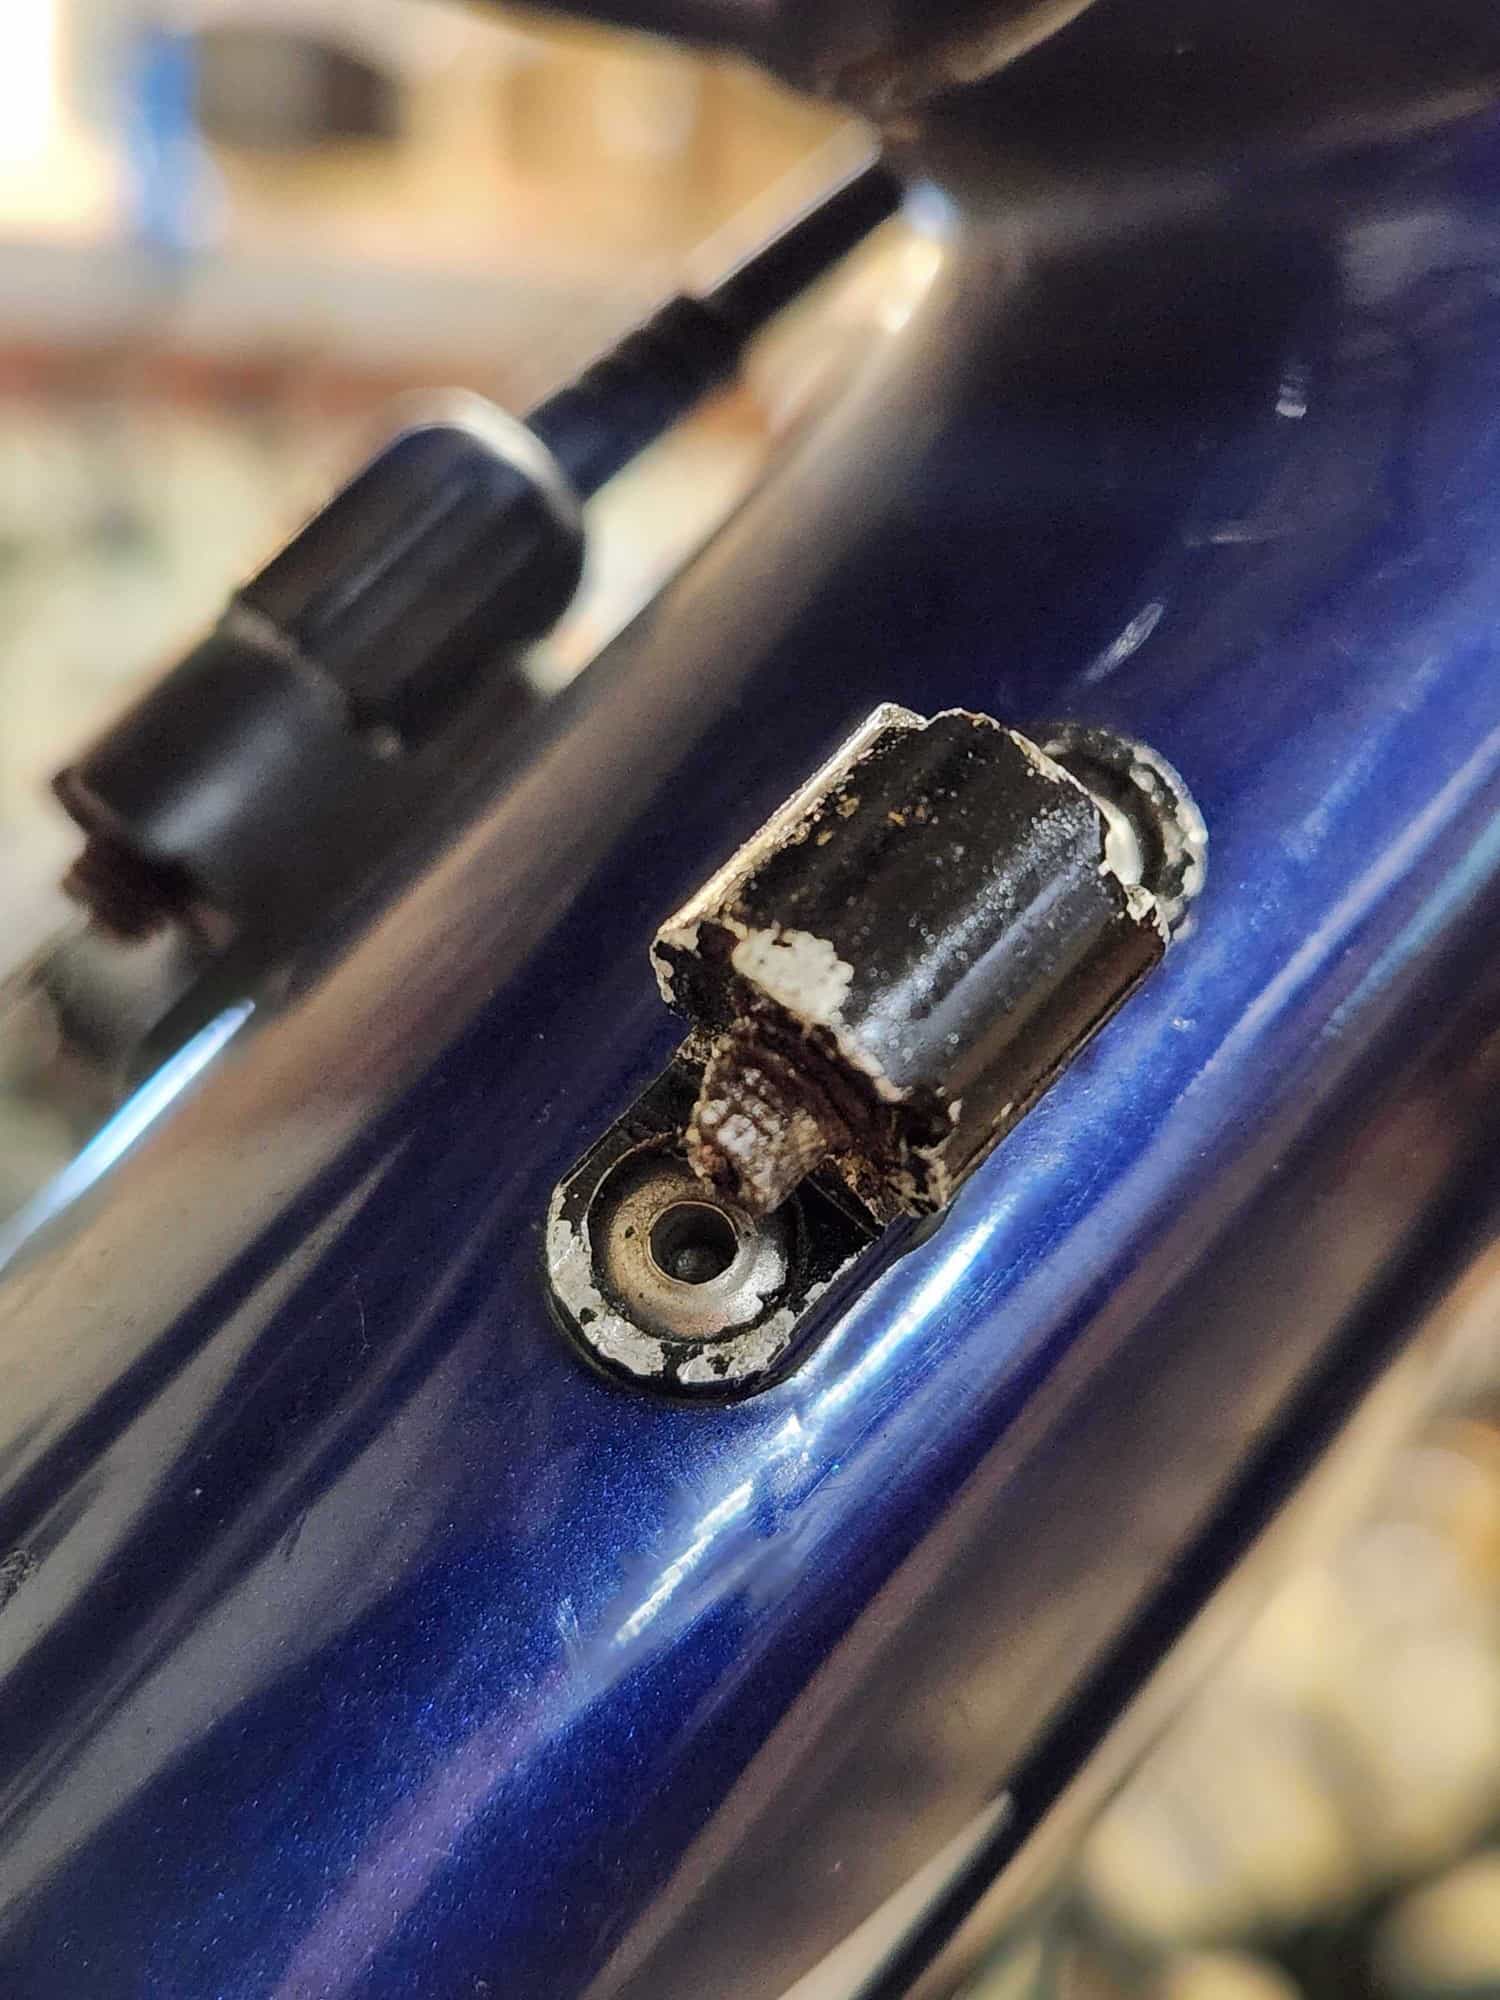
I work at a LBS and have a bike in for repair that we have a tricky situation on. This is definitely not the first time this has happened and probably won't be the last. We were replacing cable / housing for the front derailleur on an older Specialized and the barrel adjuster on the downtube would not turn. We gave it a slight turn with a pair of pliers and the thing sheared right off due to corrosion. Despite trying some penetrating fluid, we had no luck trying to twist it out of there. I'm thinking the only option now is to attempt to drill it out. Even if we ruin the threads in the integrated frame part (it's riveted to the frame), we can still use it as a stop and add a in-line barrel adjuster. Of course the frame is not round so we can't add a clamp on cable stop. Any advice would be GREATLY appreciated, attached a couple photos for reference. Thank you!
I work at a LBS and have a bike in for repair that we have a tricky situation on. This is definitely not the first time this has happened and probably won't be the last. We were replacing cable / housing for the front derailleur on an older Specialized and the barrel adjuster on the downtube would not turn. We gave it a slight turn with a pair of pliers and the thing sheared right off due to corrosion. Despite trying some penetrating fluid, we had no luck trying to twist it out of there. I'm thinking the only option now is to attempt to drill it out. Even if we ruin the threads in the integrated frame part (it's riveted to the frame), we can still use it as a stop and add a in-line barrel adjuster. Of course the frame is not round so we can't add a clamp on cable stop. Any advice would be GREATLY appreciated, attached a couple photos for reference. Thank you!
 02-15-24, 01:43 PM
#2

I'm good to go!
Join Date: Jul 2017
Location: Mississippi
Posts: 14,992
Bikes: Tarmac Disc Comp Di2 - 2020
Mentioned: 51 Post(s)
Tagged: 0 Thread(s)
Quoted: 6196 Post(s)
Liked 4,811 Times
in
3,319 Posts
Unless you have a really long drill bit and are good with your aim, I doubt you'll drill that straight enough while it's on the frame. Drill out the rivets and then try to drill out the remaining part of the barrel adjuster. Maybe also hunt around and try to find another stop like that. Ask Trek. Or look for a old trashed bike frame that has a working one on it and get that.
Likes For Iride01:
02-15-24, 01:54 PM
#3
Junior Member
Thread Starter
Join Date: Jan 2011
Posts: 155
Mentioned: 0 Post(s)
Tagged: 0 Thread(s)
Quoted: 21 Post(s)
Likes: 0
Liked 0 Times
in
0 Posts
Unless you have a really long drill bit and are good with your aim, I doubt you'll drill that straight enough while it's on the frame. Drill out the rivets and then try to drill out the remaining part of the barrel adjuster. Maybe also hunt around and try to find another stop like that. Ask Trek. Or look for a old trashed bike frame that has a working one on it and get that.
02-15-24, 02:24 PM
#4
Senior Member
Join Date: Jan 2009
Location: San Diego, CA
Posts: 3,676
Mentioned: 10 Post(s)
Tagged: 0 Thread(s)
Quoted: 839 Post(s)
Liked 1,064 Times
in
747 Posts
Try a sheet metal screw and run it through the top part of the broken Barrell adjuster. It will grab the hole in the adjuster and hopefully turn it. When you get most of the adjuster to screw out the bottom of the stop you can grab it with some pliers and remove the screw from the top. Use as large of a diameter screw that will fit so it's less likely to bend or break when turning. Put a little penetrating fluid on the threads a day or so beforehand.
Last edited by Crankycrank; 02-15-24 at 02:28 PM.
02-15-24, 02:37 PM
#5
LR�P=HR
Join Date: Sep 2019
Location: SF Bay Area
Posts: 2,180
Bikes: 1981 Holdsworth Special, 1993 C-dale MT3000 & 1996 F700CAD3, 2018 Cervelo R3 & 2022 R5, JustGo Runt, Ridley Oval, Kickr Bike 8-)
Mentioned: 2 Post(s)
Tagged: 0 Thread(s)
Quoted: 867 Post(s)
Liked 1,205 Times
in
694 Posts
02-15-24, 02:47 PM
#6
Senior Member
Join Date: Apr 2016
Posts: 1,236
Mentioned: 3 Post(s)
Tagged: 0 Thread(s)
Quoted: 502 Post(s)
Liked 436 Times
in
335 Posts
It's quite likely bonded as well as riveted so there's a good chance of at least damaging the paint. I've made ridiculously long drill bits for this sort of application by soldering a regular twist drill onto a length of cold rolled steel bar (using brass tube for a joining sleeve). Caution - only drill slowly, if the drill bit gets out of control it will whip around with some ferocity. I'd suggest making a guide for the drill that can be taped to the frame, and more tape to protect the paint.
Likes For grumpus:
02-15-24, 03:57 PM
#7
Senior Member
Join Date: Feb 2012
Location: Rochester, NY
Posts: 18,096
Bikes: Stewart S&S coupled sport tourer, Stewart Sunday light, Stewart Commuting, Stewart Touring, Co Motion Tandem, Stewart 3-Spd, Stewart Track, Fuji Finest, Mongoose Tomac ATB, GT Bravado ATB, JCP Folder, Stewart 650B ATB
Mentioned: 0 Post(s)
Tagged: 0 Thread(s)
Quoted: 4210 Post(s)
Liked 3,876 Times
in
2,315 Posts
My first thought is whether the customer is in this loop. I've certainly had repairs go south more times than I am happy with and when the added service is a0 more costly, and/or b) potentially will affect cosmetics the cust needs to be part of the decision.
I like the repair suggestions already offered.
I'll add that the rear DT casing stop/adjuster is perhaps the single most ignored feature of so many bikes I have serviced. Very few wrenches and/or riders bother to a) remove and lube the adjuster barrel threads during cable replacements, b) even use that adjuster, as nearly every Shimano rear der has an adjuster built into the der. The left/front side adjusted is far less often frozen as it at least gets rotated every so often. Between the road spray from the ft wheel and body sweat from the sides of your legs these adjusted have a bad exposure to crap life. This is one reason why some very few adjusters are made of brass... Andy
__________________
AndrewRStewart
AndrewRStewart
Likes For Andrew R Stewart:
02-15-24, 07:47 PM
#8
Senior Member
Join Date: Apr 2011
Posts: 7,068
Mentioned: 41 Post(s)
Tagged: 0 Thread(s)
Quoted: 4409 Post(s)
Liked 1,566 Times
in
1,028 Posts
Yeah, my hopes are not high for drilling it out while on the frame but I don't see many other options. My hesitation with removing the stop from the frame is that the frame is carbon and our shop doesn't have any experience doing frame repair. Trying to avoid outsourcing it but that's what it may come down to.
Get it out, put it in the vise and drill it until the adjuster remnants falls away from threads when your bit is about the diameter of the top of the threads.
For a long drill bit, you can buy them, but you can also get hex shank drill bits and use an extension. All pretty cheap.
Likes For Kontact:
02-15-24, 08:12 PM
#9
Senior Member
Join Date: Oct 2023
Location: New Jersey
Posts: 571
Mentioned: 5 Post(s)
Tagged: 0 Thread(s)
Quoted: 366 Post(s)
Liked 274 Times
in
175 Posts
It looks like you have some room to work on the bottom side. Cut a slot with a dremel and get a screwdriver on it. Nothing to lose slotting the busted part.
Likes For ScottCommutes:
02-15-24, 08:22 PM
#10
SE Wis
Join Date: Apr 2005
Location: Milwaukee, WI
Posts: 10,517
Bikes: '68 Raleigh Sprite, '02 Raleigh C500, '84 Raleigh Gran Prix, '91 Trek 400, 2013 Novara Randonee, 1990 Trek 970
Mentioned: 40 Post(s)
Tagged: 0 Thread(s)
Quoted: 2747 Post(s)
Liked 3,401 Times
in
2,058 Posts

Likes For dedhed:
02-16-24, 12:26 AM
#11
Junior Member
Thread Starter
Join Date: Jan 2011
Posts: 155
Mentioned: 0 Post(s)
Tagged: 0 Thread(s)
Quoted: 21 Post(s)
Likes: 0
Liked 0 Times
in
0 Posts
The customer does know what's going on but we always feel like this is our fault for trying to turn the adjuster too hard rather than just leaving it alone. Thank you to everyone for the suggestions. We don't feel comfortable removing the housing stop from the frame so going to do everything in our power not to let it get to that. I liked the idea about a sheet metal screw, sounds like it would have a lot of bite. Thank you dedhed for the suggestion about the flexible shafts, seems like it would be a great tool to make attempting to drill it out a little bit easier if that's what it came down to. Any more suggestions would be great!
02-16-24, 04:14 AM
#12
Droid on a mission

Join Date: May 2018
Location: Palm Coast, FL
Posts: 1,005
Bikes: Diamondback Wildwood Classic
Mentioned: 4 Post(s)
Tagged: 0 Thread(s)
Quoted: 317 Post(s)
Liked 280 Times
in
195 Posts
Soak the hell out of it with PB Blaster, wait, and then try a left hand drill to get it to move out.
second thought is to hammer in a small sacrificial Torx bit, it should bite into the opening and then use a 1/4 head on socket wrench to back out
second thought is to hammer in a small sacrificial Torx bit, it should bite into the opening and then use a 1/4 head on socket wrench to back out
__________________
JoeTBM (The Bike Man) - I'm a black & white type of guy, the only gray in my life is the hair on my head
 www.TheBikeMenOfFlaglerCounty.com
JoeTBM (The Bike Man) - I'm a black & white type of guy, the only gray in my life is the hair on my head
www.TheBikeMenOfFlaglerCounty.com Last edited by JoeTBM; 02-16-24 at 04:18 AM.
Likes For JoeTBM:
02-16-24, 04:20 AM
#13
Droid on a mission
Join Date: May 2018
Location: Palm Coast, FL
Posts: 1,005
Bikes: Diamondback Wildwood Classic
Mentioned: 4 Post(s)
Tagged: 0 Thread(s)
Quoted: 317 Post(s)
Liked 280 Times
in
195 Posts
__________________
JoeTBM (The Bike Man) - I'm a black & white type of guy, the only gray in my life is the hair on my head
www.TheBikeMenOfFlaglerCounty.com
JoeTBM (The Bike Man) - I'm a black & white type of guy, the only gray in my life is the hair on my head
www.TheBikeMenOfFlaglerCounty.com
02-16-24, 09:44 AM
#14
Senior Member
Join Date: Oct 2023
Location: New Jersey
Posts: 571
Mentioned: 5 Post(s)
Tagged: 0 Thread(s)
Quoted: 366 Post(s)
Liked 274 Times
in
175 Posts
Get a rawhide or plastic hammer and tap at all over a lot of times to break corrosion loose and facilitate PB Blaster soaking in there.
02-16-24, 11:15 AM
#15
Senior Member

Join Date: Feb 2015
Location: Mission Viejo
Posts: 5,807
Bikes: 1986 Cannondale SR400 (Flat bar commuter), 1988 Cannondale Criterium XTR, 1992 Serotta T-Max, 1995 Trek 970
Mentioned: 20 Post(s)
Tagged: 0 Thread(s)
Quoted: 1944 Post(s)
Liked 2,164 Times
in
1,323 Posts
If you do get it out, but can’t thread in another stop. you may already have a solution going forward.
If not I’ve used Jagwire Sport Direct Adjuster in a number of spots. They were designed for external cable routed Shimano STI levers, but I’ve used them on RD’s with no cable adjusters, Suntour thumb shifters, most anyplace with a stop diameter that will accept a shifter cable ferrule.
John
If not I’ve used Jagwire Sport Direct Adjuster in a number of spots. They were designed for external cable routed Shimano STI levers, but I’ve used them on RD’s with no cable adjusters, Suntour thumb shifters, most anyplace with a stop diameter that will accept a shifter cable ferrule.
John
02-20-24, 07:17 PM
#16
Junior Member
Thread Starter
Join Date: Jan 2011
Posts: 155
Mentioned: 0 Post(s)
Tagged: 0 Thread(s)
Quoted: 21 Post(s)
Likes: 0
Liked 0 Times
in
0 Posts
No luck just yet but have been taking it very slowly. I notched a slot in the bottom and tried to turn it with a flathead screwdriver but the two "tabs" just started to bend outwards. What do you guys think about using a screw extractor? I tried very briefly to use one with no luck but I did not put a lot of torque on it. Would I benefit from trying to use some heat? What about using the Finish Line "Chill Zone" product? Remember this is a carbon frame so I'm hesitant to use too much direct heat. Any additional advice would be great, thanks!
02-23-24, 07:14 PM
#17
Senior Member
Join Date: May 2019
Location: Bloomington, IN
Posts: 2,951
Bikes: Paramount, Faggin, Ochsner, Ciocc, Basso
Mentioned: 117 Post(s)
Tagged: 0 Thread(s)
Quoted: 1303 Post(s)
Liked 1,912 Times
in
1,142 Posts
Do not try heat!! Carbon fiber will break down with the application of 350*F, and that can be achieved with a small butane torch. Worst case; you can perhaps file the edges clean and add an adjustor in line right above the new cable guide. Good luck! Smiles, MH
02-23-24, 08:31 PM
#18
Senior Member
Join Date: Apr 2011
Posts: 7,068
Mentioned: 41 Post(s)
Tagged: 0 Thread(s)
Quoted: 4409 Post(s)
Liked 1,566 Times
in
1,028 Posts
No luck just yet but have been taking it very slowly. I notched a slot in the bottom and tried to turn it with a flathead screwdriver but the two "tabs" just started to bend outwards. What do you guys think about using a screw extractor? I tried very briefly to use one with no luck but I did not put a lot of torque on it. Would I benefit from trying to use some heat? What about using the Finish Line "Chill Zone" product? Remember this is a carbon frame so I'm hesitant to use too much direct heat. Any additional advice would be great, thanks!
A screw extractor used with a wrench might work. But if you want to do it with a drill, you're back to the problem of lining it up.
I think you're likely to drill the rivets and drilling the adjuster shaft out in steps, or replacing the whole assembly.
