


DIY Painting--Green and Black?
 05-18-14, 05:52 PM
#1
Senior Member
Thread Starter

Join Date: Jun 2012
Location: Tennessee
Posts: 266
Bikes: 1964 Raleigh Sports
Mentioned: 0 Post(s)
Tagged: 0 Thread(s)
Quoted: 0 Post(s)
Likes: 0
Liked 0 Times
in
0 Posts
DIY Painting--Green and Black?
Hey, guys--
Planning on taking apart my bike and giving it a new paint job. Anyone ever done their own paint job using dark green and black? If so, I'd love to see some pictures. That's what I'm thinking--at least for right now--and I'd love to see how other people have gone about it.
Planning on taking apart my bike and giving it a new paint job. Anyone ever done their own paint job using dark green and black? If so, I'd love to see some pictures. That's what I'm thinking--at least for right now--and I'd love to see how other people have gone about it.
 05-18-14, 08:22 PM
#2

Senior Member
If you've never repainted a bike before, I feel an obligation to warn you- this will be a ton more work than you're thinking, and it won't turn out anywhere near as well as you're thinking.
05-18-14, 08:30 PM
#3
Senior Member
Thread Starter
Join Date: Jun 2012
Location: Tennessee
Posts: 266
Bikes: 1964 Raleigh Sports
Mentioned: 0 Post(s)
Tagged: 0 Thread(s)
Quoted: 0 Post(s)
Likes: 0
Liked 0 Times
in
0 Posts
Yea, I was thinking that's how it would be. Calling the local shop tomorrow to discuss pricing & the like. I may just sell the thing, instead.
05-19-14, 02:55 AM
#4
Senior Member

Join Date: Apr 2014
Location: Amsterdam
Posts: 72
Bikes: Mission Valencia '09 // Mercier 300 '73
Mentioned: 0 Post(s)
Tagged: 0 Thread(s)
Quoted: 0 Post(s)
Likes: 0
Liked 0 Times
in
0 Posts
I happen to do a lot of painting sans fancy workshop, and here's what you must know:
1. Strip ALL of the paint. Anything left, even if it's a tenth of a millimeter thick, will show up as a bump in the final paint job. Luckily it's not that big an issue in tight grooves between lugs and such since the brazing is almost never perfectly smooth, but along the wide smooth surfaces of the tubes it will look like garbage.
2. Remove all rust with rust remover of choice. I've had disastrous experiments using house hold cleaning supplies and although it's not as fast and effective as an acid bath, a steel brush and generous amount of WD40 will make a steel frame shine.
3. Before you pull out a can, sterilize your environment. Clean the frame of all grease using some kind of degreaser. My preference is actually acetone on a soft cloth. It will dry quickly and plow through any finger prints or left over WD40.
4. From this point on, it's a good idea to work with clean rubber gloves. Very very lightly sand the frame to give it some grip. Although its tempting to sand with the length of the tube, you'll put long grooves into it, so go lightly with small circle motions. "Caress" is probably the right word here.
5. Put a primer on. I like to start with a self-etching primer that will galvanize the steel. You can't sand these though so the surface will start to get rough. After that, put your classic sand-able primer on.
6. Before putting paint on, smooth out the surface. We don't want to polished or the paint won't stick, but the primer will tend to give you a surface like very fine sandpaper. Using 600 grit sandpaper can help remove most of that, although I've actually found that Scotchbrite pads are my sanding tool of choice. Use clean soft cloth to remove any dust.
7. Put a coat of paint on. It's important to have good spray painting technique. Using the can too close will cause the propellant to blow on the paint and give it a rough finish. Worse, it could also lead to drips. With that in mind though, the best results are created using a "wet-painting" technique where you put the paint on heavy enough that it flows a little bit. This way rather than just being sprayed with colored dust, the surface looks like it was dipped in liquid paint, sans brush strokes. Experiment with a part of the frame that won't be seen (like the steerer) before going at it on the main frame. After it's totally dry, repeat step 6. Try not to remove too much paint, but it's not the end of the world if you do. We just want to ensure that any roughness doesn't slowly build up and amplify between layers.
8. Repeat step 6/7 twice more, so that you have 3 layers of color. On the third and final coat of color, move from Scotchbrite pad to steel wool and get very very gentle. Finally, take a clean cloth and scrub the paint until it shiiiiiineessss. Between 3 coats the paint should be thick enough that you're not going to expose anything. If you're pulling paint off with steel wool, then it didn't stick well enough and you need to go back to step 1 and re-strip and clean the frame, with extra caution given to step 3.
9. Apply decals. You can get a lot of high quality recreations of classic decals. Carefully apply them.
10. Clear coating time! This one is pretty simple. I don't sand the clear coat because it will cause it to get foggy so wet-painting is a must. I do 5 coats to ensure ain't nothing scratching my precious decals.
It's a TON of work, but it can look good, and I find the slow work of caressing with sandpaper and steel wool, and working over every inch of the frame very therapeutic.
05-19-14, 05:52 AM
#6
Senior Member
DIY Painting--Green and Black?
I've painted quite a few bikes. I get good results with a brush. There is a new product from Benjamin Moore called Advance Gloss waterborne enamel. Get this, its an alkyd(oil) paint in a water based vehicle. What does that mean? You get an enamel tough gloss finish and can clean your brush in water. Also dries in 1/2 an hour. I painted a frame with it and it turned out great. Three coats in less than 24 hours. And it polishes out great with polishing compounds.
Besides all that great stuff, I painted right over the original finish. Just lightly sanded and wiped down the frame with degreaser. Highly recommend this paint. Its better than an oil based enamel because it dries faster, dries harder. The frame I painted with this product has been knocked around quite a bit and no scratches. A really good finished paint job ready fir bike assembly can be had in two days.
Besides all that great stuff, I painted right over the original finish. Just lightly sanded and wiped down the frame with degreaser. Highly recommend this paint. Its better than an oil based enamel because it dries faster, dries harder. The frame I painted with this product has been knocked around quite a bit and no scratches. A really good finished paint job ready fir bike assembly can be had in two days.
05-19-14, 06:12 AM
#7
Senior Member

Join Date: Apr 2005
Location: Wherever
Posts: 16,748
Mentioned: 92 Post(s)
Tagged: 0 Thread(s)
Quoted: 556 Post(s)
Likes: 0
Liked 132 Times
in
78 Posts
That is very interesting, Big Chainring. Had never heard of that paint though I've always sworn by Bennie Moore when I do any painting in the house. I will use nothing else. I'll have to check into that stuff as I am, sooner or later, planning on painting a frame in this very scheme. Black with green panels. I wonder how well that stuff sprays. Time for a visit to B-Moore.
05-19-14, 06:17 AM
#8
Senior Member

Join Date: Jul 2008
Location: Spartanburg, SC, USA
Posts: 255
Bikes: 1983 Fuji Touring Series IV, Masi Volumetrica 3VC
Mentioned: 0 Post(s)
Tagged: 0 Thread(s)
Quoted: 0 Post(s)
Likes: 0
Liked 4 Times
in
4 Posts
I've painted a few bikes. As stated above, it's a lot of work. And, in the end, rattle can paint isn't really durable enough for use on a bike frame. The last bike I did, I paid a guy at an automotive body shop $60 to do the paint. All I had to do was sand everything down smooth. You don't have to remove all of the old paint. You just have to feather any chipped areas so that the surface is smooth. It turned out great, and is as hard as a factory paint job.
Another option is to have it powder coated. There's a place near me that I use for small stuff. But they'll do an entire frame for $40. In this case, you do have to remove every trace of old paint, because the curing process heats the frame to 400 degrees. For a little more, this place will take a frame in the rough and bead blast it clean for you. I'm not sure if they can do multiple colors, though. Check into this option in your area.
Another option is to have it powder coated. There's a place near me that I use for small stuff. But they'll do an entire frame for $40. In this case, you do have to remove every trace of old paint, because the curing process heats the frame to 400 degrees. For a little more, this place will take a frame in the rough and bead blast it clean for you. I'm not sure if they can do multiple colors, though. Check into this option in your area.
05-19-14, 06:43 AM
#9
Senior Member
Join Date: Apr 2014
Location: Amsterdam
Posts: 72
Bikes: Mission Valencia '09 // Mercier 300 '73
Mentioned: 0 Post(s)
Tagged: 0 Thread(s)
Quoted: 0 Post(s)
Likes: 0
Liked 0 Times
in
0 Posts
Powder coating is fairly overrated IMO. When I was an industrial design student I was crazy about it, but the truth is it's not a whole lot better than anything else. I have a powder coated frame that has chipped just as easily as any spray can job. After all, although often touted as "industrial strength," when was the last time you saw a piece of construction equipment that wasn't chipped from getting banged around? I also tested my method above by smacking my paint job with a wrench. It put some small divets in the paint, but didn't actually crack the coating. So I think the real secret is just to be gentle with your bike. Either be realistic about the fact that it will need new paint at some point, or take steps to protect it.
Powder coating comes in thermosetting and thermoplastic varieties. When you powder coat, you spray the powder on using electric charge rather than aerosol propellant. To create the coating, the powder is heated until it melts and flows. This is similar to the advantage of wet-painting with a can: the flow creates a very smooth durable surface. The problem though is that if you want to put on a second color (like, say, on the lugs), you must use a thermosetting powder instead of a thermoplastic powder because the thermoplastics will return to liquid when heated. The paint job will be a complete mess. The process for applying the two is the same, however thermosetting powders are a lot more expensive because of their special hardening properties.
Also, masking is a big issue. The main reason why I got into painting bikes myself is because I wanted the lugs to be a different color, and it would cost me hundreds of euros to pay for the labor required for an auto shop to do all the careful masking on the lugs.
Another option is to have it powder coated. There's a place near me that I use for small stuff. But they'll do an entire frame for $40. In this case, you do have to remove every trace of old paint, because the curing process heats the frame to 400 degrees. For a little more, this place will take a frame in the rough and bead blast it clean for you. I'm not sure if they can do multiple colors, though. Check into this option in your area.
Also, masking is a big issue. The main reason why I got into painting bikes myself is because I wanted the lugs to be a different color, and it would cost me hundreds of euros to pay for the labor required for an auto shop to do all the careful masking on the lugs.
05-19-14, 07:04 AM
#10
Senior Member
Join Date: Jul 2008
Location: Spartanburg, SC, USA
Posts: 255
Bikes: 1983 Fuji Touring Series IV, Masi Volumetrica 3VC
Mentioned: 0 Post(s)
Tagged: 0 Thread(s)
Quoted: 0 Post(s)
Likes: 0
Liked 4 Times
in
4 Posts
I know two local bike rehabbers that use it exclusively. They've had no issues with durability. I've not done a frame. But the racks and handlebars I've had done have held up great. And they see regular use. From what I've been told, the key is to have good prep of the bare metal prior to powder coating. In all my cases, I've had the parts bead blasted, so they have a good "tooth" for the powder coat to adhere to.
To me, the big downsides to powder coating are that the part must be completely stripped, and that the coating thickness can interfere with reassembly. Other than that, it works well.
That's a good point. If I were to do something like that, I'd probably have a body shop paint the frame in the base color. Then I'd mask and paint the lugs myself. I could be wrong. But I reason that the lugs are less likely to see abuse from cable rub, carrying, etc. So the softer paint there might fare okay. If not, a lug isn't terribly hard to repaint.
05-19-14, 07:16 AM
#11
Senior Member
Join Date: Apr 2014
Location: Amsterdam
Posts: 72
Bikes: Mission Valencia '09 // Mercier 300 '73
Mentioned: 0 Post(s)
Tagged: 0 Thread(s)
Quoted: 0 Post(s)
Likes: 0
Liked 0 Times
in
0 Posts
I know two local bike rehabbers that use it exclusively. They've had no issues with durability. I've not done a frame. But the racks and handlebars I've had done have held up great. And they see regular use. From what I've been told, the key is to have good prep of the bare metal prior to powder coating. In all my cases, I've had the parts bead blasted, so they have a good "tooth" for the powder coat to adhere to.
When it comes to a bike though, and for me also a bike that I don't ride very day (I have a non-descript black fixie that I leave out in the street; the paint job one only comes out for rides on the weekend), the benefit of powder coating is not that big. As you said, a lot of it has to do with the prep, and I think that rattle cans tend to get a bad rap just because the DIY-ers don't have the discipline or patience that removal of old paint, oil, and dust requires. Of course it doesn't look as good as the work done by the professionals if you don't give it the same attention that they do.
My point was mostly that a patient, well prepped and well done rattle can job will serve you pretty much just as well as a powder coating job. Unless you intend to dock your bike in sea water for most of the year. Or use it for rubble removal at a quarry or mine. Then I do recommend powder coating.
05-19-14, 08:37 AM
#12
Elitest Murray Owner

Join Date: Apr 2006
Posts: 2,657
Bikes: 1972 Columbia Tourist Expert III, Columbia Roadster
Mentioned: 0 Post(s)
Tagged: 0 Thread(s)
Quoted: 1 Post(s)
Likes: 0
Liked 3 Times
in
2 Posts
Funny I just posted these photos in another thread of a different topic.


This was just a rattle-can repaint. There are a few things you need to do to get best out of spray paint.
One: sand and clean the frame. Do not sand down to bare metal. Just sand with a fine grit to give the new paint something to adhere to. The original paint sanded in this way is ever better than primer (assuming you are not going to repaint a dark bike a lighter color).
Two: temperature - read the can for the best temperature to spray at. Spray at whatever time of day has that best temperature. This is important. (additionally you need to spray in a clean area - an open garage that you can close as soon as you're done spraying is good, just don't stay inside with the fumes after closing it).
Three: multiple coats. Plan on spraying two or three coats, and plan on letting the paint dry for at least 24 hours between coats, or you're very likely to ruin everything. A final clear coat will help durability too. Resist the urge to glob paint on to cover an area you noticed you missed after you finish spraying - just catch the area with the next coat - otherwise you will likely ruin everything.
Four: don't even think about assembling the bike for three or four days. Leave the frame out in the sun after the final coat has "dried" - you want the paint to fully harden before riding, or it's going to scratch and chip really easily.
Last edited by Mos6502; 05-19-14 at 08:40 AM.
05-19-14, 01:19 PM
#13
Senior Member
Join Date: Apr 2014
Location: Amsterdam
Posts: 72
Bikes: Mission Valencia '09 // Mercier 300 '73
Mentioned: 0 Post(s)
Tagged: 0 Thread(s)
Quoted: 0 Post(s)
Likes: 0
Liked 0 Times
in
0 Posts
^Good advice, although I'd advocate for more than a single clear coat since a clear coat is really what's going to give it the most professional look as well as protect the paint. If you're just worried about protecting the metal underneath a single clear coat is fine, if you want to protect the paint too, use at least 3 clear coats... I do 5 to be safe. All in all it adds about 0,5 mm to the width of the frame, but you'd get the same with powder coating.
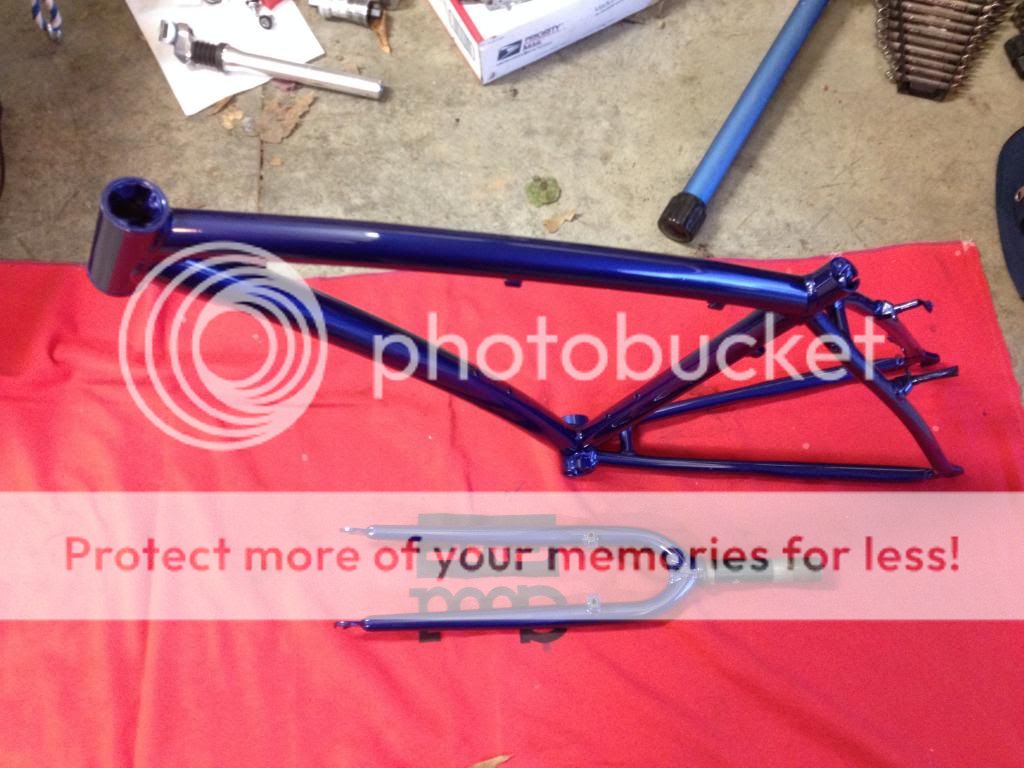
Since I advocated it, I feel obliged to share some pictures of a quick spray I did using wet technique:


It's important to let each of these hard coats dry at least 24 hours, more if it's rainy/humid. A few of them though form a very tough shell, and after polishing with steel wool and a few high gloss clear coats, it looks daaaaaaamn shiny.
Since I advocated it, I feel obliged to share some pictures of a quick spray I did using wet technique:
It's important to let each of these hard coats dry at least 24 hours, more if it's rainy/humid. A few of them though form a very tough shell, and after polishing with steel wool and a few high gloss clear coats, it looks daaaaaaamn shiny.
05-20-14, 05:34 AM
#14
Senior Member
That is very interesting, Big Chainring. Had never heard of that paint though I've always sworn by Bennie Moore when I do any painting in the house. I will use nothing else. I'll have to check into that stuff as I am, sooner or later, planning on painting a frame in this very scheme. Black with green panels. I wonder how well that stuff sprays. Time for a visit to B-Moore.
As far as spraying, they have an "extender" that thins and increases open time. I usually put a little in my paint to help with flow and leveling when I brush.
05-20-14, 07:43 AM
#15
Senior Member
Join Date: Apr 2005
Location: Wherever
Posts: 16,748
Mentioned: 92 Post(s)
Tagged: 0 Thread(s)
Quoted: 556 Post(s)
Likes: 0
Liked 132 Times
in
78 Posts
Looking at the web site, it surprised me as it says this is an interior paint. I presume this is the stuff, eh?
Advance Waterborne Alkyd Paint
Advance Waterborne Alkyd Paint
05-20-14, 08:27 AM
#16
Senior Member
Looking at the web site, it surprised me as it says this is an interior paint. I presume this is the stuff, eh?
Advance Waterborne Alkyd Paint
Advance Waterborne Alkyd Paint
05-20-14, 11:00 AM
#17
Phyllo-buster

Join Date: Jan 2010
Location: Nova Scotia
Posts: 8,847
Bikes: roadsters, club bikes, fixed and classic
Mentioned: 133 Post(s)
Tagged: 0 Thread(s)
Quoted: 2298 Post(s)
Liked 2,055 Times
in
1,255 Posts
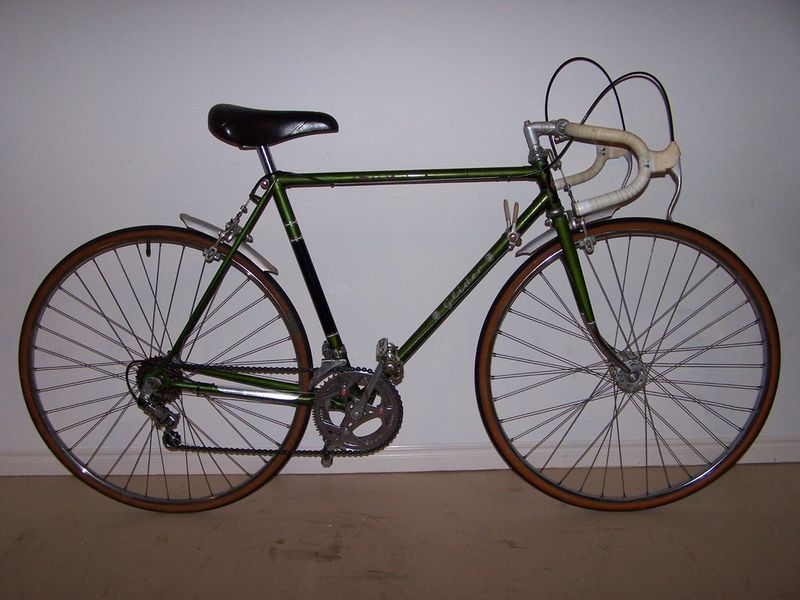
Not hand painted but Raleigh used to get a nice look with black panel and headtube with green.
05-20-14, 12:01 PM
#18

Senior Member

Join Date: Jul 2006
Location: San Jose (Willow Glen) Ca
Posts: 9,847
Bikes: Kirk Custom JK Special, '84 Team Miyata,(dura ace old school) 80?? SR Semi-Pro 600 Arabesque
Mentioned: 106 Post(s)
Tagged: 0 Thread(s)
Quoted: 2338 Post(s)
Liked 2,827 Times
in
1,543 Posts
I happen to do a lot of painting sans fancy workshop, and here's what you must know:
1. Strip ALL of the paint. Anything left, even if it's a tenth of a millimeter thick, will show up as a bump in the final paint job. Luckily it's not that big an issue in tight grooves between lugs and such since the brazing is almost never perfectly smooth, but along the wide smooth surfaces of the tubes it will look like garbage.
2. Remove all rust with rust remover of choice. I've had disastrous experiments using house hold cleaning supplies and although it's not as fast and effective as an acid bath, a steel brush and generous amount of WD40 will make a steel frame shine.
3. Before you pull out a can, sterilize your environment. Clean the frame of all grease using some kind of degreaser. My preference is actually acetone on a soft cloth. It will dry quickly and plow through any finger prints or left over WD40.
4. From this point on, it's a good idea to work with clean rubber gloves. Very very lightly sand the frame to give it some grip. Although its tempting to sand with the length of the tube, you'll put long grooves into it, so go lightly with small circle motions. "Caress" is probably the right word here.
5. Put a primer on. I like to start with a self-etching primer that will galvanize the steel. You can't sand these though so the surface will start to get rough. After that, put your classic sand-able primer on.
6. Before putting paint on, smooth out the surface. We don't want to polished or the paint won't stick, but the primer will tend to give you a surface like very fine sandpaper. Using 600 grit sandpaper can help remove most of that, although I've actually found that Scotchbrite pads are my sanding tool of choice. Use clean soft cloth to remove any dust.
7. Put a coat of paint on. It's important to have good spray painting technique. Using the can too close will cause the propellant to blow on the paint and give it a rough finish. Worse, it could also lead to drips. With that in mind though, the best results are created using a "wet-painting" technique where you put the paint on heavy enough that it flows a little bit. This way rather than just being sprayed with colored dust, the surface looks like it was dipped in liquid paint, sans brush strokes. Experiment with a part of the frame that won't be seen (like the steerer) before going at it on the main frame. After it's totally dry, repeat step 6. Try not to remove too much paint, but it's not the end of the world if you do. We just want to ensure that any roughness doesn't slowly build up and amplify between layers.
8. Repeat step 6/7 twice more, so that you have 3 layers of color. On the third and final coat of color, move from Scotchbrite pad to steel wool and get very very gentle. Finally, take a clean cloth and scrub the paint until it shiiiiiineessss. Between 3 coats the paint should be thick enough that you're not going to expose anything. If you're pulling paint off with steel wool, then it didn't stick well enough and you need to go back to step 1 and re-strip and clean the frame, with extra caution given to step 3.
9. Apply decals. You can get a lot of high quality recreations of classic decals. Carefully apply them.
10. Clear coating time! This one is pretty simple. I don't sand the clear coat because it will cause it to get foggy so wet-painting is a must. I do 5 coats to ensure ain't nothing scratching my precious decals.
It's a TON of work, but it can look good, and I find the slow work of caressing with sandpaper and steel wool, and working over every inch of the frame very therapeutic.
1. Strip ALL of the paint. Anything left, even if it's a tenth of a millimeter thick, will show up as a bump in the final paint job. Luckily it's not that big an issue in tight grooves between lugs and such since the brazing is almost never perfectly smooth, but along the wide smooth surfaces of the tubes it will look like garbage.
2. Remove all rust with rust remover of choice. I've had disastrous experiments using house hold cleaning supplies and although it's not as fast and effective as an acid bath, a steel brush and generous amount of WD40 will make a steel frame shine.
3. Before you pull out a can, sterilize your environment. Clean the frame of all grease using some kind of degreaser. My preference is actually acetone on a soft cloth. It will dry quickly and plow through any finger prints or left over WD40.
4. From this point on, it's a good idea to work with clean rubber gloves. Very very lightly sand the frame to give it some grip. Although its tempting to sand with the length of the tube, you'll put long grooves into it, so go lightly with small circle motions. "Caress" is probably the right word here.
5. Put a primer on. I like to start with a self-etching primer that will galvanize the steel. You can't sand these though so the surface will start to get rough. After that, put your classic sand-able primer on.
6. Before putting paint on, smooth out the surface. We don't want to polished or the paint won't stick, but the primer will tend to give you a surface like very fine sandpaper. Using 600 grit sandpaper can help remove most of that, although I've actually found that Scotchbrite pads are my sanding tool of choice. Use clean soft cloth to remove any dust.
7. Put a coat of paint on. It's important to have good spray painting technique. Using the can too close will cause the propellant to blow on the paint and give it a rough finish. Worse, it could also lead to drips. With that in mind though, the best results are created using a "wet-painting" technique where you put the paint on heavy enough that it flows a little bit. This way rather than just being sprayed with colored dust, the surface looks like it was dipped in liquid paint, sans brush strokes. Experiment with a part of the frame that won't be seen (like the steerer) before going at it on the main frame. After it's totally dry, repeat step 6. Try not to remove too much paint, but it's not the end of the world if you do. We just want to ensure that any roughness doesn't slowly build up and amplify between layers.
8. Repeat step 6/7 twice more, so that you have 3 layers of color. On the third and final coat of color, move from Scotchbrite pad to steel wool and get very very gentle. Finally, take a clean cloth and scrub the paint until it shiiiiiineessss. Between 3 coats the paint should be thick enough that you're not going to expose anything. If you're pulling paint off with steel wool, then it didn't stick well enough and you need to go back to step 1 and re-strip and clean the frame, with extra caution given to step 3.
9. Apply decals. You can get a lot of high quality recreations of classic decals. Carefully apply them.
10. Clear coating time! This one is pretty simple. I don't sand the clear coat because it will cause it to get foggy so wet-painting is a must. I do 5 coats to ensure ain't nothing scratching my precious decals.
It's a TON of work, but it can look good, and I find the slow work of caressing with sandpaper and steel wool, and working over every inch of the frame very therapeutic.
to add
IME This will cost you more than you think even with rattle can, you get lots of over spray and use lots of thin coats to avoid runs/drips so think chemical paint remover, gloves, rags, 1 can of etching primer, 1 can of sandable primer, 1-2 cans color, 2 cans clear, sand paper, scotch bright, etc And don't for get a good mask
and you can get a beautiful result, but it will never be as durable as job using auto paint.
auto paint is the same, but more expensive and more toxic primers your can do from cans. color you can use a preval sprayer or 2 and clear you can use a preval or get catalysed clear in a can (at about $20 a can)
__________________
Life is too short not to ride the best bike you have, as much as you can
(looking for Torpado Super light frame/fork or for Raleigh International frame fork 58cm)
Life is too short not to ride the best bike you have, as much as you can
(looking for Torpado Super light frame/fork or for Raleigh International frame fork 58cm)
05-20-14, 01:46 PM
#19
Senior Member
Join Date: Jul 2008
Location: Spartanburg, SC, USA
Posts: 255
Bikes: 1983 Fuji Touring Series IV, Masi Volumetrica 3VC
Mentioned: 0 Post(s)
Tagged: 0 Thread(s)
Quoted: 0 Post(s)
Likes: 0
Liked 4 Times
in
4 Posts
Well as long as we're sharing photos, here's one of the last bike I built with custom paint. It was for my daughter, who commutes in college. This cost $60, and took a week:
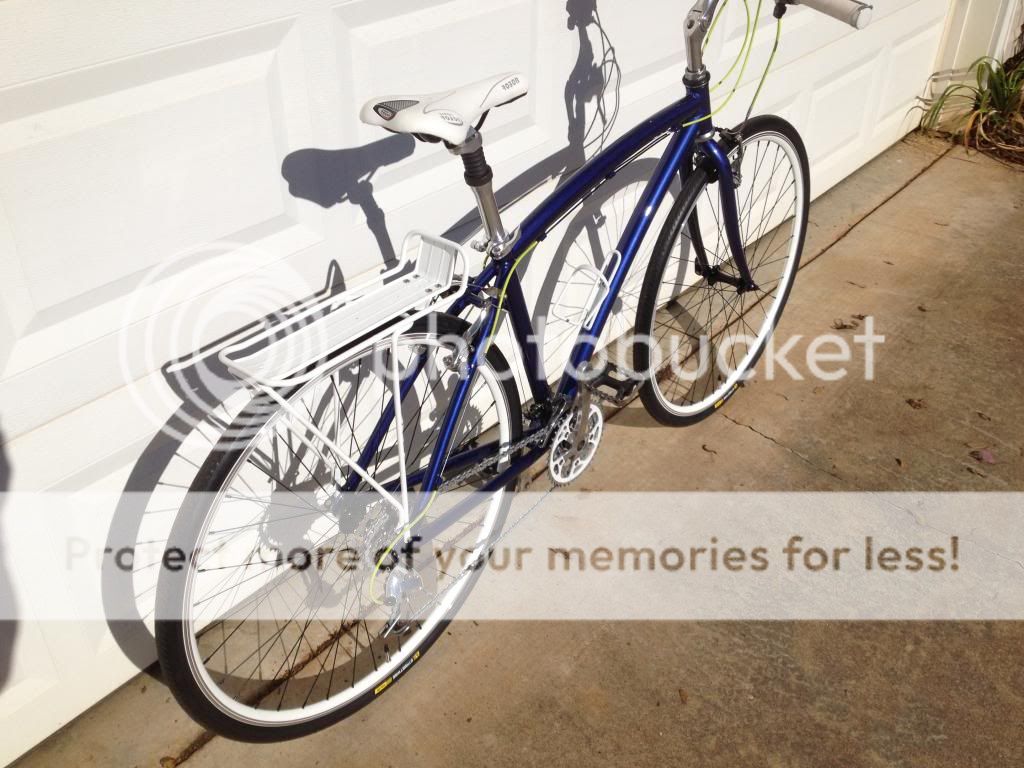
When I dropped the frame off, it looked like this (sanded, scuffed and cleaned):

I have no problem with DIY. But I know my limitations. I just don't have access to the chemistry and equipment to create a top quality, durable finish on a bike.


When I dropped the frame off, it looked like this (sanded, scuffed and cleaned):

I have no problem with DIY. But I know my limitations. I just don't have access to the chemistry and equipment to create a top quality, durable finish on a bike.
05-20-14, 04:56 PM
#20
No longer active
Join Date: May 2012
Posts: 1,001
Mentioned: 5 Post(s)
Tagged: 0 Thread(s)
Quoted: 89 Post(s)
Likes: 0
Liked 6 Times
in
6 Posts
Knowing one's limitations is the first step to success.
This is turning out to be one of the best, most accurate, and realistic threads on frame painting that I've read in a while; congrats, everyone!
I can only add: remember to be patient. Repainting a frame isn't particularly difficult, but doing it correctly is kind-of a tedious and involved process that requires time & a certain amount of diligence.
Also this: make sure your primer & topcoats are compatible; alkyds & acrylics (being latex-based) won't bond well to enamel-based primers; research is your friend.
Lastly, fwiw, my vote is always with acid-bath stripping, prior to the actual repaint. It might cost you $50, but it's totally worth it.

