Make your own T tool to braze chain stays to the BB shell
 02-10-21, 09:05 AM
#1

framebuilder
Thread Starter
Make your own T tool to braze chain stays to the BB shell
An adjustable T tool is useful for an amateur/hobbyist builder making lugged frames. It is a time tested and easy enough to make. When I was visiting framebuilders in the UK in the 70’s, nearly all of them used one to braze the chainstays/rear dropouts units to the bottom bracket shell. It holds them at the chain stay/seat tube angle that is determined by the bottom bracket drop, seat angle and chainstay length. The rear axle in the T tool holds the dropouts at the chosen width. Some kind of straight edge with an adjustable screw positions the dropouts equidistant from the frame’s centerline (like the Park Frame Alignment Gage).
One of the advantages of using a T tool while brazing the chainstays into the BB shell is because it is easy to see if the brazing material has reached the end of the shell’s socket. It also avoids frame fixture holding attachments from robbing flame heat at the BB. And allows the frame to be best positioned to braze those joints (because you are only moving the frame and not frame and fixture).

In following posts, I will provide some very basic instructions of how to make one including a materials list with dimensions.
One of the advantages of using a T tool while brazing the chainstays into the BB shell is because it is easy to see if the brazing material has reached the end of the shell’s socket. It also avoids frame fixture holding attachments from robbing flame heat at the BB. And allows the frame to be best positioned to braze those joints (because you are only moving the frame and not frame and fixture).
In following posts, I will provide some very basic instructions of how to make one including a materials list with dimensions.

Likes For Doug Fattic:
02-10-21, 09:33 AM
#2
framebuilder
Thread Starter
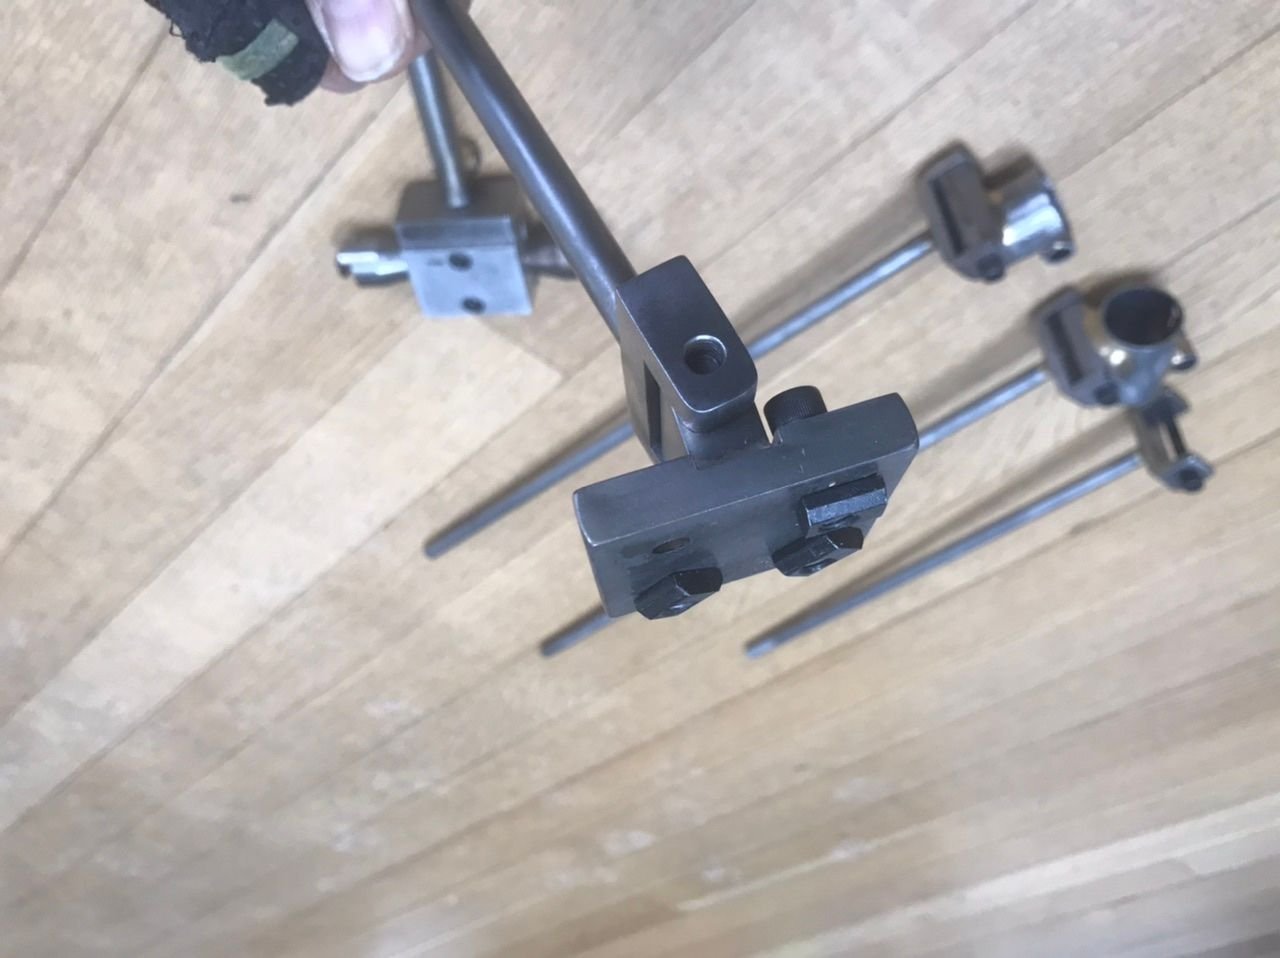
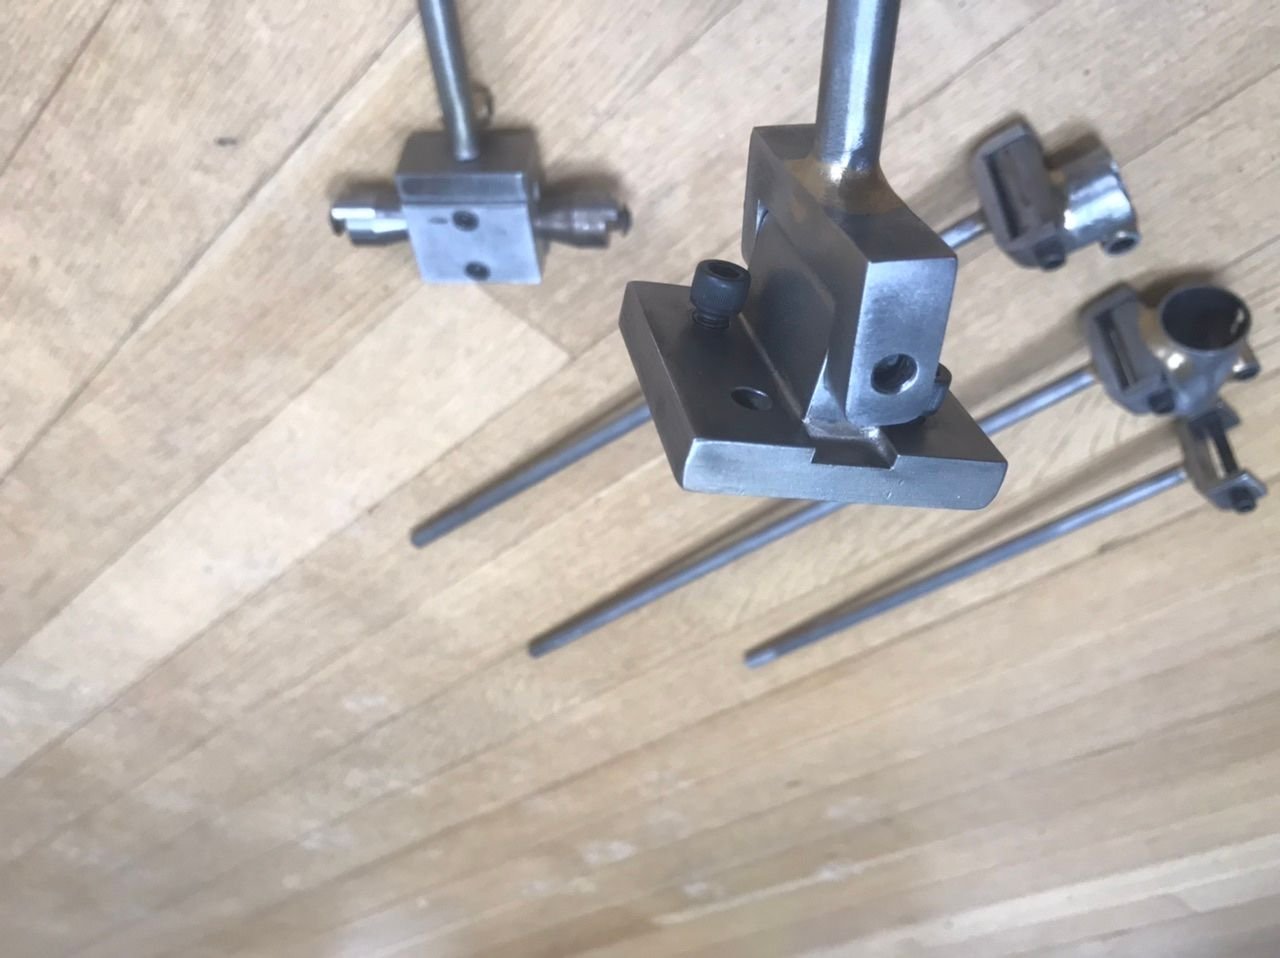
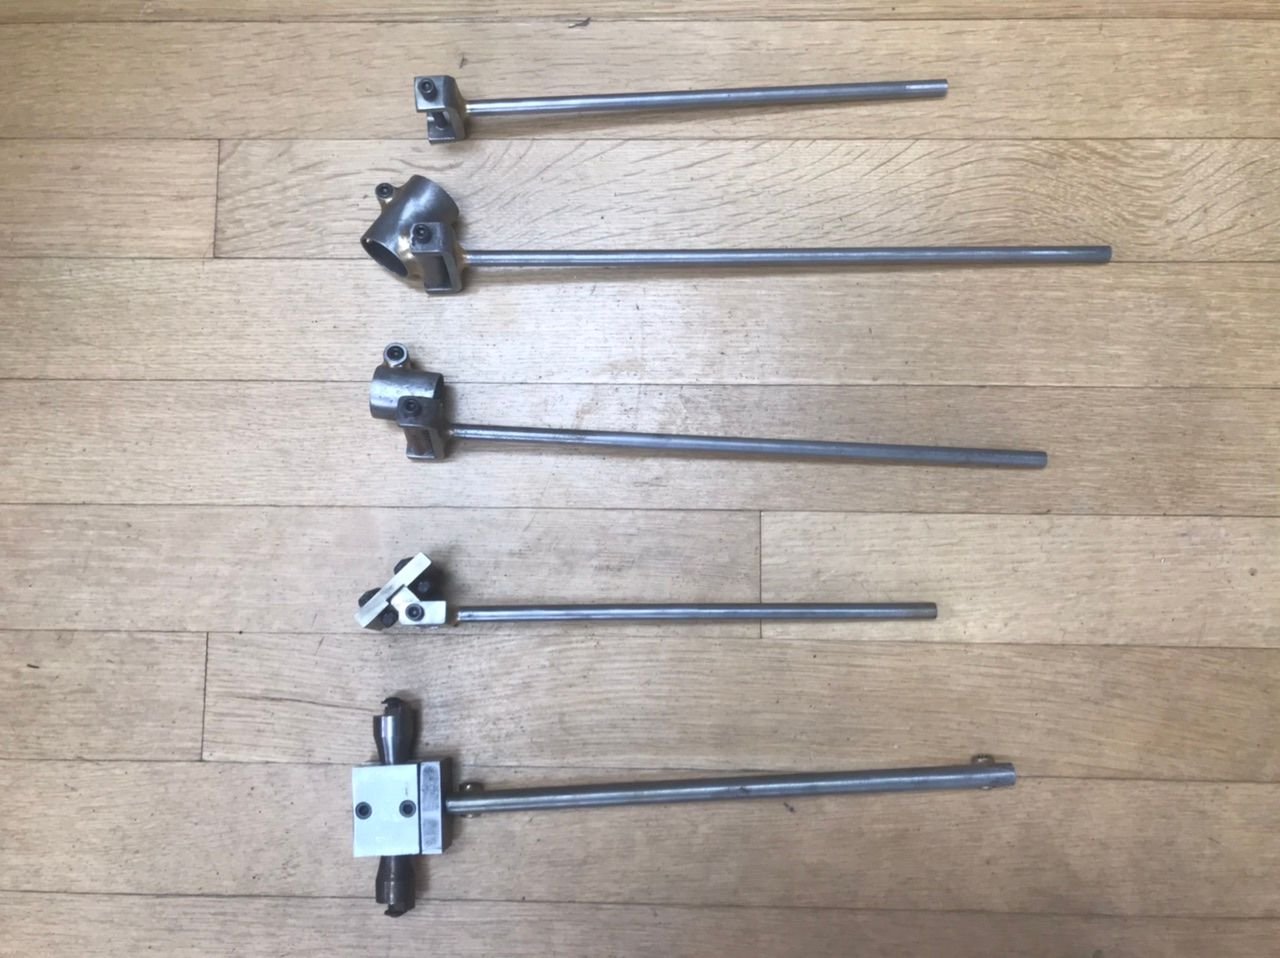
Here is a picture of an assembled T tool and next to it are the pieces needed to make one.

Here is a list of materials to make one:
1. 4130 steel tubing ˝” outside diameter with a wall thickness of 0.058”.
a. 38 cm + - long for the long stem of the T
b. 80 mm long for the short crosss piece of the T (that holds the rear axle)
2. 4130 steel tubing 3/8” OD with a wall thickness of 0.083”
a. 30 cm for the adjustable part that goes into the long stem of the T
b. 35 mm to make the pivoting axle on the accessory piece
3. 4130 steel tubing 1 Ľ” OD with a wall thickness of 0.058”
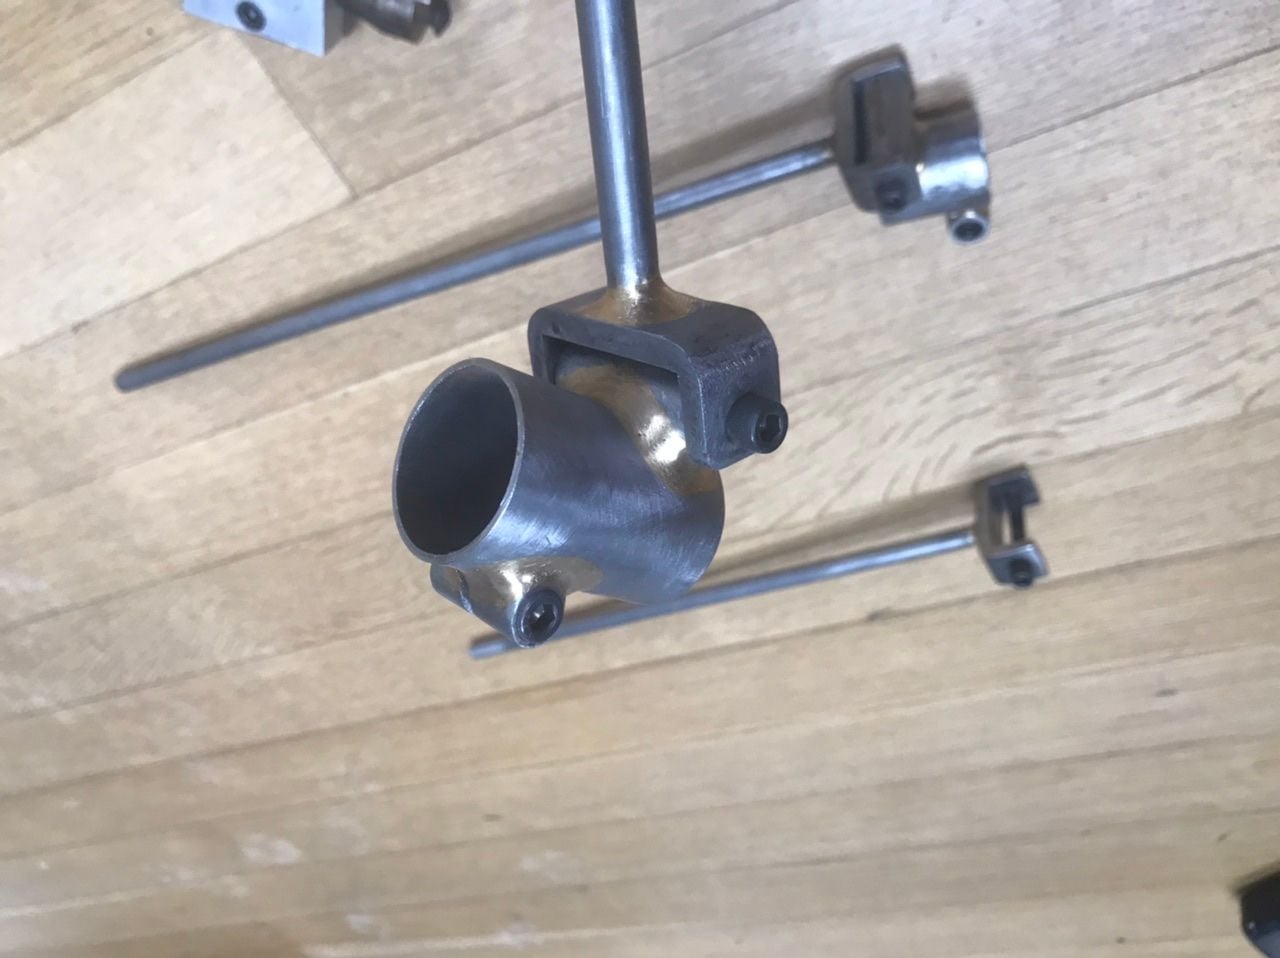
a. 25 mm long (1 inch) for the tube on the accessory that slips over the seat tube
4. ľ” X Ľ” steel flat stock
a. 10cm (4”) long to make the U shaped piece that attaches to the frame’s binder bolt or holds the accessory piece
5. Hourglass shaped rear rack boss for seat stay attachment
a. Framebuilder’s Supply # = M-RB-USA-10
b. This tightens together the two sliding long pieces of the stem
6. Seat binder
a. Nova Supply # = 202894-2150 SEAT BINDER
b. This tightens the accessory onto the top of the frame’s seat tube
7. Rear Axle 10 X 1 X 187mm
a.Wheels Manufacturing Axle #20, QBP# 6104. Or rob an axle set from an old wheel.
8. 4 - 10 X 1 Axle Nuts
a, Problem Solvers Axle Nuts 10 X 1 with rotating axle nuts. QBP# 7100
9. 2 - Hex Jam nuts 10 X 1 mm (a thin nut).
a. These can be found sometimes at hardware stores or they can be harvested from old rear axles
10. M6 X 20mm Socket Head Cap Screw (SHCS)
a. This goes into the seat binder
11. M6 X 50mm Socket Head Cap Screw
a.This is the bolt along with washers and nut for the pivoting axle on the accessory.
12. M5 X 12mm Socket Head Cap Screw and washer
a. This goes into the hourglass piece
13. 2 - 6mm washers
a.These go with the M6 X 50 bolt
14. 1 - 5mm washer
a. This goes with the M5 X 12 bolt
15. 1 - M6 nut (I like to use a wing nut
a. This goes with the 50 mm bolt assembly
Here is a list of materials to make one:
1. 4130 steel tubing ˝” outside diameter with a wall thickness of 0.058”.
a. 38 cm + - long for the long stem of the T
b. 80 mm long for the short crosss piece of the T (that holds the rear axle)
2. 4130 steel tubing 3/8” OD with a wall thickness of 0.083”
a. 30 cm for the adjustable part that goes into the long stem of the T
b. 35 mm to make the pivoting axle on the accessory piece
3. 4130 steel tubing 1 Ľ” OD with a wall thickness of 0.058”
a. 25 mm long (1 inch) for the tube on the accessory that slips over the seat tube
4. ľ” X Ľ” steel flat stock
a. 10cm (4”) long to make the U shaped piece that attaches to the frame’s binder bolt or holds the accessory piece
5. Hourglass shaped rear rack boss for seat stay attachment
a. Framebuilder’s Supply # = M-RB-USA-10
b. This tightens together the two sliding long pieces of the stem
6. Seat binder
a. Nova Supply # = 202894-2150 SEAT BINDER
b. This tightens the accessory onto the top of the frame’s seat tube
7. Rear Axle 10 X 1 X 187mm
a.Wheels Manufacturing Axle #20, QBP# 6104. Or rob an axle set from an old wheel.
8. 4 - 10 X 1 Axle Nuts
a, Problem Solvers Axle Nuts 10 X 1 with rotating axle nuts. QBP# 7100
9. 2 - Hex Jam nuts 10 X 1 mm (a thin nut).
a. These can be found sometimes at hardware stores or they can be harvested from old rear axles
10. M6 X 20mm Socket Head Cap Screw (SHCS)
a. This goes into the seat binder
11. M6 X 50mm Socket Head Cap Screw
a.This is the bolt along with washers and nut for the pivoting axle on the accessory.
12. M5 X 12mm Socket Head Cap Screw and washer
a. This goes into the hourglass piece
13. 2 - 6mm washers
a.These go with the M6 X 50 bolt
14. 1 - 5mm washer
a. This goes with the M5 X 12 bolt
15. 1 - M6 nut (I like to use a wing nut
a. This goes with the 50 mm bolt assembly
Likes For Doug Fattic:
02-10-21, 10:51 AM
#3
Senior Member
Join Date: Dec 2011
Location: NE Ohio
Posts: 2,595
Bikes: 1992 Serotta Colorado II,Co-Motion Speedster, Giant Escape Hybrid, 1977 Schwinn Super Le Tour
Mentioned: 4 Post(s)
Tagged: 0 Thread(s)
Quoted: 455 Post(s)
Likes: 0
Liked 112 Times
in
85 Posts
I remember that tool!!
 02-10-21, 02:31 PM
#4
framebuilder
Thread Starter
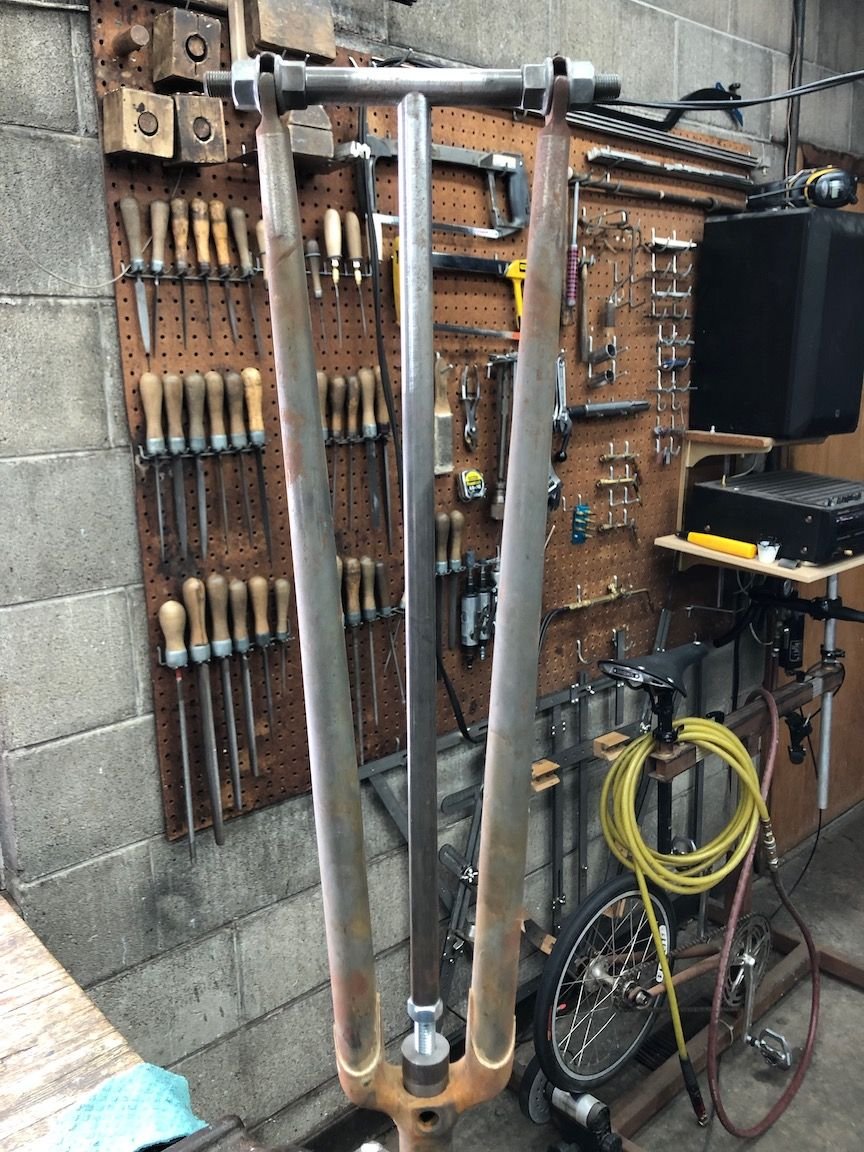
The length of the ˝” OD part of the the stem at 38cm is based on what can fit between some random fork’s crown and front drops when used as a holding fixture. The end can be mitered with a 12” round American Pattern file to fit flush against the short piece. I used a 3/8” treaded rod as part of the accessories to hold the long ˝” tube against the short tube while they are being fillet brazed together. A front axle goes through the short tube to hold it in place in the fork.
I actually made (as a demonstration) an extra long fork as a fixture for my framebuilding class students in case they wanted to make a T tool while they were here. I used my lathe to make a threaded cone to fit inside the bottom of the steerer but a simple washer and 2 nuts on the threaded rod will work ok too.
The shorter cross piece of the T should be 80 mm. This is also˝” in diameter with a wall thickness of 0.058”. The reason for this length is because when using a fork as a holding fixture, there is only 100mm in between the inside of the dropouts and there needs to be room for the nuts on the end of the cross piece to hold it in place.
Wicks Aircraft or Aircraft Spruce are 2 places that sell 4130 tubing by the foot that is suitable to make this T tool.There are others of course.
Likes For Doug Fattic:
02-10-21, 02:36 PM
#5


Randomhead
Join Date: Aug 2008
Location: Happy Valley, Pennsylvania
Posts: 24,385
Mentioned: 0 Post(s)
Tagged: 0 Thread(s)
Quoted: 4 Post(s)
Liked 3,686 Times
in
2,509 Posts
Thanks Doug, this is a very nice thread.
02-10-21, 04:49 PM
#7
framebuilder
Thread Starter
You don't, any steel tubing will work as long as they have a reasonably close tolerance sliding back and forth with each other. However 4130 has smooth inside and outside walls unlike some tubing that has a rougher surface and is more irregular in tubing diameter. The advantage of 4130 is that it will work well and can be bought easily by the foot from one of those 2 suppliers. The same place that one can get practice tubing for brazing.
As a teacher I know that one of my jobs is to reduce frustration for students as much as possible. That is part of creating a good learning environment. It is easy to get discouraged and lose motivation so the job takes longer or doesn't get finished at all. In preparation to post this subject thread, I got out my box of various not-4130-tubing pieces that I had bought locally. This tubing is just inferior (although not that cheap). It will take extra fussing around to smooth the surface. Not only that but its diameter is not perfectly round. And it is just a bit too big to slide into the 1/2" tubing. I have a lathe and know how to use it but that time could be saved by getting higher quality materials.
As a teacher I know that one of my jobs is to reduce frustration for students as much as possible. That is part of creating a good learning environment. It is easy to get discouraged and lose motivation so the job takes longer or doesn't get finished at all. In preparation to post this subject thread, I got out my box of various not-4130-tubing pieces that I had bought locally. This tubing is just inferior (although not that cheap). It will take extra fussing around to smooth the surface. Not only that but its diameter is not perfectly round. And it is just a bit too big to slide into the 1/2" tubing. I have a lathe and know how to use it but that time could be saved by getting higher quality materials.
Likes For Doug Fattic:
02-10-21, 05:18 PM
#8
Senior Member
Join Date: Dec 2019
Posts: 953
Mentioned: 3 Post(s)
Tagged: 0 Thread(s)
Quoted: 321 Post(s)
Liked 263 Times
in
212 Posts
You don't, any steel tubing will work as long as they have a reasonably close tolerance sliding back and forth with each other. However 4130 has smooth inside and outside walls unlike some tubing that has a rougher surface and is more irregular in tubing diameter. The advantage of 4130 is that it will work well and can be bought easily by the foot from one of those 2 suppliers. The same place that one can get practice tubing for brazing.
As a teacher I know that one of my jobs is to reduce frustration for students as much as possible. That is part of creating a good learning environment. It is easy to get discouraged and lose motivation so the job takes longer or doesn't get finished at all. In preparation to post this subject thread, I got out my box of various not-4130-tubing pieces that I had bought locally. This tubing is just inferior (although not that cheap). It will take extra fussing around to smooth the surface. Not only that but its diameter is not perfectly round. And it is just a bit too big to slide into the 1/2" tubing. I have a lathe and know how to use it but that time could be saved by getting higher quality materials.
As a teacher I know that one of my jobs is to reduce frustration for students as much as possible. That is part of creating a good learning environment. It is easy to get discouraged and lose motivation so the job takes longer or doesn't get finished at all. In preparation to post this subject thread, I got out my box of various not-4130-tubing pieces that I had bought locally. This tubing is just inferior (although not that cheap). It will take extra fussing around to smooth the surface. Not only that but its diameter is not perfectly round. And it is just a bit too big to slide into the 1/2" tubing. I have a lathe and know how to use it but that time could be saved by getting higher quality materials.
02-10-21, 05:45 PM
#9
Team Beer
Join Date: Apr 2004
Location: Sacramento CA
Posts: 6,339
Bikes: Too Many
Mentioned: 3 Post(s)
Tagged: 0 Thread(s)
Quoted: 114 Post(s)
Liked 159 Times
in
104 Posts
Thanks Doug. I already have the axle portion of this so I'll most likely just need to make the upper portion. I will probably reverse to have the larger tubing and binder on the top because I use the lower section for a homemade canti jig.
__________________
I'm not one for fawning over bicycles, but I do believe that our bikes communicate with us, and what this bike is saying is, "You're an idiot." BikeSnobNYC
I'm not one for fawning over bicycles, but I do believe that our bikes communicate with us, and what this bike is saying is, "You're an idiot." BikeSnobNYC
02-11-21, 08:19 AM
#10
framebuilder
Thread Starter
Here in the UK it's very hard to buy 4130 (unless you get actual Reynolds bike tubes) but you can sometimes get seamless and DOM tubing just from the local steelyard. I know mine has some. The regular mild steel welded tube is round and straight but it does have a bit of a seam on the inside so is not ideal for making anything that telescopes inside anything else.
I used some mild steel DOM tubing to make a bilaminate frame one time and both the inside and outside walls were smooth and worked well in that application.
Likes For Doug Fattic:


Likes For Tdotbikes: