


Raliegh SB1799 Team Issue repaint

 07-01-20, 05:16 PM
#27


Se�or Member

Join Date: Oct 2004
Location: Hardy, VA
Posts: 17,944
Bikes: Mostly English - predominantly Raleighs
Mentioned: 71 Post(s)
Tagged: 0 Thread(s)
Quoted: 1497 Post(s)
Liked 1,099 Times
in
644 Posts
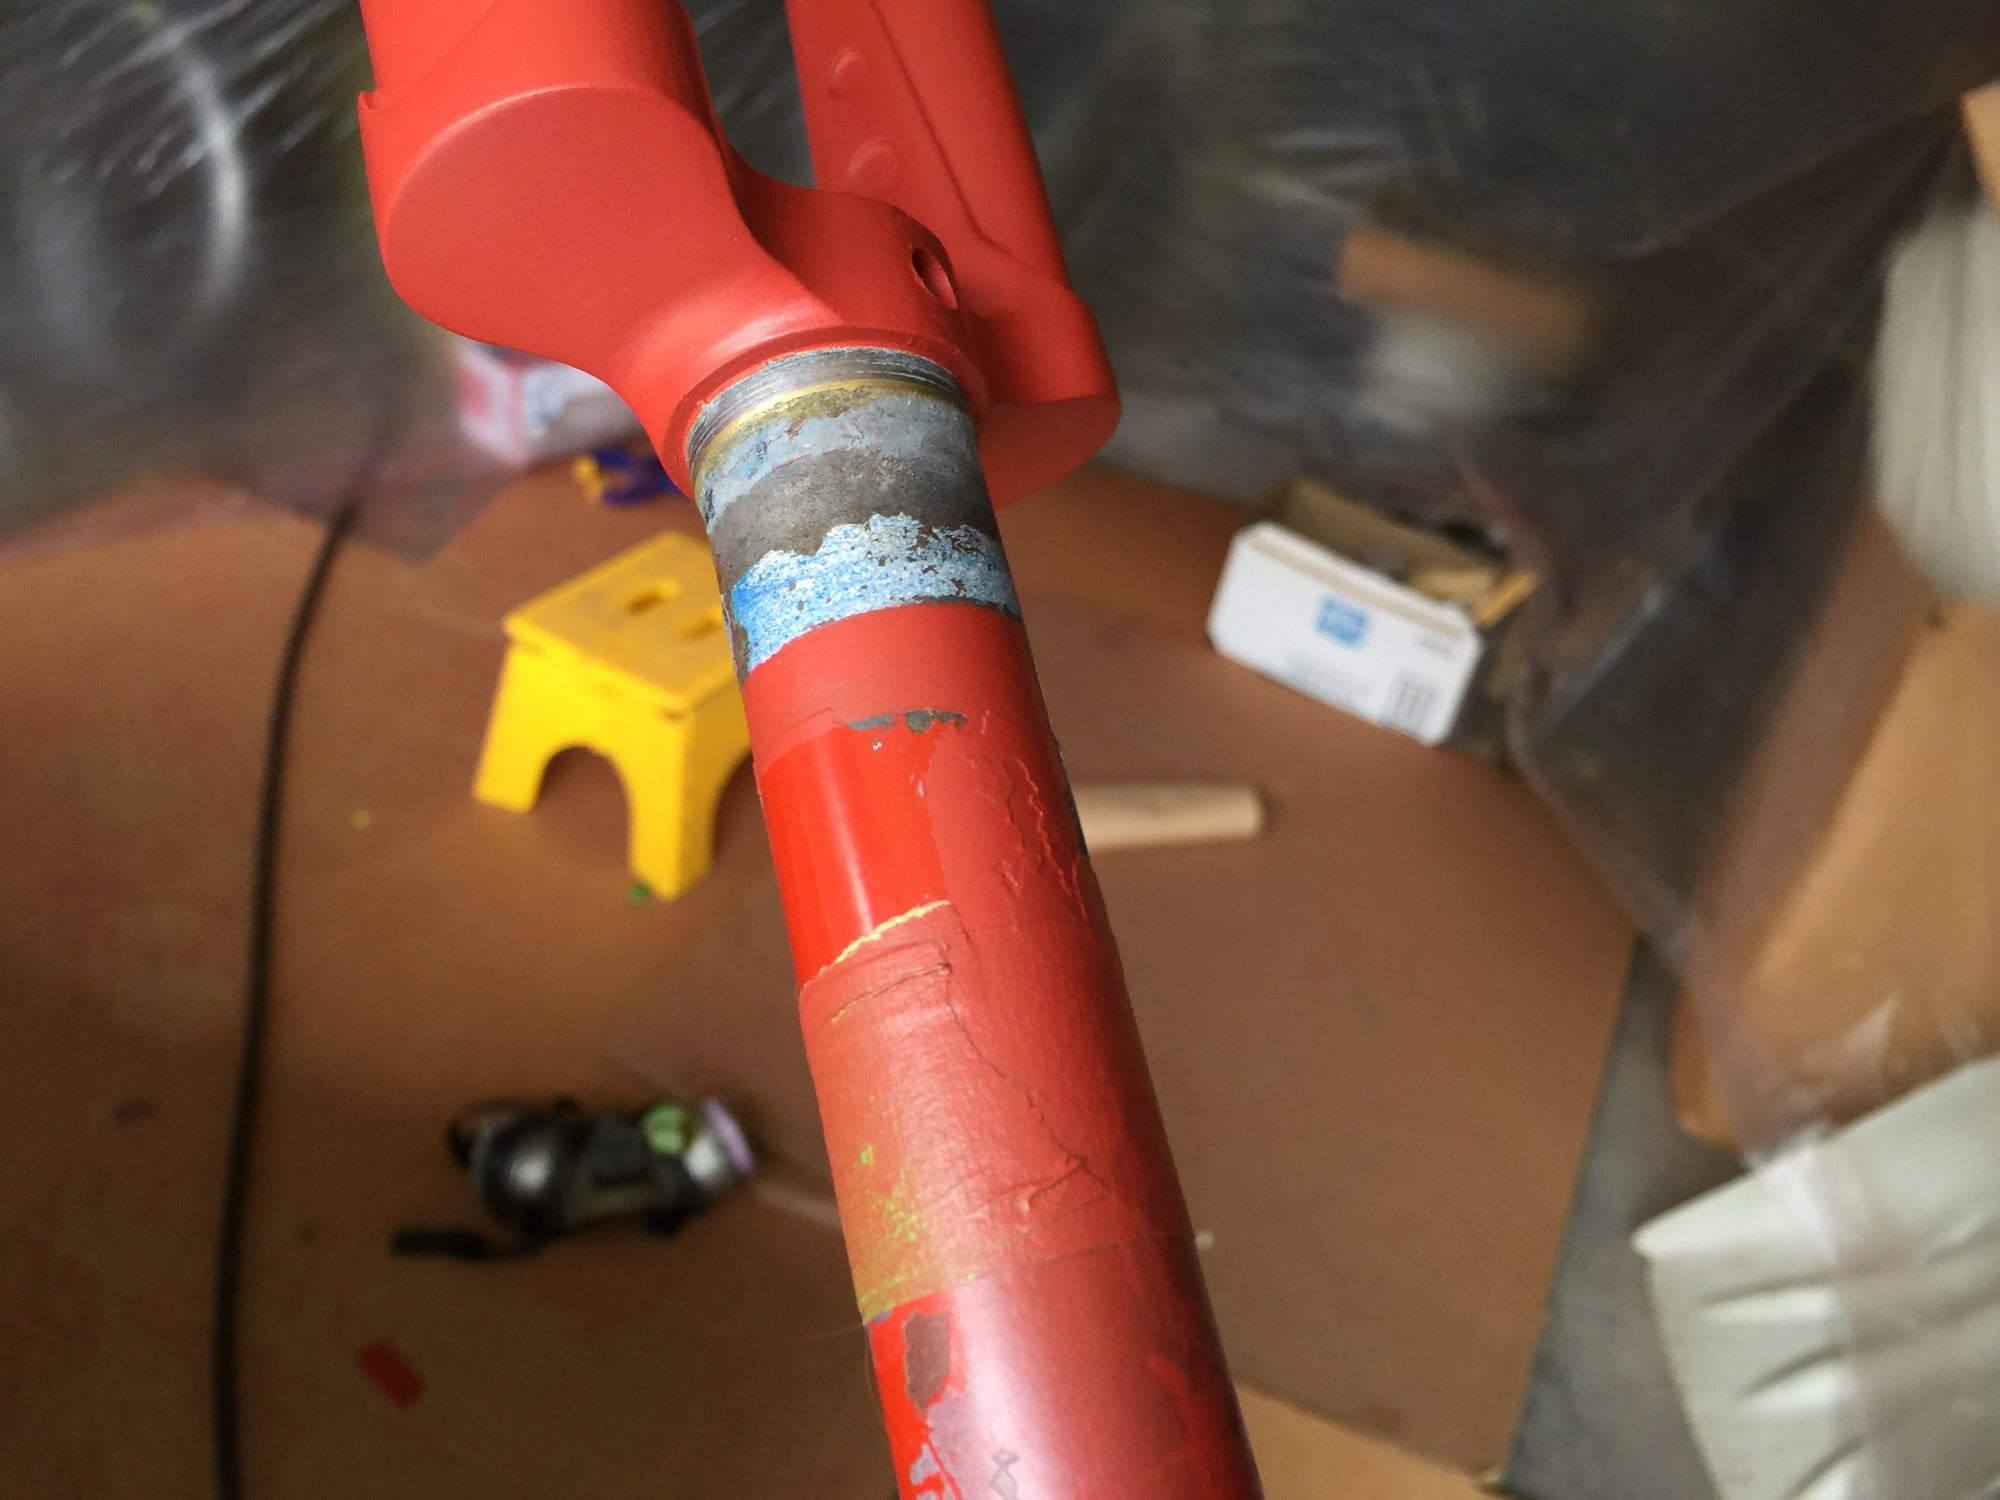
I'm here to expose you. 
Needs this
.
I know that the "all's well that ends well" rule is in effect, but I would not have used that tool to remove the paint from a 753-tubed bicycle frame. I certainly don't wish ill upon my fellow C&V enthusiasts, but I think that too heavy a hand with that could have put the frame at risk of compromise.
Needs this
I know that the "all's well that ends well" rule is in effect, but I would not have used that tool to remove the paint from a 753-tubed bicycle frame. I certainly don't wish ill upon my fellow C&V enthusiasts, but I think that too heavy a hand with that could have put the frame at risk of compromise.
__________________
In search of what to search for.
In search of what to search for.
Likes For USAZorro:
07-01-20, 08:50 PM
#28
Senior Member
Thread Starter

Join Date: Aug 2015
Posts: 3,318
Mentioned: 39 Post(s)
Tagged: 0 Thread(s)
Quoted: 1147 Post(s)
Liked 1,773 Times
in
973 Posts
^^^Thanks about the wire wheel, that one is not stiff, was used lightly throughout the paint and rust removal. Most of the paint strip was chemical.
I did some Sammy Hagar Red!
Red!

I did some Sammy Hagar
Red!
07-02-20, 12:50 AM
#29
Full Member
Join Date: Mar 2017
Location: Arnhem NL
Posts: 230
Bikes: Might as well, now that I am here...
Mentioned: 3 Post(s)
Tagged: 0 Thread(s)
Quoted: 79 Post(s)
Liked 78 Times
in
66 Posts
Niiiice.... That bike in those colours is one of my grails I think. I've always wanted one as a kid
I am not looking for one though. But if I happen to see one for sale at either a reasonable price, or in very good shape (preferably both ) I'd snatch it up in a heartbeat.
Anyway.
Please continue!
I am not looking for one though. But if I happen to see one for sale at either a reasonable price, or in very good shape (preferably both
) I'd snatch it up in a heartbeat. Anyway.
Please continue!
 07-02-20, 10:08 PM
#31
Se�or Member
Join Date: Oct 2004
Location: Hardy, VA
Posts: 17,944
Bikes: Mostly English - predominantly Raleighs
Mentioned: 71 Post(s)
Tagged: 0 Thread(s)
Quoted: 1497 Post(s)
Liked 1,099 Times
in
644 Posts
If I ever want to get "Crayola" repainted, I'll check in with you. Very impressed with your execution.
__________________
In search of what to search for.
In search of what to search for.
07-03-20, 09:28 AM
#32
Senior Member
Thread Starter
Join Date: Aug 2015
Posts: 3,318
Mentioned: 39 Post(s)
Tagged: 0 Thread(s)
Quoted: 1147 Post(s)
Liked 1,773 Times
in
973 Posts
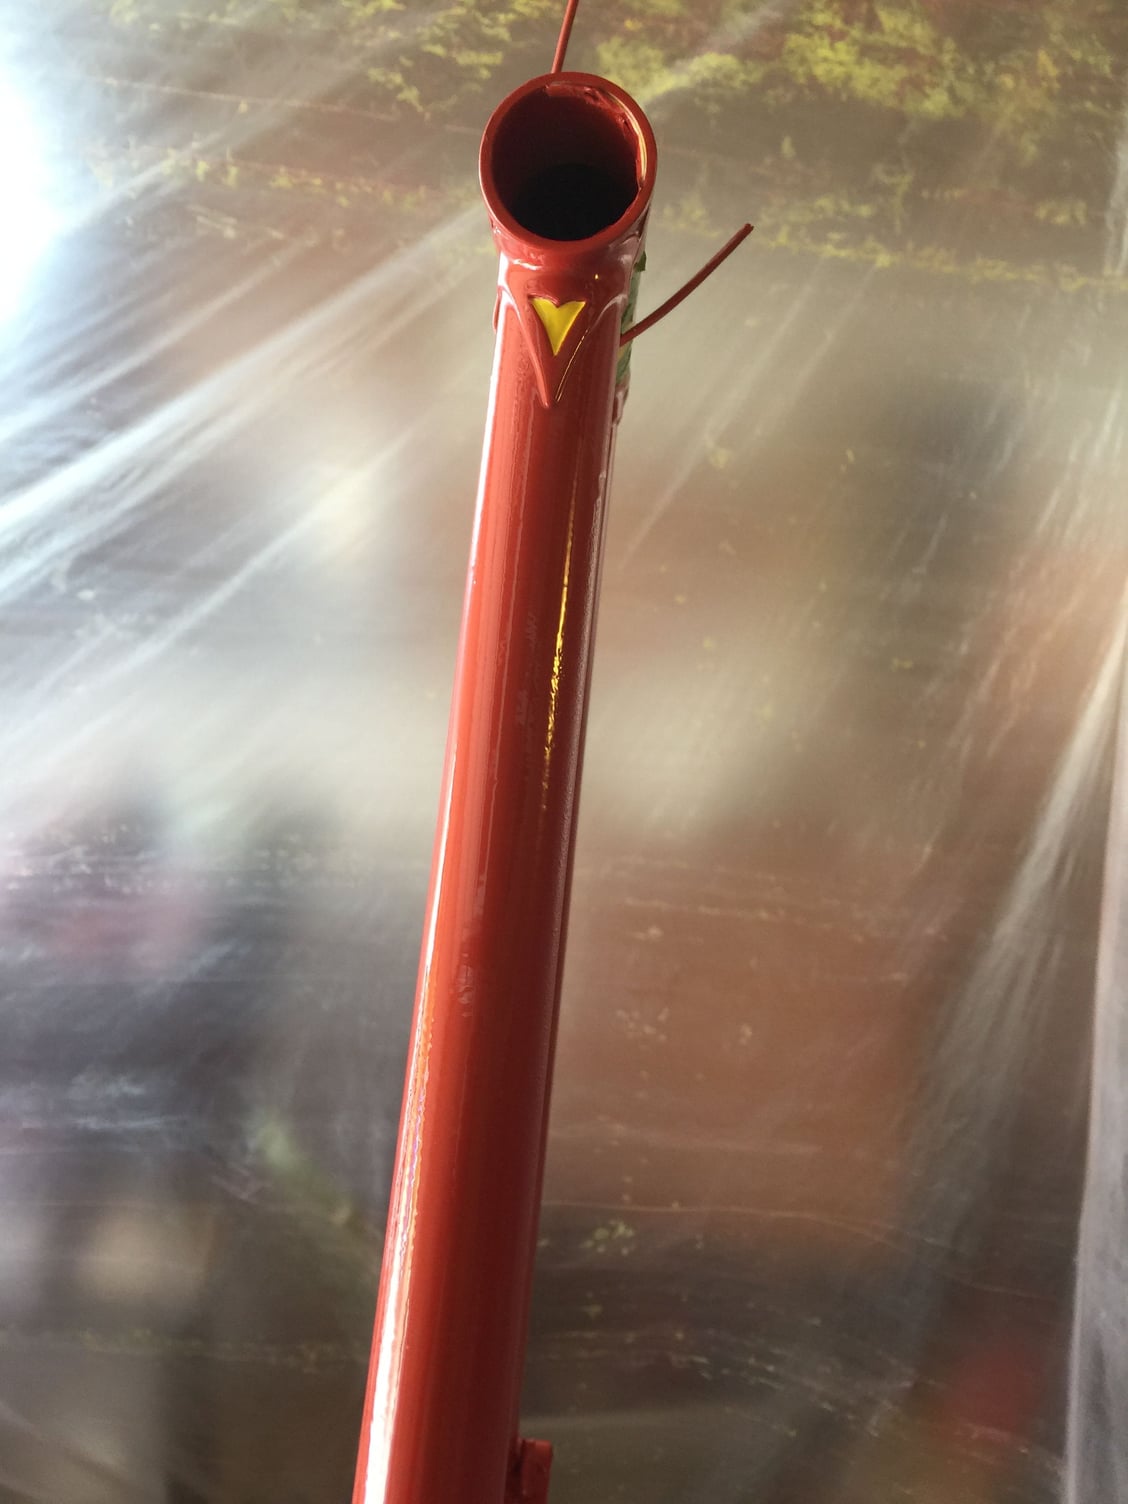
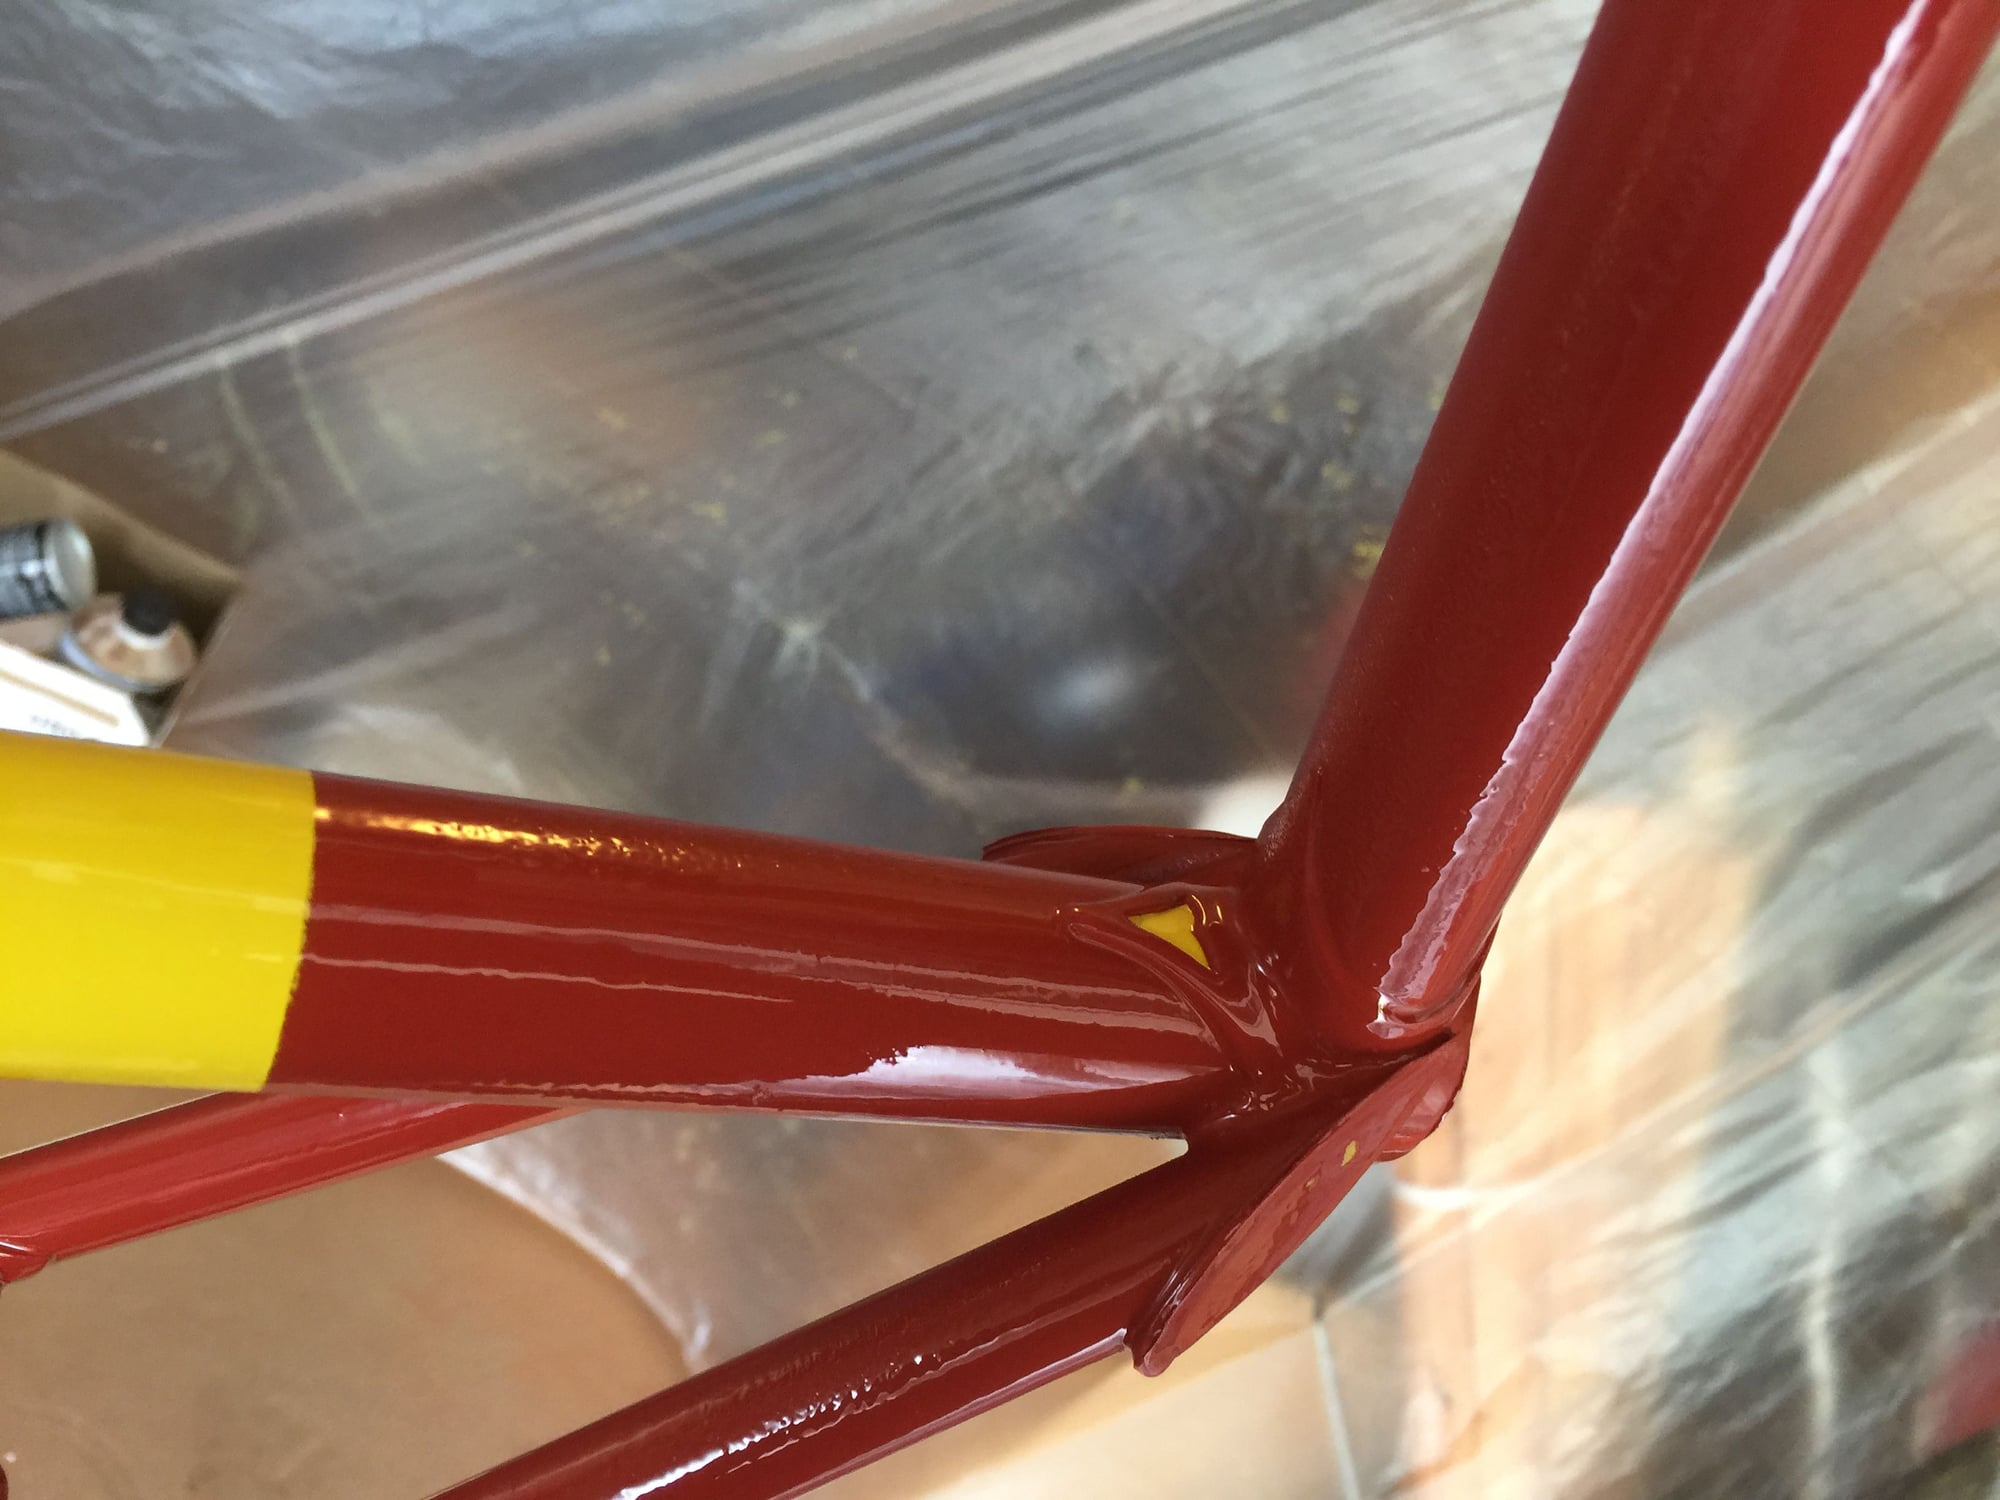
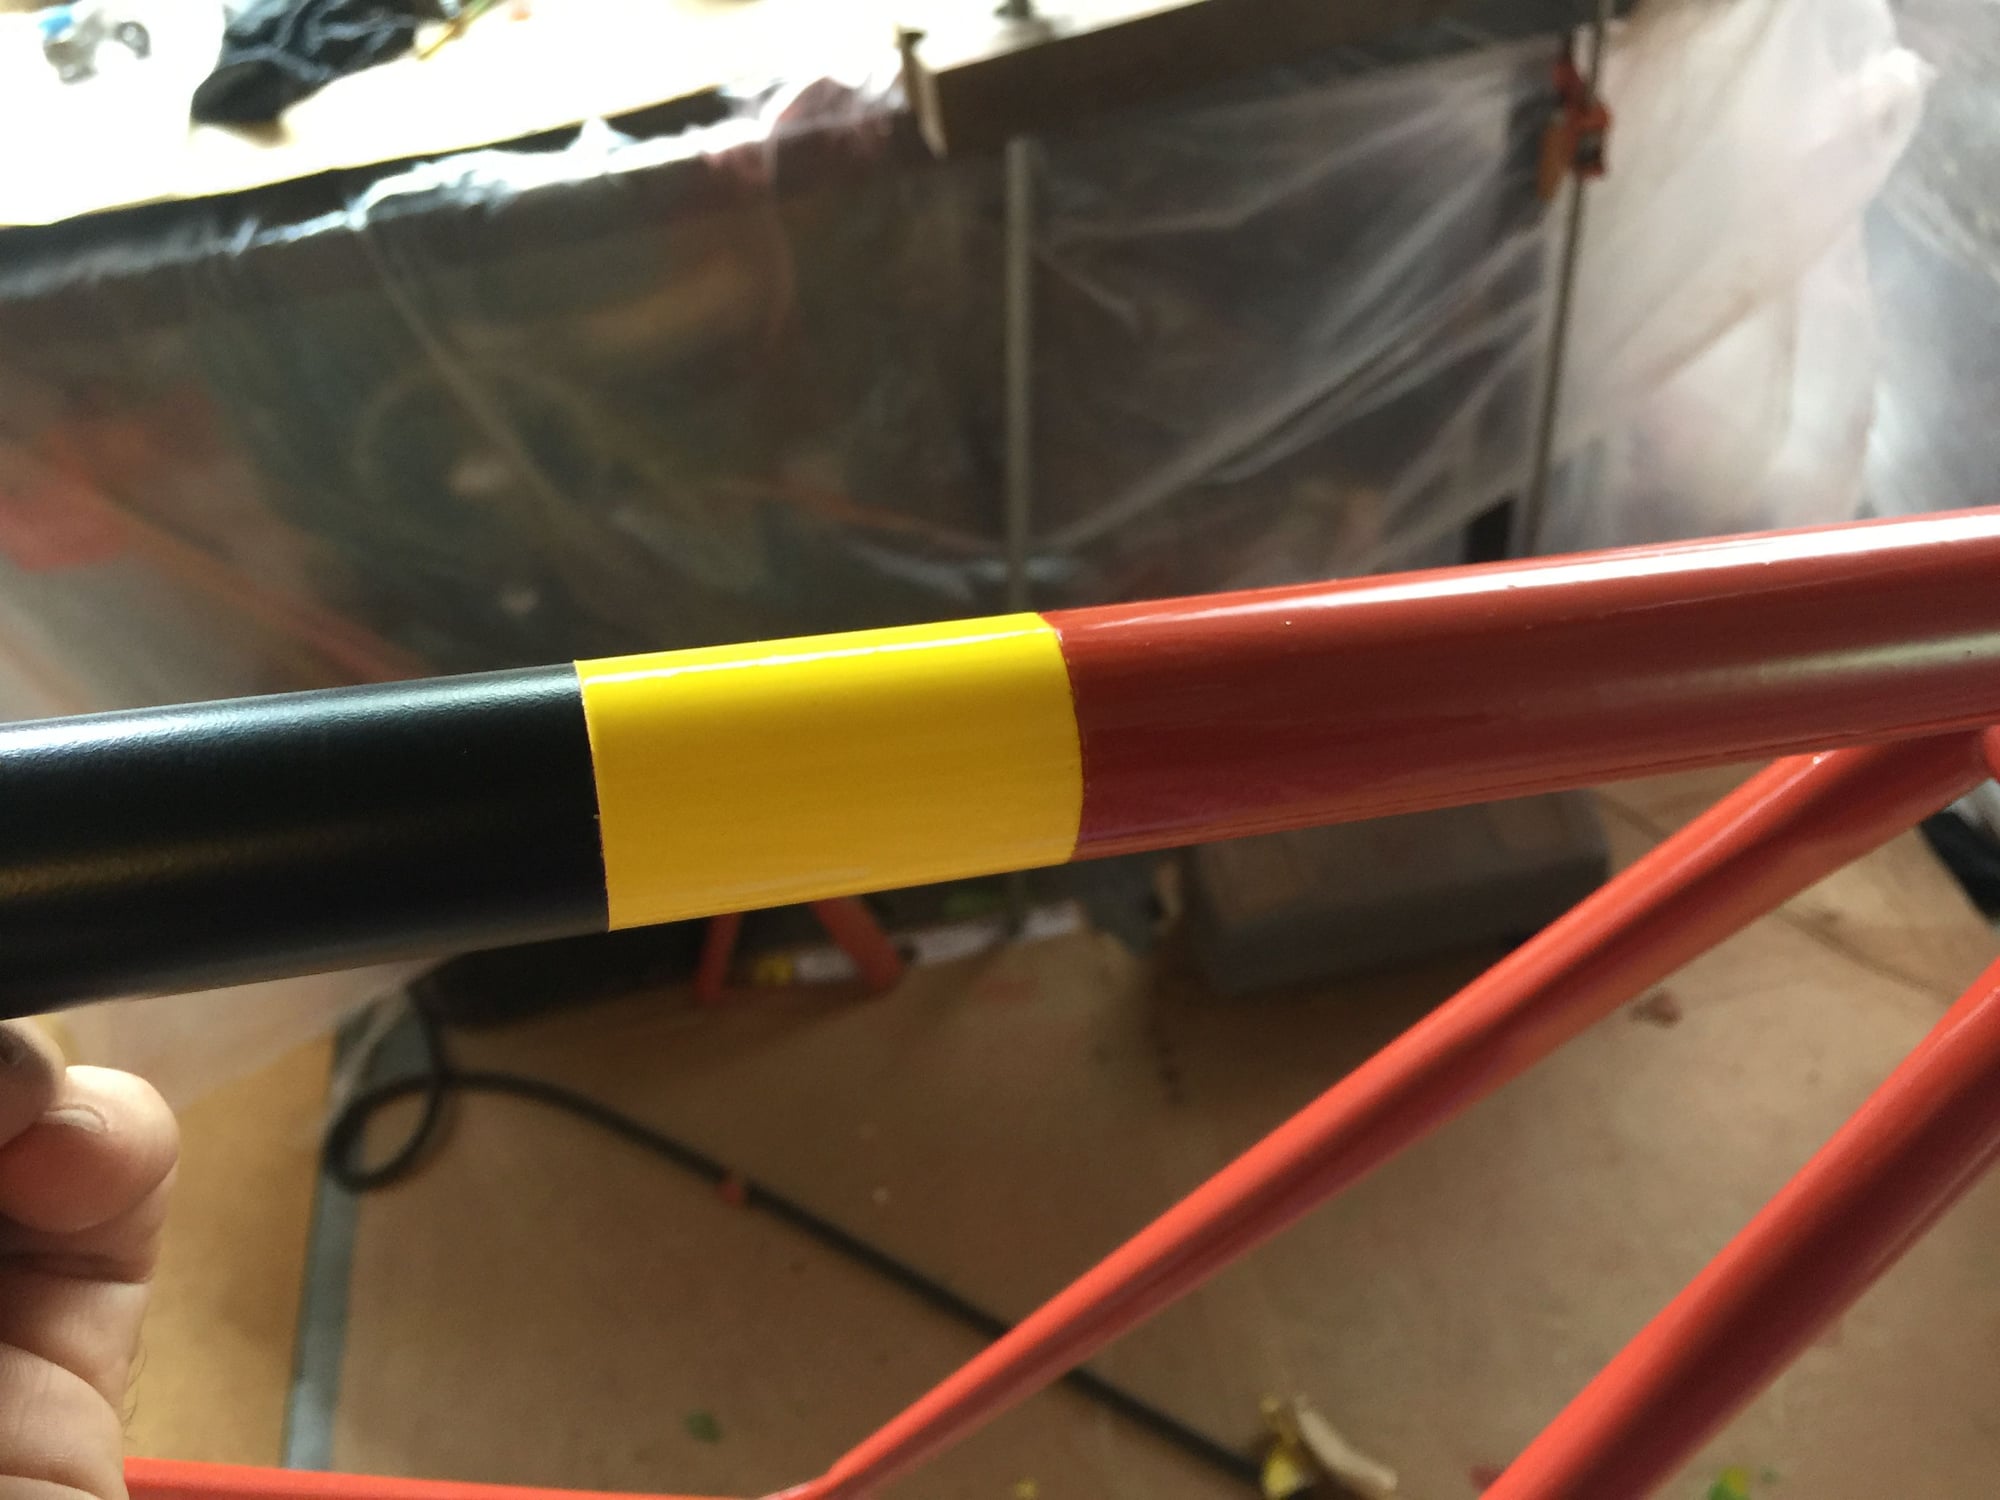
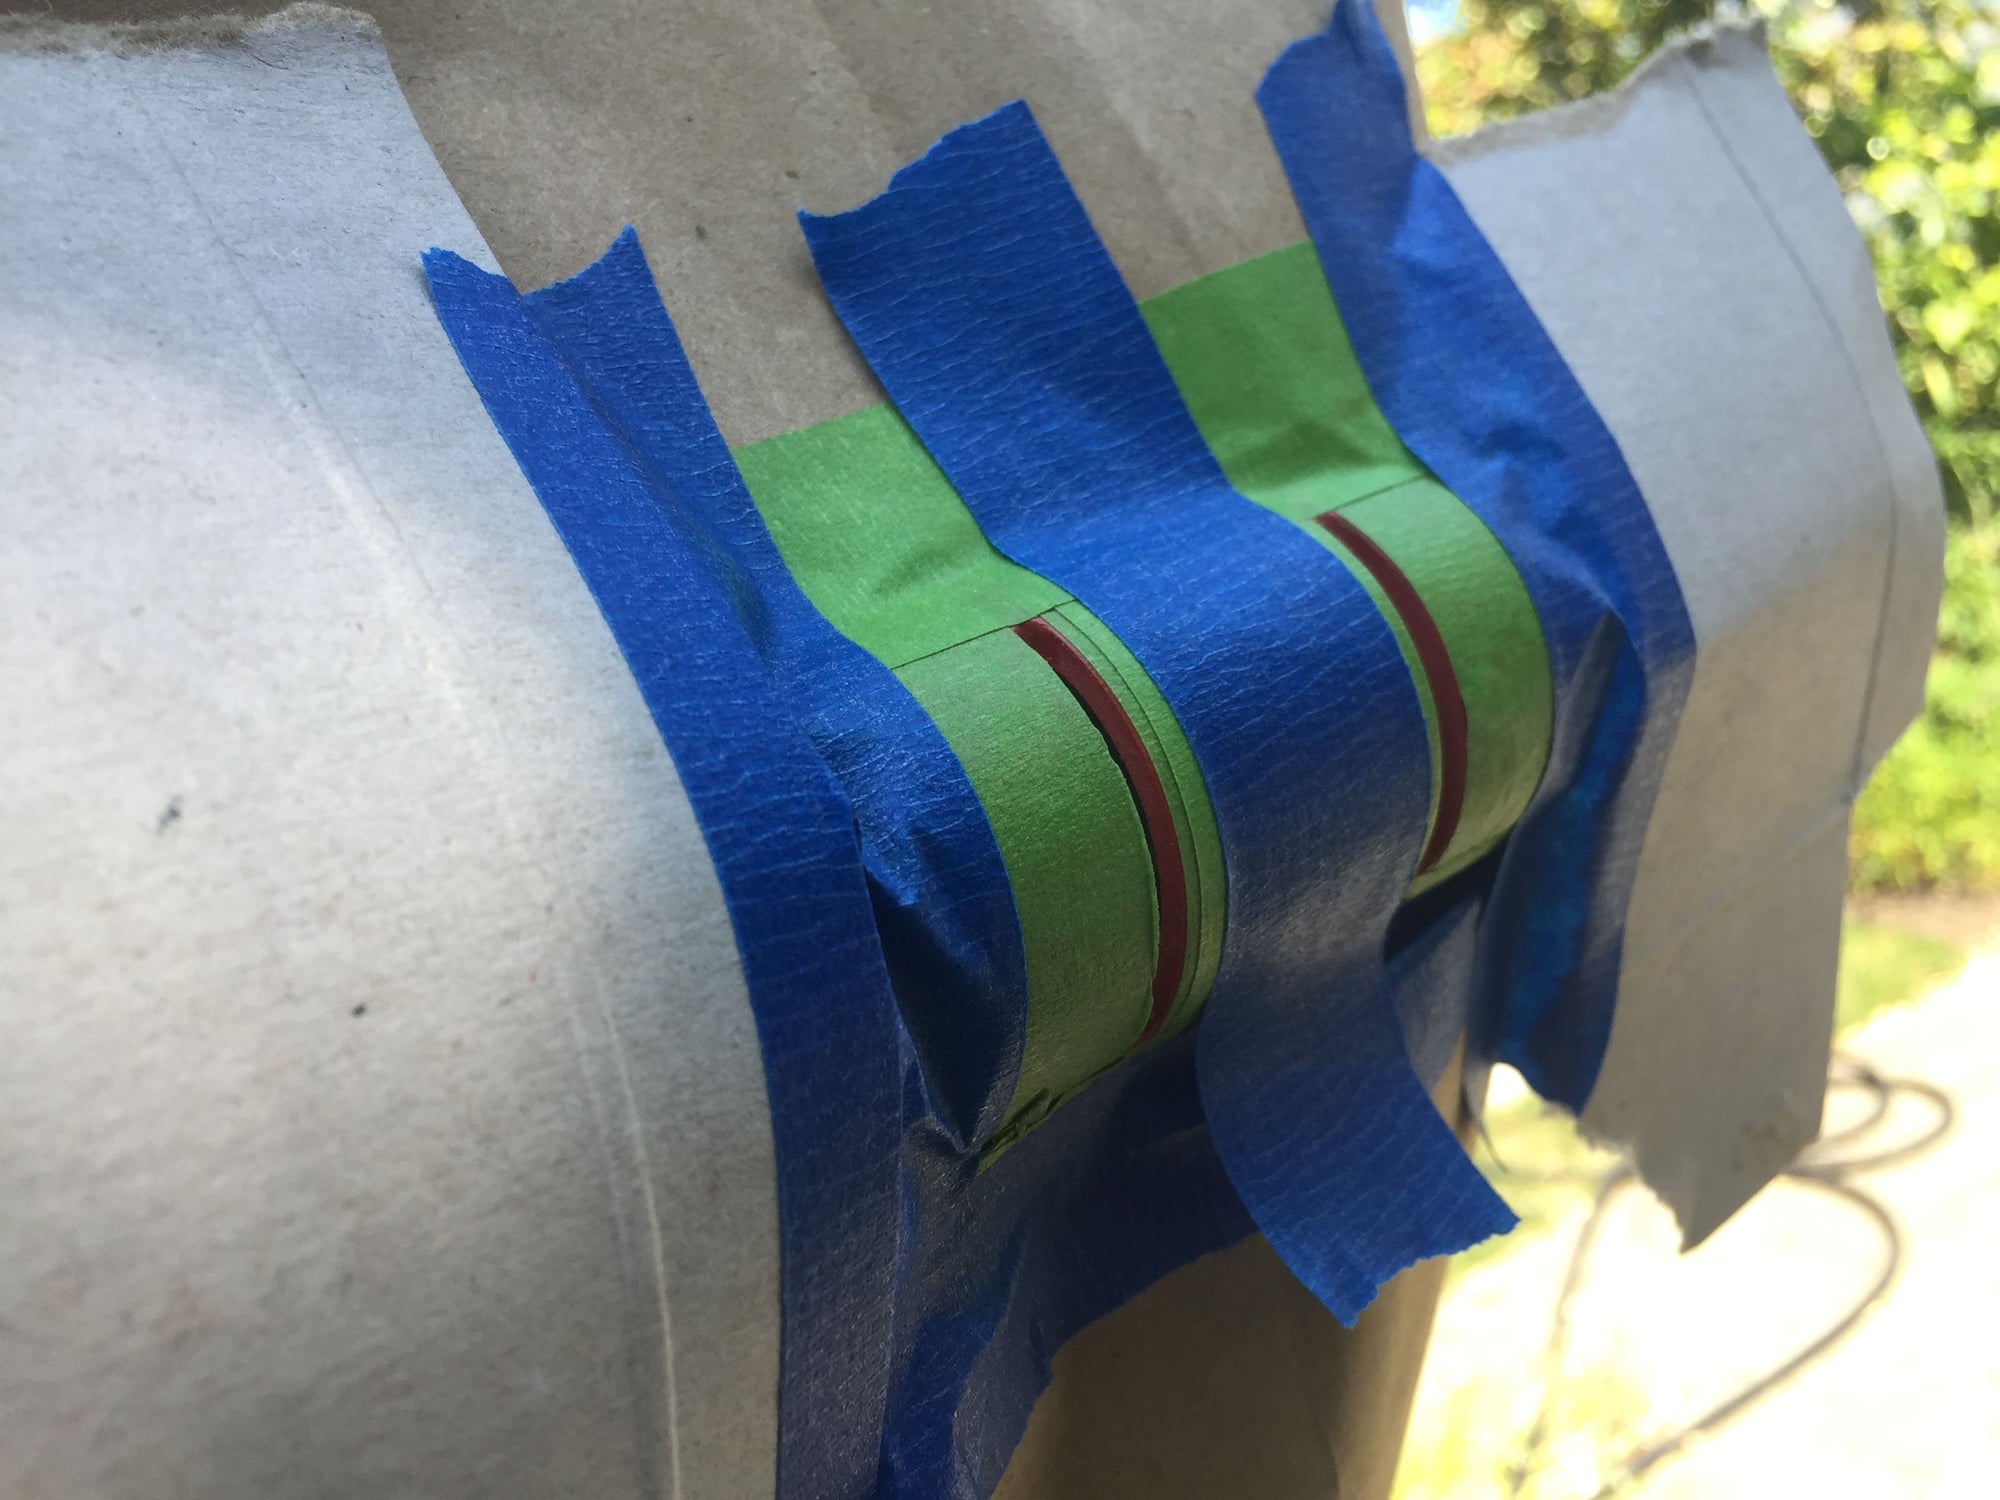
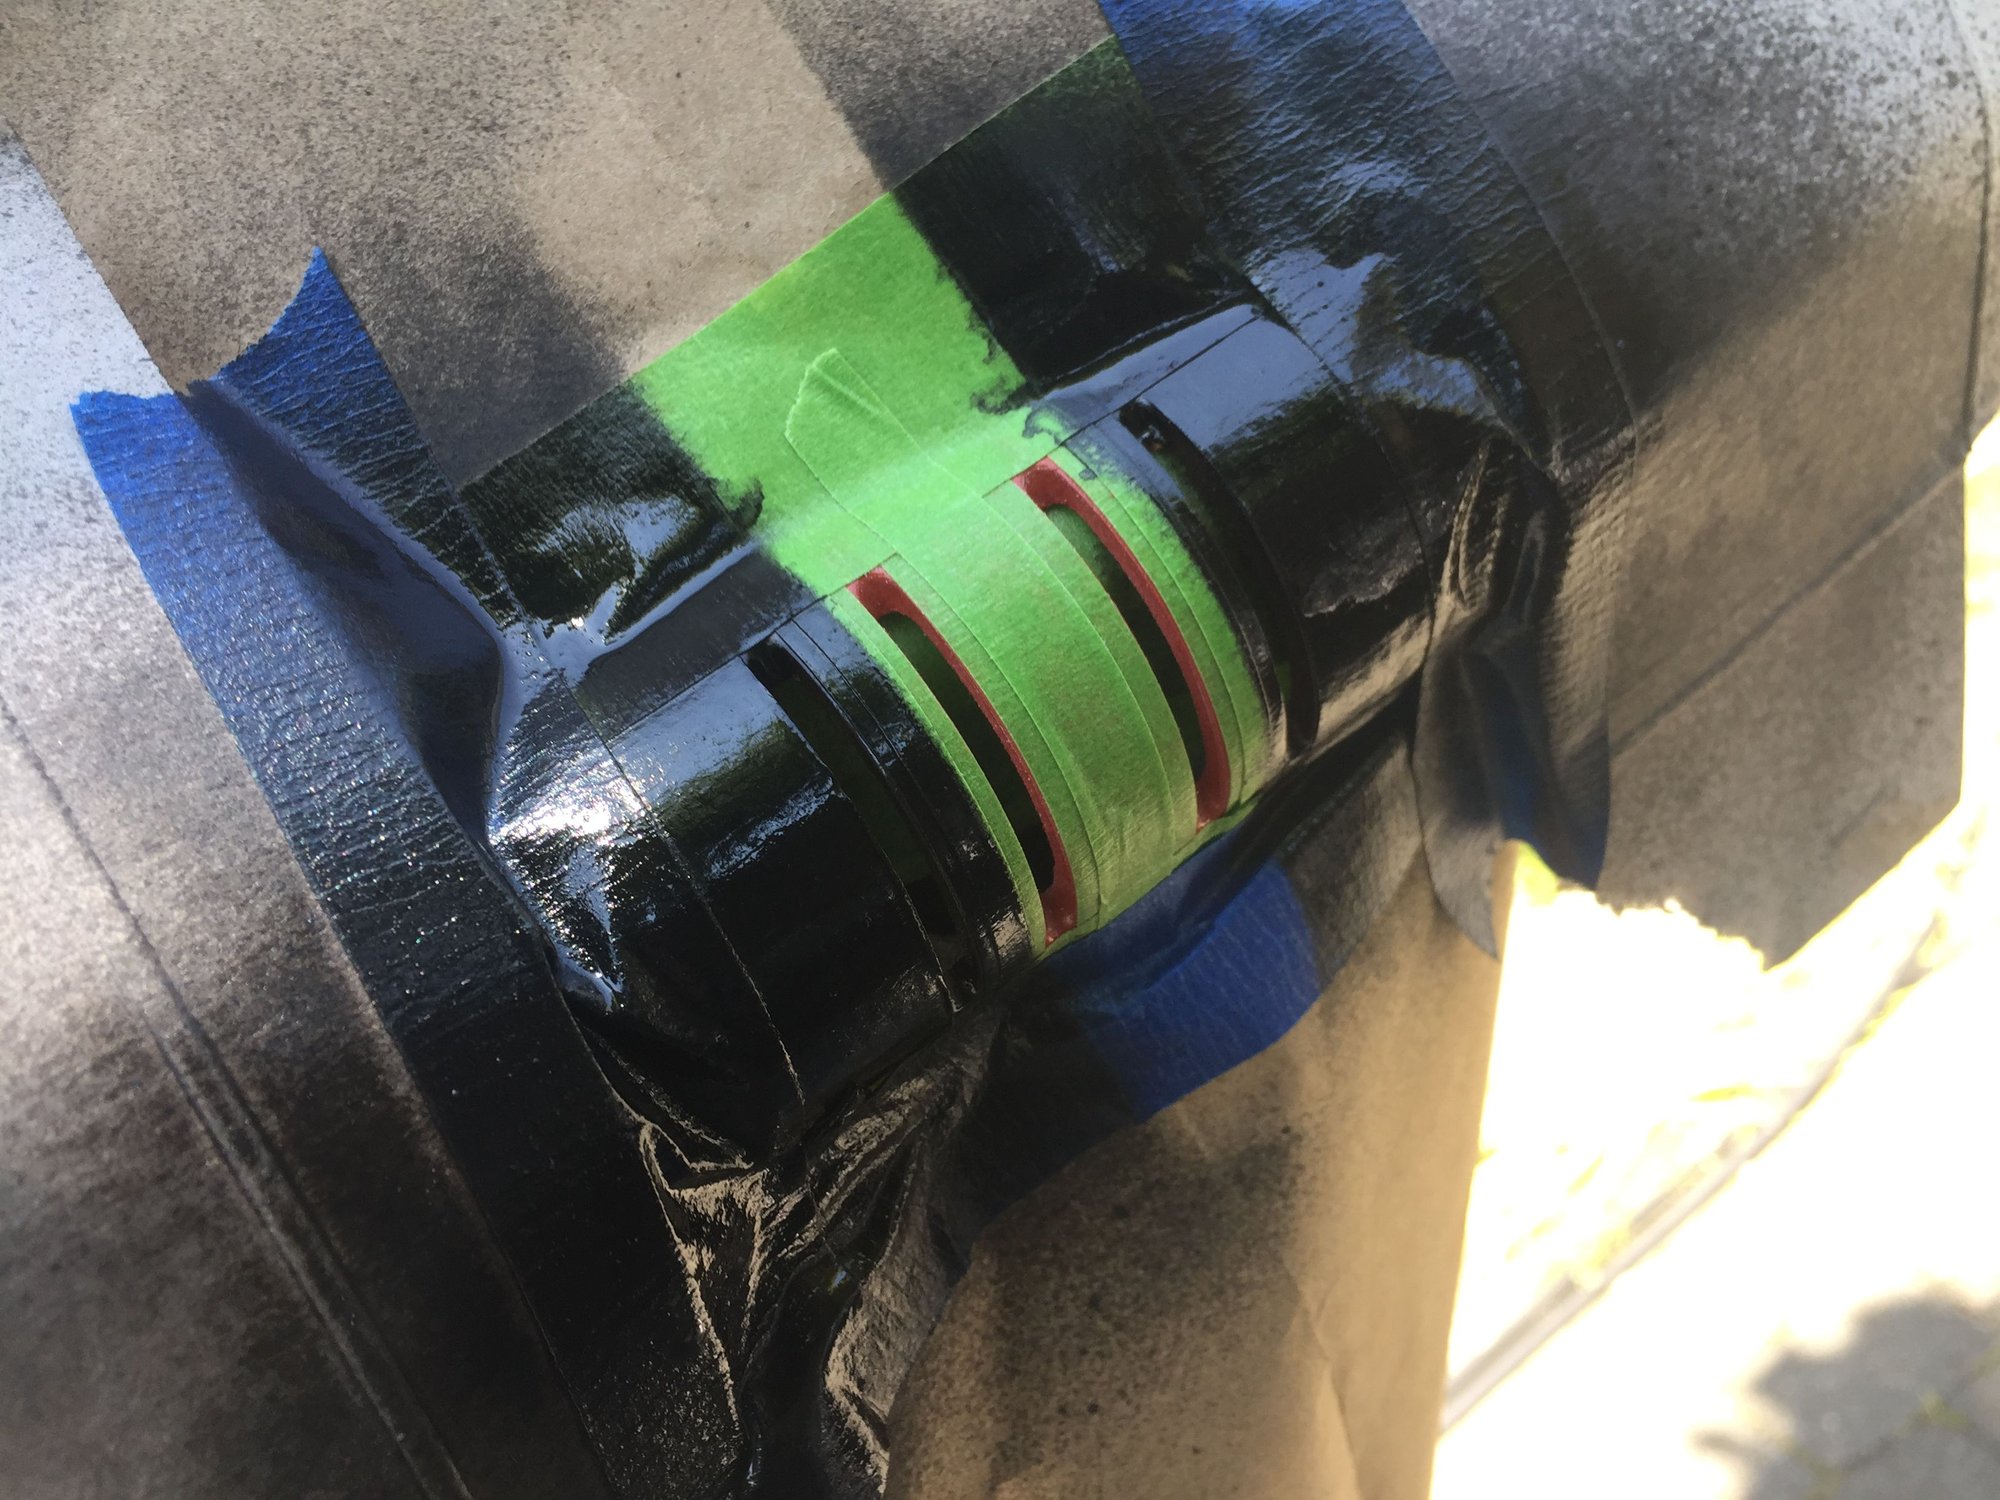
More progress I went through and did some more unmasking. The lug details worked out great, but I did have some yellow release from the primer on the red trap mask. I did some brush touch, and went with a second coat on the the yellow banding.


 07-03-20, 10:43 AM
#34
Senior Member
Thread Starter
Join Date: Aug 2015
Posts: 3,318
Mentioned: 39 Post(s)
Tagged: 0 Thread(s)
Quoted: 1147 Post(s)
Liked 1,773 Times
in
973 Posts
After a little touch of paint


My brush used, only the finest sable hair will do, Windsor & Newton 7 Series made in England
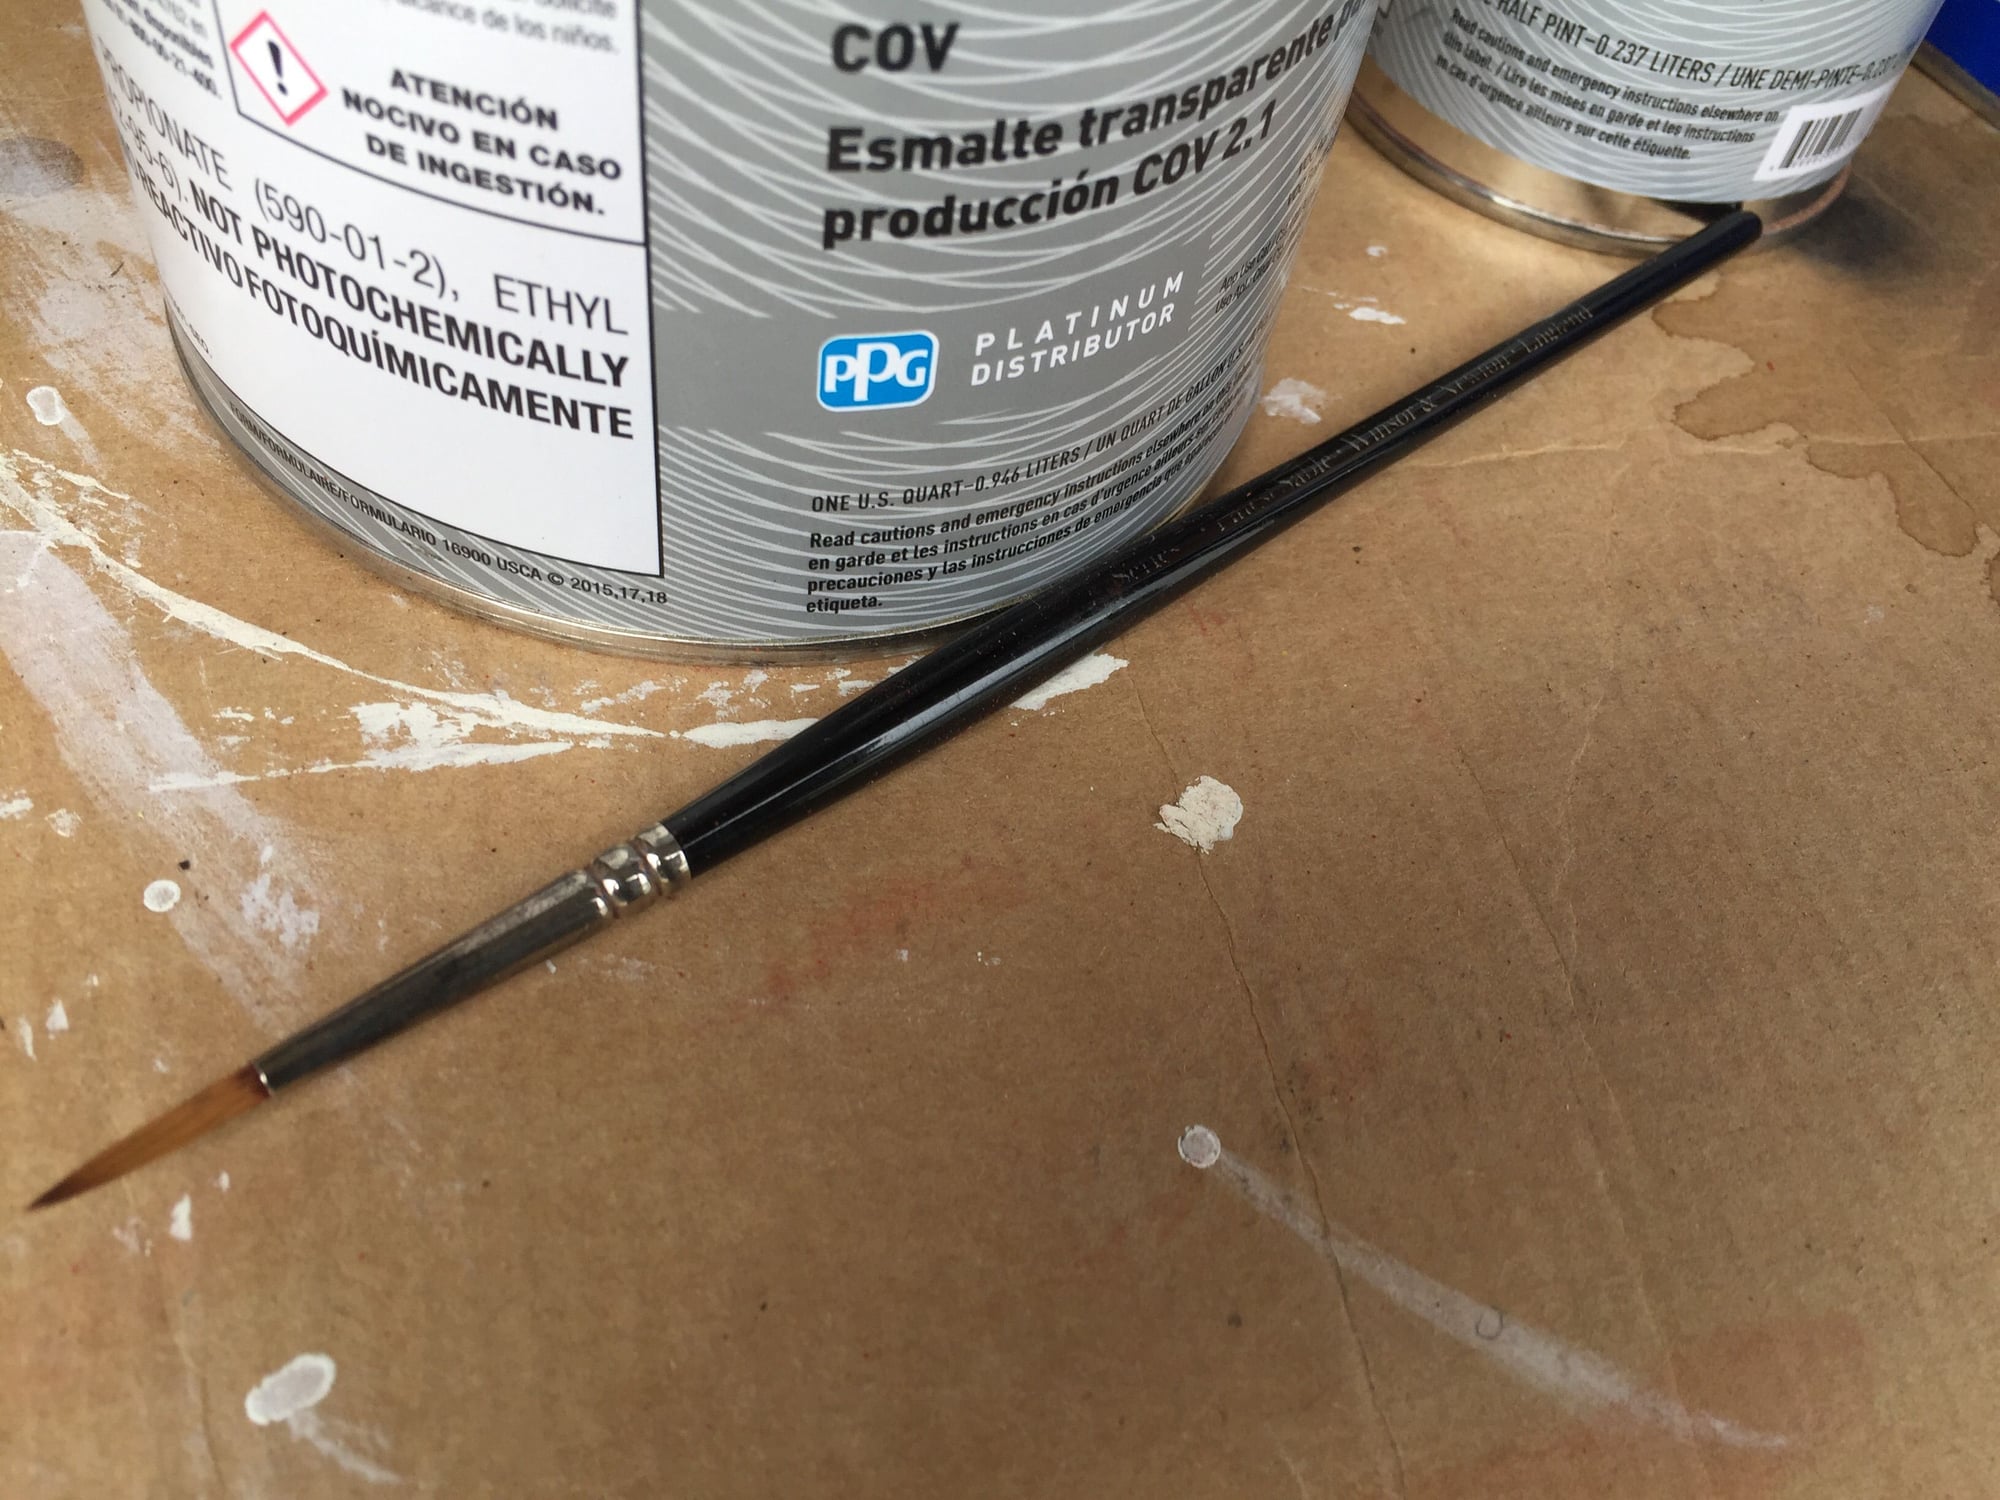
I've had this brush for 30yrs
My brush used, only the finest sable hair will do, Windsor & Newton 7 Series made in England
I've had this brush for 30yrs
07-03-20, 05:06 PM
#35
Senior Member
Thread Starter
Join Date: Aug 2015
Posts: 3,318
Mentioned: 39 Post(s)
Tagged: 0 Thread(s)
Quoted: 1147 Post(s)
Liked 1,773 Times
in
973 Posts
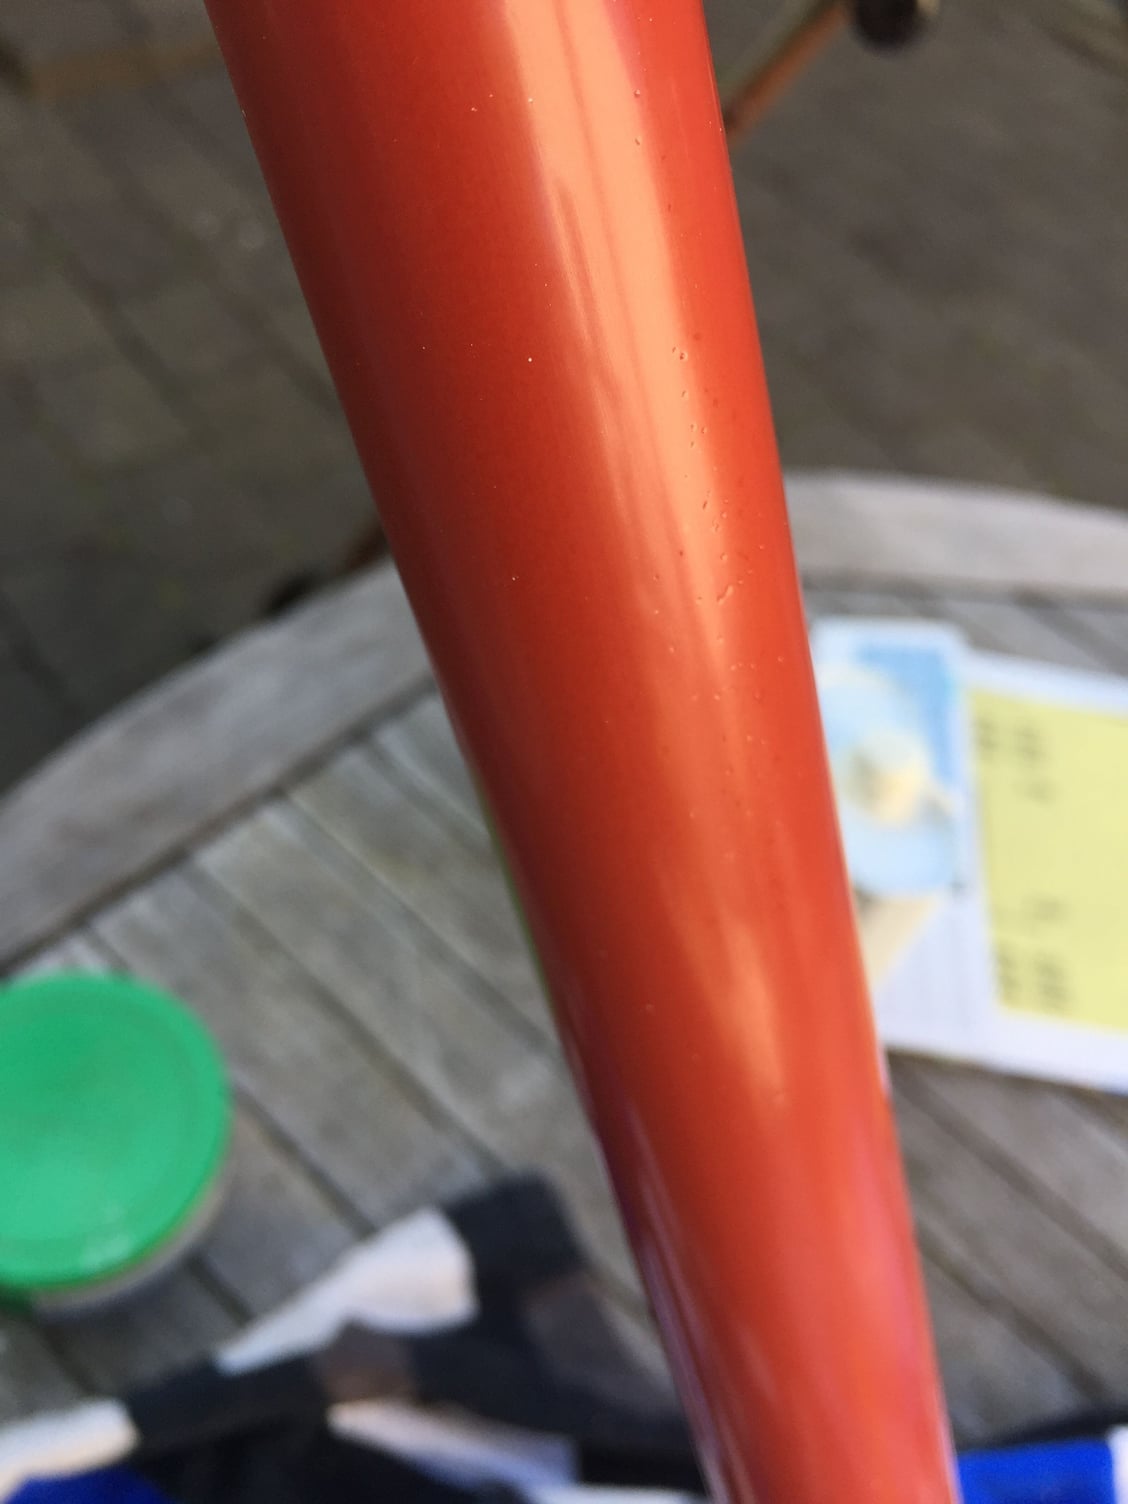
Oh my lord the 2 stage clear coat is insanely difficult to shoot, is extremely beautiful. I'm going to have to investigate that application. It was like shooting glue blobs, I cloud not get a good pressure, air/paint mix dialed in. Of coarse, yes coarse not course, yes forward bold the chit on. Respirator R51HE never felt so good to use that and constant air circulation, don't mess around safety first.
The red looks much better to the match than before. All the pictures looked better than life, now life looks as good as the pictures. You may notice, I masked the black from the clear. I think it would have been fine but that was just in case of the event that the 2k was not compatible with the 2 stage clear. There was a concern that the Black could bubble under. I waited about 45 minutes with still soft delicately pealed away the tape from the staycaps and all. That worked good.


The red looks much better to the match than before. All the pictures looked better than life, now life looks as good as the pictures. You may notice, I masked the black from the clear. I think it would have been fine but that was just in case of the event that the 2k was not compatible with the 2 stage clear. There was a concern that the Black could bubble under. I waited about 45 minutes with still soft delicately pealed away the tape from the staycaps and all. That worked good.
Likes For Mr. 66:
07-04-20, 08:30 AM
#36
www.theheadbadge.com

Join Date: Sep 2005
Location: Southern Florida
Posts: 28,514
Bikes: https://www.theheadbadge.com
Mentioned: 124 Post(s)
Tagged: 0 Thread(s)
Quoted: 2422 Post(s)
Liked 4,398 Times
in
2,093 Posts
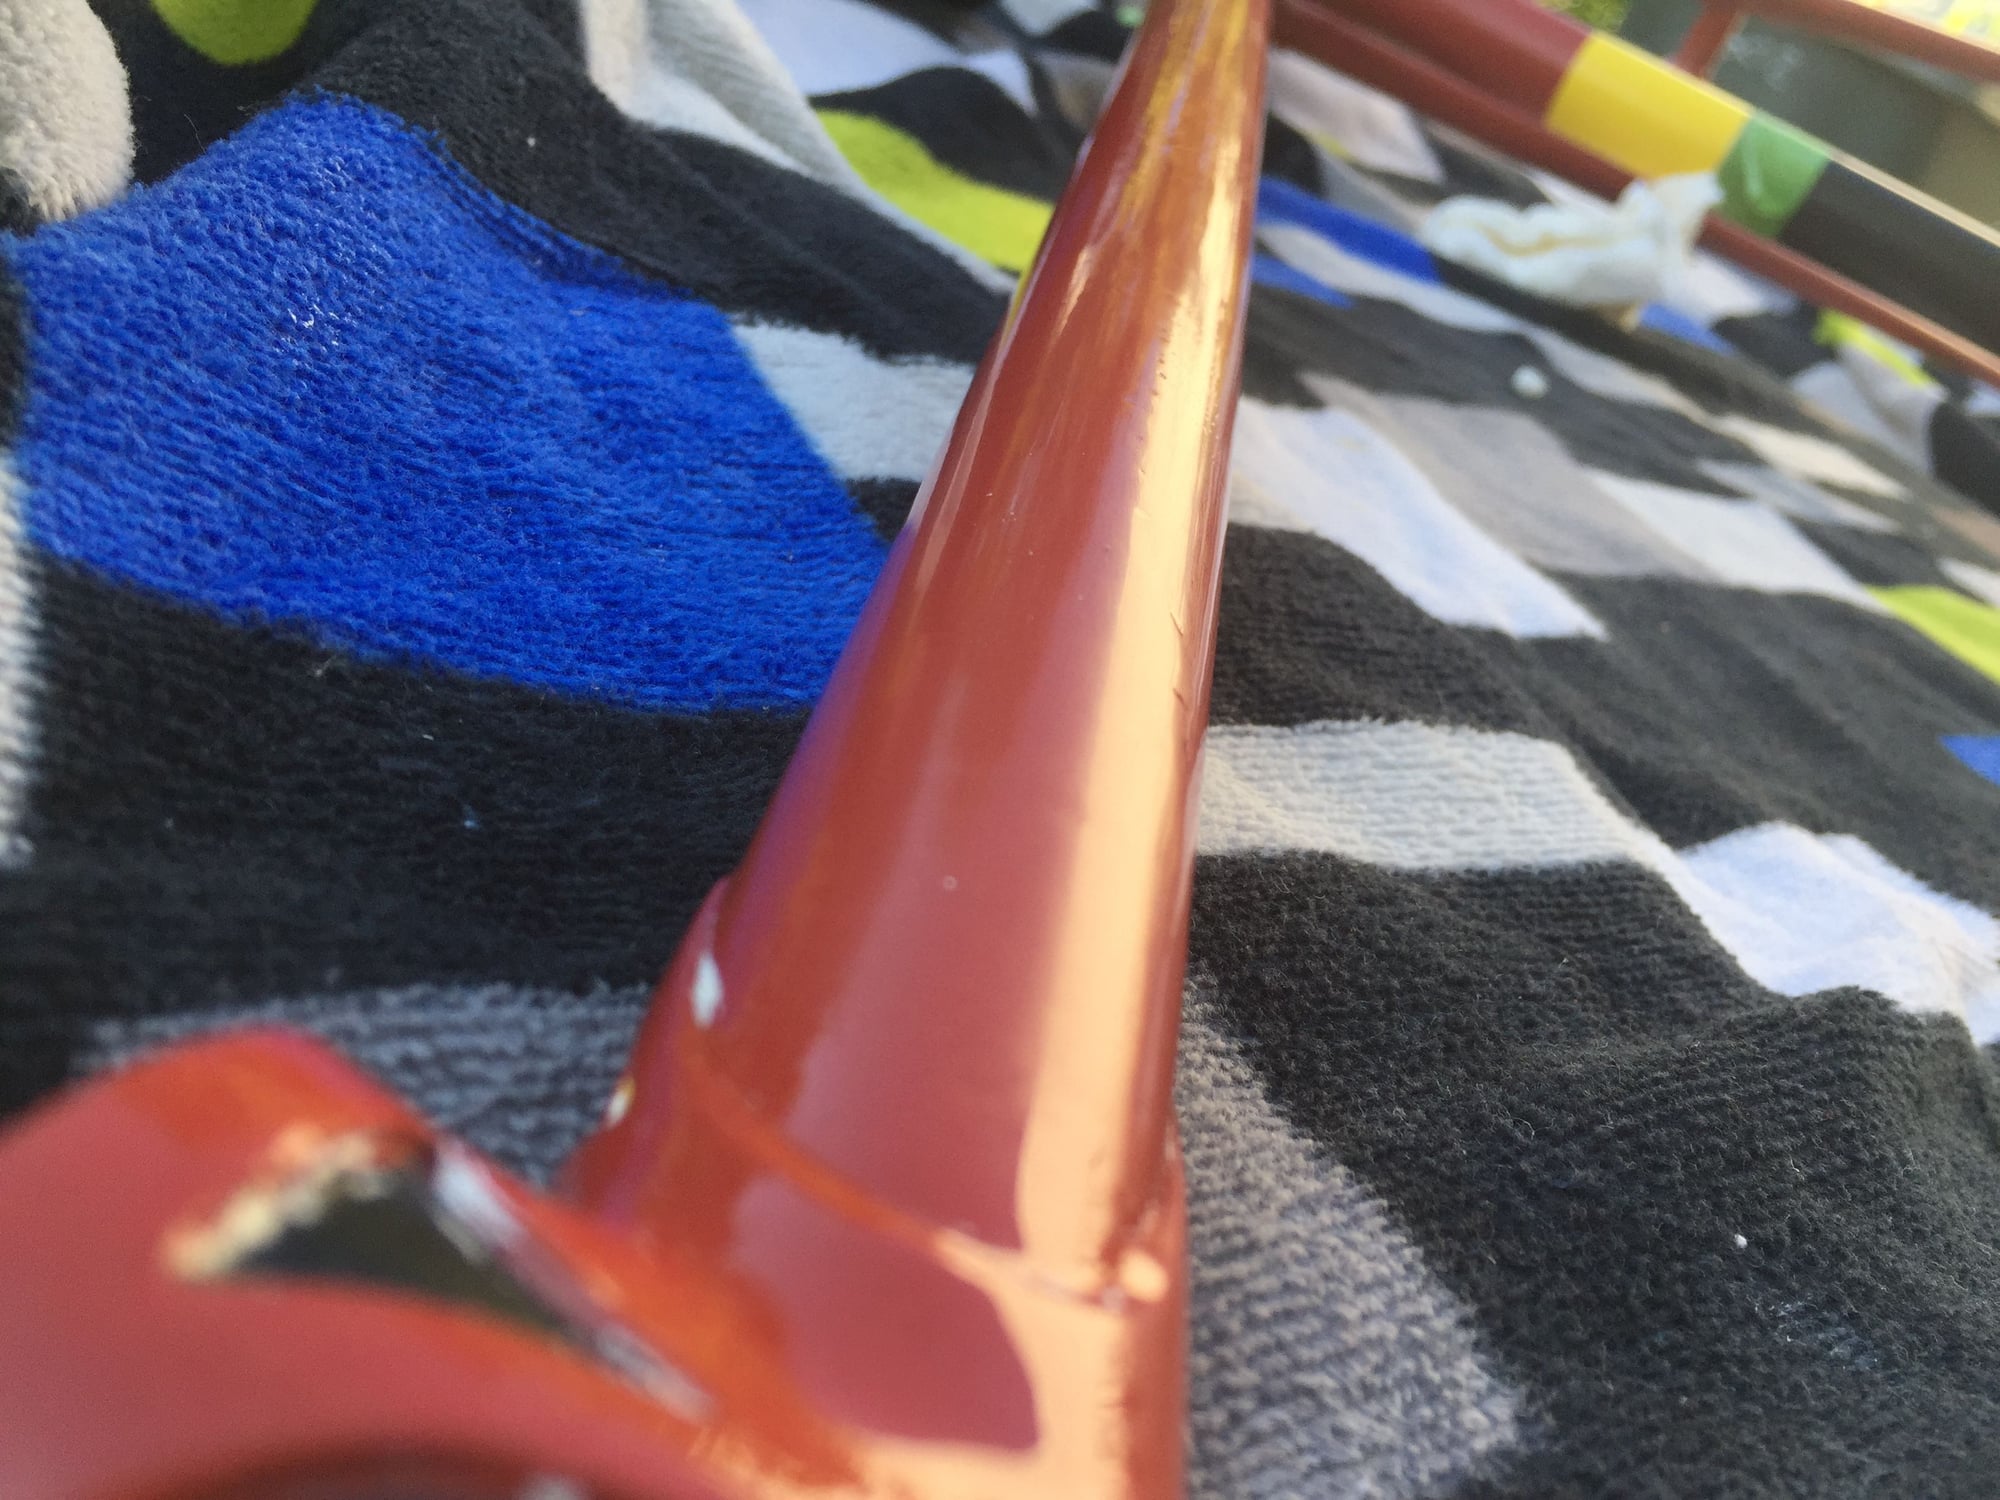
Looks like you'll probably be able to even it out with some careful wet sanding. Good luck - its a beautiful frame!
-Kurt
-Kurt
__________________


 07-04-20, 11:27 AM
#38

Senior Member
Join Date: Jun 2006
Posts: 20,305
Mentioned: 130 Post(s)
Tagged: 0 Thread(s)
Quoted: 3464 Post(s)
Liked 2,831 Times
in
1,997 Posts
Clear is I think the treacherous layer to apply
you really need good light to watch the reflections and change in gloss.
many can be reduced a bit to help with viscosity- most are not designed for Syphon feed spray equipment- top tank
this is especially true for metallics by the way.
Forgot- many reducers are designed for a temperature range- too cold or too hot when spraying- trouble.
I think the best way is to use an integrated system- all colors same brand and paint type.
easy to suggest, not so easy to afford.
i like Chromabase as it shrinks down really well, provides the thin paint of yesteryear appearance.
Clearcoat over graphics is best done with a test
some graphic providers can suggest safe top coats from other customer feedback.
i would really think through the spray plan. I started painting bike frames when I was 10, I learned a lot about where to start and where to finish by trial and error. Being able to control the orientation of the frame as you spray really improves the task.
by looking around I saw a clever approach for applying graphics- a Near seatpost sized rod projection out from the workbench and set the frame over it from the seat tube- frame is steady- two hands available to set the graphics. If required a few turns of tape to add some friction.
the making of the lug windows would have drives me batty. Pretty sure the original finishes on these bikes were much more basic- brush paint fill after clear with a different solvent used that would not attack the clear, easy clean / trim up.
07-05-20, 08:55 AM
#39
Senior Member
Thread Starter
Join Date: Aug 2015
Posts: 3,318
Mentioned: 39 Post(s)
Tagged: 0 Thread(s)
Quoted: 1147 Post(s)
Liked 1,773 Times
in
973 Posts
Clear is I think the treacherous layer to apply
you really need good light to watch the reflections and change in gloss.
many can be reduced a bit to help with viscosity- most are not designed for Syphon feed spray equipment- top tank
this is especially true for metallics by the way.
Forgot- many reducers are designed for a temperature range- too cold or too hot when spraying- trouble.
I think the best way is to use an integrated system- all colors same brand and paint type.
easy to suggest, not so easy to afford.
i like Chromabase as it shrinks down really well, provides the thin paint of yesteryear appearance.
Clearcoat over graphics is best done with a test
some graphic providers can suggest safe top coats from other customer feedback.
i would really think through the spray plan. I started painting bike frames when I was 10, I learned a lot about where to start and where to finish by trial and error. Being able to control the orientation of the frame as you spray really improves the task.
by looking around I saw a clever approach for applying graphics- a Near seatpost sized rod projection out from the workbench and set the frame over it from the seat tube- frame is steady- two hands available to set the graphics. If required a few turns of tape to add some friction.
the making of the lug windows would have drives me batty. Pretty sure the original finishes on these bikes were much more basic- brush paint fill after clear with a different solvent used that would not attack the clear, easy clean / trim up.
you really need good light to watch the reflections and change in gloss.
many can be reduced a bit to help with viscosity- most are not designed for Syphon feed spray equipment- top tank
this is especially true for metallics by the way.
Forgot- many reducers are designed for a temperature range- too cold or too hot when spraying- trouble.
I think the best way is to use an integrated system- all colors same brand and paint type.
easy to suggest, not so easy to afford.
i like Chromabase as it shrinks down really well, provides the thin paint of yesteryear appearance.
Clearcoat over graphics is best done with a test
some graphic providers can suggest safe top coats from other customer feedback.
i would really think through the spray plan. I started painting bike frames when I was 10, I learned a lot about where to start and where to finish by trial and error. Being able to control the orientation of the frame as you spray really improves the task.
by looking around I saw a clever approach for applying graphics- a Near seatpost sized rod projection out from the workbench and set the frame over it from the seat tube- frame is steady- two hands available to set the graphics. If required a few turns of tape to add some friction.
the making of the lug windows would have drives me batty. Pretty sure the original finishes on these bikes were much more basic- brush paint fill after clear with a different solvent used that would not attack the clear, easy clean / trim up.
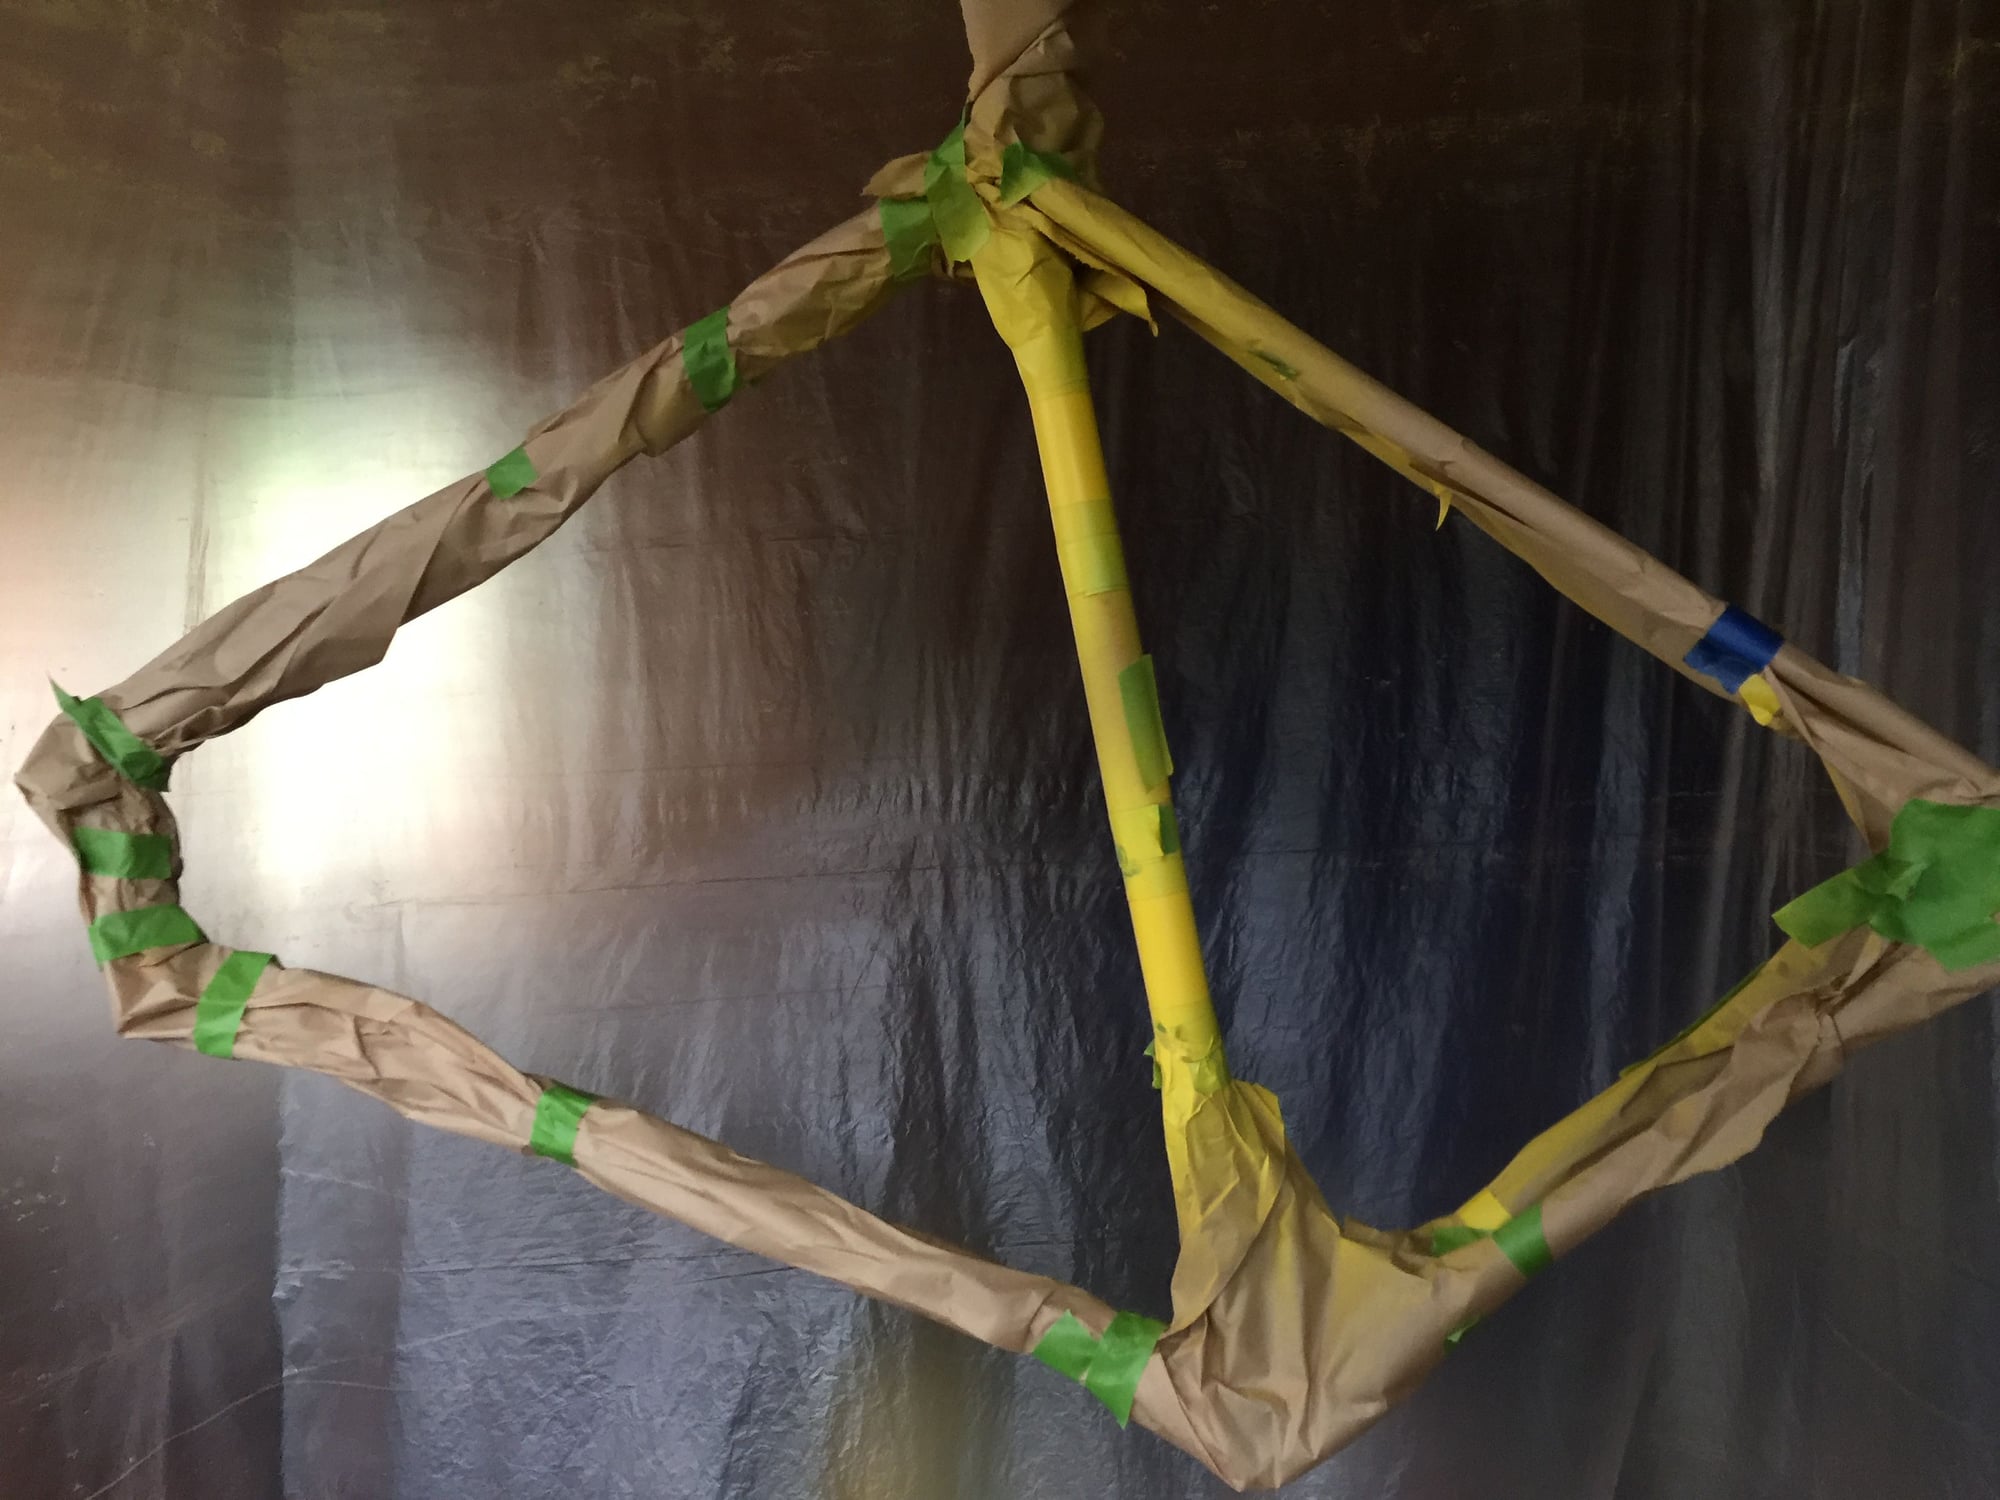
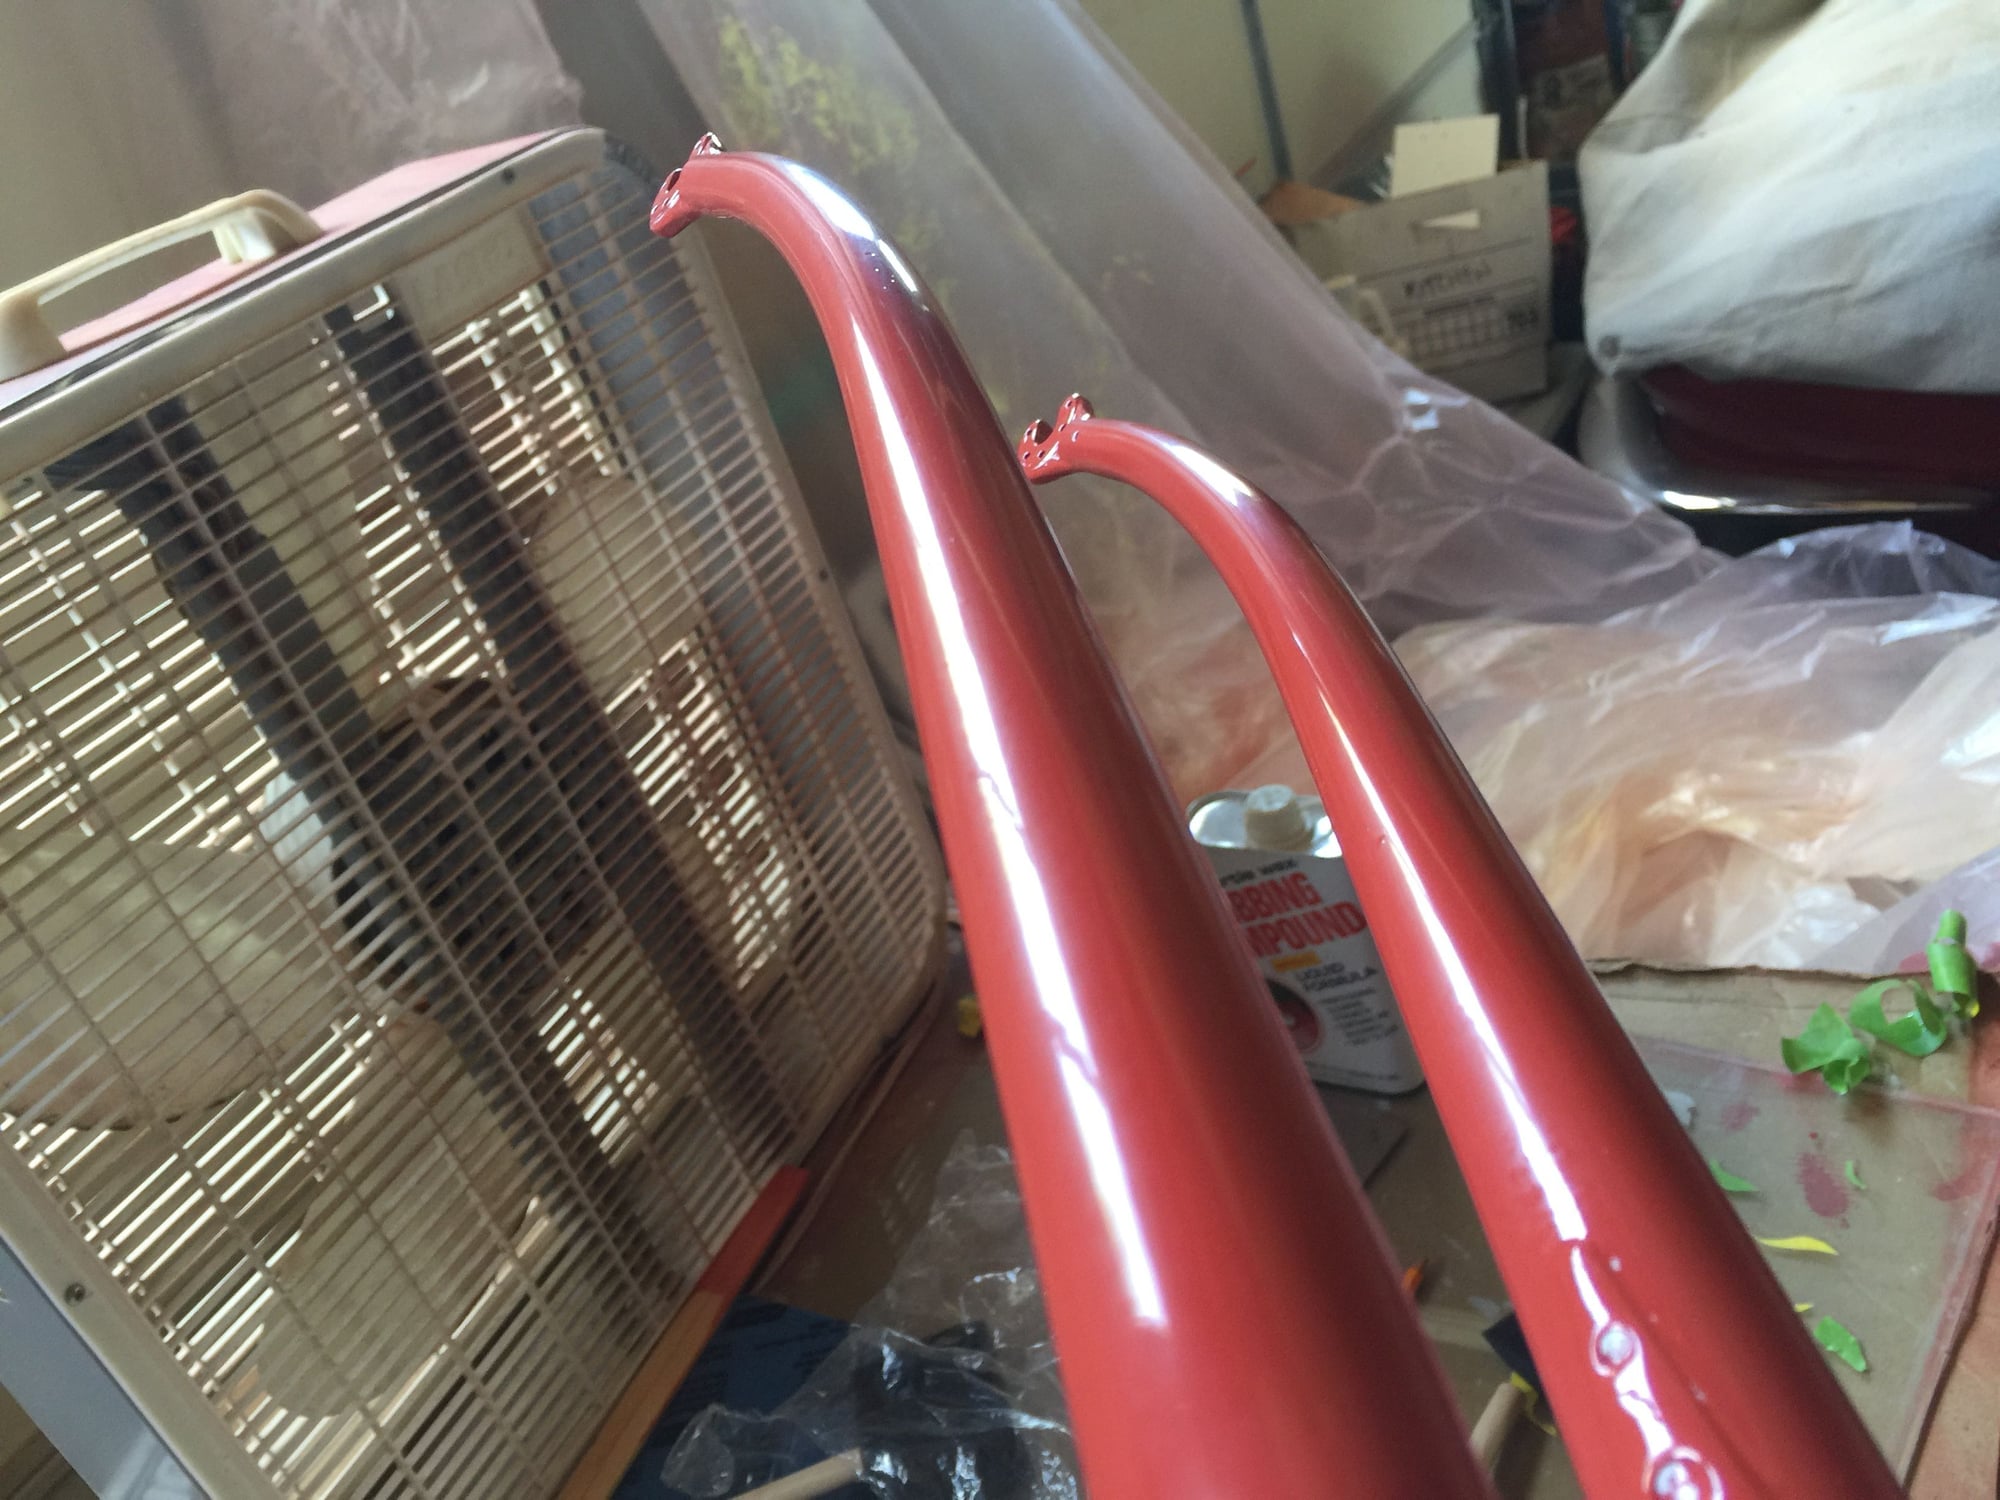
I agree with you on being able to control the frame orientation. I did three different hangs, , from the seat clamp, bottom bracket, and headtube. That was still difficult given the fact that I was only using loose wire to hang. The frame would push away from me as I sprayed.
Heres a few more shots of the progress.


Last edited by Mr. 66; 07-05-20 at 08:59 AM.
07-06-20, 08:04 AM
#40
Senior Member
Thread Starter
Join Date: Aug 2015
Posts: 3,318
Mentioned: 39 Post(s)
Tagged: 0 Thread(s)
Quoted: 1147 Post(s)
Liked 1,773 Times
in
973 Posts
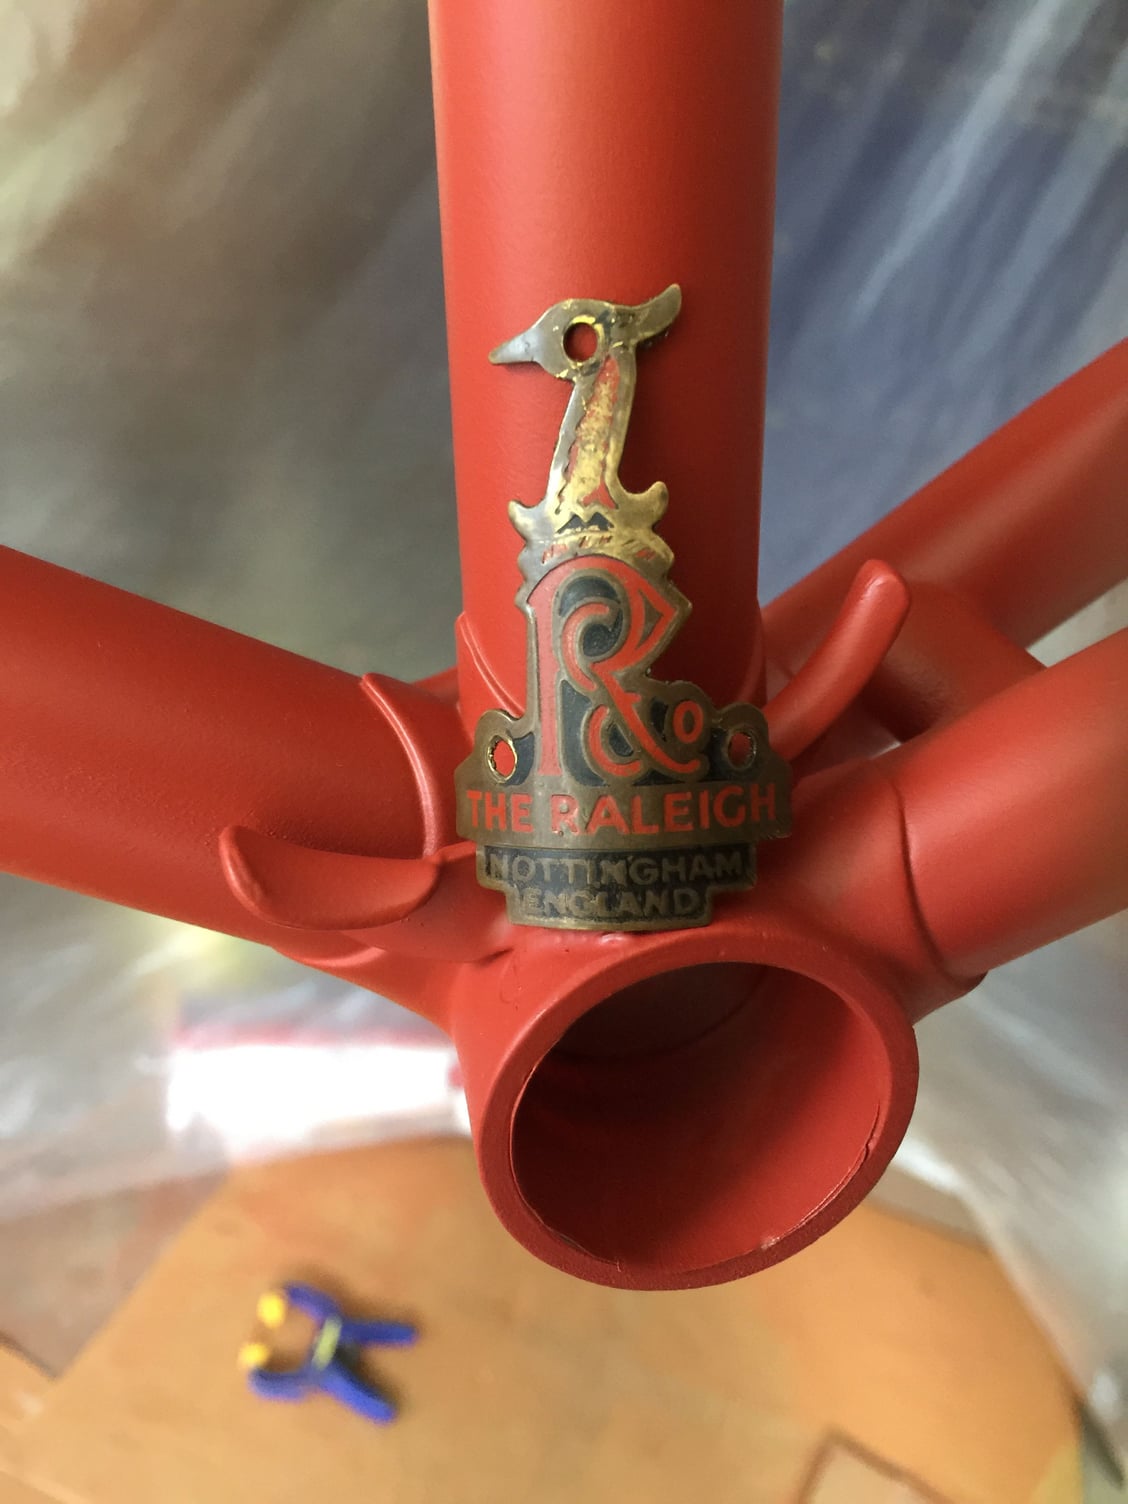
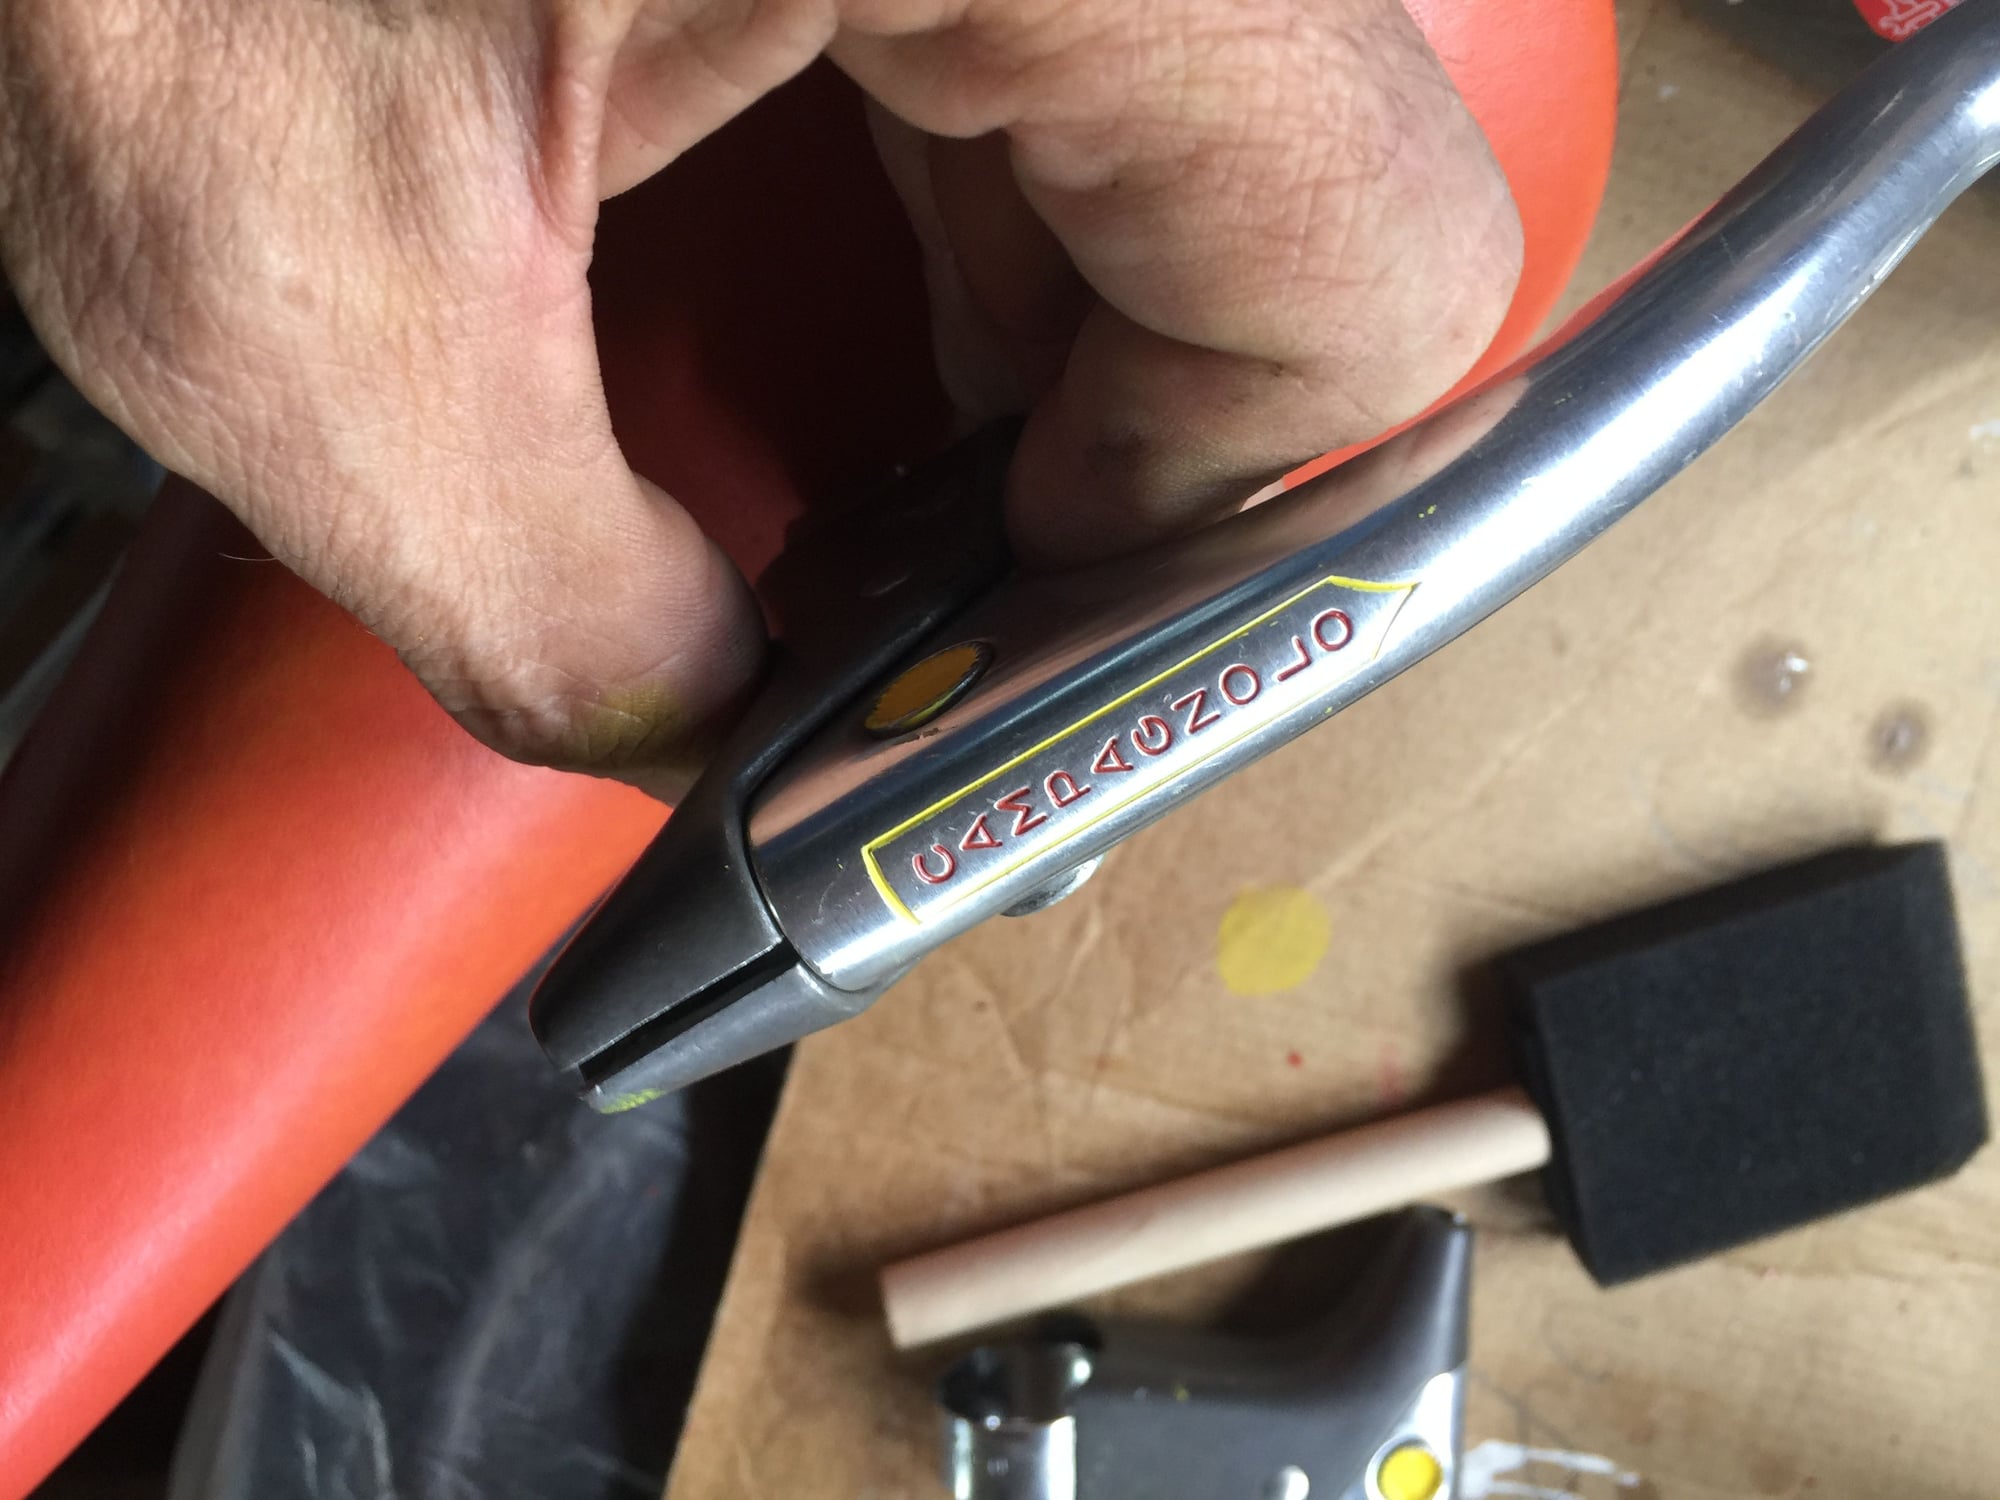
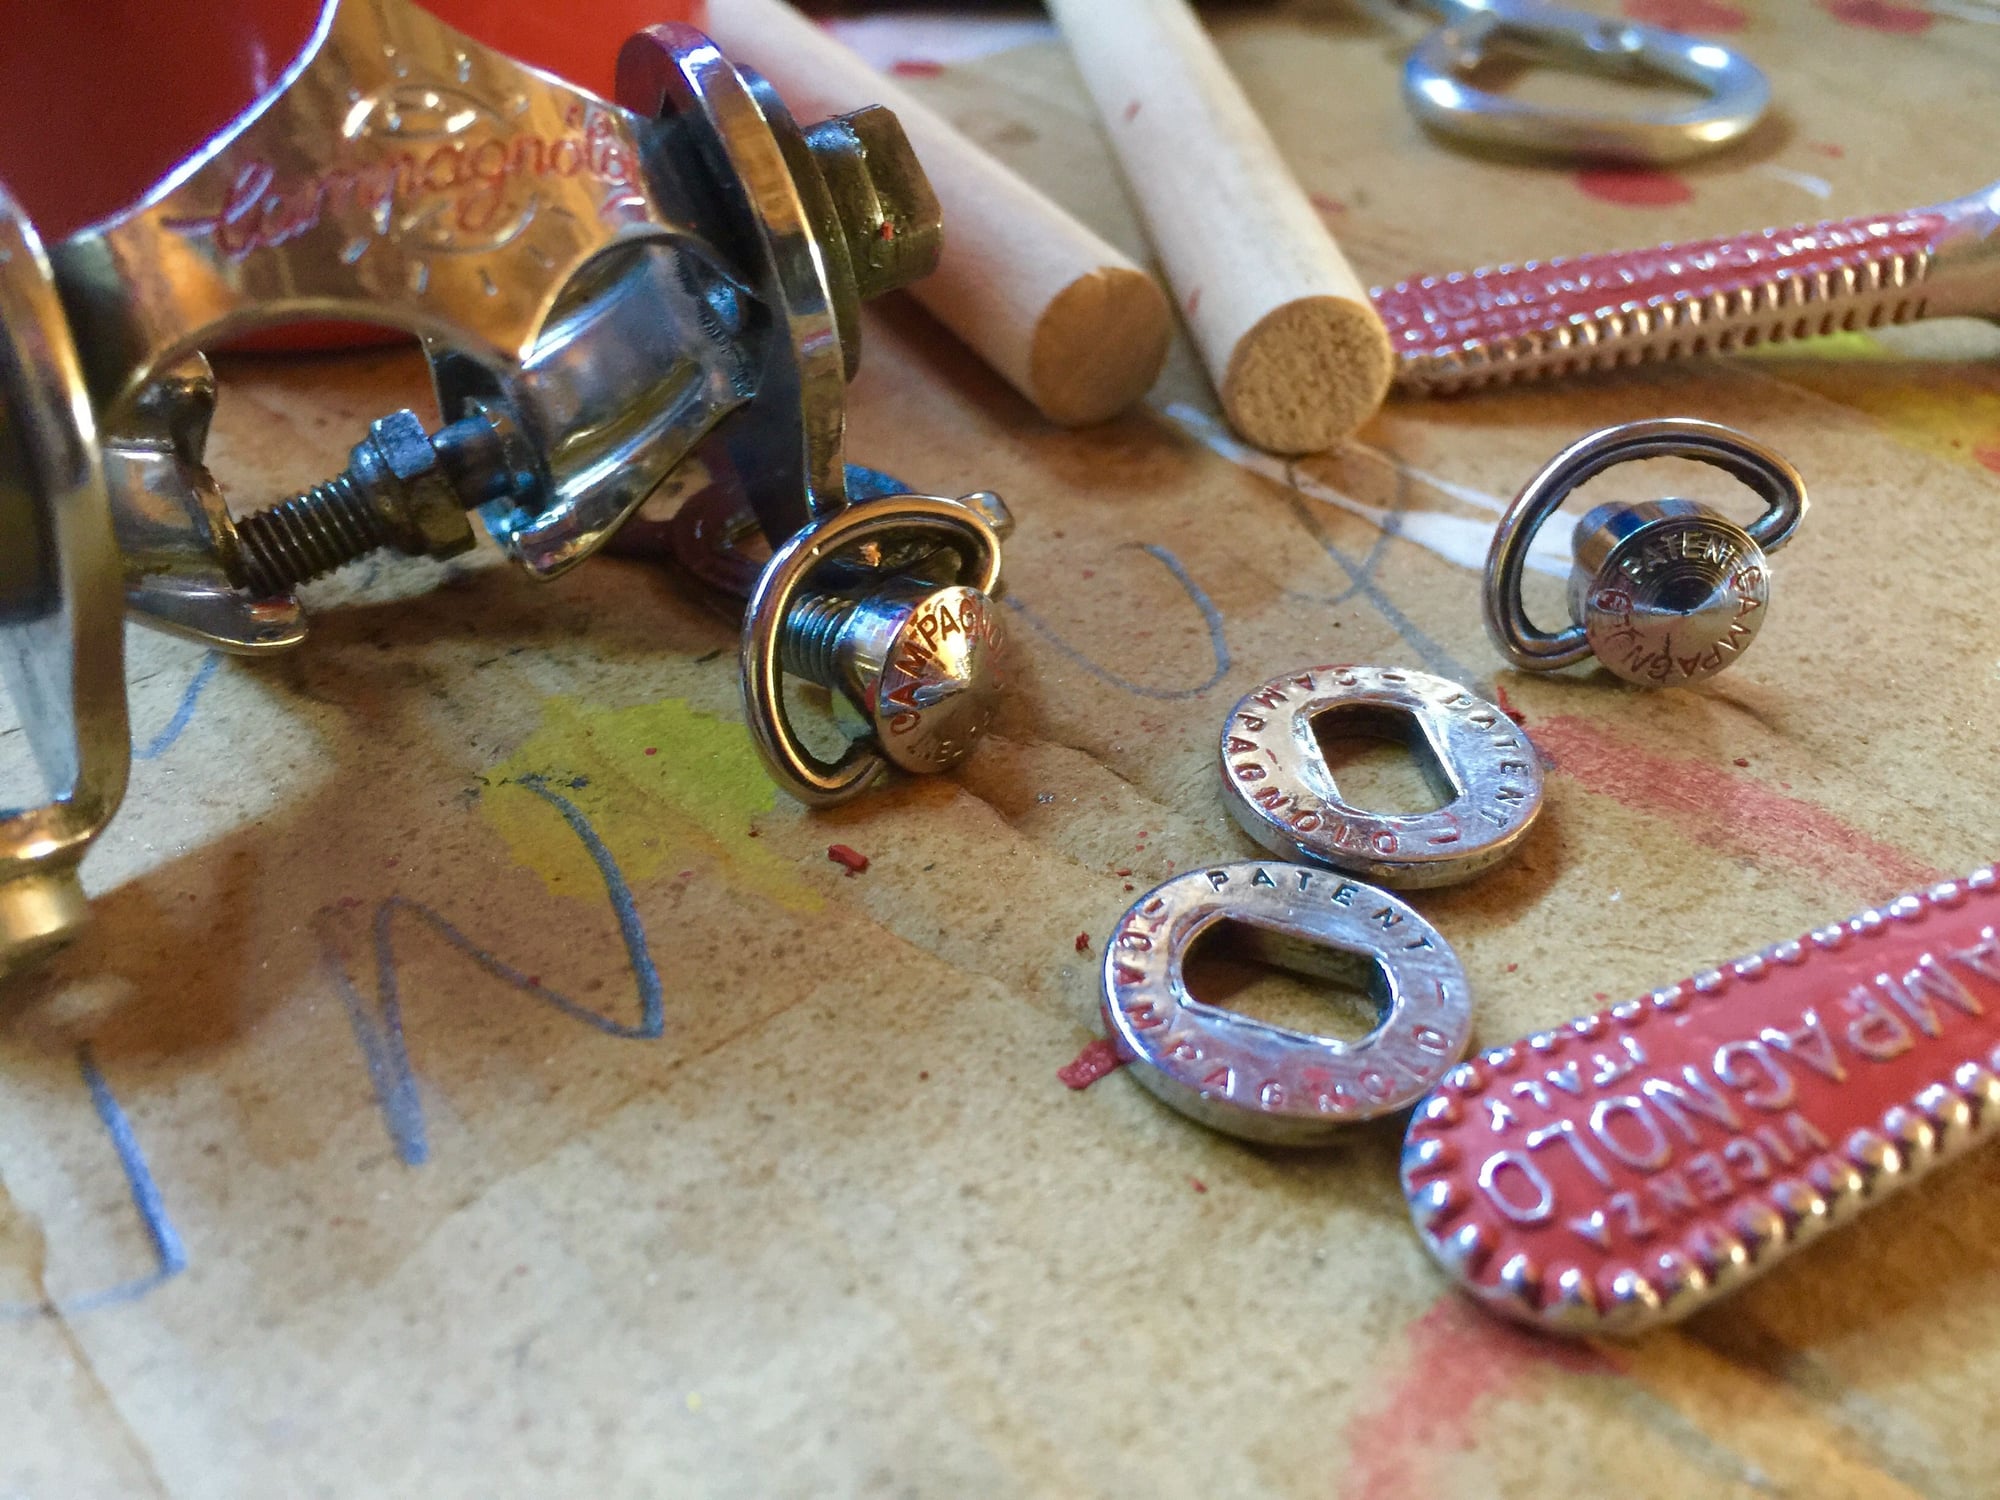
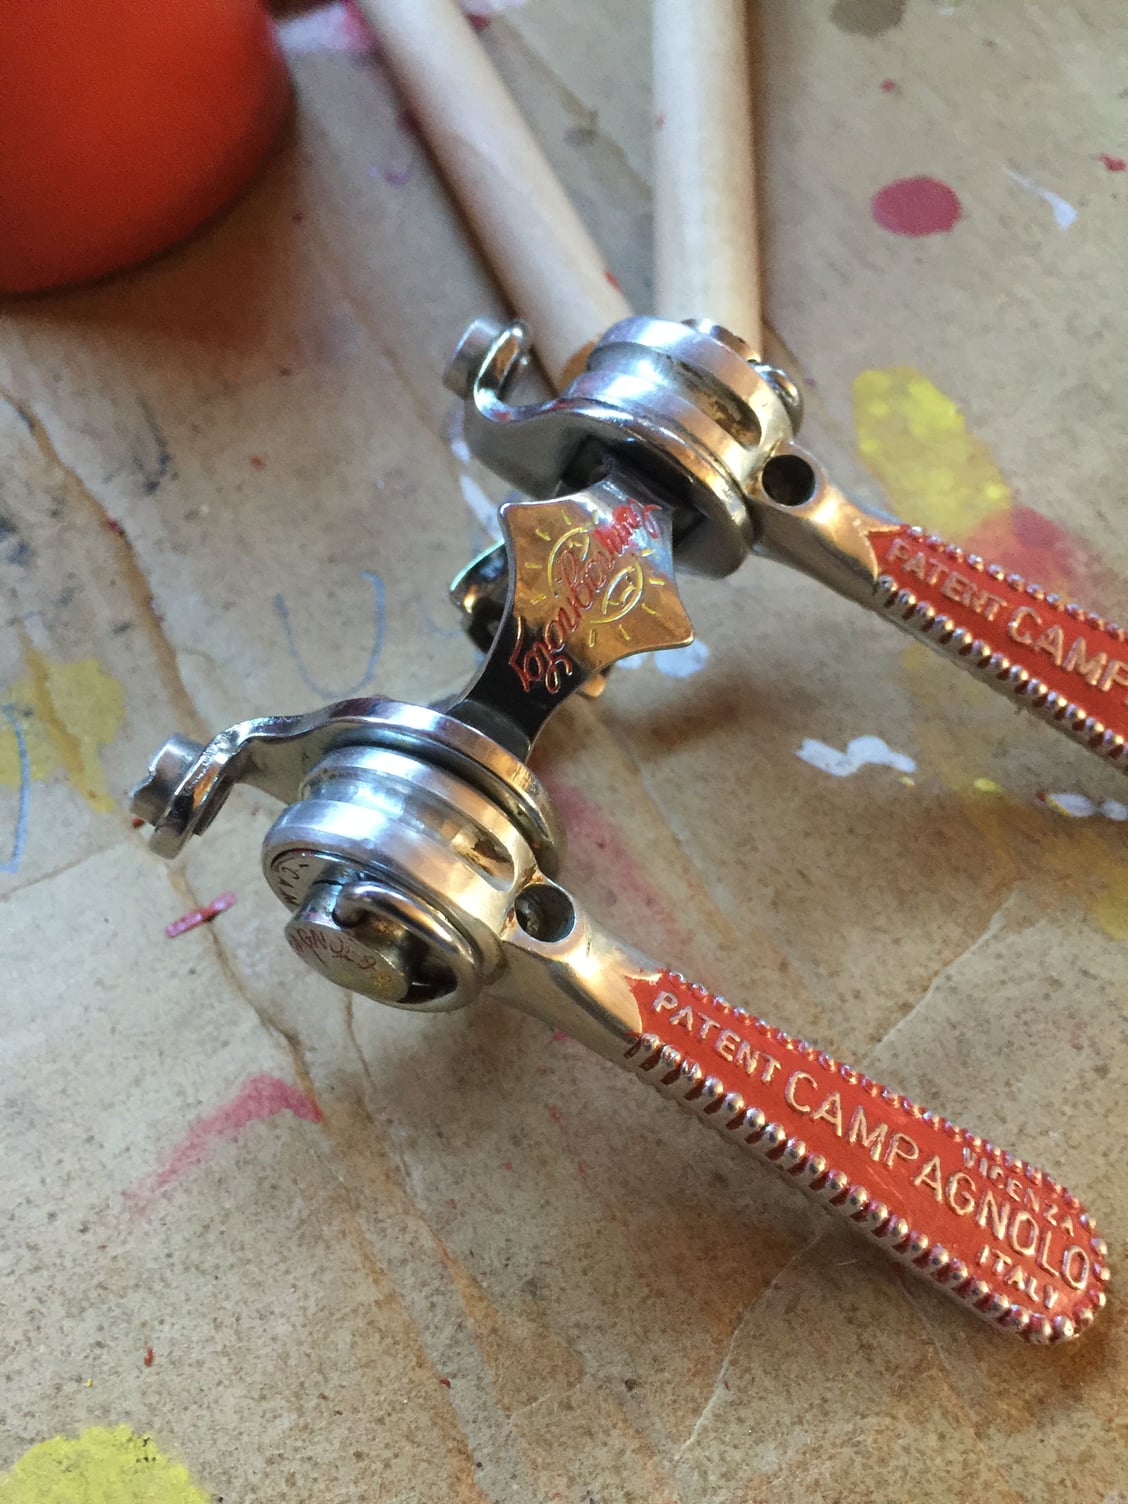
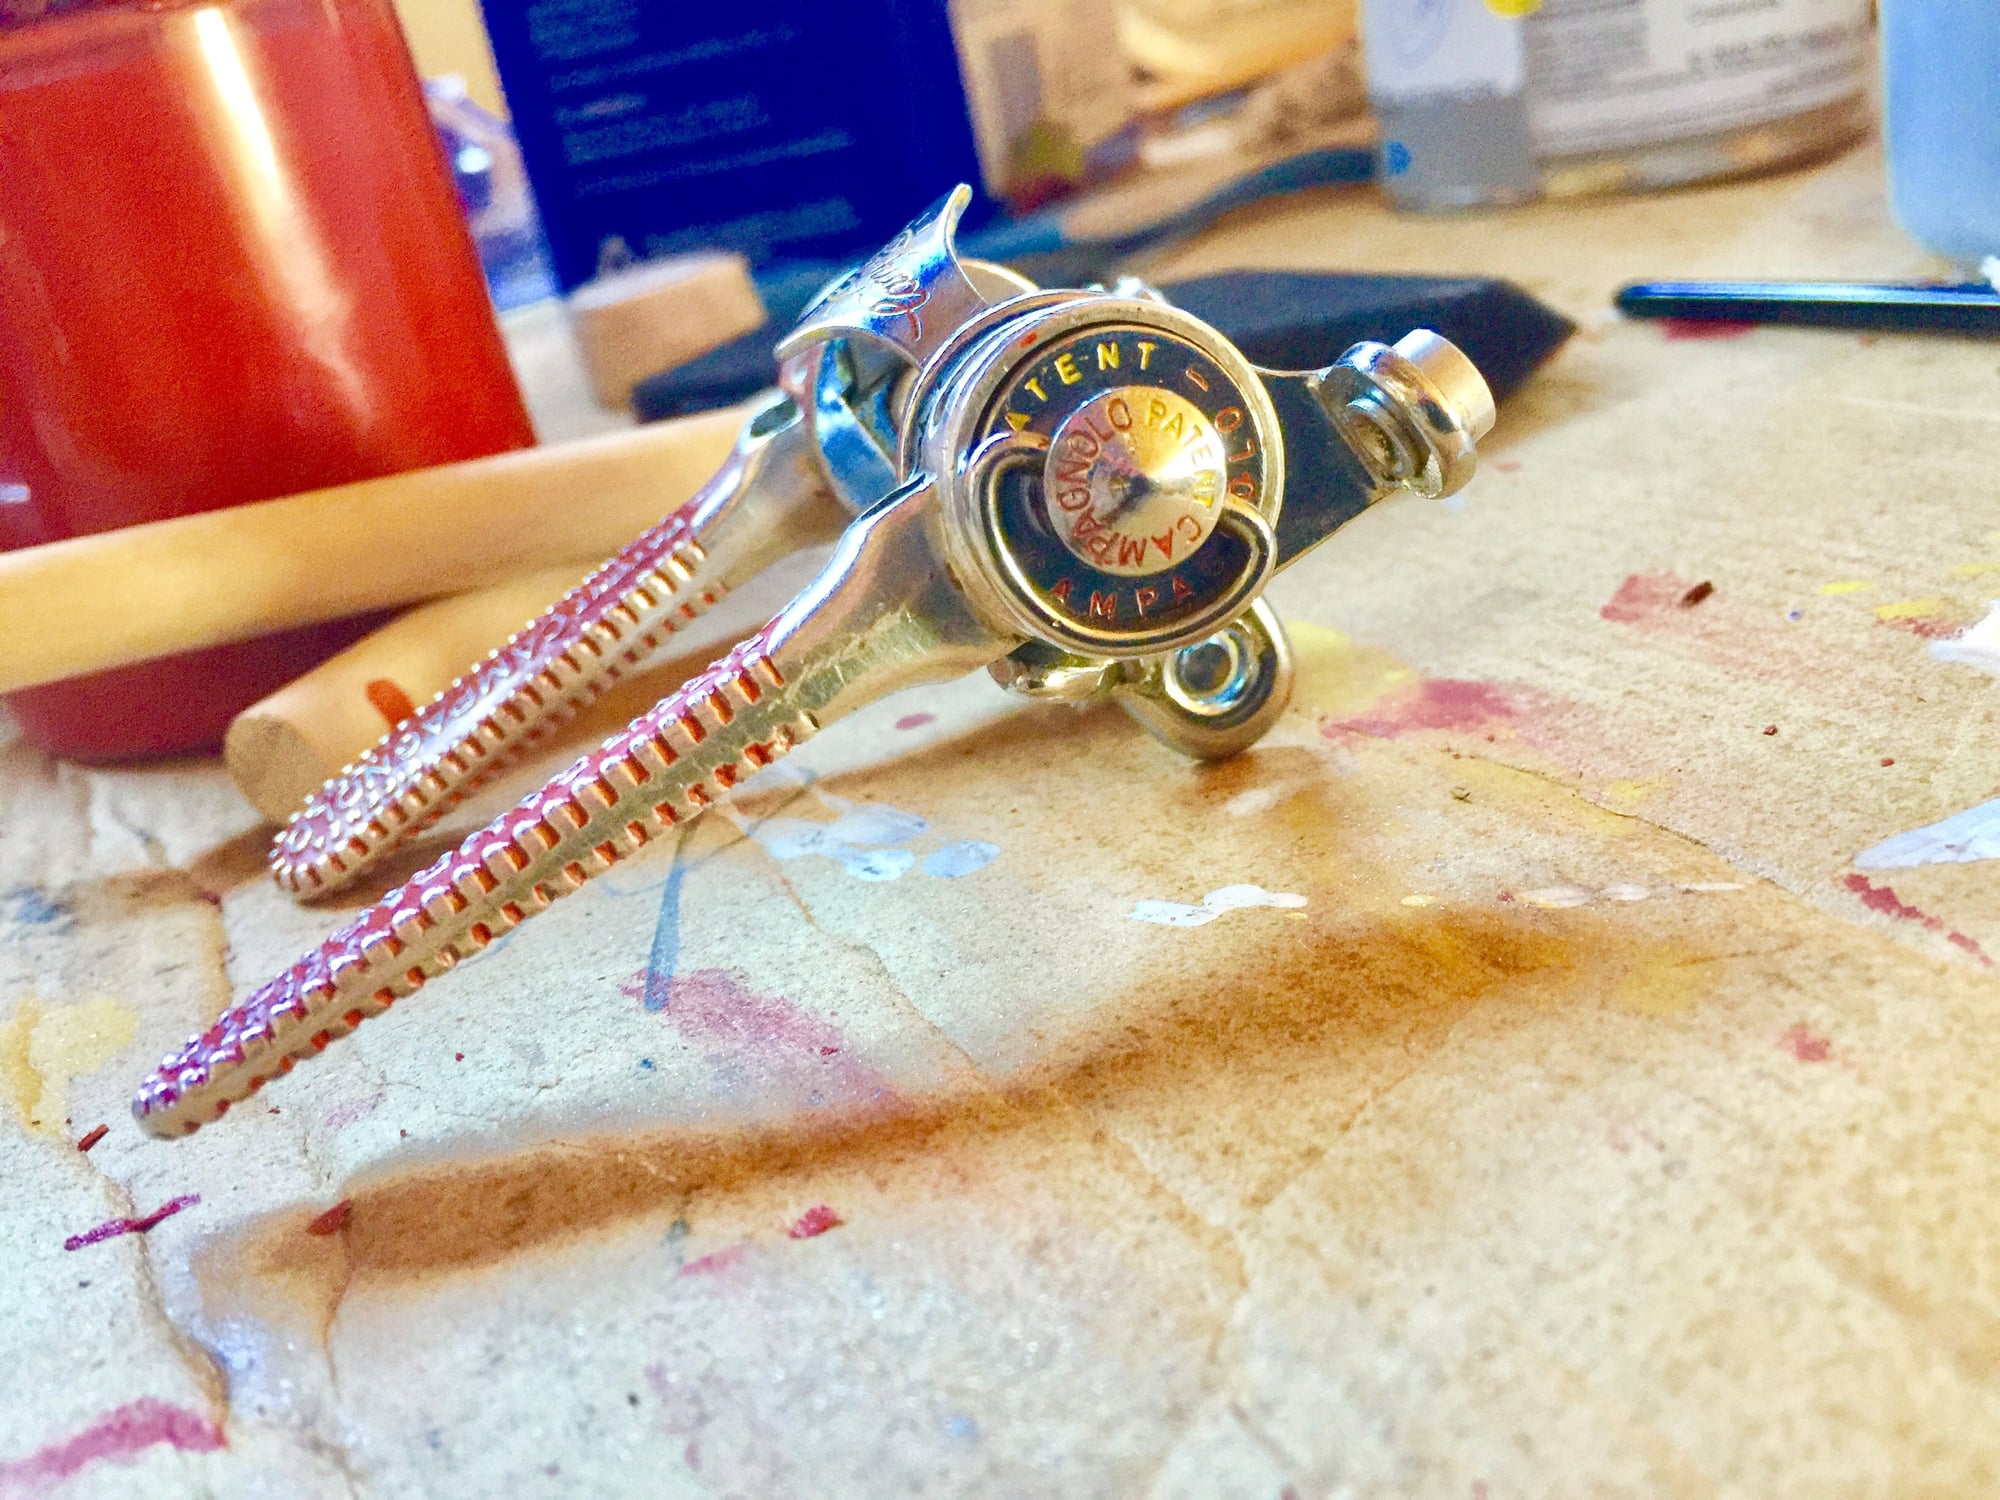
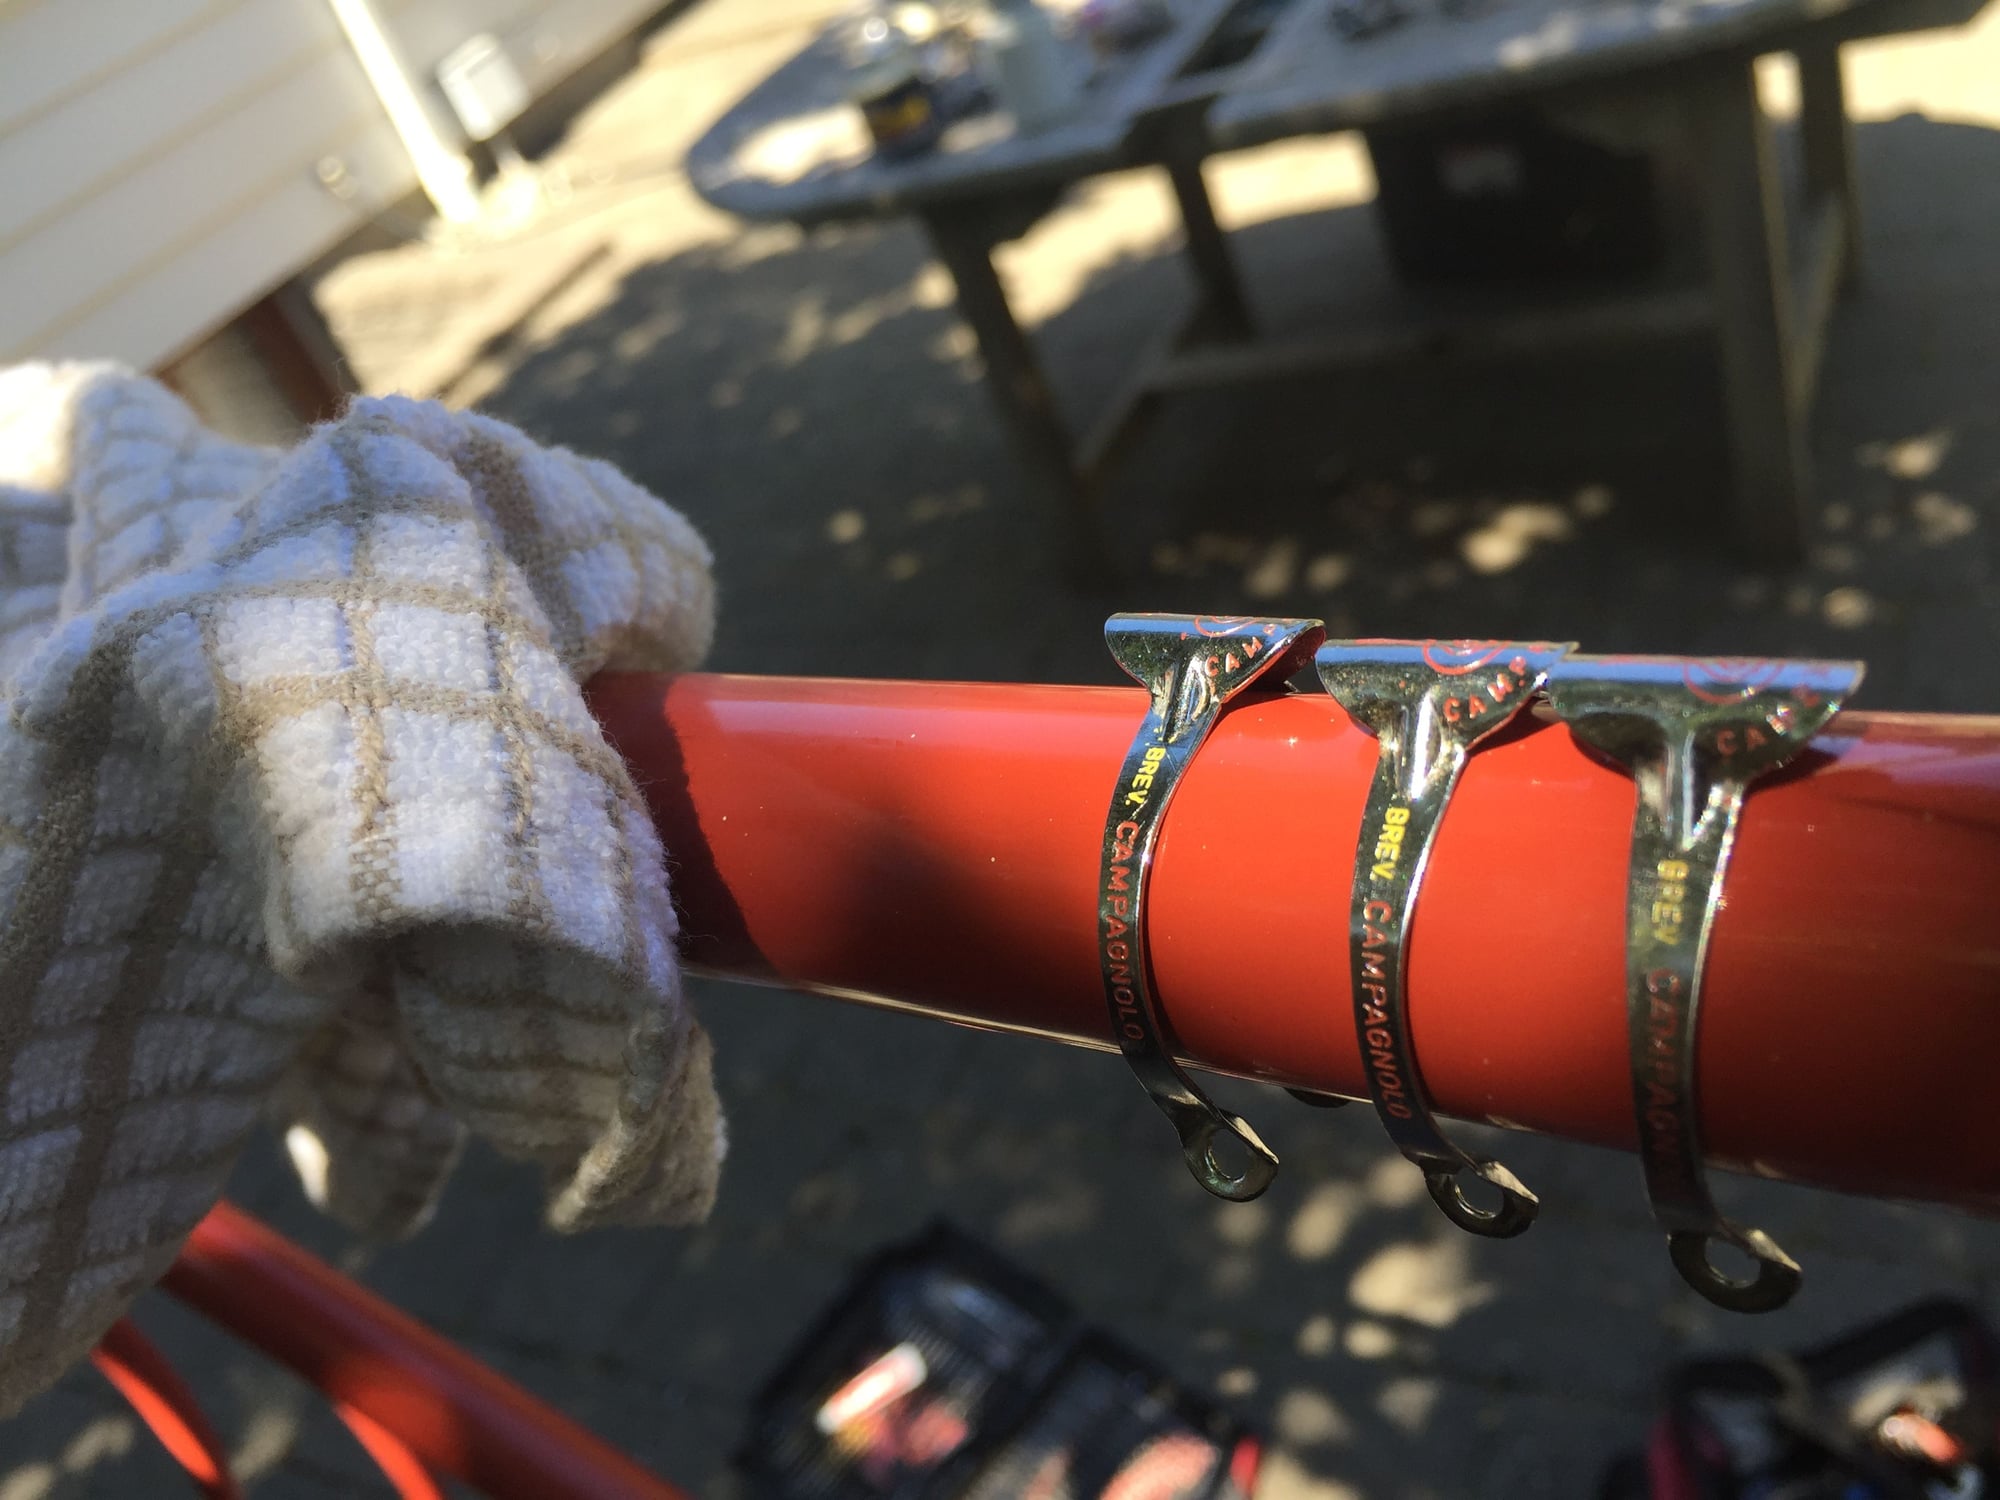
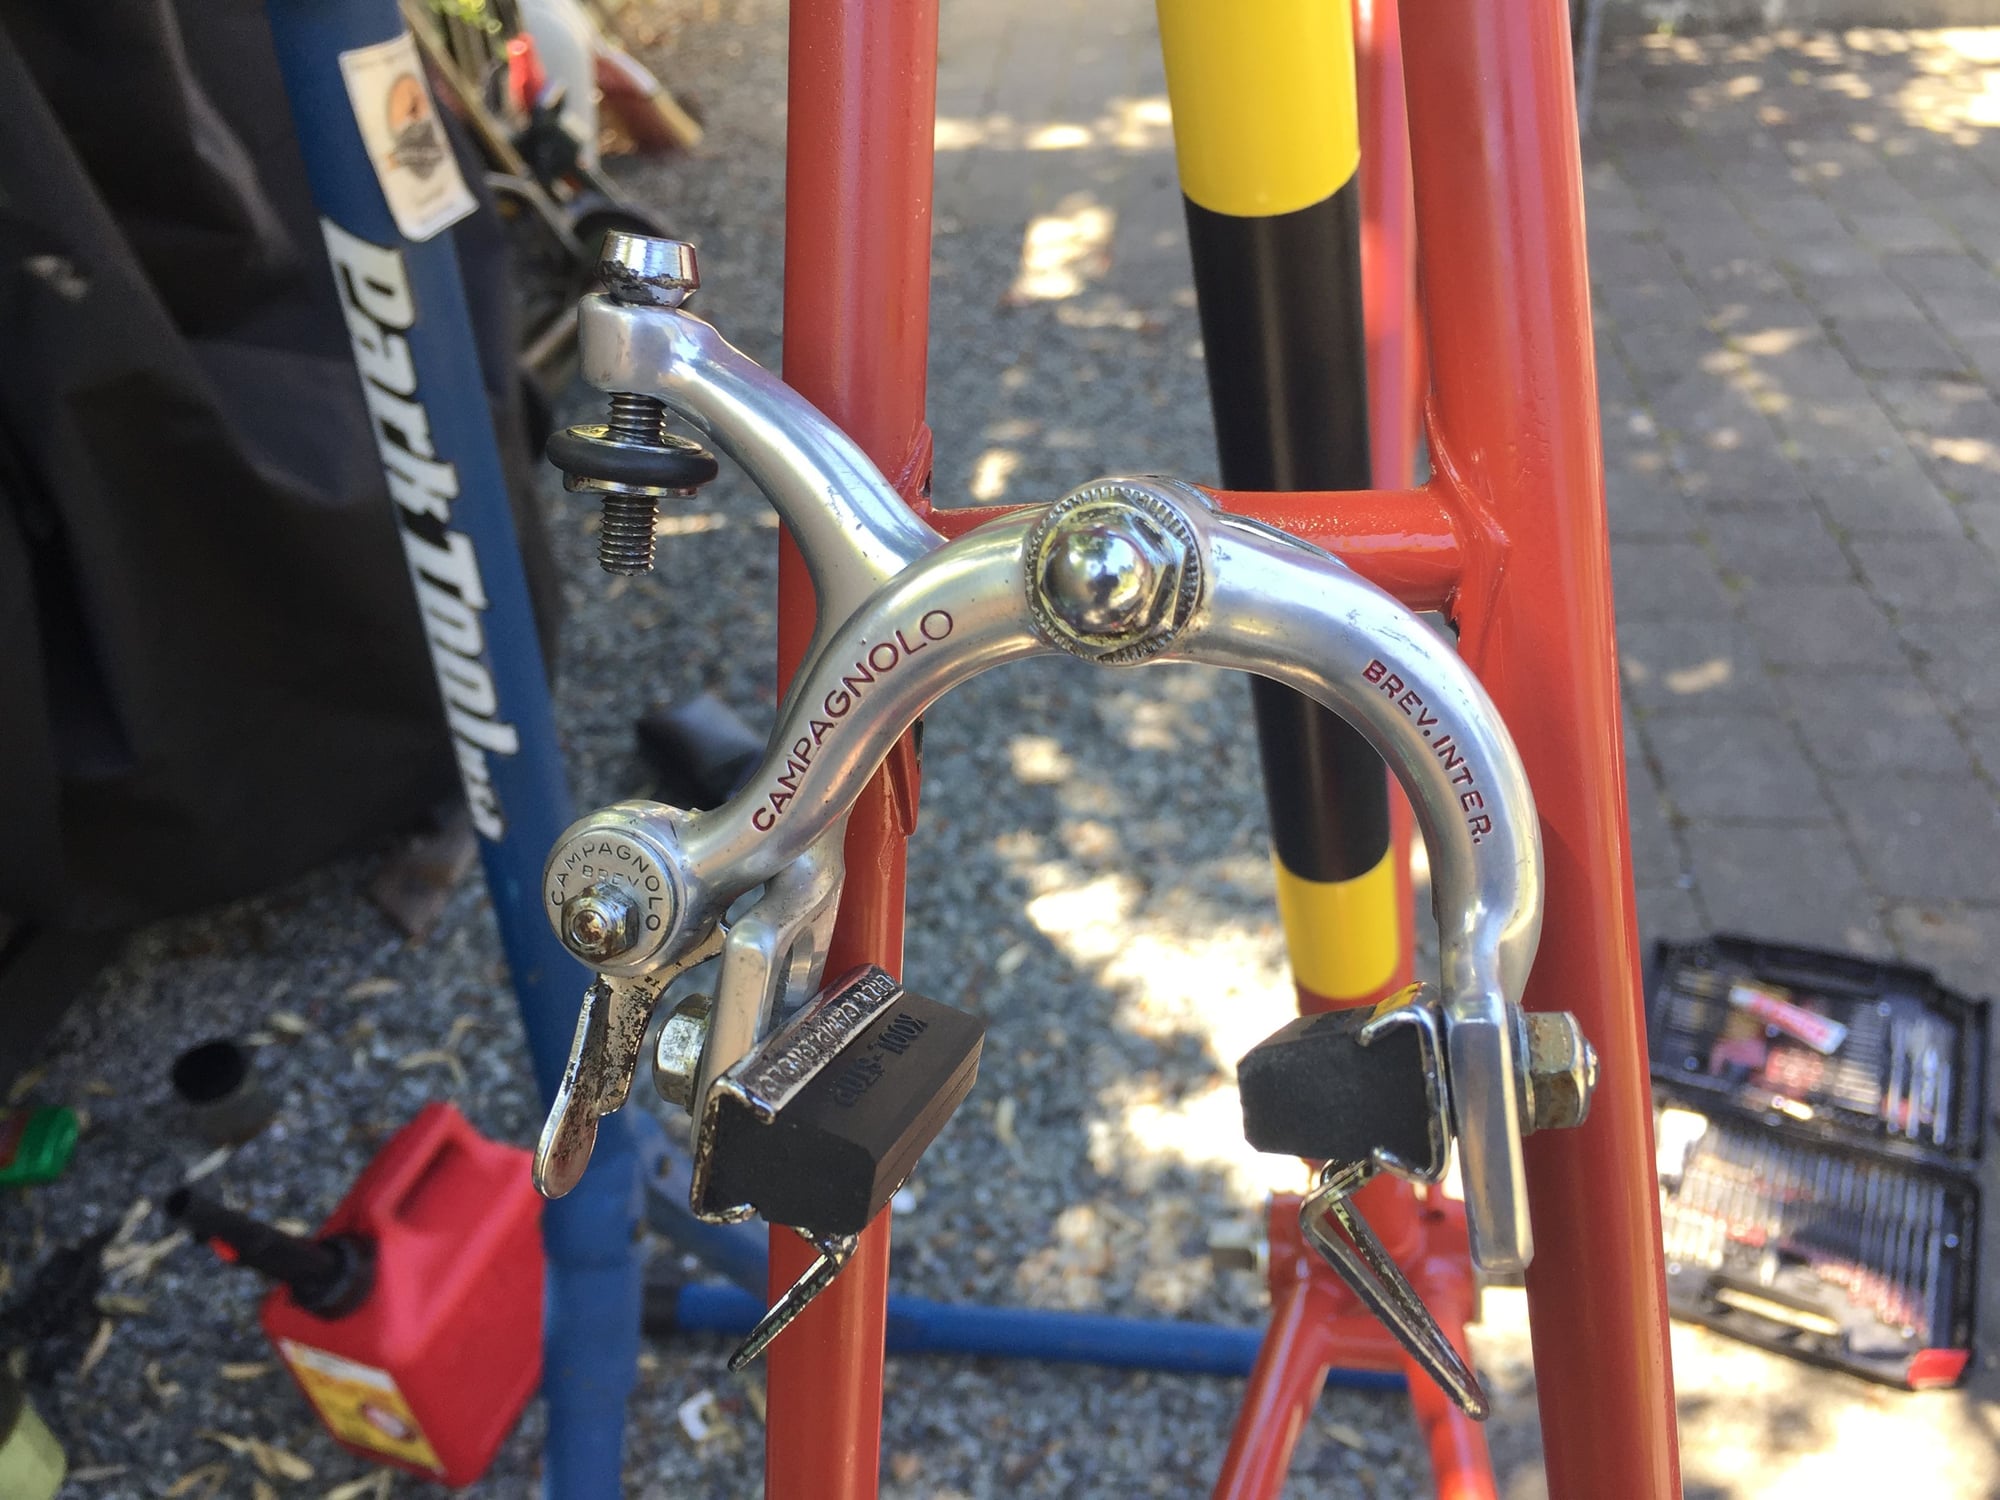
Details Traditional Campy. I decided to go with the '76 Super Record rear derailleur it is flat black like my frame details, and it is original styling. Both have been pantograph with the the frame paint to match.


Traditional Campy. I decided to go with the '76 Super Record rear derailleur it is flat black like my frame details, and it is original styling. Both have been pantograph with the the frame paint to match.
Likes For Mr. 66:
07-07-20, 05:00 PM
#42
Senior Member
Thread Starter
Join Date: Aug 2015
Posts: 3,318
Mentioned: 39 Post(s)
Tagged: 0 Thread(s)
Quoted: 1147 Post(s)
Liked 1,773 Times
in
973 Posts
That's a cool video, thanks for posting I enjoyed that very much. I'm very close to having mine complete. I still have some detail tasks on the frame, the bottom bracket needs sanding and the drain vents need paint.
07-11-20, 05:33 PM
#43
Senior Member
Join Date: Jun 2006
Posts: 20,305
Mentioned: 130 Post(s)
Tagged: 0 Thread(s)
Quoted: 3464 Post(s)
Liked 2,831 Times
in
1,997 Posts
Mr. 66- I think you have learned a lot and were very good at sharing.
Not my time, but I would start over. The majority of the expenses have been spent. You are close, but the frame deserves the pro level effort, I think you can achieve it.
And buy some 3M fineline masking tape.
Not my time, but I would start over. The majority of the expenses have been spent. You are close, but the frame deserves the pro level effort, I think you can achieve it.
And buy some 3M fineline masking tape.
Likes For repechage:
07-12-20, 11:07 AM
#45
Senior Member
These giuys


 Some wetsand and polish is in order.
Likes For Mr. 66:
07-28-20, 10:10 AM
#49
Senior Member
Thread Starter
Join Date: Aug 2015
Posts: 3,318
Mentioned: 39 Post(s)
Tagged: 0 Thread(s)
Quoted: 1147 Post(s)
Liked 1,773 Times
in
973 Posts
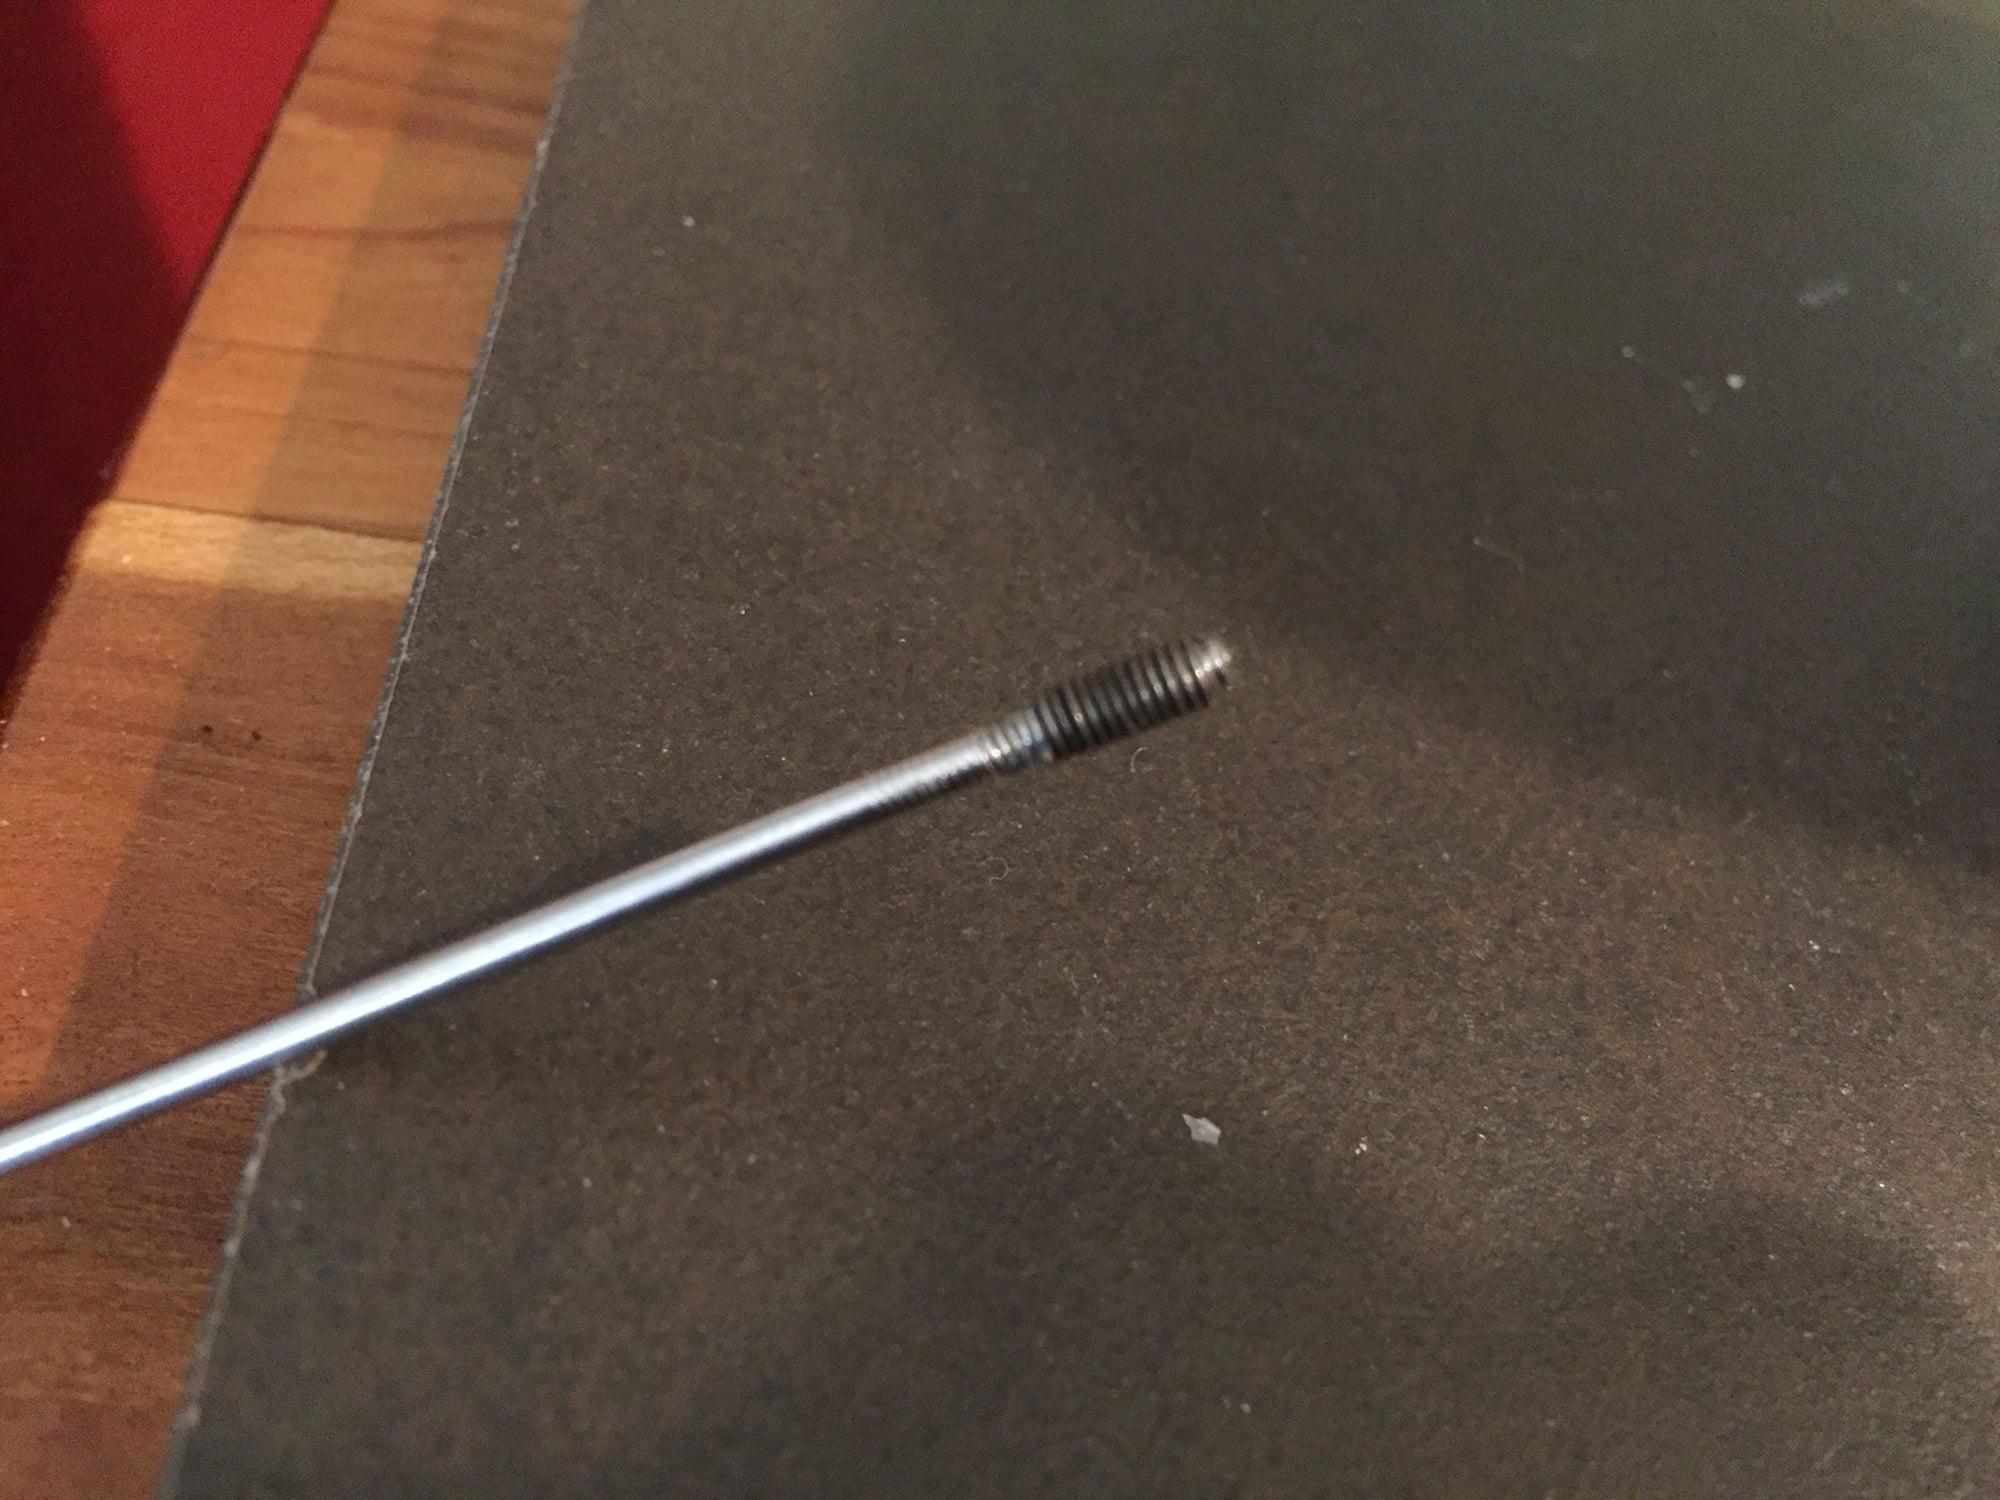
After a little bit of drama I've been able to make progress. The drama? In cleaning the threads of the dropouts I had an adjuster snap in the dropout. I started to act like I was building something French, ####ing crap crap crap crap and ####!!!!!!
I decided to drill from the back end of the dropout. Very slow and tedious I was able to dimple the screw's end and I drilled a small amount. I then tried the next size up in hoping the bit would catch. No go it started to drift, I went back to the smaller bit to get the piloting back, that worked.i tried to jam a small screw driver, it didn't grab. I went back to the larger, still no go and more drift. To the smalller again and back to the larger. I drilled very well on the screw's centerline completely through. Next I grabbed a spare spoke, mixed up a couple of drops of 24hr J&B weld. I put a dot of the epoxy on the hole and a dash on the thread of the spoke. Like buying a gun I had a 24hr cooling time.
Hooray! Success, in the meantime during my cool down period I was able to make a few more advancements. Out came the paint for details, the headset was installed with my nonprofessional press. Bottom bracket has been installed.


The head of the pop rivit is small and the shaft to big, still looking for the right fasteners.
I decided to drill from the back end of the dropout. Very slow and tedious I was able to dimple the screw's end and I drilled a small amount. I then tried the next size up in hoping the bit would catch. No go it started to drift, I went back to the smaller bit to get the piloting back, that worked.i tried to jam a small screw driver, it didn't grab. I went back to the larger, still no go and more drift. To the smalller again and back to the larger. I drilled very well on the screw's centerline completely through. Next I grabbed a spare spoke, mixed up a couple of drops of 24hr J&B weld. I put a dot of the epoxy on the hole and a dash on the thread of the spoke. Like buying a gun I had a 24hr cooling time.
Hooray! Success, in the meantime during my cool down period I was able to make a few more advancements. Out came the paint for details, the headset was installed with my nonprofessional press. Bottom bracket has been installed.
The head of the pop rivit is small and the shaft to big, still looking for the right fasteners.
Likes For Mr. 66:
07-28-20, 02:12 PM
#50
Full Member
https://www.ebay.co.uk/itm/RALEIGH-C...IAAOxy4t1Sf5FE