


Tool for adjusting Mikashima pedal preload
 03-27-20, 10:03 PM
#1

Seńor Member
Thread Starter
Join Date: Dec 2007
Location: Colorado
Posts: 895
Mentioned: 12 Post(s)
Tagged: 0 Thread(s)
Quoted: 284 Post(s)
Liked 296 Times
in
149 Posts
Tool for adjusting Mikashima pedal preload
In the process of overhauling a mid-70s bike for the Quarantine Challenge, I’ve hit a minor snag overhauling these pedals (Mikashima Unique Road).
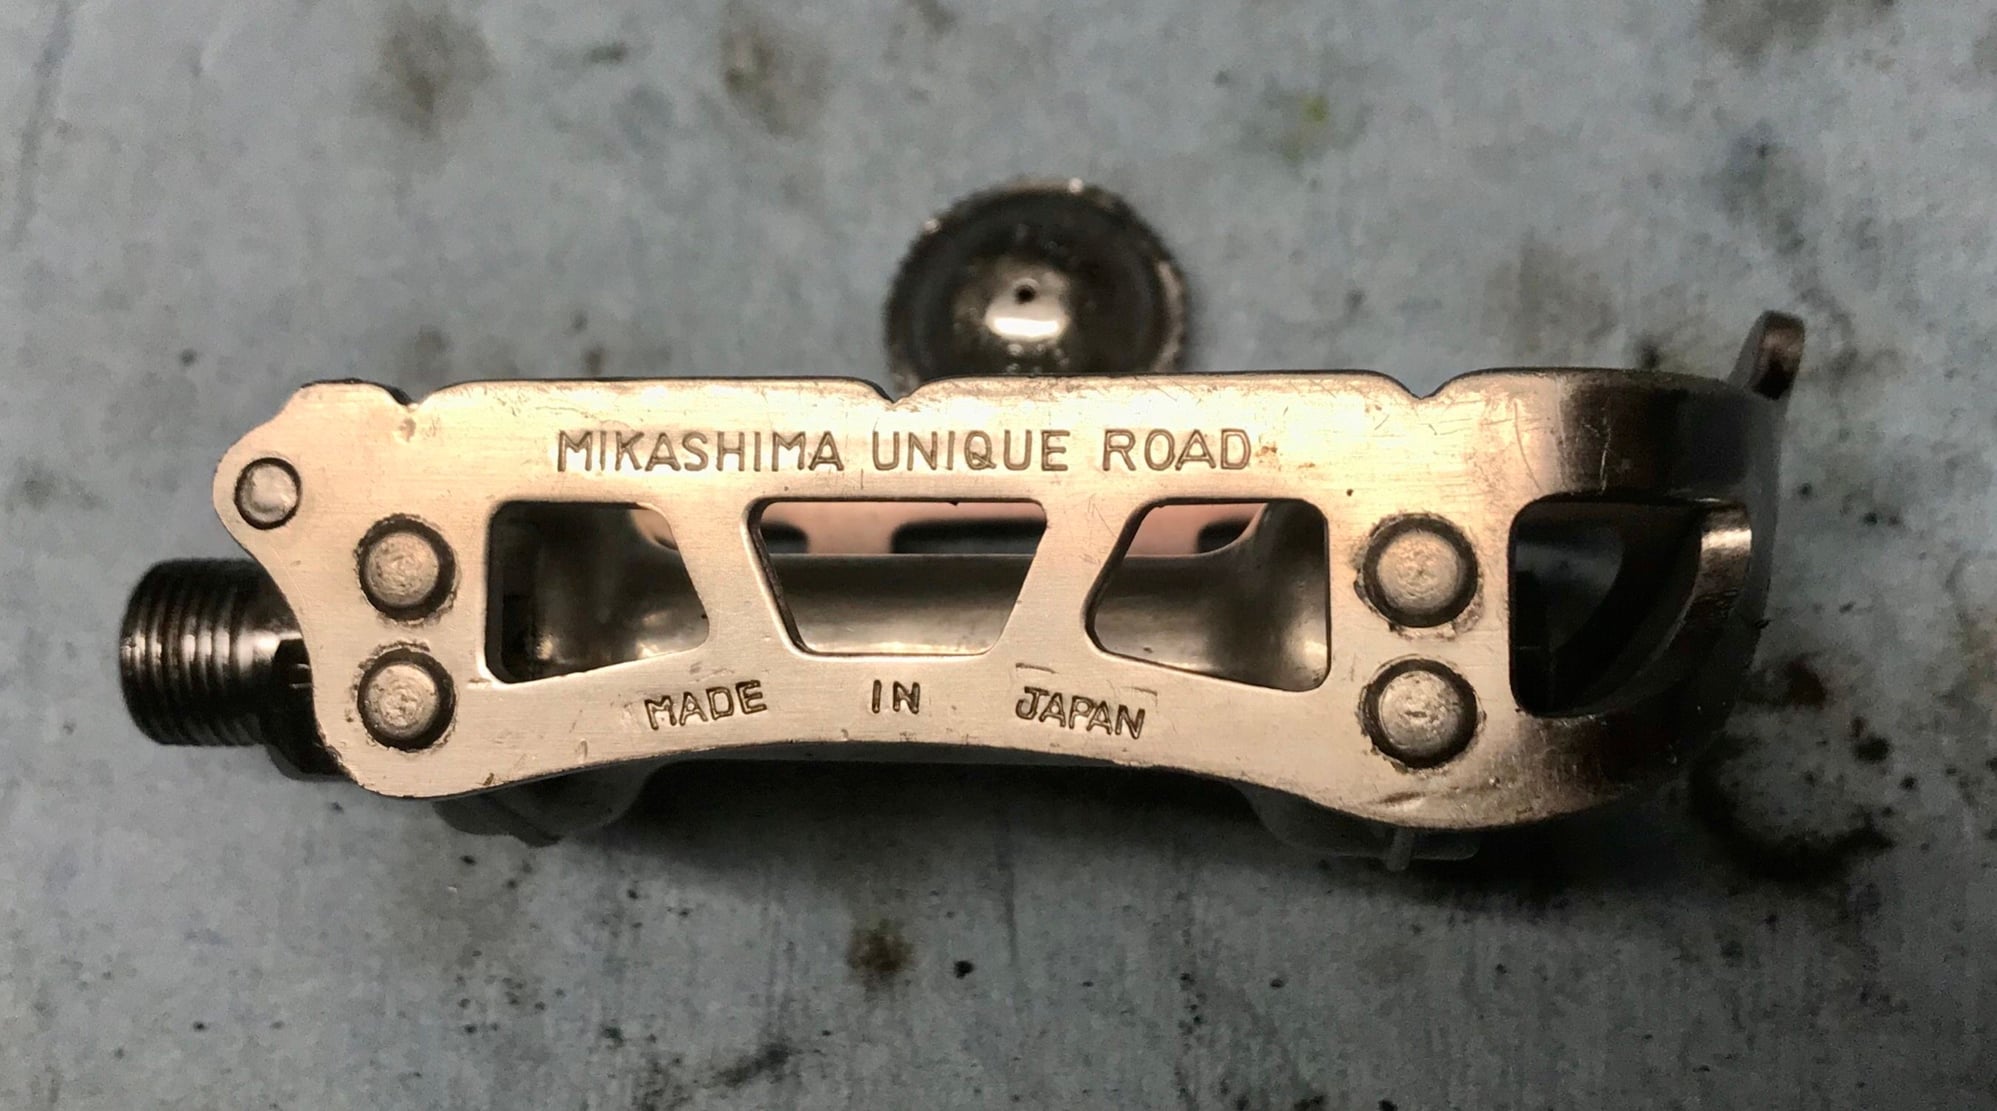
The cone for the pedal bearings doesn’t have a flat for a wrench, but instead a pair of indents on the back face. It appears the idea is that a special tool would hold the cone at the preferred preload while the lock nut was tightened.
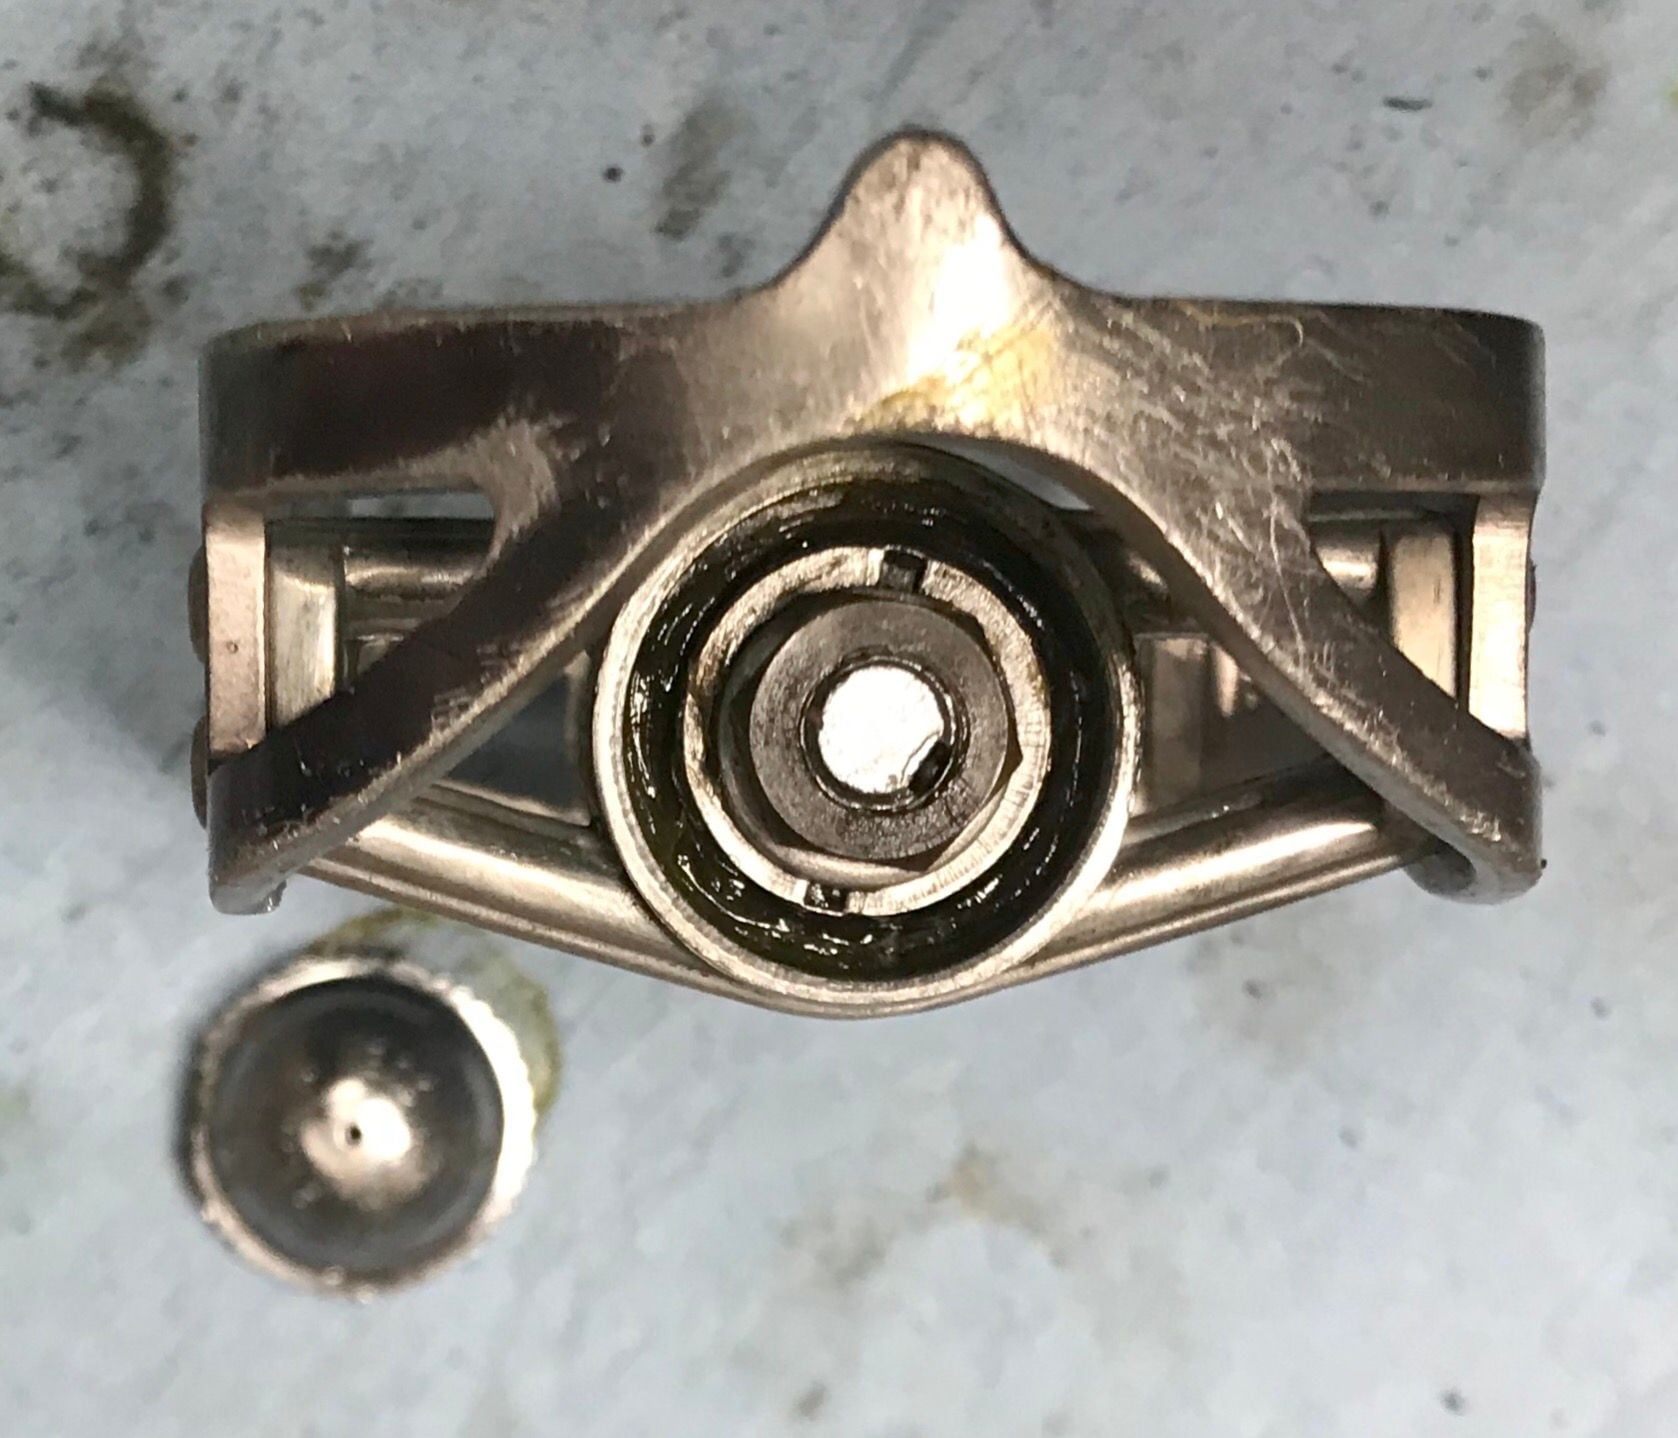
Anyone have an idea what sort of tool I should be looking for to get these adjusted correctly? I’ve tried the Park pin spinners but the pins on those tools are too large.
Without a firm grip on the cone, it quickly over-tightens when the lock nut is tightened.
The cone for the pedal bearings doesn’t have a flat for a wrench, but instead a pair of indents on the back face. It appears the idea is that a special tool would hold the cone at the preferred preload while the lock nut was tightened.
Anyone have an idea what sort of tool I should be looking for to get these adjusted correctly? I’ve tried the Park pin spinners but the pins on those tools are too large.
Without a firm grip on the cone, it quickly over-tightens when the lock nut is tightened.


Likes For Brad L:
03-28-20, 01:50 AM
#3
blahblahblah chrome moly

Join Date: Apr 2009
Location: Seattle
Posts: 1,987
Mentioned: 92 Post(s)
Tagged: 0 Thread(s)
Quoted: 1173 Post(s)
Liked 2,569 Times
in
1,073 Posts
That way it's supposed to work is position the cone, place the tongue washer, and tighten the nut. When the tongue washer is working, turning the nut doesn't make the cone turn. It does tighten up the bearing a little by taking out the slop in the threads, but you correct for that by starting with the bearing just a little loose, so it's just right after the nut is tight. Often requires trial and error. Obviously don't overtighten the nut, which is how the tongues get torn out.
Even if you can find a new tongue washer, say by stealing it from another pedal, you may still be screwed if the tongue has mangled the thread on the axle. And even if the axle thread is fine and you have a new washer, its tongue may die the same way the first one did. It's not a great system!
Without a working tongue-washer, you're right, you would need a tool to hold the cone from turning. That will be pretty difficult.
Here's a "Plan B" idea (not tested but should work): Strip the pedal back down and thoroughly degrease the axle, cone and nut. Reassemble dry, no grease, but with strong (red) loctite on the cone and nut. (You can grease the row of bearings near the crank, as long as you're careful to keep the adjusting thread, where the cone goes, grease-free.)
Adjust the bearing and try to get the nut as tight as you can, but accept that it won't be very tight, with just a pointed stick or whatever your best tool is for holding the cone. We'll have to depend on the loctite. Then don't touch it until the loctite fully cures. Read the instructions -- a day maybe? I forget.
After the loctite is cured, install the dustcap, and pump grease into the pedal using the hole in the dustcap. You'll need a grease-gun with a needle-nose fitting on the end.
Red loctite is not easy to break loose, if you ever want to overhaul this pedal again. But honestly, most pedals never get overhauled once in their entire lives, let alone twice. But if it comes to it, you can loosen the loctite with heat, such as from a heat gun. That'll make the grease smoke, so flush as much of the grease out first, with solvent, and even then it probably needs to be done outdoors. I've used a heat gun to loosen bottom bracket cups, pedals stuck in cranks, cotter pins etc., and it's a powerful technique, so every bike mechanic should have a heat gun.
For an even more permanent fix, adjust the pedal bearing with it dry (no grease) as before, then spot-weld the nut to the axle. Requires you to have some sort of welding capacity, but any kind could work -- oxy-acetylene, stick, MIG or TIG. Then you don't have to trust that loctite to hold, but of course no one can ever overhaul it again, beyond flushing and re-greasing.
Mark B in Seattle
03-28-20, 05:19 AM
#5
Senior Member
Join Date: Nov 2013
Location: Near Pottstown, PA: 30 miles NW of Philadelphia
Posts: 2,186
Bikes: 2 Trek Mtn, Cannondale R600 road, 6 vintage road bikes
Mentioned: 83 Post(s)
Tagged: 0 Thread(s)
Quoted: 472 Post(s)
Liked 1,028 Times
in
404 Posts
The DIY tool that Brad L made looks viable but in addition this is a good example of why I mod my small sockets. This nut is likely 12mm but thin. All my 1/4" drive sockets from 13mm on down have been milled/ground to eliminate the tapered leading edge. I've milled my open end wrenches too. On the various thin nuts and bolt heads on a bicycle, that taper can prevent the sockets grip on half of the nut, or more. My sockets now have a sharp leading edge - full grip on the faces of the nut or bolt head. In theory, that sharp leading edge makes engaging a socket on a fastener a bit slower. Has probably cost me 72 additional seconds over the past 10 years. I woint busy anyway.
With that sharp leading edge on your socket you could use a holding tool on the cone and still have sufficient grip on the nut to get it tight, tight without the socket cam'n off the nut. Good luck.
With that sharp leading edge on your socket you could use a holding tool on the cone and still have sufficient grip on the nut to get it tight, tight without the socket cam'n off the nut. Good luck.
03-28-20, 09:50 AM
#6
Seńor Member
Thread Starter
Join Date: Dec 2007
Location: Colorado
Posts: 895
Mentioned: 12 Post(s)
Tagged: 0 Thread(s)
Quoted: 284 Post(s)
Liked 296 Times
in
149 Posts
Thanks.
Hopefully you can see from this pic.
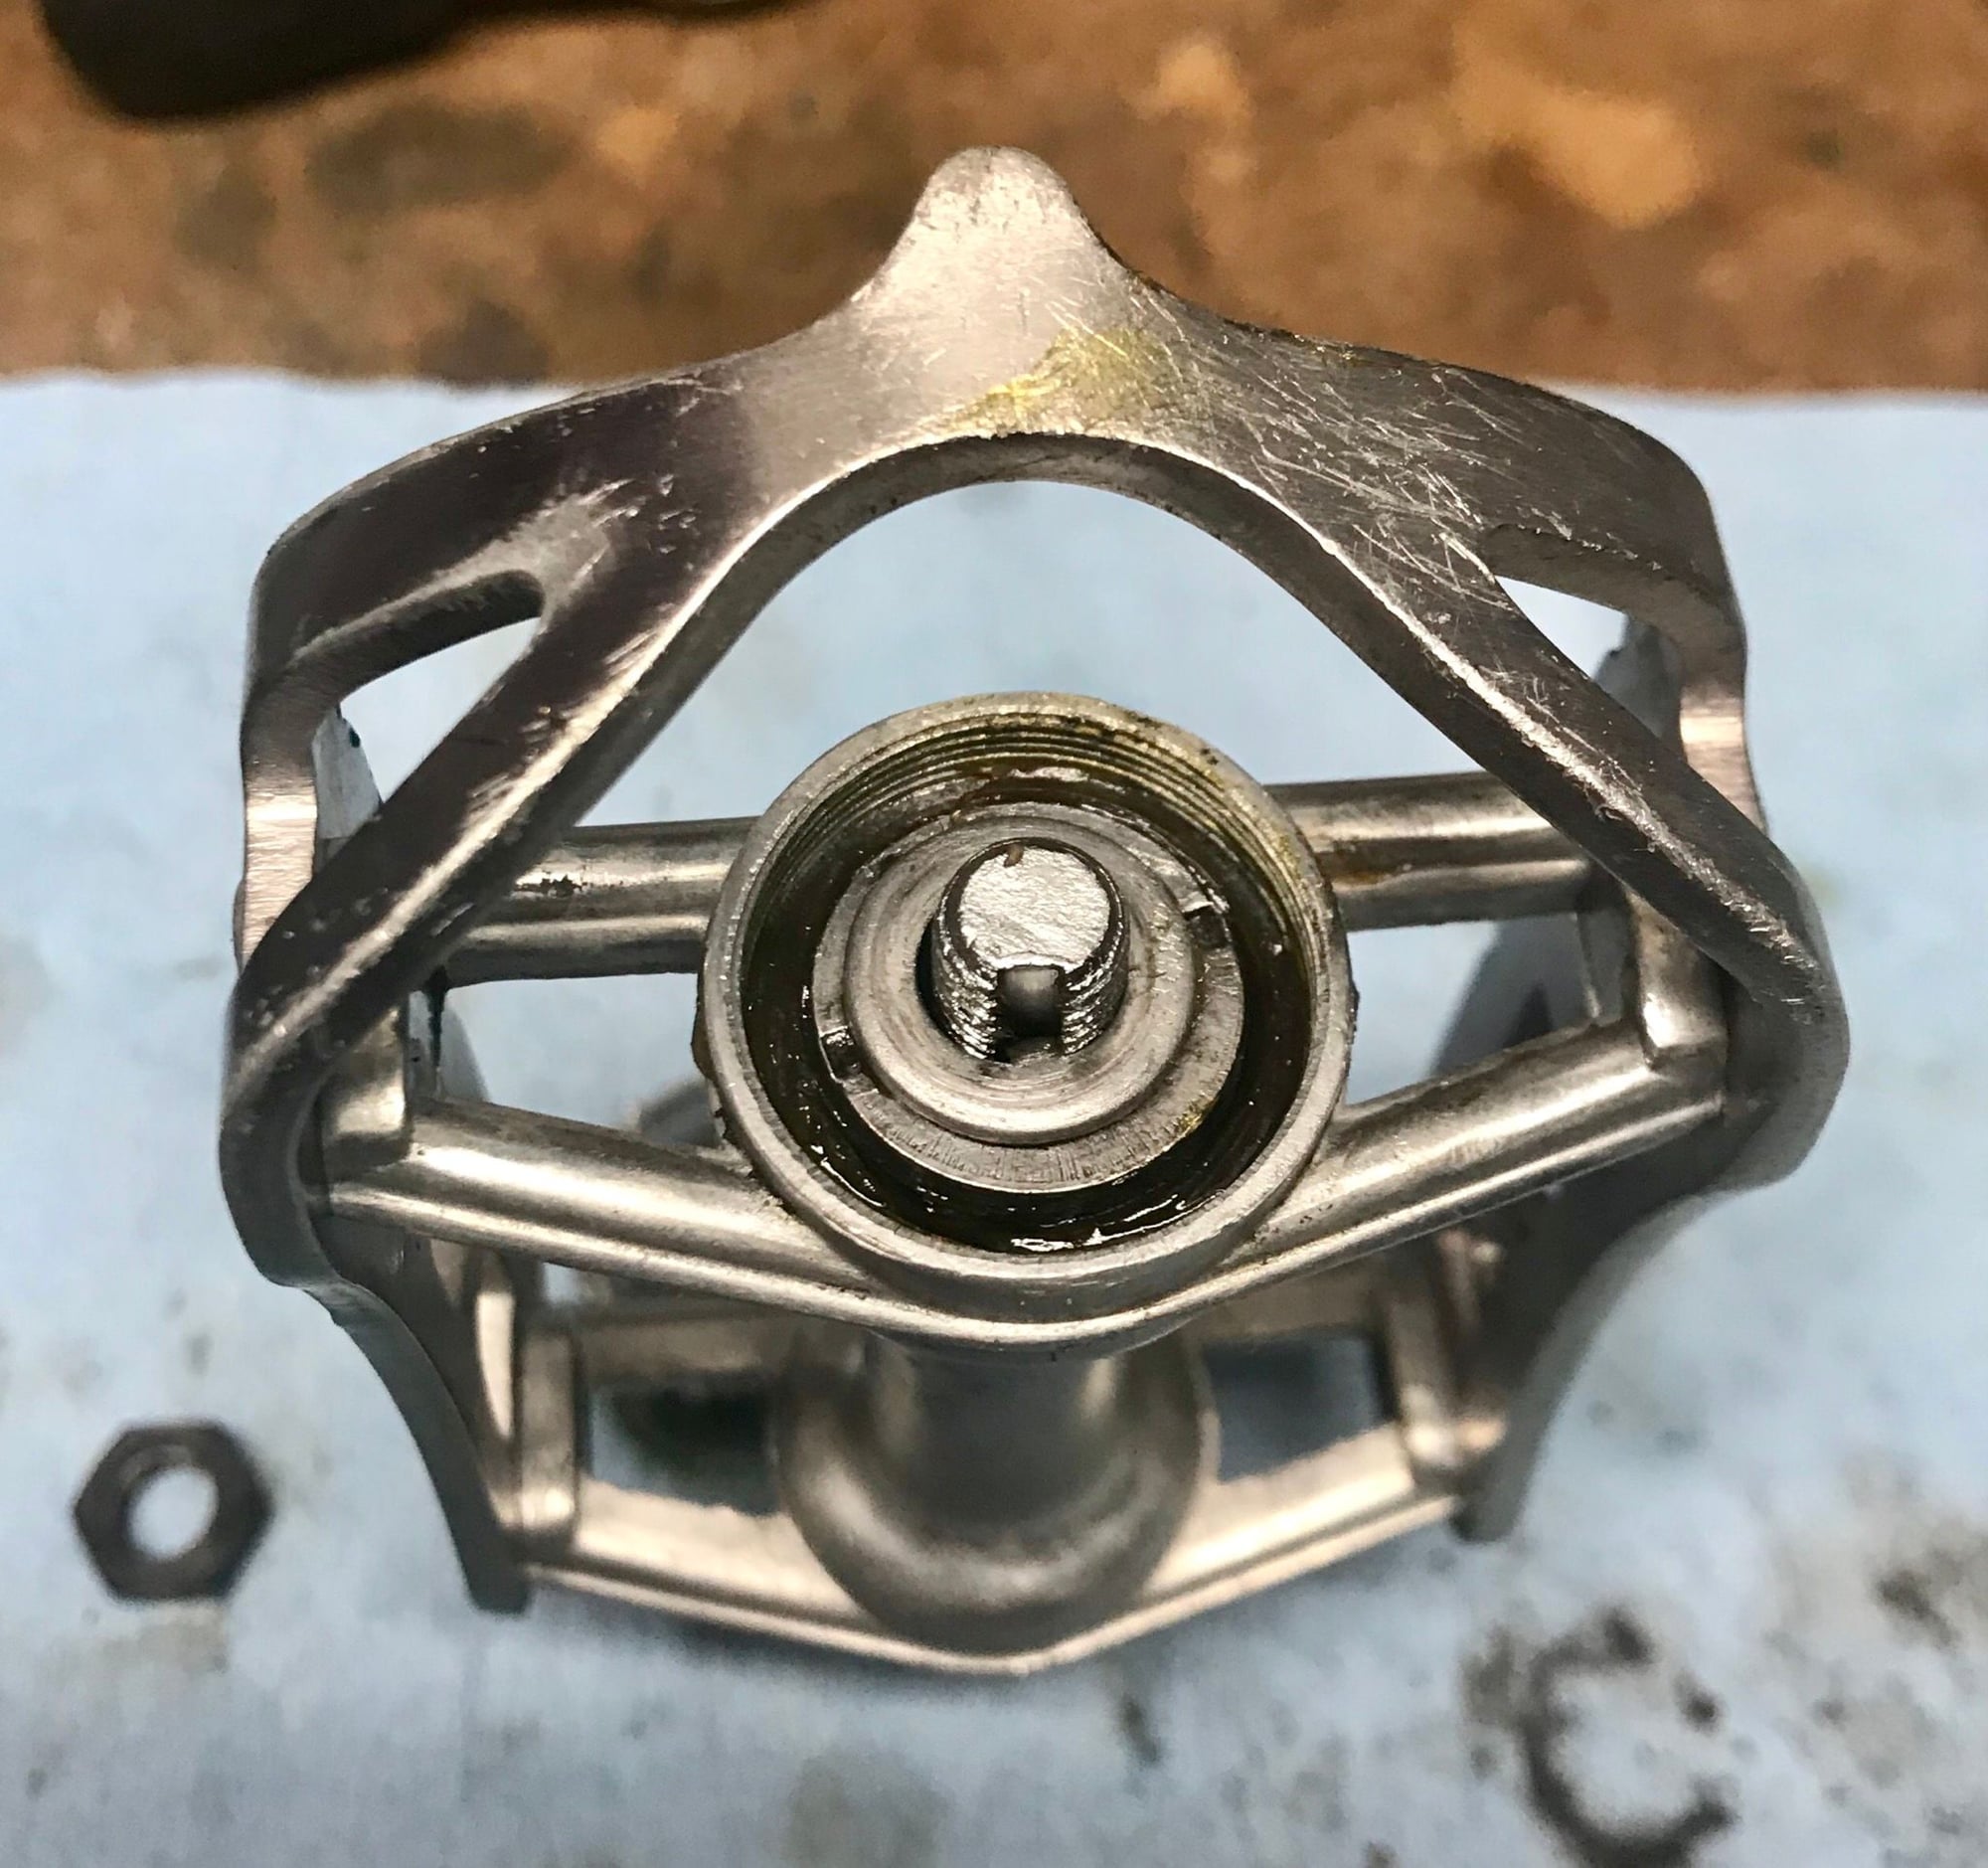
Not really. Between the shallowness of the slot and the required clearance for the wrench, you can’t quite get in there with a flathead.
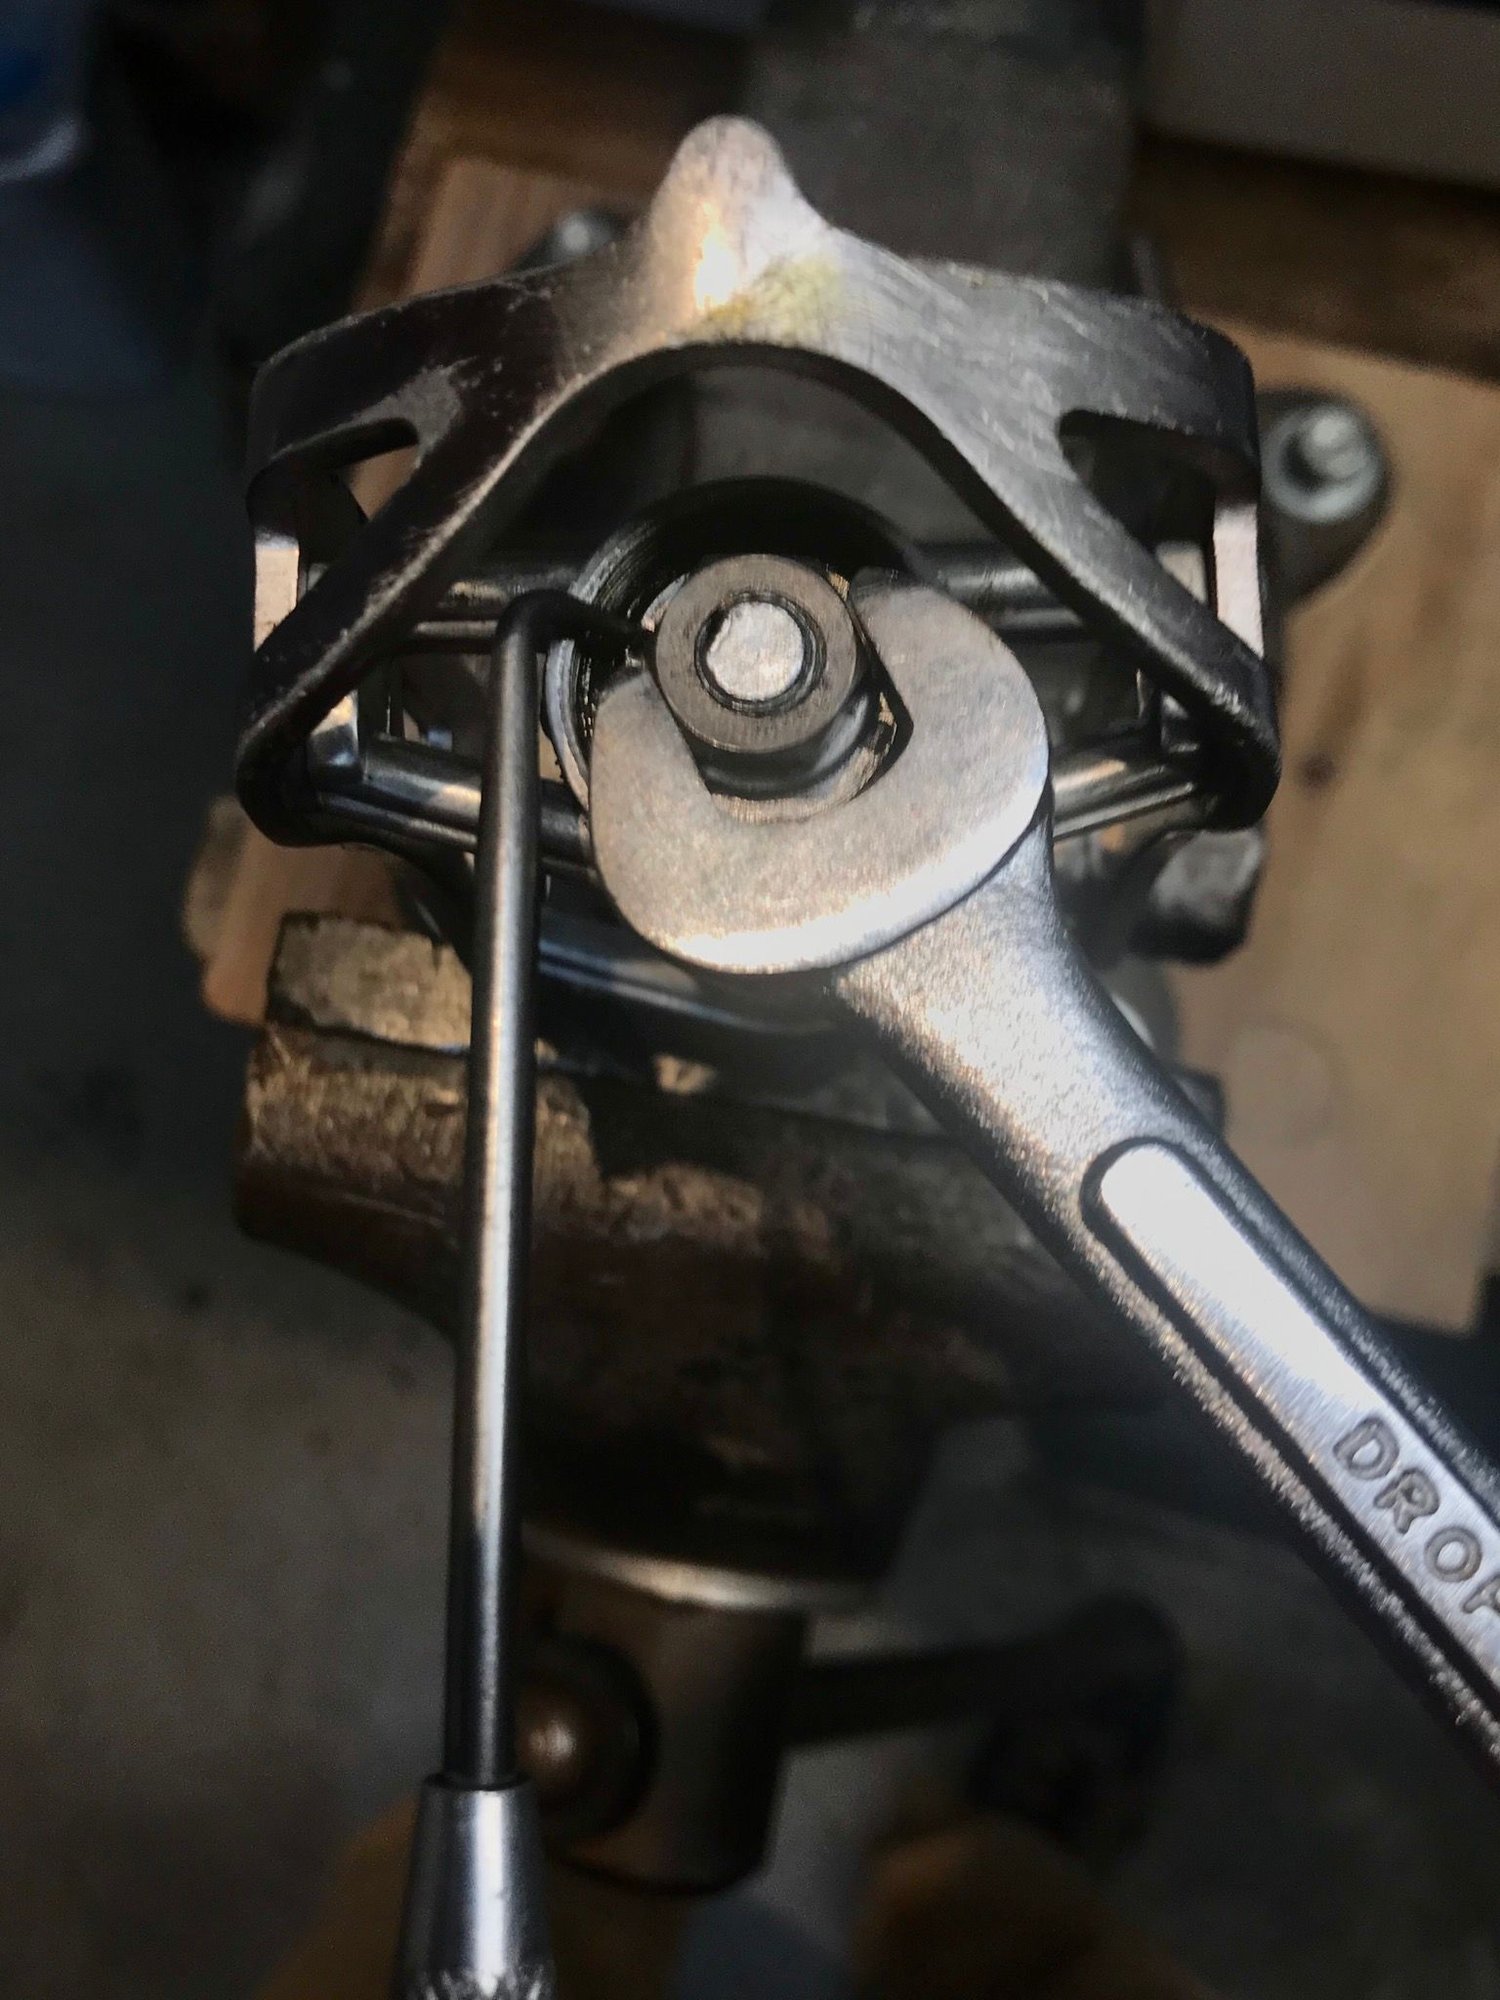
However, with a clear head this morning, I was able to come up with a good enough tool using a right angle awl (dental pick). I followed Mark’s advice of slightly loose until the final tightening and got it dialed in.
Likes For CO_Hoya:
03-29-20, 05:58 AM
#7
Senior Member
Join Date: Feb 2020
Posts: 2,819
Mentioned: 49 Post(s)
Tagged: 0 Thread(s)
Quoted: 1106 Post(s)
Likes: 0
Liked 1,327 Times
in
783 Posts
You can make a pin tool with a dremel and an old stainless table knife. Heat and bend the end, then cut the bent end to match the slots. Works as good as the campy tool (which broke), and if/when it breaks you cut off the end and make another.
