


First wheel build...first problem?
 06-01-20, 08:01 PM
#51

Senior Member
Yep. In my experience, the side to which the holes are offset is a roughly 50/50 proposition. Maybe however it's become more standardized in the last couple decades. I notice all of my newer rims have the same orientation. I've been building wheels for longer than I care to admit.
I just pulled a 36H M13II rim out of my closet to check. In fact, yes, it's the 1st hole, but only if you start with the valve at 6 o'clock. If you start building with the valve hole in 12 midnight as in the OP's first photo, the second hole to the right is where you would start. Perhaps your way is easier for a beginner to grasp. I still prefer to start with the 'pulling' spokes and the valve at the top. All the spokes end up in the same place in the end no matter how you get there -- assuming you are building the same pattern.
Irregardless of all that, I'm going with the crowd here. The most likely problem is that the opposite side spokes were all inserted one hole counter clockwise from where the should have been inserted in the flange.
 06-01-20, 08:09 PM
#52
Senior Member
DAMMIT!
I had a 50/50 chance of doing this right, and of course did not.
This miscue, coupled with the (slight) preference for running the trailing spokes inside the flange, necessitates me starting over yet again. But...that just gives me a bit more practice!
Doug, thanks a ton for your plainly-worded description.
If I read things often enough, and in a variety of terminologies, it's starting to make sense.
06-01-20, 08:14 PM
#53
Senior Member
You may have also had the issue where the sheldon instructions work well for the key spoke being in the right hole if the holes are not offset from center. There is one sentence that explains that the next spoke set needs to be moved slightly if the spokes are in the offset of center hole. That got me once.
Also you should be able to see the hub label through the valve hole.
Also you should be able to see the hub label through the valve hole.
06-01-20, 08:33 PM
#54
Senior Member
Thread Starter

Join Date: Feb 2012
Location: Williamsburg, VA Sebastian, FL
Posts: 1,363
Bikes: 1987 Centurion Ironman Master, 1992 Koga Miyata Exerciser, 1992 Schwinn Crosscut
Mentioned: 6 Post(s)
Tagged: 0 Thread(s)
Quoted: 209 Post(s)
Likes: 0
Liked 175 Times
in
92 Posts
Well, it's amazing how re-lacing several times hones that skill.
I think I've finally got it perfect, lacing-wise, with the trailing spokes inside the flange and the rim label read from the drive side.
Truing it up, likely, will be another whole challenge, I'm sure.
Thanks again to all who have contributed to my learning!
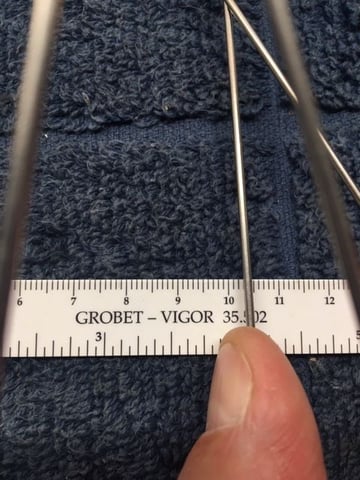
(This, by the way, is quite a slick little tool.)

I think I've finally got it perfect, lacing-wise, with the trailing spokes inside the flange and the rim label read from the drive side.
Truing it up, likely, will be another whole challenge, I'm sure.
Thanks again to all who have contributed to my learning!
(This, by the way, is quite a slick little tool.)
Last edited by 67tony; 06-01-20 at 08:37 PM.
Likes For 67tony:
06-01-20, 08:55 PM
#55
Senior Member
I went and looked at Sheldon's instructions to see what you guys are talking about and get hip to the new terminology. Key spoke = first spoke. Trailing spoke = pulling spoke. He only describes one pattern of lacing, but it's the semi traditional nor cal way and my preference too.
The problem people seem to have is with this passage:The key spoke will be next to the valve hole in the rim, or one hole away.
As viewed from the right (sprocket) side of the hub, the key spoke will run counterclockwise, and it will go to either the hole just to the right of the valve hole (as illustrated) or the second hole to the right, depending on how the rim is drilled. The aim is to make the four spokes closest to the valve hole all angle away from the valve, giving easier access to the valve for inflation.
There are two ways a rim might be configured, not one. He doesn't make this super clear, and only one way is illustrated. The Key spoke that you start with is the hole that is offset to the side of the rim nearest you. If your key spoke is the second hole, the third step will look like this:
06-01-20, 09:02 PM
#56
Senior Member
I'm more OCD than most about many aspects of bicycle mechanics, but the whole label through the valve hole thing is kind of a joke. If I care enough think about it, I'll make it face the wrong way on purpose. Reading the rim label from the drive side though, that's another story. I get the heebee jeebees if that isn't done correctly.... 

So congrats and glad you figured it out. When you get used to it, it isn't any harder than tying your shoes.
So congrats and glad you figured it out. When you get used to it, it isn't any harder than tying your shoes.
06-02-20, 10:38 AM
#57
smelling the roses

Join Date: Nov 2010
Location: Tixkokob, Yucat�n, M�xico
Posts: 15,320
Bikes: 79 Trek 930, 80 Trek 414, 84 Schwinn Letour Luxe (coupled), 92 Schwinn Paramount PDG 5
Mentioned: 104 Post(s)
Tagged: 1 Thread(s)
Quoted: 7081 Post(s)
Liked 901 Times
in
612 Posts
This description of spoke placement is just so you can be able to lace a wheel correctly. There are several other ways it can be done. My description isn't about the details or philosophy involved in building a wheel. It is easy to get into the weeds with all the variations and opinions. This way has worked for me building hundreds of wheels over many years.
When you start all over again, I suggest/recommend that you place the valve hole at the 6 o�clock position. Thread your 1st spoke in the 1st hole to the right (or counterclockwise) of the valve hole (when you are looking down at the rim laying on a table). The spoke can be in any hub hole that is on the right (or up) side (the one that would be closest to the camera). By starting the spoke from the outside of the hub, the spoke body will end up on the inside - which if course puts the head on the outside of the hub flange. Finish putting in the other 7 spokes that belong in that sequence. That would be every other spoke hole on that side of the hub and every 4th hole on the rim.
The next group of 8 spokes (because you have 32 holes) will be just behind the 1st group. This is because of the way Sun rim holes are offset. They will be almost parallel to each other. This is where you have to be careful and where you probably messed up before. When you flip the hub/rim over (for easy access to the holes on the other side of the hub) the next rim hole you will fill will now be the 2nd hole to the left of the valve hole (going clockwise). Locate which hub hole you will next fill by looking straight down at the hub. The holes on the bottom flange are offset so they are between the holes on your top flange. Find the hole that is just behind (or to your left going clockwise) of your original 1st spoke hole. This is where you will start your next group of 8 spokes. Again the spoke body is on the inside and the spoke head on the outside. When you are finished with that group of 8, twist the hub so the spokes go away from the valve hole. You have twisted it the wrong way if you have spokes cross over the valve hole.
It almost doesn't matter which of the next free 16 hub hole choices you next put in a spoke for the next group of 8 spokes as long as your pattern is correct. The spoke will enter on the inside the hub and exit on the outside. Cross over 2 spokes and under the 3rd spoke. Make sure that you place the spoke in the hole in the rim that is 2 spaces away from the other spoke (one space in-between) from the same side. It is easy to make a mistake here and put it either 1 or 3 holes away. Where the 4th set of 8 spokes go on the other flange is obvious.
The exceptions to general rules can make descriptions more difficult and wordy. When trying to explain the exceptions, everything becomes confusing. For example most rims including yours offset their holes from centerline so spokes more directly point to one flange side or the other. Usually if you look down at the valve hole with your head on the inside of the rim, you will see that the 1st hole to the right of the valve hole is offset a bit towards you. However some rim makers reverse which holes are offset and that can change your spoking sequence from a general standard.
I also never bothered with all the extra terminology. Pulling spokes, trailing spokes, etc. Why confuse myself? I just wanted to build wheels.
Last edited by seedsbelize; 06-02-20 at 10:42 AM.
06-02-20, 07:26 PM
#58
Senior Member
Thread Starter
Join Date: Feb 2012
Location: Williamsburg, VA Sebastian, FL
Posts: 1,363
Bikes: 1987 Centurion Ironman Master, 1992 Koga Miyata Exerciser, 1992 Schwinn Crosscut
Mentioned: 6 Post(s)
Tagged: 0 Thread(s)
Quoted: 209 Post(s)
Likes: 0
Liked 175 Times
in
92 Posts
Allright, one more thing and then I'll stop bothering you guys.
The wheel is (finally) laced correctly, and drawing it up slowly went well...it is both round and true. But, in doing so, I notice that a few spokes seem tauter than others, and a few seem looser than others. This is ever so slight, but noticable to my touch. Is this normal? Will the difference lesson as I tighten?
Speaking of tightening, I figure I've got more to do, but without a tension meter I'm just guessing. For instance, pushing at a spoke's midpoint, I get a deflection of about 4 mm right now. Should they deflect about 2 mm with modest pressure, or less? Is there any kind of rule of thumb, or do I just get it close to what my other three bike's wheels feel like?
I've tried strumming a spoke and listening, but that's obviously a skill reserved for the pros!
Thanks again for all the help, it really is invaluable to a beginner.
Last edited by 67tony; 06-02-20 at 07:32 PM.
06-02-20, 09:00 PM
#59
Senior Member

Join Date: Jan 2015
Location: Los Angeles
Posts: 4,693
Bikes: 82 Medici, 2011 Richard Sachs, 2011 Milwaukee Road
Mentioned: 55 Post(s)
Tagged: 0 Thread(s)
Quoted: 1946 Post(s)
Liked 2,004 Times
in
1,105 Posts
Stuming a spoke tells you nothing. You need to strum a bunch of them. And you don't need to be a pro. Begin somewhere and pluck one and then the next, and the next. Some will sound very similar and one here or there will be noticeably higher or lower. Keep plucking in the area where you will little by little tighten or loosen the offending spokes and adjust the nearby ones so they don't get to out of "tune". Then go back to your truing and stress relieving routine. Repeat.
__________________
I don't do: disks, tubeless, e-shifting, or bead head nymphs.
I don't do: disks, tubeless, e-shifting, or bead head nymphs.
06-02-20, 09:01 PM
#60
se�or miembro

Join Date: Dec 2018
Location: Pac NW
Posts: 6,597
Bikes: '70s - '80s Campagnolo
Mentioned: 92 Post(s)
Tagged: 0 Thread(s)
Quoted: 3861 Post(s)
Liked 6,450 Times
in
3,190 Posts
06-02-20, 09:41 PM
#61
framebuilder
67tony, because spokes coming from the inside of the hub travel a slightly different length to a rim than those from the outside, it is normal for them to have a slightly different tightness if all the nipples has been screwed on the same amount. I use a tension meter when building wheels so I can't offer much advice on how to do it without one. However I can say that when I tighten the spokes to the right tension they are probably a bit tighter than a novice might think. If you have a properly built wheel you can ping or pluck their spokes to get the pitch and copy that sound on the wheel you are building. Of course the thickness and length of the spokes play a part in the sound. There starts to be pretty strong resistance when turning the spoke wrench as it comes up to the right tension. So much so that on some wheels, if they were not properly lubricated on both the spoke treads and rim, the spokes tend to twist (or wind up) as the nipple is turned.
I'm not a betting person but I'm going to guess that as you true your wheel, the probability that you ask some more questions will be pretty high.
I'm not a betting person but I'm going to guess that as you true your wheel, the probability that you ask some more questions will be pretty high.
Last edited by Doug Fattic; 06-02-20 at 10:10 PM.
Likes For Doug Fattic:
06-03-20, 12:31 AM
#62
Senior Member

Join Date: May 2013
Location: Pacific Northwest
Posts: 1,989
Bikes: �87 Marinoni SLX Sports Tourer, �79 Miyata 912 by Gugificazione
Mentioned: 166 Post(s)
Tagged: 0 Thread(s)
Quoted: 500 Post(s)
Liked 466 Times
in
256 Posts
There’s an app called “Tensioner” that does an OK job of calculating spoke tension based on plucked tone. As Doug Fattic mentions, spoke diameter and free length from nipple to first crossing are input variables. Both are easily accomplished with “dials” on the iPad. Just be sure that ambient noise is very low. It’s results are reasonably close to the fancy DT spoke tension meter that I was recently gifted.
Pre-internet, I’d just compare the plucked tones to a known good wheel. When instructing fellow volunteers at Bike Works, where we encounter bikes that have suffered all manner of abuse/neglect, I tell them to shoot for a middle-of-the-scale musical note.
Pre-internet, I’d just compare the plucked tones to a known good wheel. When instructing fellow volunteers at Bike Works, where we encounter bikes that have suffered all manner of abuse/neglect, I tell them to shoot for a middle-of-the-scale musical note.
06-03-20, 07:34 AM
#63
Senior Member
Thread Starter
Join Date: Feb 2012
Location: Williamsburg, VA Sebastian, FL
Posts: 1,363
Bikes: 1987 Centurion Ironman Master, 1992 Koga Miyata Exerciser, 1992 Schwinn Crosscut
Mentioned: 6 Post(s)
Tagged: 0 Thread(s)
Quoted: 209 Post(s)
Likes: 0
Liked 175 Times
in
92 Posts
I remain very grateful for the advice I am absorbing...this site is truly amazing.
Tightening continues today. The equalization of spoke tensions, while remaining round and true, is the focus.
I may even investigate the tonal iphone app, just because it sounds kind of fun!
06-03-20, 08:02 AM
#64
Senior Member
IMO don't get too hung up on equalizing spoke tension. It is normal for there to be some variation. A lot of beginners have the misconception that if all the spokes are just brought to exactly equal tension, the wheel will be perfectly built and true. In the real world, this doesn't happen. Aim to get them pretty even, but perfectly round and true. Do watch for outliers that are much tighter than other spokes. In the days before spoke tension meters, spokes were sometimes compared with those on a known well built wheel to assess overall tension. After a while, you just brought them to tension from experience by feel. I have a spoke tension meter now, and I love being able to measure, but it isn't strictly necessary.
Likes For Salamandrine:
06-03-20, 08:09 AM
#65
framebuilder
One trick that has always helped me is that I orient the flats of the nipples so they are always vertical or parallel to the ground (until the very end). Most adjustments are done in quarter turn increments. That way if you are making the wheel rounder and are tightening 2 spokes coming from 2 flanges, it is easier to keep track that both nipples are turned the same amount (at least for me). In the same way when you are truing side to side and one nipple is loosened and the other tightened. Towards the end this pattern of a quarter turn adjustments and doing both sides the same amount changes - but you are not there yet so there is no need so explain about that now.
My tip for Wednesday morning is that I focus on rim roundness a lot more than side to side when bringing the wheel up to tension. I just try to keep the side to side grossly correct as i tighten all the spokes. While I am doing that I use my Campy wheel dishing tool to see if the rim is centered over the axle nuts. If not (and it is almost always not) I tighten all the spokes in the direction the rim needs to go. This allows me to tell if there are any trouble spokes either too loose or too tight. Sometimes if it is far out I loosen all the opposite side spokes for the double reason that I am not only moving the rim in the direction it needs to go but also trying to discover if there are any problem spokes. You never truly get a wheel round so it is always possible to keep tightening 2 (or 4) spokes from opposite flanges as they hit your truing stand letting you know they are the loosest spokes in the wheel at that moment. Rinse and repeat many times.
You are always going to have issues around the seam. I often take a file to knock off a tiny bit of the excess sticking out just a bit.
Likes For Doug Fattic:
06-03-20, 10:17 AM
#66
Senior Member
Thread Starter
Join Date: Feb 2012
Location: Williamsburg, VA Sebastian, FL
Posts: 1,363
Bikes: 1987 Centurion Ironman Master, 1992 Koga Miyata Exerciser, 1992 Schwinn Crosscut
Mentioned: 6 Post(s)
Tagged: 0 Thread(s)
Quoted: 209 Post(s)
Likes: 0
Liked 175 Times
in
92 Posts
Spot on again, Doug.
Instinctively, I used the squared up nipple advice, even before reading your tip!
I also kept a close eye on roundness, and appear to be in good shape there.
I don't have the dishing tool, but kept flipping the wheel to monitor that, as has been suggested.
At one time I did tighten all the spokes on one side, and that corrected it.
The seam is noticed by feel, ever so slightly, but filing scares me due to scratching.
A video shows my result, but I'll have to figure out how to upload it!
06-03-20, 11:37 AM
#67
Senior Member
Join Date: Jan 2004
Location: Madison, WI USA
Posts: 6,149
Mentioned: 50 Post(s)
Tagged: 0 Thread(s)
Quoted: 2361 Post(s)
Liked 1,745 Times
in
1,189 Posts
Upload the video to Vimeo or the like, and post the link.
Rim-centering tool can be fabbed with a couple of stacks of books and some sort of spacer to put on the floor under the end of the axle.
Rim-centering tool can be fabbed with a couple of stacks of books and some sort of spacer to put on the floor under the end of the axle.
Likes For madpogue:
06-03-20, 02:32 PM
#68
Senior Member
Thread Starter
Join Date: Feb 2012
Location: Williamsburg, VA Sebastian, FL
Posts: 1,363
Bikes: 1987 Centurion Ironman Master, 1992 Koga Miyata Exerciser, 1992 Schwinn Crosscut
Mentioned: 6 Post(s)
Tagged: 0 Thread(s)
Quoted: 209 Post(s)
Likes: 0
Liked 175 Times
in
92 Posts
Last edited by 67tony; 06-03-20 at 06:05 PM.
Likes For 67tony:
06-04-20, 07:19 AM
#69
Senior Member
Thread Starter
Join Date: Feb 2012
Location: Williamsburg, VA Sebastian, FL
Posts: 1,363
Bikes: 1987 Centurion Ironman Master, 1992 Koga Miyata Exerciser, 1992 Schwinn Crosscut
Mentioned: 6 Post(s)
Tagged: 0 Thread(s)
Quoted: 209 Post(s)
Likes: 0
Liked 175 Times
in
92 Posts
06-04-20, 07:34 AM
#70
Senior Member
Thread Starter
Join Date: Feb 2012
Location: Williamsburg, VA Sebastian, FL
Posts: 1,363
Bikes: 1987 Centurion Ironman Master, 1992 Koga Miyata Exerciser, 1992 Schwinn Crosscut
Mentioned: 6 Post(s)
Tagged: 0 Thread(s)
Quoted: 209 Post(s)
Likes: 0
Liked 175 Times
in
92 Posts
I'd like to officially give kudos, and much thanks, to Doug Fattic, Salamandrine, SurferRosa, and narhay for great input and tutoring. Other tips, and (commiserations!) were helpful as well. As a noobie I struggled even with all the instructions...I can't imagine where I'd have been without it.
I'm sure many of the referenced books are great, but I'm probably truing more than building wheels, so the ability to learn from this site without a reference book is very much appreciated. The resources found here are invaluable on may levels, and on most every topic.
Rear wheel is next, and I'm excited to tackle it.
With luck I'll not have to start a new topic,...but that may be a tad optimistic!
Likes For 67tony:
06-04-20, 09:07 AM
#71
framebuilder
You didn't mention anything about prepping the spokes and rim before building. I assume you put a little grease on each rim hole and some kind of lubricant on all the spoke treads? I use Spoke Prep from Wheelsmith but a number of different lubricants can work. For example a thicker oil like Phil Wood. And I've heard of linseed oil too (because when wet it is like an oil but as it drys it keeps the nipple from turning like Loctite. In fact almost any oil will work.
Different wheel builders have different methods and philosophies for their choices. My preference is for the pulling spokes to have their head in the inside and body on the outside on both flanges. When I set up to build a rear wheel, I like the cassette or freewheel threads to be facing me when all the pieces are laying on a table. I do the inside spokes 1st and start lacing them to the right of the valve hole when it is in the 6 o'clock position. By always placing them that way I am less likely to make a lacing mistake.
Different wheel builders have different methods and philosophies for their choices. My preference is for the pulling spokes to have their head in the inside and body on the outside on both flanges. When I set up to build a rear wheel, I like the cassette or freewheel threads to be facing me when all the pieces are laying on a table. I do the inside spokes 1st and start lacing them to the right of the valve hole when it is in the 6 o'clock position. By always placing them that way I am less likely to make a lacing mistake.
06-04-20, 06:22 PM
#72
Senior Member
Thread Starter
Join Date: Feb 2012
Location: Williamsburg, VA Sebastian, FL
Posts: 1,363
Bikes: 1987 Centurion Ironman Master, 1992 Koga Miyata Exerciser, 1992 Schwinn Crosscut
Mentioned: 6 Post(s)
Tagged: 0 Thread(s)
Quoted: 209 Post(s)
Likes: 0
Liked 175 Times
in
92 Posts
Yes, I used an old tube of white Schwinn bike grease on the spokes, and a Vaselined q-tip on the rim eyelets.
I also went past and backed off when things got tighter, to un-tension the spokes.
Based on your description above, and others who chimed in, my pulling spokes are also on the outside of both flanges.
I also went past and backed off when things got tighter, to un-tension the spokes.
Based on your description above, and others who chimed in, my pulling spokes are also on the outside of both flanges.
06-04-20, 08:54 PM
#73
Senior Member
Linseed oil works great. It's been my favorite spoke lube for decades. These days I use walnut oil instead, because I have it around for guitar fretboards. It is basically the same thing, a drying vegetable oil. If I didn't use that I'd use the wheelsmith stuff. Don't get carried away, keep it light, and IMO avoid teflon products. I made that mistake once.
Pulling spokes on the inside vs outside is a good debate to have on long bike rides. BITD there were also proponents of asymmetrical. All have their ups and downs, pick your team... I prefer pulling inside and symmetrical, which is pretty mainstream I guess. I do still use 4x sometimes, especially for high flange, which is a bit old fashioned.
Pulling spokes on the inside vs outside is a good debate to have on long bike rides. BITD there were also proponents of asymmetrical. All have their ups and downs, pick your team... I prefer pulling inside and symmetrical, which is pretty mainstream I guess. I do still use 4x sometimes, especially for high flange, which is a bit old fashioned.
06-05-20, 10:04 AM
#74
smelling the roses
Join Date: Nov 2010
Location: Tixkokob, Yucat�n, M�xico
Posts: 15,320
Bikes: 79 Trek 930, 80 Trek 414, 84 Schwinn Letour Luxe (coupled), 92 Schwinn Paramount PDG 5
Mentioned: 104 Post(s)
Tagged: 1 Thread(s)
Quoted: 7081 Post(s)
Liked 901 Times
in
612 Posts
The final step is riding your wheel for awhile. And then re-true it. Once is almost always enough.
I also use the strumming method. I spin the wheel and insert my thumbnail to the correct depth. I am not a detail guy. Never have been. The first wheelset I built, nearly 10 years ago, is still in regular use. Still straight and true. It's not rocket science.
But. Even before I began building wheels, for many years, I very much enjoyed truing them. For me, that is where it's at. Lacing is just a means to an end.
06-11-20, 11:20 AM
#75
Fillet-Brazed Member

I'd like to officially give kudos, and much thanks, to Doug Fattic, Salamandrine, SurferRosa, and narhay for great input and tutoring. Other tips, and (commiserations!) were helpful as well. As a noobie I struggled even with all the instructions...I can't imagine where I'd have been without it.
I'm sure many of the referenced books are great, but I'm probably truing more than building wheels, so the ability to learn from this site without a reference book is very much appreciated. The resources found here are invaluable on may levels, and on most every topic.
Rear wheel is next, and I'm excited to tackle it.
With luck I'll not have to start a new topic,...but that may be a tad optimistic!
I'm sure many of the referenced books are great, but I'm probably truing more than building wheels, so the ability to learn from this site without a reference book is very much appreciated. The resources found here are invaluable on may levels, and on most every topic.
Rear wheel is next, and I'm excited to tackle it.
With luck I'll not have to start a new topic,...but that may be a tad optimistic!
Which lacing method did you end up using overall? I found Sheldon Brown's site the simplest, even if some parts weren't 100% clear even on multiple readings. It was the simplest for me and I was successful using it. I particularly liked the colored spoke illustrations.
So far I've only laced one set of wheels. Truing to me seems more daunting, but then I haven't actually tried it. What was the more difficult aspect for you?
Measuring without a clear database consensus for hub and rim combination for spoke lengths can also be stressful. I found https://leonard.io/edd/ to be very helpful.
I found this to be true as well. Once I was done lacing my wheels, I was surprised I'd done it correctly, even though it looked right. My mechanic was able to true them right up though to me the spokes felt pretty wonky, some too tight, others too loose, all seemingly after giving each equal turns on the threads to get them ready for truing.

