


Old School Frame Project for Rat Trap Pass Tire
 09-02-18, 11:33 AM
#26
Senior Member
Thread Starter
Join Date: May 2013
Posts: 80
Mentioned: 4 Post(s)
Tagged: 0 Thread(s)
Quoted: 21 Post(s)
Likes: 0
Liked 16 Times
in
8 Posts
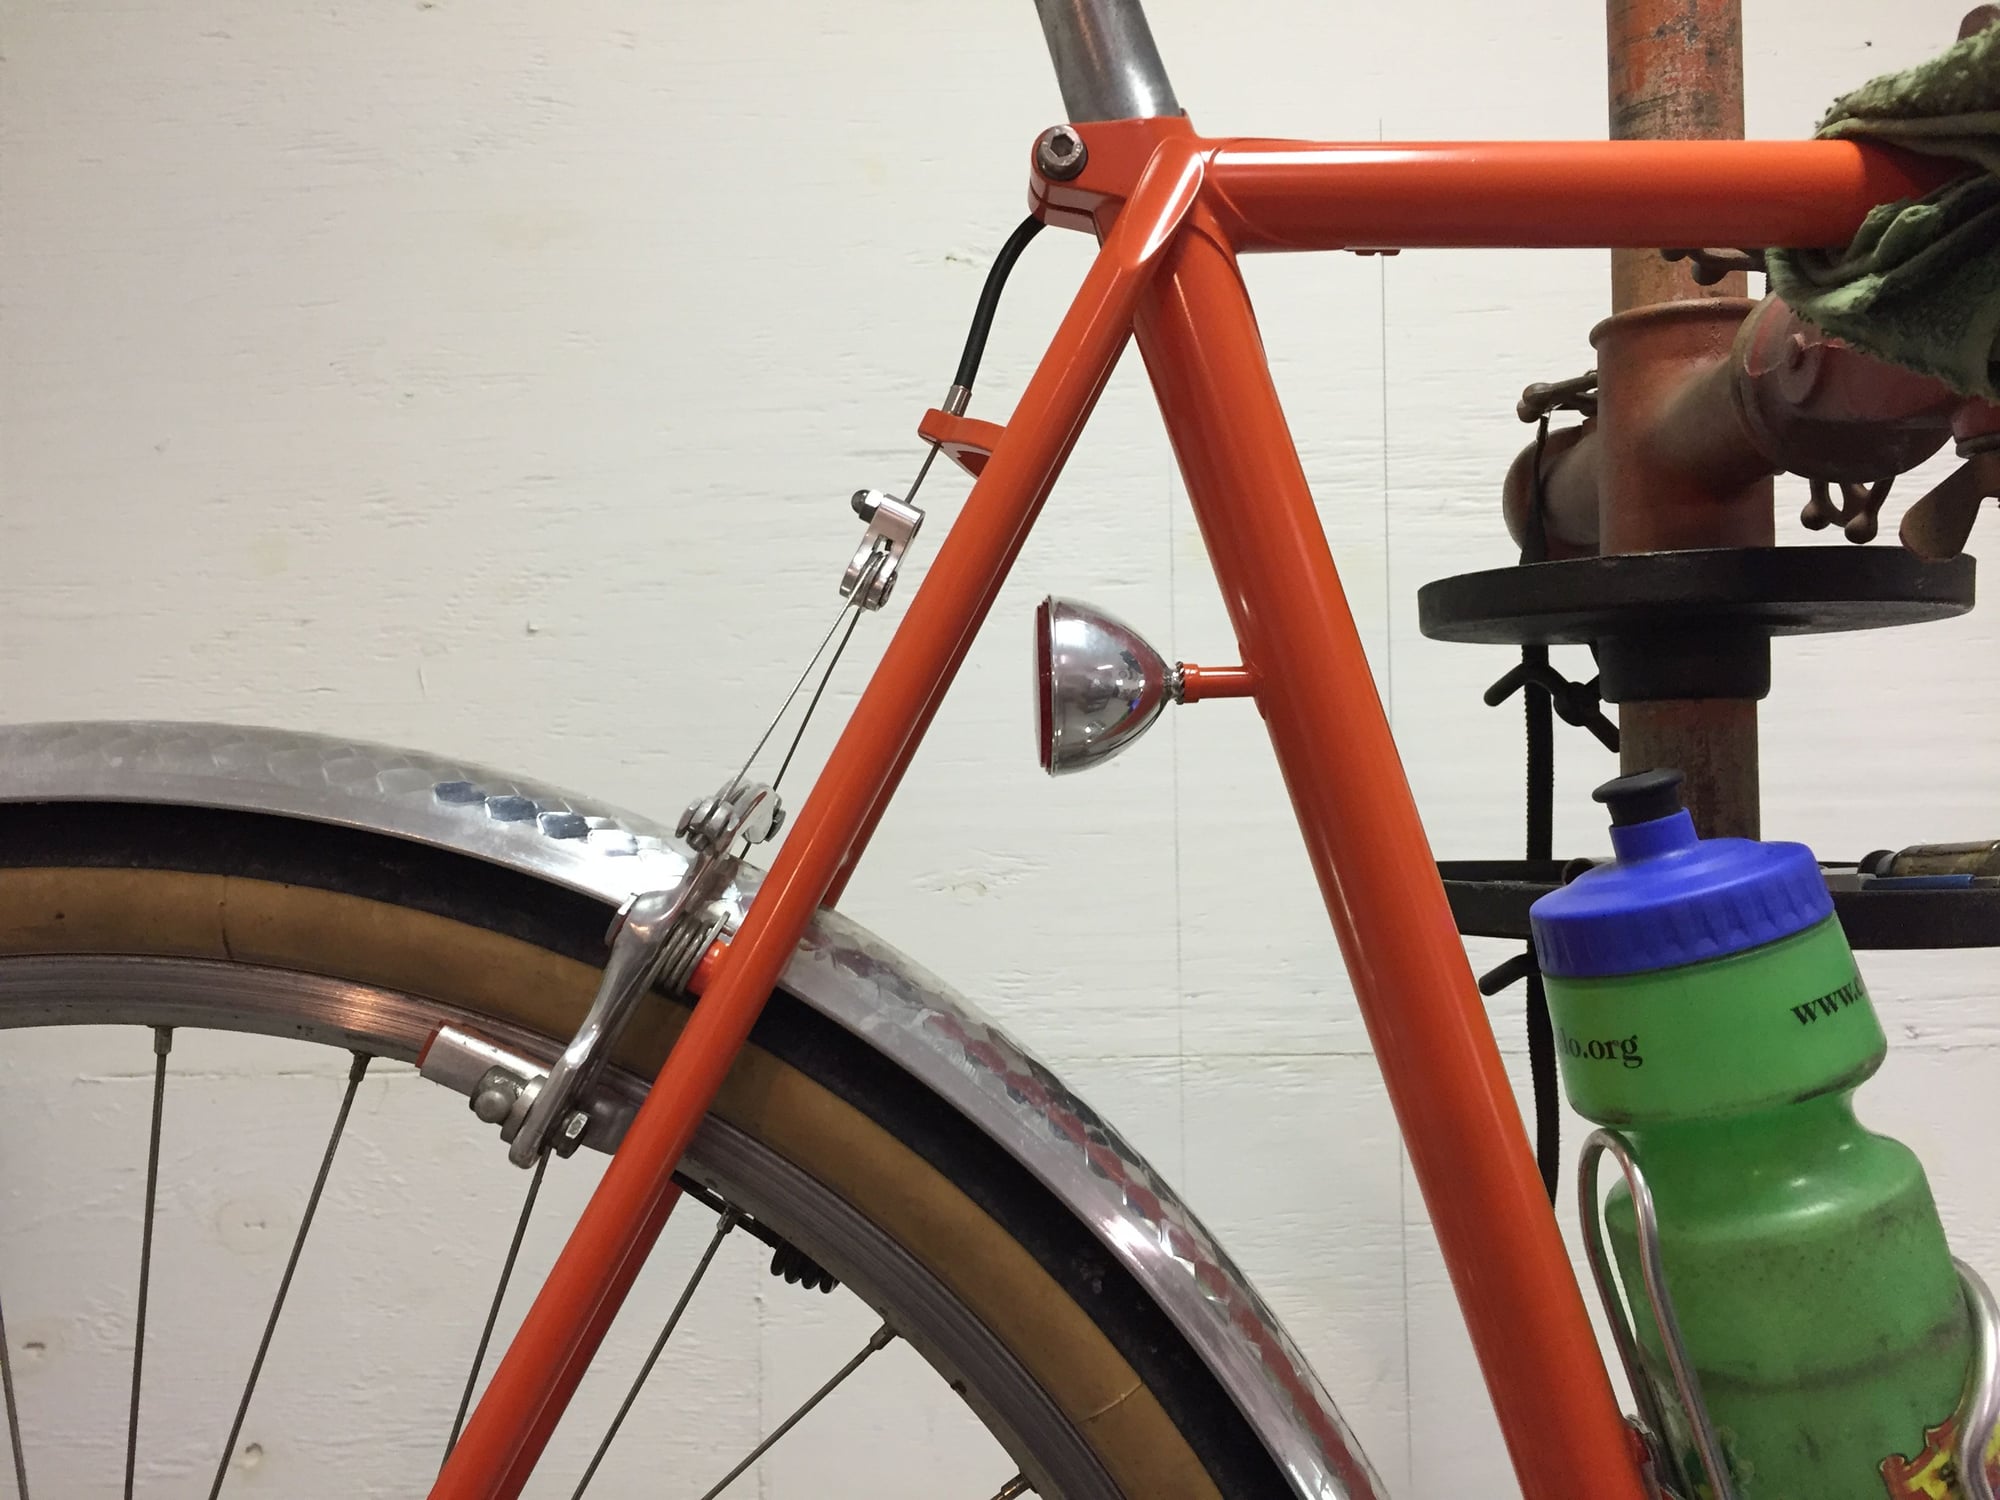
Good catch! It is in the sight line but the light is plenty visible from afar. 1) I was too chicken to force a shorter seat post by raising the boss (though I got over it for the RTP frame) and 2) in the pretty near term I'll do something about it. Maybe raise/lower the straddle cable so that it's above/below the light or use a smaller and drilled yoke. Being the rear brake I'm not concerned with any loss of power.
 09-02-18, 06:24 PM
#27
Senior Member
Good catch! It is in the sight line but the light is plenty visible from afar. 1) I was too chicken to force a shorter seat post by raising the boss (though I got over it for the RTP frame) and 2) in the pretty near term I'll do something about it. Maybe raise/lower the straddle cable so that it's above/below the light or use a smaller and drilled yoke. Being the rear brake I'm not concerned with any loss of power.
It's great!
P.S. - Something I learned in a fire safety class - fire extinguishers are to be used for punching a hole in the flames so you can exit the building.
More safety stuff - you don't want dust, dirt and debris to get to the back of the electrical outlets. Cover the outlet.
Last edited by Bad Lag; 09-02-18 at 06:31 PM.
09-02-18, 06:36 PM
#28
Occam's Rotor
Join Date: Jul 2013
Posts: 7,248
Mentioned: 61 Post(s)
Tagged: 0 Thread(s)
Quoted: 2366 Post(s)
Liked 2,331 Times
in
1,164 Posts
You just need more Kool Aid.
I talked to a guy at one of the Norther Cycles swap meets about some cool fleur-de-lis lugs he was selling. He said you have to be careful with things like this. He called it the doorknob effect -- you find a unique doorknob that you really like and you end up building a house to go with it. Obviously the same thing can happen with tires.
I talked to a guy at one of the Norther Cycles swap meets about some cool fleur-de-lis lugs he was selling. He said you have to be careful with things like this. He called it the doorknob effect -- you find a unique doorknob that you really like and you end up building a house to go with it. Obviously the same thing can happen with tires.
09-03-18, 05:20 AM
#29
Senior Member
Thread Starter
Join Date: May 2013
Posts: 80
Mentioned: 4 Post(s)
Tagged: 0 Thread(s)
Quoted: 21 Post(s)
Likes: 0
Liked 16 Times
in
8 Posts
I noticed it because that tail light implementation is probably my favorite thing on the bike - clean, simple, well executed, really well done. It looks like it belongs there rather than being added on or bolted, as is the case with so many bicycle lights.
It's great!
P.S. - Something I learned in a fire safety class - fire extinguishers are to be used for punching a hole in the flames so you can exit the building.
More safety stuff - you don't want dust, dirt and debris to get to the back of the electrical outlets. Cover the outlet.
It's great!
P.S. - Something I learned in a fire safety class - fire extinguishers are to be used for punching a hole in the flames so you can exit the building.
More safety stuff - you don't want dust, dirt and debris to get to the back of the electrical outlets. Cover the outlet.
I'm kind of partial to this: https://www.flickr.com/photos/216244...7674615273680/
All the holes in the fork were sealed once the wiring was installed and the right rack strut is chromed internally.
And thanks for the outlet cover reminder....the covers are on my shopping list. The shop layout is such that my few steps to the door, when brazing, is clear; the brazing activity & equipment being upstream, on the other side, as it were. The extinguisher is very nearby. I appreciate the reminders.
 09-05-18, 11:41 PM
#31
Senior Member
That is an awfully nice frame.
This orange bike has inspired me to replace the flat bars on my Stumpjumper Sport with a set of drop bars from my box of parts. It makes for a different, more aggressive riding position but I want to try drop bars and long wheel base with balloon tires.
This discussion of lighting has also brought to mind that the days are getting shorter and after-work riding will soon be done in the dark. Soon I should get the lights out and test their batteries. It's been a year.
09-07-18, 12:24 PM
#32
Senior Member
Thread Starter
Join Date: May 2013
Posts: 80
Mentioned: 4 Post(s)
Tagged: 0 Thread(s)
Quoted: 21 Post(s)
Likes: 0
Liked 16 Times
in
8 Posts
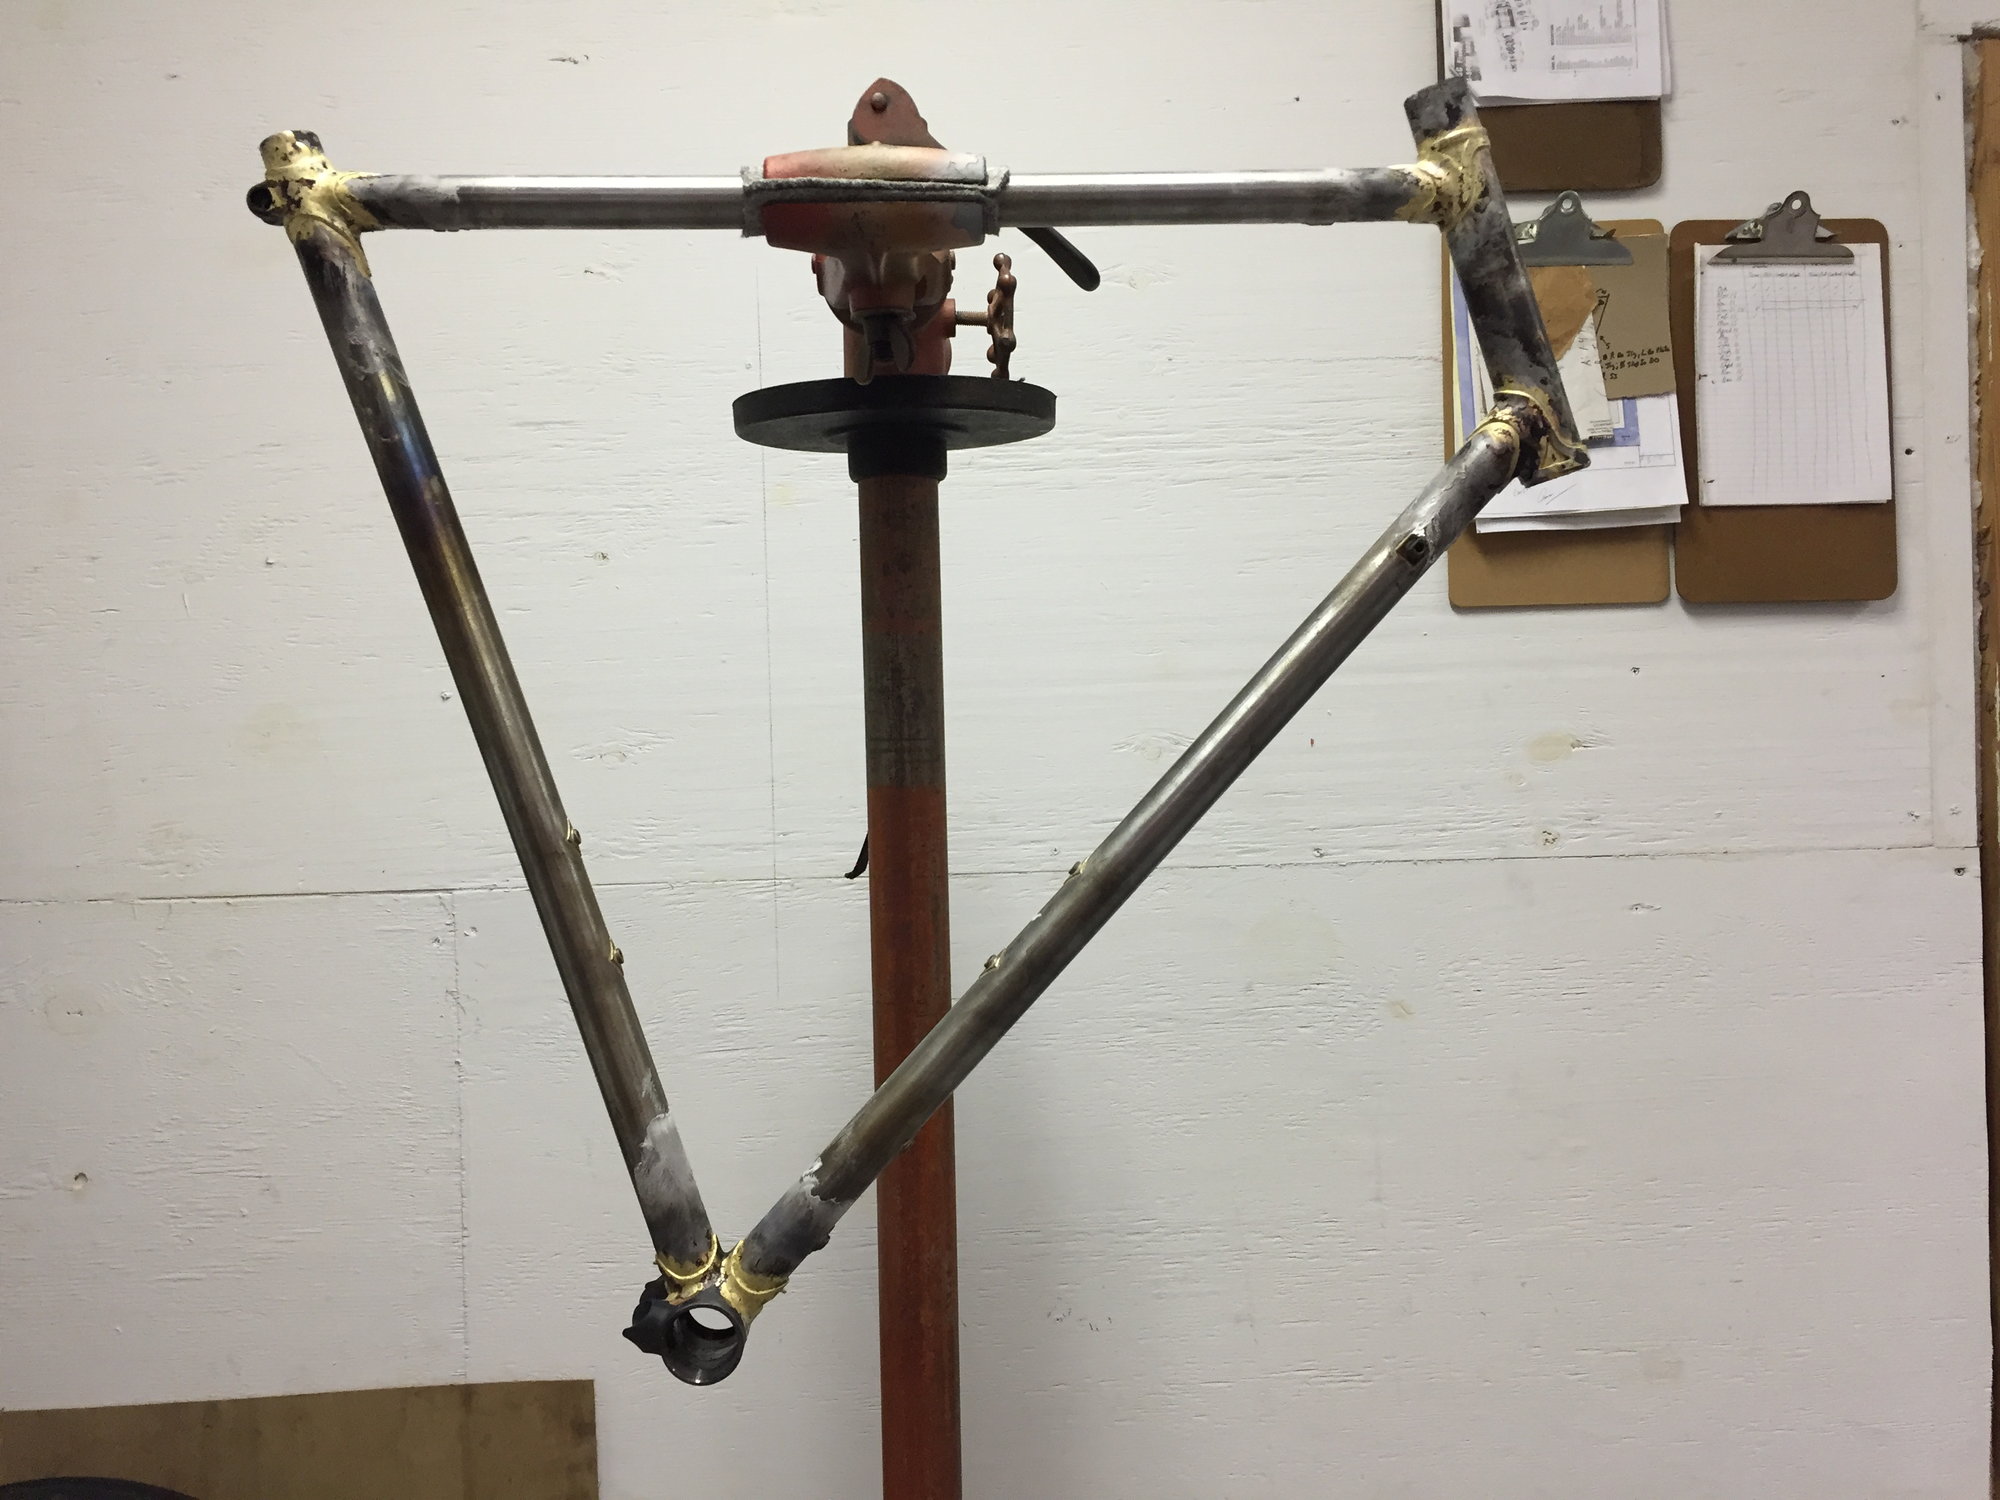
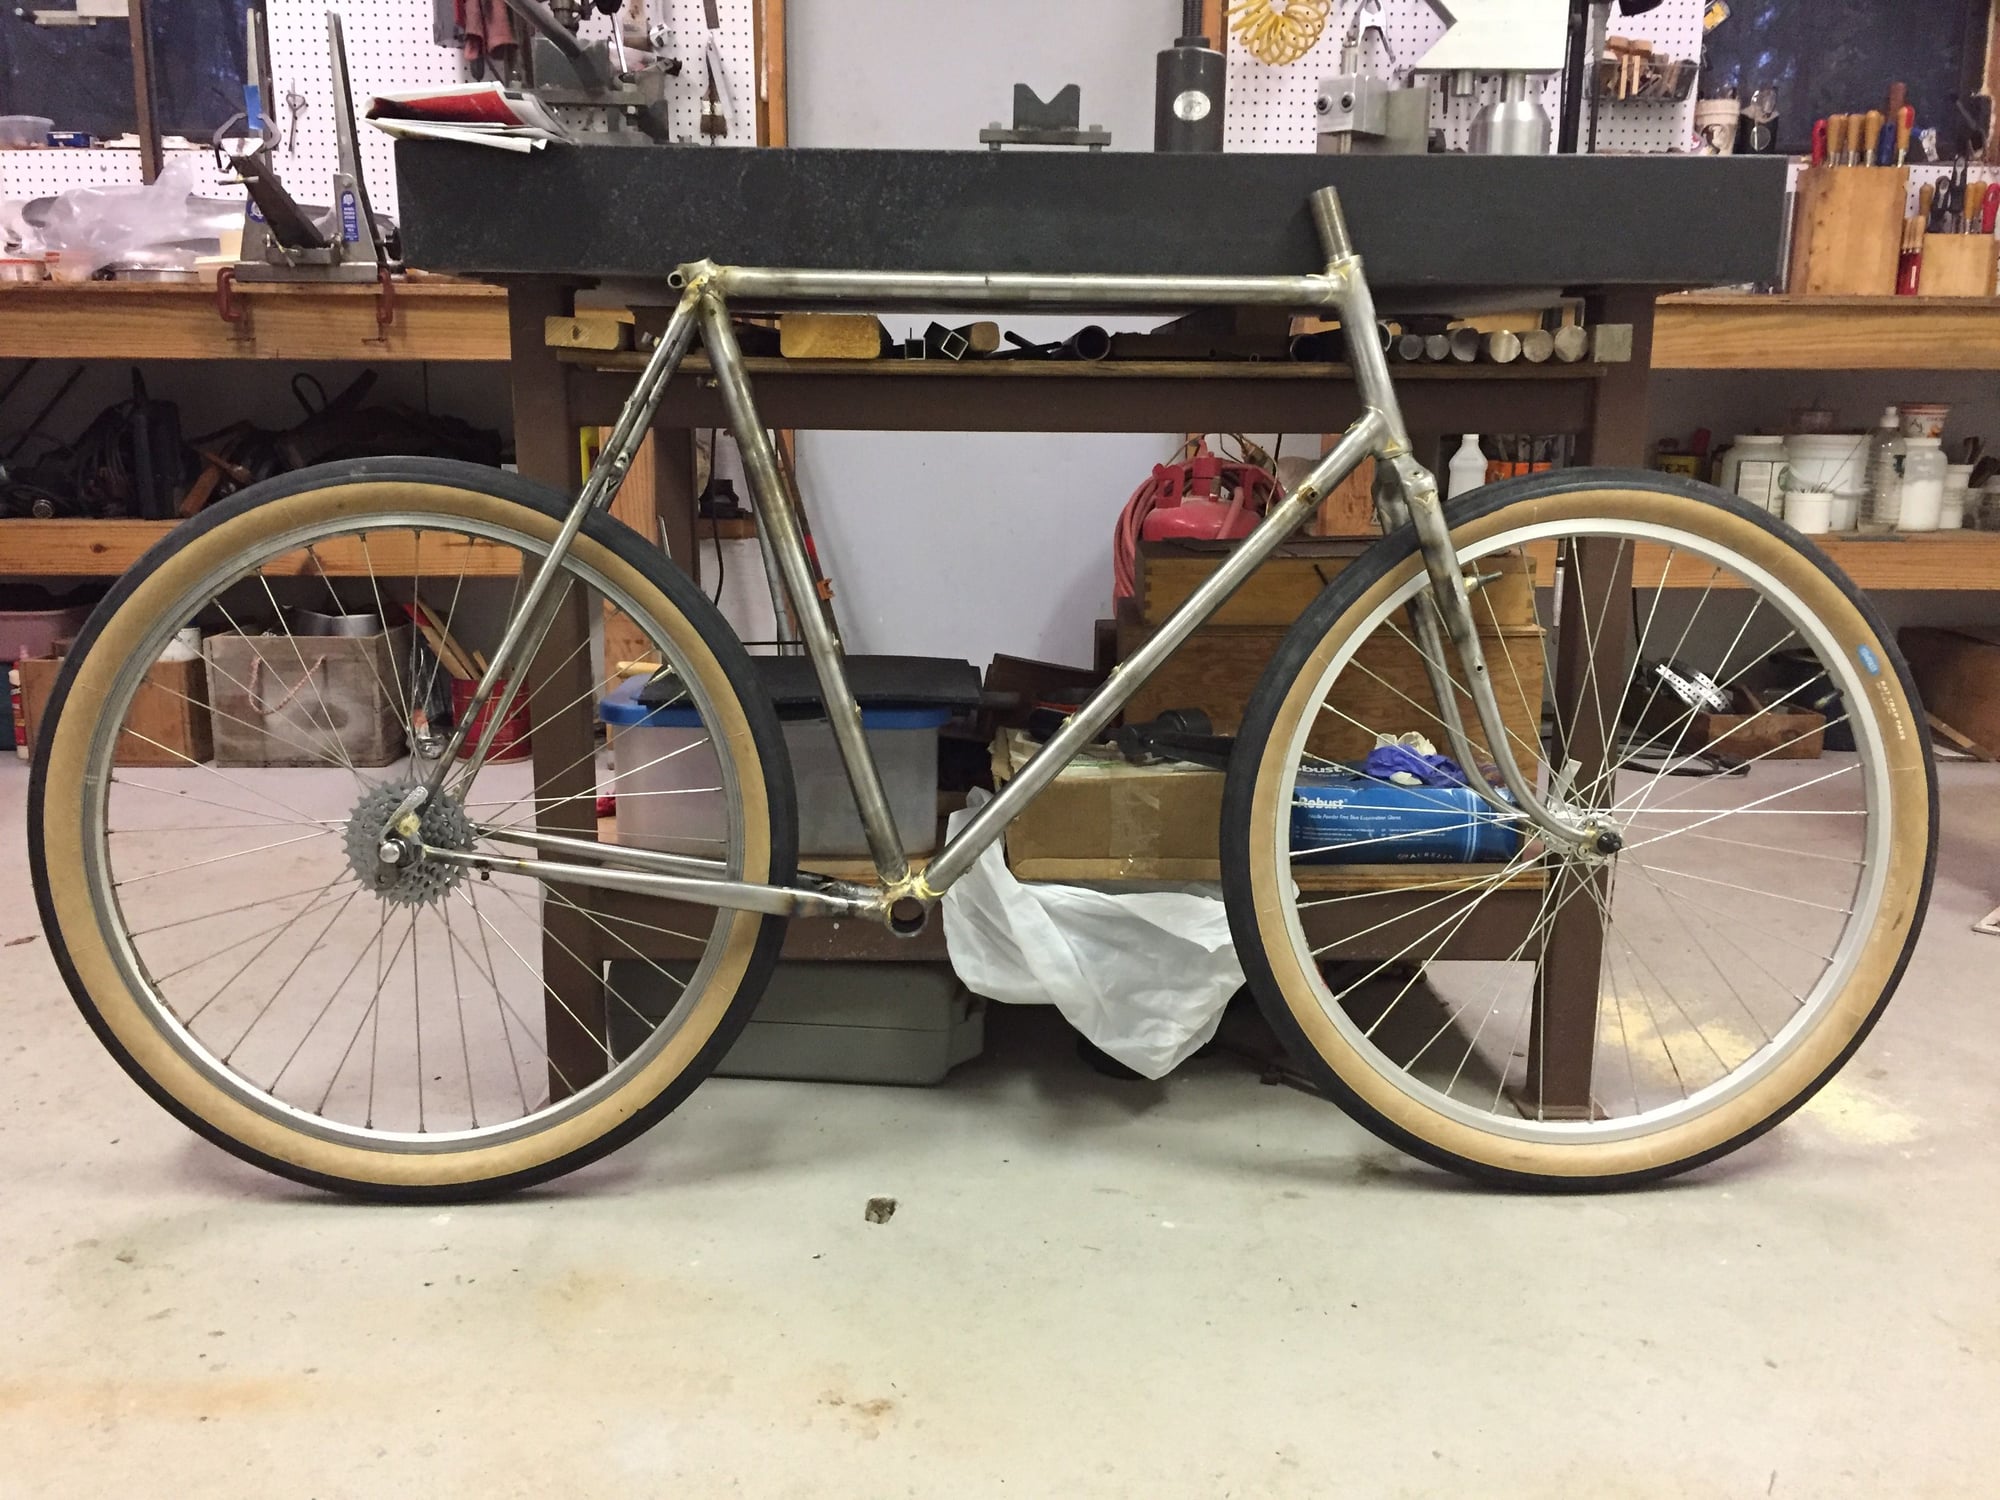
I brazed the RTP main triangle today. I used low fuming bronze instead of silver and couldn't be more pleased with how it turned out. Bending a set of chainstays to give clearance for the tire & fender is the next task. If I'm lucky the relatively easy single bend I used on the BSP bike will suffice. If not it will get a bit more challenging. A few more photos of today's work start here: https://www.flickr.com/photos/216244...7671170583438/
It is officially Miller time.
It is officially Miller time.
Last edited by Jmclay; 09-07-18 at 03:37 PM.
11-02-18, 04:54 PM
#33
Senior Member
Thread Starter
Join Date: May 2013
Posts: 80
Mentioned: 4 Post(s)
Tagged: 0 Thread(s)
Quoted: 21 Post(s)
Likes: 0
Liked 16 Times
in
8 Posts
The chainstays and CS sockets are essentially ready for brazing; just a little bit of fine tuning remains. The included angle is around 30 degrees and a 62mm fender fits with a couple mm of clearance on either side. The manipulation of both stays and sockets was far more involved and difficult than it was for my 650b x 42 with 50mm fenders but I'm very pleased with the results. It was a mix of grinding and bending with my Omar Khiel bending bars; but you don't just insert the bars and lean on them! There is a lot of finesse involved for this amount of metal movement; I taped tiny pieces of tubing scrap, maybe 2mm x 2mm, to the bar to allow precise placement of the force I was applying. You can't just go in and bend the sockets as much as necessary or the shell will be ruined, quickly. A lot of grinding was involved too. Of course all of this work generated a huge gap between the inboard aspect of the sockets and the stays which had to be closed up. A couple of slots on each socket allowed that to be accomplished with judicious use of a hammer and drift. The stays fit beautifully and have exactly the shape and fender clearance I was after. More photos start here: https://www.flickr.com/photos/21624415@N04/45679956511/in/dateposted-public/
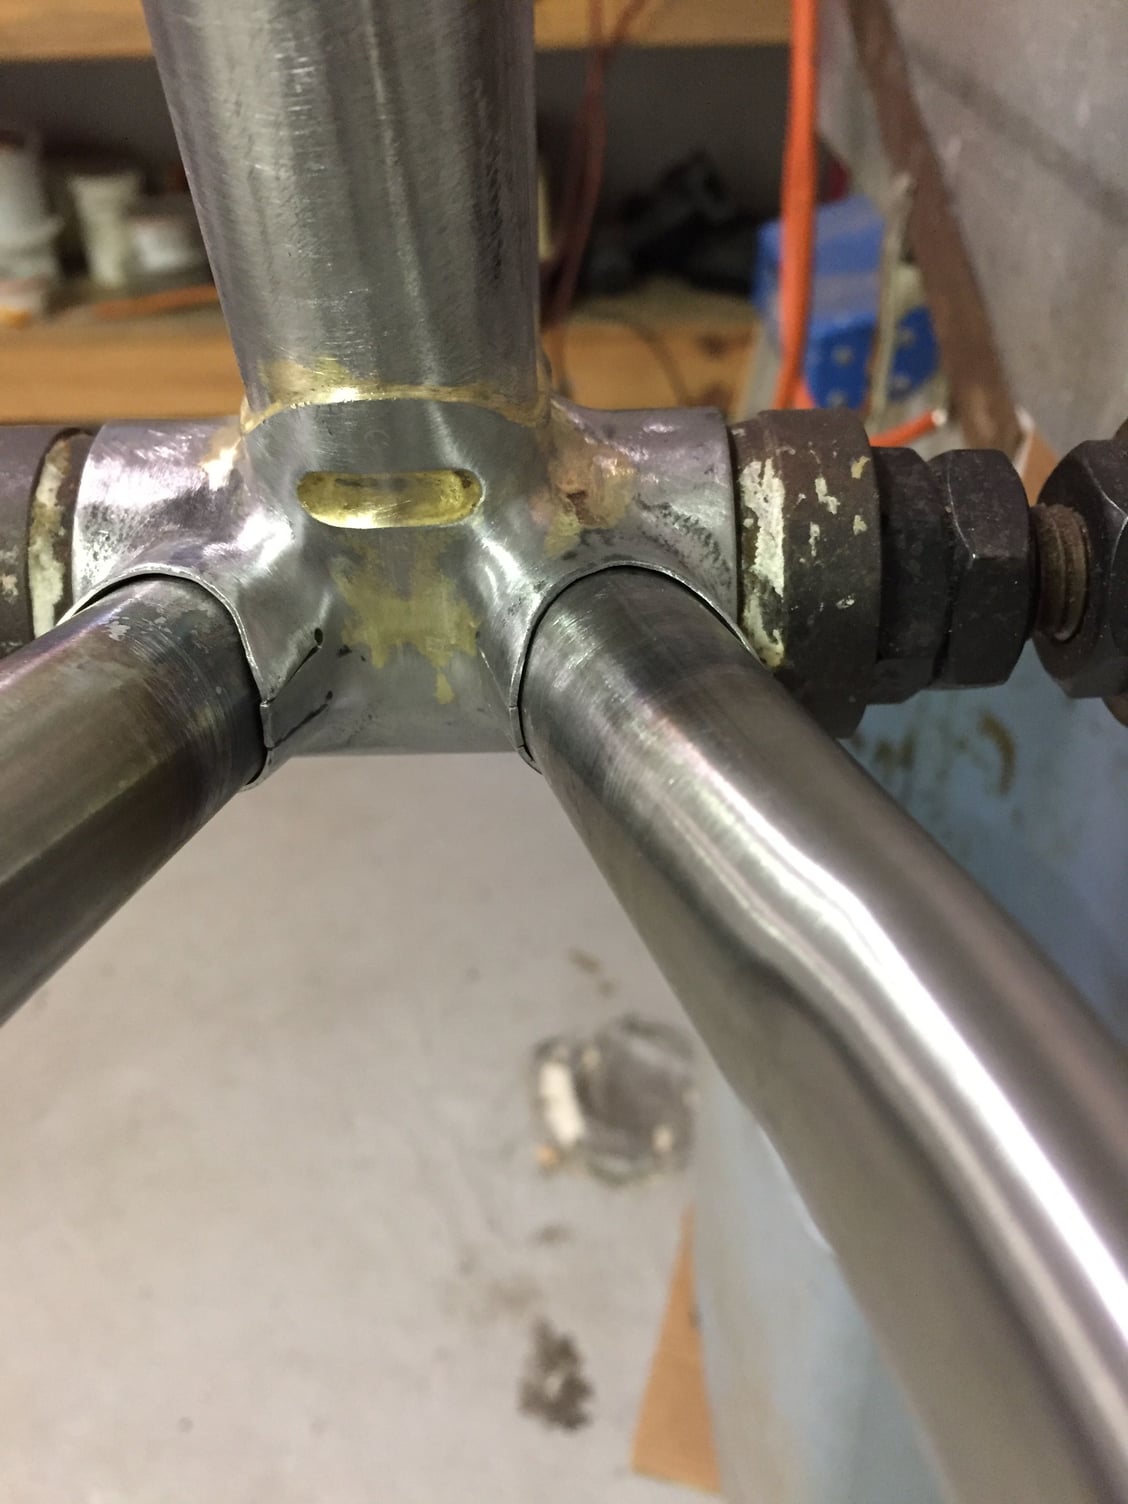
After closing the inboard CS socket gaps
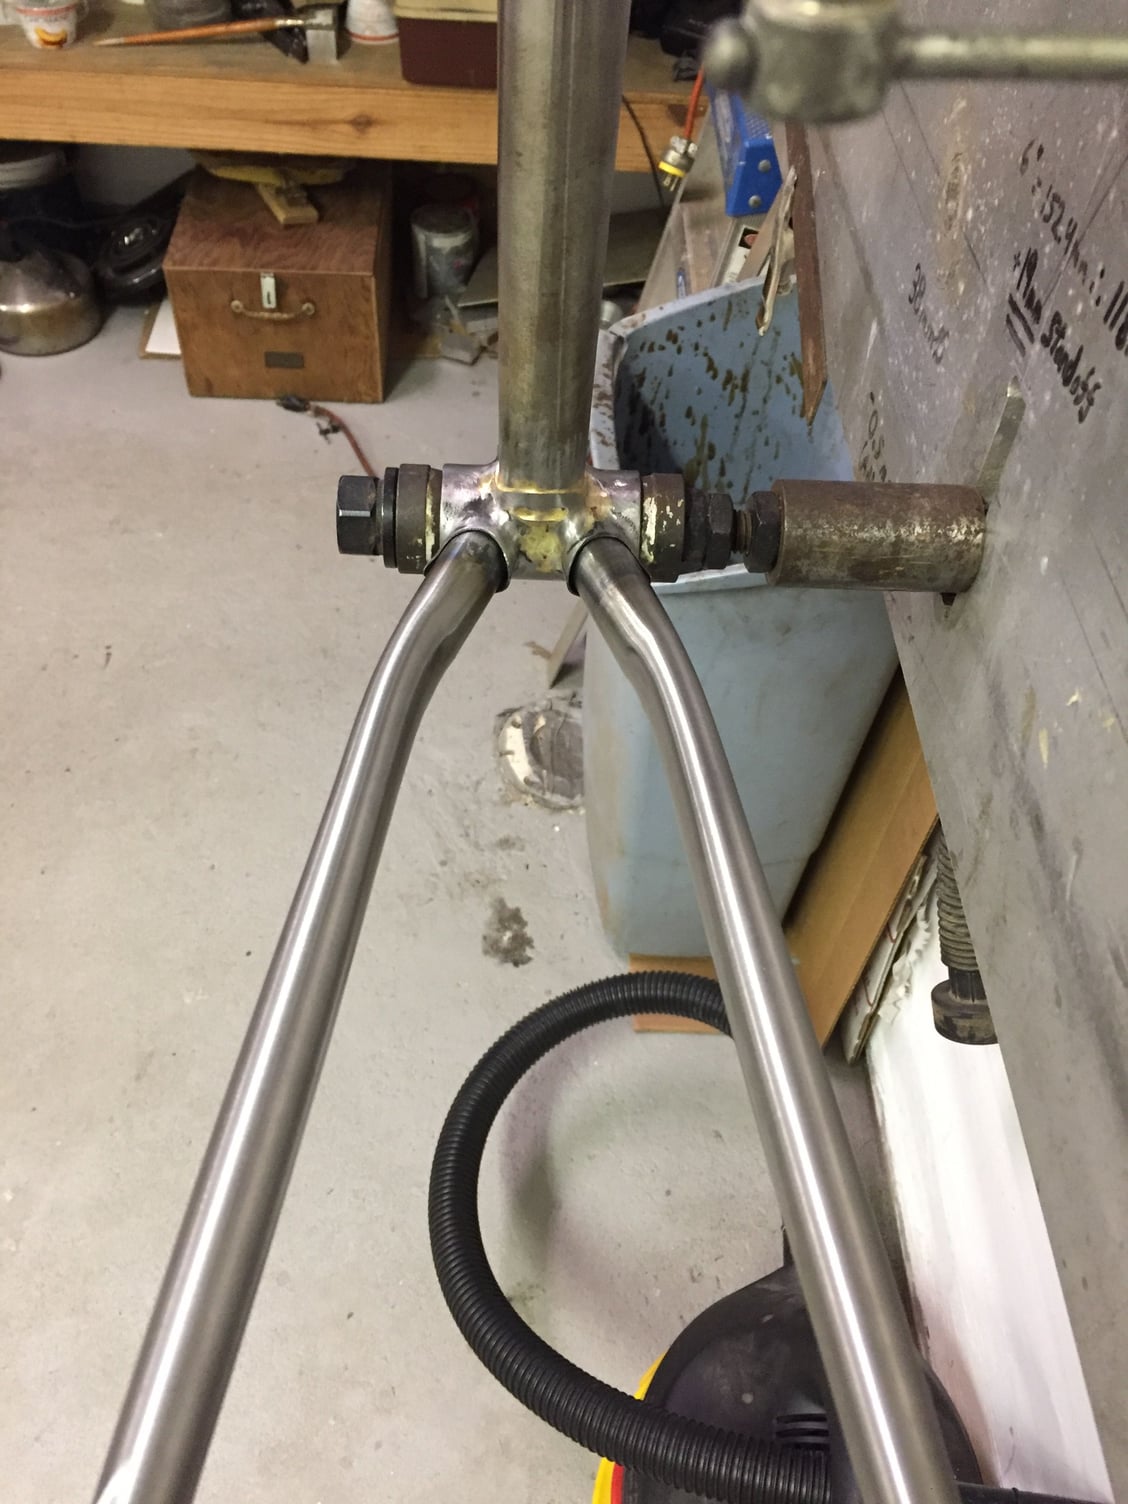
Before closing the gaps.
After closing the inboard CS socket gaps
Before closing the gaps.
Last edited by Jmclay; 11-02-18 at 04:59 PM.
11-03-18, 11:15 AM
#34

Bike Butcher of Portland

Join Date: Jul 2014
Location: Portland, OR
Posts: 11,634
Bikes: It's complicated.
Mentioned: 1299 Post(s)
Tagged: 0 Thread(s)
Quoted: 4678 Post(s)
Liked 5,795 Times
in
2,281 Posts
That single bend on the chainstays looks great!
I've been looking at the (pricey) Compass BB. The chainstays flare out more than others, and they take round chainstays.
I've been looking at the (pricey) Compass BB. The chainstays flare out more than others, and they take round chainstays.
__________________
If someone tells you that you have enough bicycles and you don't need any more, stop talking to them. You don't need that kind of negativity in your life.
If someone tells you that you have enough bicycles and you don't need any more, stop talking to them. You don't need that kind of negativity in your life.
11-03-18, 11:41 AM
#35

multimodal commuter

Join Date: Nov 2006
Location: NJ, NYC, LI
Posts: 19,808
Bikes: 1940s Fothergill, 1959 Allegro Special, 1963? Claud Butler Olympic Sprint, Lambert 'Clubman', 1974 Fuji "the Ace", 1976 Holdsworth 650b conversion rando bike, 1983 Trek 720 tourer, 1984 Counterpoint Opus II, 1993 Basso Gap, 2010 Downtube 8h, and...
Mentioned: 584 Post(s)
Tagged: 0 Thread(s)
Quoted: 1908 Post(s)
Liked 574 Times
in
339 Posts
It looks good!
Perhaps the thing about this project that most impresses me is John's patience. I would have plowed ahead and finished the project in a week or less, probably doing a crummy job of it. This is why I don't build frames.
Meanwhile I've ridden my Rat Trap Pass bike close to a thousand miles in the last month. I rode a different bike yesterday and it just felt weird (and bumpy). It's pretty easy to get used to the fat tires.
Last edited by rhm; 11-03-18 at 12:43 PM.
11-03-18, 12:07 PM
#36
Senior Member
Thread Starter
Join Date: May 2013
Posts: 80
Mentioned: 4 Post(s)
Tagged: 0 Thread(s)
Quoted: 21 Post(s)
Likes: 0
Liked 16 Times
in
8 Posts
^^Thanks Guys. A couple of thoughts:
The shell I used had a 14 degree included angle and I ended up manipulating it to 31 degrees. The Compass shell has a 20 degree included angle, so 6 degrees more; helpful but maybe not a whole lot for this frame? I'd be interested in trying it but it IS expensive, I have several shells from Ceeway (my go-to) left in my stash, and the Compass unit would still take a lot of manipulation for a bike with 60, 62mm fenders. I need to remeasure the angle I achieved for my BSP frame but neither that shell nor the stays required anything like the effort needed for this RTP exercise; it was vastly easier so the Compass shell might have been close to a plug and play.
Patience. I am working on that but the hurricane and some other responsibilities have largely kept me out of the shop. Lately I've been able to rectify that a bit. It's also kind of scary to do this surgery after the shell is brazed into the main triangle so I wanted to be fresh and in the right frame of mind! I managed to close up the socket/stay gap a little more and tidy it up too, since the photos above. I 95% fit the seat stays this morning but it will probably be a couple of weeks before I have the time to braze the rear end into the main.
I am really looking forward to riding those tires.
Last edited by Jmclay; 11-03-18 at 12:18 PM.
 12-04-18, 06:59 PM
#38
multimodal commuter
Join Date: Nov 2006
Location: NJ, NYC, LI
Posts: 19,808
Bikes: 1940s Fothergill, 1959 Allegro Special, 1963? Claud Butler Olympic Sprint, Lambert 'Clubman', 1974 Fuji "the Ace", 1976 Holdsworth 650b conversion rando bike, 1983 Trek 720 tourer, 1984 Counterpoint Opus II, 1993 Basso Gap, 2010 Downtube 8h, and...
Mentioned: 584 Post(s)
Tagged: 0 Thread(s)
Quoted: 1908 Post(s)
Liked 574 Times
in
339 Posts
Looks pretty great!
I have now worn out two RTP tires on mine. You don't do that by leaving it in the garage! It has become my favorite bike.
I have now worn out two RTP tires on mine. You don't do that by leaving it in the garage! It has become my favorite bike.
12-04-18, 07:53 PM
#39
Senior Member
12-05-18, 09:37 AM
#41

Se�or Member

Join Date: Oct 2004
Location: Hardy, VA
Posts: 17,923
Bikes: Mostly English - predominantly Raleighs
Mentioned: 70 Post(s)
Tagged: 0 Thread(s)
Quoted: 1491 Post(s)
Liked 1,090 Times
in
638 Posts
I'm really enjoying seeing this come along. I am also guilty of making those tires the basis of a project, although now that it's been done, I have to acknowledge that the tires belong on a bike with a bit more fork rake than I have on my converted Giant Iguana (beefiest forks I've ever seen, and I suspect they would be a massive challenge to adapt to the ideal rake). Despite that, the tires make it feel like you're riding on gigantic marshmallows with remarkably low rolling resistance.
__________________
In search of what to search for.
In search of what to search for.
12-05-18, 09:53 AM
#42
Senior Member

Join Date: Jun 2008
Location: Louisville, KY
Posts: 13,444
Mentioned: 33 Post(s)
Tagged: 0 Thread(s)
Quoted: 4232 Post(s)
Liked 2,947 Times
in
1,806 Posts
That is coming along very nicely.
12-12-18, 10:17 AM
#43
Senior Member
Thread Starter
Join Date: May 2013
Posts: 80
Mentioned: 4 Post(s)
Tagged: 0 Thread(s)
Quoted: 21 Post(s)
Likes: 0
Liked 16 Times
in
8 Posts
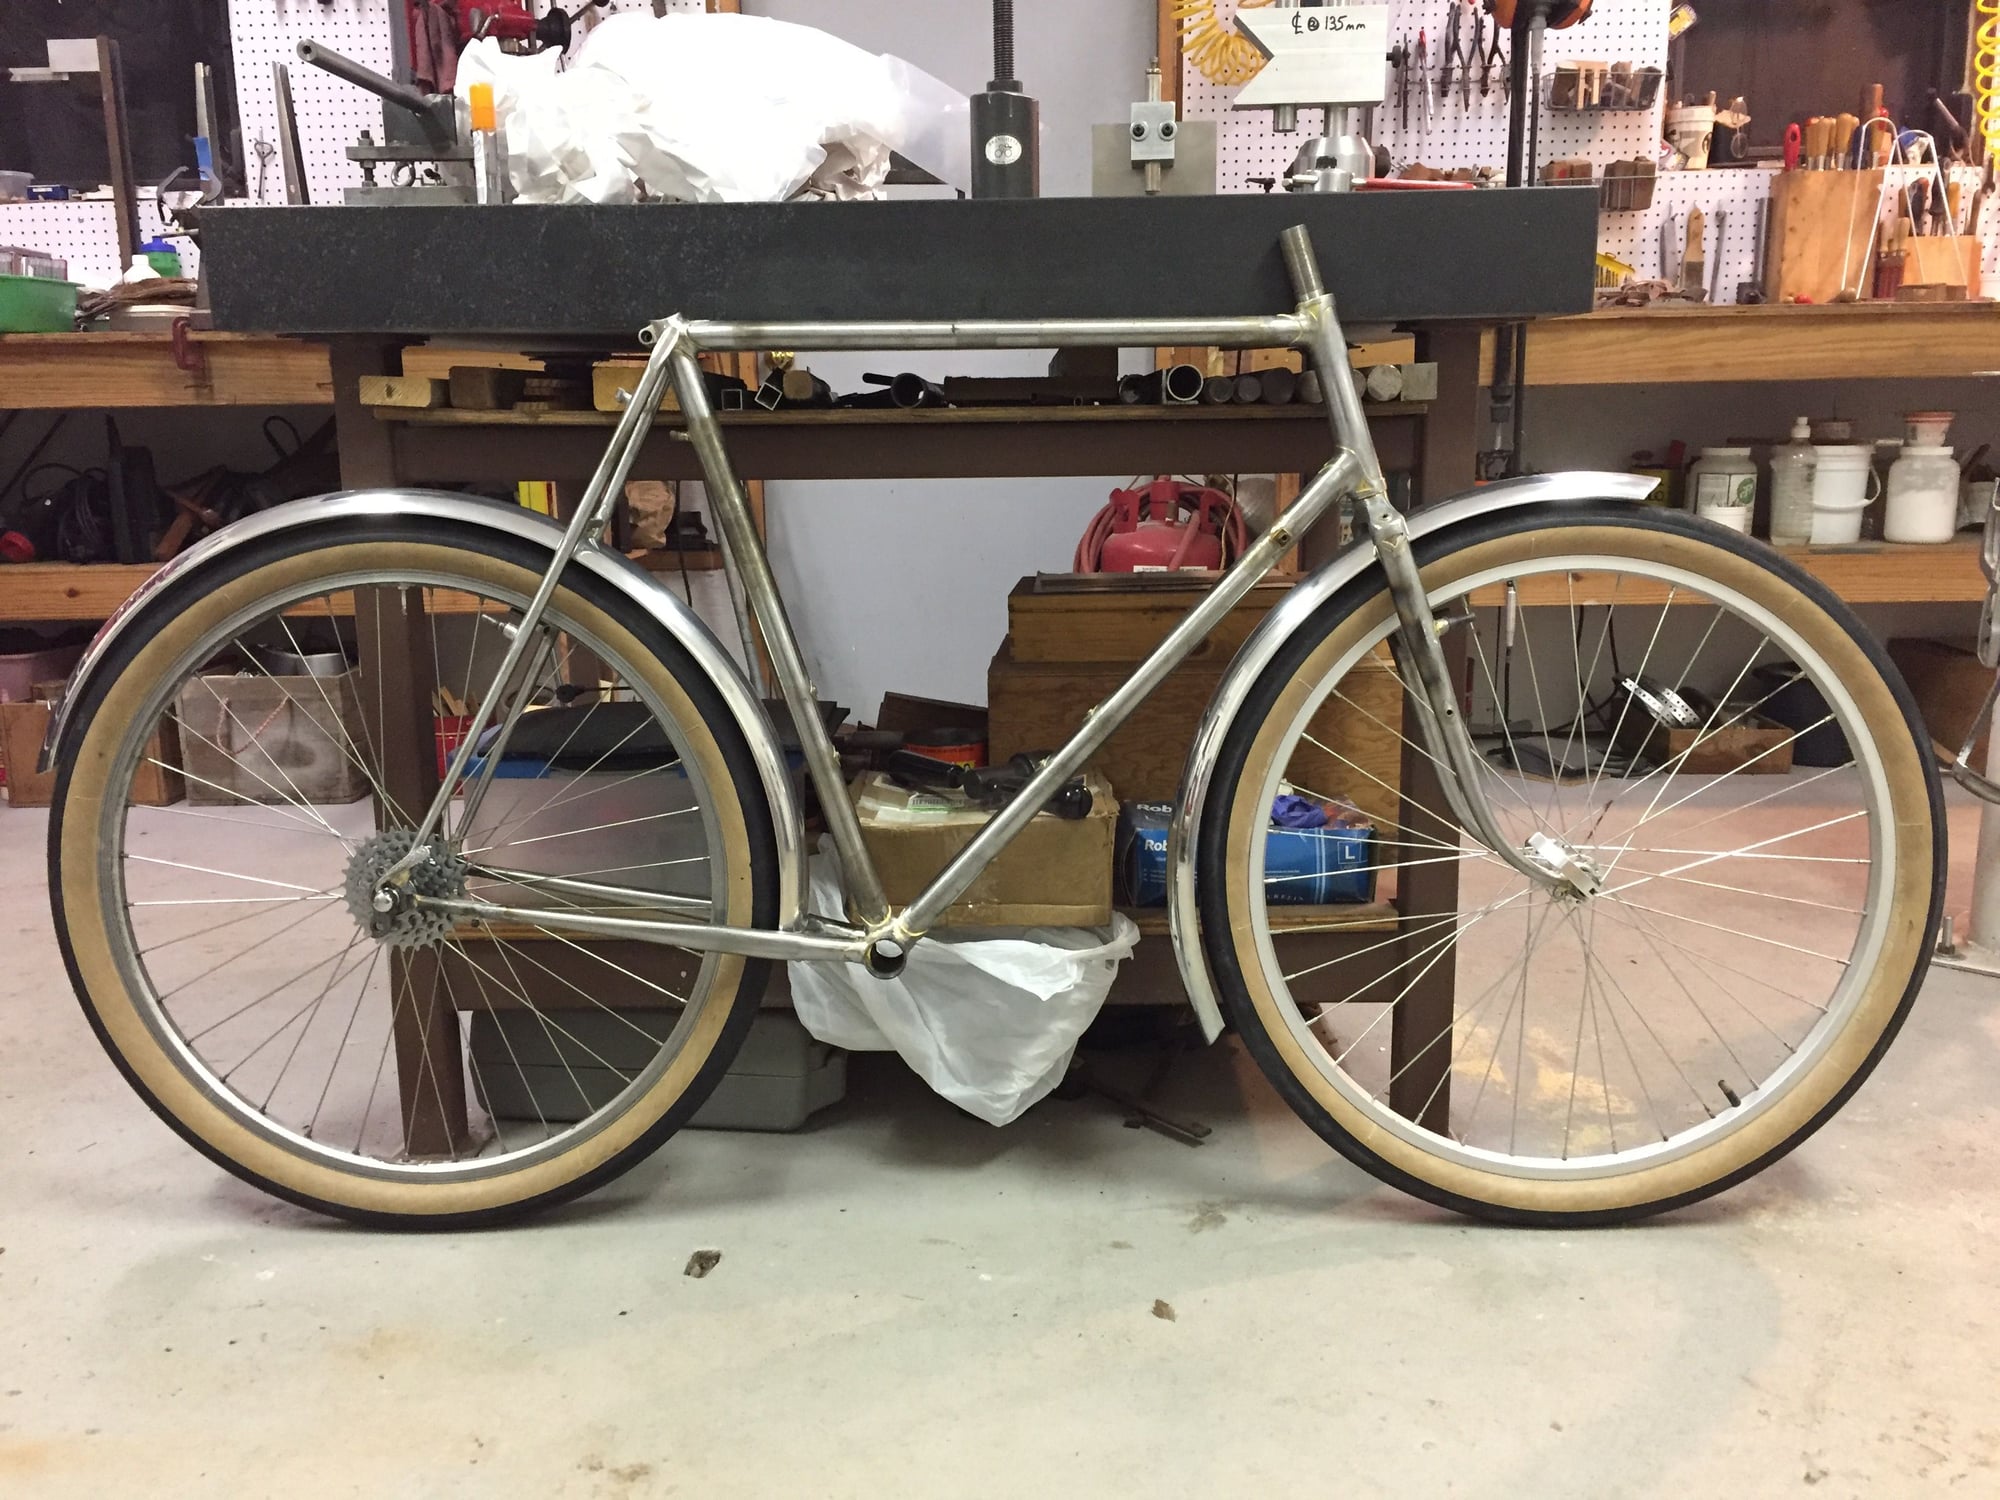
It doesn't look like much has been done much since the last photo, but a lot of the final prep work has been. Grind the tubes flush in the BB shell, add a drain hole and braze the BB shell cable guides on, underneath; shape the spearpoints on the aft facing part of the Seat-stay/drop-out tabs, rinko slot the housing stops, hone and slot the seat-tube, add the rear brake posts, preliminary adjustment of the fenders (the aft portion of the rear fits well, it's just flopped towards the table), thin all of the lug points and reinforcing diamonds and clean up most of the shorelines, chase all of the threads and ream/face the head-tube. Paint isn't far off.
12-12-18, 10:52 AM
#44
multimodal commuter
Join Date: Nov 2006
Location: NJ, NYC, LI
Posts: 19,808
Bikes: 1940s Fothergill, 1959 Allegro Special, 1963? Claud Butler Olympic Sprint, Lambert 'Clubman', 1974 Fuji "the Ace", 1976 Holdsworth 650b conversion rando bike, 1983 Trek 720 tourer, 1984 Counterpoint Opus II, 1993 Basso Gap, 2010 Downtube 8h, and...
Mentioned: 584 Post(s)
Tagged: 0 Thread(s)
Quoted: 1908 Post(s)
Liked 574 Times
in
339 Posts
Looks so nice, aren't you tempted to leave it bare steel? 
__________________
www.rhmsaddles.com.
www.rhmsaddles.com.
12-29-18, 01:43 PM
#45
Senior Member
Thread Starter
Join Date: May 2013
Posts: 80
Mentioned: 4 Post(s)
Tagged: 0 Thread(s)
Quoted: 21 Post(s)
Likes: 0
Liked 16 Times
in
8 Posts
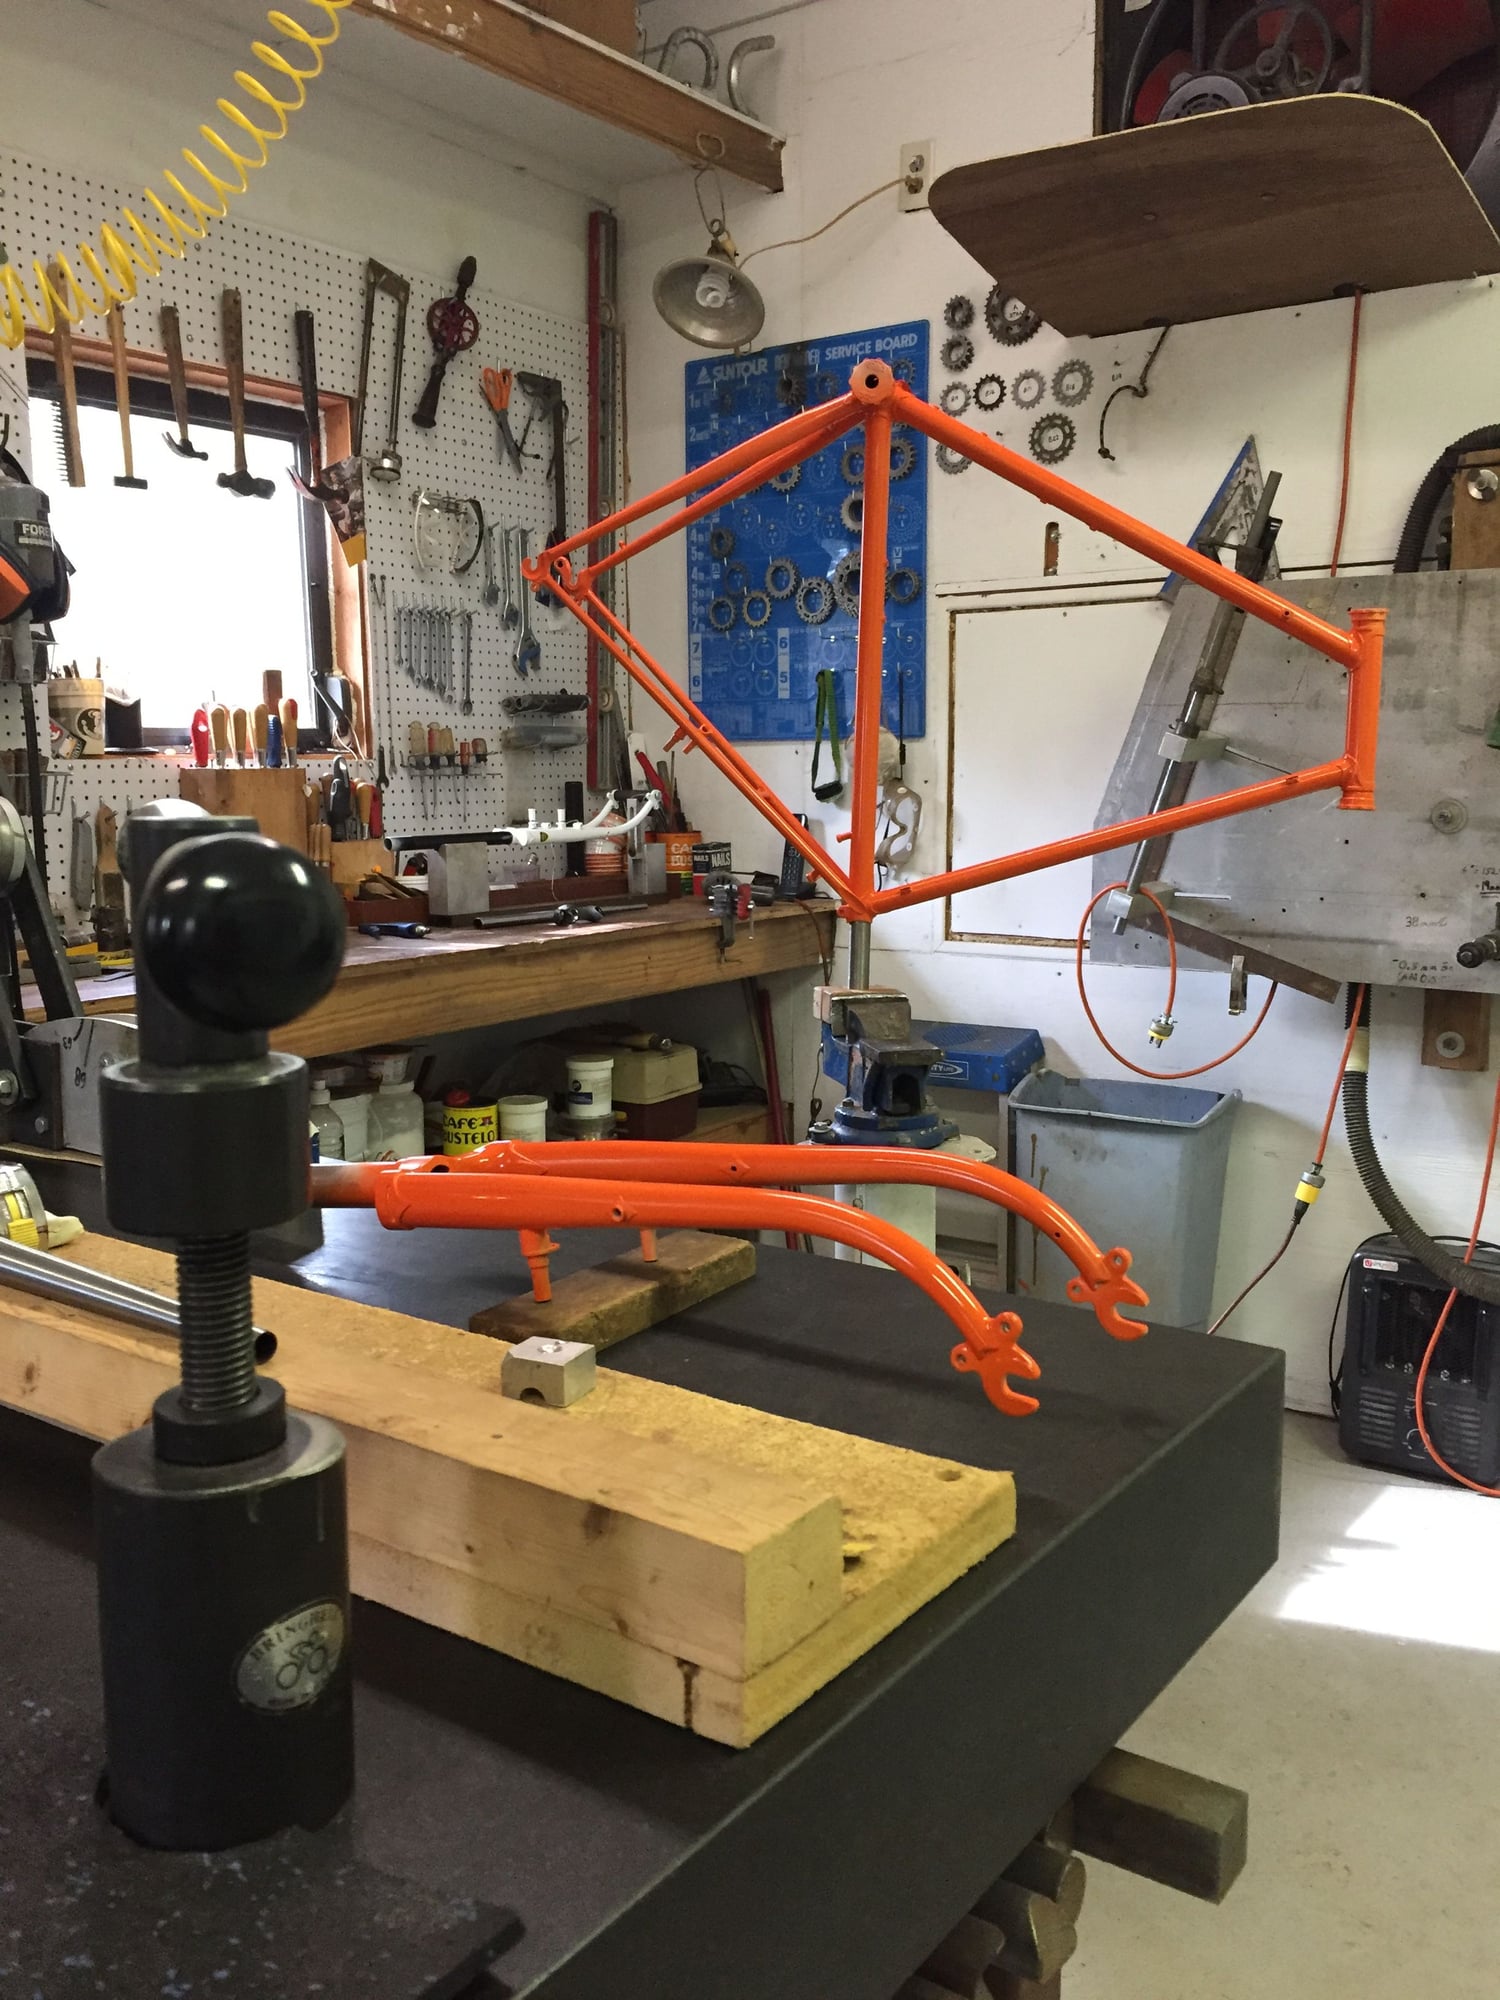
First color coat. It's Rustoleum alkyd oil so second coat application is a couple of days away; a little brighter than a bona fide Molteni Orange but I like it. 8 parts Kubota Orange, 2 parts Sunburst Yellow. Two or three weeks from now should see it get built up.
02-20-19, 08:34 AM
#46
Senior Member
Thread Starter
Join Date: May 2013
Posts: 80
Mentioned: 4 Post(s)
Tagged: 0 Thread(s)
Quoted: 21 Post(s)
Likes: 0
Liked 16 Times
in
8 Posts
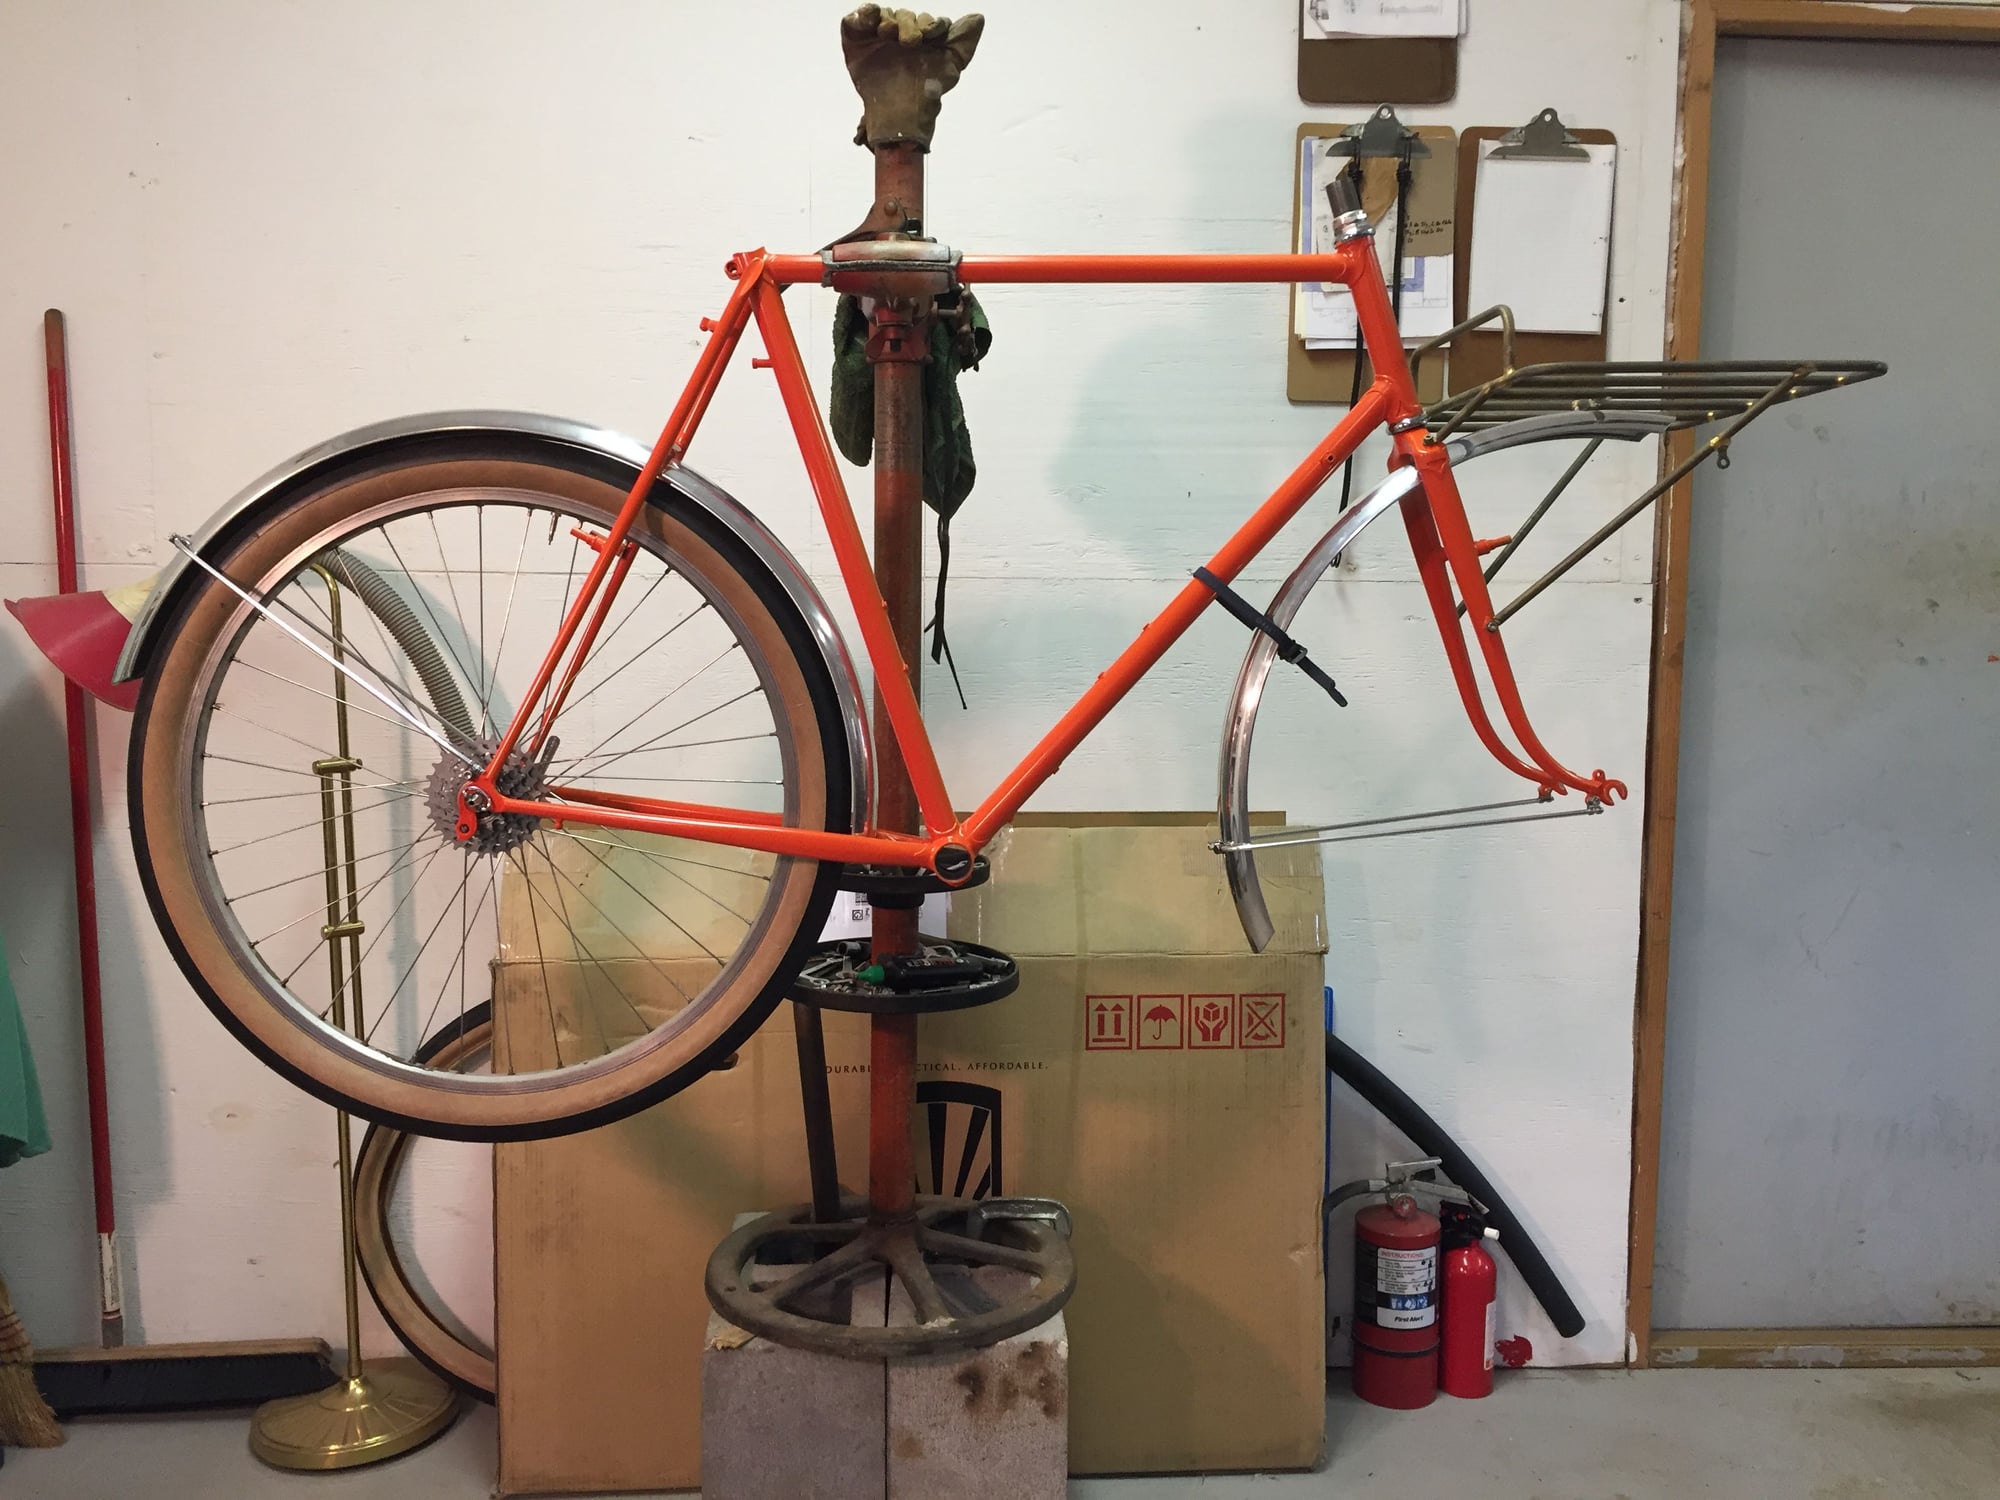
The paint is pretty well cured and I'm getting around to the initial prep and assembly. The tube IDs have been coated with boiled linseed oil as a rust preventative. Generous fender/tire clearance, and fender/chainstay clearance as well! Steerer tube will be trimmed to exact length later; I'm always a bit fearful about trying to get it right with the first attempt so I sneak up on it. I need to build a front wheel. The frame has the slip-ring/brass brush fittings for taillight power.
02-20-19, 10:10 AM
#47
Senior Member

Join Date: Apr 2012
Location: Middle Earth (aka IA)
Posts: 20,435
Bikes: A bunch of old bikes and a few new ones
Mentioned: 178 Post(s)
Tagged: 0 Thread(s)
Quoted: 5888 Post(s)
Liked 3,471 Times
in
2,079 Posts
I think the combination of fat cushy 26 inch tires and a road frame rock. That was the idea behind some of Grant Peterson's XO bikes (he called them fire road bikes). I love my 1993 Bridgestone XO 2. I ride it with 26 x 1.75 tires. I think it maxes out at 1.9 so it won't take a compass rattrap 26 x 2.3. That's a pretty radical tire. This is a cool project.
 02-21-19, 01:01 AM
#49
Senior Member
^ That's what he said :D!
Jmclay, I'm assuming you used some sort of sprayer for the paint? was it a hvlp? or biggest airbrush ever? cfm of tank? I'm going to try to build a set up in the next year, so i'd appreciate any information.
Jmclay, I'm assuming you used some sort of sprayer for the paint? was it a hvlp? or biggest airbrush ever? cfm of tank? I'm going to try to build a set up in the next year, so i'd appreciate any information.
02-21-19, 08:07 AM
#50
Senior Member
Thread Starter
Join Date: May 2013
Posts: 80
Mentioned: 4 Post(s)
Tagged: 0 Thread(s)
Quoted: 21 Post(s)
Likes: 0
Liked 16 Times
in
8 Posts
 !
!Although I've used automotive urethanes I'm growing tired of the expense of solidifying activators. My last few frames were shot with Rustoleum "Stops Rust" alkyd oil. It's a small fraction of the urethane cost and it's pretty good. A good painter can make it look fantastic. Certainly not as tough but then, it's a bicycle. If I were to do it over again from scratch I'd standardize on either the Rusto or perhaps a single stage urethane from one manufacturer in only one color. I've got half a dozen colors from two manufacturers which means that my five or six different activators for all that stuff go bad before I've used even a quarter of any can. That would keep the urethane costs halfway reasonable (though still a LOT more than the Rusto).