


26" Frankenbike gravel build... just because I could.
 11-17-18, 06:10 PM
#26
Senior Member
I have had the rust issue on another blued bike before around the BB where water pooled and have in the past used spray lacquer and epoxy clear coat. The lacquer seems too fragile but the clear coat appears good. However, I find spraying a bike after lots of rubbing to create a patina to be wrong some how. Just me maybe.
Looking for a more natural alternative I've just finished a vintage rebuild to experiment with boiled linseed oil as a protective coating and am really happy with that result. I intend to treat this frame with it pretty quick.
Looking for a more natural alternative I've just finished a vintage rebuild to experiment with boiled linseed oil as a protective coating and am really happy with that result. I intend to treat this frame with it pretty quick.
 11-17-18, 07:20 PM
#27
Senior Member
Thread Starter
Join Date: Sep 2015
Location: Left Coast, Canada
Posts: 5,126
Mentioned: 24 Post(s)
Tagged: 0 Thread(s)
Quoted: 2236 Post(s)
Liked 1,314 Times
in
707 Posts
It kind of does and doesn't, depending on the finish/quality. For some bits I had to score the coating with the wire wheel and then stripper and other bits came right off with just stripper. It's a bit of experimenting.
11-17-18, 07:23 PM
#28
Senior Member
Thread Starter
Join Date: Sep 2015
Location: Left Coast, Canada
Posts: 5,126
Mentioned: 24 Post(s)
Tagged: 0 Thread(s)
Quoted: 2236 Post(s)
Liked 1,314 Times
in
707 Posts
Here's a link to the BLO inspired rebuild thread in the FG/SS forum: https://www.bikeforums.net/singlespe...onversion.html
11-19-18, 01:29 AM
#29
Senior Member
Thread Starter
Join Date: Sep 2015
Location: Left Coast, Canada
Posts: 5,126
Mentioned: 24 Post(s)
Tagged: 0 Thread(s)
Quoted: 2236 Post(s)
Liked 1,314 Times
in
707 Posts
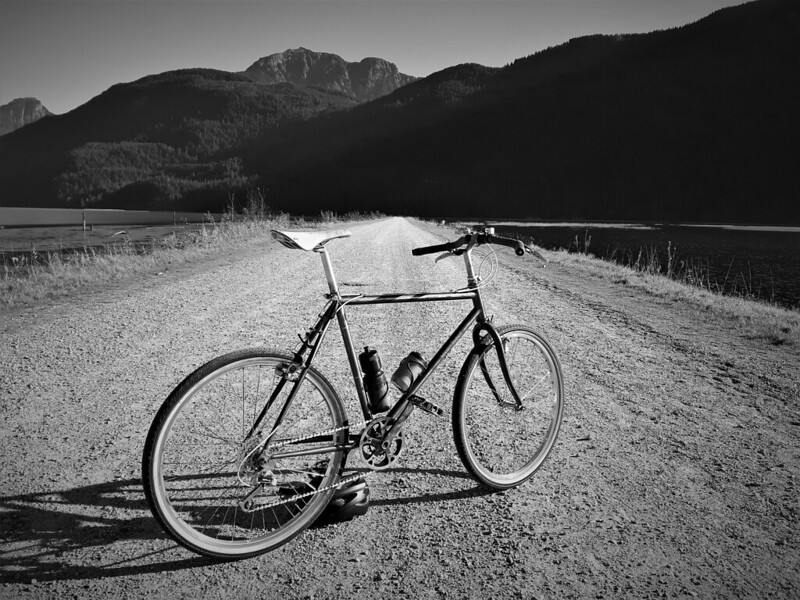
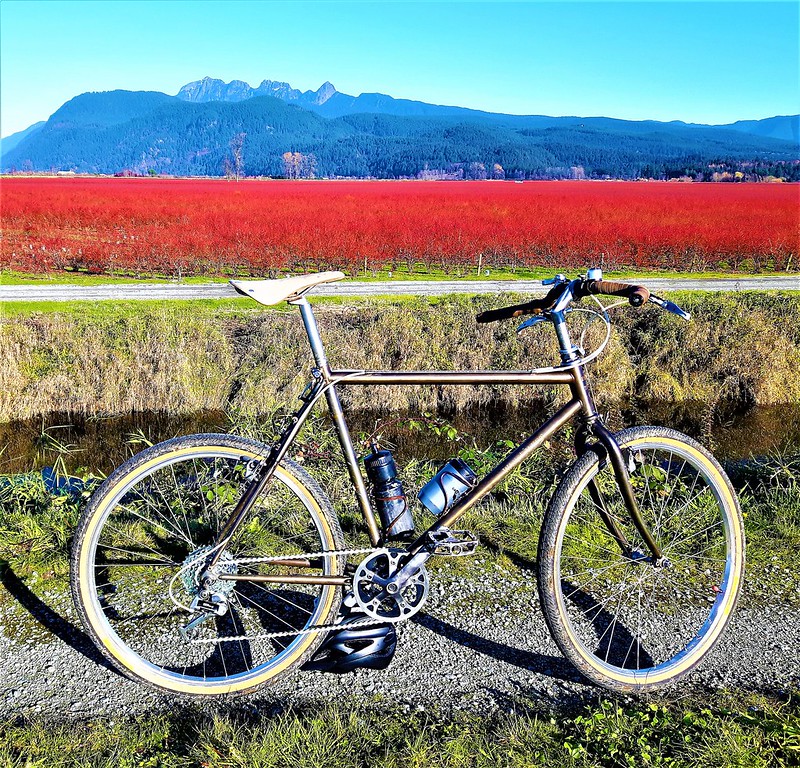
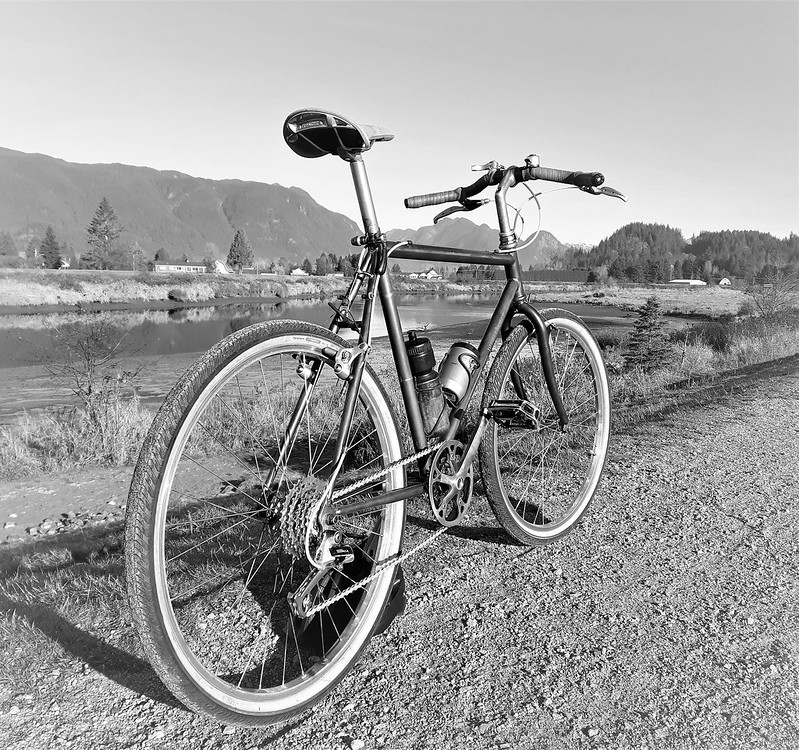
Took the bike out for a ride today to see how it performs.
The area I visited is called Pitt Addington, an agricultural tract at the base of Pitt Lake that includes dikes and a large bog.
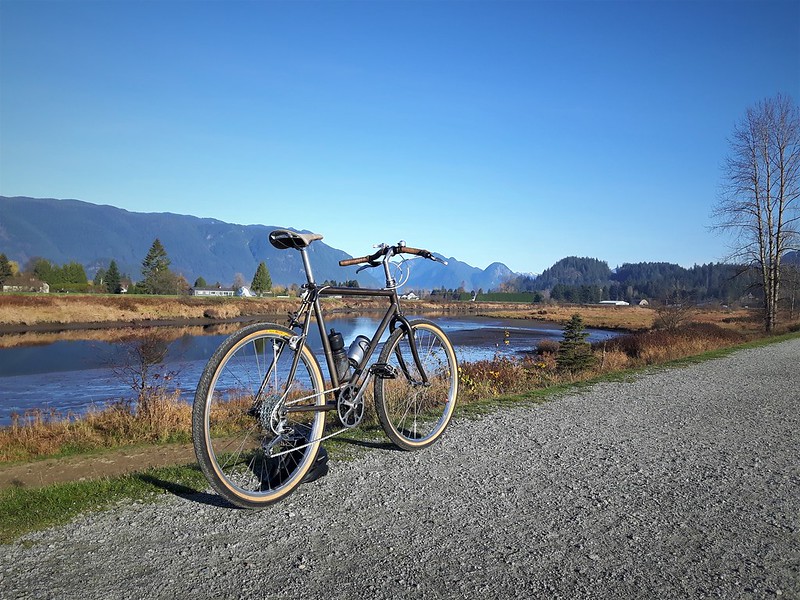
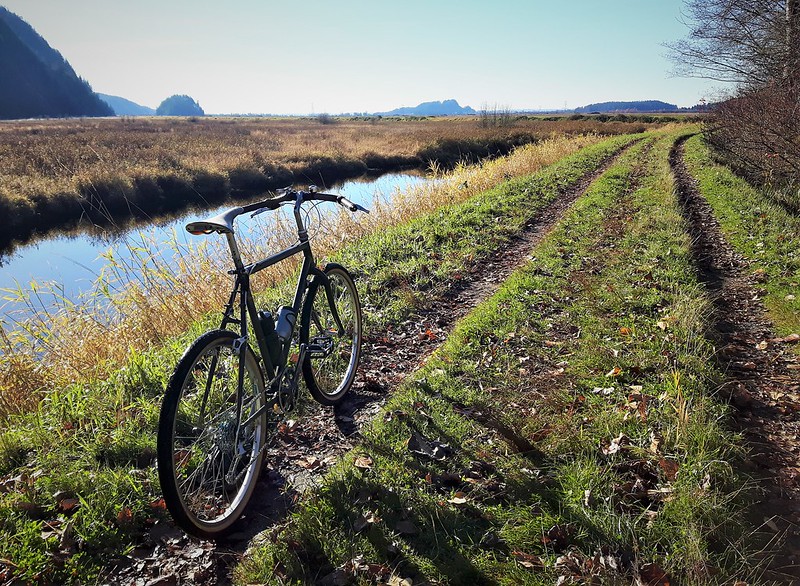
The ride started off nice along groomed dikes
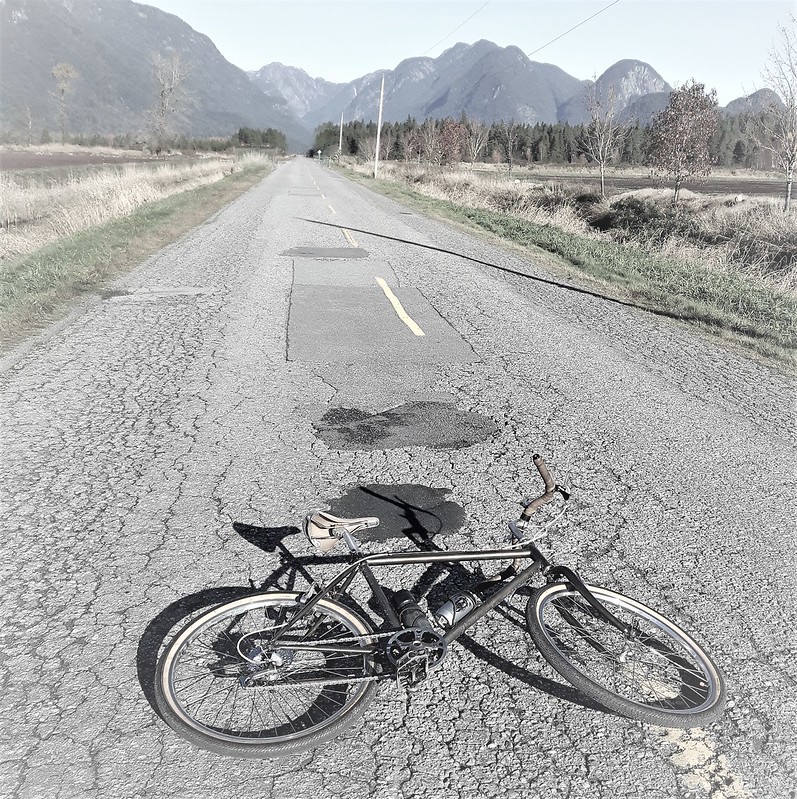
And then up a rough rural road passed fields of Blueberries and Cranberries.
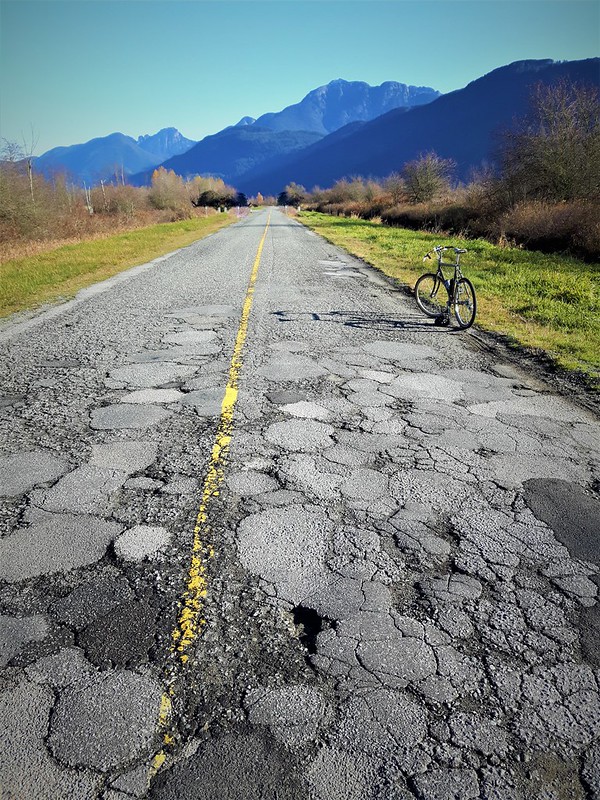
This led to more dikes but now with grassy ruts instead of groomed gravel.
and then some single track.
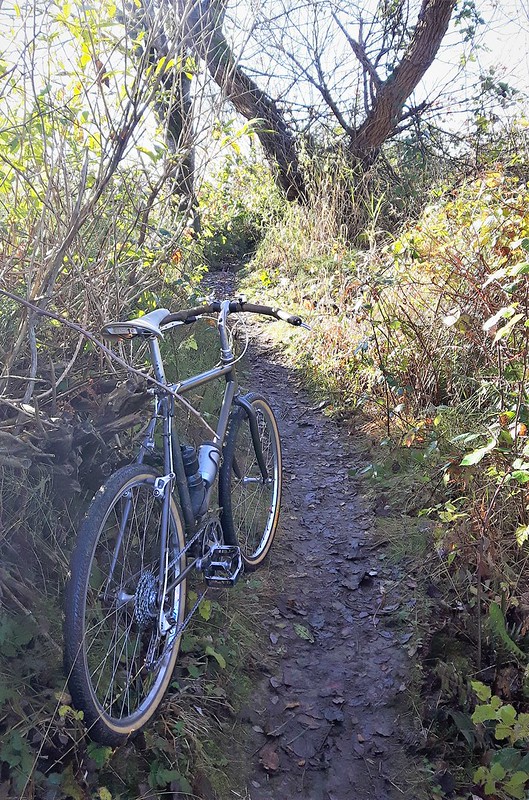
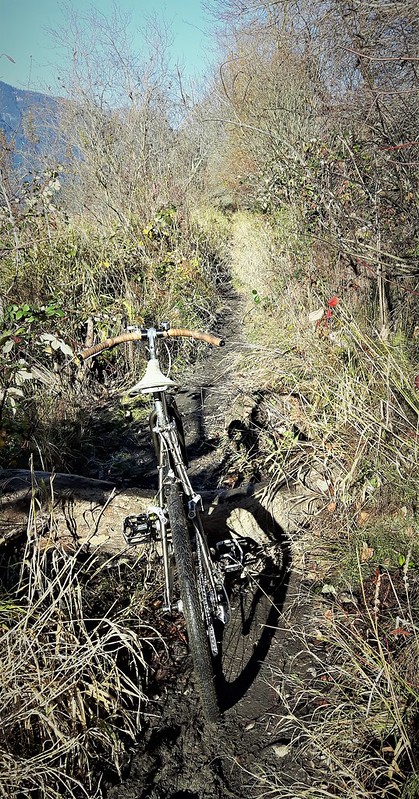
And then back along dikes again to the start - with a slight detour.
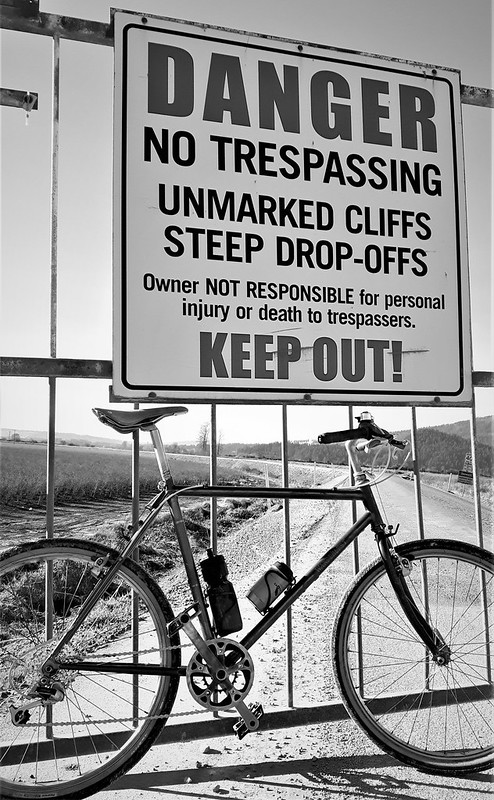
All told, 47Km's of mixed surface riding. Bike worked great, though there were some washboard sections that had me wishing for just a wee bit of suspension.
The area I visited is called Pitt Addington, an agricultural tract at the base of Pitt Lake that includes dikes and a large bog.
The ride started off nice along groomed dikes
And then up a rough rural road passed fields of Blueberries and Cranberries.
This led to more dikes but now with grassy ruts instead of groomed gravel.
and then some single track.
And then back along dikes again to the start - with a slight detour.
All told, 47Km's of mixed surface riding. Bike worked great, though there were some washboard sections that had me wishing for just a wee bit of suspension.
Last edited by Happy Feet; 11-19-18 at 01:38 AM.
11-19-18, 07:32 AM
#30
Advanced Slacker

Join Date: Feb 2017
Posts: 6,210
Bikes: Soma Fog Cutter, Surly Wednesday, Canfielld Tilt
Mentioned: 26 Post(s)
Tagged: 0 Thread(s)
Quoted: 2762 Post(s)
Liked 2,537 Times
in
1,433 Posts
This project is so awesome that I will overlook the stem shifters 
Seriously good stuff, here.
Seriously good stuff, here.
11-19-18, 08:34 AM
#31
Senior Member
Awesome project, beautiful work. Would appreciate future updates on how the bluing treatment holds up to wet riding. I have a couple of old beaters that I could try this on.
Thanks, J
Thanks, J
11-19-18, 11:18 AM
#32
High Plains Luddite
Great bike and a very entertaining write-up. Thanks for taking the time to take and post all those pictures as well. 
11-21-18, 01:29 PM
#33

Senior Member

Join Date: May 2008
Location: Fredericksburg, Va
Posts: 9,579
Bikes: '65 Frejus TDF, '73 Bottecchia Giro d'Italia, '83 Colnago Superissimo, '84 Trek 610, '84 Trek 760, '88 Pinarello Veneto, '88 De Rosa Pro, '89 Pinarello Montello, '94 Burley Duet, 97 Specialized RockHopper, 2010 Langster, Tern Link D8
Mentioned: 73 Post(s)
Tagged: 0 Thread(s)
Quoted: 1607 Post(s)
Liked 2,216 Times
in
1,103 Posts
@bdooner - anodizing can be removed with Easy Off oven cleaner. Don't leave it on too long, about 15 min.
__________________
Bikes don't stand alone. They are two tired.
Bikes don't stand alone. They are two tired.
11-21-18, 01:49 PM
#34
Senior Member
Thread Starter
Join Date: Sep 2015
Location: Left Coast, Canada
Posts: 5,126
Mentioned: 24 Post(s)
Tagged: 0 Thread(s)
Quoted: 2236 Post(s)
Liked 1,314 Times
in
707 Posts
@bdooner - anodizing can be removed with Easy Off oven cleaner. Don't leave it on too long, about 15 min.
11-21-18, 02:25 PM
#35
Senior Member
Join Date: May 2008
Location: Fredericksburg, Va
Posts: 9,579
Bikes: '65 Frejus TDF, '73 Bottecchia Giro d'Italia, '83 Colnago Superissimo, '84 Trek 610, '84 Trek 760, '88 Pinarello Veneto, '88 De Rosa Pro, '89 Pinarello Montello, '94 Burley Duet, 97 Specialized RockHopper, 2010 Langster, Tern Link D8
Mentioned: 73 Post(s)
Tagged: 0 Thread(s)
Quoted: 1607 Post(s)
Liked 2,216 Times
in
1,103 Posts
@Happy Feet - We, C&V crowd, use it all the time to remove anodizing of any sort. Usually to add bling to a part that has a lot of rub on it, plus for parts that need filing and polishing to get rid of road rash, like levers.
__________________
Bikes don't stand alone. They are two tired.
Bikes don't stand alone. They are two tired.
11-22-18, 09:29 PM
#36
52psi

Join Date: Aug 2013
Location: Tucson, AZ
Posts: 4,015
Bikes: Schwinn Volare ('78); Raleigh Competition GS ('79)
Mentioned: 29 Post(s)
Tagged: 0 Thread(s)
Quoted: 790 Post(s)
Liked 802 Times
in
391 Posts
One of the more remarkable before/afters I've seen. Very cool build. I glanced at my well-worn Raleigh once or twice after looking at the new finish on yours, thinking "hmmmmm..." 
__________________
A race bike in any era is a highly personal choice that at its "best" balances the requirements of fit, weight, handling, durability and cost tempered by the willingness to toss it and oneself down the pavement at considerable speed. ~Bandera
A race bike in any era is a highly personal choice that at its "best" balances the requirements of fit, weight, handling, durability and cost tempered by the willingness to toss it and oneself down the pavement at considerable speed. ~Bandera
03-06-19, 05:25 PM
#38
Senior Member
Thread Starter
Join Date: Sep 2015
Location: Left Coast, Canada
Posts: 5,126
Mentioned: 24 Post(s)
Tagged: 0 Thread(s)
Quoted: 2236 Post(s)
Liked 1,314 Times
in
707 Posts
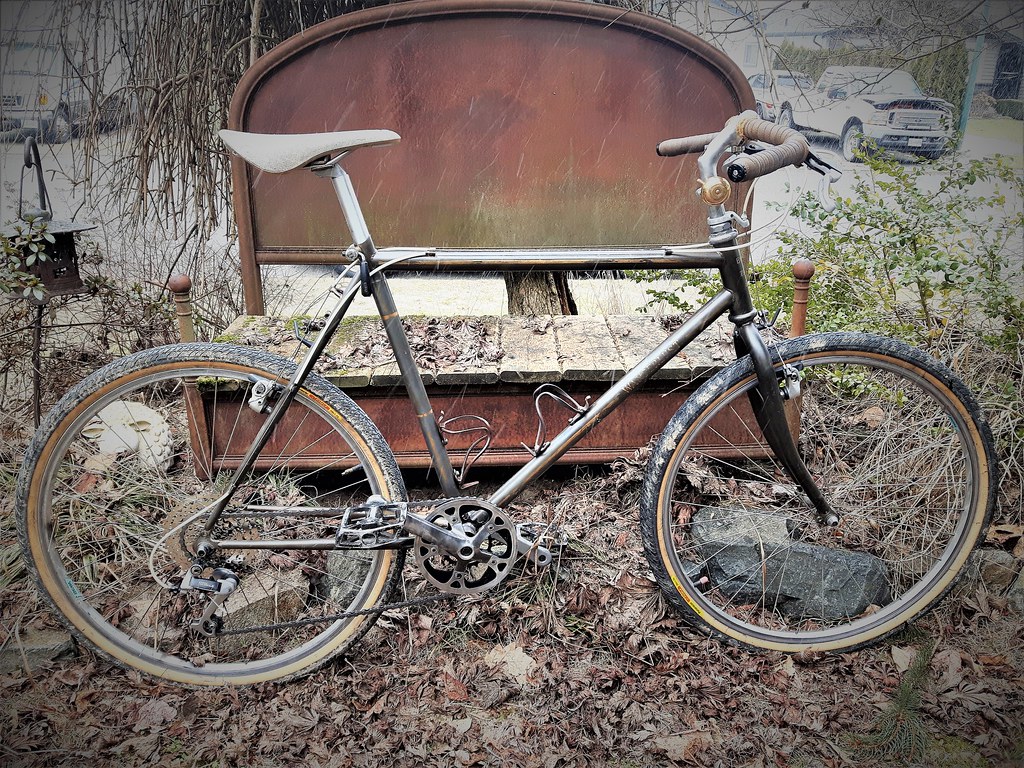
A final update on the build.
I've been riding this bike for a while and it is one of my new favorites due to its simplicity.
I wanted to do a couple of last minute touches and wound up swapping out the rear cassette while I was at it.
The external cables along the top tube tend to slap a little and were scratching the finish so I bought some Gorilla Grip clear duct tape and applied it along that part of the tube. MEC sells a similar frame saver product for $39/1m https://www.mec.ca/en/search2?text=clear%20frame%20tape&org_text=clear%20frame%20tape but the whole roll of this was $10/8.2m and can do a number of bikes https://www.homedepot.ca/product/gor...ape/1000762658

I also wanted to finish the bar tape with an organic looking product (rather than tape) and tried some Jute twine top coated with French Schellac. It should dry darker but I'm so so about the rough texture. Hummm... If I don't like it I'll cut it off and go with hemp cord. Also added a different bell and put the thumbie under the bar so the top of the cockpit looks bare.

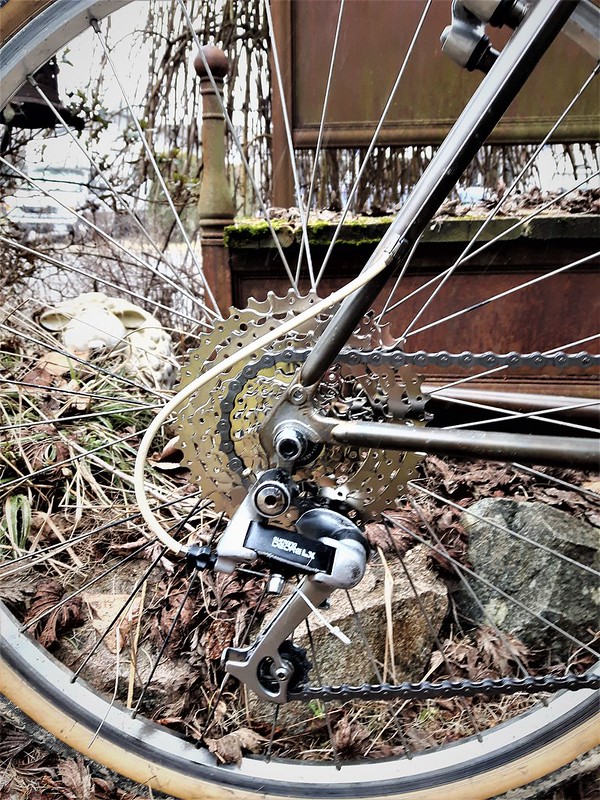
Lastly, I swapped out the cassette. Originally a stock 7speed 13/28 I tried a SunRace 7speed 11/34 which was great. But then I read about a SunRace 8speed 11/40 cassette and with the help of my bike mechanic friend figured out how to change the hub body to turn a 7 speed into an 8 speed. The derailer and thumb shifters were both compatible.
I think that's it. A fun minimalist 1x 26r for cheaps.
I've been riding this bike for a while and it is one of my new favorites due to its simplicity.
I wanted to do a couple of last minute touches and wound up swapping out the rear cassette while I was at it.
The external cables along the top tube tend to slap a little and were scratching the finish so I bought some Gorilla Grip clear duct tape and applied it along that part of the tube. MEC sells a similar frame saver product for $39/1m https://www.mec.ca/en/search2?text=clear%20frame%20tape&org_text=clear%20frame%20tape but the whole roll of this was $10/8.2m and can do a number of bikes https://www.homedepot.ca/product/gor...ape/1000762658
I also wanted to finish the bar tape with an organic looking product (rather than tape) and tried some Jute twine top coated with French Schellac. It should dry darker but I'm so so about the rough texture. Hummm... If I don't like it I'll cut it off and go with hemp cord. Also added a different bell and put the thumbie under the bar so the top of the cockpit looks bare.
Lastly, I swapped out the cassette. Originally a stock 7speed 13/28 I tried a SunRace 7speed 11/34 which was great. But then I read about a SunRace 8speed 11/40 cassette and with the help of my bike mechanic friend figured out how to change the hub body to turn a 7 speed into an 8 speed. The derailer and thumb shifters were both compatible.
I think that's it. A fun minimalist 1x 26r for cheaps.
Last edited by Happy Feet; 03-06-19 at 05:34 PM.
03-08-19, 07:07 AM
#39
Senior Member
Join Date: Dec 2007
Location: NWNJ
Posts: 3,704
Bikes: Road bike is a Carbon Bianchi C2C & Grandis (1980's), Gary Fisher Mt Bike, Trek Tandem & Mongoose SS MTB circa 1992.
Mentioned: 9 Post(s)
Tagged: 0 Thread(s)
Quoted: 722 Post(s)
Liked 353 Times
in
226 Posts
26 inches of fun
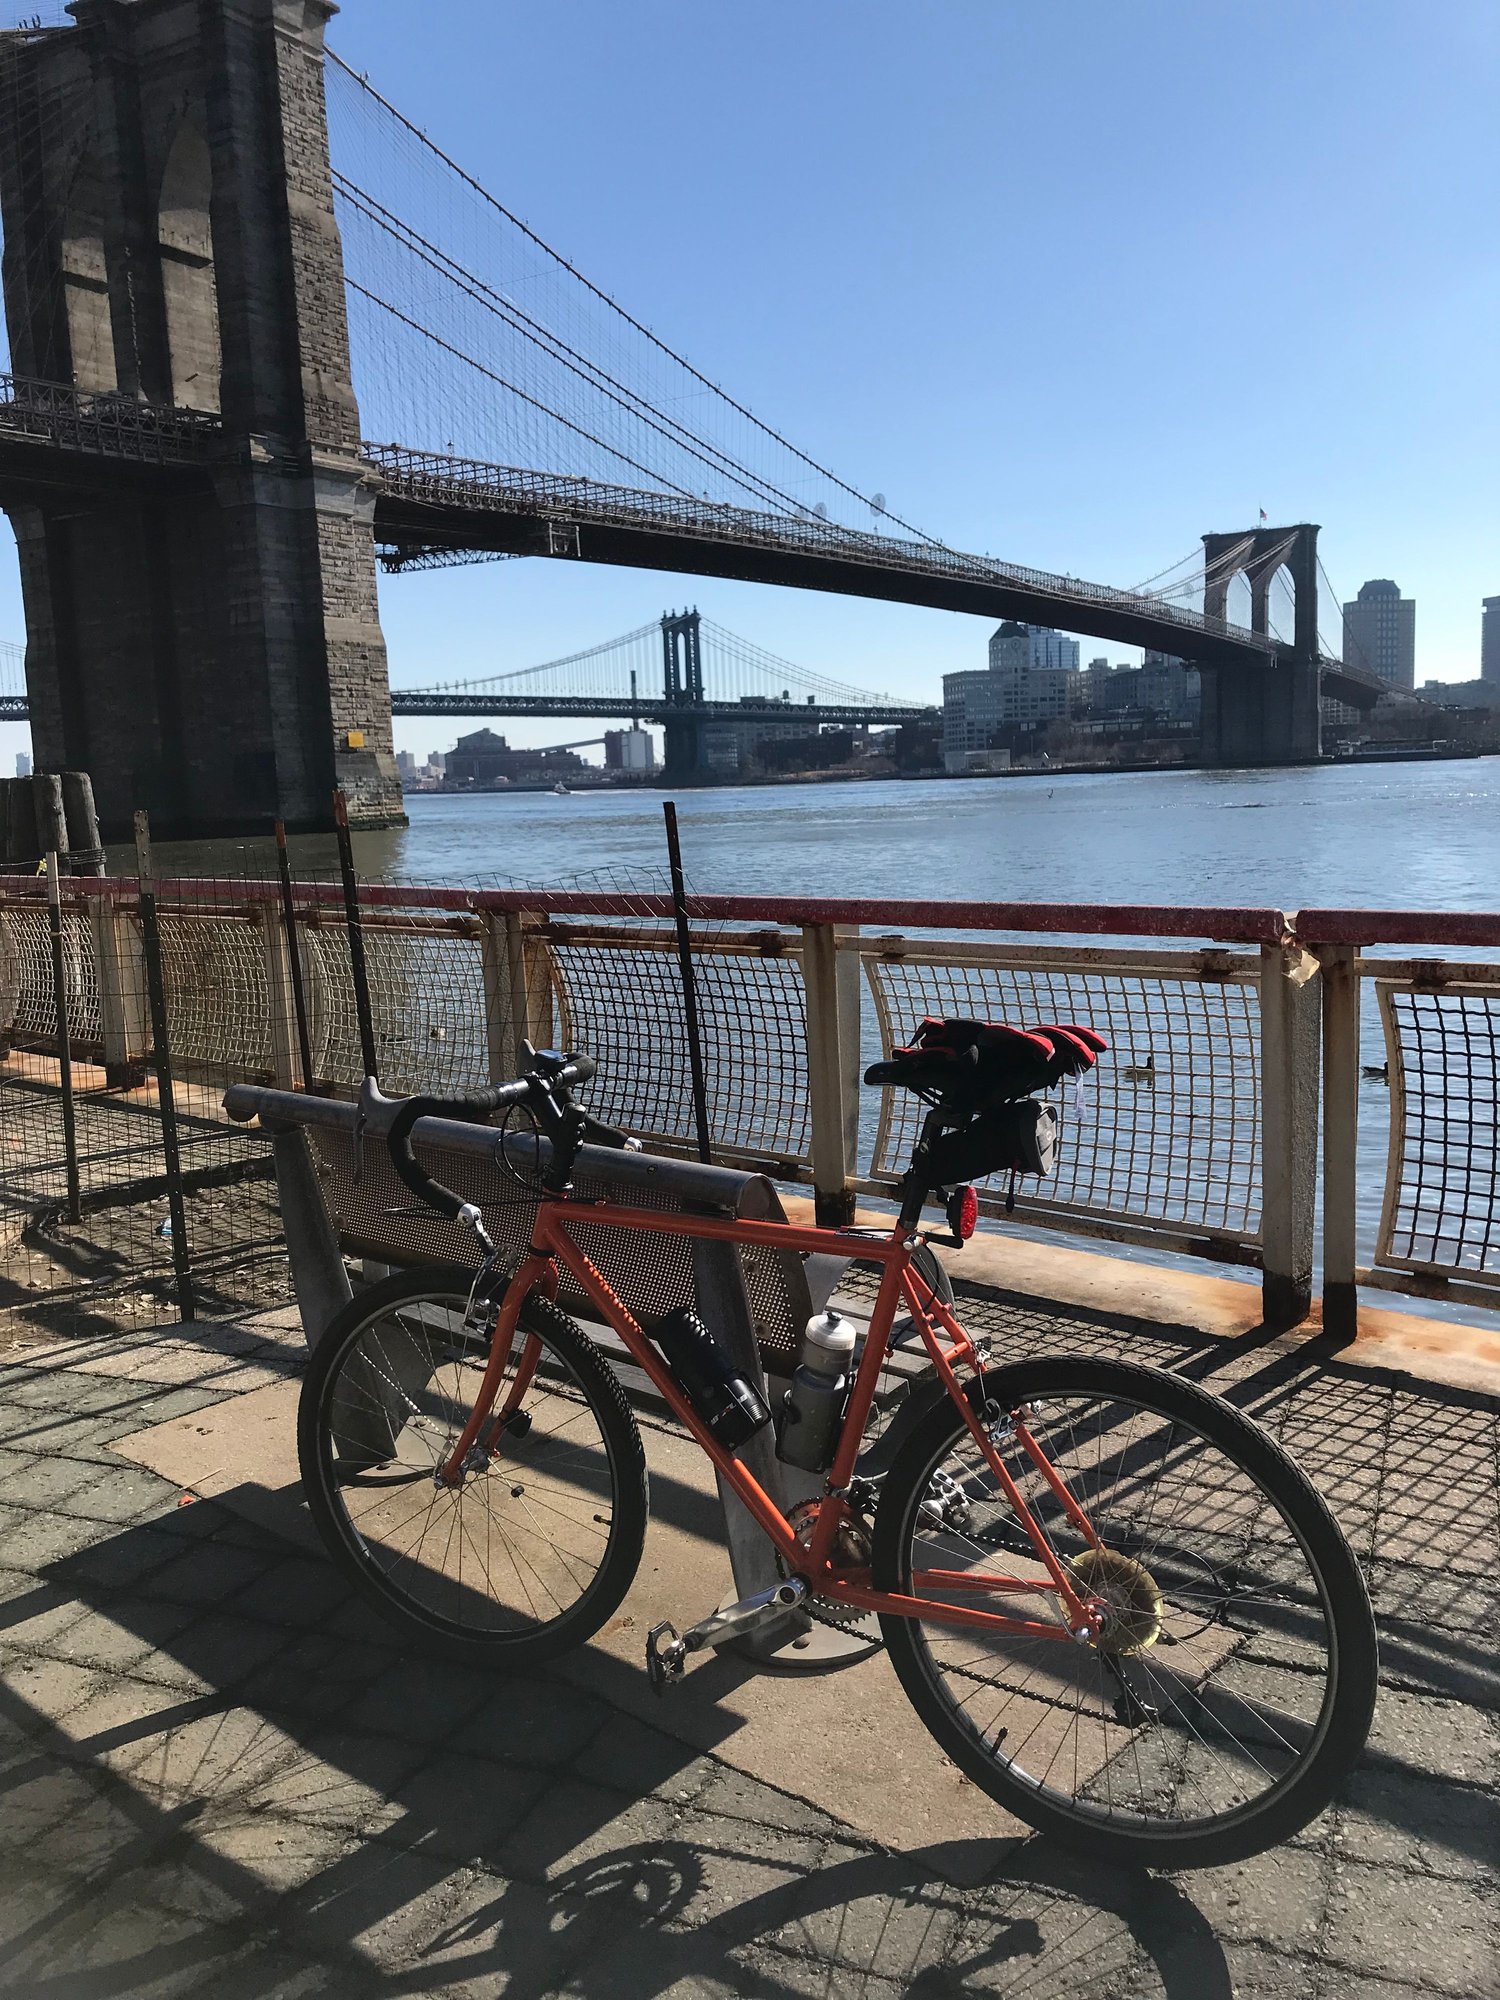
Graveler goes to nyc

Lake mohawk NJ
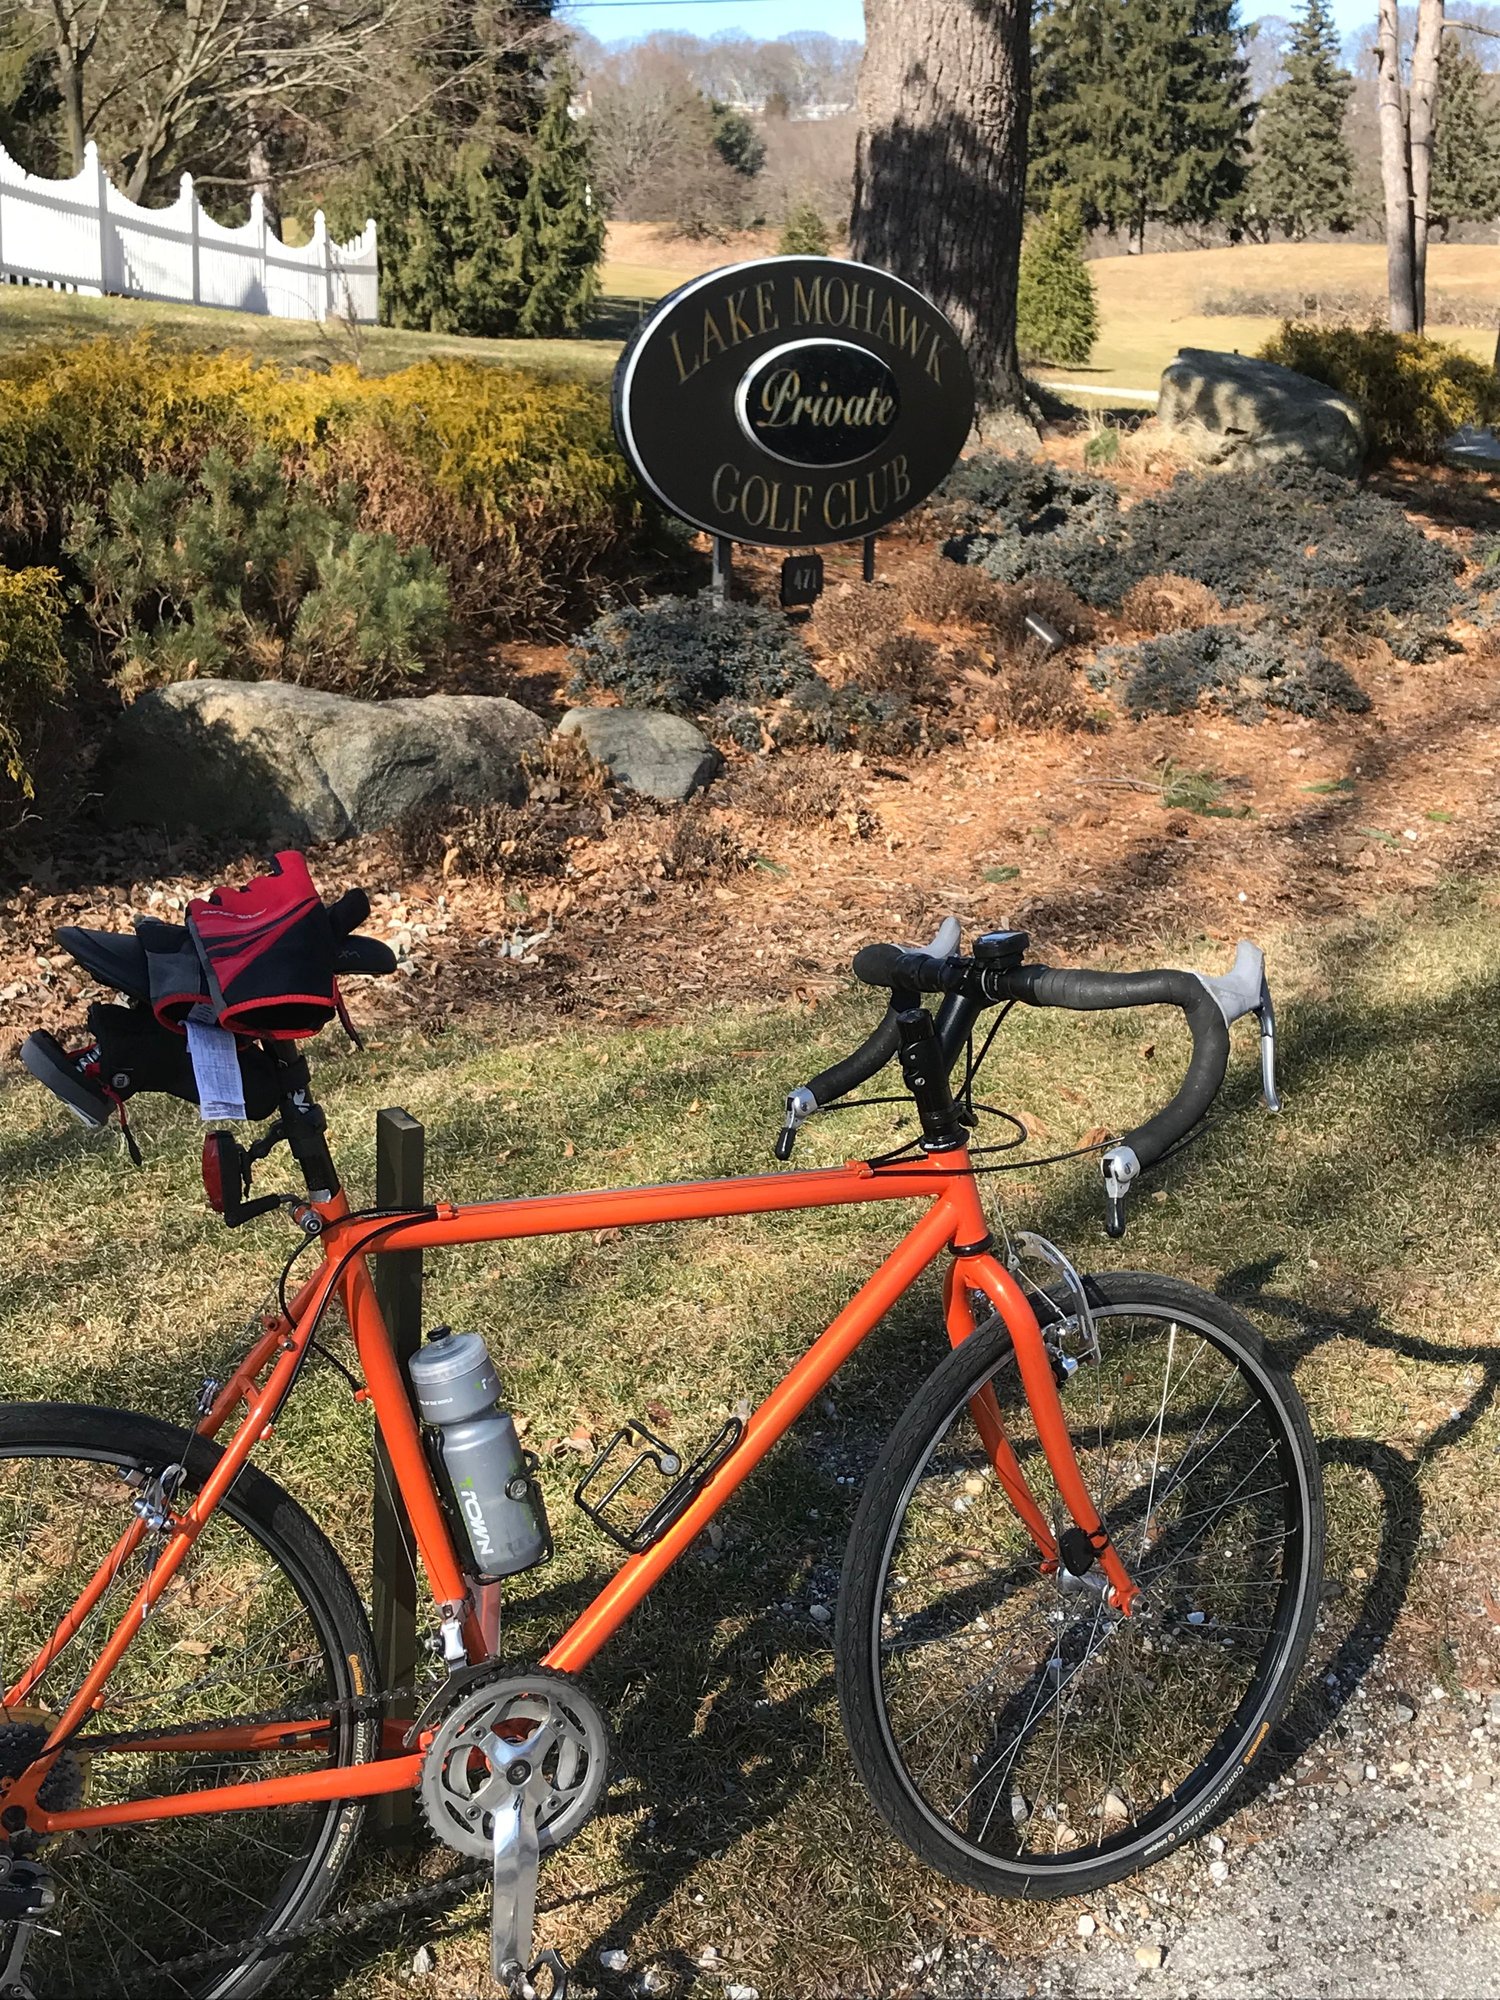
Lmcc golf
03-08-19, 09:02 AM
#40
Senior Member
I have had the rust issue on another blued bike before around the BB where water pooled and have in the past used spray lacquer and epoxy clear coat. The lacquer seems too fragile but the clear coat appears good. However, I find spraying a bike after lots of rubbing to create a patina to be wrong some how. Just me maybe.
Looking for a more natural alternative I've just finished a vintage rebuild to experiment with boiled linseed oil as a protective coating and am really happy with that result. I intend to treat this frame with it pretty quick.
Looking for a more natural alternative I've just finished a vintage rebuild to experiment with boiled linseed oil as a protective coating and am really happy with that result. I intend to treat this frame with it pretty quick.
Great project - very creative with the gun barrel bluing and stencils!
Re: boiled linseed oil....this is also a good idea. Before cars were manufactured using double-sided galvanized steel, road salt was a car body killer. To combat this my father and I would thin BLO with turpentine and then use a simple spray bottle to apply it to the inside of doors, the entire underside of the car, brake lines, gas line, suspension parts, etc. It would drip and smell for about a week, but then form a protective shell - worked well especially after a few applications.
How did you apply the BLO and were there any issues with drips, etc.?
Thanks.
03-08-19, 09:43 AM
#41
Senior Member
Thread Starter
Join Date: Sep 2015
Location: Left Coast, Canada
Posts: 5,126
Mentioned: 24 Post(s)
Tagged: 0 Thread(s)
Quoted: 2236 Post(s)
Liked 1,314 Times
in
707 Posts
Great project - very creative with the gun barrel bluing and stencils!
Re: boiled linseed oil....this is also a good idea. Before cars were manufactured using double-sided galvanized steel, road salt was a car body killer. To combat this my father and I would thin BLO with turpentine and then use a simple spray bottle to apply it to the inside of doors, the entire underside of the car, brake lines, gas line, suspension parts, etc. It would drip and smell for about a week, but then form a protective shell - worked well especially after a few applications.
How did you apply the BLO and were there any issues with drips, etc.?
Thanks.
Re the BLO. I painted it on using a brush and left it but it dried to thickly and created wrinkles. I think I got carried away and tried to create one thick coat instead of several thinner coats. To correct I re wetted the area and wiped it thinner. The next experiment will be painting again by brush but then wiping off the excess with a lint free cloth.
03-08-19, 09:57 AM
#42
Senior Member
Thanks
Re the BLO. I painted it on using a brush and left it but it dried to thickly and created wrinkles. I think I got carried away and tried to create one thick coat instead of several thinner coats. To correct I re wetted the area and wiped it thinner. The next experiment will be painting again by brush but then wiping off the excess with a lint free cloth.
Re the BLO. I painted it on using a brush and left it but it dried to thickly and created wrinkles. I think I got carried away and tried to create one thick coat instead of several thinner coats. To correct I re wetted the area and wiped it thinner. The next experiment will be painting again by brush but then wiping off the excess with a lint free cloth.
I have a high-pressure sprayer that would certainly atomize it, but there could be safety issues re: volatility and static electricity - and cleaning the sprayer would create more mess.
Very cool bike - you have given some BF members a chance to copy and/or build upon your ideas.

