


Inexpensive Studio Photography Setup
 01-18-24, 09:23 AM
#1

My Workshop = Happy Place
Thread Starter

Join Date: Aug 2023
Location: Norwalk, CT
Posts: 88
Bikes: Schwinns, and many others.
Mentioned: 5 Post(s)
Tagged: 0 Thread(s)
Quoted: 42 Post(s)
Liked 224 Times
in
56 Posts
Inexpensive Studio Photography Setup
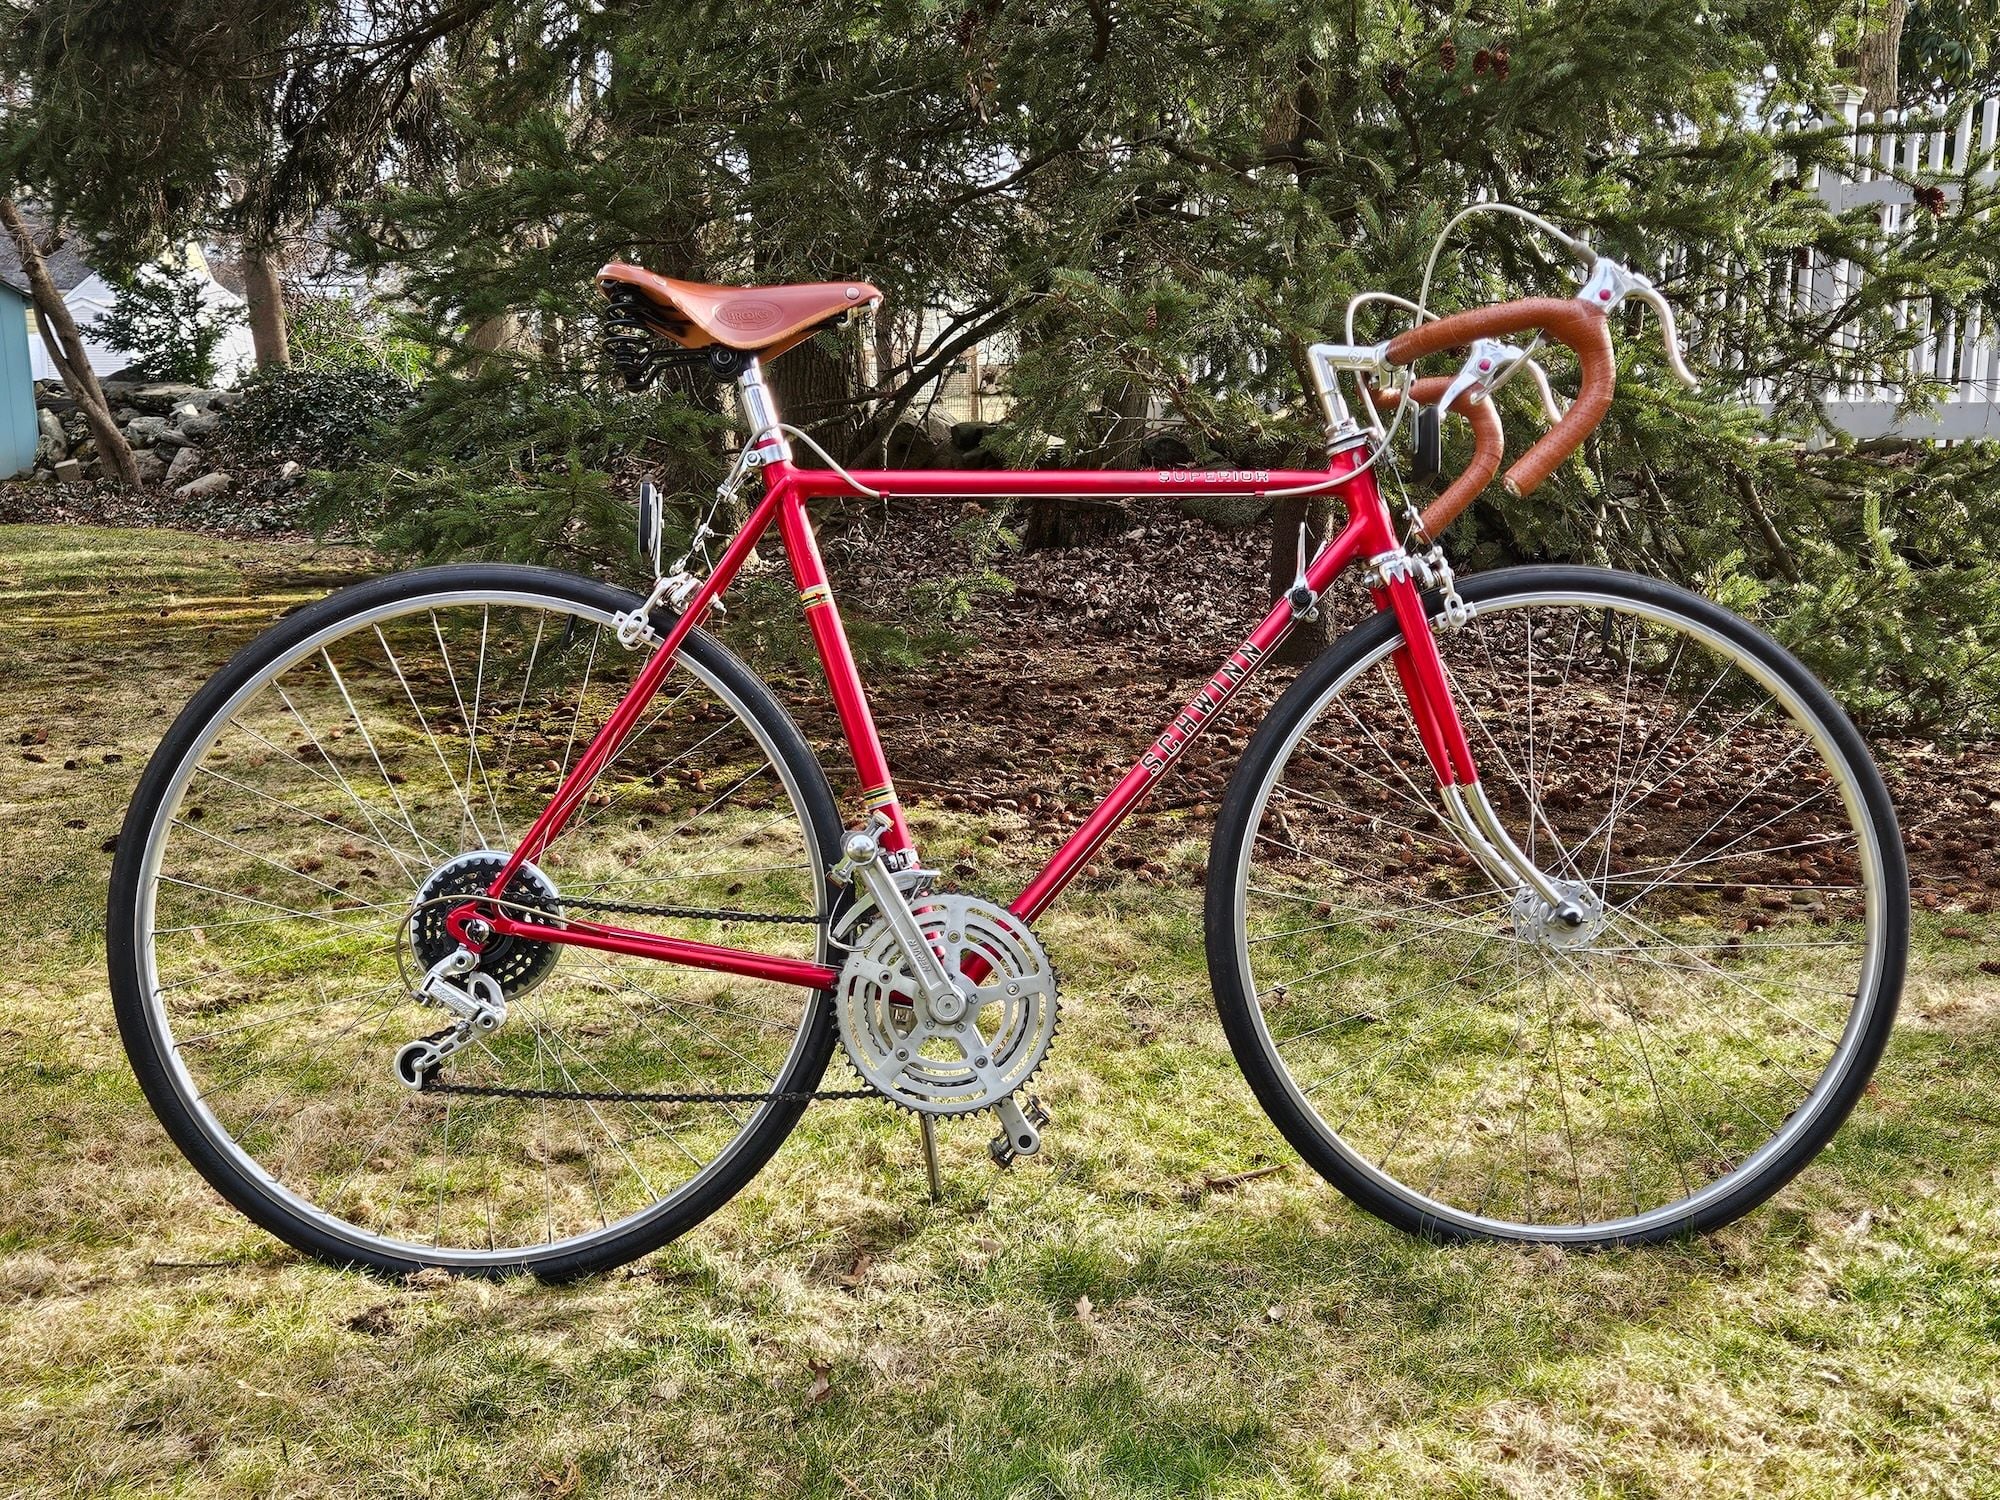
I have been enjoying myself immensely in the past year restoring mostly Chicago-era Schwinns.
Like you, I like to share my hard work and love for bikes. ALL bikes.
I'm a professional photographer in a niche market: Handmade Custom Knives. Specialized, shiny, varied, and potentially dangerous. Sound familiar?
When it came time to reveal my bikes I wanted *better* than a clear cell-phone shot. We ALL can do that reasonably well.
Initially I tried suspending a rudimentary white painter's drop cloth at first, with lackluster results. Next, I found an INEXPENSIVE cloth 10'x8' backdrop on Amazon for less than $20.
It has a pocket to accept a holding bar, which a long piece of PVC would do just fine. I made a frame for this out in my driveway with a wooden base. Cheap. However, the SLIGHTEST breeze would try to topple it. Frustrating.
Then I took the long bar and suspended it in my basement, where I DO my restorations. I already had good side lighting (courtesy of Lowes and Harbor Freight 4' LED shop lights.) I added one more directly over the bike.
Additional fill lighting provided by large WHITE posterboard reflectors.
Here are a few shots, and here are my setup(s). As is the case with ALL great photography, it's more about the lighting and positioning than the camera.
Outdoor and indoor setups with black backdrop:
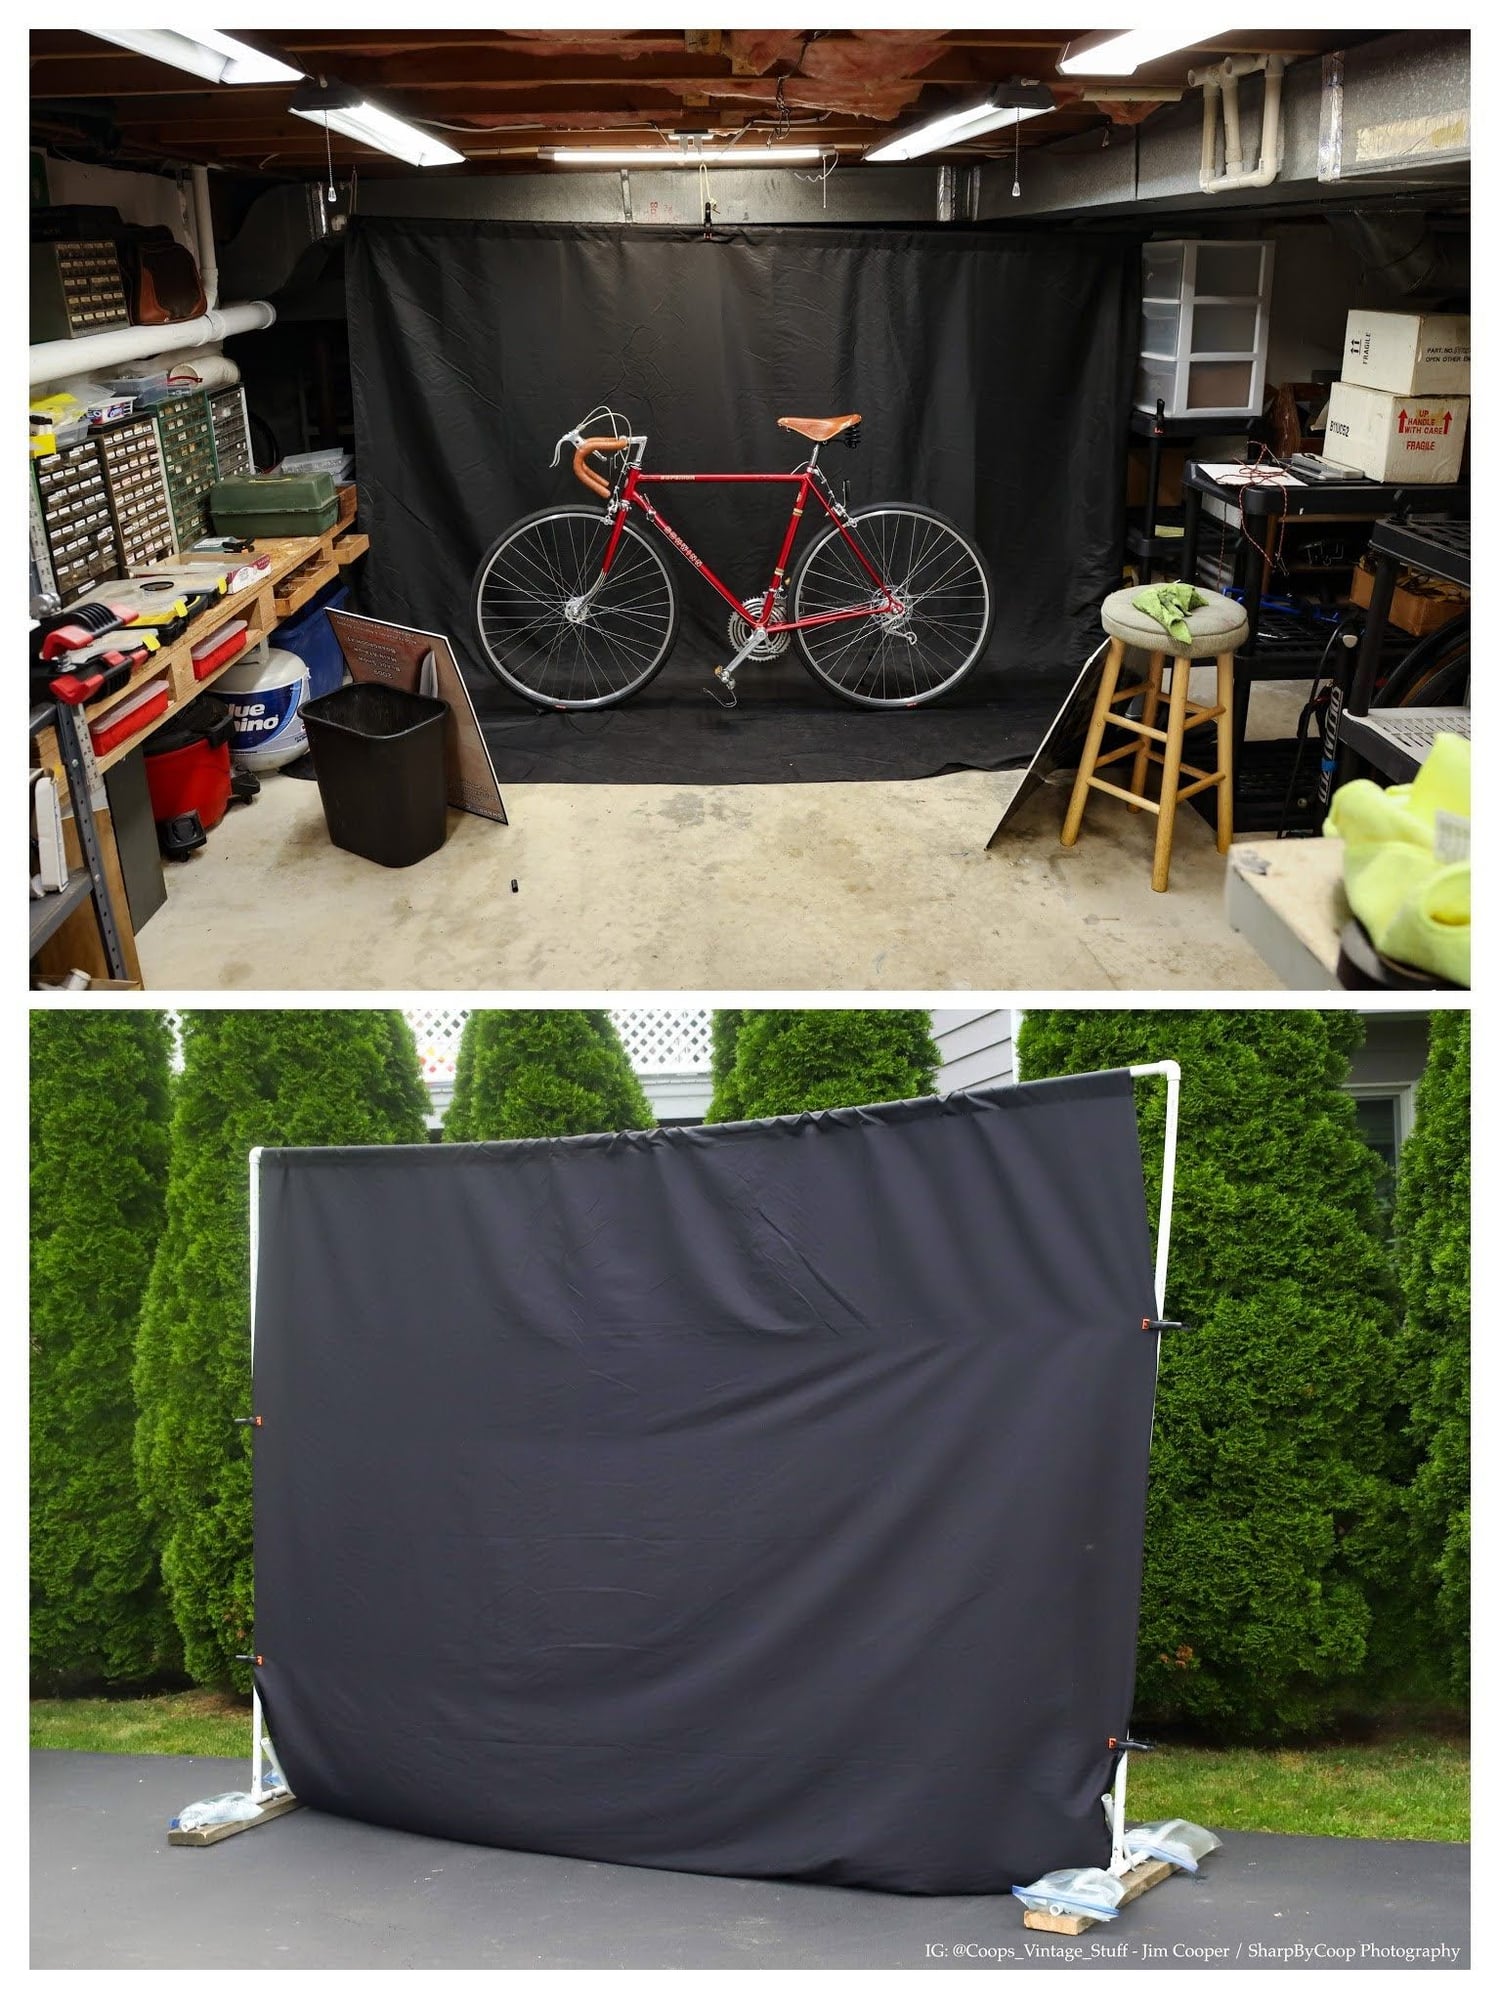
Here is how the OUTDOOR lighting came out:
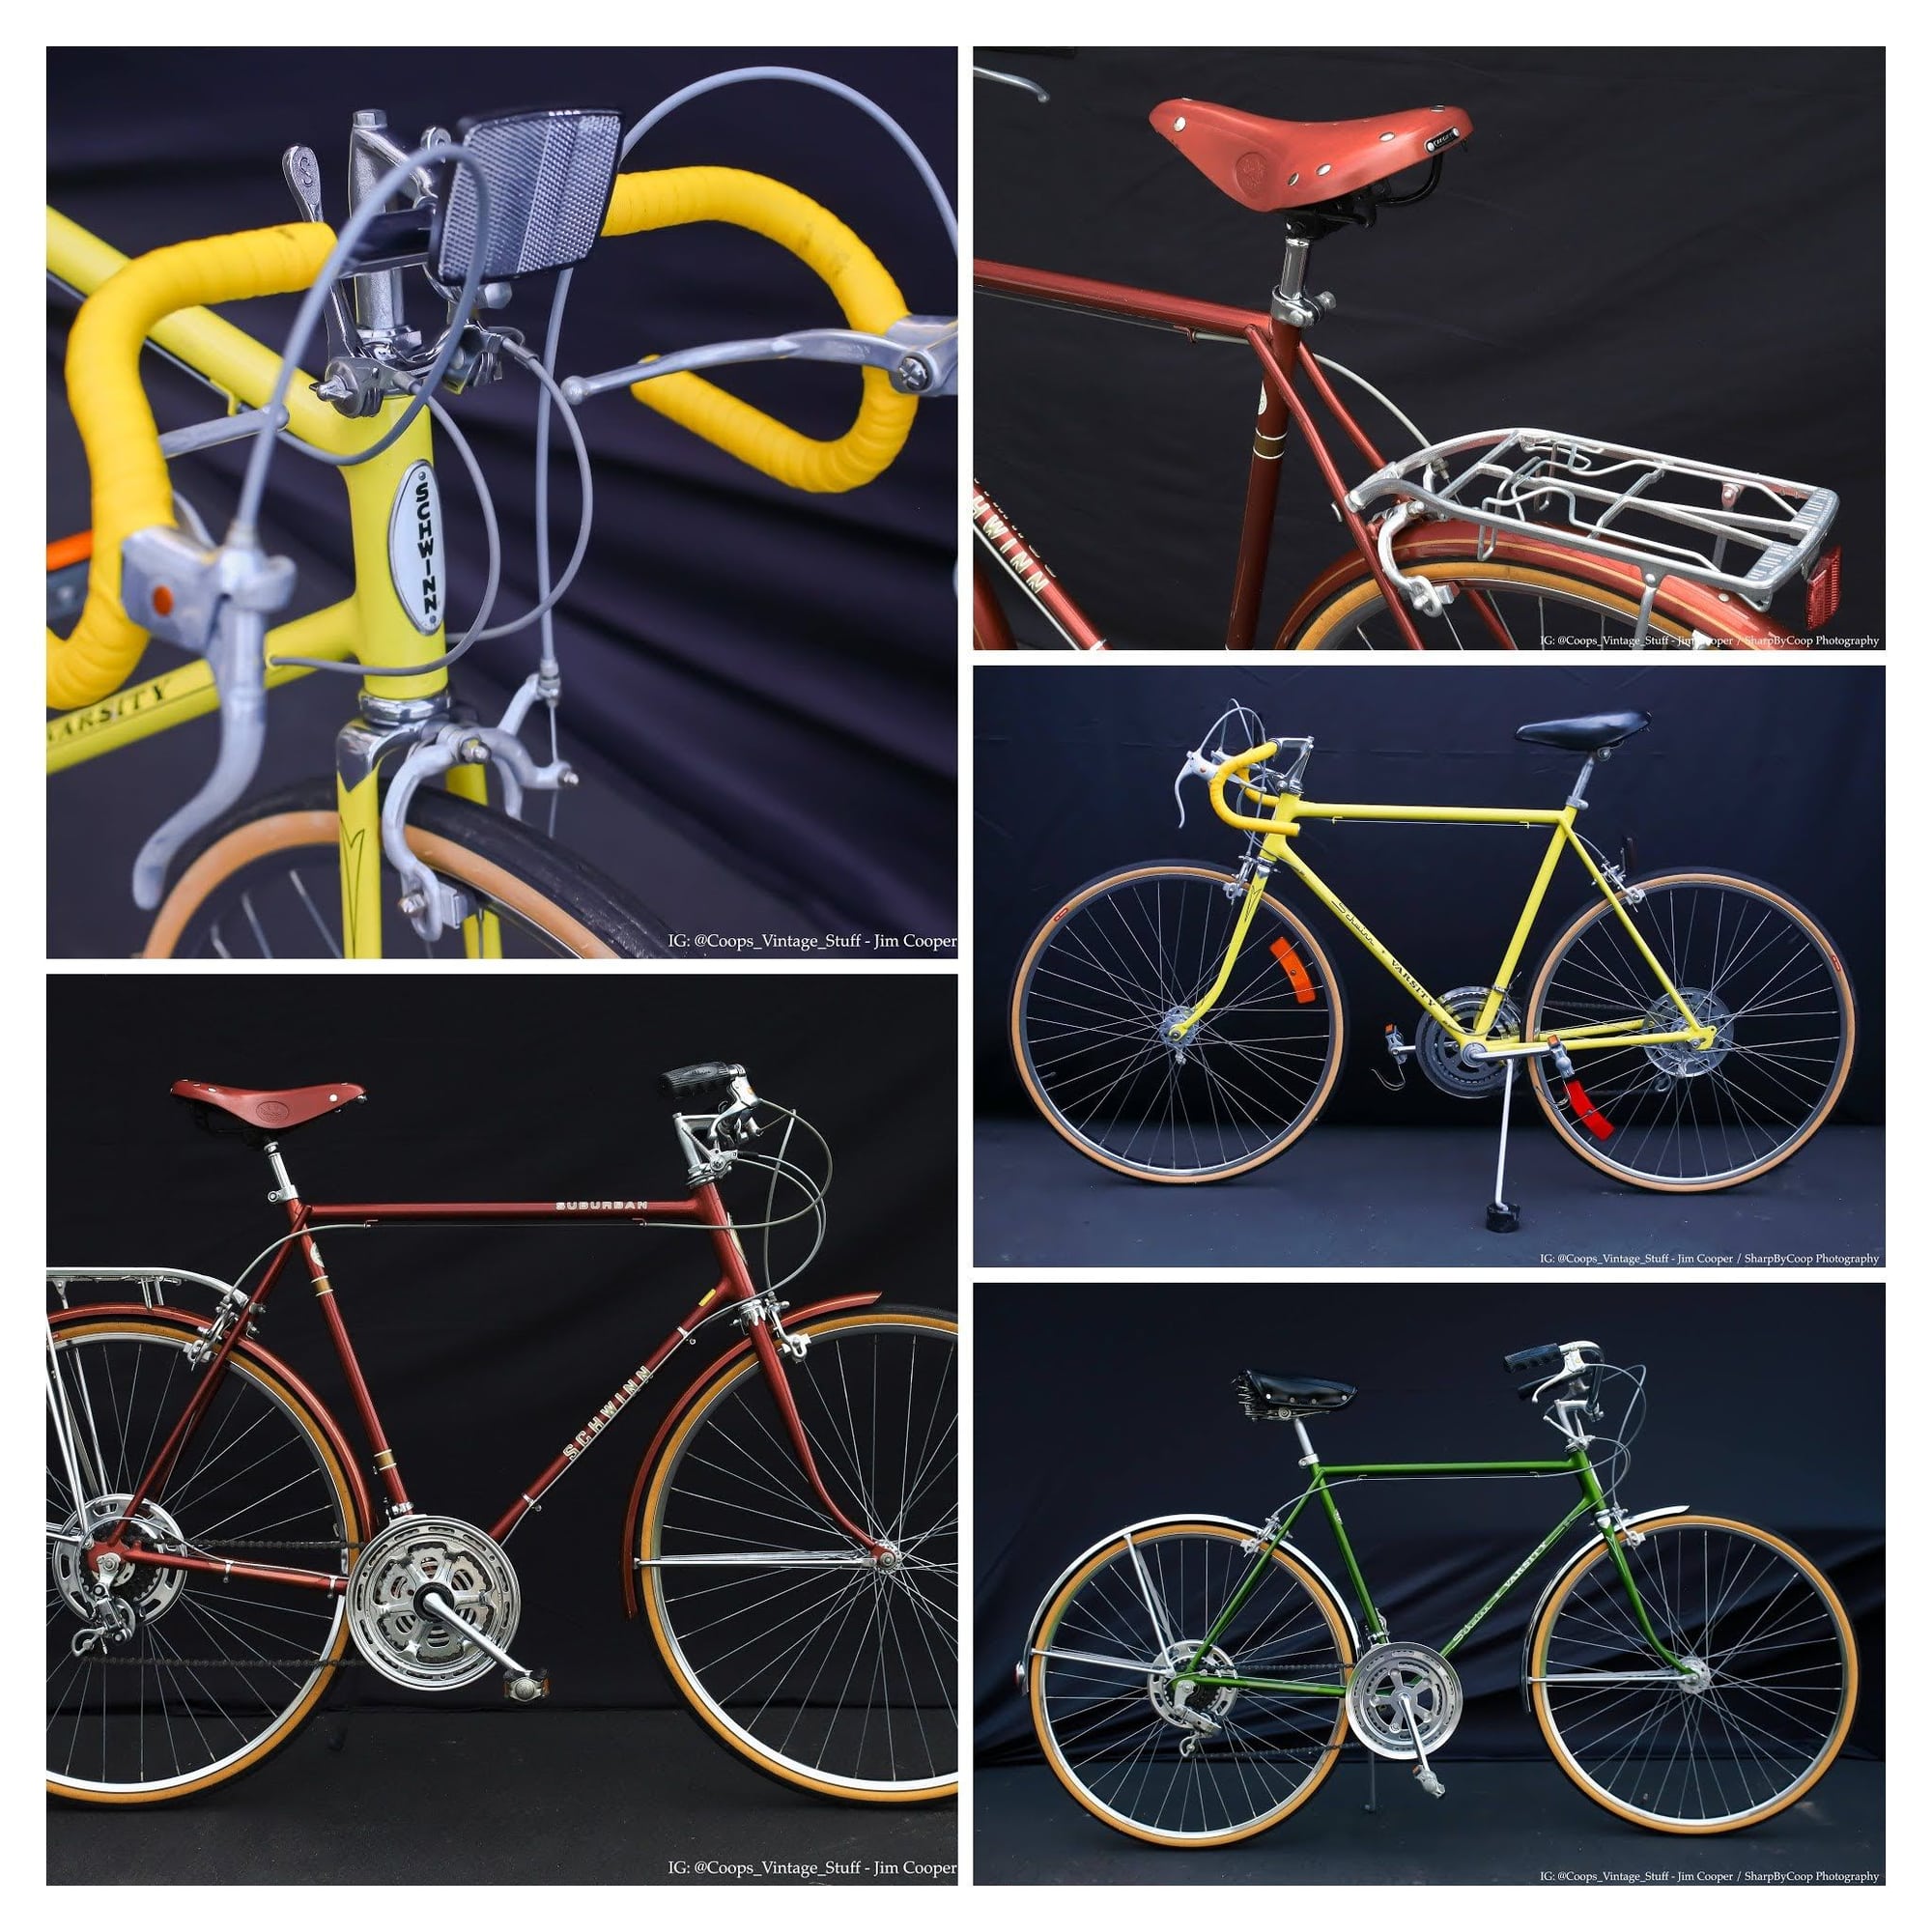
Here are the images from my indoor setup:
There are slight differences, and I like the consistency and ease of my indoor setup better now. You may not have this space.
My initial attempt with a light background is disappointing comparatively. Note the small quick attach-to-axle sidestand I use to hold them nearly upright.
My Camera: EOS R5 Mirrorless camera. Canon Telephoto 24/105 zoom lens, handheld 1/125sec, f-8 f-stop with at 2500 ISO (indoors).
ANY Good camera will suffice (including a cell phone!)
Yes, I edit in a program (Adobe Camera Raw) to make the darks darker and the brights brighter. A time-honored photographer's toolkit is editing.
I post this in case you wish to extend your skillsets. There are MANY other methods and setups, and I am a beginner at THIS form of photography, so your tips will guide me, too. I'm NOT an authority.
See more examples: My Vintage Restoration Gallery: https://www.knifegallery.com/Vintage%20Stuff/index.html
Thanks for viewing! Jim Cooper
Like you, I like to share my hard work and love for bikes. ALL bikes.
I'm a professional photographer in a niche market: Handmade Custom Knives. Specialized, shiny, varied, and potentially dangerous. Sound familiar?
When it came time to reveal my bikes I wanted *better* than a clear cell-phone shot. We ALL can do that reasonably well.
Initially I tried suspending a rudimentary white painter's drop cloth at first, with lackluster results. Next, I found an INEXPENSIVE cloth 10'x8' backdrop on Amazon for less than $20.
It has a pocket to accept a holding bar, which a long piece of PVC would do just fine. I made a frame for this out in my driveway with a wooden base. Cheap. However, the SLIGHTEST breeze would try to topple it. Frustrating.
Then I took the long bar and suspended it in my basement, where I DO my restorations. I already had good side lighting (courtesy of Lowes and Harbor Freight 4' LED shop lights.) I added one more directly over the bike.
Additional fill lighting provided by large WHITE posterboard reflectors.
Here are a few shots, and here are my setup(s). As is the case with ALL great photography, it's more about the lighting and positioning than the camera.
Outdoor and indoor setups with black backdrop:
Here is how the OUTDOOR lighting came out:
Here are the images from my indoor setup:
There are slight differences, and I like the consistency and ease of my indoor setup better now. You may not have this space.
My initial attempt with a light background is disappointing comparatively. Note the small quick attach-to-axle sidestand I use to hold them nearly upright.
My Camera: EOS R5 Mirrorless camera. Canon Telephoto 24/105 zoom lens, handheld 1/125sec, f-8 f-stop with at 2500 ISO (indoors).
ANY Good camera will suffice (including a cell phone!)
Yes, I edit in a program (Adobe Camera Raw) to make the darks darker and the brights brighter. A time-honored photographer's toolkit is editing.
I post this in case you wish to extend your skillsets. There are MANY other methods and setups, and I am a beginner at THIS form of photography, so your tips will guide me, too. I'm NOT an authority.
See more examples: My Vintage Restoration Gallery: https://www.knifegallery.com/Vintage%20Stuff/index.html
Thanks for viewing! Jim Cooper
Last edited by SharpByCoop; 01-18-24 at 09:28 AM.

Likes For SharpByCoop:
01-18-24, 09:54 AM
#2
Senior Member
Join Date: Jul 2008
Location: 25 miles northwest of Boston
Posts: 29,552
Bikes: Bottecchia Sprint, GT Timberline 29r, Marin Muirwoods 29er, Trek FX Alpha 7.0
Mentioned: 112 Post(s)
Tagged: 0 Thread(s)
Quoted: 5224 Post(s)
Liked 3,584 Times
in
2,344 Posts
SharpByCoop
nice job. nice & clean. I too have photo'd collectable knives. inherited my Dad's collection. they are a challenge to light
nice job. nice & clean. I too have photo'd collectable knives. inherited my Dad's collection. they are a challenge to light
01-18-24, 11:13 AM
#3
Thread derailleur
Join Date: Mar 2004
Location: Glendora, CA
Posts: 643
Bikes: Merlin Extralight '94 & Cannondale Supersix '15
Mentioned: 0 Post(s)
Tagged: 0 Thread(s)
Quoted: 367 Post(s)
Liked 461 Times
in
263 Posts
Superb setup and shots. The black backdrop adds considerable dramatic effect.
Way back when, I did a fair share of amateur studio work with female models. Gorgeous ladies, in fact.
Still own all that 80's lighting equipment and film cameras! Except for a nice white roll of paper backdrop.
I suspended that roll from two tripods using a stiff eight foot wooden rod. The tripods could extend ten-feet high.
Think paper towel dispenser, which allowed me to pull fresh seamless paper out for my photos.
Imagine this working well for bicycle photography. They probably sell paper rolls in other colors.
Yes, get the lighting right and everything falls into place. And bicycles are far less fussy than people!
Likes For roadcrankr:
01-18-24, 04:00 PM
#4
-------
Join Date: Jul 2020
Location: Tejas
Posts: 12,795
Mentioned: 2 Post(s)
Tagged: 0 Thread(s)
Quoted: 9653 Post(s)
Liked 6,365 Times
in
3,505 Posts
As a photography hobbyist with a long shooting history, I do not care for the folds, wrinkles and other details of the drop showing as much as they do in those pictures. I would move the focal point out about 10' from the backdrop, and then select an aperture that puts it out of focus. I would also get a tripod, lower your ISO to 200, reduce your aperture from f8 to f4 (which should be sufficient with your 24-105 - if like mine it's sharp wide open), and be prepared to use long shutter speeds. This shows how much better the background is when there is separation between the subject and the black background (granted it's easier to accomplish with small items due to space constraints):

If you have some money to spend, you could invest in some Alien Bee or other strobes and shoot down through a white cloth, essentially make yourself a light box.
If you want to shoot into a white background, you really have to very powerfully illuminate the background to blow it out, kind of like this:
Likes For Mojo31:
01-18-24, 05:01 PM
#5
Thread derailleur
Join Date: Mar 2004
Location: Glendora, CA
Posts: 643
Bikes: Merlin Extralight '94 & Cannondale Supersix '15
Mentioned: 0 Post(s)
Tagged: 0 Thread(s)
Quoted: 367 Post(s)
Liked 461 Times
in
263 Posts
Evidently, Mojo31 missed the part where the OP stated he works as a professional photographer.
Likes For roadcrankr:
01-18-24, 07:49 PM
#6
My Workshop = Happy Place
Thread Starter
Join Date: Aug 2023
Location: Norwalk, CT
Posts: 88
Bikes: Schwinns, and many others.
Mentioned: 5 Post(s)
Tagged: 0 Thread(s)
Quoted: 42 Post(s)
Liked 224 Times
in
56 Posts
'Inexpensive Studio Photography Setup' My objective for the masses: Emphasis on Inexpensive.
You have a keen eye. I don't love them, yet the complexities involved in removing them involve more than my intention for here. I wanted to offer a repeatable setup for the the 'ordinary' member with less skills.
The outside setup with the perimeter frame attempted to achieve that by pulling it taught. It was hard. I decided it was more important to emphasize the subject than be too concerned with the neutral background folds.
If I moved that far away from the black background, I would need a background about twice the size, and a space twice the width. Not happening. But... I understand.
Shooting at ISO 2500 is completely intentional so I DON'T have to use long shutter speeds and a tripod. The viewer cannot see the 'grain' a high ISO includes. They CAN handhold at 1/125th of a second like I did for clarity.
Tripods are advanced and CLUMSY and require a lot more setup and adjustment. I am WELL AWARE of the usage. I have made a living and grown to worldwide stature for 20 years largely because I can move quickly and not be hindered by a tripod.
That and, again, this largely places this out of the realm of the hobbiest members here.
This is true in this case. GREAT shot! But showing me a macro image and discussing the possibilities applying to an object 10 feet away is Apples and Oranges.
Ummmm...... right next to my basement shop is my actual Studio. With strobes, lightboxes, adjustable table, light tent, mirrors and more.
Gotcha on that. That crummy shot of the yellow Varsity on the tarp was actually lit by strobes last Spring. I hated it so I kept learning. You are correct that's a whole nuther area with VERY specialized studio setup.
The irony that you would uses an example photo of a knife to guide me is not lost.
I'll point you towards my body of better work, or.... Just Google me.
SharpByCoop Photography
I want to remind ANYONE that this is an achievable setup / tutorial for occasional bike captures, beyond cell phones outside against a wall. Goal met.
The outside setup with the perimeter frame attempted to achieve that by pulling it taught. It was hard. I decided it was more important to emphasize the subject than be too concerned with the neutral background folds.
I would move the focal point out about 10' from the backdrop, and then select an aperture that puts it out of focus.
I would also get a tripod, lower your ISO to 200, reduce your aperture from f8 to f4 (which should be sufficient with your 24-105 - if like mine it's sharp wide open), and be prepared to use long shutter speeds.
Tripods are advanced and CLUMSY and require a lot more setup and adjustment. I am WELL AWARE of the usage. I have made a living and grown to worldwide stature for 20 years largely because I can move quickly and not be hindered by a tripod.
That and, again, this largely places this out of the realm of the hobbiest members here.
This shows how much better the background is when there is separation between the subject and the black background (granted it's easier to accomplish with small items due to space constraints):
If you have some money to spend, you could invest in some Alien Bee or other strobes and shoot down through a white cloth, essentially make yourself a light box.
If you want to shoot into a white background, you really have to very powerfully illuminate the background to blow it out, kind of like this:
The irony that you would uses an example photo of a knife to guide me is not lost.
I'll point you towards my body of better work, or.... Just Google me.
SharpByCoop Photography
I want to remind ANYONE that this is an achievable setup / tutorial for occasional bike captures, beyond cell phones outside against a wall. Goal met.
Likes For SharpByCoop:
01-20-24, 11:17 AM
#7
Newbie
Join Date: Oct 2013
Location: Northern Ohio
Posts: 12
Bikes: Trek Verve 2
Mentioned: 0 Post(s)
Tagged: 0 Thread(s)
Quoted: 1 Post(s)
Liked 0 Times
in
0 Posts
You are right. Apparently Mojo31 missed the "reading comprehension" sessions in the third grade. We see this all the time.
02-03-24, 05:57 AM
#8
...
Join Date: Oct 2021
Location: Whitestone and Rensselaerville, New York
Posts: 1,518
Bikes: Bicycles? Yup.
Mentioned: 8 Post(s)
Tagged: 0 Thread(s)
Quoted: 482 Post(s)
Liked 1,593 Times
in
739 Posts
SharpByCoop Wow, serious knives! That Loveless-style Big Bear...yowsa!
 02-05-24, 09:24 AM
#9
Rider. Wanderer. Creator.

Join Date: May 2007
Location: New Jersey
Posts: 774
Bikes: Bike Friday Pocket Rocket, Cinelli Hobootleg, Zizzo Liberte
Mentioned: 0 Post(s)
Tagged: 0 Thread(s)
Quoted: 394 Post(s)
Liked 781 Times
in
377 Posts
I have been enjoying myself immensely in the past year restoring mostly Chicago-era Schwinns.
Like you, I like to share my hard work and love for bikes. ALL bikes.
I'm a professional photographer in a niche market: Handmade Custom Knives. Specialized, shiny, varied, and potentially dangerous. Sound familiar?
When it came time to reveal my bikes I wanted *better* than a clear cell-phone shot. We ALL can do that reasonably well.
Initially I tried suspending a rudimentary white painter's drop cloth at first, with lackluster results. Next, I found an INEXPENSIVE cloth 10'x8' backdrop on Amazon for less than $20.
It has a pocket to accept a holding bar, which a long piece of PVC would do just fine. I made a frame for this out in my driveway with a wooden base. Cheap. However, the SLIGHTEST breeze would try to topple it. Frustrating.
Then I took the long bar and suspended it in my basement, where I DO my restorations. I already had good side lighting (courtesy of Lowes and Harbor Freight 4' LED shop lights.) I added one more directly over the bike.
Additional fill lighting provided by large WHITE posterboard reflectors.
Here are a few shots, and here are my setup(s). As is the case with ALL great photography, it's more about the lighting and positioning than the camera.
Outdoor and indoor setups with black backdrop:
Here is how the OUTDOOR lighting came out:
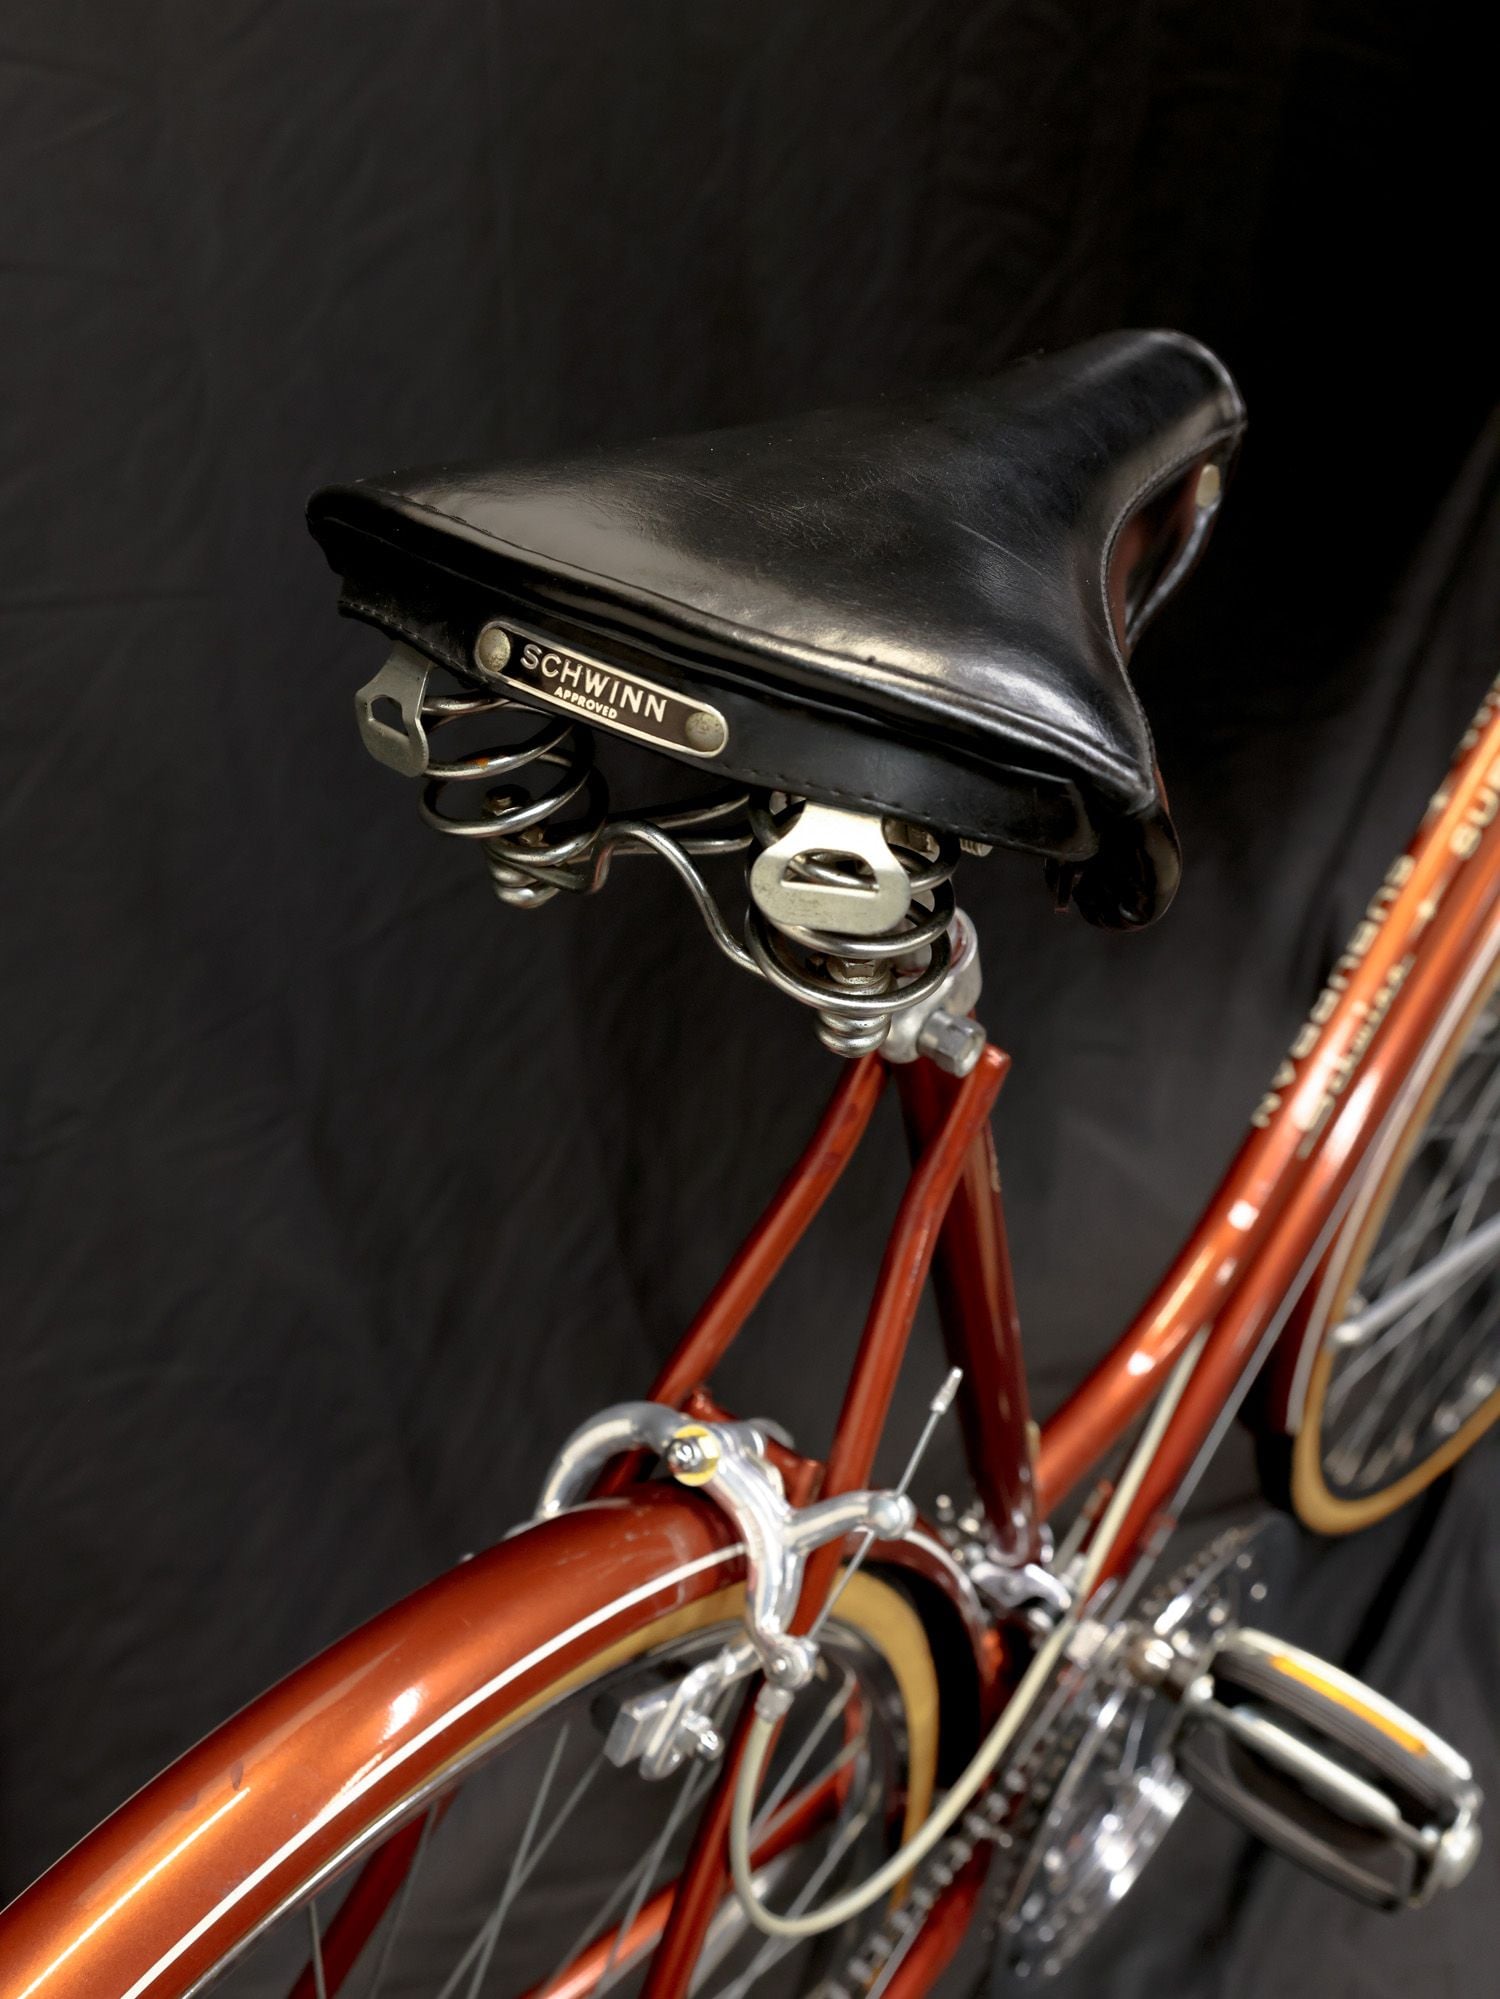
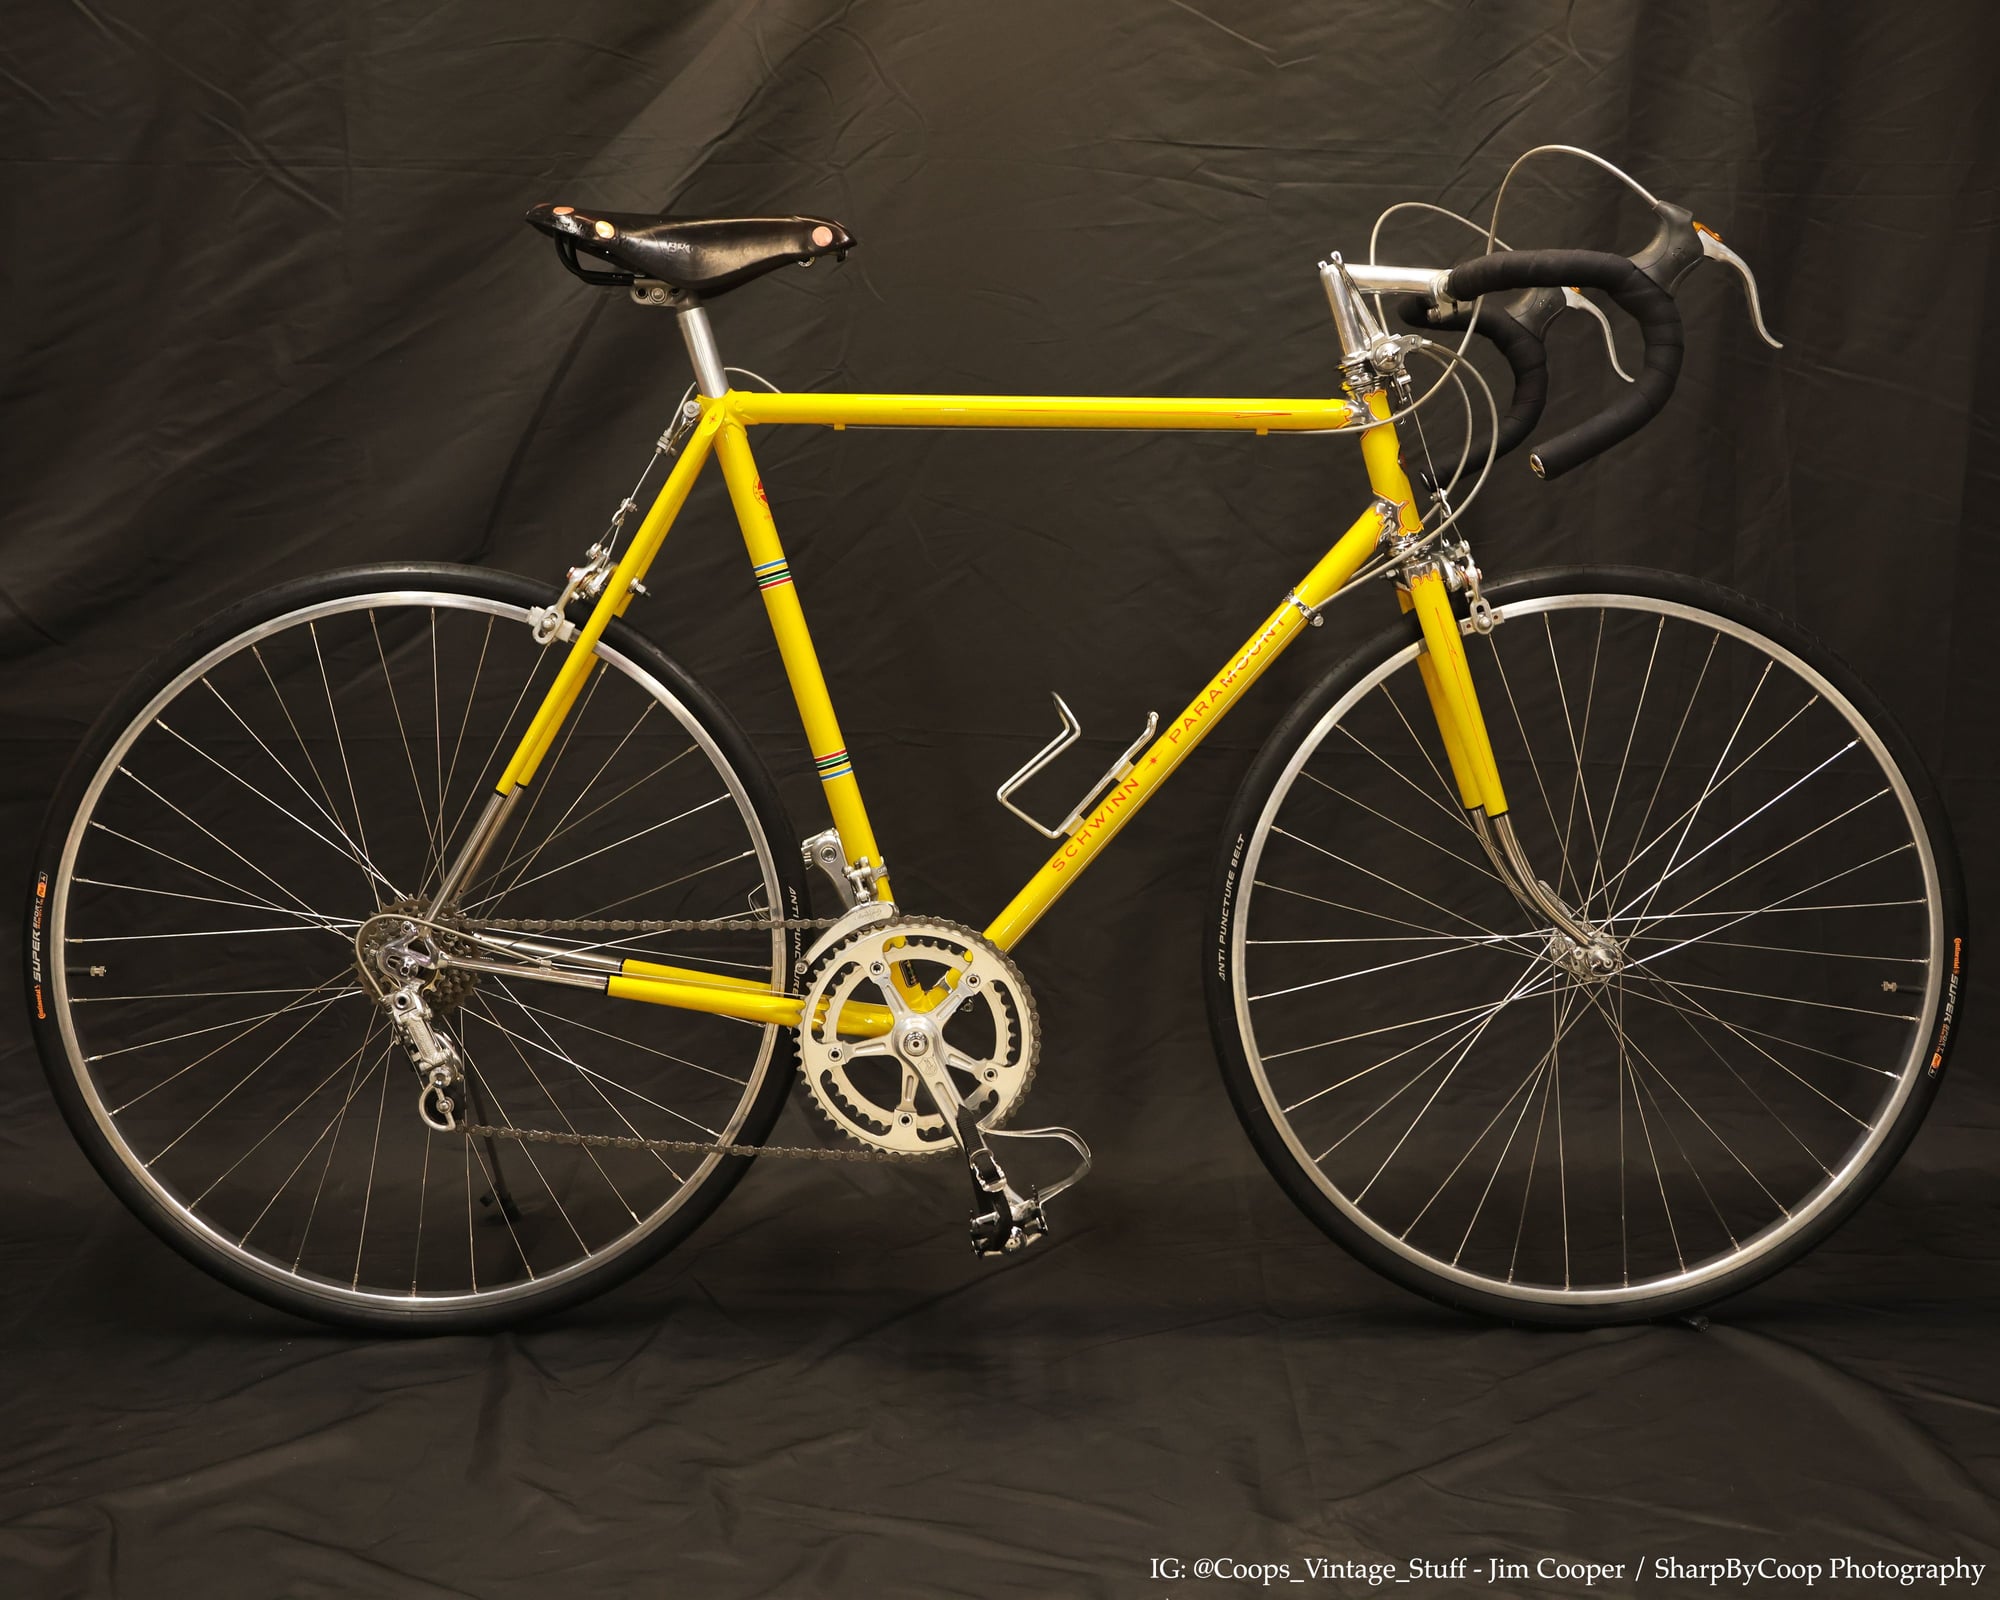
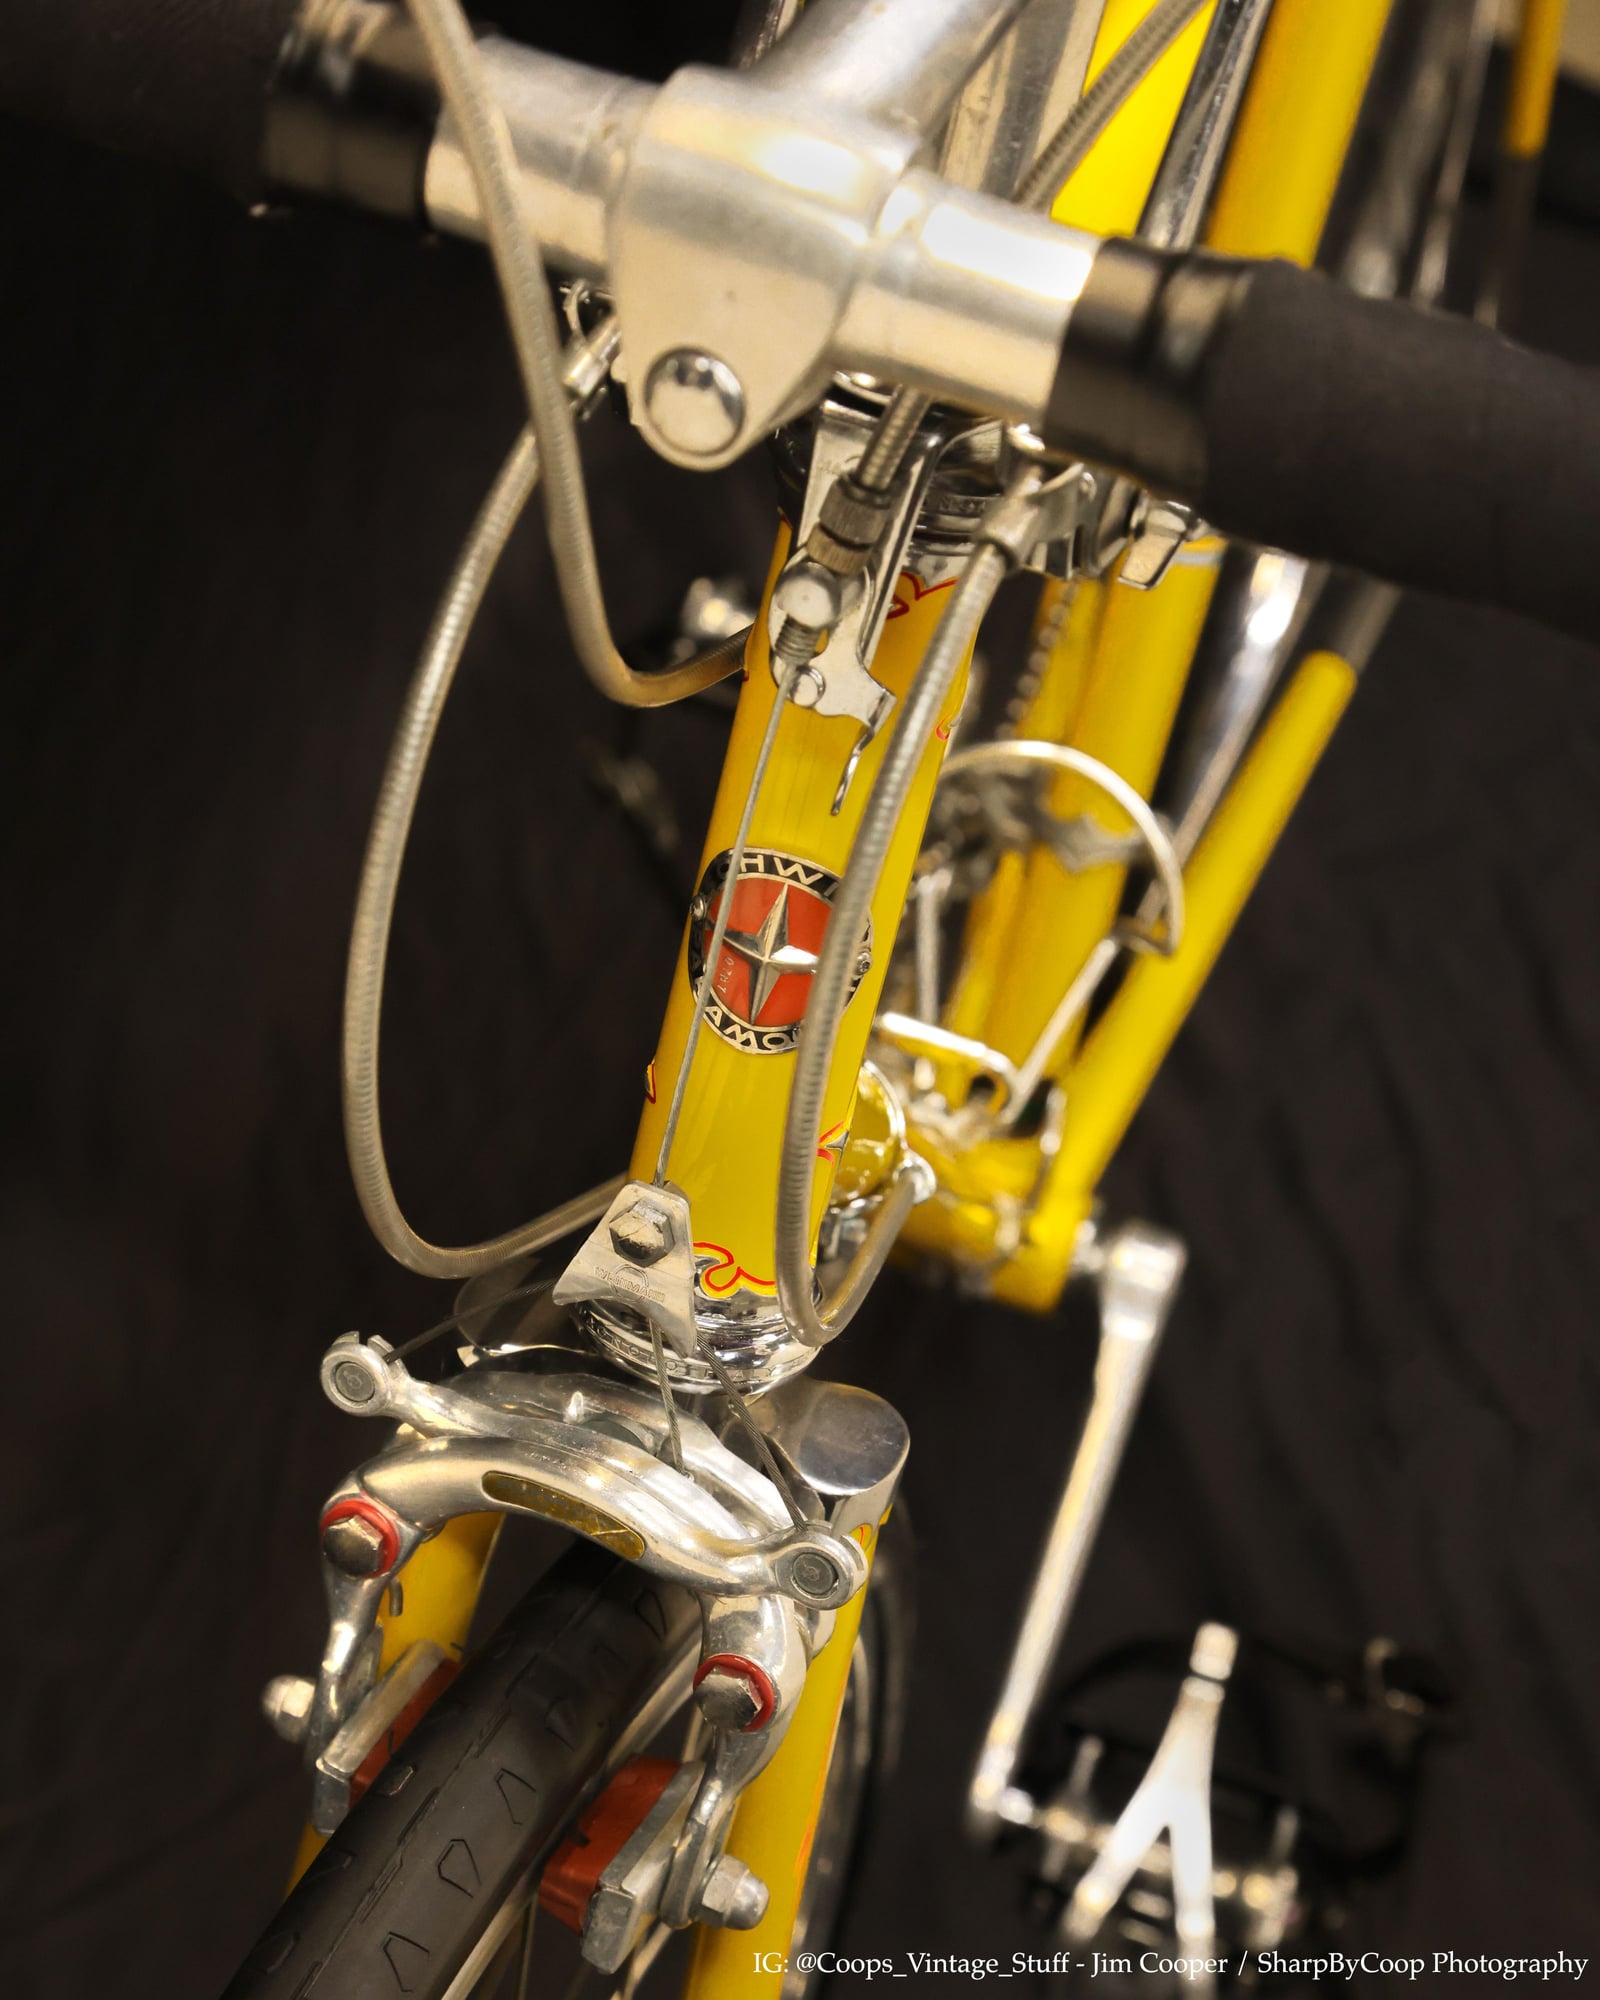
Here are the images from my indoor setup:
There are slight differences, and I like the consistency and ease of my indoor setup better now. You may not have this space.
My initial attempt with a light background is disappointing comparatively. Note the small quick attach-to-axle sidestand I use to hold them nearly upright.
My Camera: EOS R5 Mirrorless camera. Canon Telephoto 24/105 zoom lens, handheld 1/125sec, f-8 f-stop with at 2500 ISO (indoors).
ANY Good camera will suffice (including a cell phone!)
Yes, I edit in a program (Adobe Camera Raw) to make the darks darker and the brights brighter. A time-honored photographer's toolkit is editing.
I post this in case you wish to extend your skillsets. There are MANY other methods and setups, and I am a beginner at THIS form of photography, so your tips will guide me, too. I'm NOT an authority.
See more examples: My Vintage Restoration Gallery: https://www.knifegallery.com/Vintage%20Stuff/index.html
Thanks for viewing! Jim Cooper
Like you, I like to share my hard work and love for bikes. ALL bikes.
I'm a professional photographer in a niche market: Handmade Custom Knives. Specialized, shiny, varied, and potentially dangerous. Sound familiar?
When it came time to reveal my bikes I wanted *better* than a clear cell-phone shot. We ALL can do that reasonably well.
Initially I tried suspending a rudimentary white painter's drop cloth at first, with lackluster results. Next, I found an INEXPENSIVE cloth 10'x8' backdrop on Amazon for less than $20.
It has a pocket to accept a holding bar, which a long piece of PVC would do just fine. I made a frame for this out in my driveway with a wooden base. Cheap. However, the SLIGHTEST breeze would try to topple it. Frustrating.
Then I took the long bar and suspended it in my basement, where I DO my restorations. I already had good side lighting (courtesy of Lowes and Harbor Freight 4' LED shop lights.) I added one more directly over the bike.
Additional fill lighting provided by large WHITE posterboard reflectors.
Here are a few shots, and here are my setup(s). As is the case with ALL great photography, it's more about the lighting and positioning than the camera.
Outdoor and indoor setups with black backdrop:
Here is how the OUTDOOR lighting came out:
Here are the images from my indoor setup:
There are slight differences, and I like the consistency and ease of my indoor setup better now. You may not have this space.
My initial attempt with a light background is disappointing comparatively. Note the small quick attach-to-axle sidestand I use to hold them nearly upright.
My Camera: EOS R5 Mirrorless camera. Canon Telephoto 24/105 zoom lens, handheld 1/125sec, f-8 f-stop with at 2500 ISO (indoors).
ANY Good camera will suffice (including a cell phone!)
Yes, I edit in a program (Adobe Camera Raw) to make the darks darker and the brights brighter. A time-honored photographer's toolkit is editing.
I post this in case you wish to extend your skillsets. There are MANY other methods and setups, and I am a beginner at THIS form of photography, so your tips will guide me, too. I'm NOT an authority.
See more examples: My Vintage Restoration Gallery: https://www.knifegallery.com/Vintage%20Stuff/index.html
Thanks for viewing! Jim Cooper
Note to all about the background and wrinkles - it's much easier to control those aspects of a photograph for small objects like knives, but it becomes much more challenging with just a small increase in size. My ex wife photographed pottery for fellow potters (the kinds of photos you put in portfolios or use to enter and announce juried shows), and photographing a 12" glazed vase was much more difficult than you'd imagine, controlling for seamless backgrounds, shadows, reflections, depth of field, etc.
A bicycle would be on a whole other level. I have photographer friends who photograph cars professionally and would rent studio spaces like this:

There are studios like this built in industrial areas just for pro photographers to rent because creating and maintaining a space like this is not cheap. All the photos that you see on bicycle manufacturer websites and in catalogs and magazines (remember them?!) are shot in spaces like this.
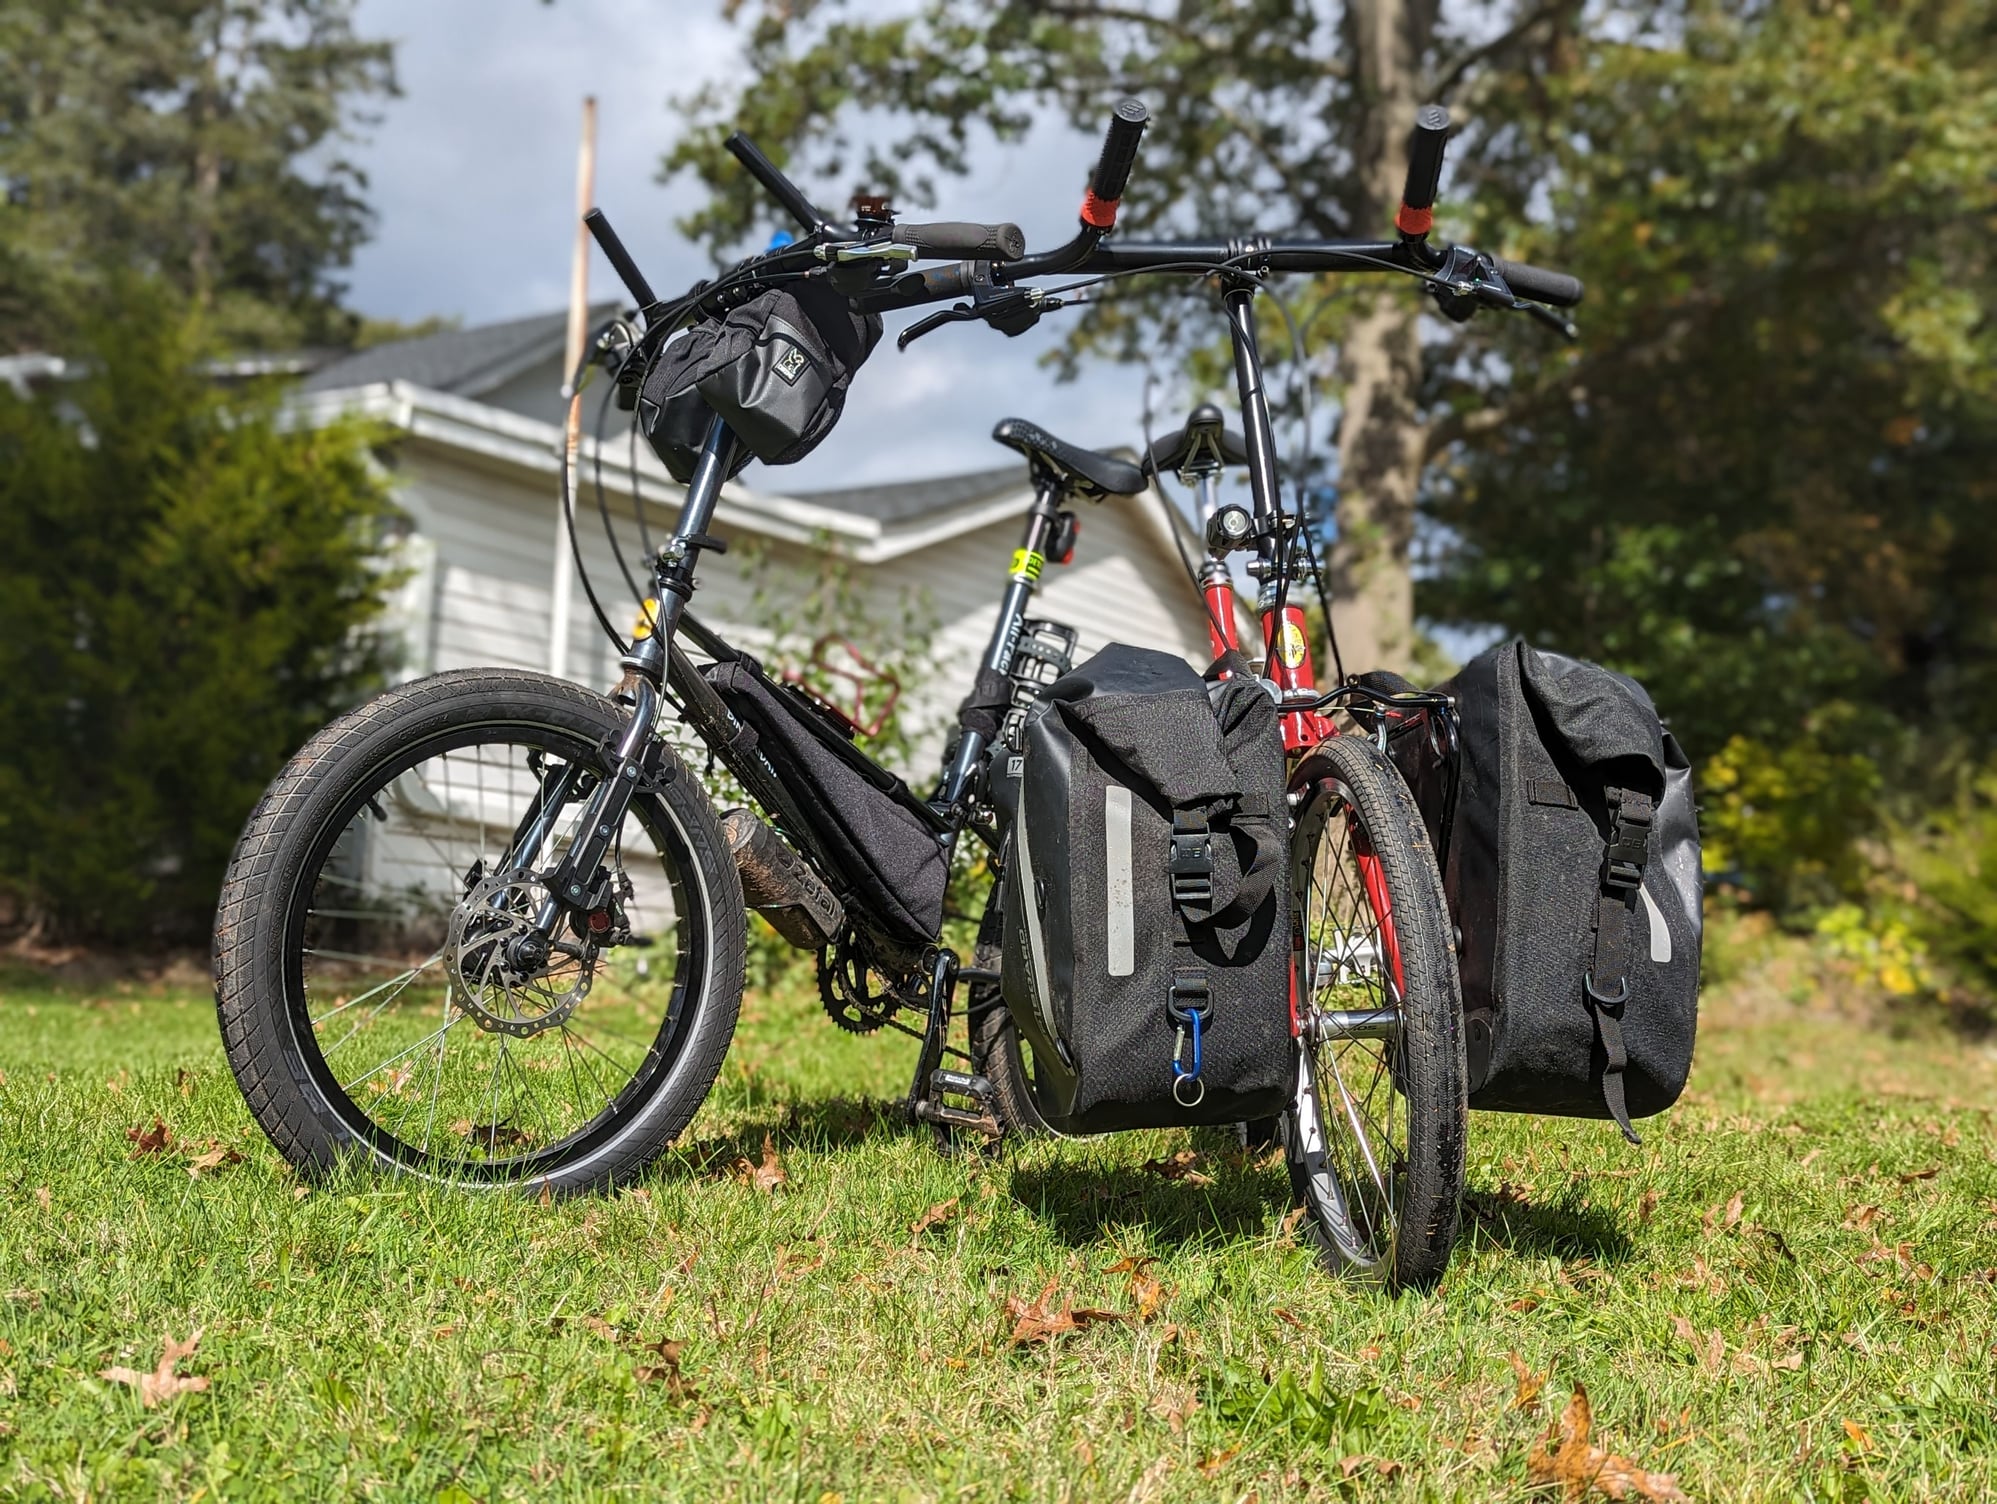
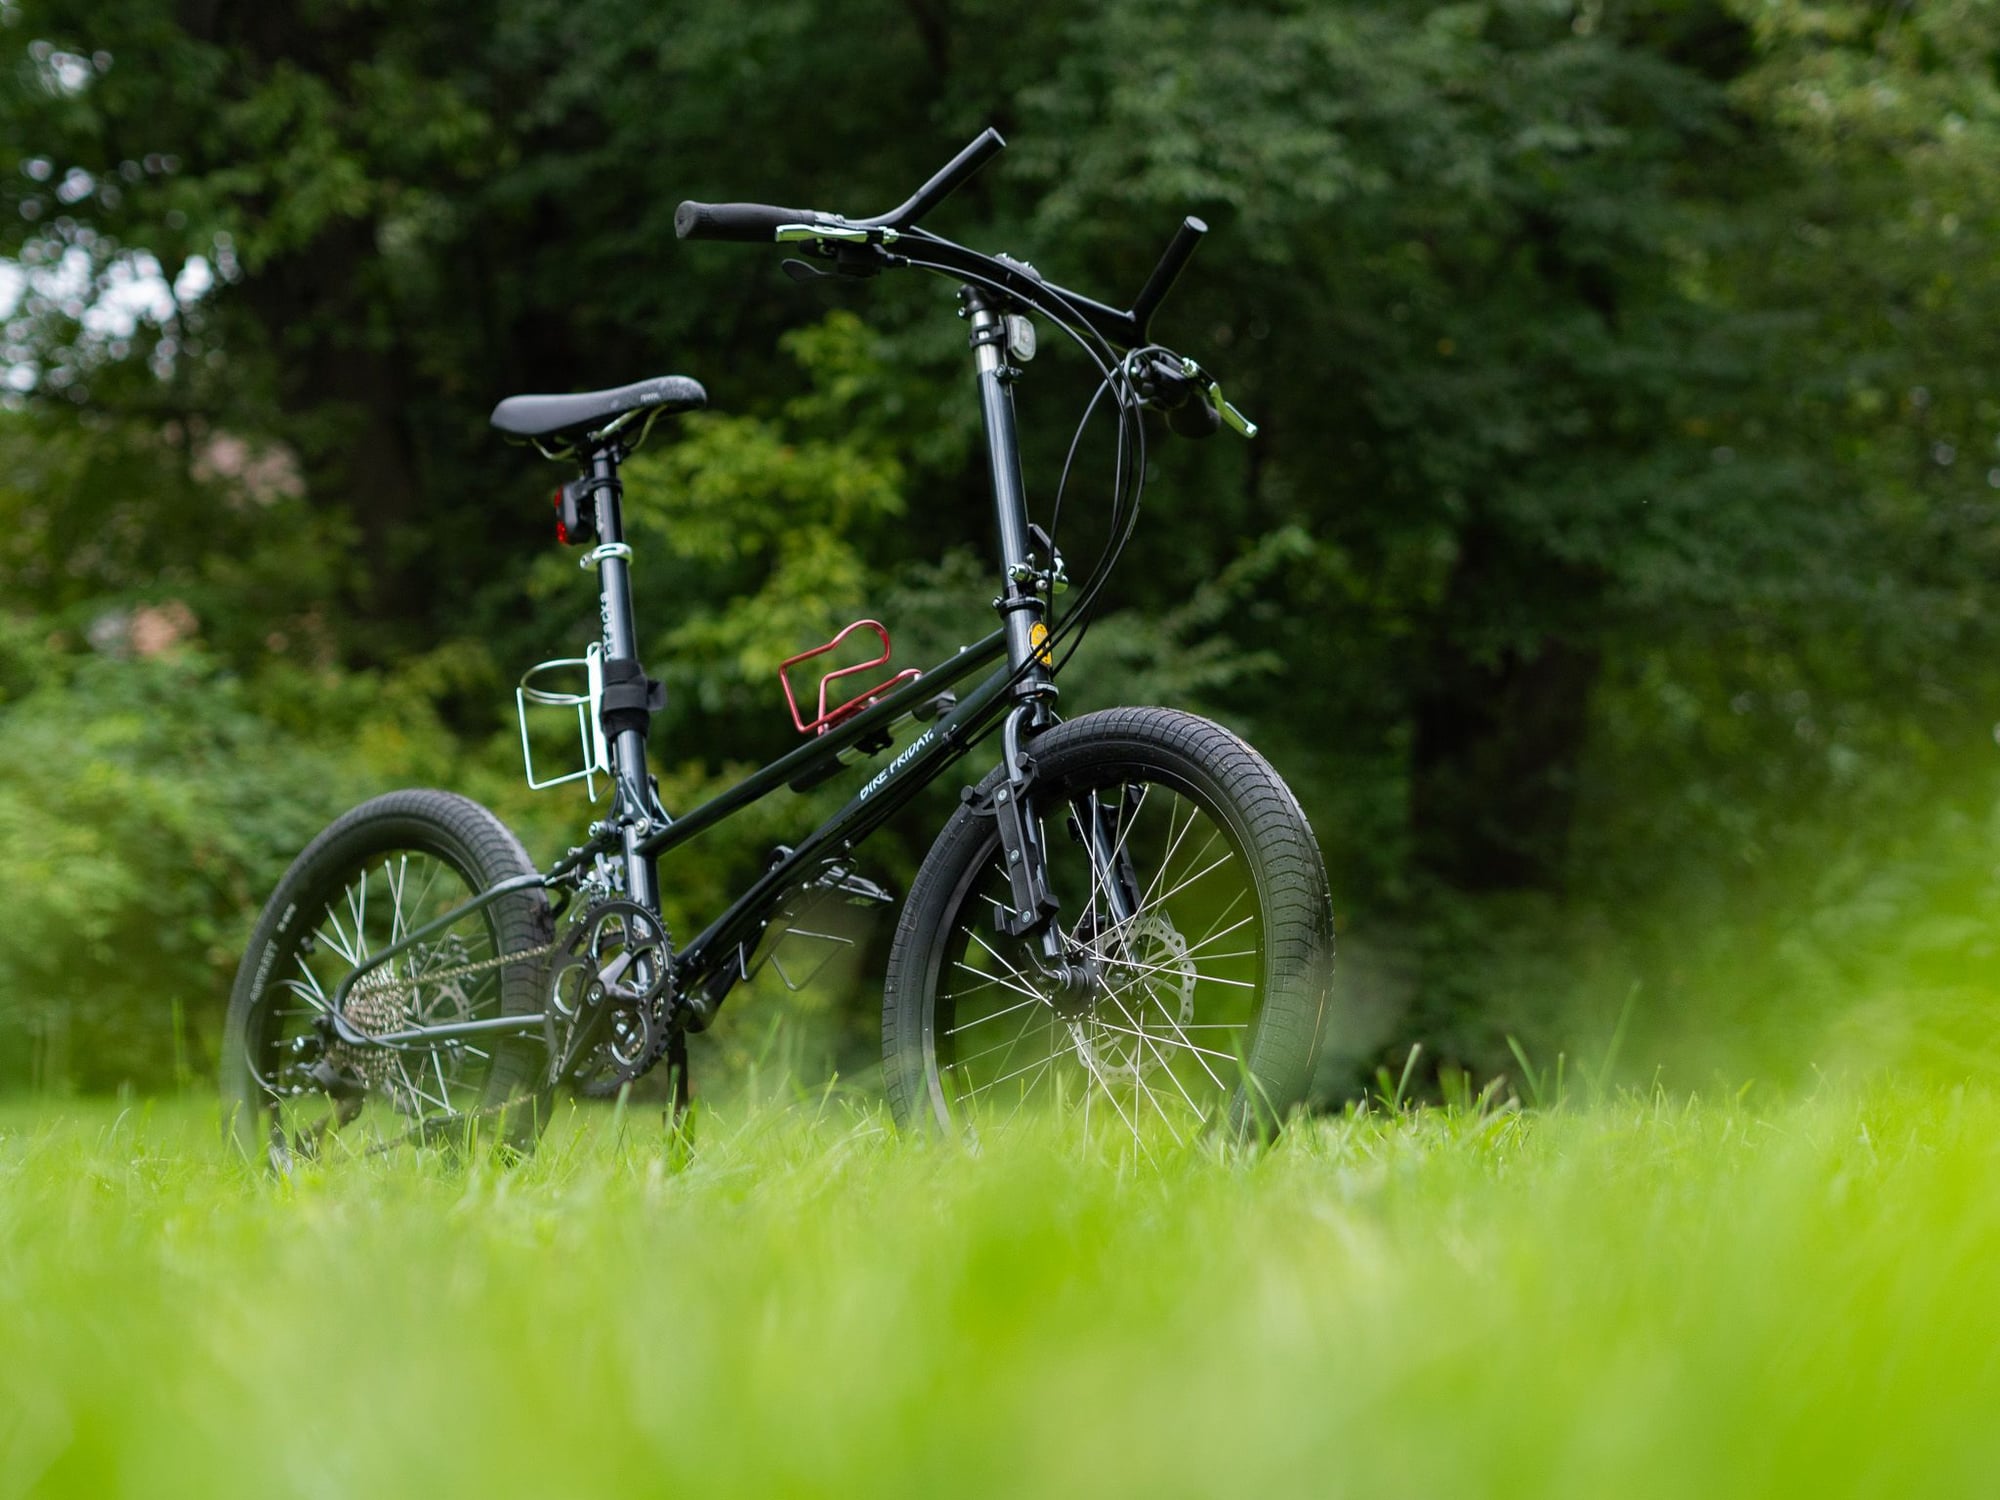
I photograph motorcycles usually, and will go to a park to get my static shots. I try to choose a place where the stuff in the background isn't too distracting and also far from the bike so that it will be out of focus. Cloudy days are actually better than sunny days because the clouds act like a giant diffuser and prevents harsh shadows. I then step far back, get low, and then zoom in to get my desired framing and background blur.
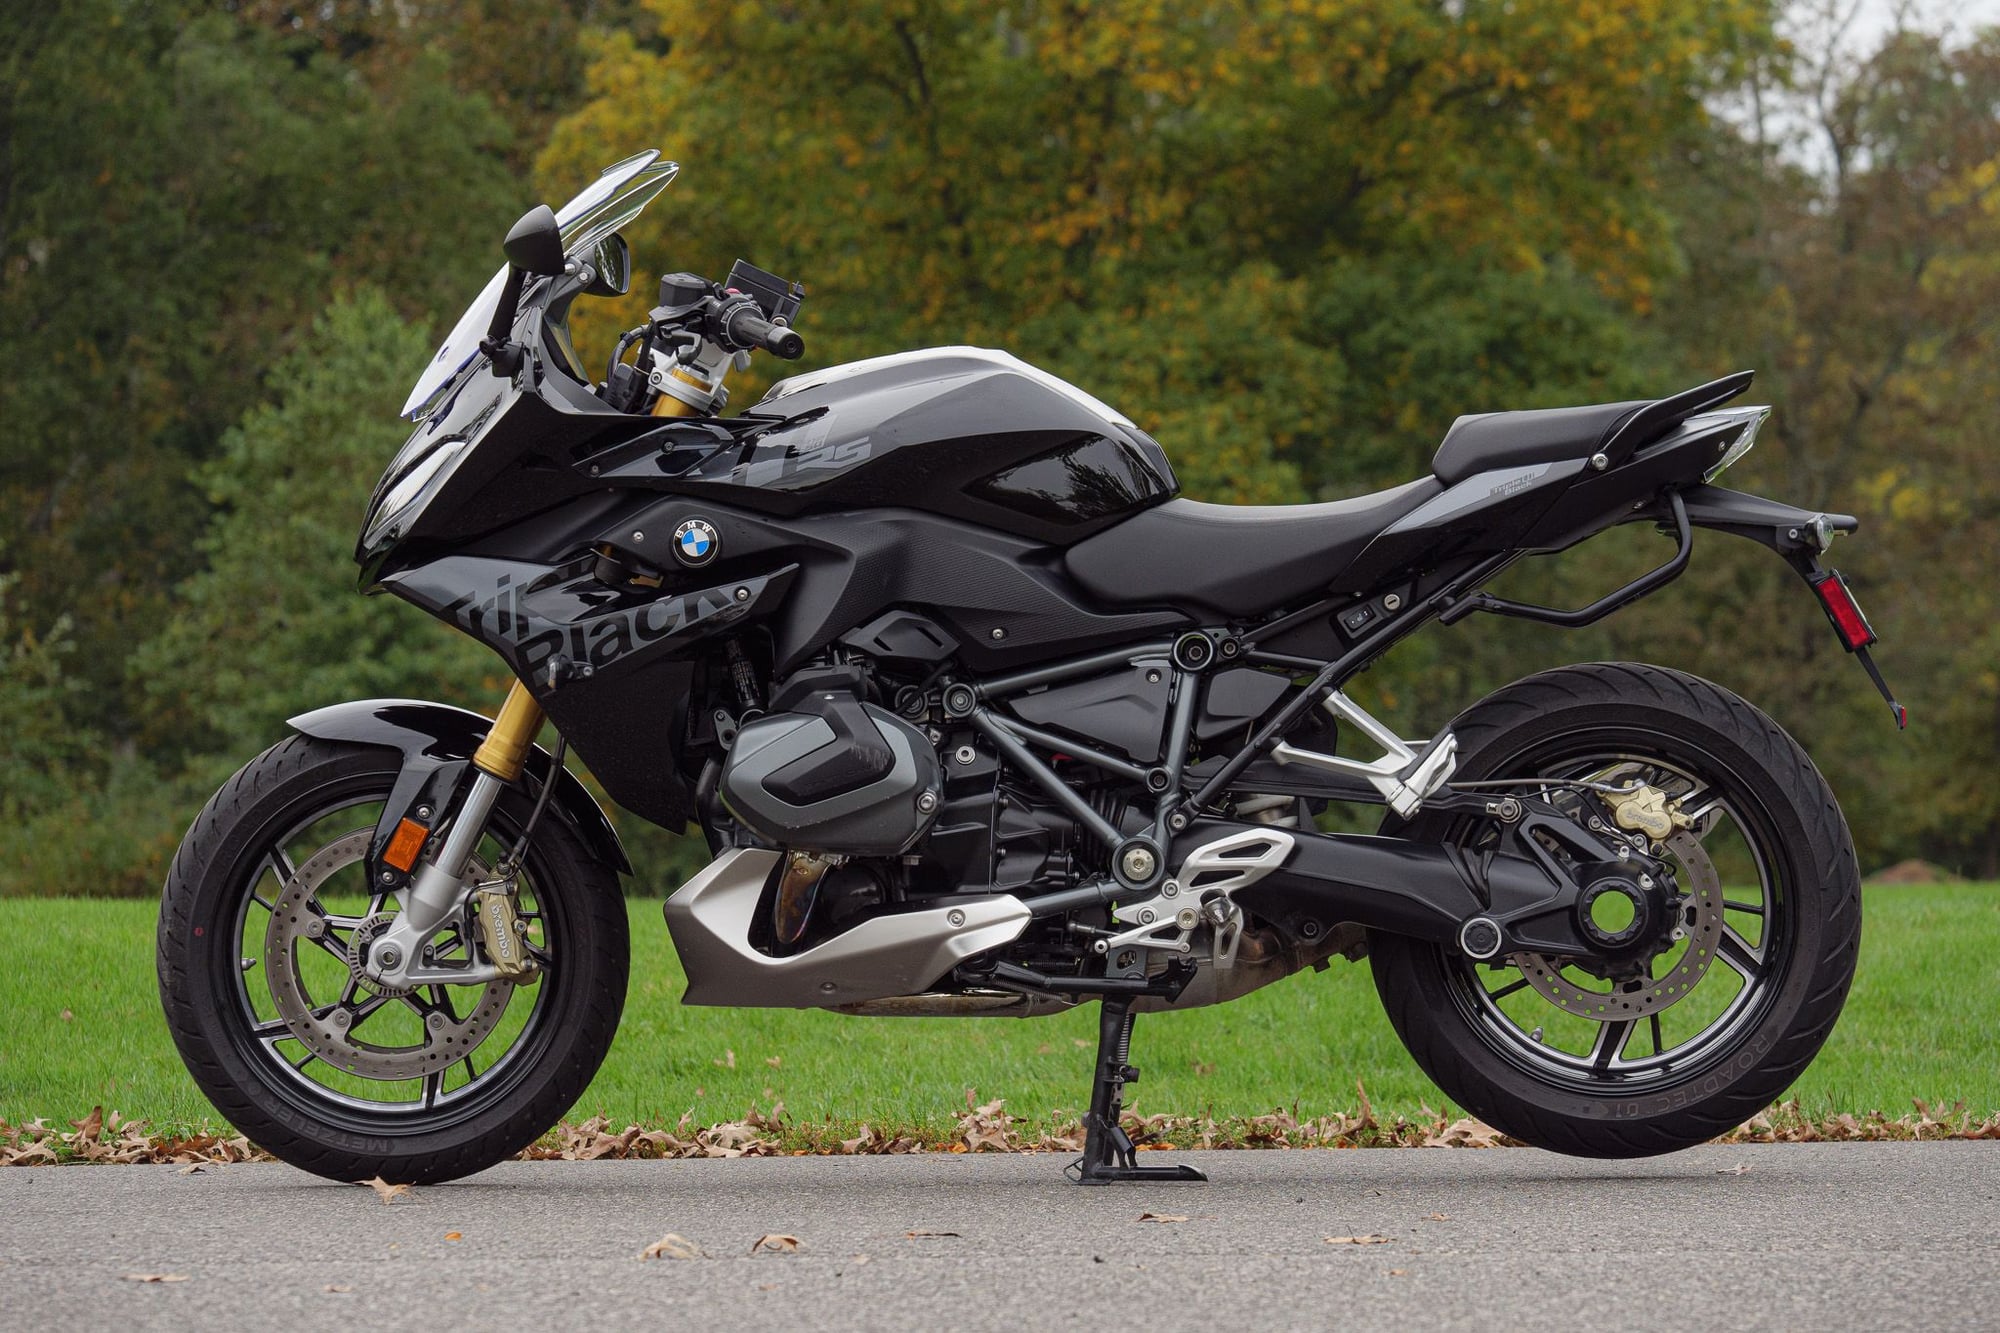
These tips also work for bicycles
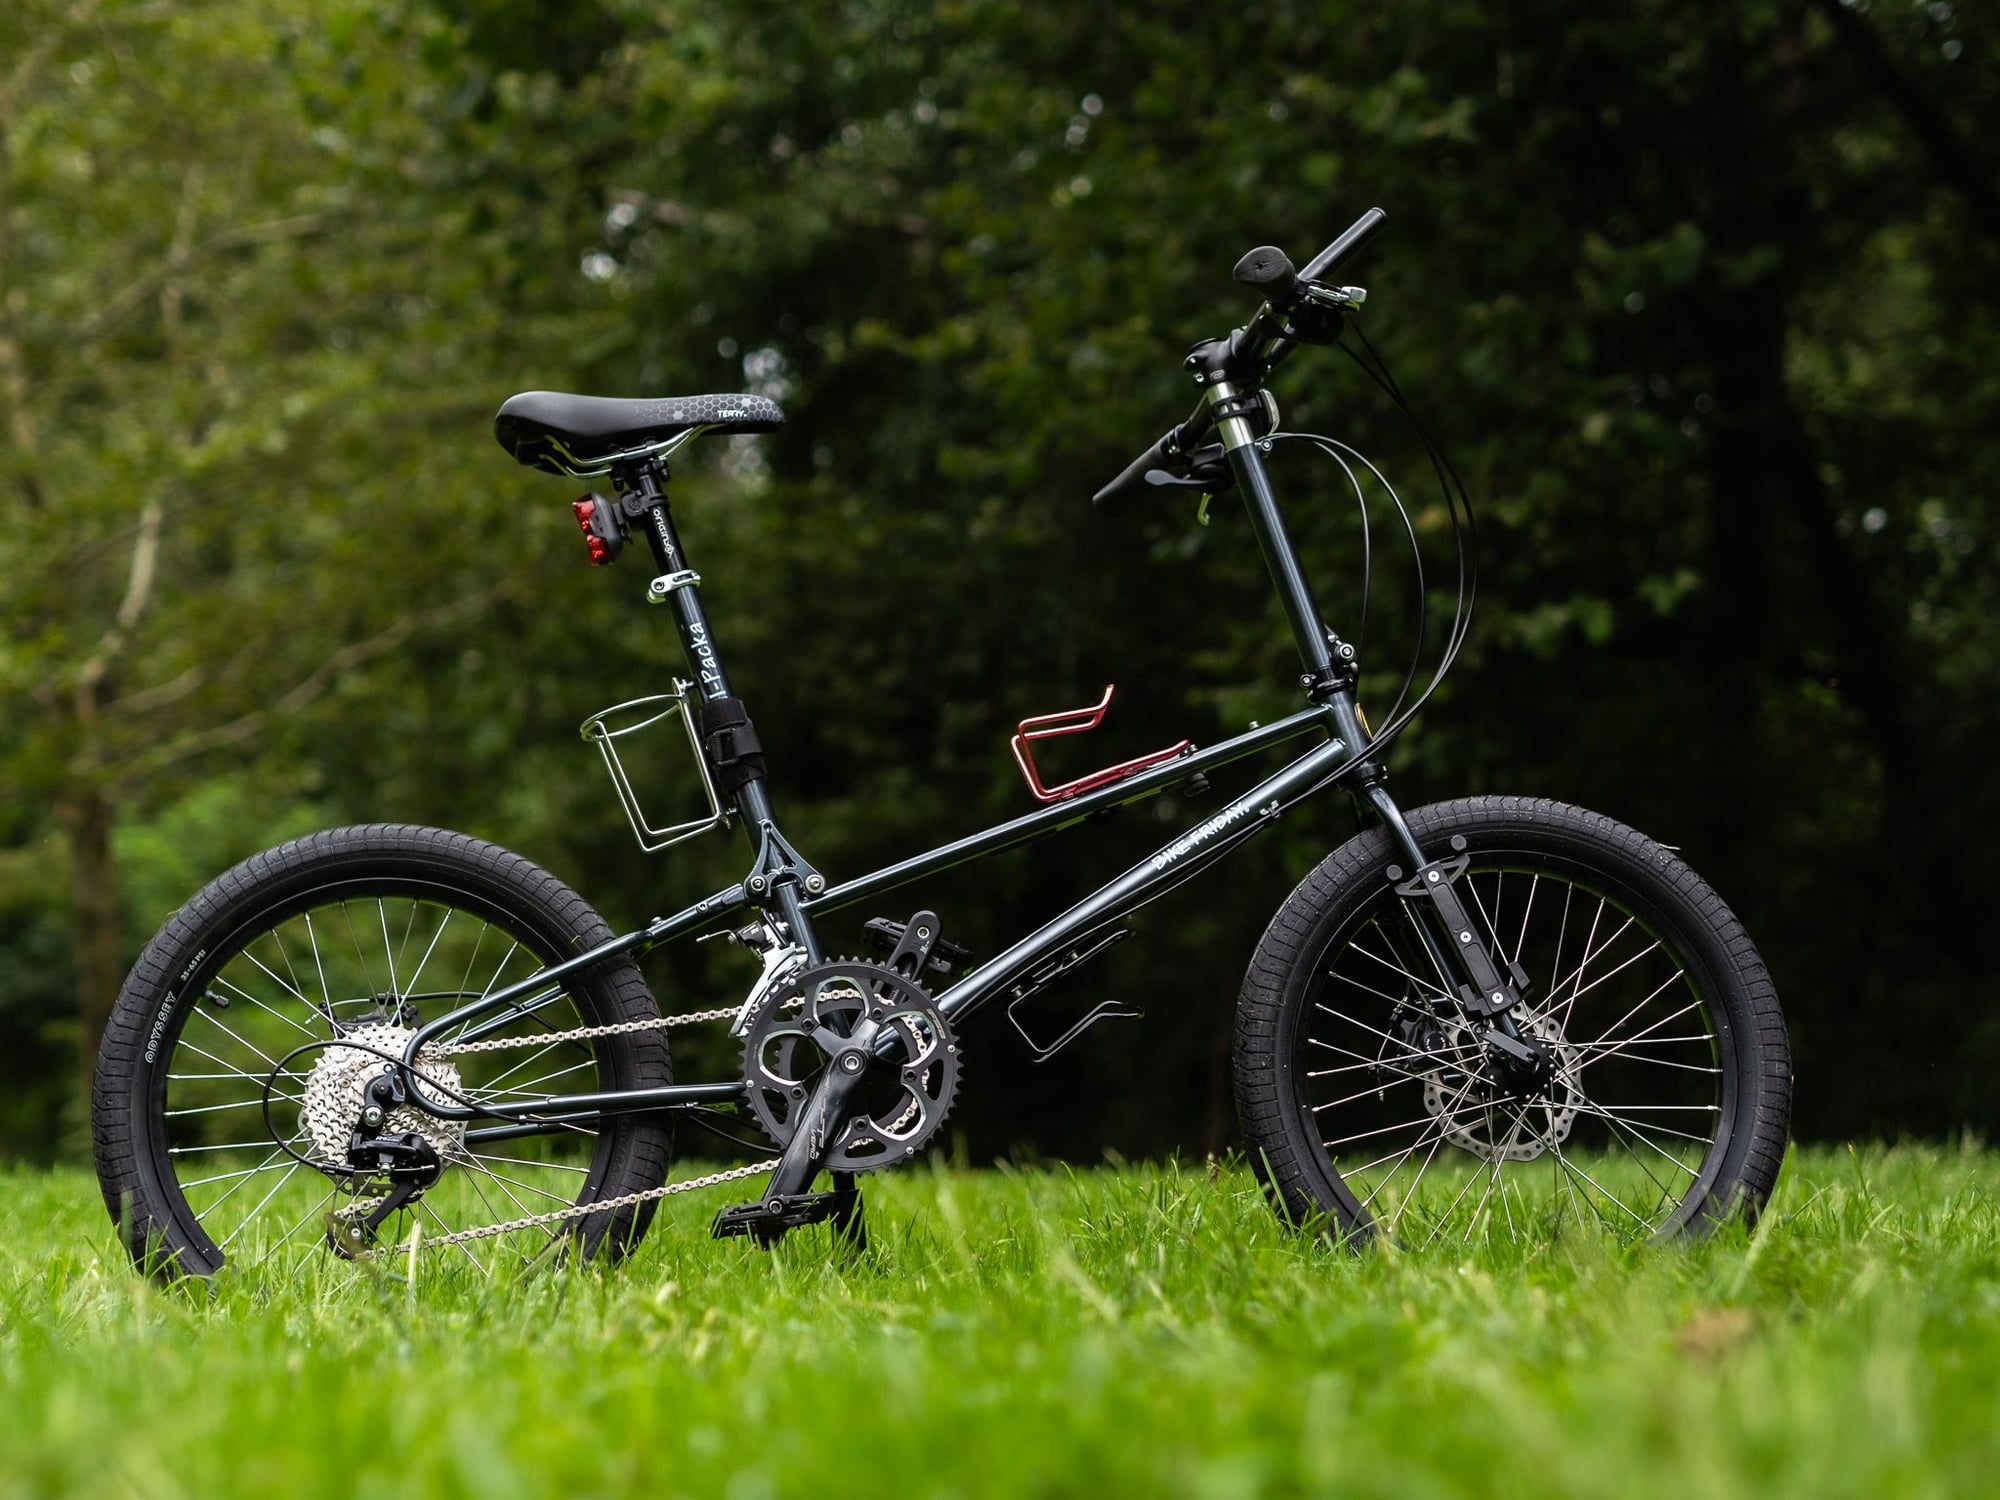
As Jim mentions, modern phones are good enough these days to get some nice photos.
__________________
--------------------------------------
Rider. Wanderer. Creator.
JohnMFlores.com | YouTube: JohnMFlores
Insta: JohnMichaelFlores | TikTok: @johnnymotoflores
--------------------------------------
Rider. Wanderer. Creator.
JohnMFlores.com | YouTube: JohnMFlores
Insta: JohnMichaelFlores | TikTok: @johnnymotoflores
Likes For john m flores:
02-05-24, 10:09 AM
#10
My Workshop = Happy Place
Thread Starter
Join Date: Aug 2023
Location: Norwalk, CT
Posts: 88
Bikes: Schwinns, and many others.
Mentioned: 5 Post(s)
Tagged: 0 Thread(s)
Quoted: 42 Post(s)
Liked 224 Times
in
56 Posts
john m flores Great post. Thank you. Much like Mojo31 suggested, having the bike in focus and the blurred background really changes the dynamic. I did not have that space in my narrow basement. Well done!
mr,grumpy The name checks out.
Coop
mr,grumpy The name checks out.
Coop
Likes For SharpByCoop:
02-09-24, 07:29 AM
#11
...
Join Date: Oct 2021
Location: Whitestone and Rensselaerville, New York
Posts: 1,518
Bikes: Bicycles? Yup.
Mentioned: 8 Post(s)
Tagged: 0 Thread(s)
Quoted: 482 Post(s)
Liked 1,593 Times
in
739 Posts
BF, Always enabling...now I want to buy black sheets.
BTW, great lighting from just overhead fluorescents.
BTW, great lighting from just overhead fluorescents.


Likes For Siu Blue Wind:
02-13-24, 07:40 AM
#13
Yep
john m flores Great post. Thank you. Much like Mojo31 suggested, having the bike in focus and the blurred background really changes the dynamic. I did not have that space in my narrow basement. Well done!
mr,grumpy The name checks out.
Coop
mr,grumpy The name checks out.
Coop
With artificial lighting the background can be made to go dark as long as no other lights illuminate the background (inverse square law).
Last edited by axelwik; 02-13-24 at 07:54 AM.
Likes For axelwik:
02-13-24, 07:57 AM
#14
Forum Moderator

Join Date: Jul 2007
Location: Kalamazoo MI
Posts: 20,650
Bikes: Fuji SL2.1 Carbon Di2 Cannondale Synapse Alloy 4 Trek Checkpoint ALR-5 Viscount Aerospace Pro Colnago Classic Rabobank Schwinn Waterford PMount Raleigh C50 Cromoly Hybrid Legnano Tipo Roma Pista
Mentioned: 59 Post(s)
Tagged: 0 Thread(s)
Quoted: 3091 Post(s)
Liked 6,601 Times
in
3,785 Posts

__________________
Likes For cb400bill:
02-13-24, 10:08 AM
#15
My Workshop = Happy Place
Thread Starter
Join Date: Aug 2023
Location: Norwalk, CT
Posts: 88
Bikes: Schwinns, and many others.
Mentioned: 5 Post(s)
Tagged: 0 Thread(s)
Quoted: 42 Post(s)
Liked 224 Times
in
56 Posts
Siu Blue Wind axelwik cb400bill Thank you ALL!
Bill, thanks for this. ^^ Especially keen on that white setup. Beautiful. Same concept also with white foam boards. Never saw that page, yet we arrived at the same destination. Wonderful.
What I encourage more than suggestions are EXAMPLES, like shown above. If you can provide a better example show me/us.
The focus / depth-of-field thing works well if the background is more than 18" away. That's my limitation. I'm aware of the methods. Love john m flores examples outdoors to display that look.
Keep adding to this. (I also appreciate the moderators for their diligence.)
Coop (Who JUST purchased another Vintage Paramount. Look for it soon....)
Likes For SharpByCoop:
02-14-24, 10:12 PM
#16
My Workshop = Happy Place
Thread Starter
Join Date: Aug 2023
Location: Norwalk, CT
Posts: 88
Bikes: Schwinns, and many others.
Mentioned: 5 Post(s)
Tagged: 0 Thread(s)
Quoted: 42 Post(s)
Liked 224 Times
in
56 Posts
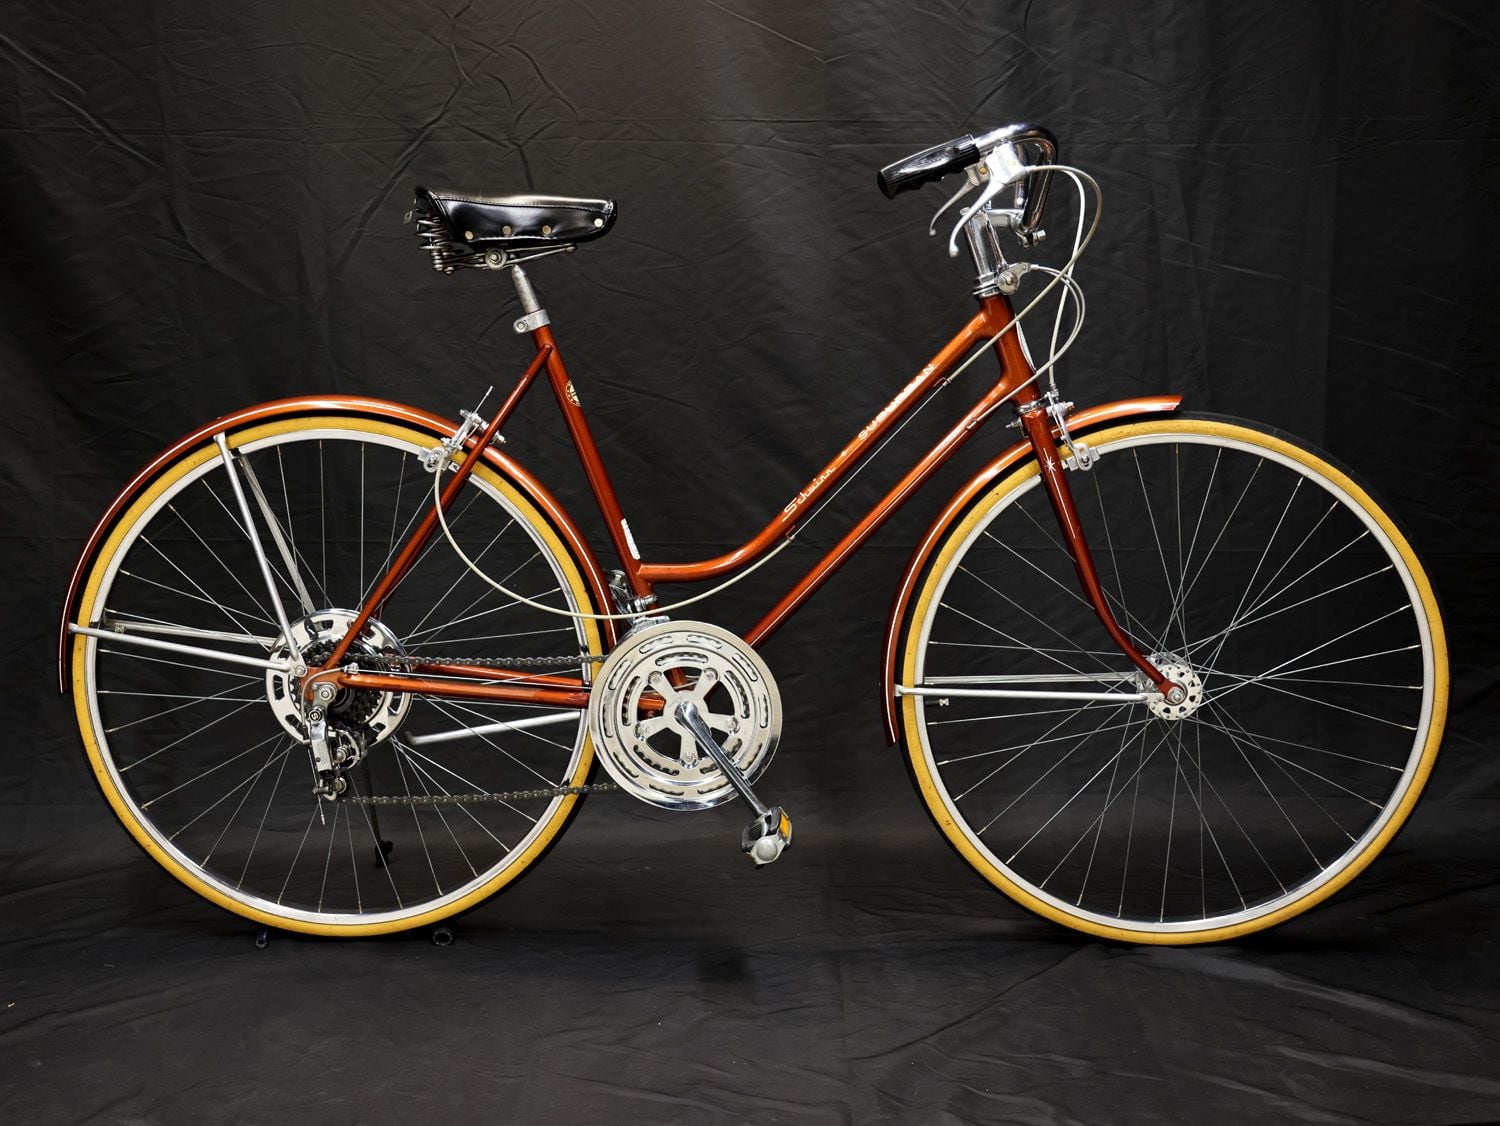
New subject needing capturing: 1974 Girl's Schwinn Suburban restored by me.
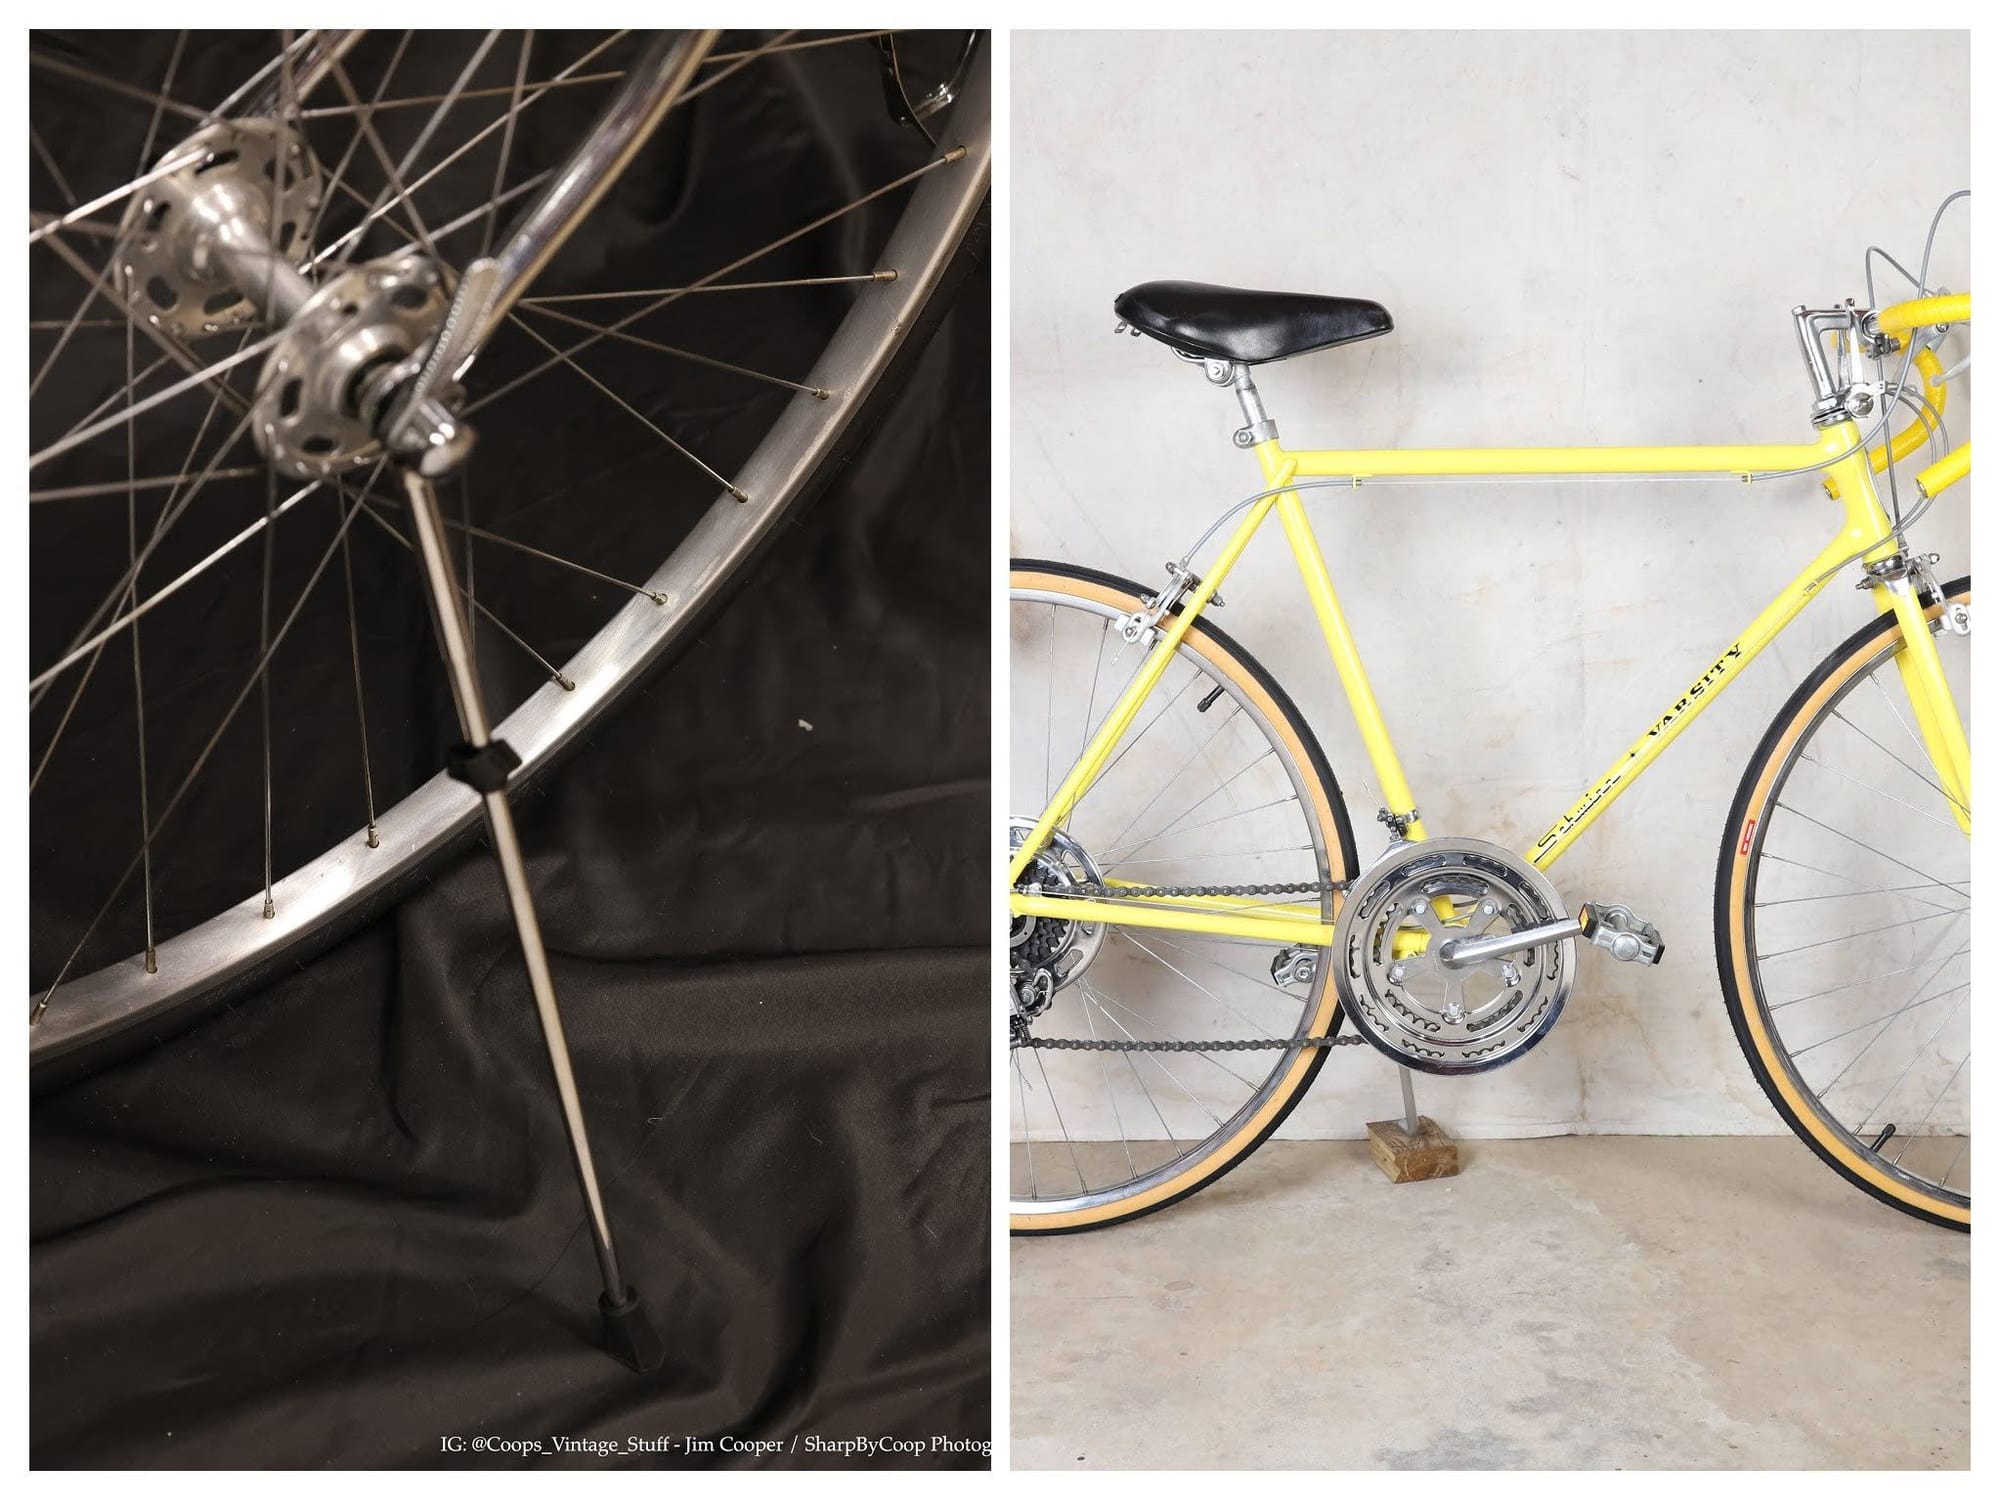
So a few of you wanted MORE bike and LESS background. I get it. OK. I am LIMITED by the size of my space and could not pull my subject away from the draped background much to make a huge effect.
However... I DID stretch the *cloth* backdrop to minimize wrinkles. They are still there. Less so.
FIRST: The subject line of this thread includes 'Inexpensive' so I offer the least expensive option. I captured the following TWO images with my Samsung S23+.
Yes, I then edited them in Adobe Camera Raw as I did my others (with my $4000 camera!) Darks darker, midtones brightened, and highlights reduced.
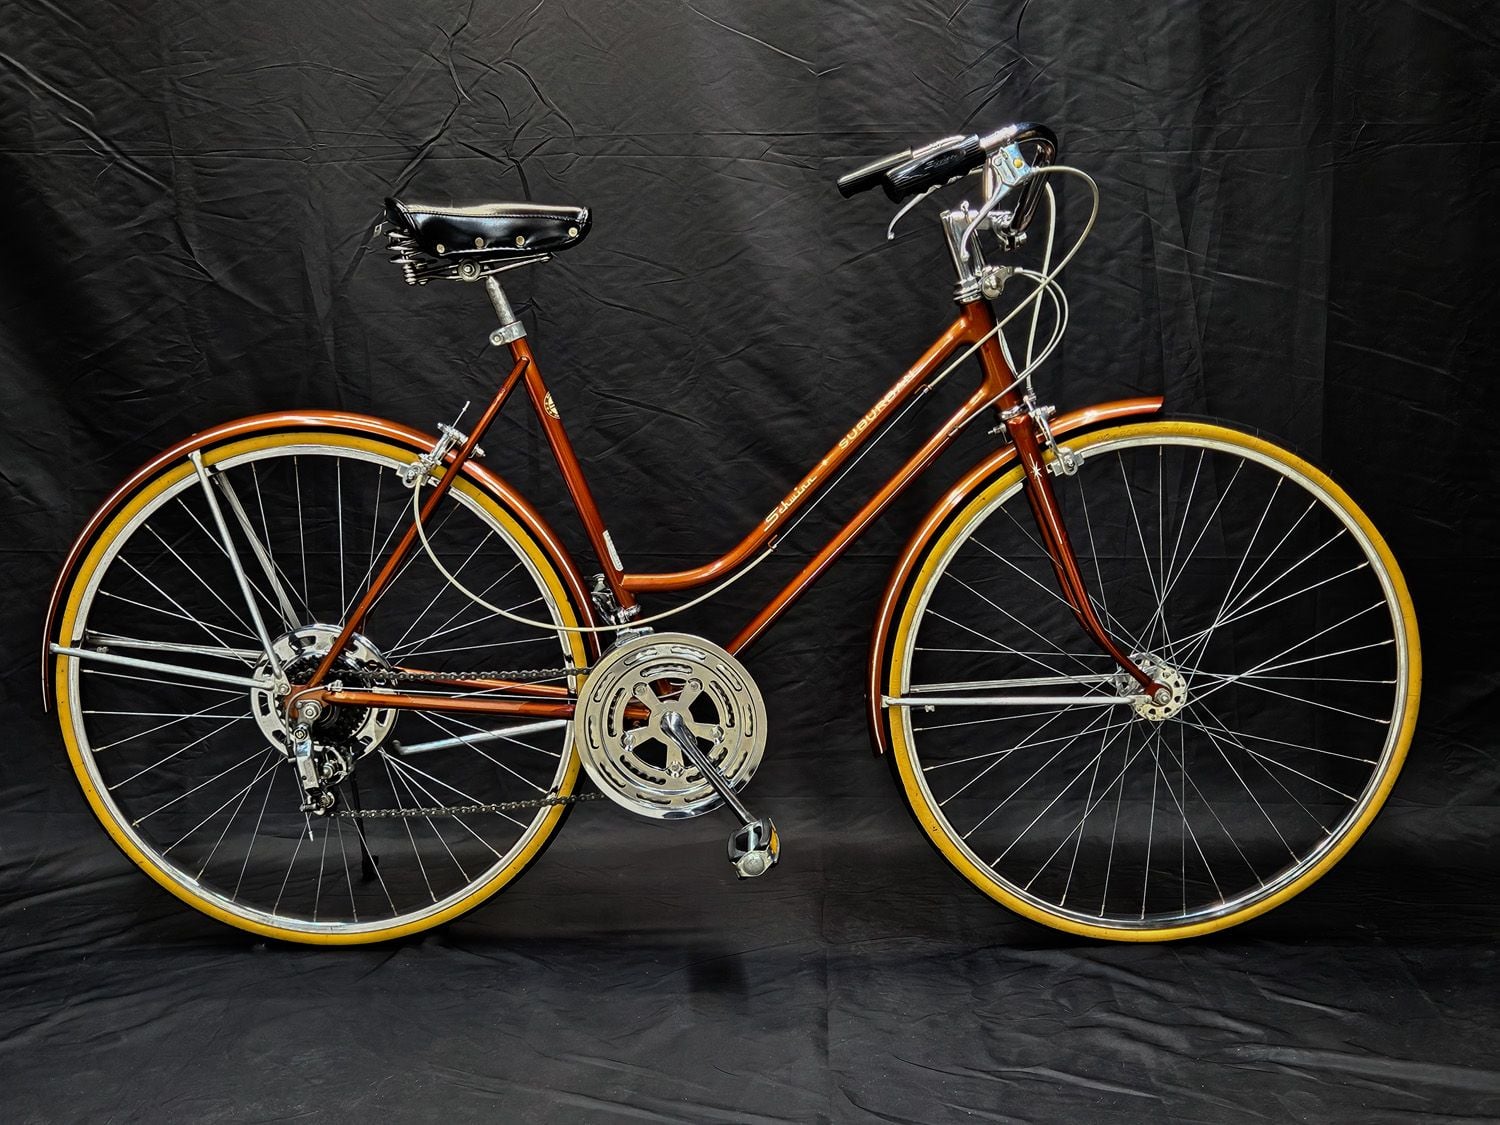
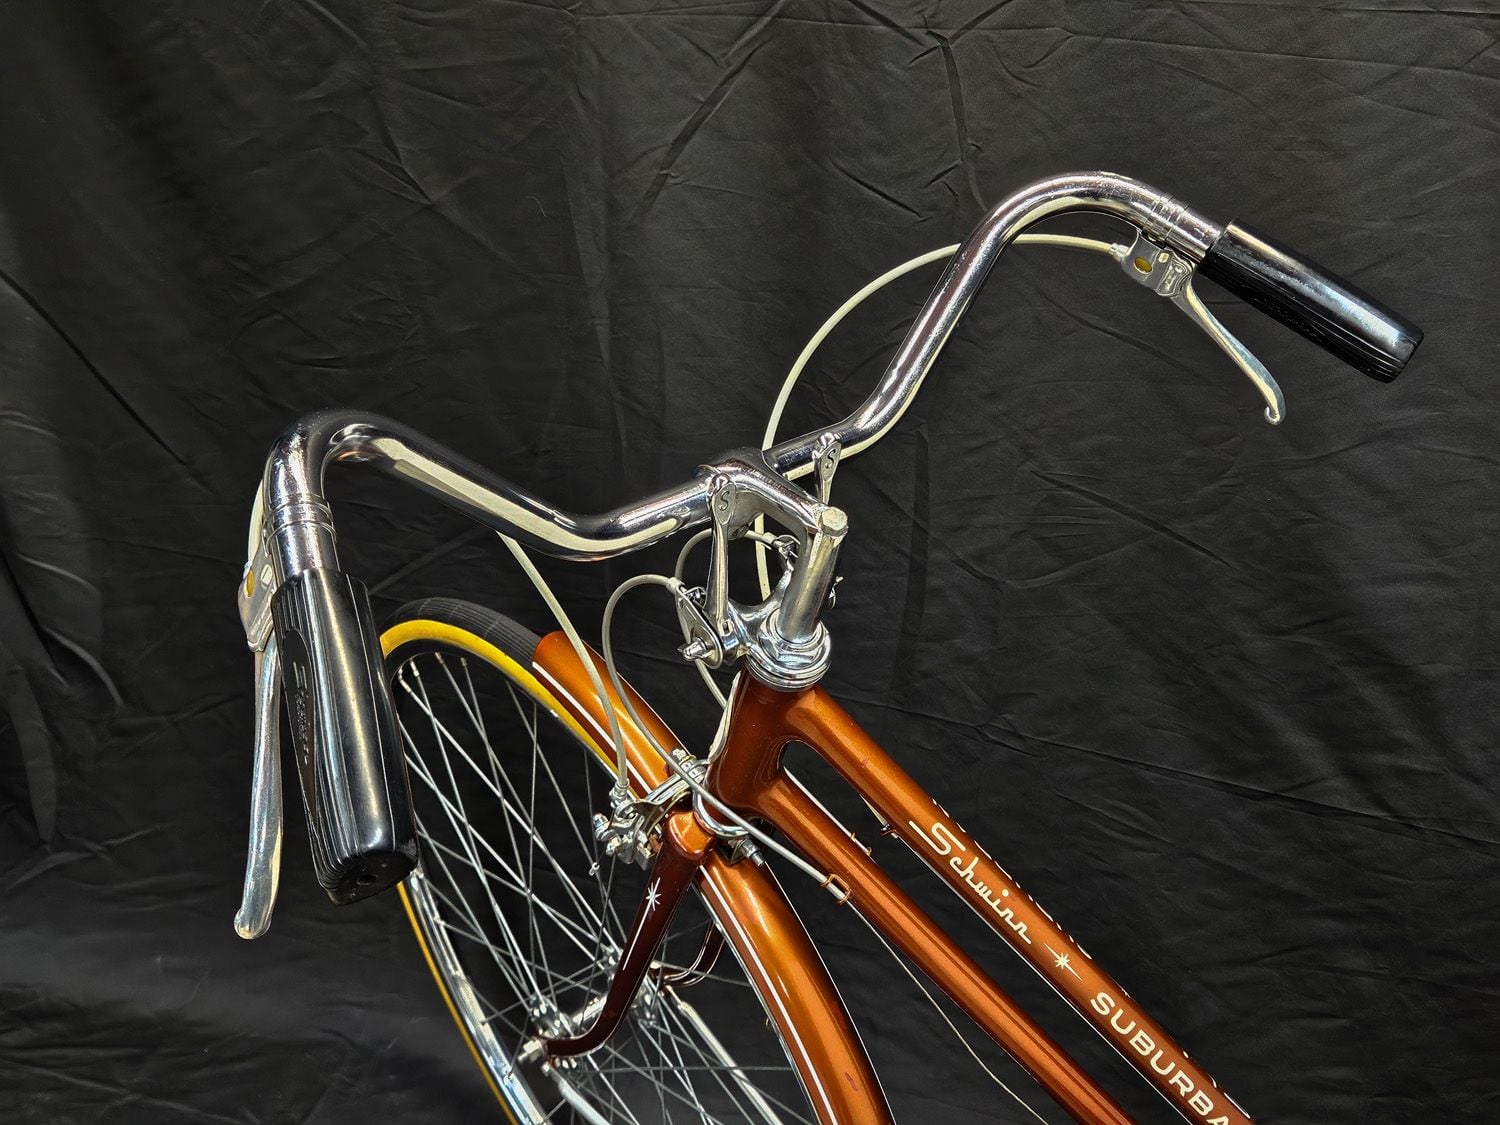
^^^ Pretty darn good! (All images resized down to 1500 pixels wide here)
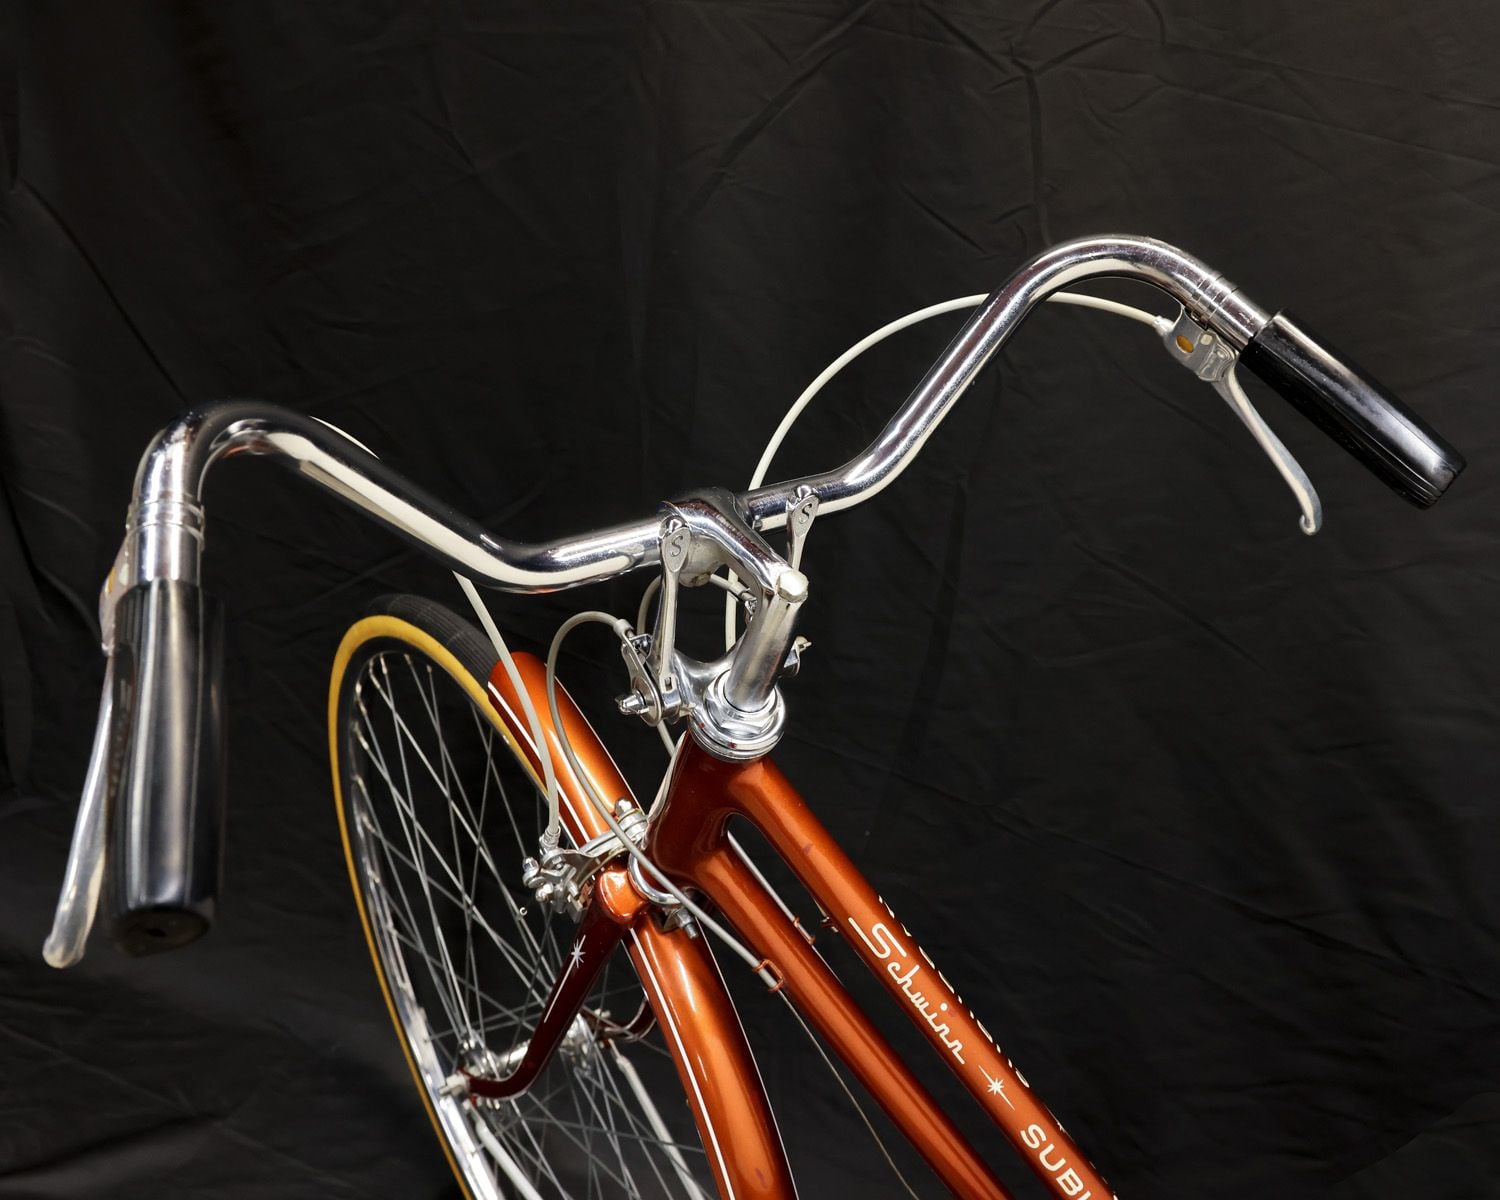
NOTE: I tried to use the 'Pro' settings in the Samsung menu, and truthfully they did NOT come out better. Too soft. That was surprising.
I reverted to simply 'auto' mode and edited instead. They had much more detail. However you can see how it captures the background clearly also. Overall it's fine.
***************************************
Now I used my EXPENSIVE camera: Canon EOS5R and Canon 28-105L lens (Probably about $4000 new)
Overhead LED 4' shop lighting. f/4.0 ISO 2500, 1/125th shutter. NO tripod. JPG, NOT RAW. So sue me.
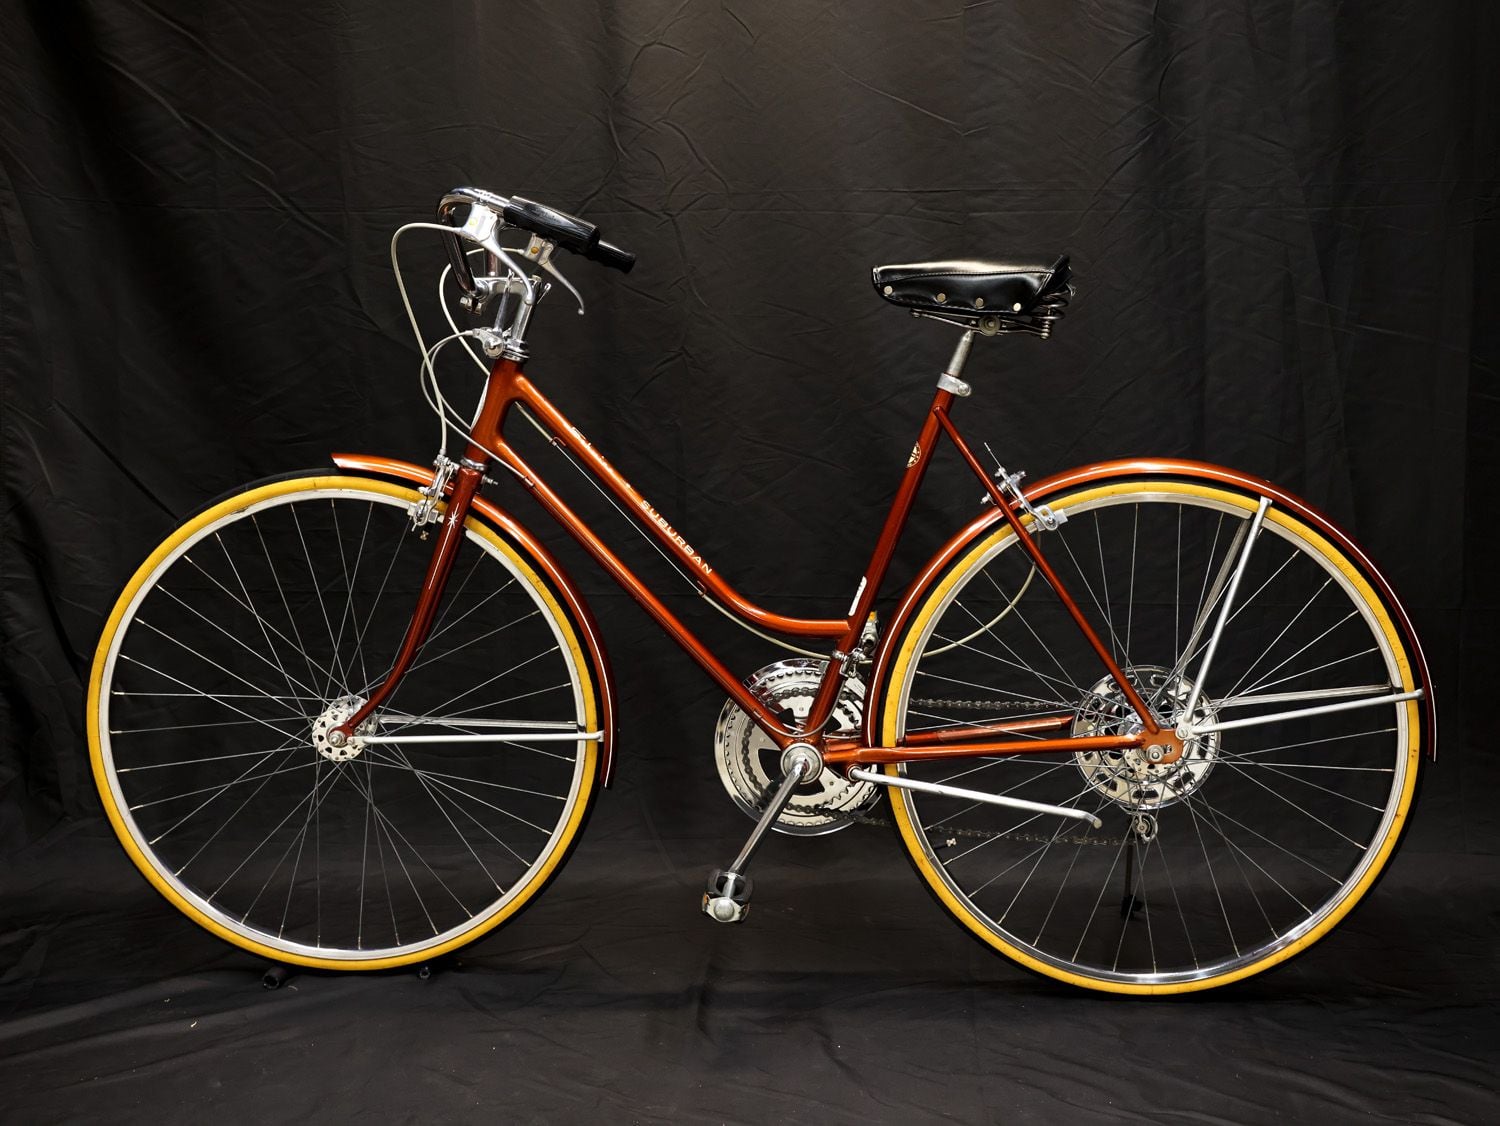
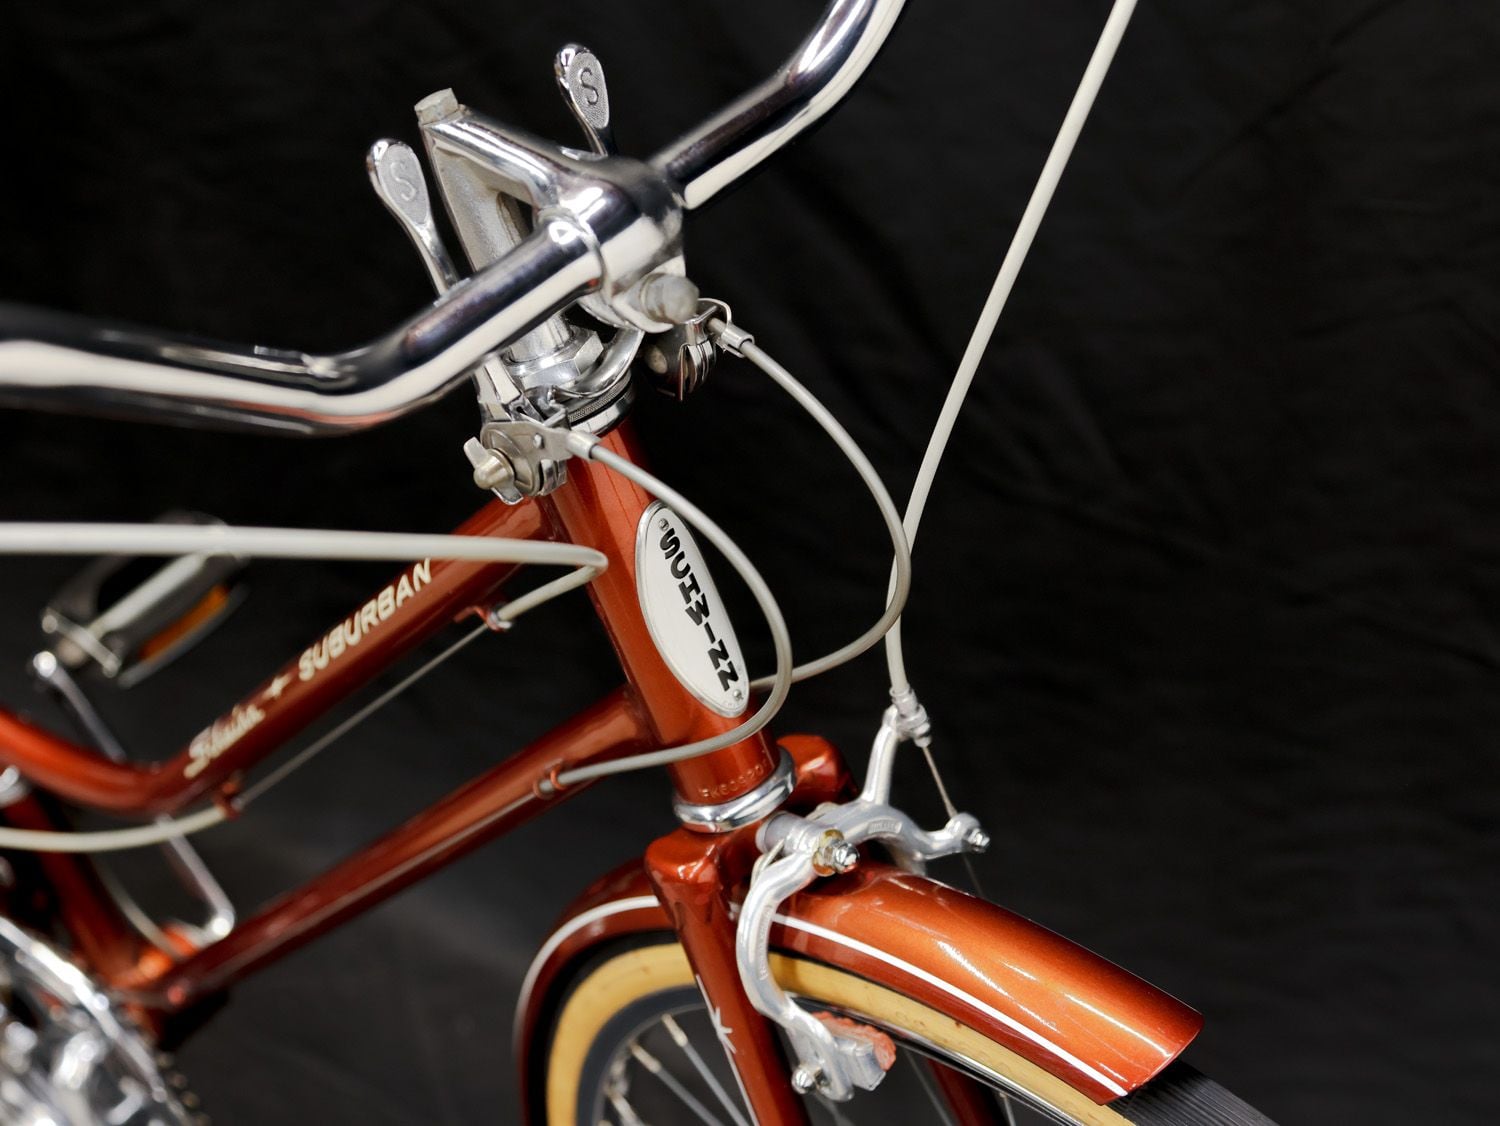
So, unless I opted for a PAPER backdrops (NO wrinkles, I see) this is where I sit. Paper comes in rolls of 9' x 36' from B&H for under $100 shipped. White as well.
However this cloth including a PVC hanger was less than $25 from Amazon. Shop lights or daylight: Both work.
Show me your examples. Thanks for viewing!
Coop
However... I DID stretch the *cloth* backdrop to minimize wrinkles. They are still there. Less so.
FIRST: The subject line of this thread includes 'Inexpensive' so I offer the least expensive option. I captured the following TWO images with my Samsung S23+.
Yes, I then edited them in Adobe Camera Raw as I did my others (with my $4000 camera!) Darks darker, midtones brightened, and highlights reduced.
^^^ Pretty darn good! (All images resized down to 1500 pixels wide here)
NOTE: I tried to use the 'Pro' settings in the Samsung menu, and truthfully they did NOT come out better. Too soft. That was surprising.
I reverted to simply 'auto' mode and edited instead. They had much more detail. However you can see how it captures the background clearly also. Overall it's fine.
***************************************
Now I used my EXPENSIVE camera: Canon EOS5R and Canon 28-105L lens (Probably about $4000 new)
Overhead LED 4' shop lighting. f/4.0 ISO 2500, 1/125th shutter. NO tripod. JPG, NOT RAW. So sue me.
So, unless I opted for a PAPER backdrops (NO wrinkles, I see) this is where I sit. Paper comes in rolls of 9' x 36' from B&H for under $100 shipped. White as well.
However this cloth including a PVC hanger was less than $25 from Amazon. Shop lights or daylight: Both work.
Show me your examples. Thanks for viewing!
Coop
Likes For SharpByCoop:
03-22-24, 09:20 AM
#17
My Workshop = Happy Place
Thread Starter
Join Date: Aug 2023
Location: Norwalk, CT
Posts: 88
Bikes: Schwinns, and many others.
Mentioned: 5 Post(s)
Tagged: 0 Thread(s)
Quoted: 42 Post(s)
Liked 224 Times
in
56 Posts
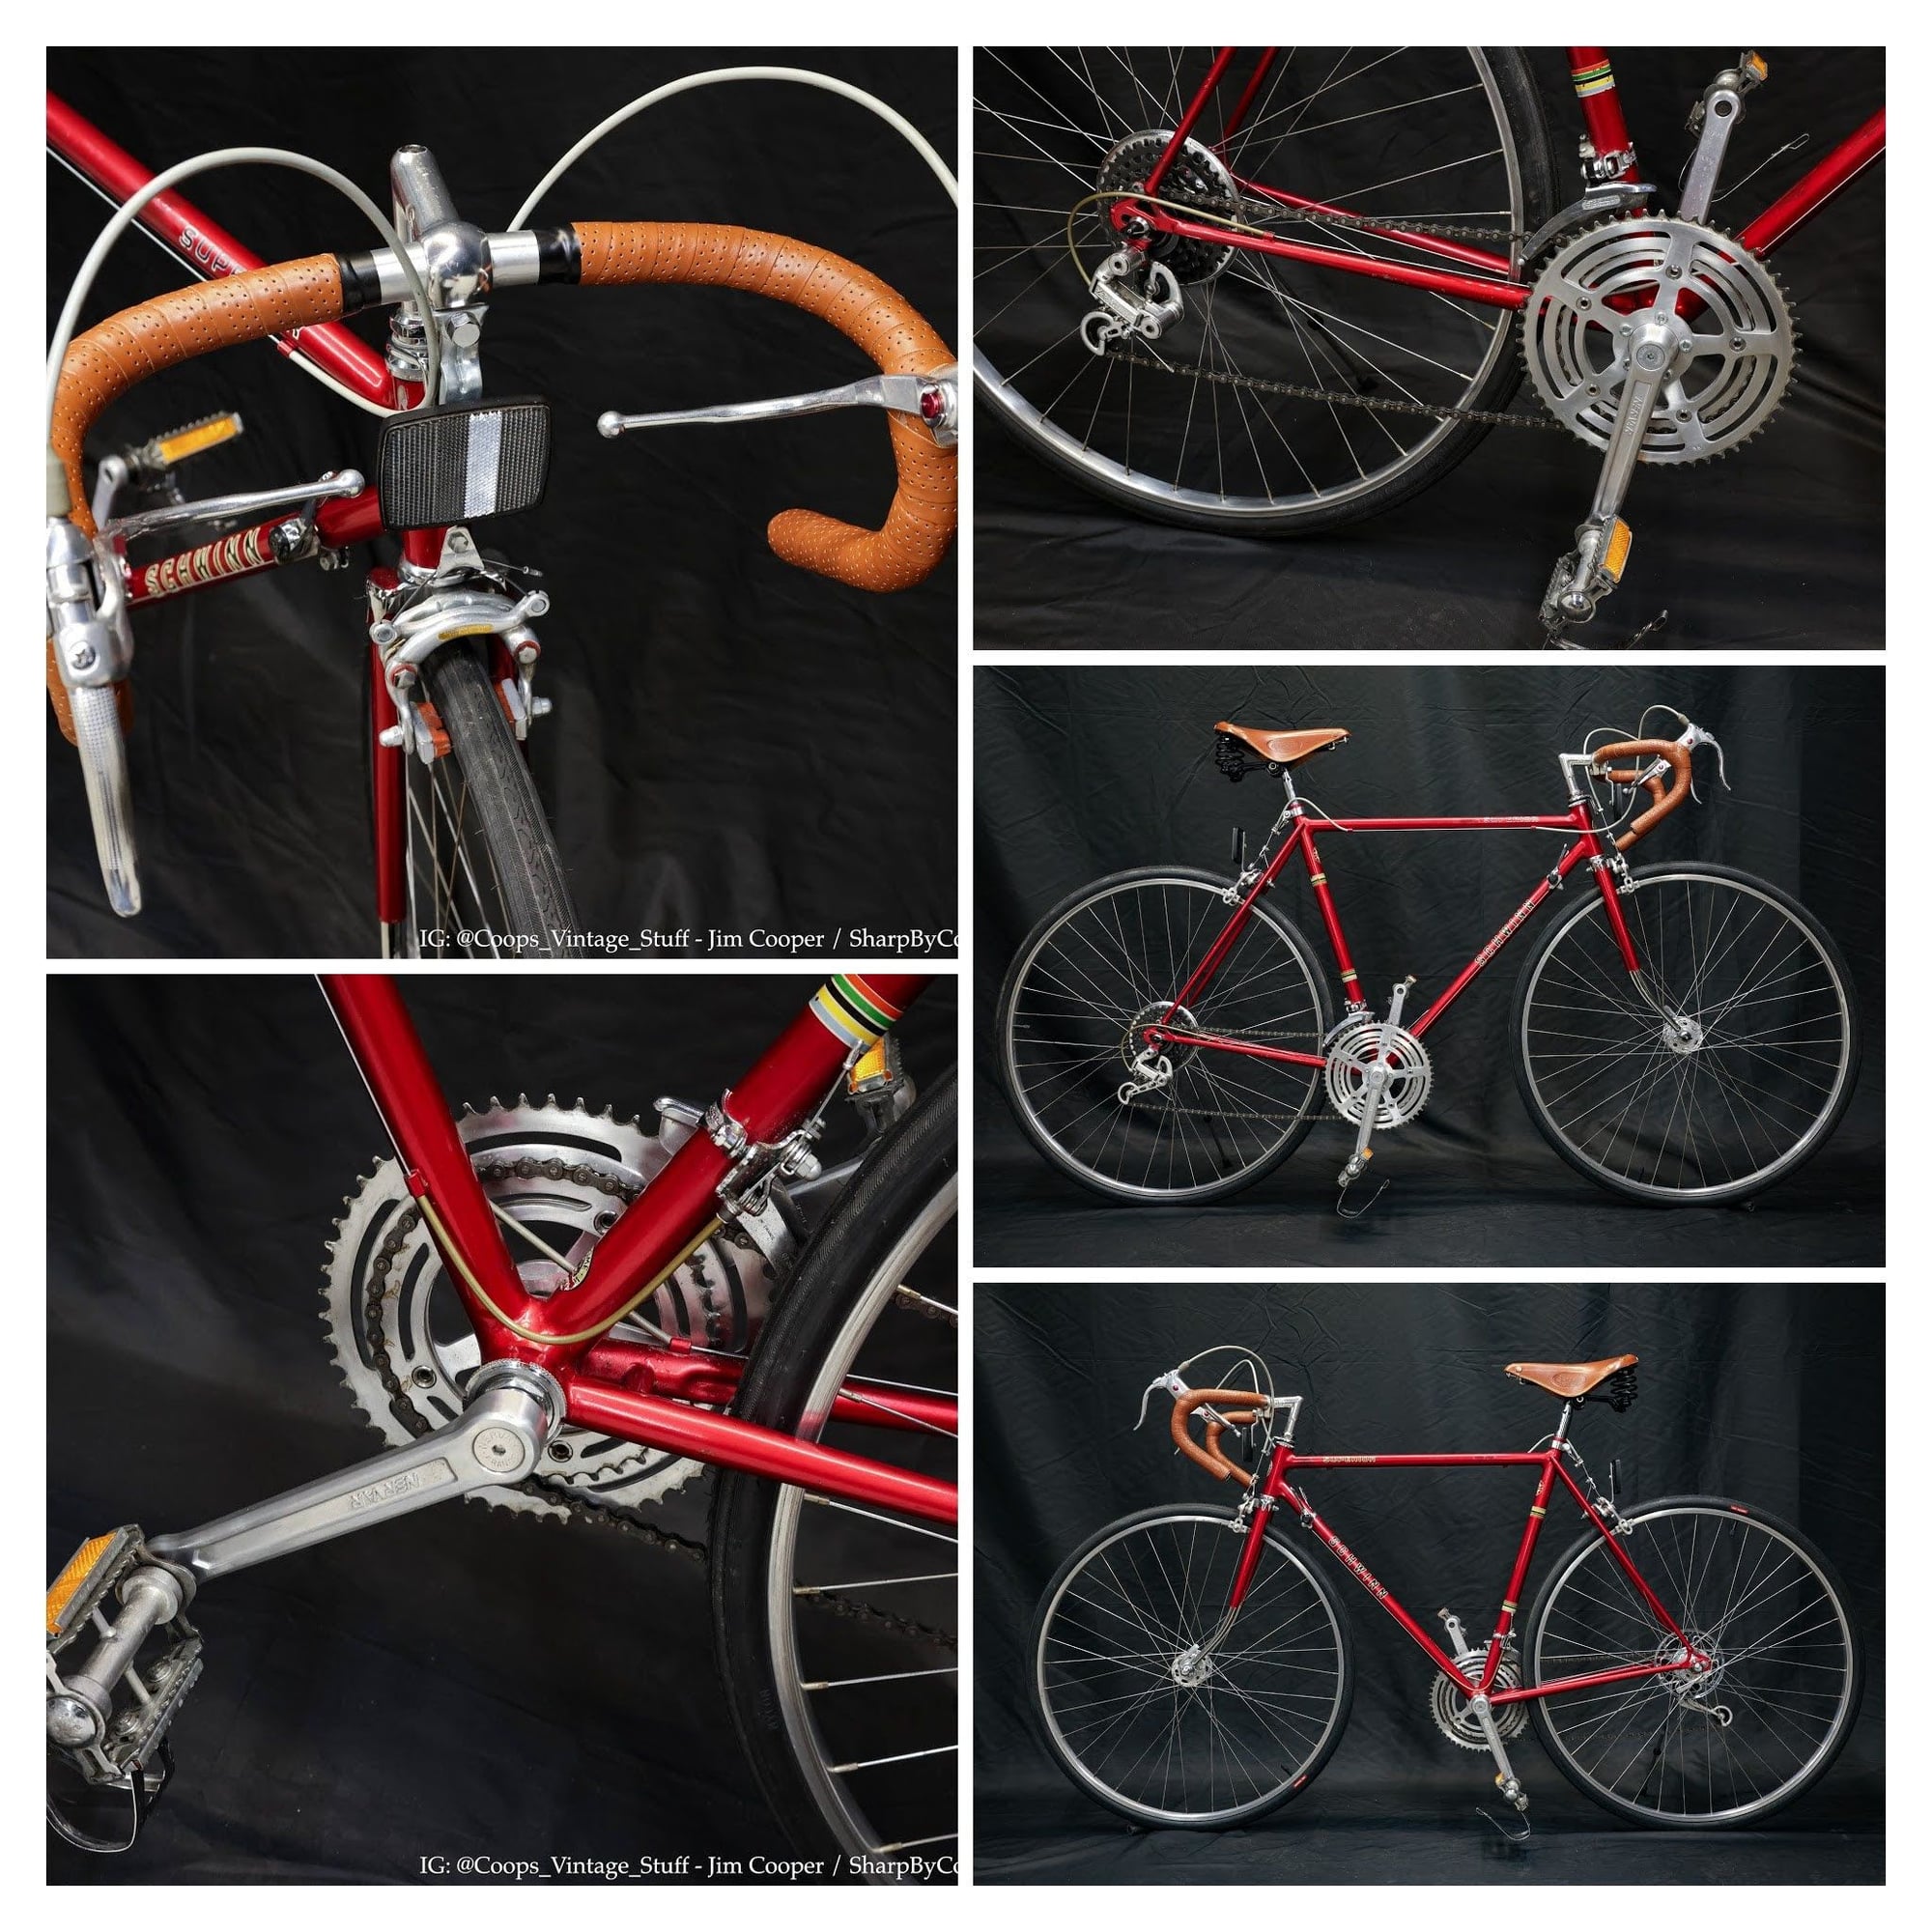
Well, I had a great project and utilized my indoor setup again.
it takes me 20-30 mins to get it right before I begin shooting. Fabric, reflectors, sidestand attach, and sweeping the floor.
A worthy subject I just restored, you will agree:

it takes me 20-30 mins to get it right before I begin shooting. Fabric, reflectors, sidestand attach, and sweeping the floor.
A worthy subject I just restored, you will agree:
Likes For SharpByCoop:
03-22-24, 02:52 PM
#18

don't try this at home.

Join Date: Jan 2006
Location: N. KY
Posts: 5,940
Mentioned: 10 Post(s)
Tagged: 0 Thread(s)
Quoted: 974 Post(s)
Liked 512 Times
in
352 Posts
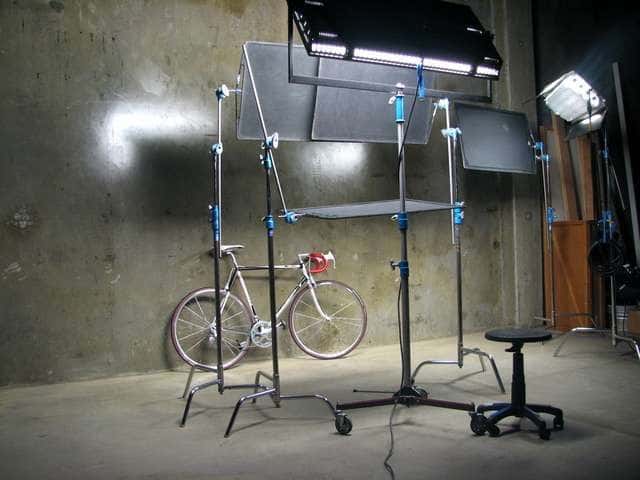
This thread reminded me of 55/Rad's extensive bike collection, and his use of a professional studio after hours.
One of the studio setups. I never thought about studio lighting, so this was very interesting, especially the black panels blocking and shaping the lighting panels.
Linked from an interesting 2016 thread: How To Photograph a Bike
More 55/Rad bikes. (wow, I've been lurking on BF a very long time!)
These were shot and edited with circa 2008 technology. Modern cameras and editors might be better for the perhaps too high contrast and overexposed highlights.
Daccordi 50th Anniversary
Carbon Orbea Orca with dramatic lighting
Giordana Spica updated
Last edited by rm -rf; 03-23-24 at 11:53 AM.
Likes For rm -rf:
03-22-24, 05:58 PM
#19
Senior Member

I’ve been into photography since I was quite young, I still have my first “pro” camera, a Nikon FE that was used to photograph Reagan’s inauguration.
There are two basic things which are important to photography and most other art, composition and light. The geometry of your subject, and the geometry of the background makes a huge difference in how the eye appreciates a photograph. Simply shooting something standing in the center of a frame is not going to do it, unless there is something else in the image which adds a sense of proportion, direction, or dramatic effect.
A picture of something like a big truck is best when you can make it look bigger, like shooting it from wheel-level near the front, with the grille, fenders, and wheels filling up one side of the image, and the rest of the truck diminishing in size toward the other side.
Photograph in a way which makes well-balanced use of lines and angles, and use background objects which fit into the formula.
Light is the next important thing, and can be used to either illuminate or shade, depending on the effect you are trying to get. Shadows can be used to add geometry and drama to what otherwise might be a stale photograph. Edward Steichen was the first master of using light and shadow back in the early days of photography, and Henri Cartier-Bresson was master of composition and geometry, but who also was very clever at using light and shadow in his photos.
Likes For 50PlusCycling:
03-23-24, 08:03 AM
#20
My Workshop = Happy Place
Thread Starter
Join Date: Aug 2023
Location: Norwalk, CT
Posts: 88
Bikes: Schwinns, and many others.
Mentioned: 5 Post(s)
Tagged: 0 Thread(s)
Quoted: 42 Post(s)
Liked 224 Times
in
56 Posts
Excellent input. Thank you.
I ESPECIALLY like the long thread from 2016. SUCH great examples! (Linked from an interesting 2016 thread: How To Photograph a Bike)
I get that my images are "Just the facts, Sir!"
No emphasis on anything more than CLARITY, and to that end I hope: Goal met.
Even OUTSIDE, emphasis on non-distracting backgrounds is key.
This is right outside my house. There is a lot going on, yet with smart natural lighting the bike is truly the subject.
Thank you. Coop
Likes For SharpByCoop:
03-23-24, 08:26 AM
#21
Rider. Wanderer. Creator.
Join Date: May 2007
Location: New Jersey
Posts: 774
Bikes: Bike Friday Pocket Rocket, Cinelli Hobootleg, Zizzo Liberte
Mentioned: 0 Post(s)
Tagged: 0 Thread(s)
Quoted: 394 Post(s)
Liked 781 Times
in
377 Posts
So a few of you wanted MORE bike and LESS background. I get it. OK. I am LIMITED by the size of my space and could not pull my subject away from the draped background much to make a huge effect.
However... I DID stretch the *cloth* backdrop to minimize wrinkles. They are still there. Less so.
FIRST: The subject line of this thread includes 'Inexpensive' so I offer the least expensive option. I captured the following TWO images with my Samsung S23+.
Yes, I then edited them in Adobe Camera Raw as I did my others (with my $4000 camera!) Darks darker, midtones brightened, and highlights reduced.
^^^ Pretty darn good! (All images resized down to 1500 pixels wide here)
NOTE: I tried to use the 'Pro' settings in the Samsung menu, and truthfully they did NOT come out better. Too soft. That was surprising.
I reverted to simply 'auto' mode and edited instead. They had much more detail. However you can see how it captures the background clearly also. Overall it's fine.
Coop
If you are going to use your phone and use the blurred background feature, I suggest shooting multiple shots, some with the blur feature off, just in case.
__________________
--------------------------------------
Rider. Wanderer. Creator.
JohnMFlores.com | YouTube: JohnMFlores
Insta: JohnMichaelFlores | TikTok: @johnnymotoflores
--------------------------------------
Rider. Wanderer. Creator.
JohnMFlores.com | YouTube: JohnMFlores
Insta: JohnMichaelFlores | TikTok: @johnnymotoflores
Likes For john m flores:
03-23-24, 08:30 AM
#22
Rider. Wanderer. Creator.
Join Date: May 2007
Location: New Jersey
Posts: 774
Bikes: Bike Friday Pocket Rocket, Cinelli Hobootleg, Zizzo Liberte
Mentioned: 0 Post(s)
Tagged: 0 Thread(s)
Quoted: 394 Post(s)
Liked 781 Times
in
377 Posts
I�ve been into photography since I was quite young, I still have my first �pro� camera, a Nikon FE that was used to photograph Reagan�s inauguration.
There are two basic things which are important to photography and most other art, composition and light. The geometry of your subject, and the geometry of the background makes a huge difference in how the eye appreciates a photograph. Simply shooting something standing in the center of a frame is not going to do it, unless there is something else in the image which adds a sense of proportion, direction, or dramatic effect.
A picture of something like a big truck is best when you can make it look bigger, like shooting it from wheel-level near the front, with the grille, fenders, and wheels filling up one side of the image, and the rest of the truck diminishing in size toward the other side.
Photograph in a way which makes well-balanced use of lines and angles, and use background objects which fit into the formula.
Light is the next important thing, and can be used to either illuminate or shade, depending on the effect you are trying to get. Shadows can be used to add geometry and drama to what otherwise might be a stale photograph. Edward Steichen was the first master of using light and shadow back in the early days of photography, and Henri Cartier-Bresson was master of composition and geometry, but who also was very clever at using light and shadow in his photos.
__________________
--------------------------------------
Rider. Wanderer. Creator.
JohnMFlores.com | YouTube: JohnMFlores
Insta: JohnMichaelFlores | TikTok: @johnnymotoflores
--------------------------------------
Rider. Wanderer. Creator.
JohnMFlores.com | YouTube: JohnMFlores
Insta: JohnMichaelFlores | TikTok: @johnnymotoflores
Likes For john m flores:
03-23-24, 12:01 PM
#23
don't try this at home.
Join Date: Jan 2006
Location: N. KY
Posts: 5,940
Mentioned: 10 Post(s)
Tagged: 0 Thread(s)
Quoted: 974 Post(s)
Liked 512 Times
in
352 Posts
The bike photography threads back in the 2005-2010 era always had (somewhat joking) comments on the bike setups: crank arm not in line with the seat tube. Tire valves needed to be both at the top of their wheels (or was it at the bottom of the wheels?), and props holding up the bike hidden or edited out. Big ring + small cog only! DRIVE SIDE ONLY!!
Picky!
Picky!
Last edited by rm -rf; 03-23-24 at 12:04 PM.
03-27-24, 09:50 AM
#24
Commuter

Join Date: Jun 2022
Location: SE Wisconsin, USA
Posts: 540
Bikes: Main Bikes: 2023 Trek Domane AL3, 2022 Aventon Level.2 eBike, 1972 Schwinn Varsity, 2024 Priority Apollo 11
Mentioned: 3 Post(s)
Tagged: 0 Thread(s)
Quoted: 238 Post(s)
Liked 323 Times
in
196 Posts
Looking good.
I have a big piece of black velour that absorbs all the light. Yours has some reflection. You might look into that.
Don't forget to adjust your exposure to under-expose; all the black will trick your light meter into thinking things are darker than they are and it will tend to OVER expose. The opposite holds true with a white background. Cameras' light meters are calibrated for 18% gray, but the metering systems are getting more advanced now.
I just got a 1972 Schwinn Varsity that I really like. Very few of my club mates understand, one even calling it a "*****ty old bike". It's Campus Green. You have a nice collection there. It is heavy, but once moving it rolls very smoothly and has quite a supple ride, with that springy fork!
Likes For Smaug1:
