Well I made it to a rolling chassis. However, it still needs some work.
Getting the wheels mounted to the frame is tripping me up a bit. I didn't have a solid plan for how to do it and just took a few swings at it. So the design evolved a bit as I went based on material. I had a rough idea of what to do - and the inside (fixed) flange is what that idea evolved in to, basically. However, I had to make a change to it even. The basis of the flanges was some scrap 1-1/2" x 1/8" thick angle. The 1/8" material was a bit too thin for my liking for the axle to sit in. So I welded another 1/8" thick plate to the side of the angle that the axle hole was going in - before I drilled the hole. This gave me a 1/4" thick seat for the axle. I like that a lot better.
The above "working through the problem" skewed the idea I had for the outside adjustable flange. My original idea was to use the same 1-1/2" x 1/8" thick angle for it. However, working through the dimensions that became awkward. What is more is the QR skewer cam wouldn't fit in the original "idea". I had to widen it quite a bit. By that time I was about 2-1/2" wide on the outside and if I kept the angles whole (reducing some fabrication effort) and went 3" that wasn't that much more material and was less cutting time. So I left the angles whole. The other issue was the flange itself - since I bumped the axle seat up to 1/4" on the inside I thought I could reduce some fabrication effort by using 1/4" material from the get-go. So I did. That reduced the cutting, fitting, and welding time quite a bit. But it did add material which adds weight. At this point I am not going to worry about it too much. If I try to nit-pick the parts to shave a couple lbs it is going to take me another 2 months to work through the nit-picks.
On to some pictures.
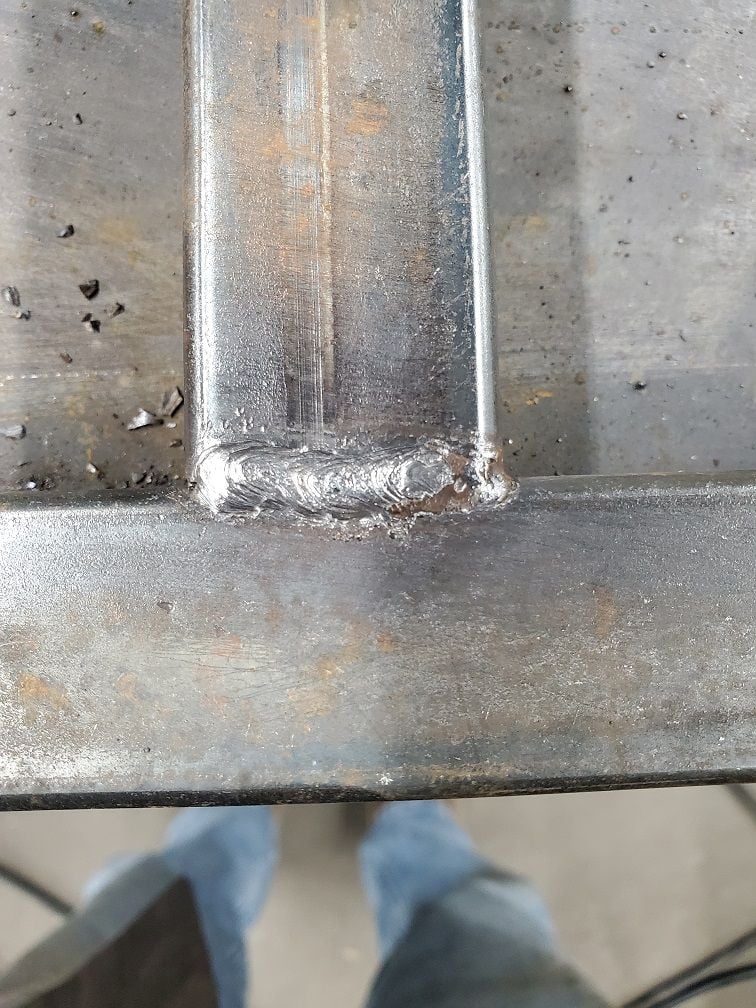
Here is what the welds should look like.
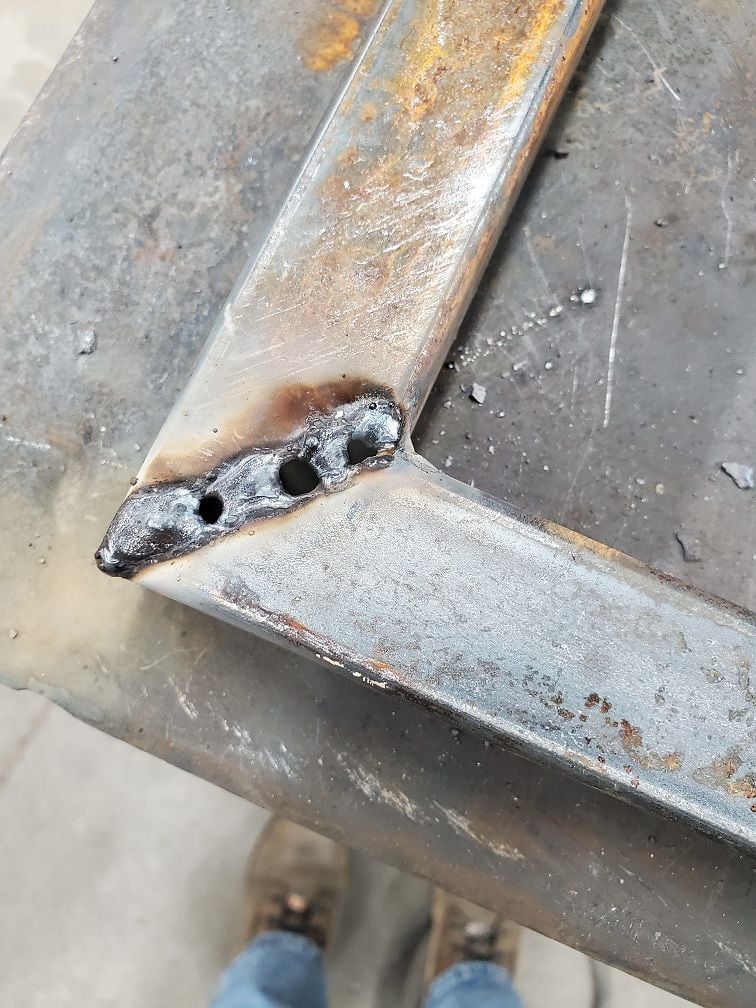
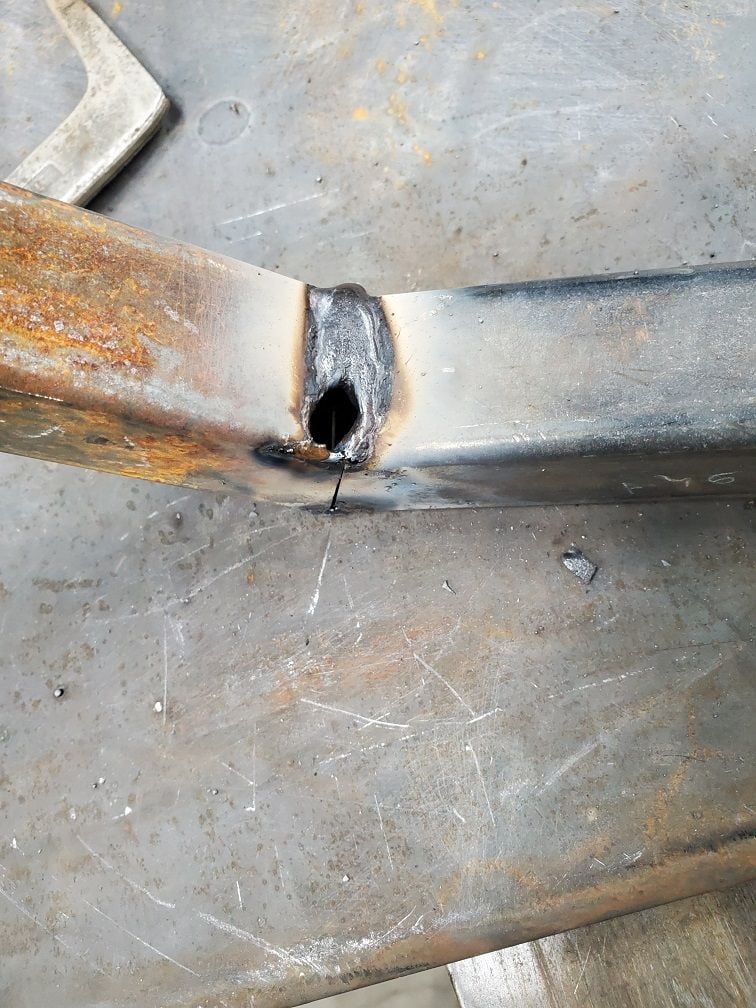
This is what I was fighting in places. The dark coating on the weld is the slag - that is the remnant of the welding rod burning. The rods are coated with a flux, depending on the type of rod. These are 7018. They have a lot of slag over top of the weld, but produce a pretty good bead. The more important aspect is the quality of the weld. There are other rods to use, but this type is very common for structural applications and resists cracking better. It is also said to be a more ductile weld - that is, it can be flexed without cracking as easy. Not that I have to really worry about anything bending much here, but still.
The rods I used were 3/32" diameter. I had to run them at about 90-95 amps to get them going adequately. That was barely enough heat to get them to go, but too much heat for the thin tubing at times. Hence the hole.
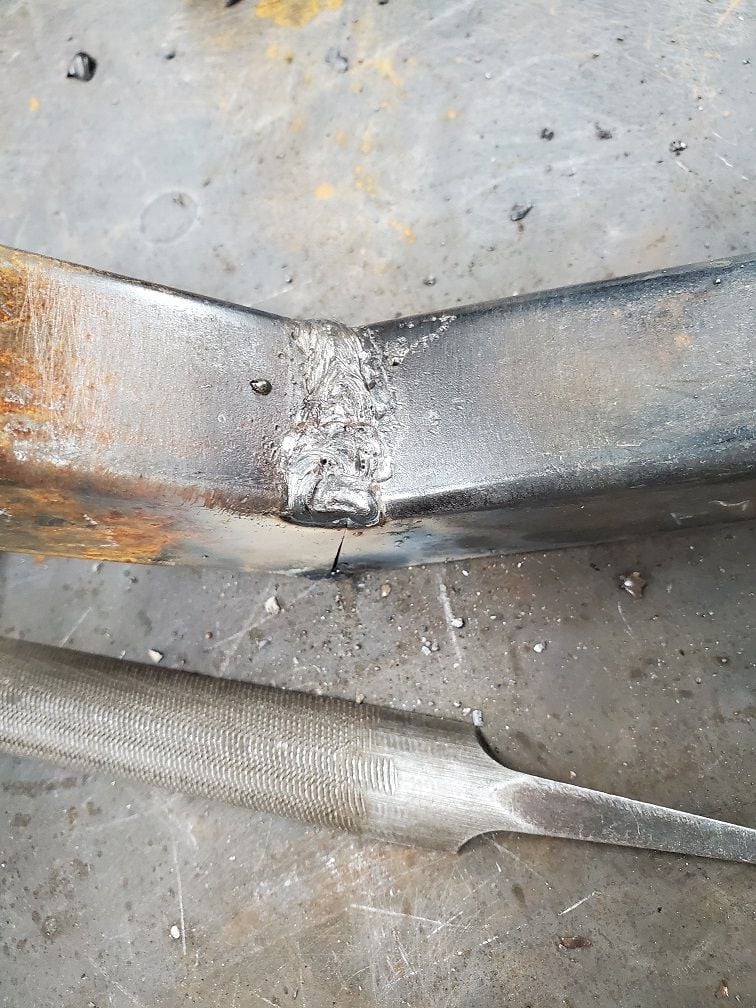
Here is that same joint with some time, effort, and care with stacking welds to patch the hole. They can be repaired - but it is obviously best to not get the holes in the first place. I am sure the end result isn't going to be as strong, but it will be stronger than having an open hole.
And another example.