The issue the OP has is the front rack and fork.
Since several people are describing ways to do it in back, in the future this might be one of those reference threads people go to, so I will describe how I did it on one of my bikes in the back.
My issue was that on my Lynskey the rack and fender mounts are significantly higher than on most frames. Not an issue for the fender but that put the top of the rack way up higher than I wanted it.
First photo when I used the original rack mounting holes on the upper frame mounting points. The pannier hanging rails on the rack are almost as high as the top of most racks on other bikes. This clearly was a bad plan.

Some racks, the lower mounting bolts have to go through the rack in only one spot. My Racktime Addit Rack only had one set of mounting holes, but the hole was through aluminum plate that was flat. After thinking about this for quite a while I decided to drill some new holes through that plate so that I could move the mounting points up higher on the rack. Drilled a hole on each side, was extremely careful with marking and drilling to make sure that both holes are exactly the same position relative to the other holes to make sure the rack is not leaning to one side or rotated when mounted on the bike.
And, the Lynskey frame had two mounting points, upper for rack and lower for fender, I decided to use the lower mounting points for both. And the disc brake did not cause any problem, lots of room for the fender hardware. And in this case the mounting point was high enough above the cassette and chain that the chain will not hit the bolt for fender hardware when shifting onto or off of the smallest sprocket.
This worked well. In the photo below you can see on the drive side that both fender and rack use the lower mounting holes in the frame. On the non-drive side, the rack clears the axle and dropout, that was a consideration when determining where to drill the new mounting holes in the rack. Nylock nuts used, so they will not vibrate loose and fall off.
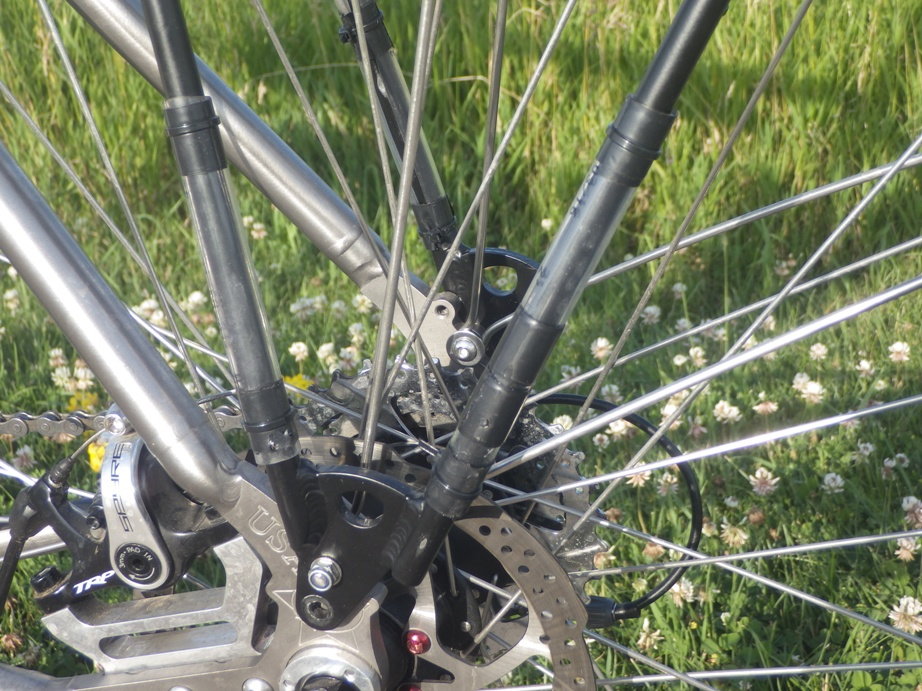
The clear plastic tubing wrapped around the rack tubing is intended to prevent the pannier from chafing the rack.
Photo below, there is plenty of room for a panhead M5 bolt, fender stays, a few washers on the inside on the non-drive side, plenty of room next to the disc brake rotor. And on the drive side the frame mounting points are well above the chain and cassette so shifting is not impaired.

And this looks much better with the pannier hanging rails down lower. Yes, the rack is tilted a bit forward, but I was in a hurry to take the photo, it was nearly sunset and I would lose the light in a few minutes.
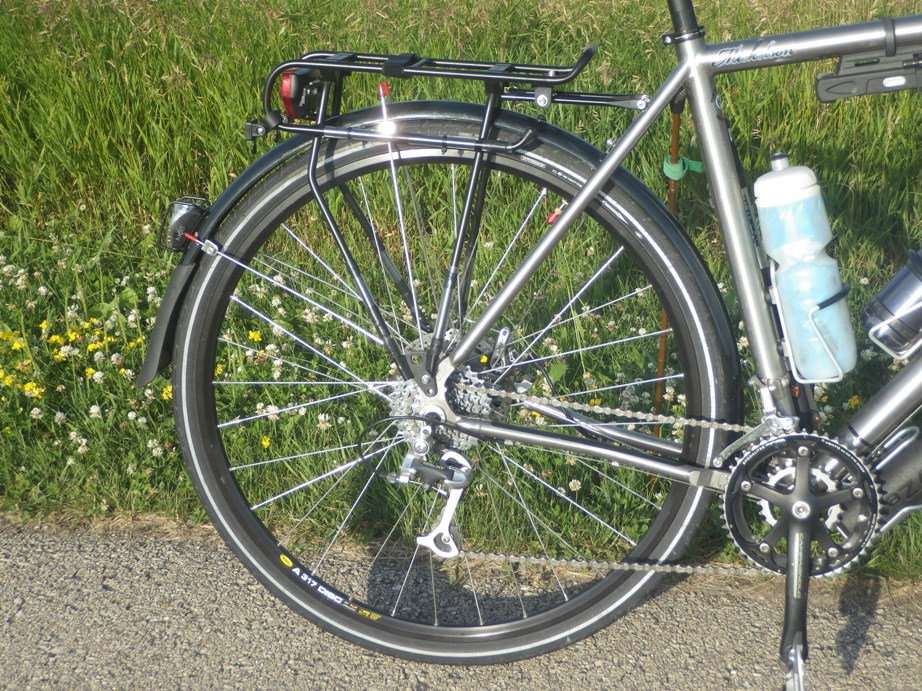
I mentioned in a previous post that I generally do not like to cut stays shorter, but the fender stays that are under the rack platform, I did cut those shorter later, they stick up way too high in the above photo.
I got lucky and picked up a nice Nitto rack at a swap meet for $10, I use that for riding around near home and only use the Racktime rack for touring loads with panniers. But that is off topic.