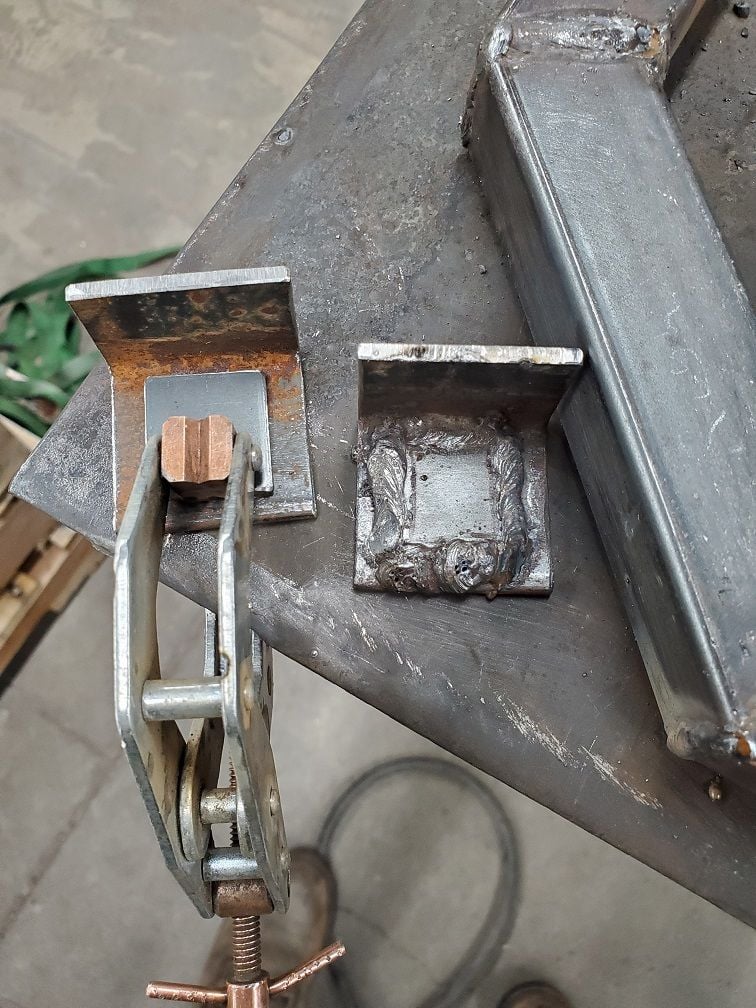
These are the inside flanges going together. One welded and the other getting ready to weld so you can see the layering process.
Before I finish this up I'll grind down the welds. The welded layer is on the outside, with the hub on the inside, of the flange. The QR nut has to be opened quite a bit to clear the weld bumps. If I grind it down that will help smooth out the wheel install/removal.
These are the flanges with the axle holes drilled and chamfered. I used a letter T bit. It had about .010" clearance for the axle. The next smallest was an S and the axle wouldn't go through. I did a couple test holes to see how the fit was. I felt the T was a bit sloppy, but that was the best I could do. It will still work.
Not pictured is I cut the flange to the bottom with a band saw to make a slot. I was debating on using a mill, but the set up time to do it was prohibitive. So I just went old school with the band saw to carefully open it up and a cut off disk on an angle grinder to finish the saw cut in to the hole and finesse it a bit manually. They came out pretty good in my opinion - the axles sit in there just perfect.

I tack welded the flanges on to experiment with the fitting. When I set them I took a straight measurement across to the outer rail with the edge of the flange flush against the outside of the inside frame rail. Then I marked 1/16" up. While the flange was clamped in place I tapped it to rotate it so the alignment mark lined up with the one 1/16" forward.
What this accomplishes is it cambers the wheels in slightly. That will add stability especially if I get cruising down a hill. I don't intend to get going that fast, but that is the physics of how it works - the wheels pushing in slightly stabilizes the direction. And since I was in the fabrication phase where that would be possible to do without much effort I did it.
I did not take any pictures of building the outside adjustable flanges. You can see the one here pretty well so that should be clear enough how the parts went together. I did the holes and slots the same way. I had .770" from the top of the flange (where the flange seats against the frame) to the center of the holes on the inside flanges so I did some math on the different material thicknesses and got to the same measurement before I marked the hole locations.
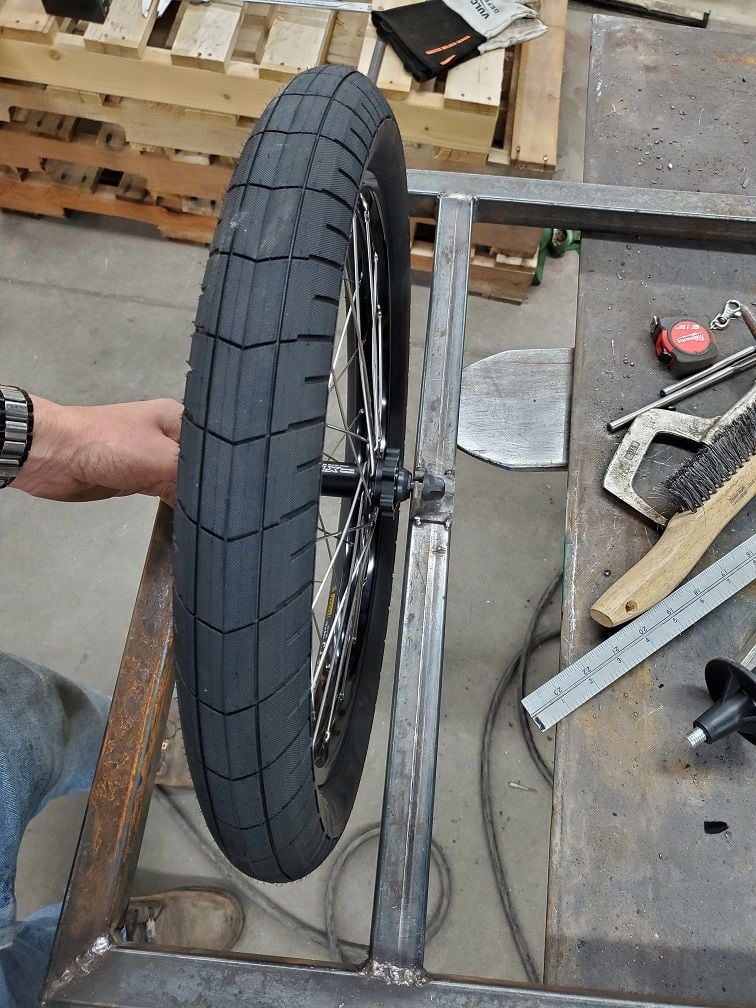
For the time being I tack welded the outside flanges in place. To set them I clamped the QR skewers so the axle held the flanges in perfect alignment. That gets back to the camber angle I set in there on the inside fixed flanges. The tacks are heavy enough I can roll it around now. However, as discussed earlier (a couple posts up I think) the idea with the outside flange is to have it bolt on so it is adjustable depending on the width of hub. How to do the holes is the next item of consideration. What I am thinking of doing is using something like a 3/32" or 1/4" end mill to make the slots in the flanges. I am wanting to stick with metric hardware so I will find what size bolts to use - maybe a 7 or 8mm. Then go with a standard end mill a bit smaller and widen the slot to what I need for the bolt clearance. That will take some time to set up and accomplish.
The square tubing under (in the case of it being upside down here, or the top when it is right side up in use) the outside flanges is where I am going to cut open and weld in thicker thread plate metal. I have 1/4" easy to use, however I don't think the thread plates need to be quite that thick. If I can find some 3/16" that would work. If not - the 1/4" will be fine. Again, the thinner plate is a part nit-pick to save weight. At the end of the day the 1/4" will work.
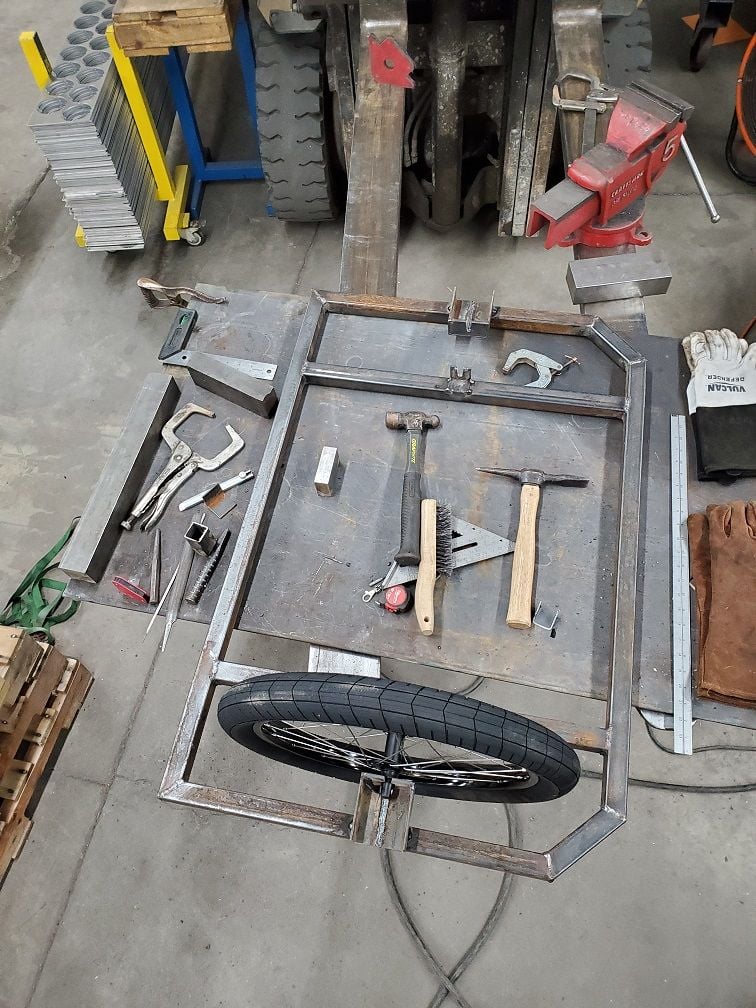
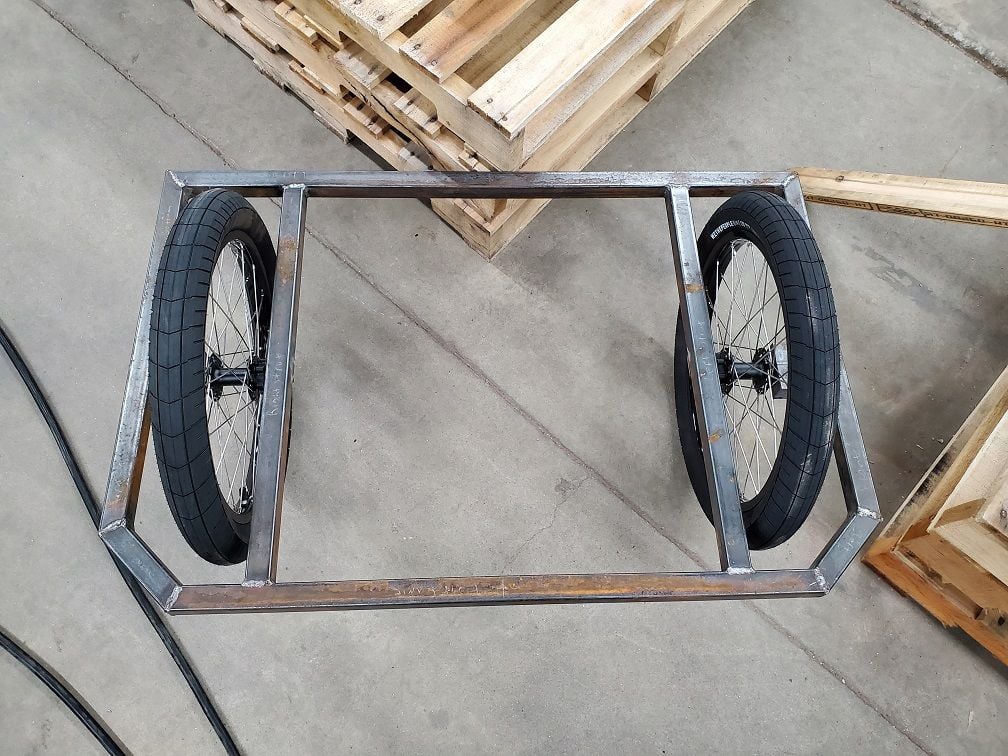
And the rolling chassis. Now its starting to look like something!