


What have you been wrenching on lately?
 11-05-23, 08:40 PM
#6976

Senior Member

Join Date: Aug 2015
Location: Murrieta Ca.
Posts: 537
Bikes: Teledyne Titan, Bob Jackson Audax Club, Bob Jackson World Tour, AlAn Record Ergal, 3Rensho Katana.
Liked 623 Times
in
245 Posts

The hubs are available here... https://www.lllco.url.tw/product.html P/N LS-62. The hubs are made in Taiwan, the quality is good, their products are well supported I ordered a spare free hub, no issues.
The mechanical design is simple and it only takes two allen wrenches to break down the hubs, sealed cartridge bearings, easy service.
The design and size is very similar to the Curtis Odom hubs on my Bob Jackson World Tour, just 1/3 the cost and also available on Ebay.
 20160220_134103 by nemosengineer, on Flickr
: Mike
__________________
Booyah Hubba-Hubba!!!
Booyah Hubba-Hubba!!!

Likes For Nemosengineer:
11-05-23, 09:23 PM
#6977
Built up my new Centurion Cinelli frame, but it's too ugly still to take pics of (no bar tape, mismatched (shudder) tires, etc. Rides nice though. And dang! 30mm rear tires fit with plenty of room, and 28mm front.

Likes For NVFlinch:
11-05-23, 10:33 PM
#6978
Bergz
 11-09-23, 09:25 AM
#6979

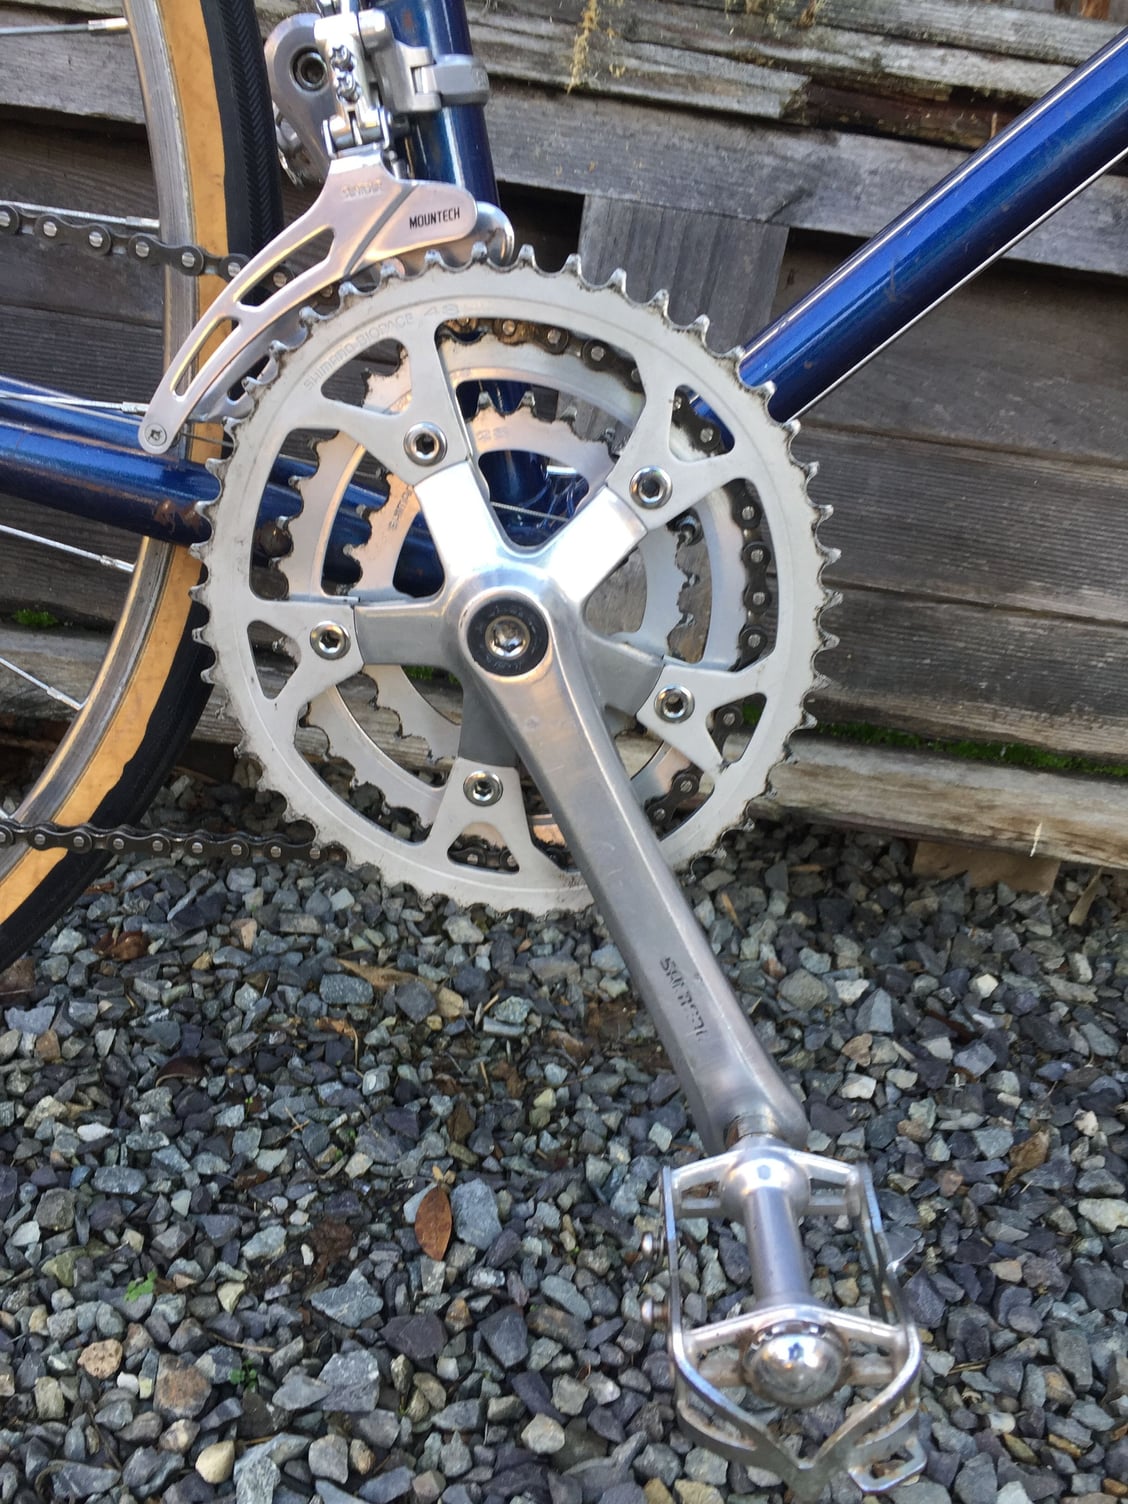
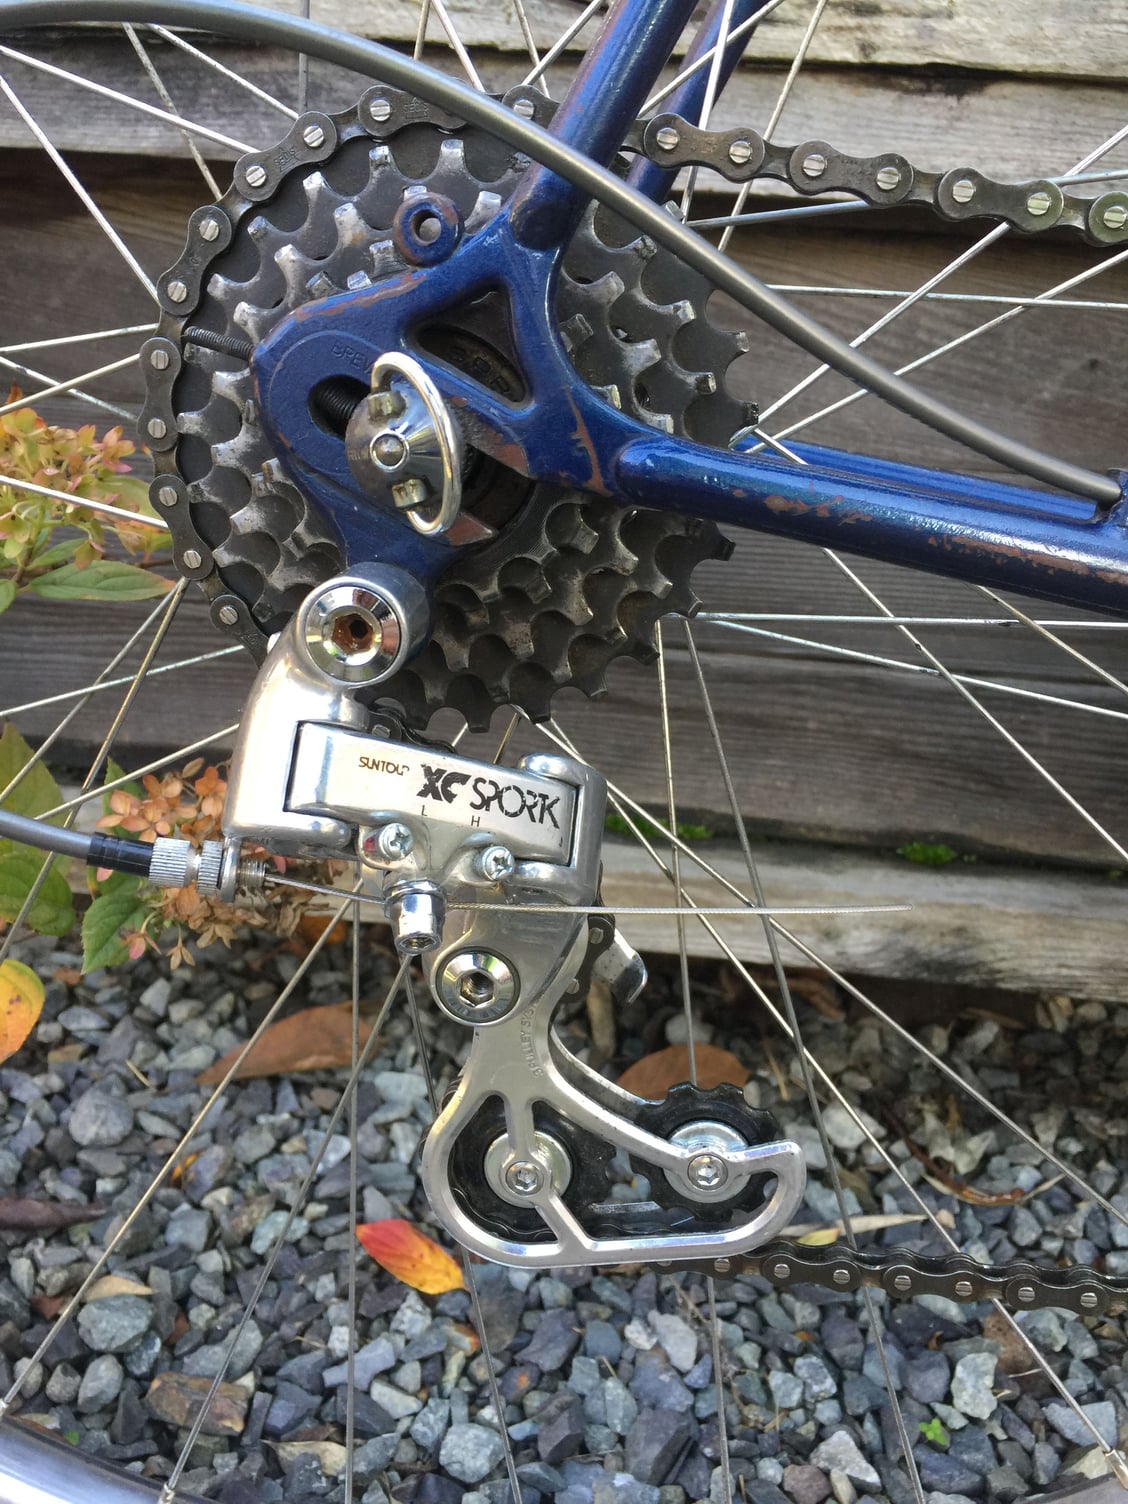
The 1977 MKM is back on the road. Reynolds 531 26.8? Seatpost I think. High flange Campy on Weinman convex 27" rims with chrome double butted spokes. Double triple, cranks and very rare rear derailleur Suntour XC Spork. The front derailleur is Suntour Mountec. The brakes are Diacomp with Cyclone levers. Sedis chain with Regina freewheel.
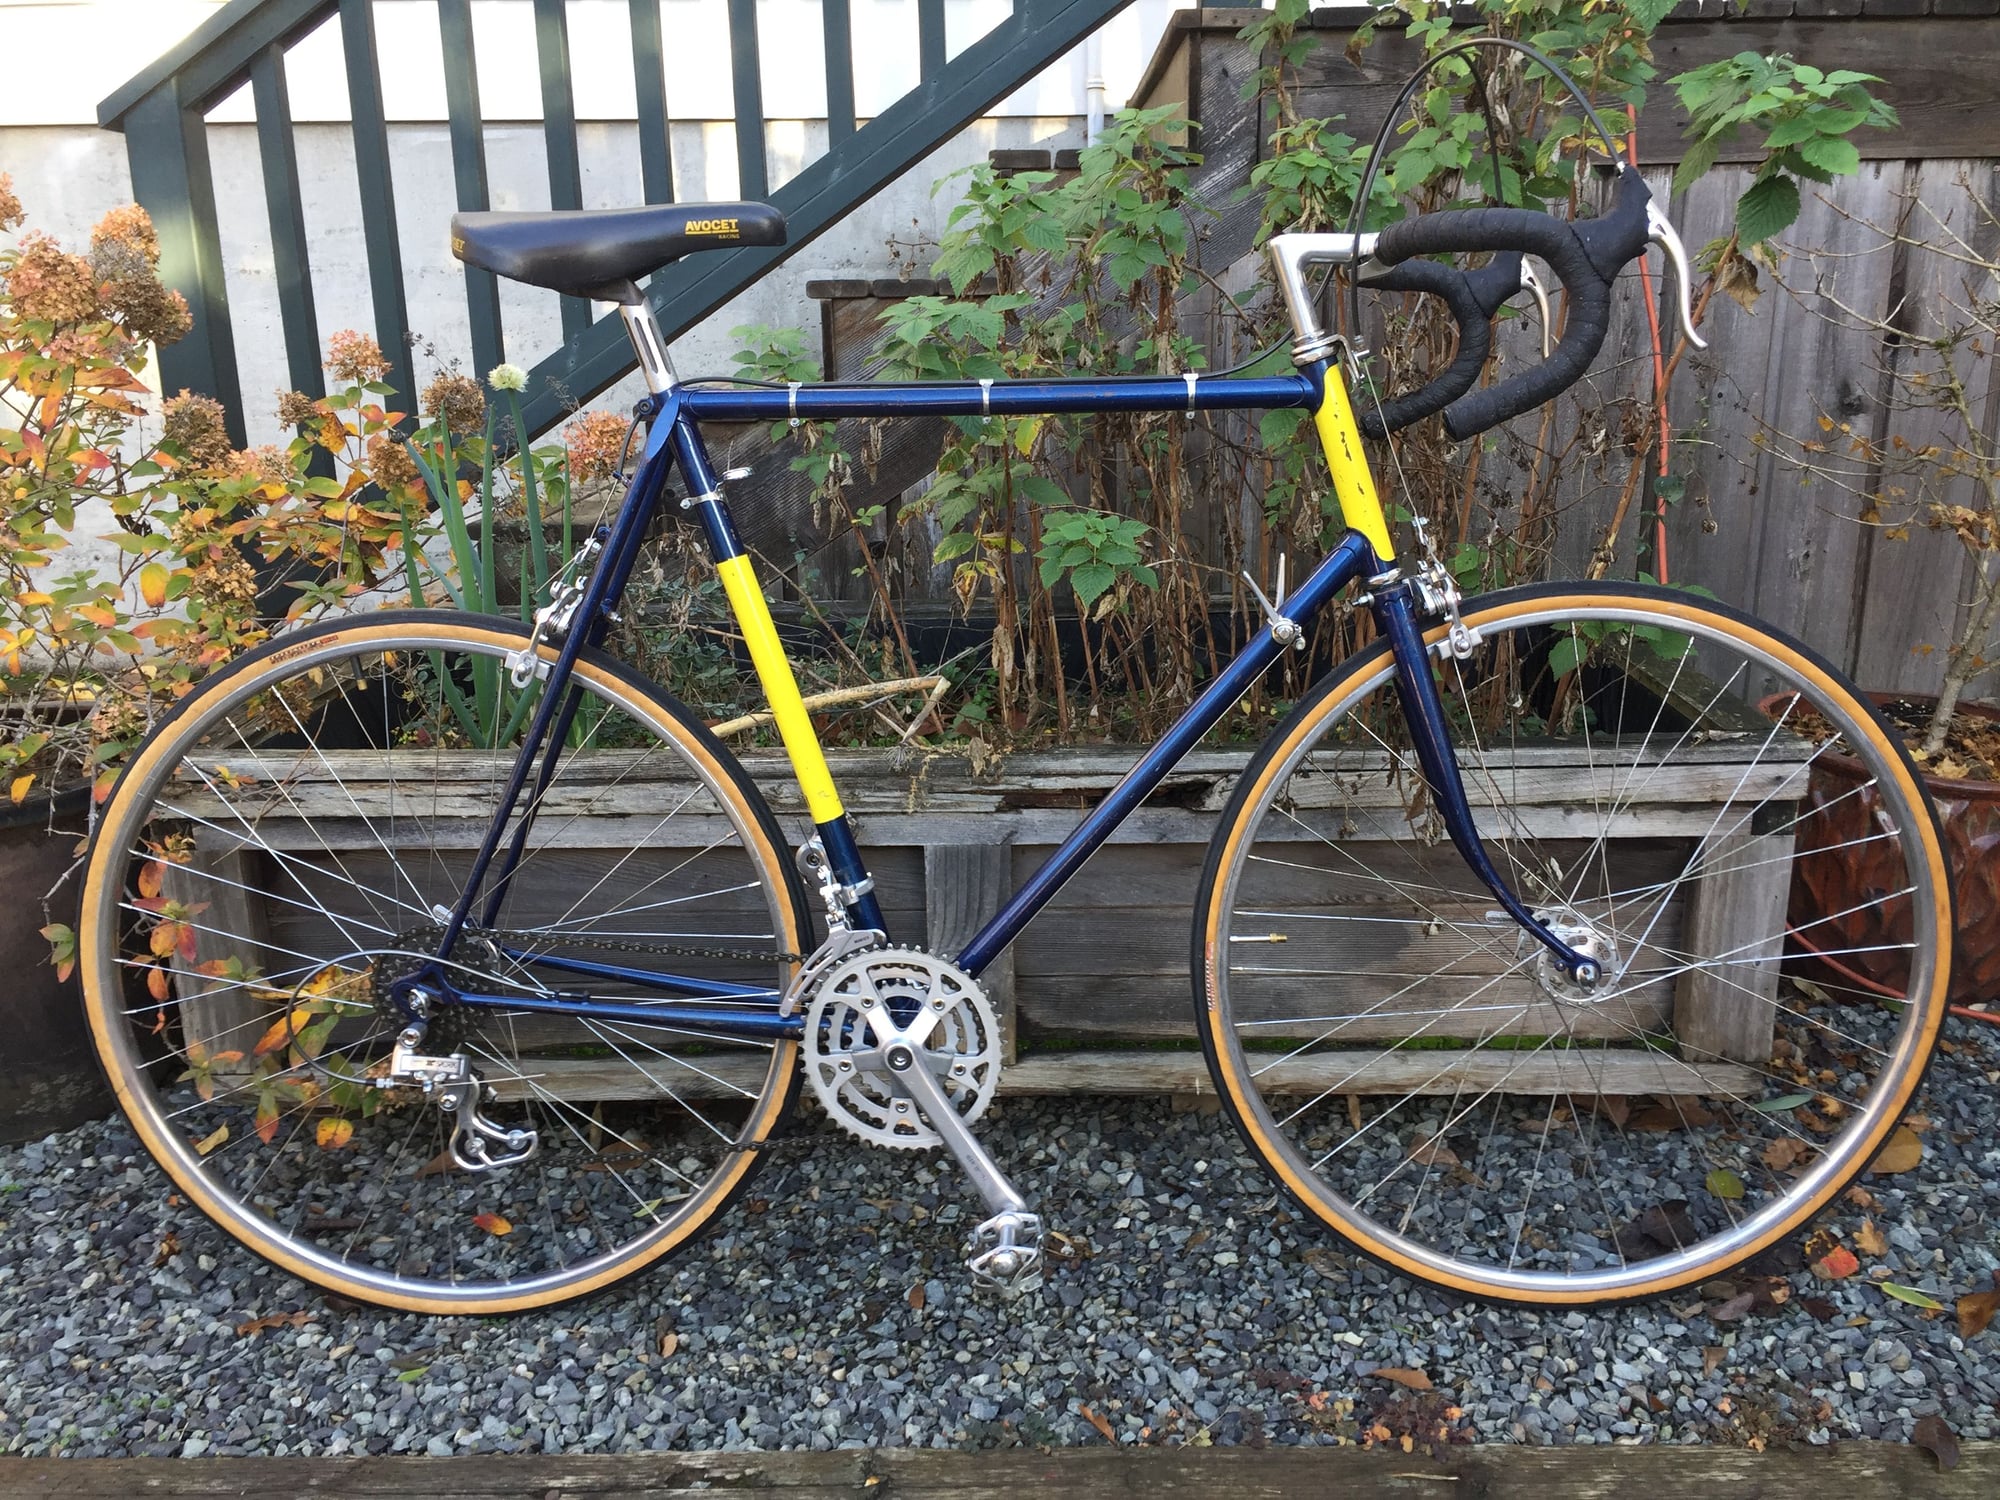
The Specialized tires are courtesy from the RiddleOfSteel
Please forgive me for I have sinned, the chainrings are biopace.
The Specialized tires are courtesy from the RiddleOfSteel
Please forgive me for I have sinned, the chainrings are biopace.
Likes For Mr. 66:
11-09-23, 05:27 PM
#6980
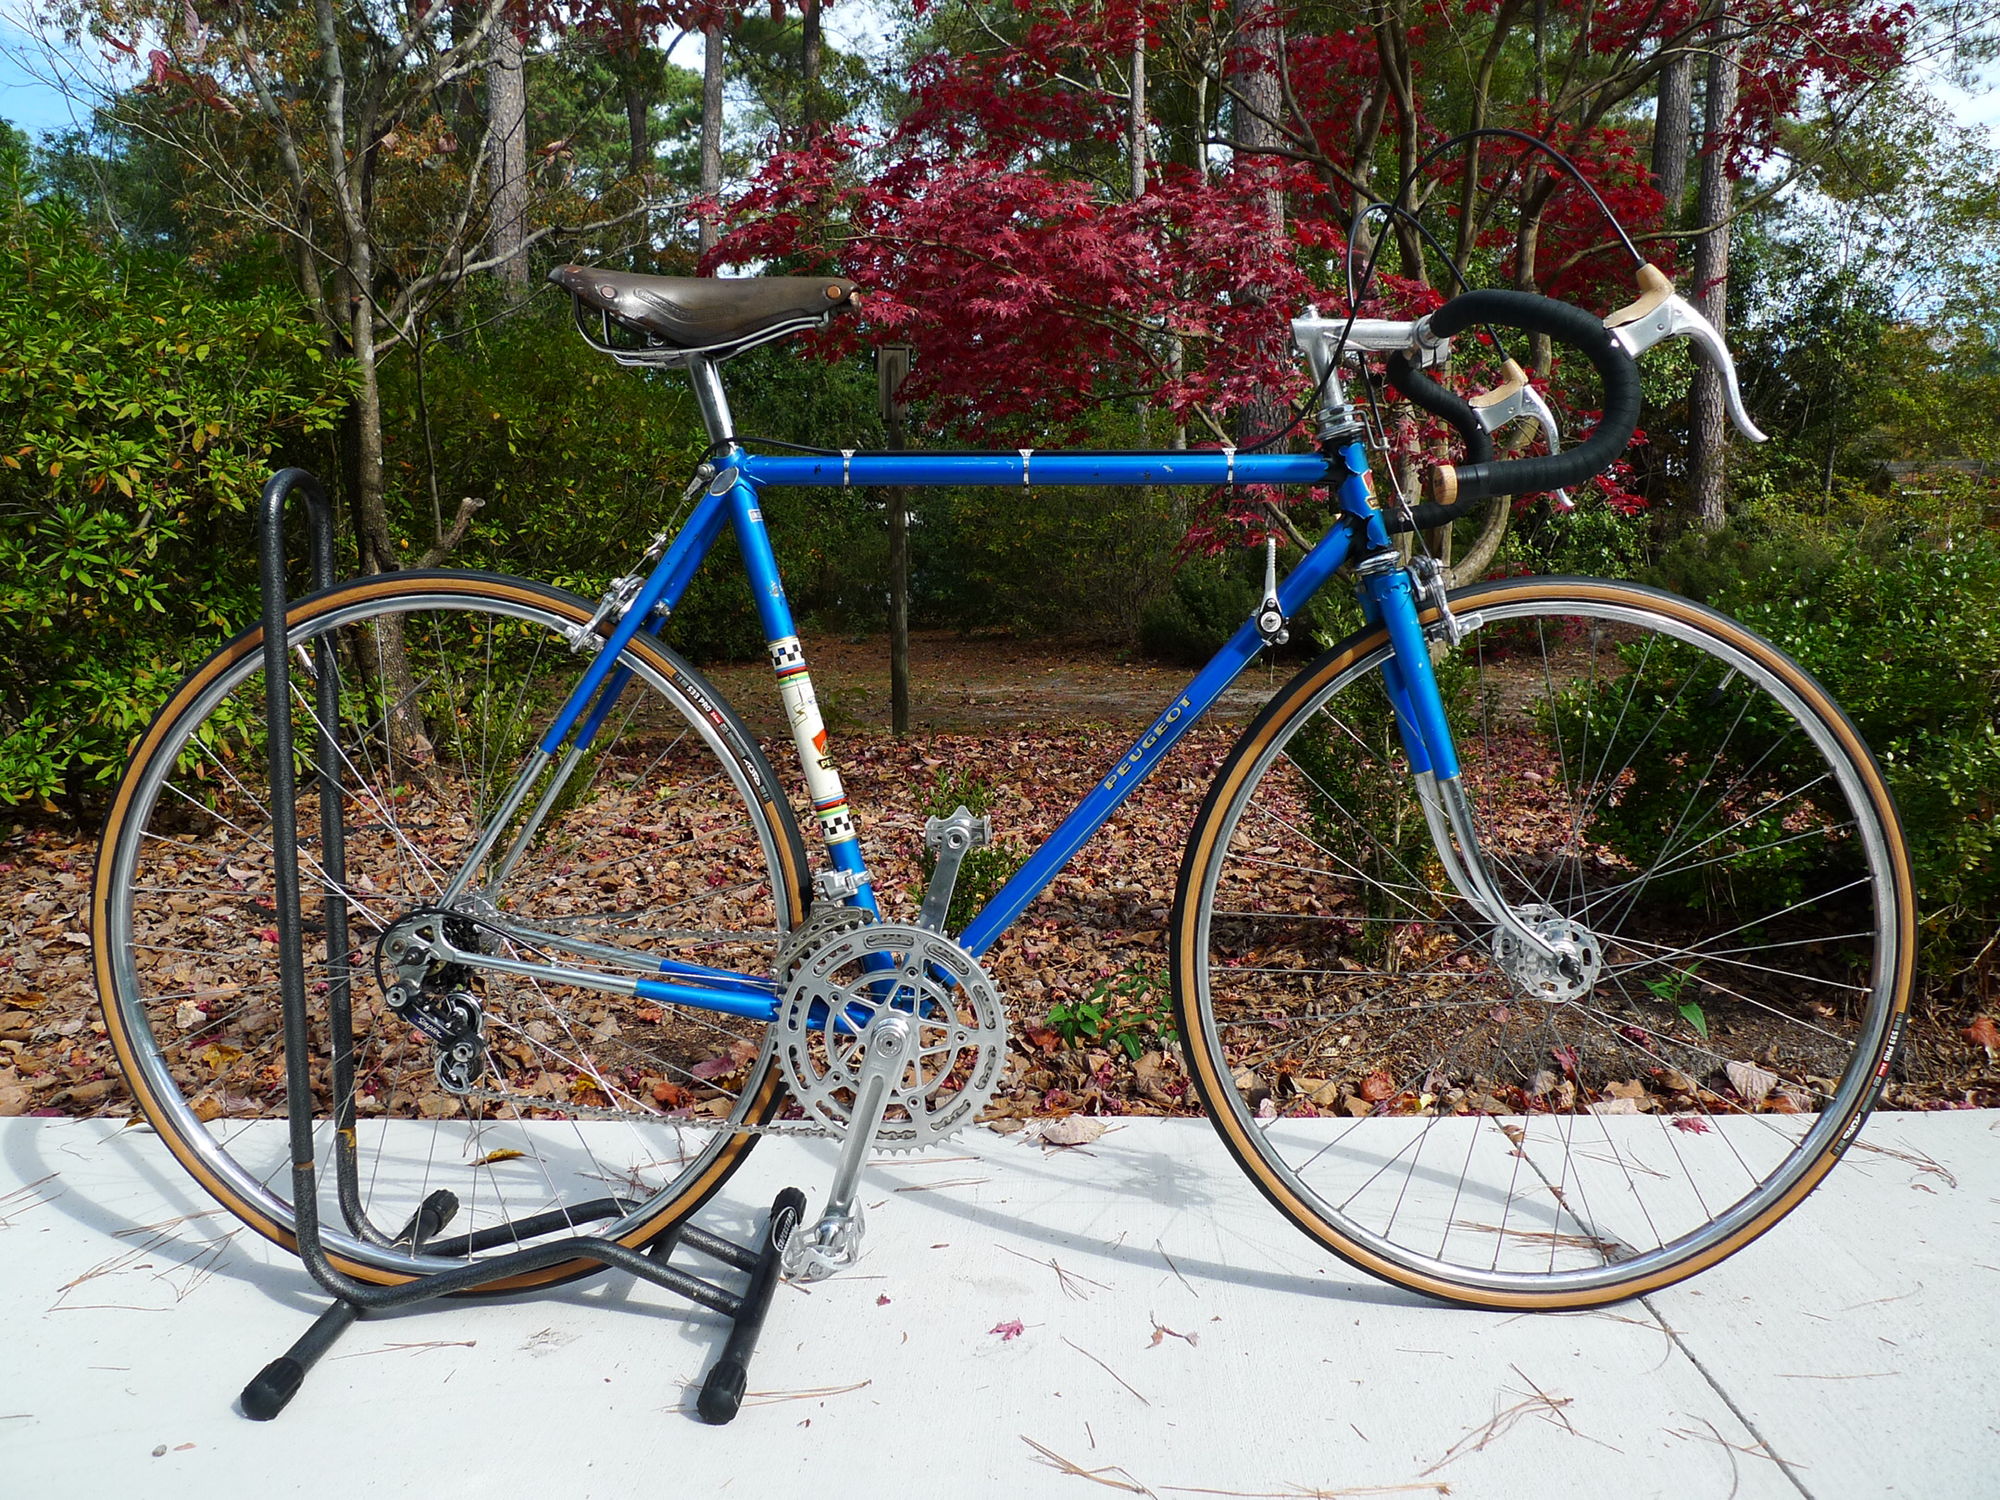
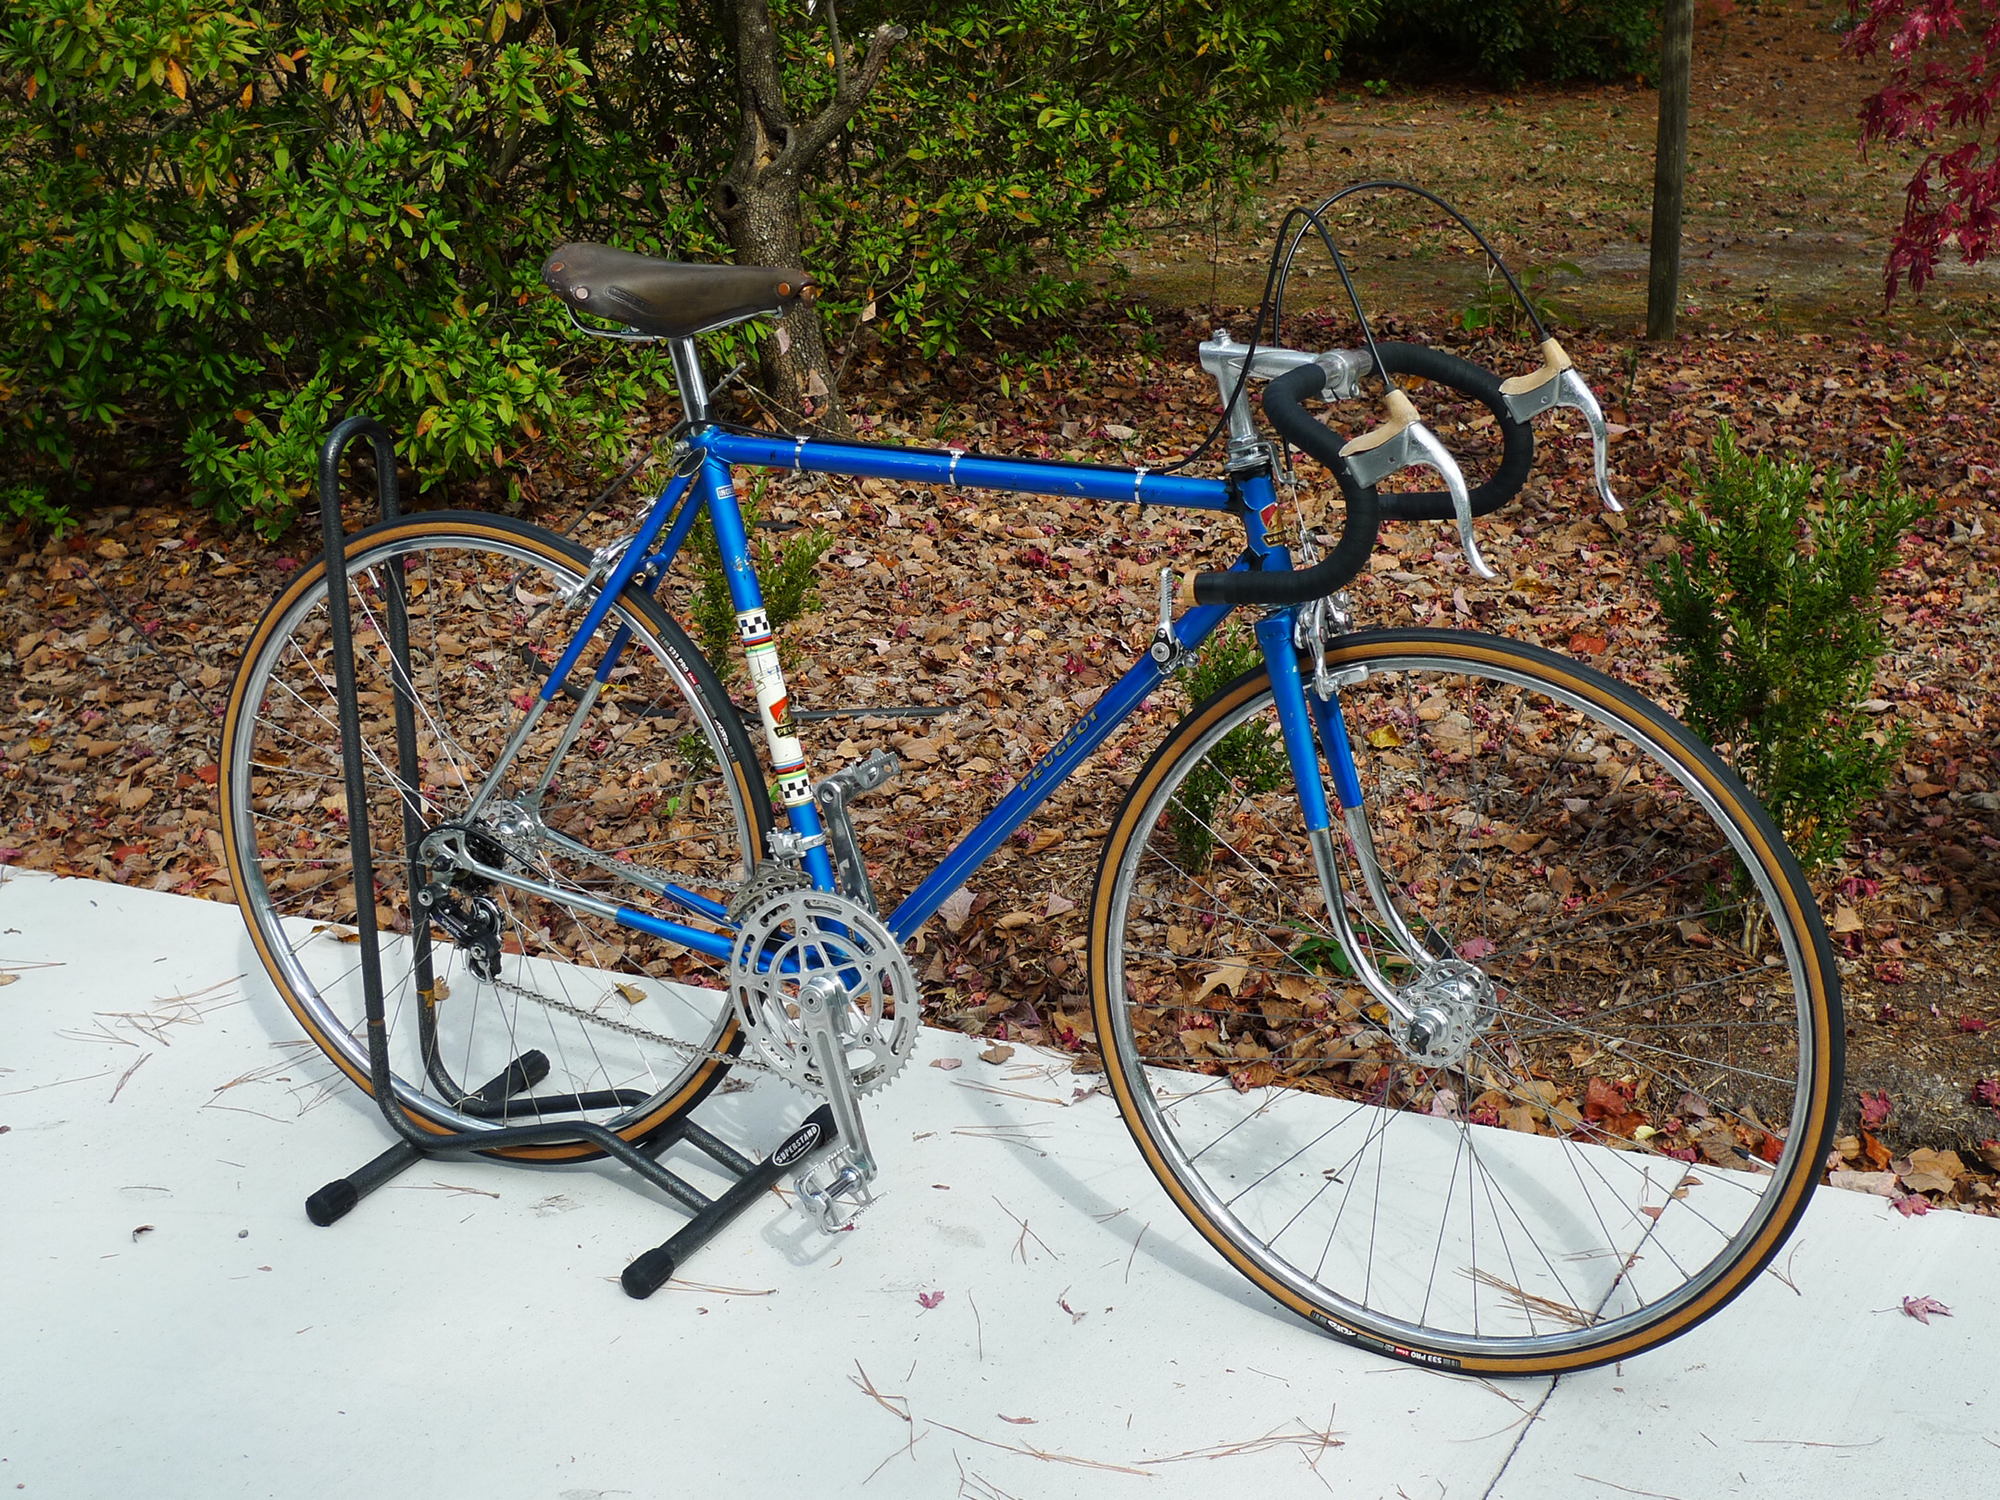
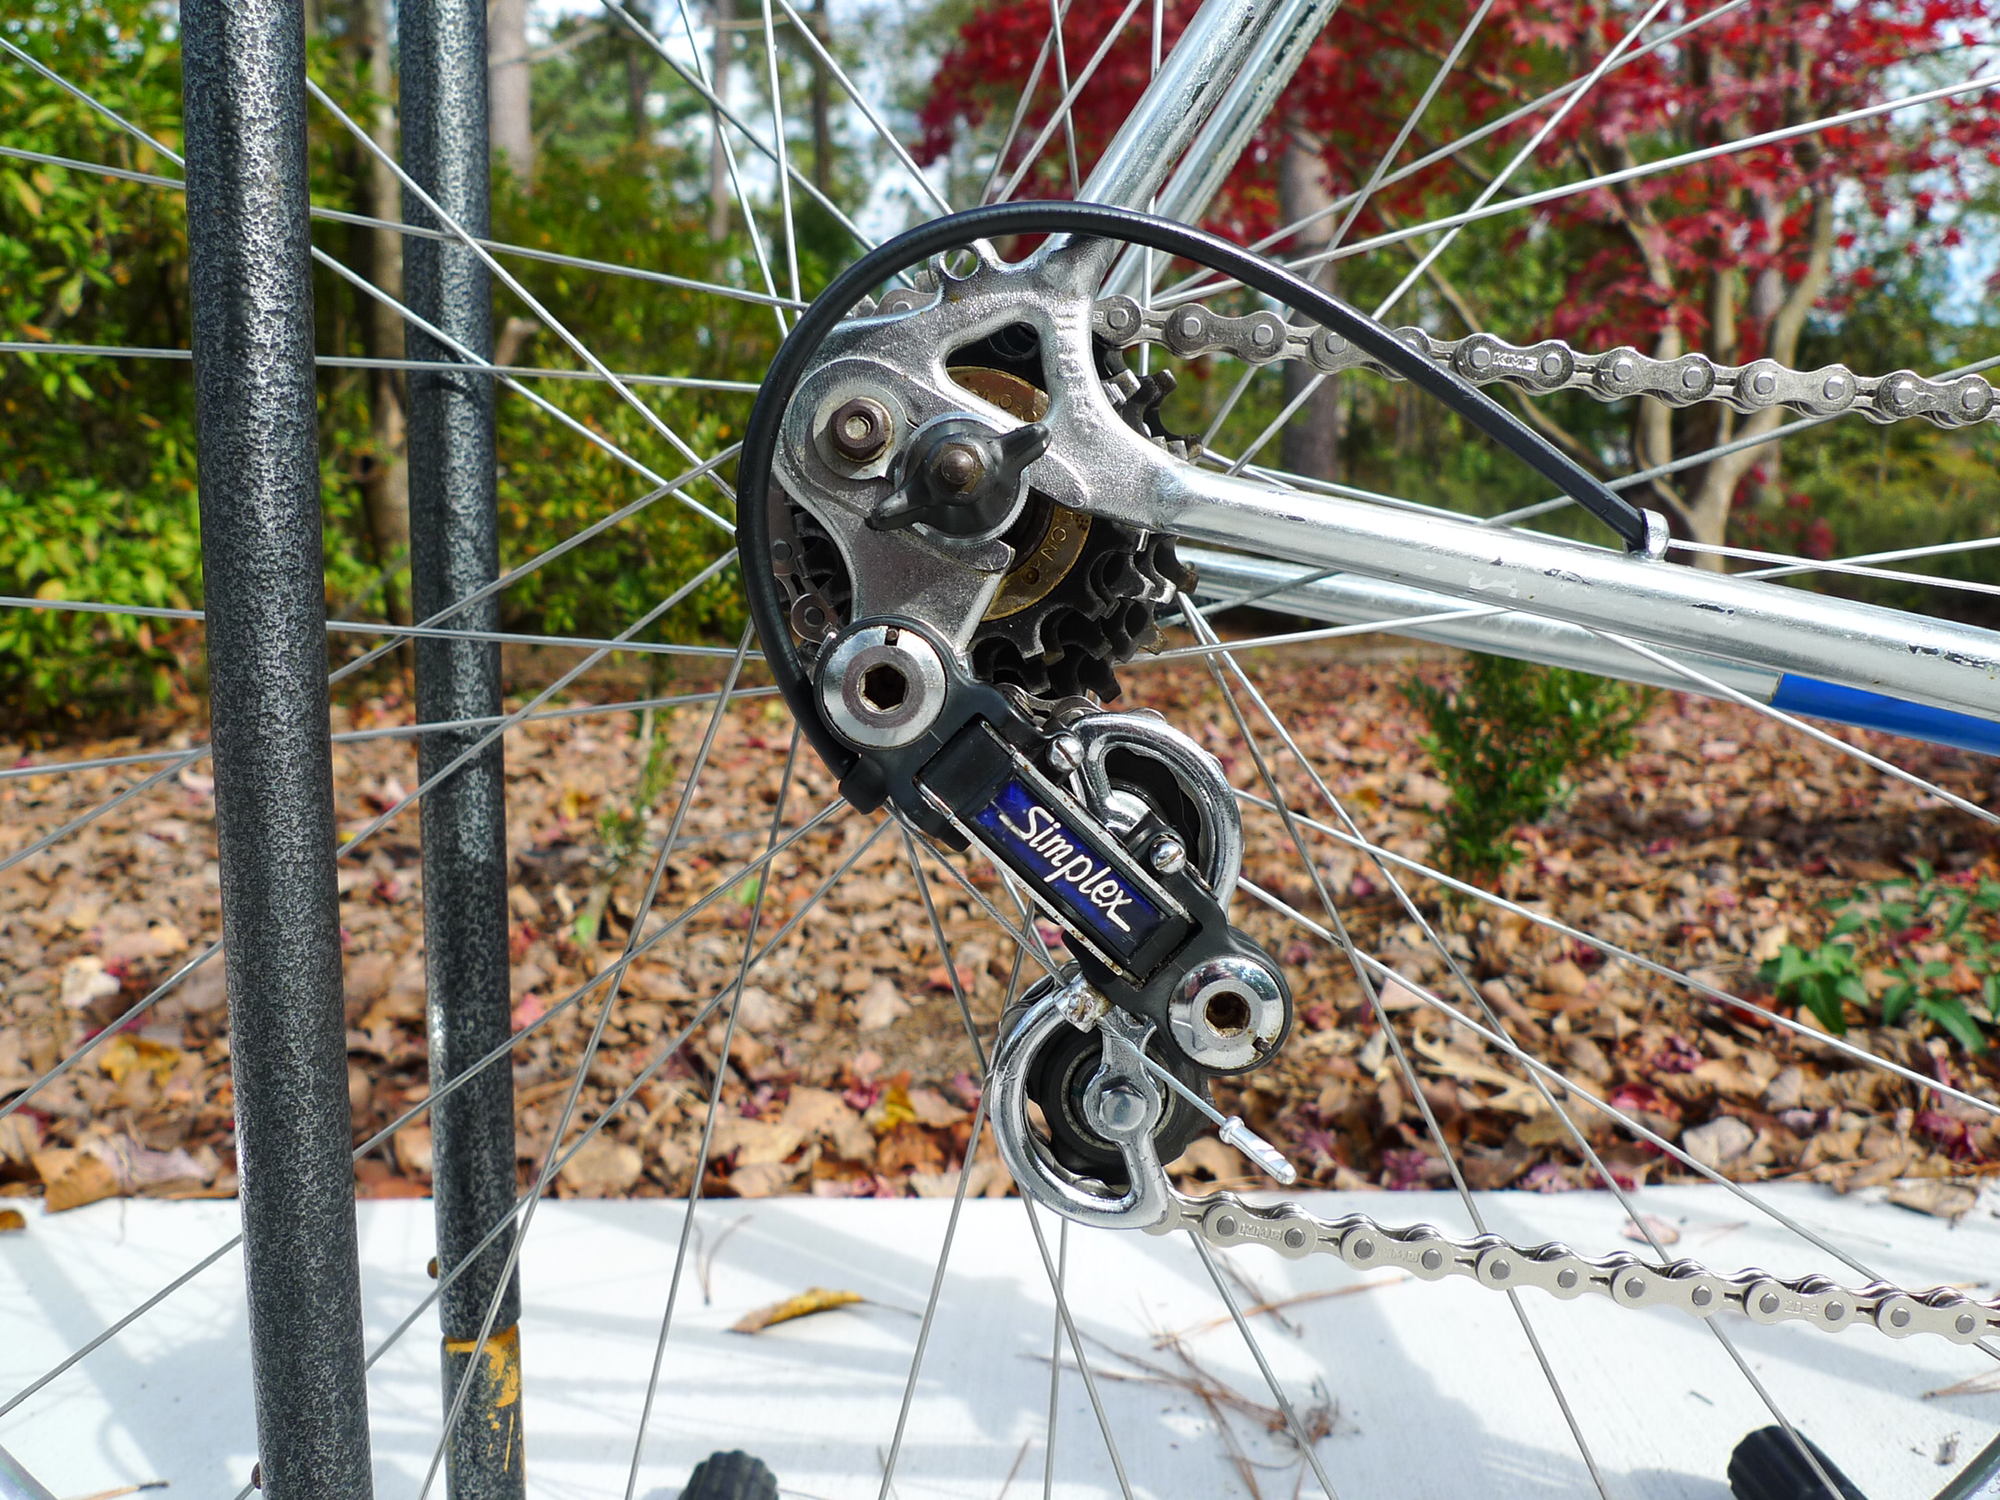
Just finished this up today. I believe this is a 1969 or 1970 Peugeot PX10. The shifters and front derailleur are not original. I overhauled it and put it back together using the components as it came when I purchased it. Had to work on the rear derailleur and replaced the back rim. Rode it today for the first time and seems to be working well.

Likes For Arktiger:
11-09-23, 06:42 PM
#6981
Senior Member
Join Date: Mar 2021
Location: SoCal
Posts: 2,944
Bikes: Cuevas Custom, Cimmaron, 1988 "Pinalized Rockma", 1984 Trek 510, Moulton custom touring, Raleigh Competition GS, Bridgestone Mb-2 & 3, 1980's Peugeot - US, City, & Canyon Express (6)
Liked 4,894 Times
in
2,286 Posts
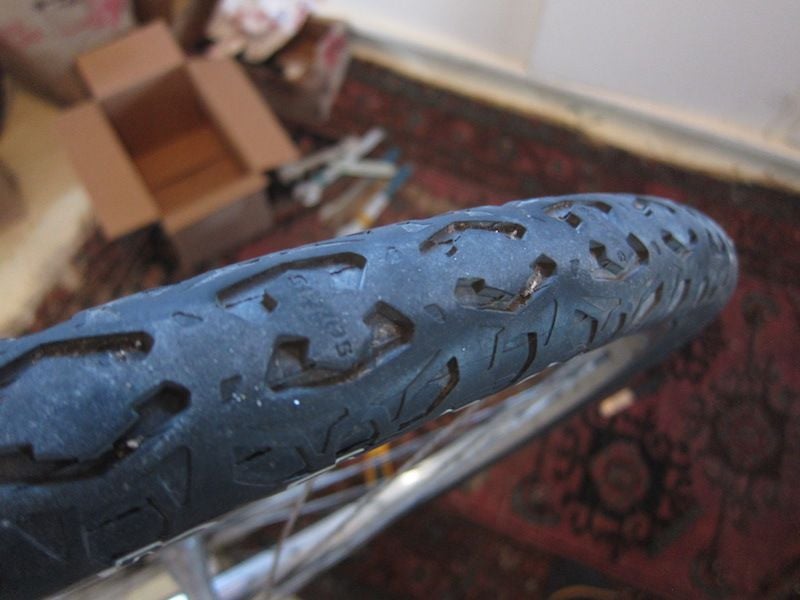
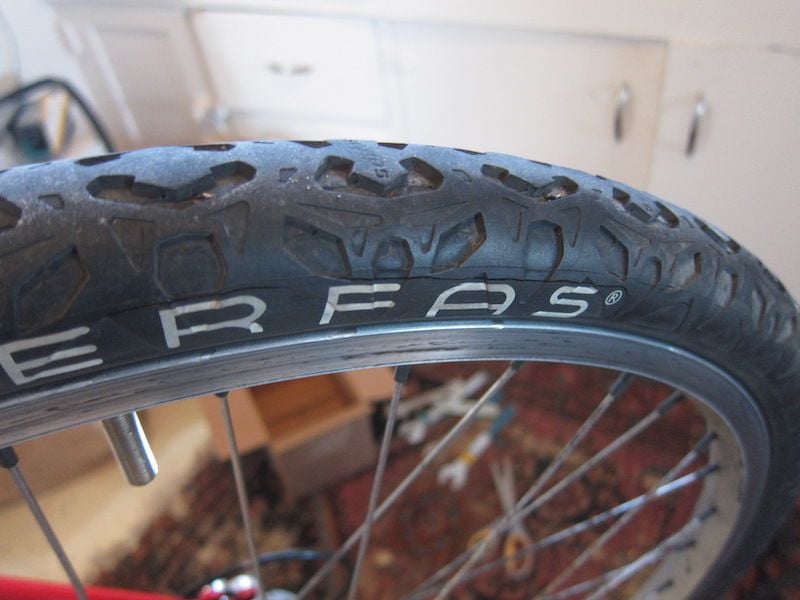
Went to go for a ride on the Cimmaron and when I pumped up the tires I noticed a nasty split in the side wall of the tire, that I had not seen before. Tires had plenty of tread when I bought the bike and did not seem very old? Well that's what I get for not doing a proper inspection, lucky this didn't blow out on a previous ride.
So now I do Tires (didn't think I needed to) and Wheel bearings (hadn't gotten to it yet) on my Cimmaron. Anyone know how to find the closed position on these grease ports? hard to see in my pic, but there is an arrow for "open" but not any indication of a start or stop? I tried various position they all seem "open"
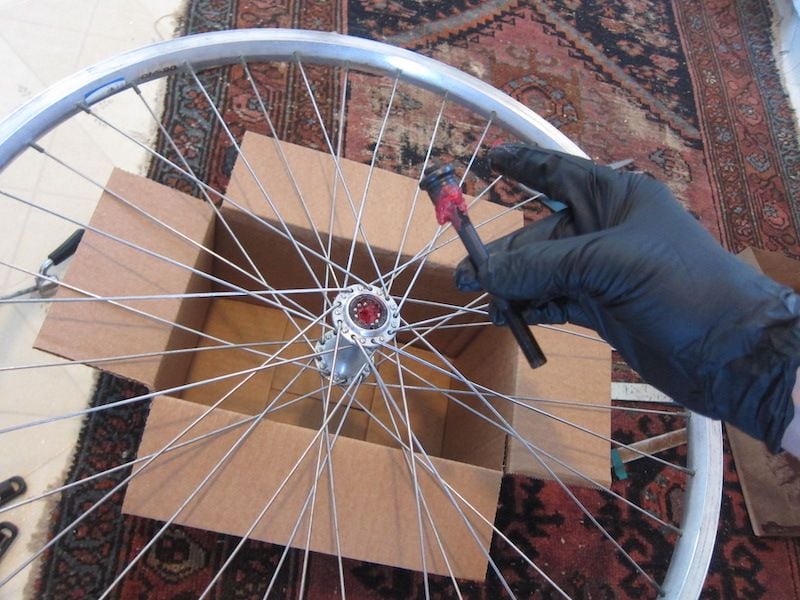
So now I do Tires (didn't think I needed to) and Wheel bearings (hadn't gotten to it yet) on my Cimmaron. Anyone know how to find the closed position on these grease ports? hard to see in my pic, but there is an arrow for "open" but not any indication of a start or stop? I tried various position they all seem "open"
11-10-23, 05:38 AM
#6982
Senior Member

Join Date: Jul 2023
Location: "Driftless" WI
Posts: 523
Bikes: 1972 Motobecane Grand Record, 2023 Specialized Tarmac SL7, 2022 Kona Dew+
Liked 253 Times
in
151 Posts
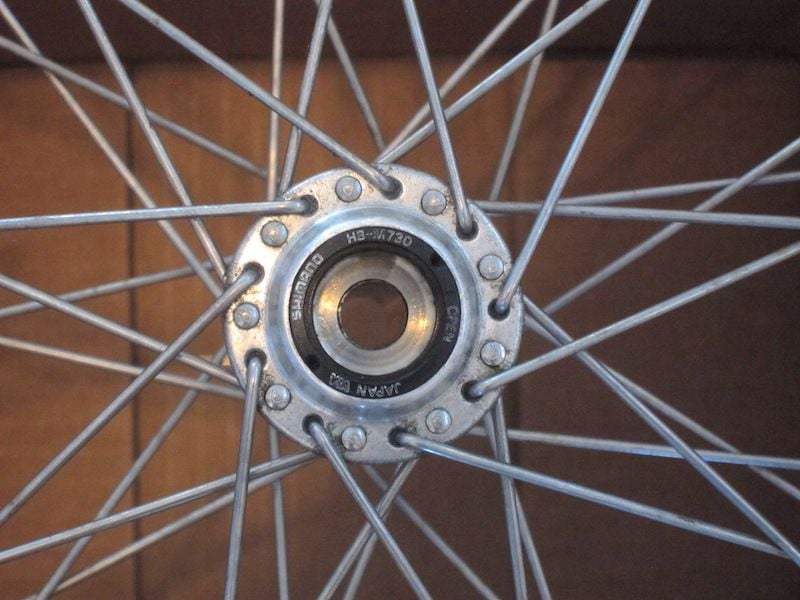
Studying up for my first go at building a pair of wheels. Using a set of Ukai rims I bought off eBay, hubs an identical pair of Campy NR wide-flange (eBay again) like the pair that came with my MB GR back in '72. Ukai rims are Very Slightly smaller diameter than the tubular Mavics the MB's carried since Day 1, so I understand I'll have to drop the brake pad carriers ~ 3/16". There's room on the calipers for that. All just to try a set of clinchers, my first since high school days before I earned a driver's license.
Approaching 75 I'm still motivated to try new things even if it means I have to find/buy/borrow tools. I'll save learning how to approach bleeding my Kona's brakes for next spring.
Approaching 75 I'm still motivated to try new things even if it means I have to find/buy/borrow tools. I'll save learning how to approach bleeding my Kona's brakes for next spring.
Likes For spclark:
11-10-23, 08:08 AM
#6983
Senior Member

Join Date: Jan 2015
Location: Los Angeles
Posts: 4,926
Bikes: 82 Medici, 85 Ironman, 2011 Richard Sachs
Liked 2,241 Times
in
1,219 Posts
Maybe Ukai rims are different but I can go back and forth between old school Mavic tubulars and various makes of clinchers without adjusting the brakes. 3/16" seems like a lot.
__________________
I don't do: disks, tubeless, e-shifting, or bead head nymphs.
I don't do: disks, tubeless, e-shifting, or bead head nymphs.
11-10-23, 10:19 PM
#6984
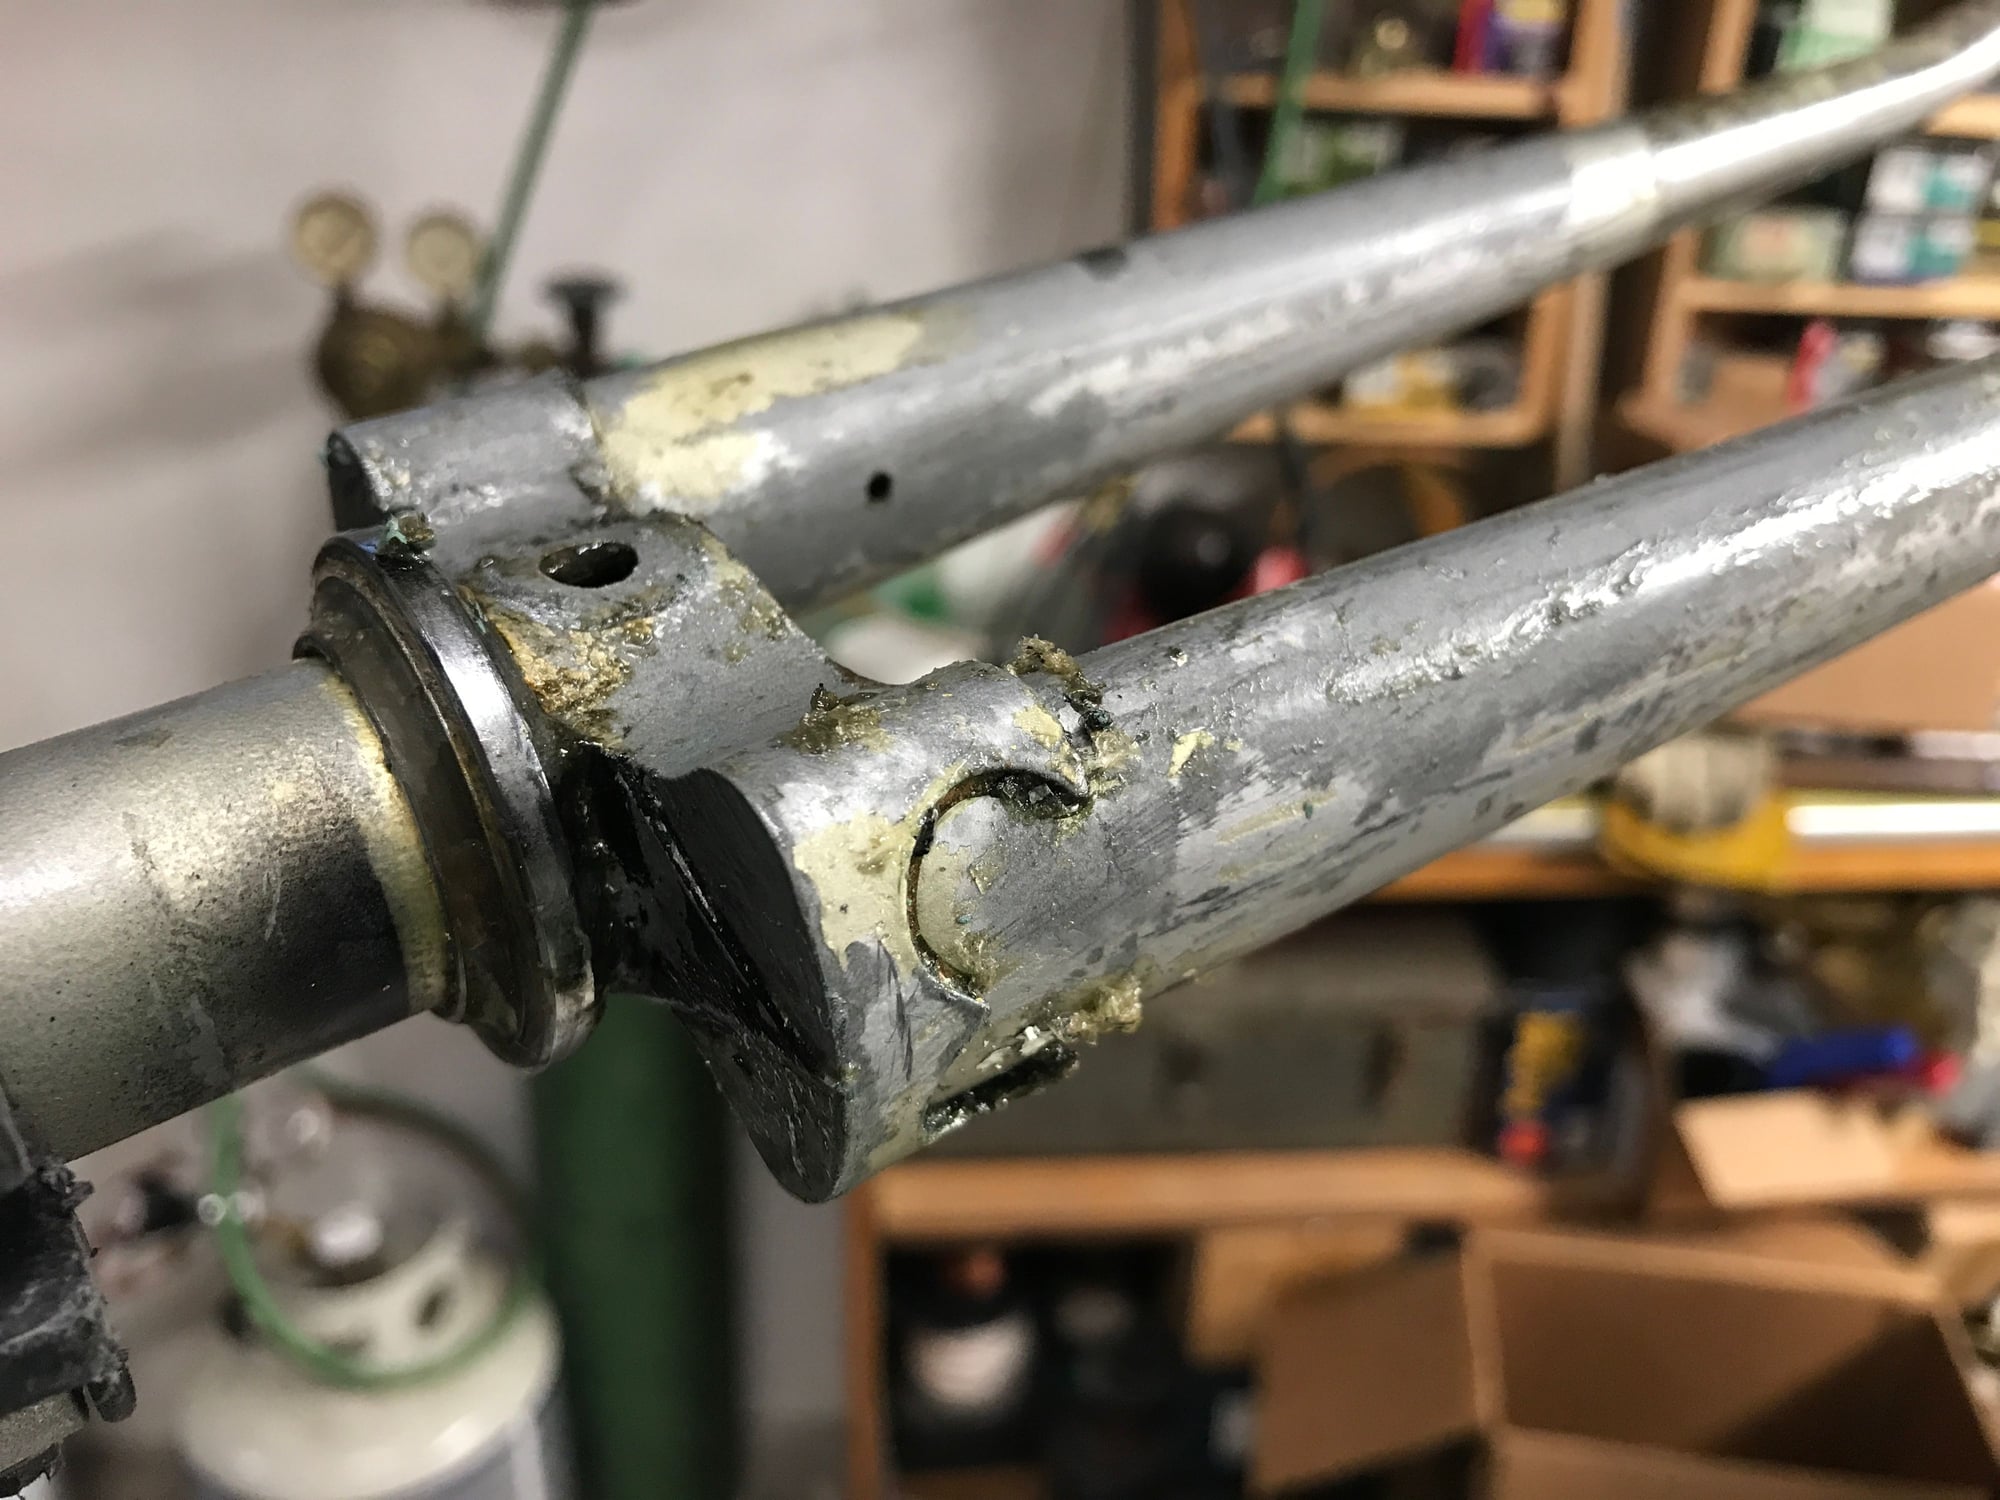
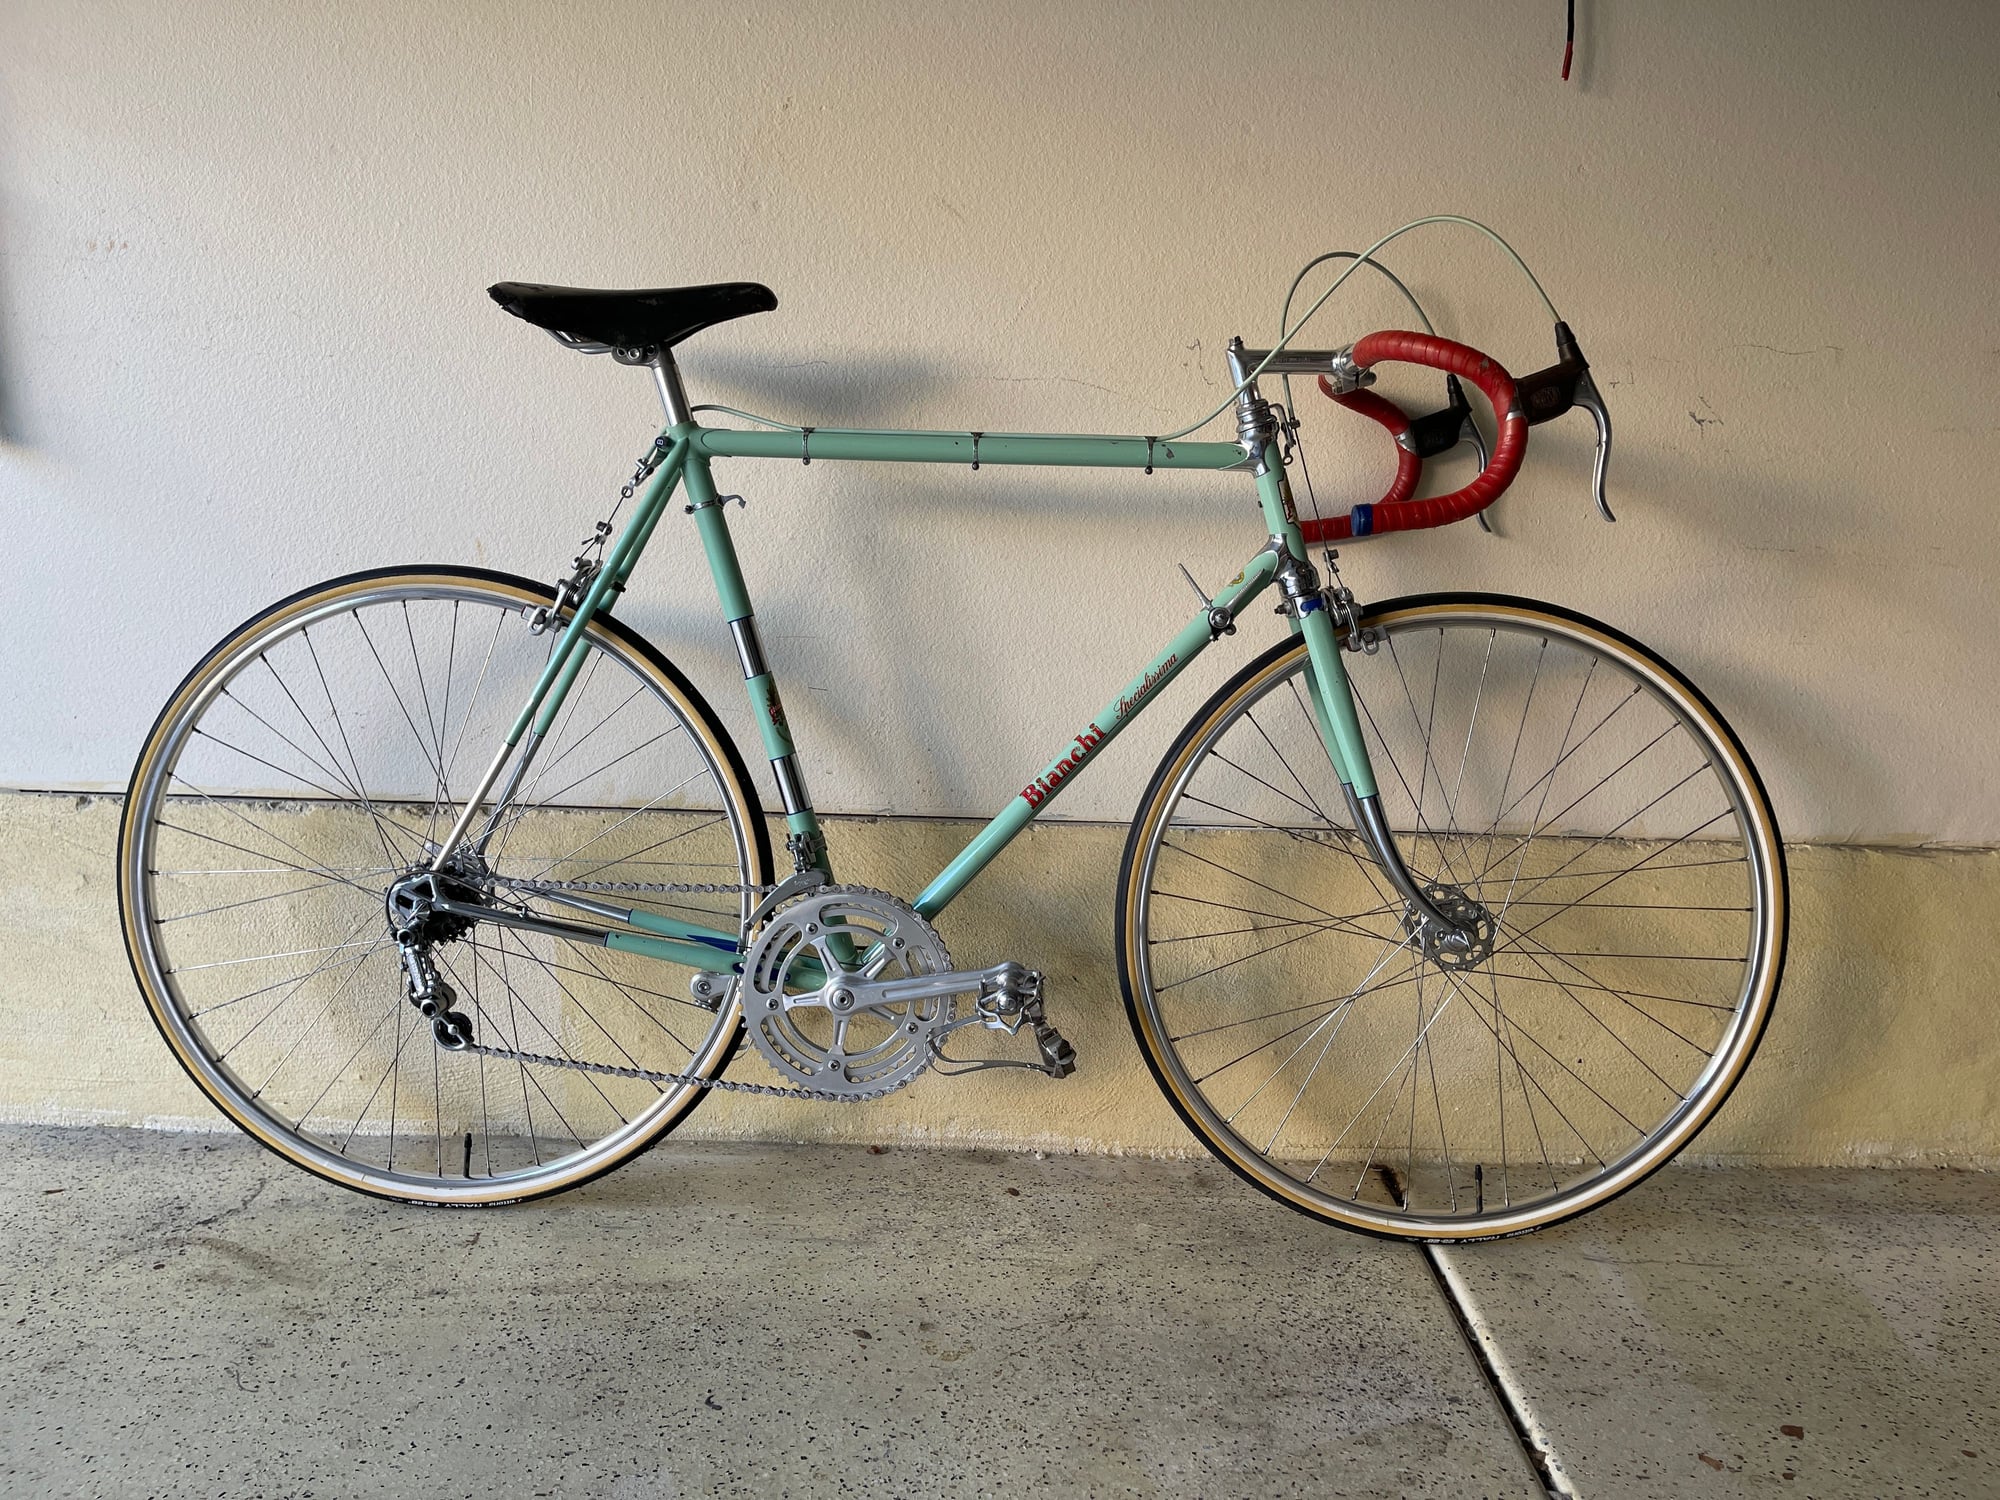
Bianchi rebuild, ran into problem with crown race size (JIS VS ISO) and step down ferrule size, finally completed the build though.
This is the final part of the build video on youtube if anyone interested.
This is the final part of the build video on youtube if anyone interested.
Likes For NDL:
11-11-23, 11:30 AM
#6985
Senior Member
Join Date: Aug 2015
Location: Murrieta Ca.
Posts: 537
Bikes: Teledyne Titan, Bob Jackson Audax Club, Bob Jackson World Tour, AlAn Record Ergal, 3Rensho Katana.
Liked 623 Times
in
245 Posts
Land Shark progress. Headset, bits and pieces installed, and mocking up the cockpit.
 Untitled by nemosengineer, on Flickr
 Untitled by nemosengineer, on Flickr
: Mike
Untitled by nemosengineer, on FlickrUntitled by nemosengineer, on Flickr: Mike
__________________
Booyah Hubba-Hubba!!!
Booyah Hubba-Hubba!!!
Likes For Nemosengineer:
11-11-23, 01:37 PM
#6986
aka: Dr. Cannondale
Your bike stand is classier than mine. Jealous.
__________________
Hard at work in the Secret Underground Laboratory...
Hard at work in the Secret Underground Laboratory...
Likes For rccardr:
11-11-23, 02:45 PM
#6987
Senior Member
Join Date: Jan 2015
Location: Los Angeles
Posts: 4,926
Bikes: 82 Medici, 85 Ironman, 2011 Richard Sachs
Liked 2,241 Times
in
1,219 Posts
The last time that I stripped a frame for painting, the product label contained a warning about methylene chloride. No such luck today🙁
Second coat doing something maybe?
Second coat doing something maybe?
__________________
I don't do: disks, tubeless, e-shifting, or bead head nymphs.
I don't do: disks, tubeless, e-shifting, or bead head nymphs.
Last edited by Classtime; 11-11-23 at 02:54 PM.
11-11-23, 03:14 PM
#6988
Senior Member
Join Date: Oct 2015
Location: PDX
Posts: 13,520
Bikes: Merz x 5 + Specialized Merz Allez x 2, Strawberry/Newlands/DiNucci/Ti x3, Gordon, Fuso/Moulton x2, Bornstein, Paisley,1958-74 Paramounts x3, 3rensho, 74 Moto TC, 73-78 Raleigh Pro's x5, Marinoni x2, 1960 Cinelli SC, 1980 Bianchi SC, PX-10 X 2
Liked 6,834 Times
in
3,900 Posts
Sunlight accelerates the process much with its warm too, I've had the stuff melt off with the right timing and patience.
I slather it on and wait, then slather on some more to reactivate the first coat, wait slather again and scrub away using the brush with the stripper.
 11-11-23, 03:47 PM
#6989
Yes as above, wire brush to help dig in. Heavy steel wool rub will gobble up all that has softened
11-11-23, 06:02 PM
#6990
Overdoing projects

Join Date: Oct 2011
Location: Rotterdam, former republic of the Netherlands
Posts: 2,443
Bikes: Batavus Randonneur GL, Gazelle Orange Excellent, Gazelle Super Licht, Gazelle Grand Tourist, Gazelle Lausanne, Gazelle Tandem, Koga-Miyata SilverAce, Koga-Miyata WorldTraveller
Liked 1,319 Times
in
711 Posts
I'm making headway into a certain wheel build... but I am running out of spoke nipples at this rate.
Give me lightweight triple butted spokes over 13G (2.3mm) straight stainless steel spokes any day...
Oh, and I accidentally annoyed my downstairs neighbour. Found out the hard way that I need a longer seatpost.


Some cool details with the fenders and drivetrain. It has the classic Gazelle crankset and especially the skirt guards have some cool details like these clips. More tomorrow as I clean and derust the rest of the bike.

Give me lightweight triple butted spokes over 13G (2.3mm) straight stainless steel spokes any day...
Oh, and I accidentally annoyed my downstairs neighbour. Found out the hard way that I need a longer seatpost.
Some cool details with the fenders and drivetrain. It has the classic Gazelle crankset and especially the skirt guards have some cool details like these clips. More tomorrow as I clean and derust the rest of the bike.
Likes For JaccoW:
11-11-23, 08:49 PM
#6991
Senior Member
Likes For mackgoo:
11-11-23, 11:00 PM
#6992

Senior Member
Warm it up, hair dryer or heat gun with plenty of ventilation and stiff wire welding brush.
Sunlight accelerates the process much with its warm too, I've had the stuff melt off with the right timing and patience.
I slather it on and wait, then slather on some more to reactivate the first coat, wait slather again and scrub away using the brush with the stripper.
Sunlight accelerates the process much with its warm too, I've had the stuff melt off with the right timing and patience.
I slather it on and wait, then slather on some more to reactivate the first coat, wait slather again and scrub away using the brush with the stripper.
Yes, methylene chloride was dangerous and effective. The state of affairs in California. Paint thinner and mineral spirits are almost useless now too. Between the SCAQMD and Prop 65. Simple tasks like cleaning a chain and freewheel are no longer so. The way of things.
11-11-23, 11:03 PM
#6993
Senior Member
I'm making headway into a certain wheel build... but I am running out of spoke nipples at this rate.
Give me lightweight triple butted spokes over 13G (2.3mm) straight stainless steel spokes any day...
Oh, and I accidentally annoyed my downstairs neighbour. Found out the hard way that I need a longer seatpost.
Some cool details with the fenders and drivetrain. It has the classic Gazelle crankset and especially the skirt guards have some cool details like these clips. More tomorrow as I clean and derust the rest of the bike.
11-12-23, 01:38 AM
#6994
Steel is real

Join Date: Mar 2013
Location: Not far from Paris
Posts: 2,460
Bikes: 1992Giant Tourer,1992MeridaAlbon,1996Scapin,1998KonaKilaueua,1993Peugeot Prestige,1991RaleighTeamZ(to be upgraded),1998 Jamis Dragon,1992CTWallis(to be built),1998VettaTeam,1995Coppi(to be built),1993Grandis(to be built)
Liked 1,275 Times
in
849 Posts
Went to the bike shop Friday and gave all the other spare parts to get the Trek 6500 SLR and the Trek 6700SLR MTBs fully assembled. Installed this look carbon seat post on the Trek 2300, waiting for the 3t Mutant Stem and Bar, I might also purchase 3 pair of Dura Ace BR 7800 brakes for thisTrek, for the for the Veneto and the Canondale, plus 4 pairs of Dura Ace ST 7800 brifters and 4 additionnal Dura Ace CS -7800 10 speeds cassettes. Beside that I have two other MTB projects that need to be assembled and three bike upgrades to be done. But each thing in its time


Last edited by georges1; 11-12-23 at 01:48 AM.
11-12-23, 07:07 AM
#6995
Overdoing projects
Join Date: Oct 2011
Location: Rotterdam, former republic of the Netherlands
Posts: 2,443
Bikes: Batavus Randonneur GL, Gazelle Orange Excellent, Gazelle Super Licht, Gazelle Grand Tourist, Gazelle Lausanne, Gazelle Tandem, Koga-Miyata SilverAce, Koga-Miyata WorldTraveller
Liked 1,319 Times
in
711 Posts
If all else fails I will be ordering slightly longer spokes next month and twice as many nipples.
11-12-23, 07:54 AM
#6996
Senior Member
Join Date: Jan 2015
Location: Los Angeles
Posts: 4,926
Bikes: 82 Medici, 85 Ironman, 2011 Richard Sachs
Liked 2,241 Times
in
1,219 Posts
For stripping the paint off this Motobecane LC, Citristrip works better than the current Jasco product.
__________________
I don't do: disks, tubeless, e-shifting, or bead head nymphs.
I don't do: disks, tubeless, e-shifting, or bead head nymphs.
Likes For Classtime:
11-12-23, 08:28 AM
#6997
Senior Member
Join Date: Jul 2023
Location: "Driftless" WI
Posts: 523
Bikes: 1972 Motobecane Grand Record, 2023 Specialized Tarmac SL7, 2022 Kona Dew+
Liked 253 Times
in
151 Posts
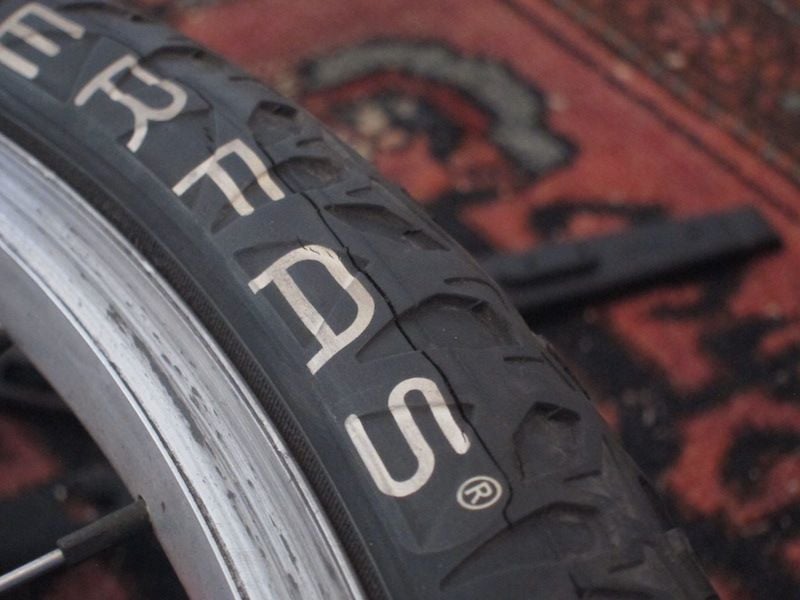
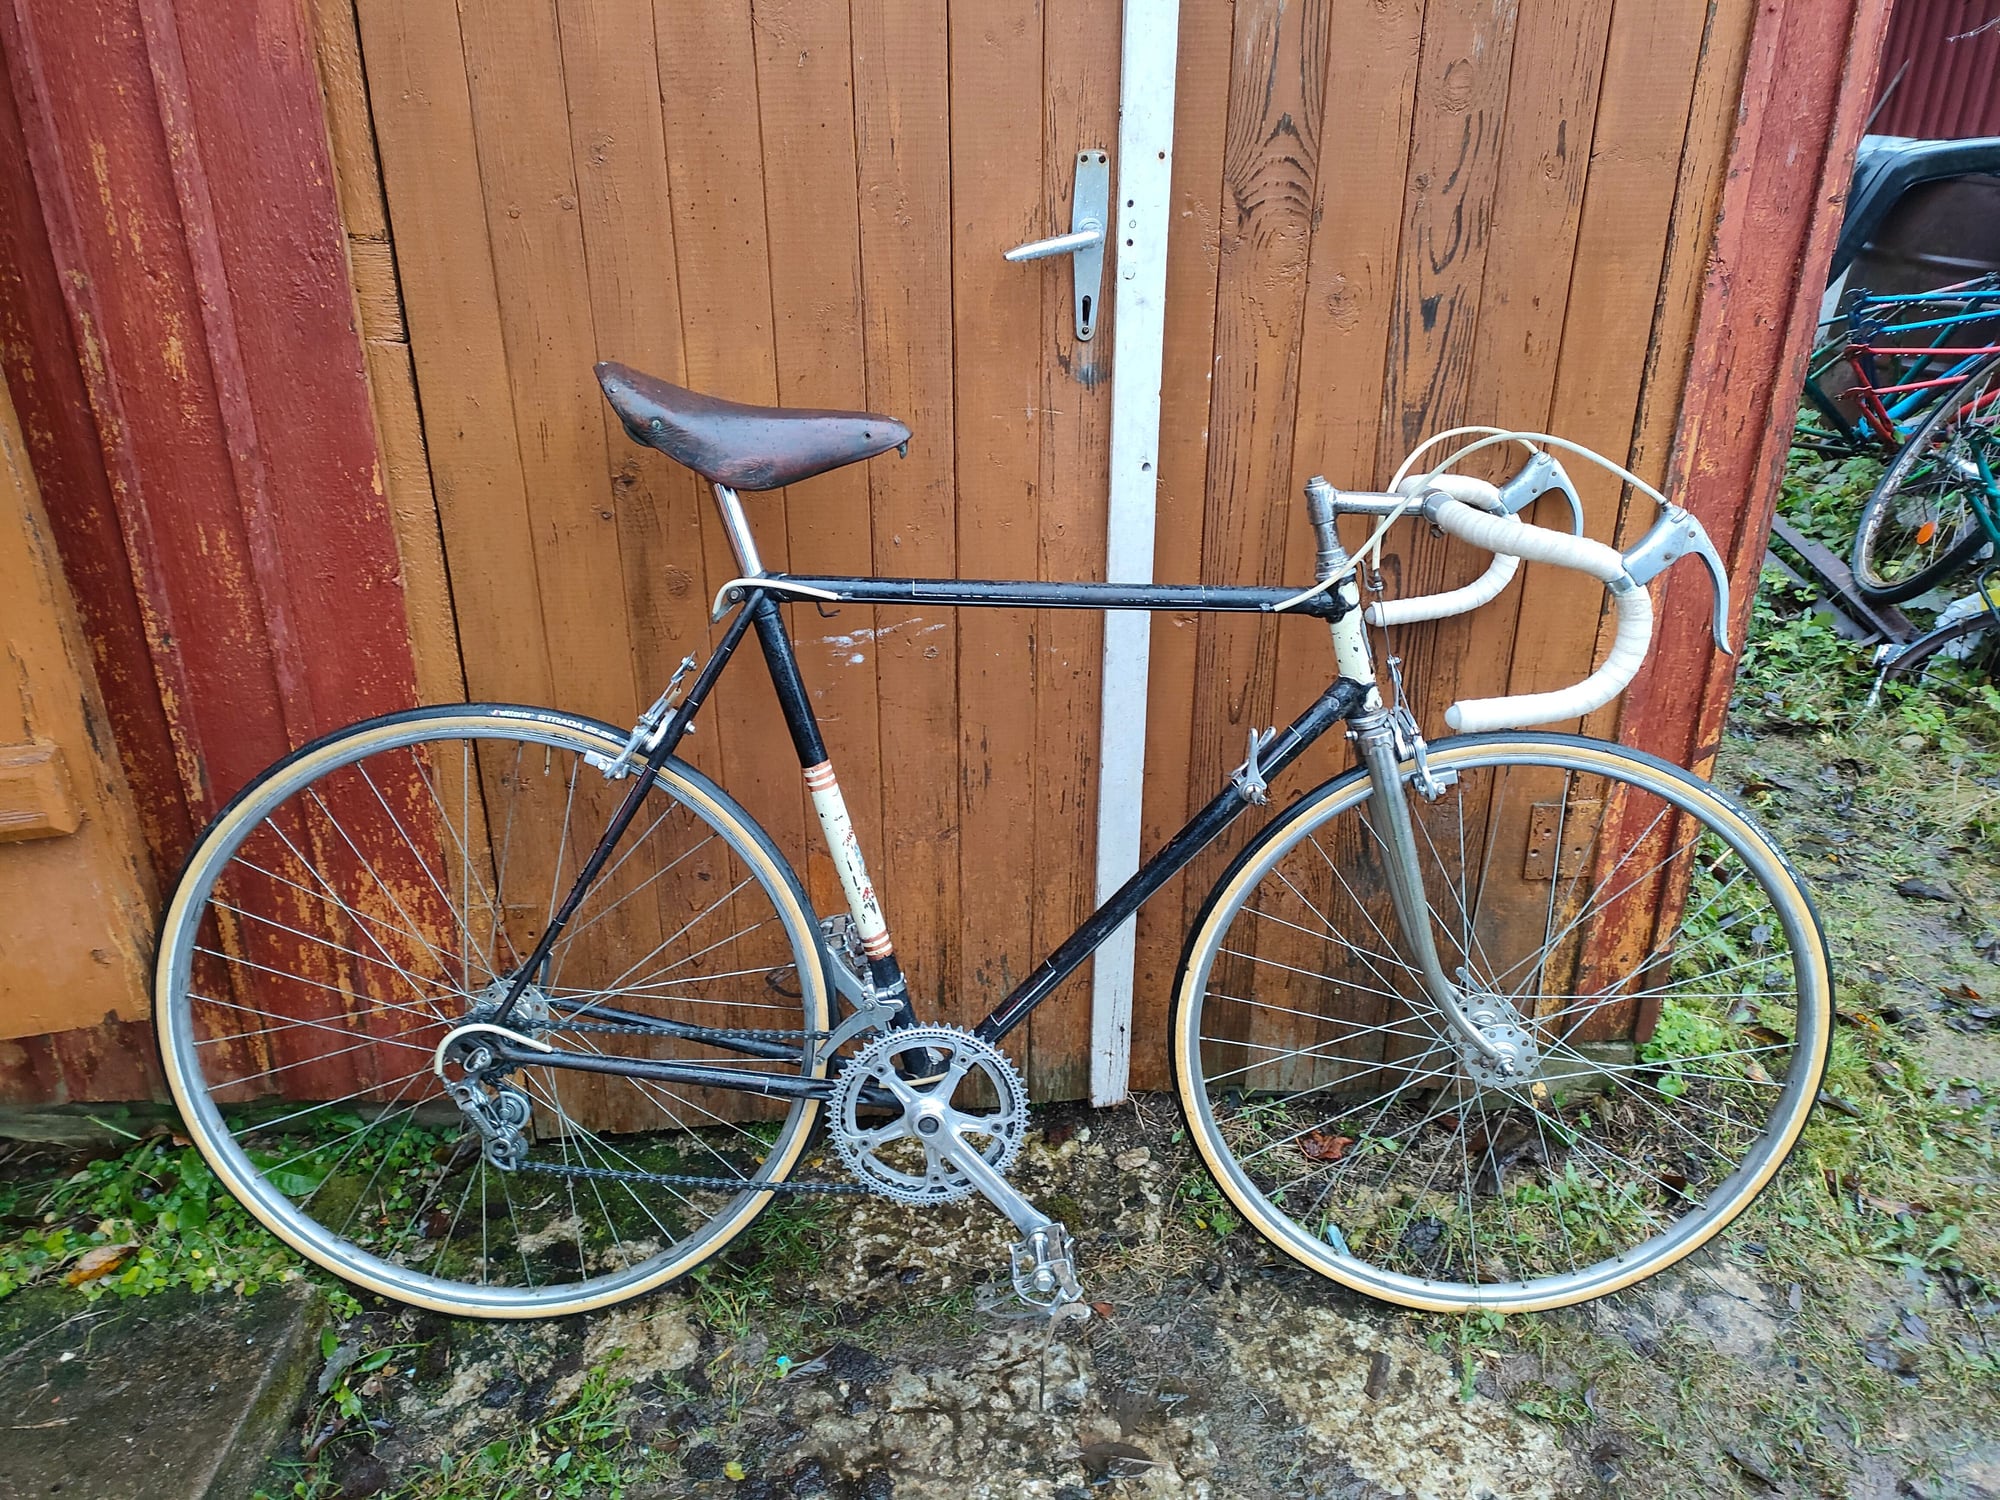
My MAVICS:
- are certainly 'old school' dating from Easter Sunday '72 when I rolled the bike out of the store on N. Clark St. in Chicago.
I'd read elsewhere (here) there's maybe a 4mm difference in wheel radius between rims of various specs, why I wasn't surprised to see this when I first compared the new wheels to what I've been riding off & on for over fifty years.
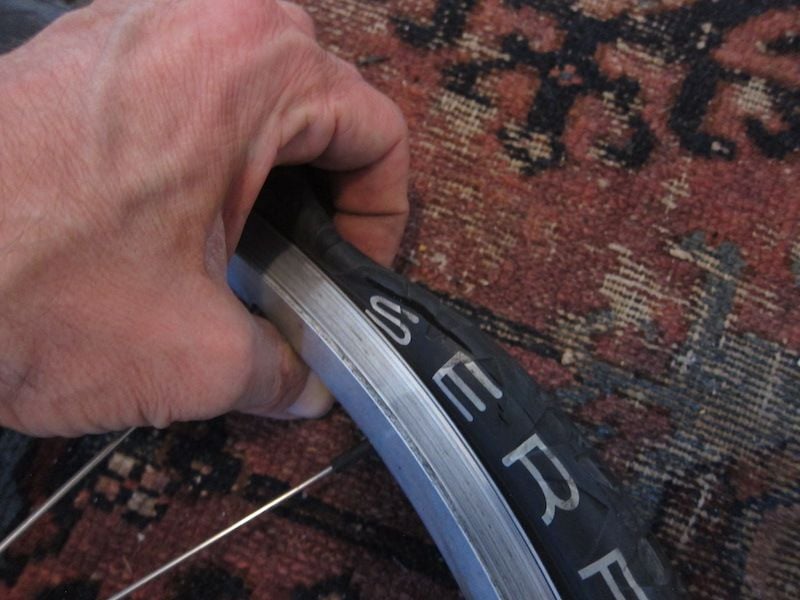
Just now, looking at a bare Ukai rim against one of my Mavics w/tire on, there's virtually NO discernible difference in diameter.
Comparing rim depths:
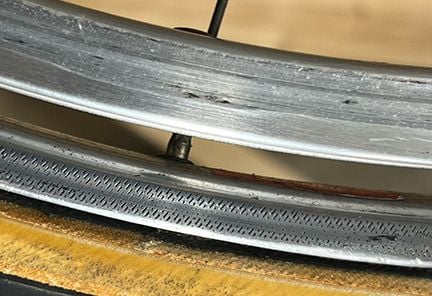
- it's readily apparent the Ukai is deeper, maybe where I was misled when I first compared the two?
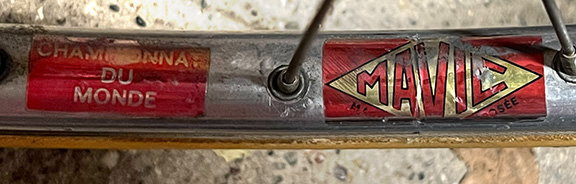
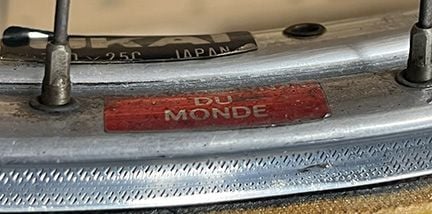
New (to me) rim's decal.

Both rims' decals:
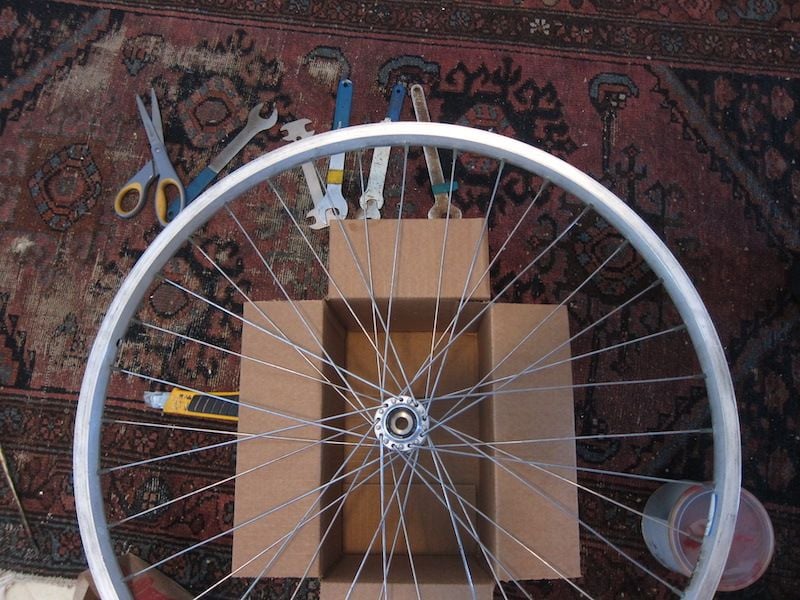
Noted rust in Ukai's spoke wells once I'd gotten wheel disassembled. Cleaning that up wasn't hard using a .30 cal. bronze bore brush chucked in a drill. What's a good way to clean up the outer bit rolled over onto the rim's inner face, w/o doing much to change the patina on the aluminum?
Or should I bother with that at all? They're 'used' after all, not new, bright $ shiny.
11-12-23, 09:02 AM
#6998
Happy With My Bikes

Join Date: Sep 2020
Location: Oklahoma
Posts: 2,487
Bikes: Hi-Ten bike boomers, a Trek Domane and some projects
Liked 2,769 Times
in
1,282 Posts
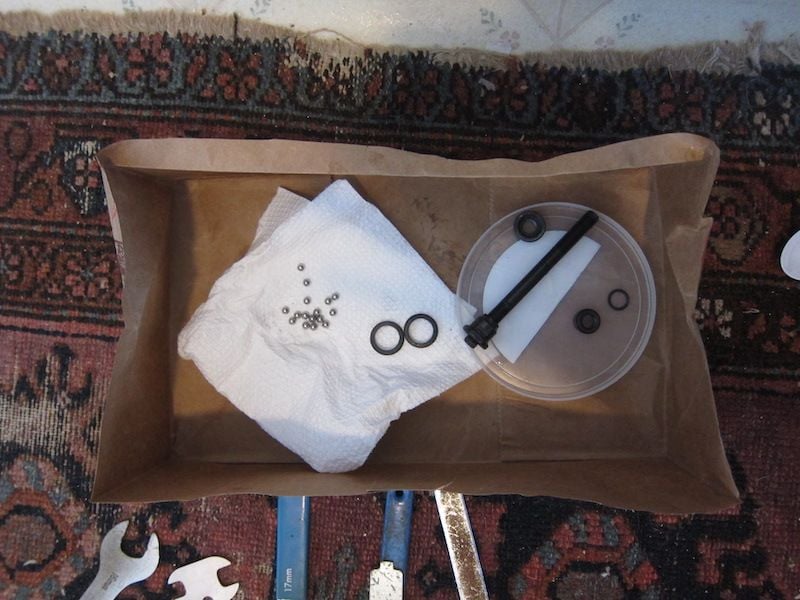
Rebuilding some ubiquitous bike boom KKT self leveling pedals this morning, all was going well until I went to install the second one and the spindle was far too loose. So loose I don't know how I missed it on reassembly. But that has been the way everything has gone on this not so challenging rebuild which is supposed to be a project to get my mind off of bigger things. I've gone out to ride my age on a fresh build before with nothing more than a multi-tool to make a saddle or bar adjustment. This bike I feel like I will need a sag wagon to go for a test ride to the coffee shop.
__________________
"It is the unknown around the corner that turns my wheels." -- Heinz St�cke
"It is the unknown around the corner that turns my wheels." -- Heinz St�cke
Likes For Chuck M:
11-12-23, 12:46 PM
#6999
Junior Member
Join Date: Dec 2020
Location: Estonia
Posts: 142
Bikes: HVZ Meteor 1979, HVZ Champion 1962, HVZ SS Moskva80 1981, D�rkopp 1936
Liked 355 Times
in
70 Posts
Threw some new rubber on this old thing and adjusted the gears. Derailleur hanger is pretty bent so didnt get them adjusted 100%. Also threw in some NOS brake pads so its less noisy under braking.
Likes For geeteeiii:
11-12-23, 02:46 PM
#7000
Hmmm... thanks for that. Your post caused me to take another look now that I have one of the donor Ukai's unlaced:
My MAVICS:
- are certainly 'old school' dating from Easter Sunday '72 when I rolled the bike out of the store on N. Clark St. in Chicago.
I'd read elsewhere (here) there's maybe a 4mm difference in wheel radius between rims of various specs, why I wasn't surprised to see this when I first compared the new wheels to what I've been riding off & on for over fifty years.
Just now, looking at a bare Ukai rim against one of my Mavics w/tire on, there's virtually NO discernible difference in diameter.
Comparing rim depths:
- it's readily apparent the Ukai is deeper, maybe where I was misled when I first compared the two?
New (to me) rim's decal.
Both rims' decals:
Noted rust in Ukai's spoke wells once I'd gotten wheel disassembled. Cleaning that up wasn't hard using a .30 cal. bronze bore brush chucked in a drill. What's a good way to clean up the outer bit rolled over onto the rim's inner face, w/o doing much to change the patina on the aluminum?
Or should I bother with that at all? They're 'used' after all, not new, bright $ shiny.
All apart it's easy to polish up with 0000 steal wool and rubbing compound, either of those certainly will clean things off. Wet car wax can do good, but that on the brake tracks can get slippery, I wouldn't be liberal with it.