


Recover Your Saddle
 01-16-20, 08:54 AM
#176
Senior Member
I'd love to see all the photos in this thread but they're fuzzy PhotoBucket images. Any way around this or can images be uploaded by the poster again?

 01-18-20, 05:52 PM
#178
Senior Member
There�s been some discussion around vinyl and it�s lack of flexibility. Most of it is brutal, but my upholstery guy uses a �4-way stretch� material on the chair backs in my restaurant and it�s fantastic. It�s more expensive, but has enough stretch for bike seats for sure.
04-17-20, 05:13 PM
#179
Followed the instructions and was able to recover an old Ultragel Racing saddle. Found a 12� X 12� piece of leather online for cheap. Not too difficult of a job, just need to be careful when spraying the glue and be careful to leave extra cover to help stretch the material. You can easily trim the extra material once glued.


Last edited by gstein; 04-17-20 at 05:27 PM.
04-17-20, 06:08 PM
#180
Senior Member

Join Date: Jul 2002
Location: Sacramento, California, USA
Posts: 40,863
Bikes: Specialized Tarmac, Canyon Exceed, Specialized Transition, Ellsworth Roots, Ridley Excalibur
Liked 3,111 Times
in
1,418 Posts
Beautiful color.
07-28-20, 02:28 PM
#181
Junior Member
Join Date: Nov 2018
Location: Burnaby, British Columbia
Posts: 167
Bikes: 1984 & 1990 Marinoni Specials - 1990 Bianchi Sika - 1993 Cannondale M800 - 1996 GT Zaskar - 1993 Kona Kilauea - 1987 Ritchey Ascent - 1996 Rocky Mountain Vertex - 2008 Kona Dogma - 1976 Schwinn Suburban - 1994 Kuwahara Makai
Liked 203 Times
in
58 Posts
I have recovered 3 or 4 saddles previously a few years back with good results. I tried a donor leather jacket once but it was lamb or calf skin, very delicate and did not stand up well.
Last weekend I helped my 17 year old son buy a vintage Gardin with almost full Super Record and a very faded Concor saddle (yes, he likes vintage friction better than more modern brifters!!). He wants a white saddle and bar tape. I looked for a $30-$40 white saddle on-line but with COVID did not find any deals especially with shipping to Canada being so expensive and lengthy so decided to source out white leather instead and recover the Concor. I always liked these from back in the day. Leather cost $30. I was able to successfully pull the old leather off last night without any foam coming off too. Step #1 success!
I'll send and update when done
07-30-20, 08:08 AM
#182
Junior Member
Join Date: Nov 2018
Location: Burnaby, British Columbia
Posts: 167
Bikes: 1984 & 1990 Marinoni Specials - 1990 Bianchi Sika - 1993 Cannondale M800 - 1996 GT Zaskar - 1993 Kona Kilauea - 1987 Ritchey Ascent - 1996 Rocky Mountain Vertex - 2008 Kona Dogma - 1976 Schwinn Suburban - 1994 Kuwahara Makai
Liked 203 Times
in
58 Posts
Concor Recover
Well I finished the white Concor last night and I'm very happy with the result. The nose underside could be a bit better but talk about a challenge, there is not a nice hollow spot to hide the extra leather inside the nose part of the shell but I did my best to keep it flat.
I'm pretty happy with the crazy back area where my backup plan was to just trim it like a regular saddle if it didn't work out. Full disclosure: I cheated a bit and dropped a thin bead of white silicone to the outside creases and under the saddle nose to 'erase' the visible bits of black shell. The leather I found was $30 and think its big enough to do one more saddle, nice cow hide with white finish. The amount of stretching I did at the nose caused a tiny bit of white finish material to peel of (drive side), thinking about a dab of shoe polish and a rub to restore it.
I appreciate the tips from this thread as I have previously recovered saddles with good result but the seatpost/mount/stretch suggest by the OP is a great idea. Also, used Super 77 spray for top only and Lepage heavy duty contact cement (another good suggestion) for the lower/under
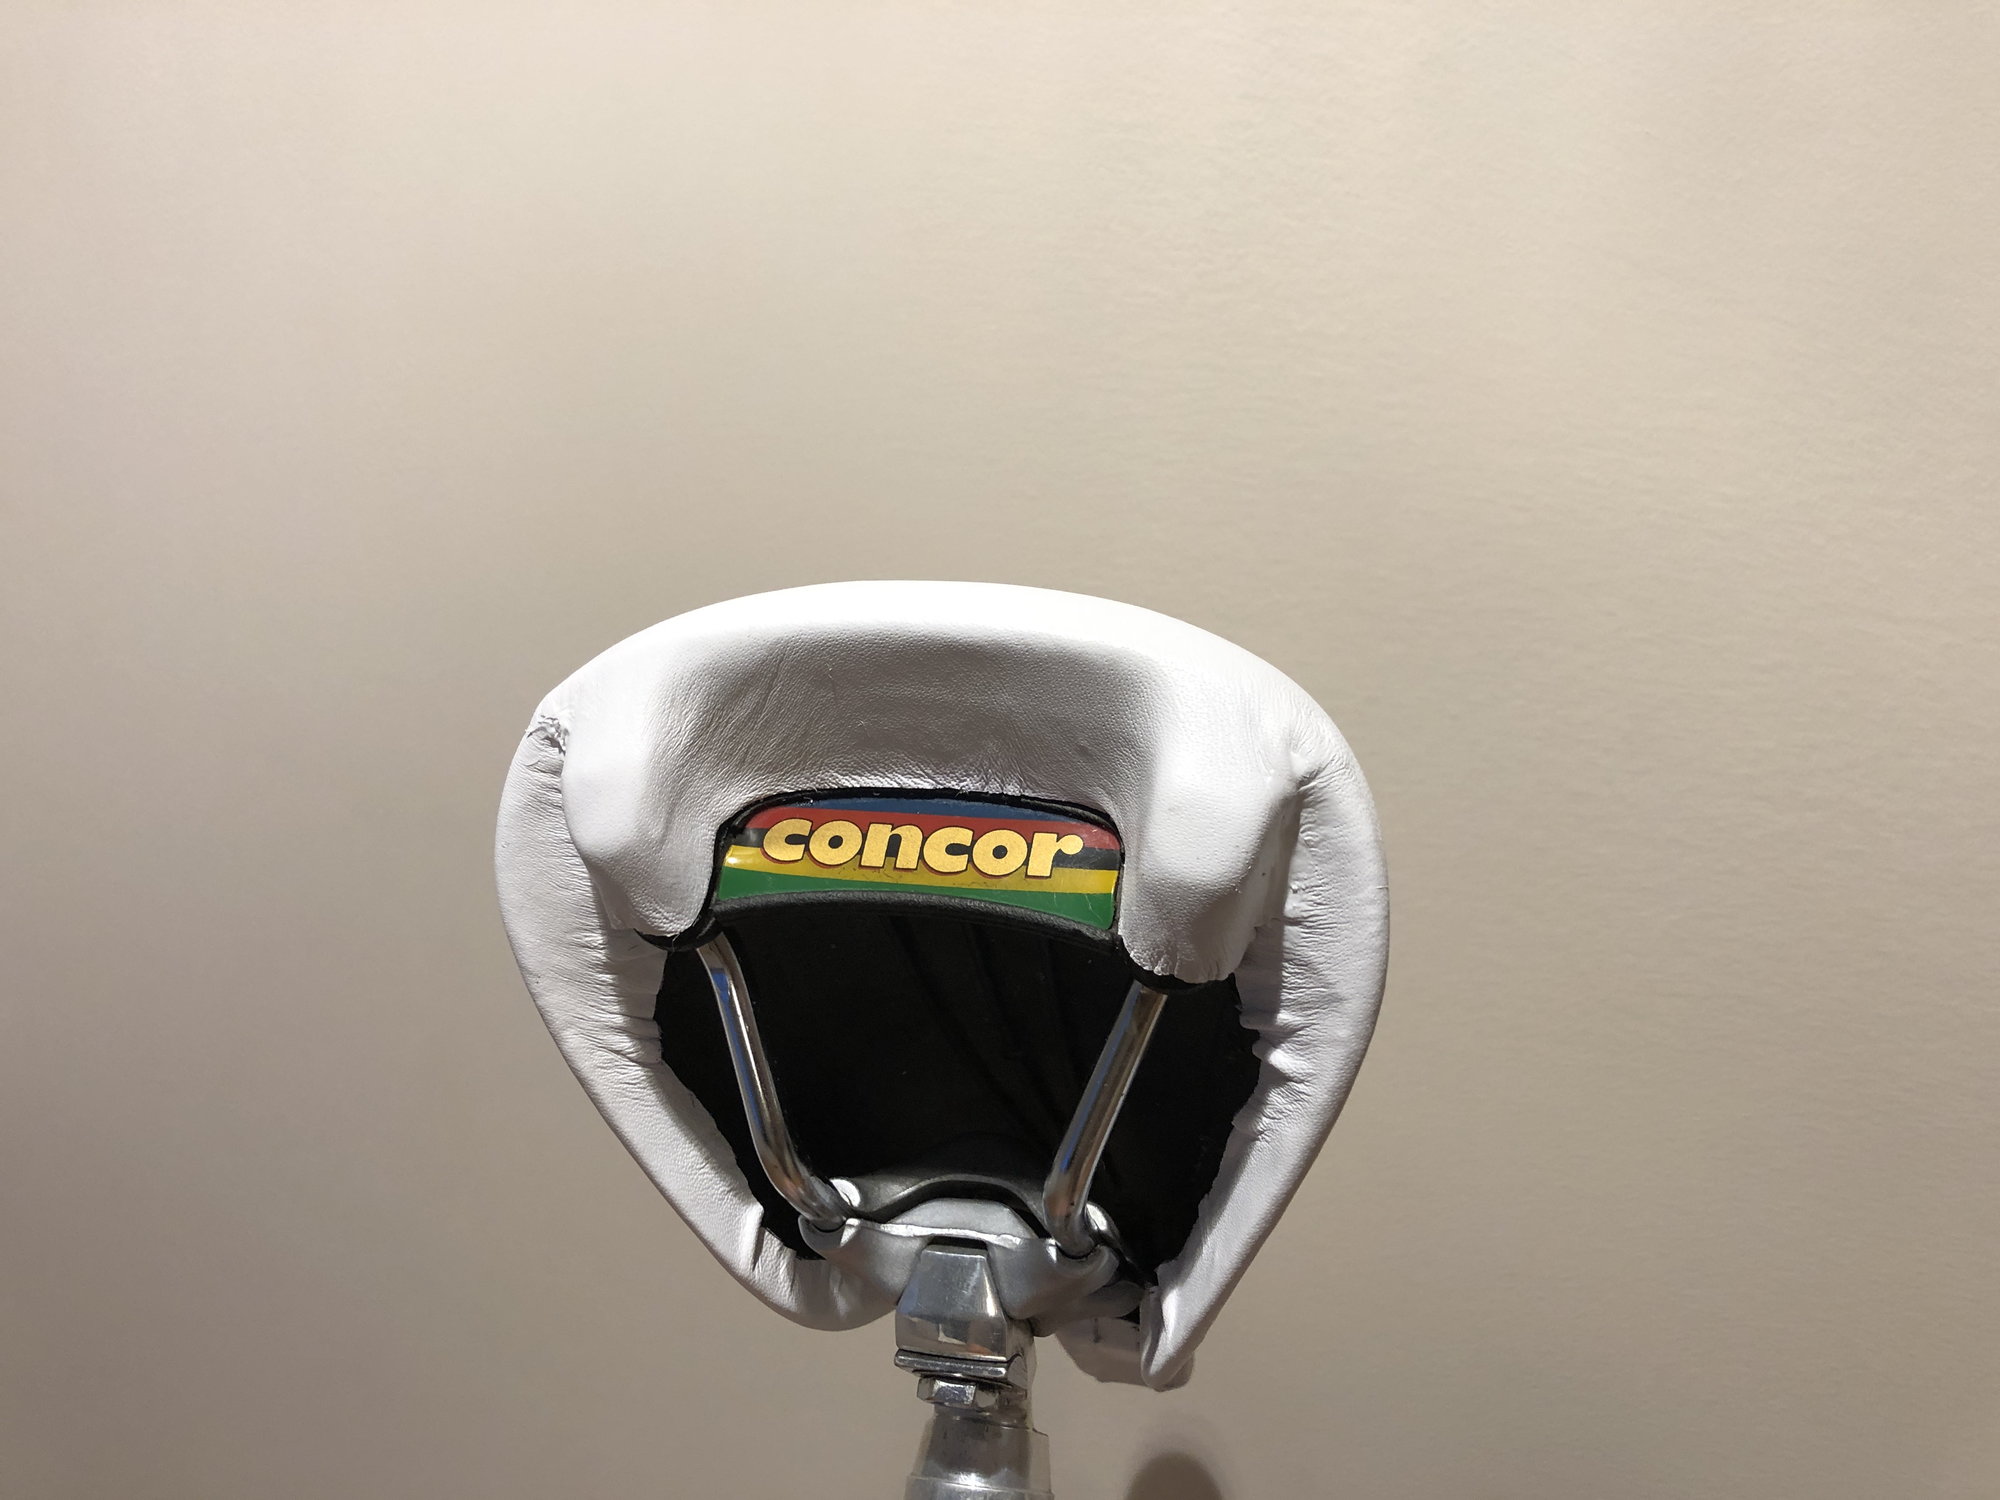
Likes For retrodude:
07-30-20, 10:03 AM
#183

^ Nice job on that Concor, especially the back.
Where you have a few puckers on the underside, I have found that if you go after those with a straight screwdriver, you can get them to lay down pretty well.
Where you have a few puckers on the underside, I have found that if you go after those with a straight screwdriver, you can get them to lay down pretty well.
07-31-20, 10:38 AM
#184
Junior Member
Join Date: Nov 2018
Location: Burnaby, British Columbia
Posts: 167
Bikes: 1984 & 1990 Marinoni Specials - 1990 Bianchi Sika - 1993 Cannondale M800 - 1996 GT Zaskar - 1993 Kona Kilauea - 1987 Ritchey Ascent - 1996 Rocky Mountain Vertex - 2008 Kona Dogma - 1976 Schwinn Suburban - 1994 Kuwahara Makai
Liked 203 Times
in
58 Posts
BTW, I picked up small bottle of 'leather paint' for $6, kinda reminds me of a bottle of liquid paper with a little brush built in to touch up the front nose edge that got over stretched, worked pretty good
07-31-20, 03:54 PM
#185
Senior Member
You could invest in some new products such as a leather conditioner and when it gets grubby, a leather cleaner
07-31-20, 04:15 PM
#186
Thanks due ruote! I'll give that a shot next time, or do you think it's still doable after the glue is cured? Any suggestions on a good leather protector? I have sprays meant for leather footwear and protective creams meant for furniture
BTW, I picked up small bottle of 'leather paint' for $6, kinda reminds me of a bottle of liquid paper with a little brush built in to touch up the front nose edge that got over stretched, worked pretty good
BTW, I picked up small bottle of 'leather paint' for $6, kinda reminds me of a bottle of liquid paper with a little brush built in to touch up the front nose edge that got over stretched, worked pretty good
08-05-20, 09:58 PM
#187
I am looking for advice on dyeing leather. I just recovered a Flite saddle and wanted a different shade of brown from the leather I had. I dyed it before covering the saddle, using Feibing�s Deglazer and Pro Dye. It looked great when finished, but on the first ride, the finish started to rub off. Not sure what I did wrong.
Has anyone done a dye job that lasted?
Has anyone done a dye job that lasted?
08-10-20, 12:38 AM
#188
Senior Member
Join Date: Jun 2014
Location: Ontario, Canada
Posts: 4,626
Bikes: iele Latina, Miele Suprema, Miele Uno LS, Miele Miele Beta, MMTB, Bianchi Model Unknown, Fiori Venezia, Fiori Napoli, VeloSport Adamas AX
Liked 934 Times
in
646 Posts
I am looking for advice on dyeing leather. I just recovered a Flite saddle and wanted a different shade of brown from the leather I had. I dyed it before covering the saddle, using Feibing�s Deglazer and Pro Dye. It looked great when finished, but on the first ride, the finish started to rub off. Not sure what I did wrong.
Has anyone done a dye job that lasted?
Has anyone done a dye job that lasted?
Did you use a sealer after you dyed the leather?
This is also why bicycle shorts are usually black in colour -so dyes from a bicycle saddle won't show up.
Tandy Leather could probably advise you on how to seal the dye so it won't bleed any more.
Cheers
08-10-20, 01:18 AM
#189
Member
Join Date: Jan 2012
Location: Malaysia
Posts: 35
Bikes: Currently: Tommasini Sintesi, Concorde Astore (OTW), Gazelle Champion Mondial (1979)
Liked 7 Times
in
5 Posts
Besides leather, is there a 'vegan' ( ) option? What would be a good and wear proof synthetic material to consider.
Thanks Johnny
) option? What would be a good and wear proof synthetic material to consider.Thanks Johnny
08-10-20, 08:36 AM
#190
Where did you get your deglazer and dye from?
Did you use a sealer after you dyed the leather?
This is also why bicycle shorts are usually black in colour -so dyes from a bicycle saddle won't show up.
Tandy Leather could probably advise you on how to seal the dye so it won't bleed any more.
Cheers
Did you use a sealer after you dyed the leather?
This is also why bicycle shorts are usually black in colour -so dyes from a bicycle saddle won't show up.
Tandy Leather could probably advise you on how to seal the dye so it won't bleed any more.
Cheers
Did not use a sealer but have spoken with someone at Feibing and now understand I should have. I ordered some from EBay. Will re-dye and report back.
12-11-20, 01:30 PM
#191
Junior Member
Join Date: Nov 2018
Location: Burnaby, British Columbia
Posts: 167
Bikes: 1984 & 1990 Marinoni Specials - 1990 Bianchi Sika - 1993 Cannondale M800 - 1996 GT Zaskar - 1993 Kona Kilauea - 1987 Ritchey Ascent - 1996 Rocky Mountain Vertex - 2008 Kona Dogma - 1976 Schwinn Suburban - 1994 Kuwahara Makai
Liked 203 Times
in
58 Posts
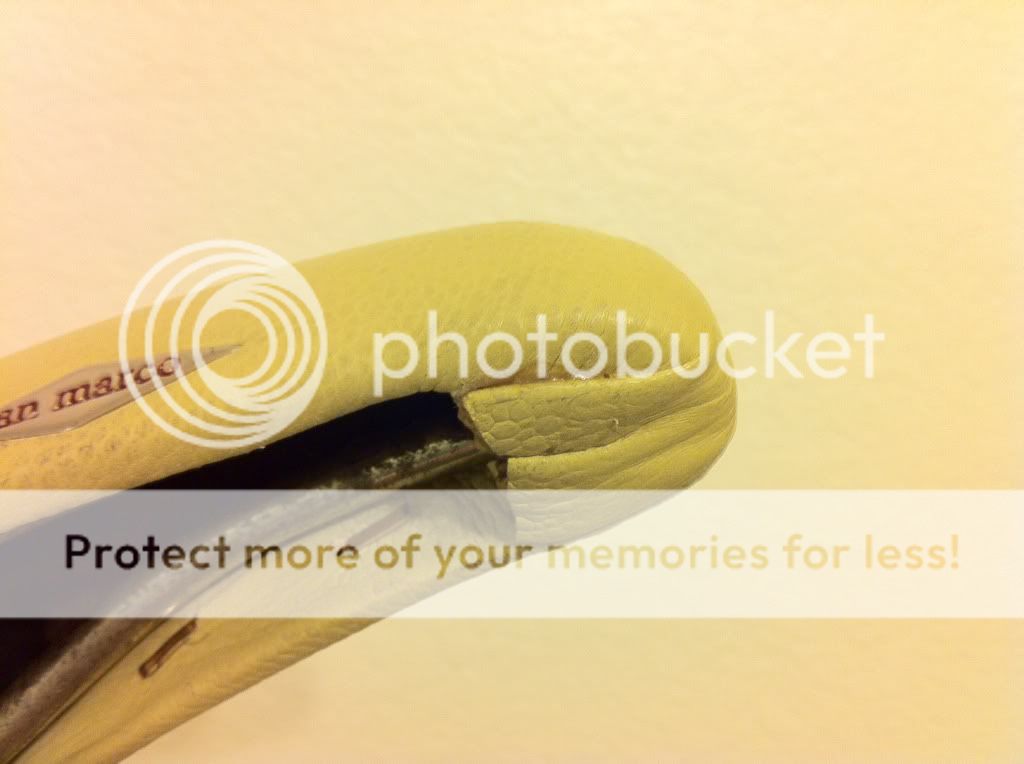
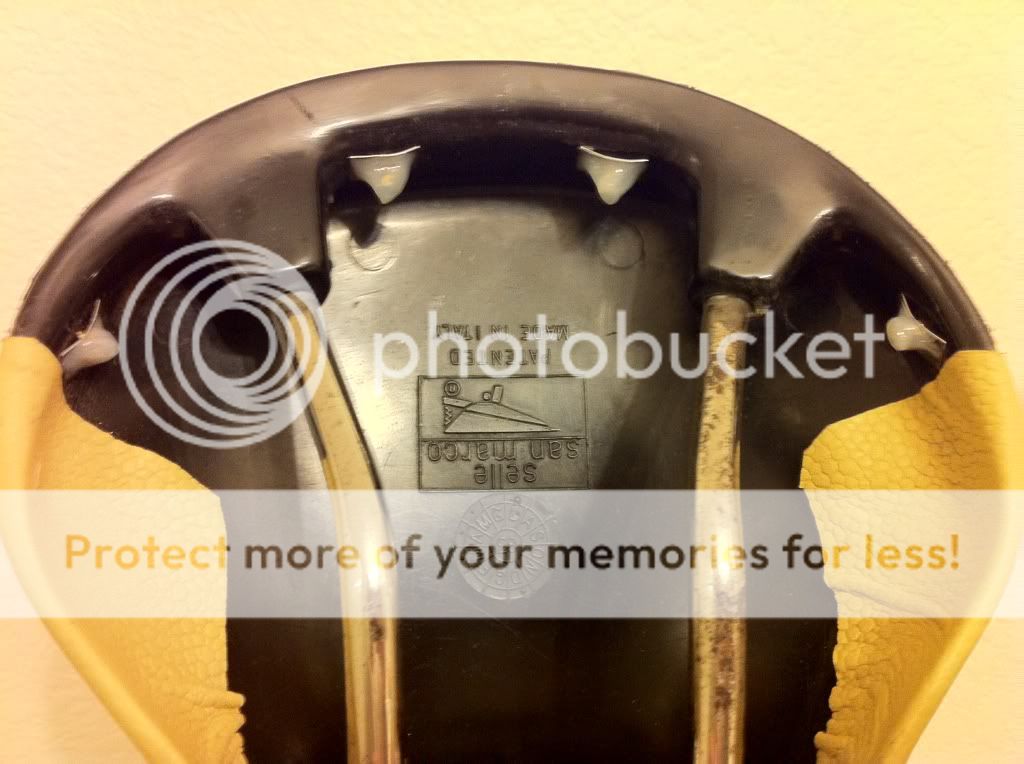
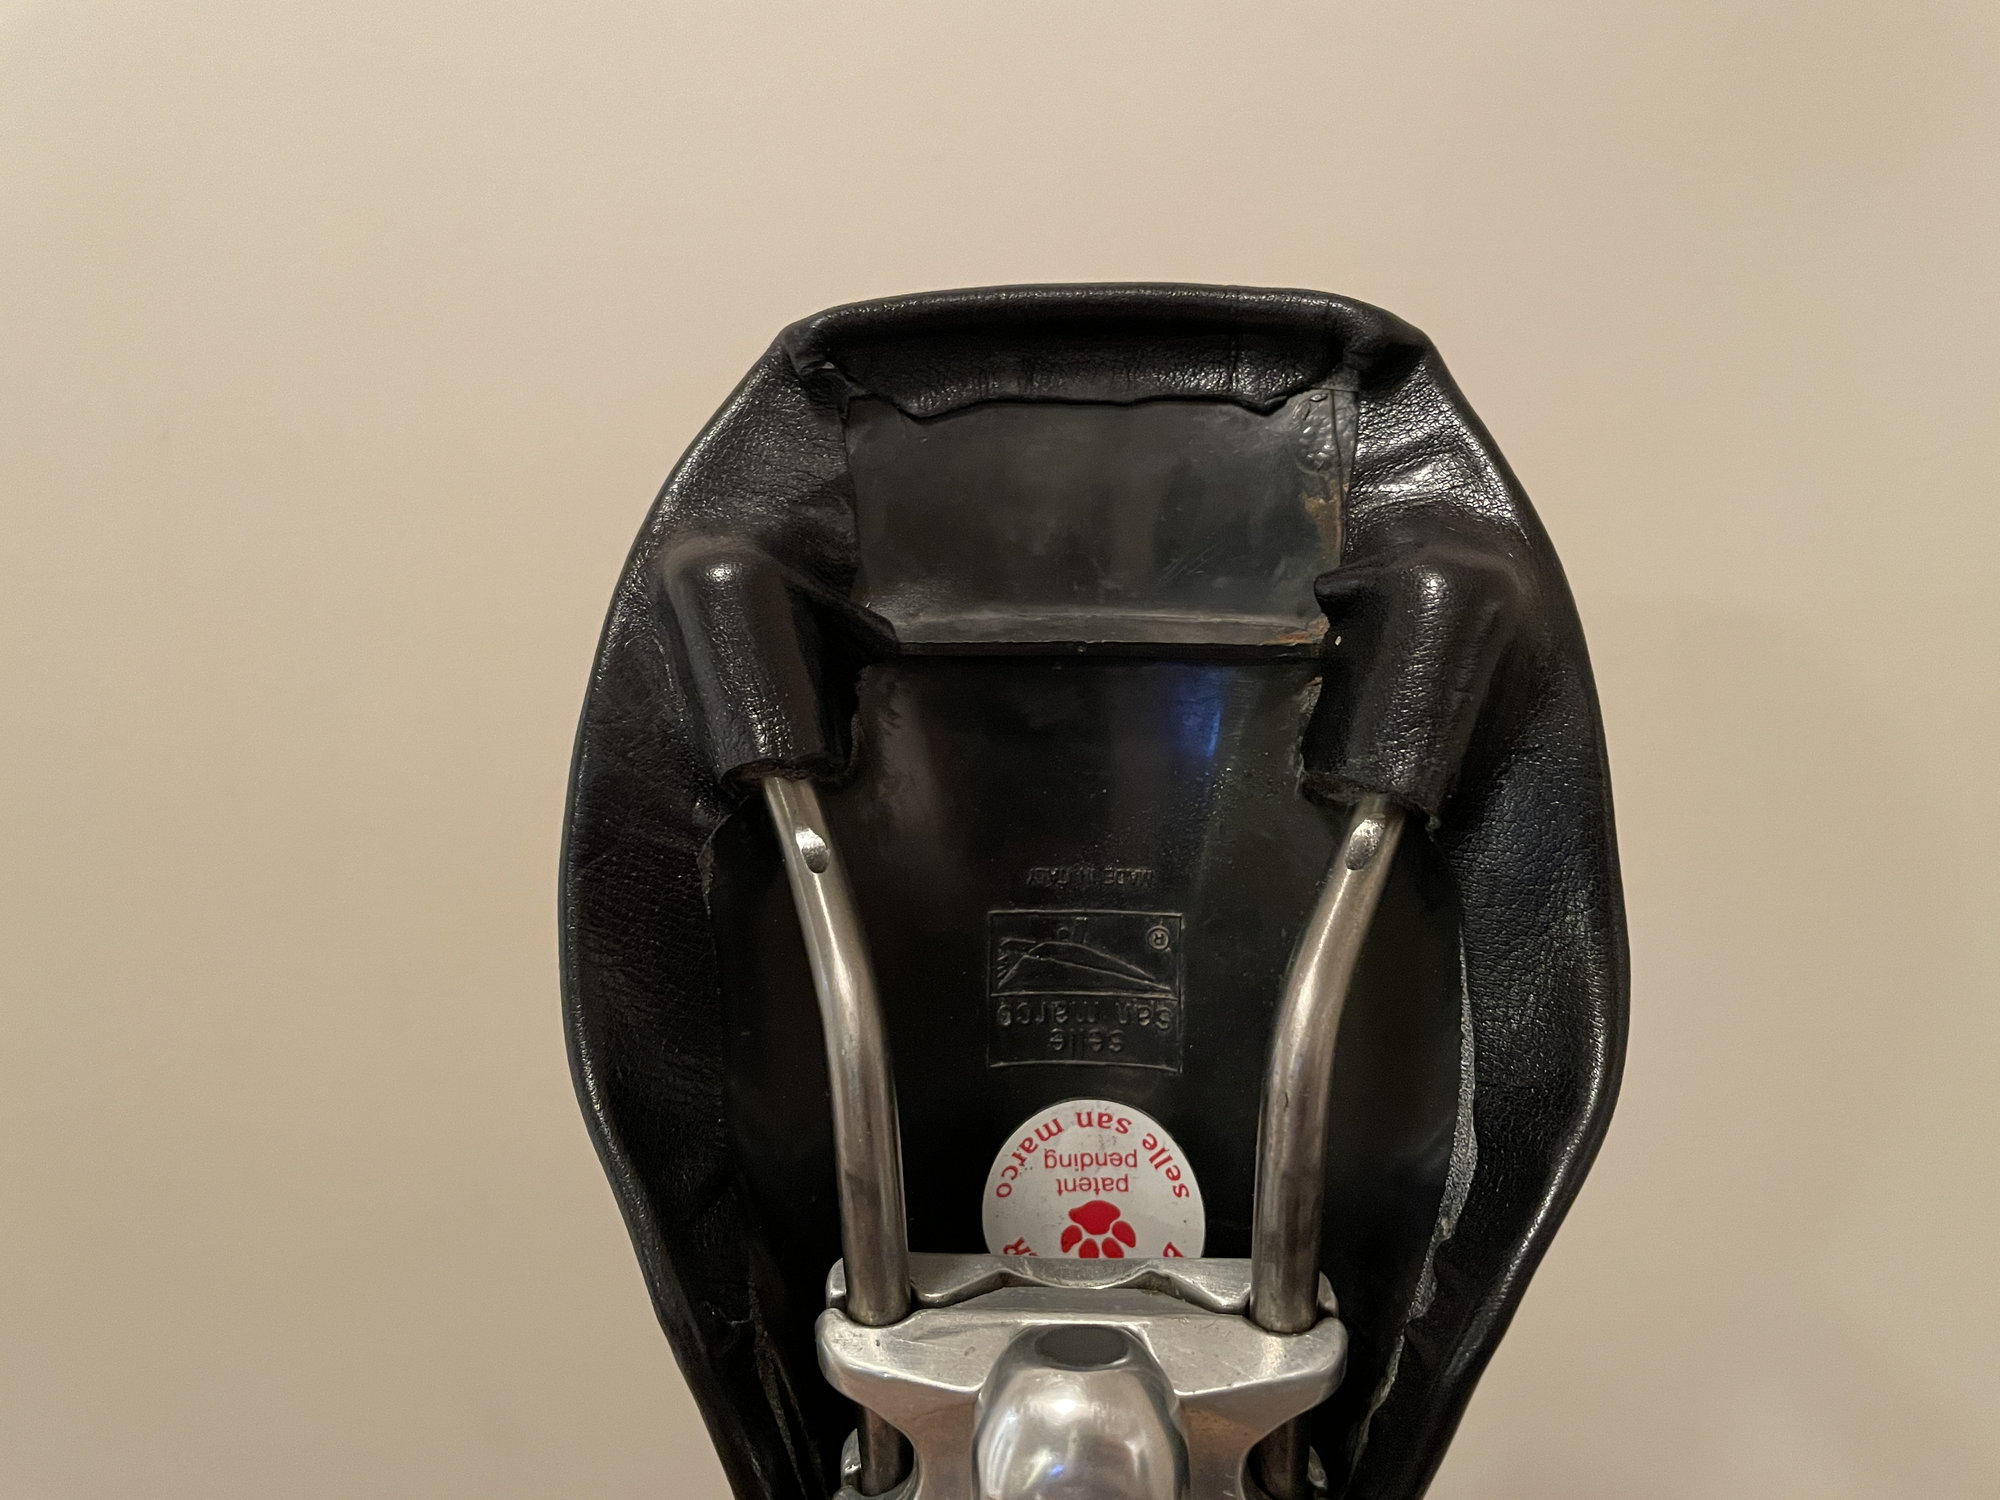
On a good note, someone gave me a well used, badly worn San Marco Rolls to try to save. I wish I took some pics! It had holes in the leather on every corner, cracks in the leather throughout, rust on the rails, and a small bend on the rear trim plate. What a challenge!
My best riding saddle so far has been a San Marco Squadra, the Rolls' successor. This was the extra push to try and do a good job on this Rolls to make it my permanent riding saddle. I have a Squadra in black in great condition - I'm not touching it!
Removing the leather took a long time. Since it was cracked all over, it came out in tiny little pieces. A heatgun REALLY helped in keeping the foam together. There was still divots so I went over it with the sanding-block. Plus, a big chunk was removed from the nose from a crash. Overall, I did alot of shaping to keep it from looking horrible. The ending shape actually came out good, I flattened the top of the saddle quite a bit.
The stretching was the regular thing, spray adhesive on top, stretch, heatgun, Woodweld underneath, trim. The underside of the nose was different than other saddles I've done. It was just flat underneath, no tucking the leather under-and-up like a Turbo. I used some good stretching on the nose's sides and just folded the front and Woodwelded the rest on top of the stretch leather. It came out good.
As for the rear trim plate, I totally destroyed the original rivets removing the trim, forcing me to find a replacement solution. A quick trip to the local hardware store yeilded a very nice and simple solution: brass nails and flat speed nuts! The head of the nails were a nice shape. They fit perfectly in the existing holes. The speed nuts slid on as tight as they went. I trimmed them down and coated them with a gob of 5-minute epoxy gel from the .99 store.
Overall, I'm very happy with the results. It was the most challenging, time-consuming recover yet but I think it's my favorite! It feels nice because of the flat top and the leather matches my bar-tape. I'm a happy camper.
Oh, and some pics:
Likes For retrodude:
12-11-20, 01:54 PM
#192
Junior Member
Join Date: Nov 2018
Location: Burnaby, British Columbia
Posts: 167
Bikes: 1984 & 1990 Marinoni Specials - 1990 Bianchi Sika - 1993 Cannondale M800 - 1996 GT Zaskar - 1993 Kona Kilauea - 1987 Ritchey Ascent - 1996 Rocky Mountain Vertex - 2008 Kona Dogma - 1976 Schwinn Suburban - 1994 Kuwahara Makai
Liked 203 Times
in
58 Posts
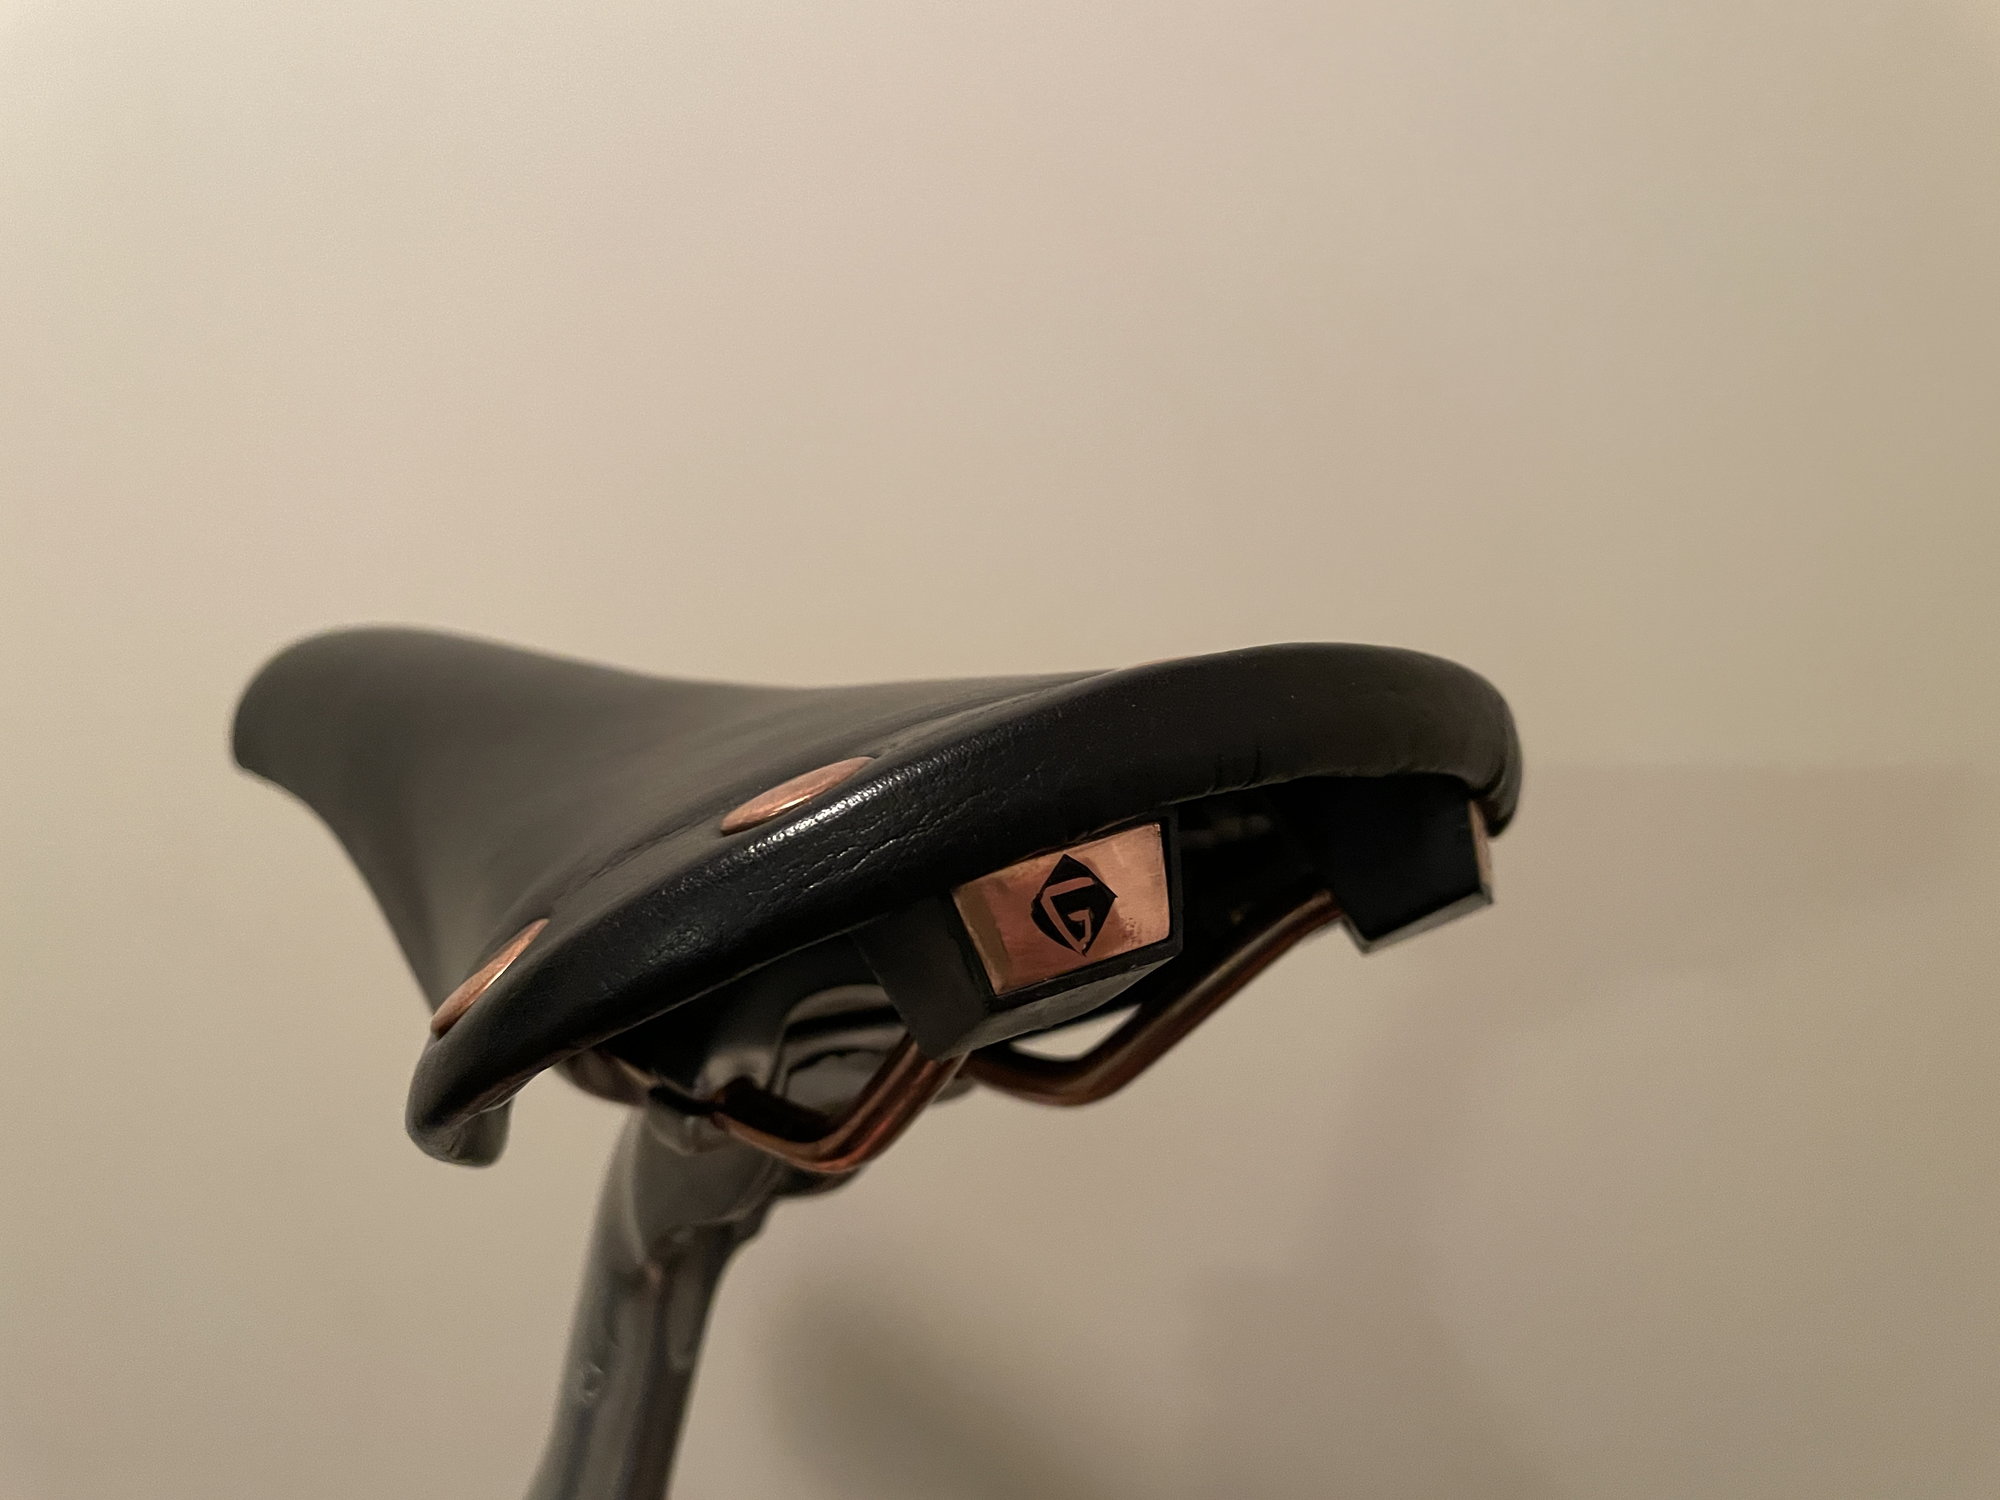
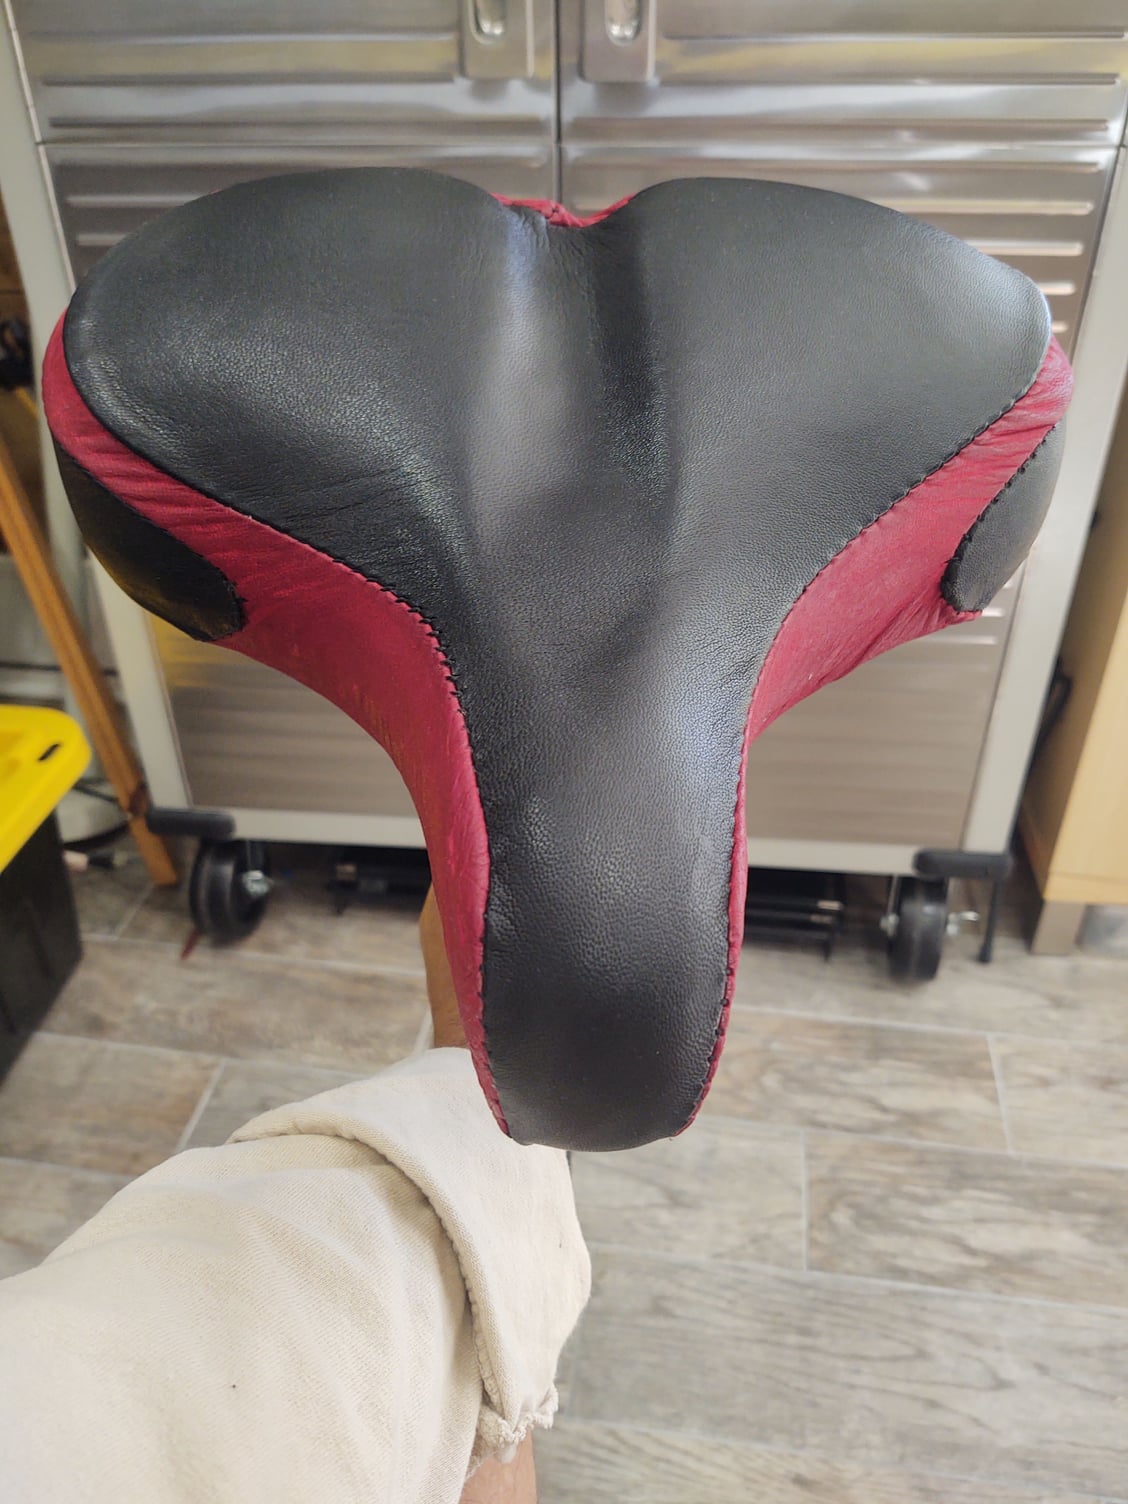
I have added to this thread previously. I just finished two new saddles and wanted to share. The first was one of my previous favorites (until the flite came along). The San Marco Regal, think they have lighter versions now but the old ones are heavy, like almost 390g. I came across a white one (well worn) on CL for $5, good project right? Started hunting for leather scrapes and found a very large piece at Tandy Leather for only $17, would do several saddles. My previous Regal was white which I loved, but really attracts dirt marks. Decided on black. The copper rivets where a challenge to remove and re-spread (hope I got them good enough because they hold the whole saddle together. The leather I bought is a little thicker than past projects. I had to abort while gluing and luckily did not ruin the foam because it just was not sticking or sitting nice while fighting with the dry time window. Started with a new leather piece and tried something different: soak the leather in hot water first and then stretch it around and under. I really took my time and would let leather dry over night, used a piece much bigger than needed and then tied some tie wraps through small holes where it would eventually be discarded. I then re-wet certain portions to help form the leather and let dry completely again. Wish I took process pictures but hopefully you get the gist of it. Oh ya, also, the second square piece of copper on the back with the "G" was missing. So, I went to Home Depot and bought a 1/2" copper pipe coupling for 97 cents, cut a piece out, formed and polished it, then painted on a "G" then glued it on. Not perfect but good from far (LOL)
Before:
After


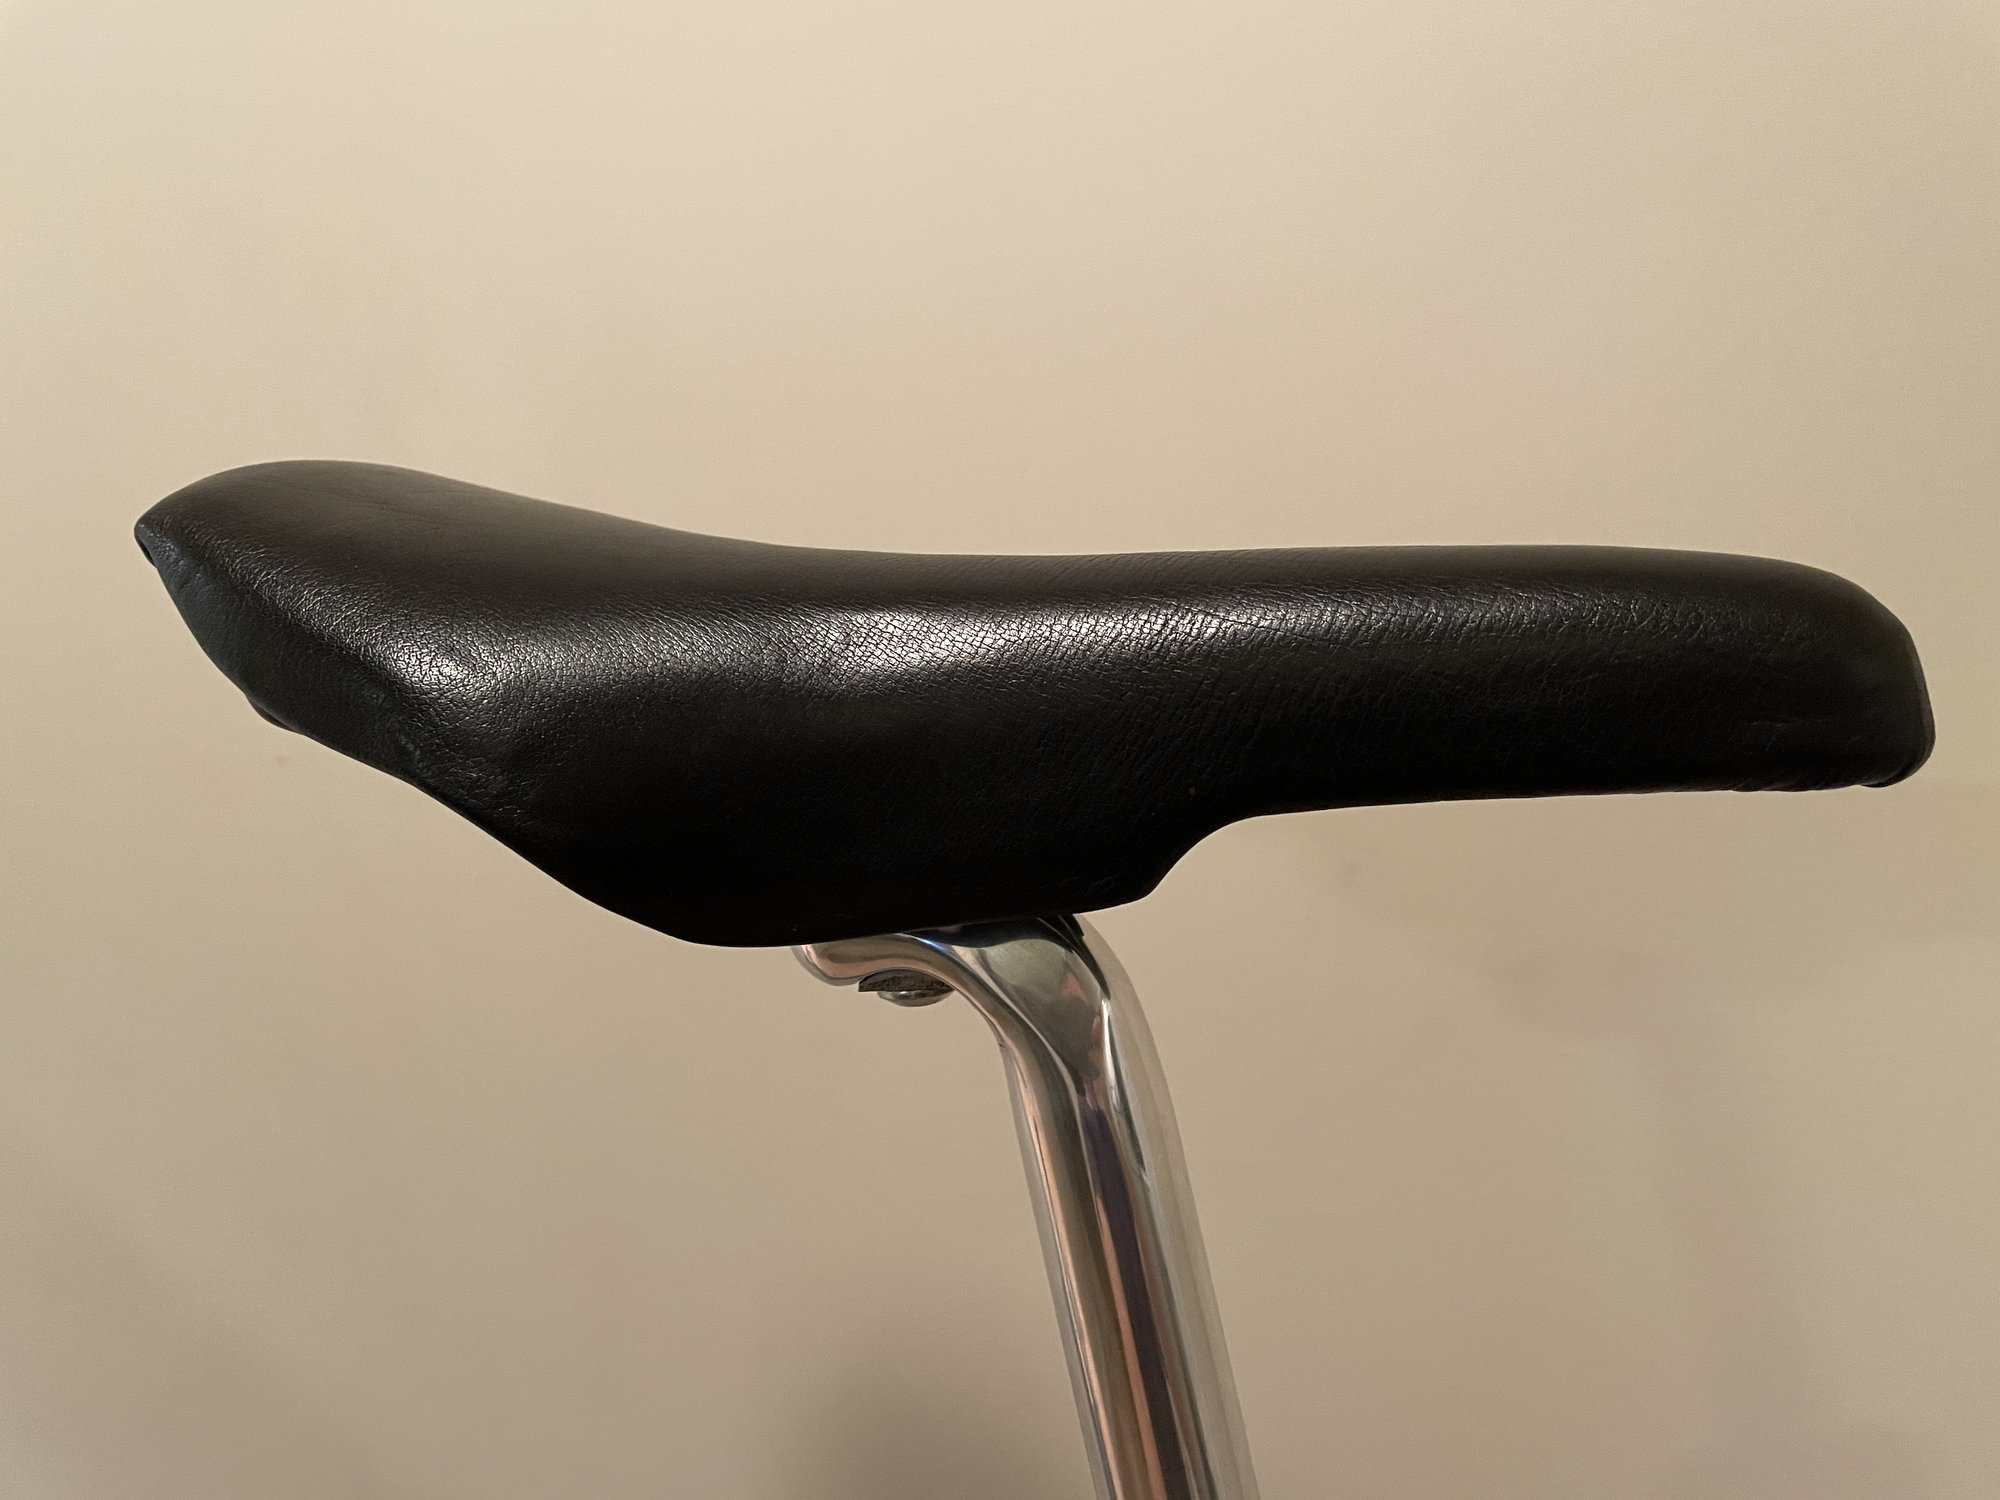
The second one I did was a 93' Bontrager (San Marco made) Titanium. Pretty unique looking saddle. The back corners are reduced to aid moving backward off the saddle during technical sections (old MTB lore)
Don't have a before picture, I think the leather soaking method really helped me get this one good:

Before:
After
The second one I did was a 93' Bontrager (San Marco made) Titanium. Pretty unique looking saddle. The back corners are reduced to aid moving backward off the saddle during technical sections (old MTB lore)
Don't have a before picture, I think the leather soaking method really helped me get this one good:
12-11-20, 04:03 PM
#193
Well, for me it seems to be a no-go.
To recap, I had used Feibing Deglazer and Pro Dye, but the finish color was rubbing off. I ordered some sealer (Feibing Resolene) and tried again. It was maybe marginally better, but nowhere near a permanent finish. It still rubbed off significantly after a couple rides. Too bad because I liked the colors I was getting from the dye. The other issue I would mention is the Resolene dries to a gloss finish, which I don't care for.
I don't know if the problem is something to do with the leather I was using, or maybe I move around too much on my saddle, or some other explanation. Obviously it is possible to dye leather so this doesn't happen. My factory saddles are all fine, as are the ones I've recovered without dying the leather.
12-11-20, 05:06 PM
#194
Retrodude, that looks great! I also have an old San Marco Regal in white perforated leather with copper rivets that could use some refurbishing (my seatpost also looks the same as yours - Campy Chorus aero?). Your post gives me inspiration. Any tricks to getting the copper rivets off?
I have added to this thread previously. I just finished two new saddles and wanted to share. The first was one of my previous favorites (until the flite came along). The San Marco Regal, think they have lighter versions now but the old ones are heavy, like almost 390g. I came across a white one (well worn) on CL for $5, good project right? Started hunting for leather scrapes and found a very large piece at Tandy Leather for only $17, would do several saddles. My previous Regal was white which I loved, but really attracts dirt marks. Decided on black. The copper rivets where a challenge to remove and re-spread (hope I got them good enough because they hold the whole saddle together. The leather I bought is a little thicker than past projects. I had to abort while gluing and luckily did not ruin the foam because it just was not sticking or sitting nice while fighting with the dry time window. Started with a new leather piece and tried something different: soak the leather in hot water first and then stretch it around and under. I really took my time and would let leather dry over night, used a piece much bigger than needed and then tied some tie wraps through small holes where it would eventually be discarded. I then re-wet certain portions to help form the leather and let dry completely again. Wish I took process pictures but hopefully you get the gist of it. Oh ya, also, the second square piece of copper on the back with the "G" was missing. So, I went to Home Depot and bought a 1/2" copper pipe coupling for 97 cents, cut a piece out, formed and polished it, then painted on a "G" then glued it on. Not perfect but good from far (LOL)
Before:
After
The second one I did was a 93' Bontrager (San Marco made) Titanium. Pretty unique looking saddle. The back corners are reduced to aid moving backward off the saddle during technical sections (old MTB lore)
Don't have a before picture, I think the leather soaking method really helped me get this one good:
 12-14-20, 12:51 PM
#195
Junior Member
Join Date: Nov 2018
Location: Burnaby, British Columbia
Posts: 167
Bikes: 1984 & 1990 Marinoni Specials - 1990 Bianchi Sika - 1993 Cannondale M800 - 1996 GT Zaskar - 1993 Kona Kilauea - 1987 Ritchey Ascent - 1996 Rocky Mountain Vertex - 2008 Kona Dogma - 1976 Schwinn Suburban - 1994 Kuwahara Makai
Liked 203 Times
in
58 Posts
Getting the rivets out wasn't as hard as getting them back in. To get them out I used a combination of really thin terminal screw drivers, eye glass frame screw driver and a drift which has a slightly smaller diameter than the rivet hole to tap them out, basically I dug the thin flat blade screwdrivers in around where the rivet is flared and pried the copper up to allow for removal. This allows for complete removal of the rails making the recovering process a bit easier. To put the saddle back together after recovering i decide to cut a small wood block peice out of oak I had lying around to be a softer rest for the outside part of the rivet when hammering the flare back, need to be careful this rivet rest/protector does not make marks on your brand new saddle cover. Getting the rivets all back in was a fight as well. I basically shaped a random drift tool into the flaring drift I was after and did my best to re-flare the rivet ends. Kind of a pain but I know have a recovered Regal with about $10 invested 
 06-23-21, 01:51 PM
#197
Junior Member
Any thoughts on covering saddles without removing the existing cover? I have so many cheapo seats that I've been thinking of giving them some character by using colourful marine vinyl and just gluing overtop of the current seat? Thoughts? Thanks in advance.
06-23-21, 04:03 PM
#198
Senior Member
Join Date: Dec 2016
Location: Long Island, NY
Posts: 2,225
Bikes: Trek 800 x 2, Schwinn Heavy Duti, Schwinn Traveler, Schwinn Le Tour Luxe, Schwinn Continental, Cannondale M400 and Lambert, Schwinn Super Sport
Liked 1,115 Times
in
719 Posts
If the vinyl on the original seat is in good shape I would think you could put the new vinyl over it. It is not too hard to remove the original cover. The ones that I have recovered had holes in the vinyl so I have always removed the original cover.
If you have holes or tears in the original vinyl, I would think that those places could show through the new material because it is stretched.
If you have holes or tears in the original vinyl, I would think that those places could show through the new material because it is stretched.
10-25-23, 11:19 PM
#199
bironi
Join Date: Feb 2010
Location: Olympia, Wa
Posts: 334
Bikes: 2 DeRosa, 1 Medici, 1 Moots
Liked 406 Times
in
156 Posts
If the vinyl on the original seat is in good shape I would think you could put the new vinyl over it. It is not too hard to remove the original cover. The ones that I have recovered had holes in the vinyl so I have always removed the original cover.
If you have holes or tears in the original vinyl, I would think that those places could show through the new material because it is stretched.
If you have holes or tears in the original vinyl, I would think that those places could show through the new material because it is stretched.
Some of the photos with the leather covering removed are way too painful.
These are like bare butt shots.
A new leather saddle is the answer, festering foam covered over is not.
Thank god that Photo Bucket has timed out!
10-26-23, 05:52 AM
#200
Freewheel Medic

Join Date: Oct 2005
Location: An Island on the Coast of GA!
Posts: 13,019
Bikes: Snazzy* Schwinns, Classy Cannondales & a Super Pro Aero Lotus (* Ed.)
Liked 2,341 Times
in
1,036 Posts
I recently completed recovering this saddle. It was for a very kind fellow who was moving into a condo and he gave me shop tools he could no longer keep. He would accept no payments for his tools no matter how much I tried.
I spotted the tattered nylon cover falling off his beach cruiser saddle. I told him the least I could do was recover his saddle. He was a University of Georgia grad, so I did it in Bulldog colors.

I spotted the tattered nylon cover falling off his beach cruiser saddle. I told him the least I could do was recover his saddle. He was a University of Georgia grad, so I did it in Bulldog colors.
__________________
Bob
Enjoying the GA coast all year long!
Thanks for visiting my website: www.freewheelspa.com
Bob
Enjoying the GA coast all year long!
Thanks for visiting my website: www.freewheelspa.com