


1973 Fuji Special Road Racer Project
 07-31-18, 07:37 AM
#1
Junior Member
Thread Starter
Join Date: May 2015
Posts: 20
Mentioned: 1 Post(s)
Tagged: 0 Thread(s)
Quoted: 1 Post(s)
Likes: 0
Liked 0 Times
in
0 Posts
1973 Fuji Special Road Racer Project
I decided I wanted to learn a little about working on bikes, and thought the best way to do it was to find a project. I love the look of the vintage steel bikes, and so I started there. My thought was to find a quality vintage steel frame and build it up with modern components. Hopefully I would end up with a bike that rides (and can be repaired easily) like a modern bike with the look of the vintage bikes. The town I live in is not a big biking town, so my options were limited. I eventually found a 1970s Fuji Special Road Racer on craigslist and bought it for $75. It was not in riding shape, but the frame appears to be in good shape. Also, from my research these appeared to be decently well respected frames, but are not very collectable. So hopefully people don't get too offended when I rip all the original components off of it. I knew nothing about working on bikes when I bought this thing so I have been reading forums, and watching a lot of youtube videos to figure it out. It has definitely been a learning experience so far.
I tore it down to the frame. Replaced all of the bearings. I cold set the rear drop outs to 130mm from 126mm. This bike has an odd bottom bracket size (70mm, english threaded). So I got my LBS to face the housing down to 68mm so I could put a new shimano bottom bracket. I plan to put Shimano 105 components on the bike. I have been slowly buying them used piece by piece on Ebay and craigslist.
Things that still need to get done. I still need the Shimano shifters (one of the biggest purchases left on the bike) and 700c wheels. I hope to be able to restore the Fujita Belt leather seat. It is unfortunately pretty cracked and in rough shape, so we will see. Shimano makes some flat backed cable stops that will hopefully fit on the Suntour downshifter clamp to allow for cable routing from the new shifters. I have ordered some Tektro side pull brakes that are nutted to allow for easy install on a vintage frame.
I would love any advice on some issues or problems I am still likely to run into. Also advice on restoring old leather saddles, and converting the downtube shifters to the Shimano STI shifters. Finally any general thoughts on the project overall. I will continue to post pictures as I move along. I have been working on it in spurts, but am hopefully going to push through and really try to get it done soon.
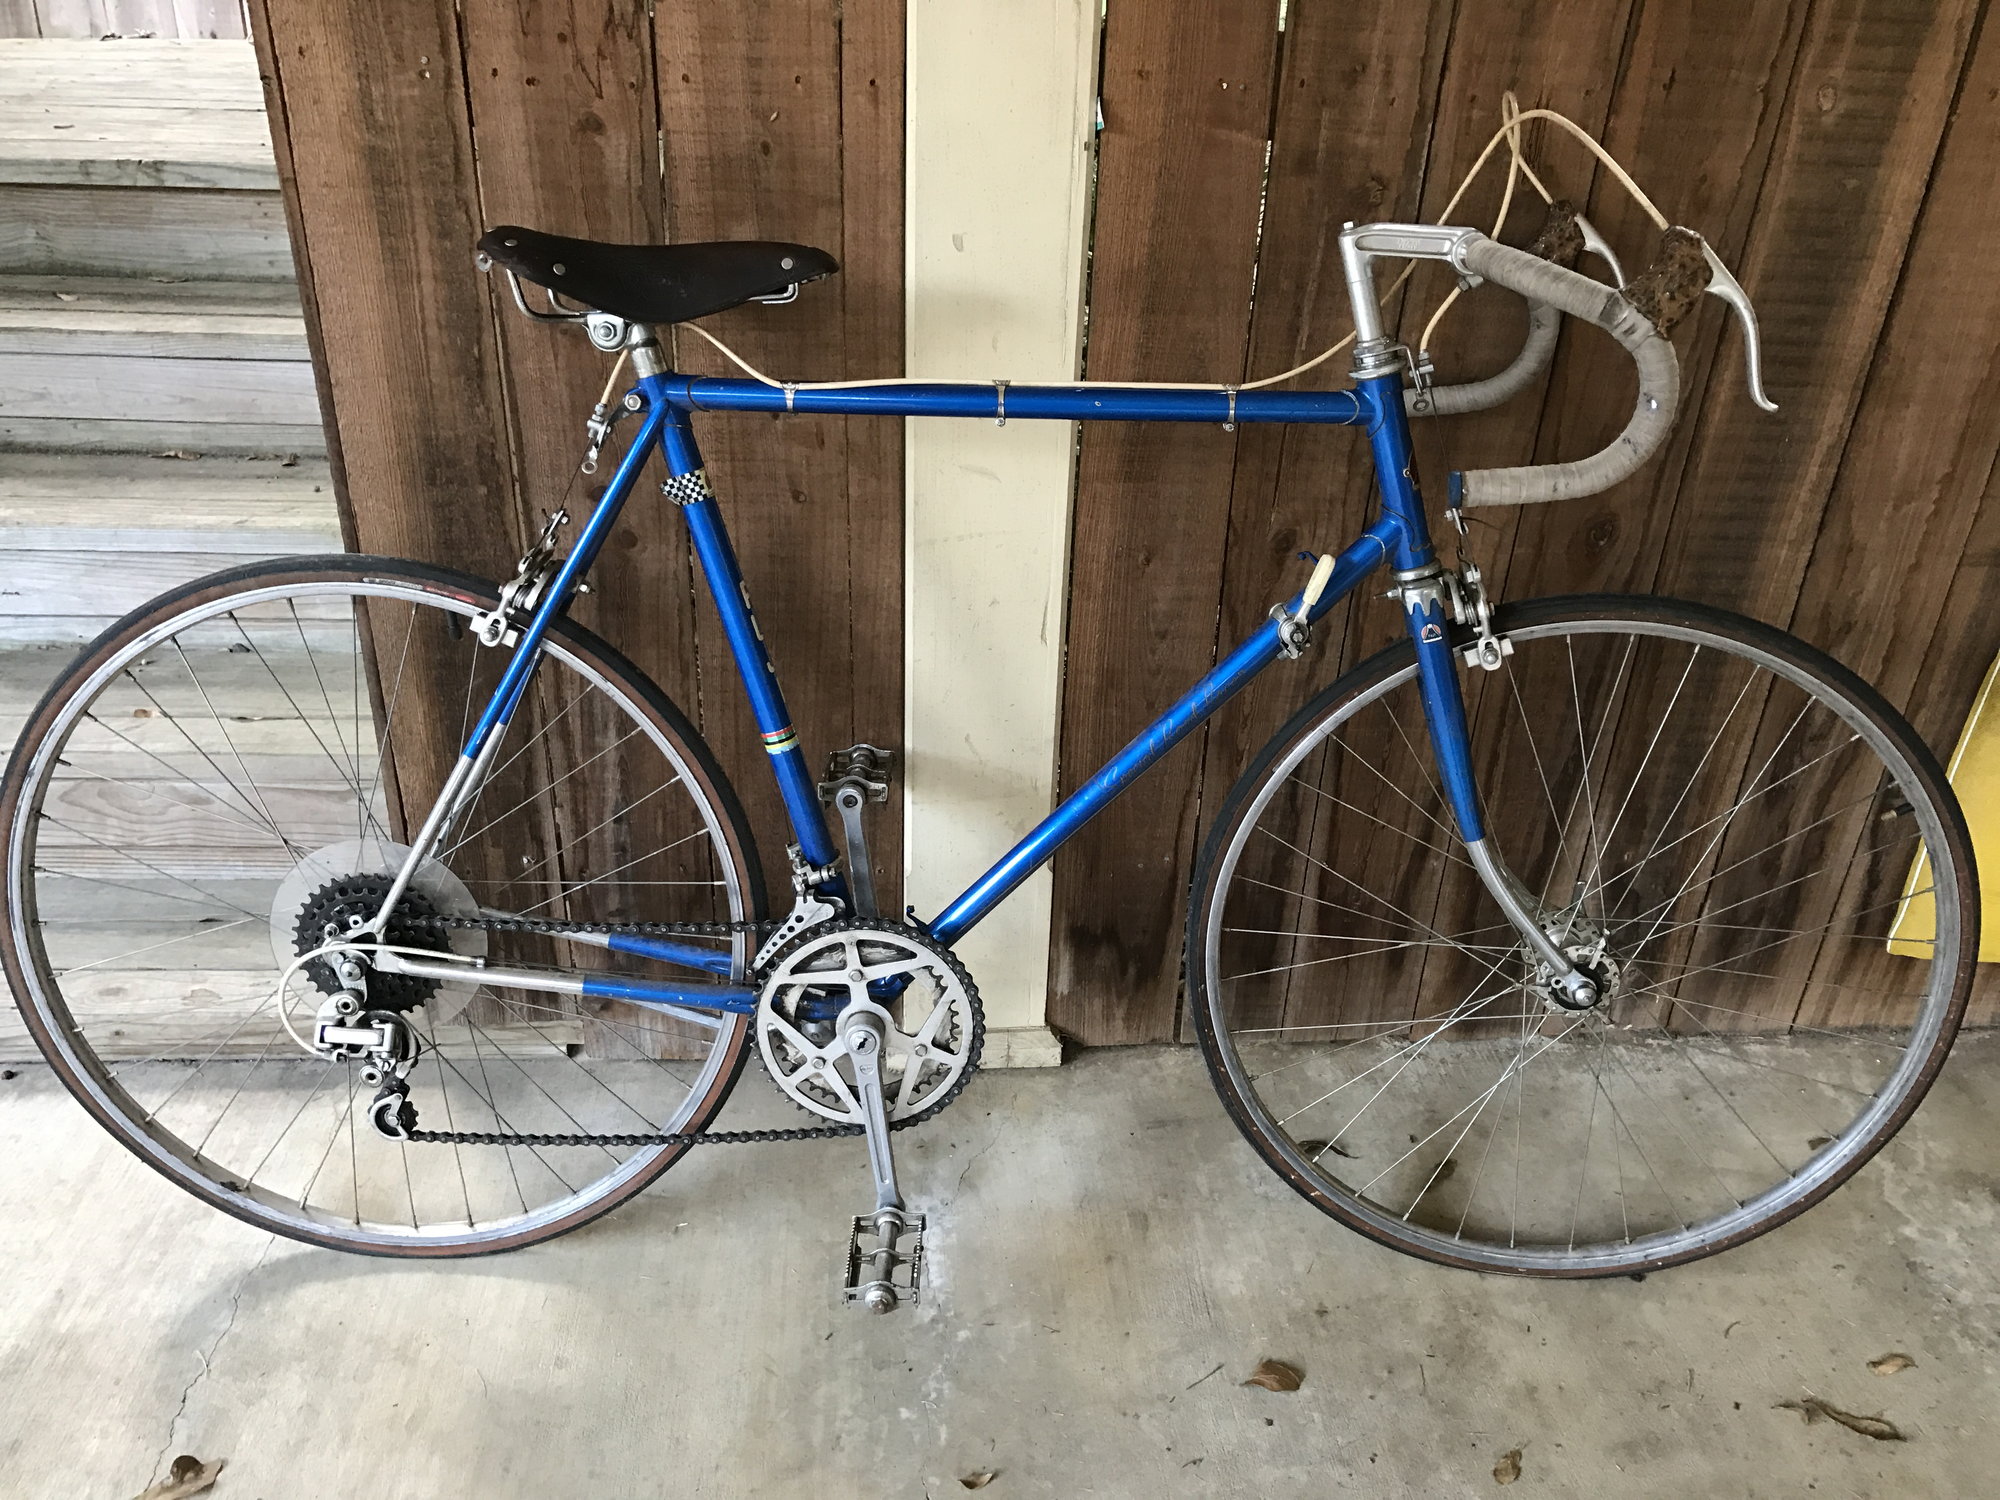
Original bike

Stripped down to just the frame

Starting to build back up. Replaced bearings on front fork.

Original Fujita seat that needs some work.

Faced down bottom bracket housing to add Shimano 105 bottom bracket and crankset.

Shimano 105 rear derailleur
I tore it down to the frame. Replaced all of the bearings. I cold set the rear drop outs to 130mm from 126mm. This bike has an odd bottom bracket size (70mm, english threaded). So I got my LBS to face the housing down to 68mm so I could put a new shimano bottom bracket. I plan to put Shimano 105 components on the bike. I have been slowly buying them used piece by piece on Ebay and craigslist.
Things that still need to get done. I still need the Shimano shifters (one of the biggest purchases left on the bike) and 700c wheels. I hope to be able to restore the Fujita Belt leather seat. It is unfortunately pretty cracked and in rough shape, so we will see. Shimano makes some flat backed cable stops that will hopefully fit on the Suntour downshifter clamp to allow for cable routing from the new shifters. I have ordered some Tektro side pull brakes that are nutted to allow for easy install on a vintage frame.
I would love any advice on some issues or problems I am still likely to run into. Also advice on restoring old leather saddles, and converting the downtube shifters to the Shimano STI shifters. Finally any general thoughts on the project overall. I will continue to post pictures as I move along. I have been working on it in spurts, but am hopefully going to push through and really try to get it done soon.
Original bike
Stripped down to just the frame
Starting to build back up. Replaced bearings on front fork.
Original Fujita seat that needs some work.
Faced down bottom bracket housing to add Shimano 105 bottom bracket and crankset.
Shimano 105 rear derailleur
 07-31-18, 08:05 AM
#2

buy my bikes

Join Date: Jun 2014
Location: Michigan
Posts: 1,800
Bikes: my very own customized GUNNAR CrossHairs
Mentioned: 19 Post(s)
Tagged: 0 Thread(s)
Quoted: 519 Post(s)
Liked 428 Times
in
249 Posts
https://www.brooksengland.com/en_us/...e-40g-tin.html
https://www.rivbike.com/collections/...ddle-goop-4-oz
There's lots of threads on leather saddles. You could order up one of the above products and try to work the preservative into the leather. Make sure you DO NOT use a softener, like Neets Foot Oil. That's different stuff.
Looks like a fun bike project. I have done something similar with a mid-80's TREK 420. Modernized the components to 8-spd indexed barend shifters, index-able rear deraileur, aero-brake levers, 700c wheels.
If you think you would like to see the project, I've got an album here: https://goo.gl/photos/7CSoyncDZavYT1zw8
It no longer has the "priest" bars (upside down mustache bars), it's now a traditional drop bar deal, no rack.
I like it pretty well. I can run a 700c x 37mm (barely) tire through the frame.
07-31-18, 08:49 AM
#3
Senior Member
I like the frame, looks like a nice starting point. Your coat hanger handle bar stabilizer trick I will try myself!
 07-31-18, 09:09 AM
#4
Senior Member
Once everything is stripped off of them, Fuji Special Road Racers have remarkably light frames. I believe if you put some lightweight wheels & tires on that bike you could probably get the bare weight down to something respectable. Be good. Have fun.
07-31-18, 09:56 AM
#5
Junior Member
Thread Starter
Join Date: May 2015
Posts: 20
Mentioned: 1 Post(s)
Tagged: 0 Thread(s)
Quoted: 1 Post(s)
Likes: 0
Liked 0 Times
in
0 Posts
07-31-18, 10:07 AM
#6
Senior Member
Join Date: Jul 2004
Location: northern michigan
Posts: 13,317
Bikes: '77 Colnago Super, '76 Fuji The Finest, '88 Cannondale Criterium, '86 Trek 760, '87 Miyata 712
Mentioned: 19 Post(s)
Tagged: 0 Thread(s)
Quoted: 659 Post(s)
Liked 595 Times
in
313 Posts
That is a Fuji classic frameset!
07-31-18, 10:17 AM
#7
Bad example
Join Date: Nov 2015
Location: Seattle and Reims
Posts: 3,062
Bikes: Peugeot: AO-8 1973, PA-10 1971, PR-10 1973, Sante 1988; Masi Gran Criterium 1975, Stevenson Tourer 1980, Stevenson Criterium 1981, Schwinn Paramount 1972, Rodriguez 2006, Gitane Federal ~1975, Holdsworth Pro, Follis 172 ~1973, Bianchi '62
Mentioned: 36 Post(s)
Tagged: 0 Thread(s)
Quoted: 823 Post(s)
Liked 206 Times
in
94 Posts
I am a fan of using nice newer parts on old frames. Your Fuji should prove to be a great ride when you are done. Do splurge on really nice tires!
__________________
Keeping Seattle�s bike shops in business since 1978
Keeping Seattle�s bike shops in business since 1978
07-31-18, 10:27 AM
#8

Senior Member

Join Date: Jul 2006
Location: San Jose (Willow Glen) Ca
Posts: 9,842
Bikes: Kirk Custom JK Special, '84 Team Miyata,(dura ace old school) 80?? SR Semi-Pro 600 Arabesque
Mentioned: 106 Post(s)
Tagged: 0 Thread(s)
Quoted: 2337 Post(s)
Liked 2,821 Times
in
1,540 Posts
nice, and sounds like you are pretty good at scrounging. if you can't find a used wheel set..... check out velomine here here is an example Mavic Open Elite Silver Rims Road Bike Wheelset 8 9 10 11 speed [640300] - $130.00 Velomine.com : Worldwide Bicycle Shop, fixed gear track bike wheelsets campagnolo super record vintage bike
__________________
Life is too short not to ride the best bike you have, as much as you can
(looking for Torpado Super light frame/fork or for Raleigh International frame fork 58cm)
Life is too short not to ride the best bike you have, as much as you can
(looking for Torpado Super light frame/fork or for Raleigh International frame fork 58cm)
07-31-18, 10:32 AM
#9
Junior Member
Thread Starter
Join Date: May 2015
Posts: 20
Mentioned: 1 Post(s)
Tagged: 0 Thread(s)
Quoted: 1 Post(s)
Likes: 0
Liked 0 Times
in
0 Posts
nice, and sounds like you are pretty good at scrounging. if you can't find a used wheel set..... check out velomine here here is an example Mavic Open Elite Silver Rims Road Bike Wheelset 8 9 10 11 speed [640300] - $130.00 Velomine.com : Worldwide Bicycle Shop, fixed gear track bike wheelsets campagnolo super record vintage bike
This is great. Thanks so much. Wheelsets has been one of the most difficult things for me to find when trying to keep this on a reasonable budget.
08-01-18, 11:20 AM
#11
Senior Member

I'll be curious to see how you route your front derailleur cable arrangement near the BB. Your bike has a brazed-on cable housing stop on the seat tube near the bottom bracket, and the old derailleur had a stop built into it. That arrangement has disappeared with modern front derailleurs, which usually only use housing to get the cable from the shifter to the first attachment on the frame nowadays. On my Centurion, I just tried using my original Suntour derailleur with the brifters I installed, and I managed to make it work well enough as an indexed double.
You can also probably get a downtube cable stop similar to what was used back in the day, as long as you have a barrel adjuster somewhere in both shifting lines. For my front, I used an inline adjuster, and for the rear I just use the RD's adjuster.
You can also probably get a downtube cable stop similar to what was used back in the day, as long as you have a barrel adjuster somewhere in both shifting lines. For my front, I used an inline adjuster, and for the rear I just use the RD's adjuster.
08-11-18, 01:22 PM
#12
Junior Member
Thread Starter
Join Date: May 2015
Posts: 20
Mentioned: 1 Post(s)
Tagged: 0 Thread(s)
Quoted: 1 Post(s)
Likes: 0
Liked 0 Times
in
0 Posts
I'll be curious to see how you route your front derailleur cable arrangement near the BB. Your bike has a brazed-on cable housing stop on the seat tube near the bottom bracket, and the old derailleur had a stop built into it. That arrangement has disappeared with modern front derailleurs, which usually only use housing to get the cable from the shifter to the first attachment on the frame nowadays. On my Centurion, I just tried using my original Suntour derailleur with the brifters I installed, and I managed to make it work well enough as an indexed double.
You can also probably get a downtube cable stop similar to what was used back in the day, as long as you have a barrel adjuster somewhere in both shifting lines. For my front, I used an inline adjuster, and for the rear I just use the RD's adjuster.
You can also probably get a downtube cable stop similar to what was used back in the day, as long as you have a barrel adjuster somewhere in both shifting lines. For my front, I used an inline adjuster, and for the rear I just use the RD's adjuster.
I have been researching this problem. I will probably do one of two things. Attach a cable router to the bottom bracket using double sided tape, or get something similar to a Problem solvers back stop to attach it to the seat tube. I am thinking the cable router under the bottom bracket will look the best. I have attached barrel adjusters to the old SunTour downtube shifter clamp, and installed my front derailleur. Still waiting for my brakes to arrive my China (probably will get here the end of august), and my 105 shifters should get here next week. Next purchase is the wheels.

Front derailleur using problem solvers clamp
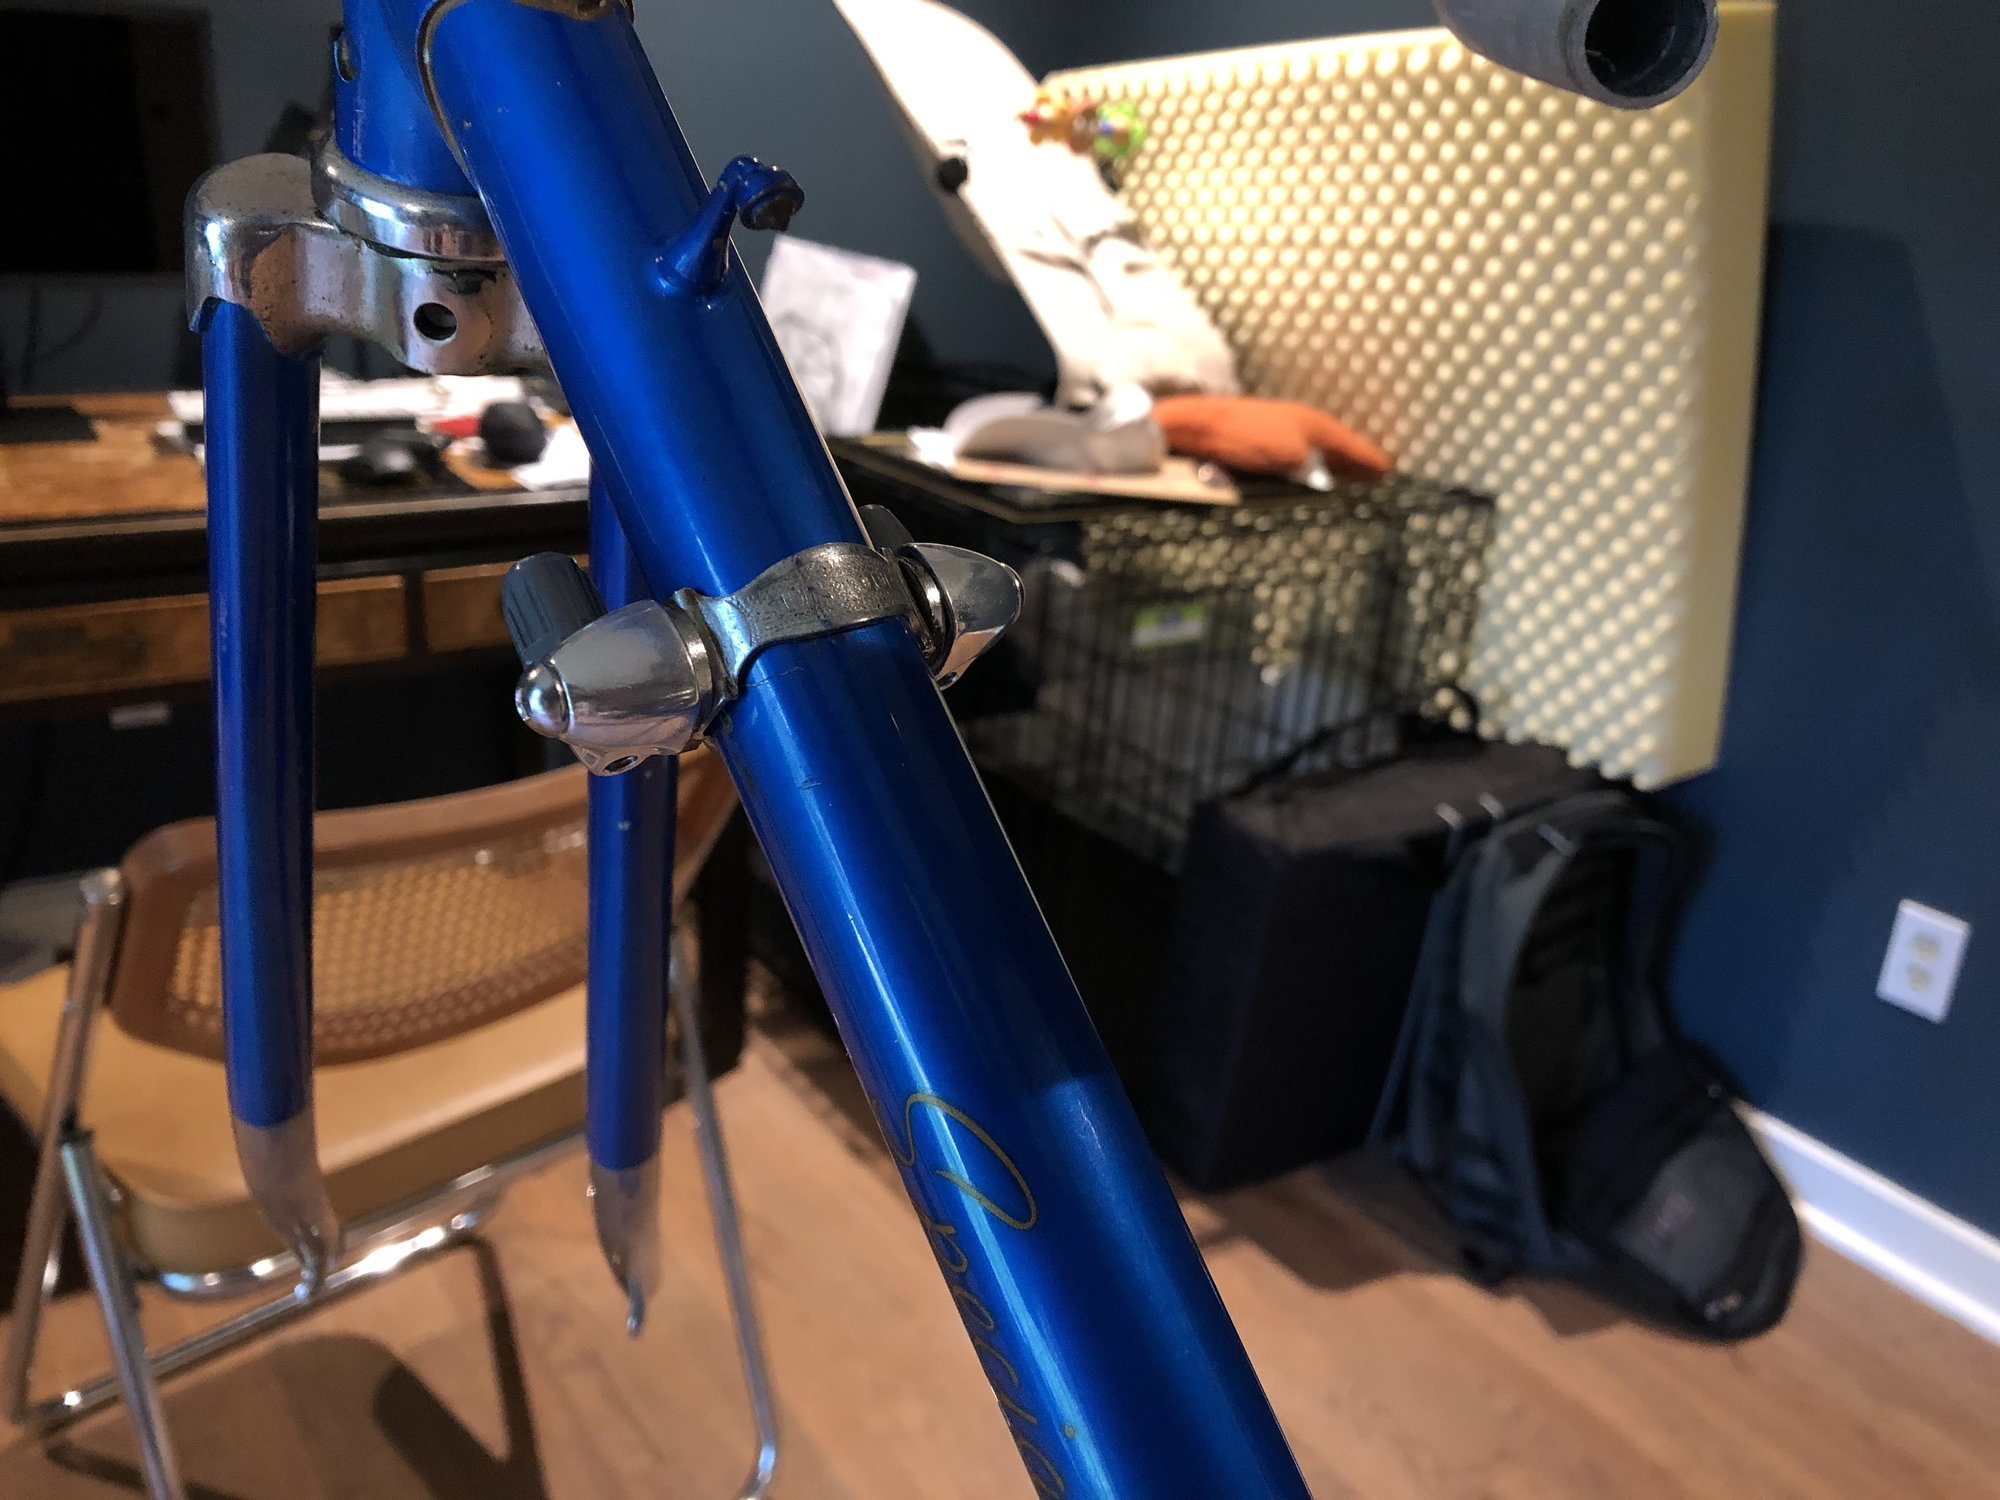
barrel adjusters attached to downtube shifters clamp
08-12-18, 07:12 AM
#13
Senior Member
The brifters you buy will probably come with an under-BB guide for both cables. At least my Claris brifters did. You have the option to drill and tap a hole in the BB shell for a screw, which will likely work better than flexible adhesives. In this case, you would use the original guide for the rear derailleur. I would have done this, too, but I was trying to avoid buying a new FD.
08-12-18, 11:58 AM
#14
Virgo

I also have a �73 and am considering a 700c conversion. Check your rear brake reach, on mine the stock brake won�t reach. I�m pretty sure there�s a longer version of that center pull available. The front will prob have enough reach on mine. I think your scheme will look great on that blue frame. Mine is yellow.
Edit: just saw your bit about brakes, sorry. Which Tektros are you getting?
Edit: just saw your bit about brakes, sorry. Which Tektros are you getting?
08-13-18, 10:45 PM
#16
Virgo
I measured my brake reach tonight, the pads are all the way down in the slots on the rear with 27� wheels, reach is 61-62mm. For my frame I�m going to need a brake with at least a 66mm reach to use 700c wheels, at least on the rear. The front has a little more room in the slots. The Dia Compe 750 version of the 610 that�s on my bike front and rear should work for me. I think those R539s are 47-57mm reach, you may want to check it out on yours.
08-21-18, 08:29 AM
#17
Junior Member
Thread Starter
Join Date: May 2015
Posts: 20
Mentioned: 1 Post(s)
Tagged: 0 Thread(s)
Quoted: 1 Post(s)
Likes: 0
Liked 0 Times
in
0 Posts
I measured my brake reach tonight, the pads are all the way down in the slots on the rear with 27� wheels, reach is 61-62mm. For my frame I�m going to need a brake with at least a 66mm reach to use 700c wheels, at least on the rear. The front has a little more room in the slots. The Dia Compe 750 version of the 610 that�s on my bike front and rear should work for me. I think those R539s are 47-57mm reach, you may want to check it out on yours.
02-13-19, 10:45 PM
#18
Junior Member
Thread Starter
Join Date: May 2015
Posts: 20
Mentioned: 1 Post(s)
Tagged: 0 Thread(s)
Quoted: 1 Post(s)
Likes: 0
Liked 0 Times
in
0 Posts
Update
Took a little time off of working on the bike due to busy times at work. However, over that last couple of weeks I have really been determined to finish.
To recap:
Started with 1973 Fuji Special Road Racer and tore it apart. Converted it to Shimano 105 components and 700c wheels.
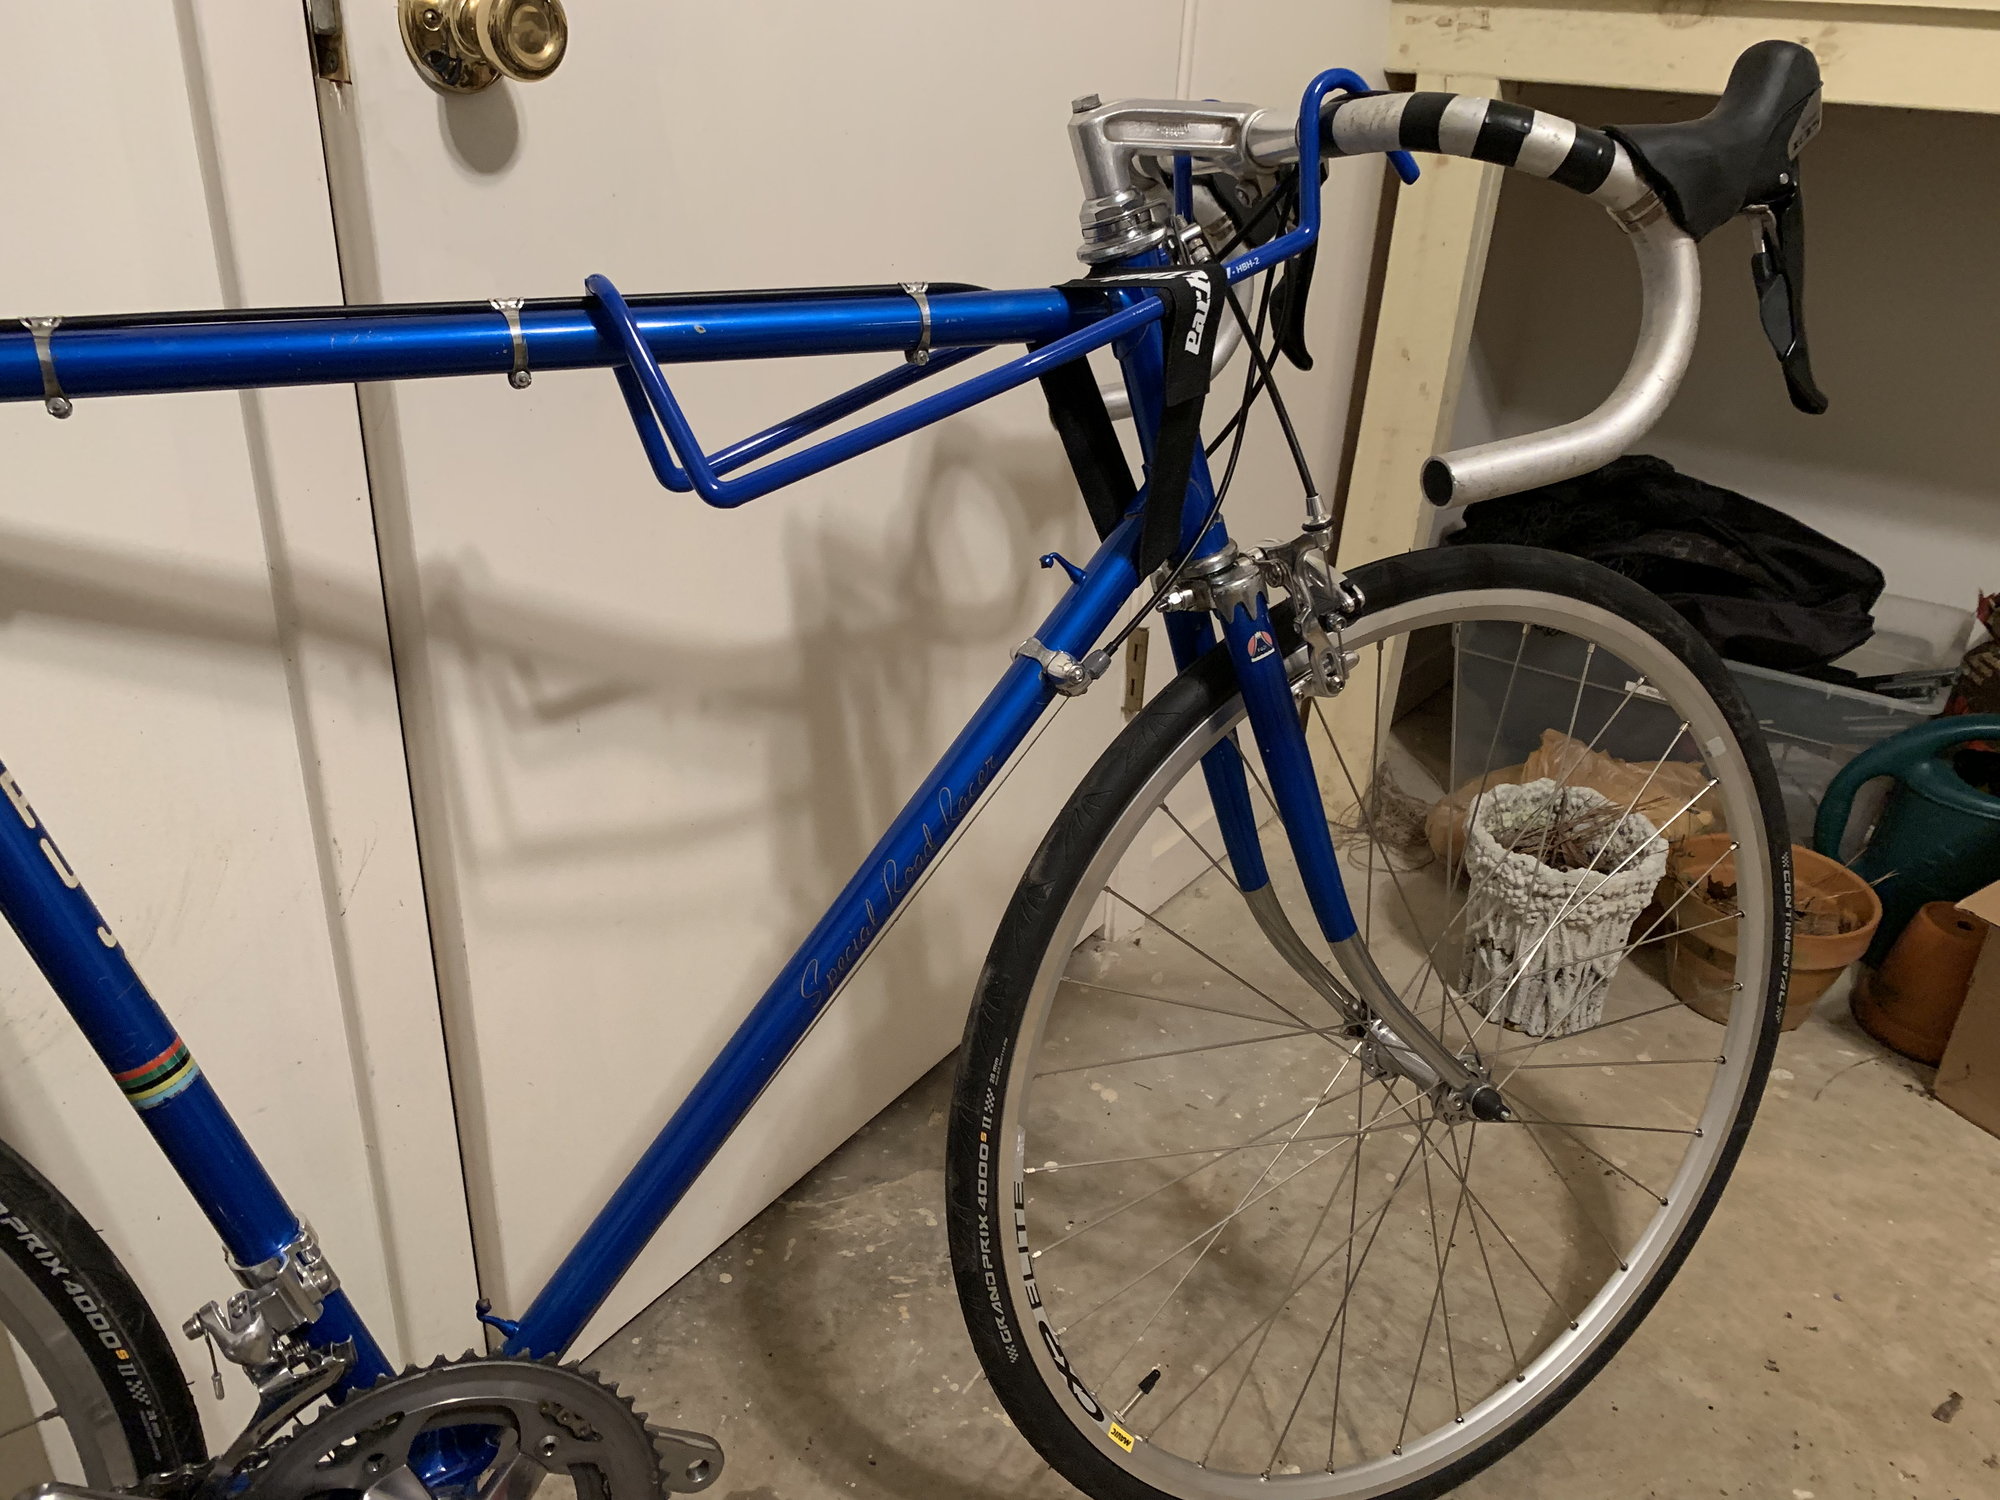
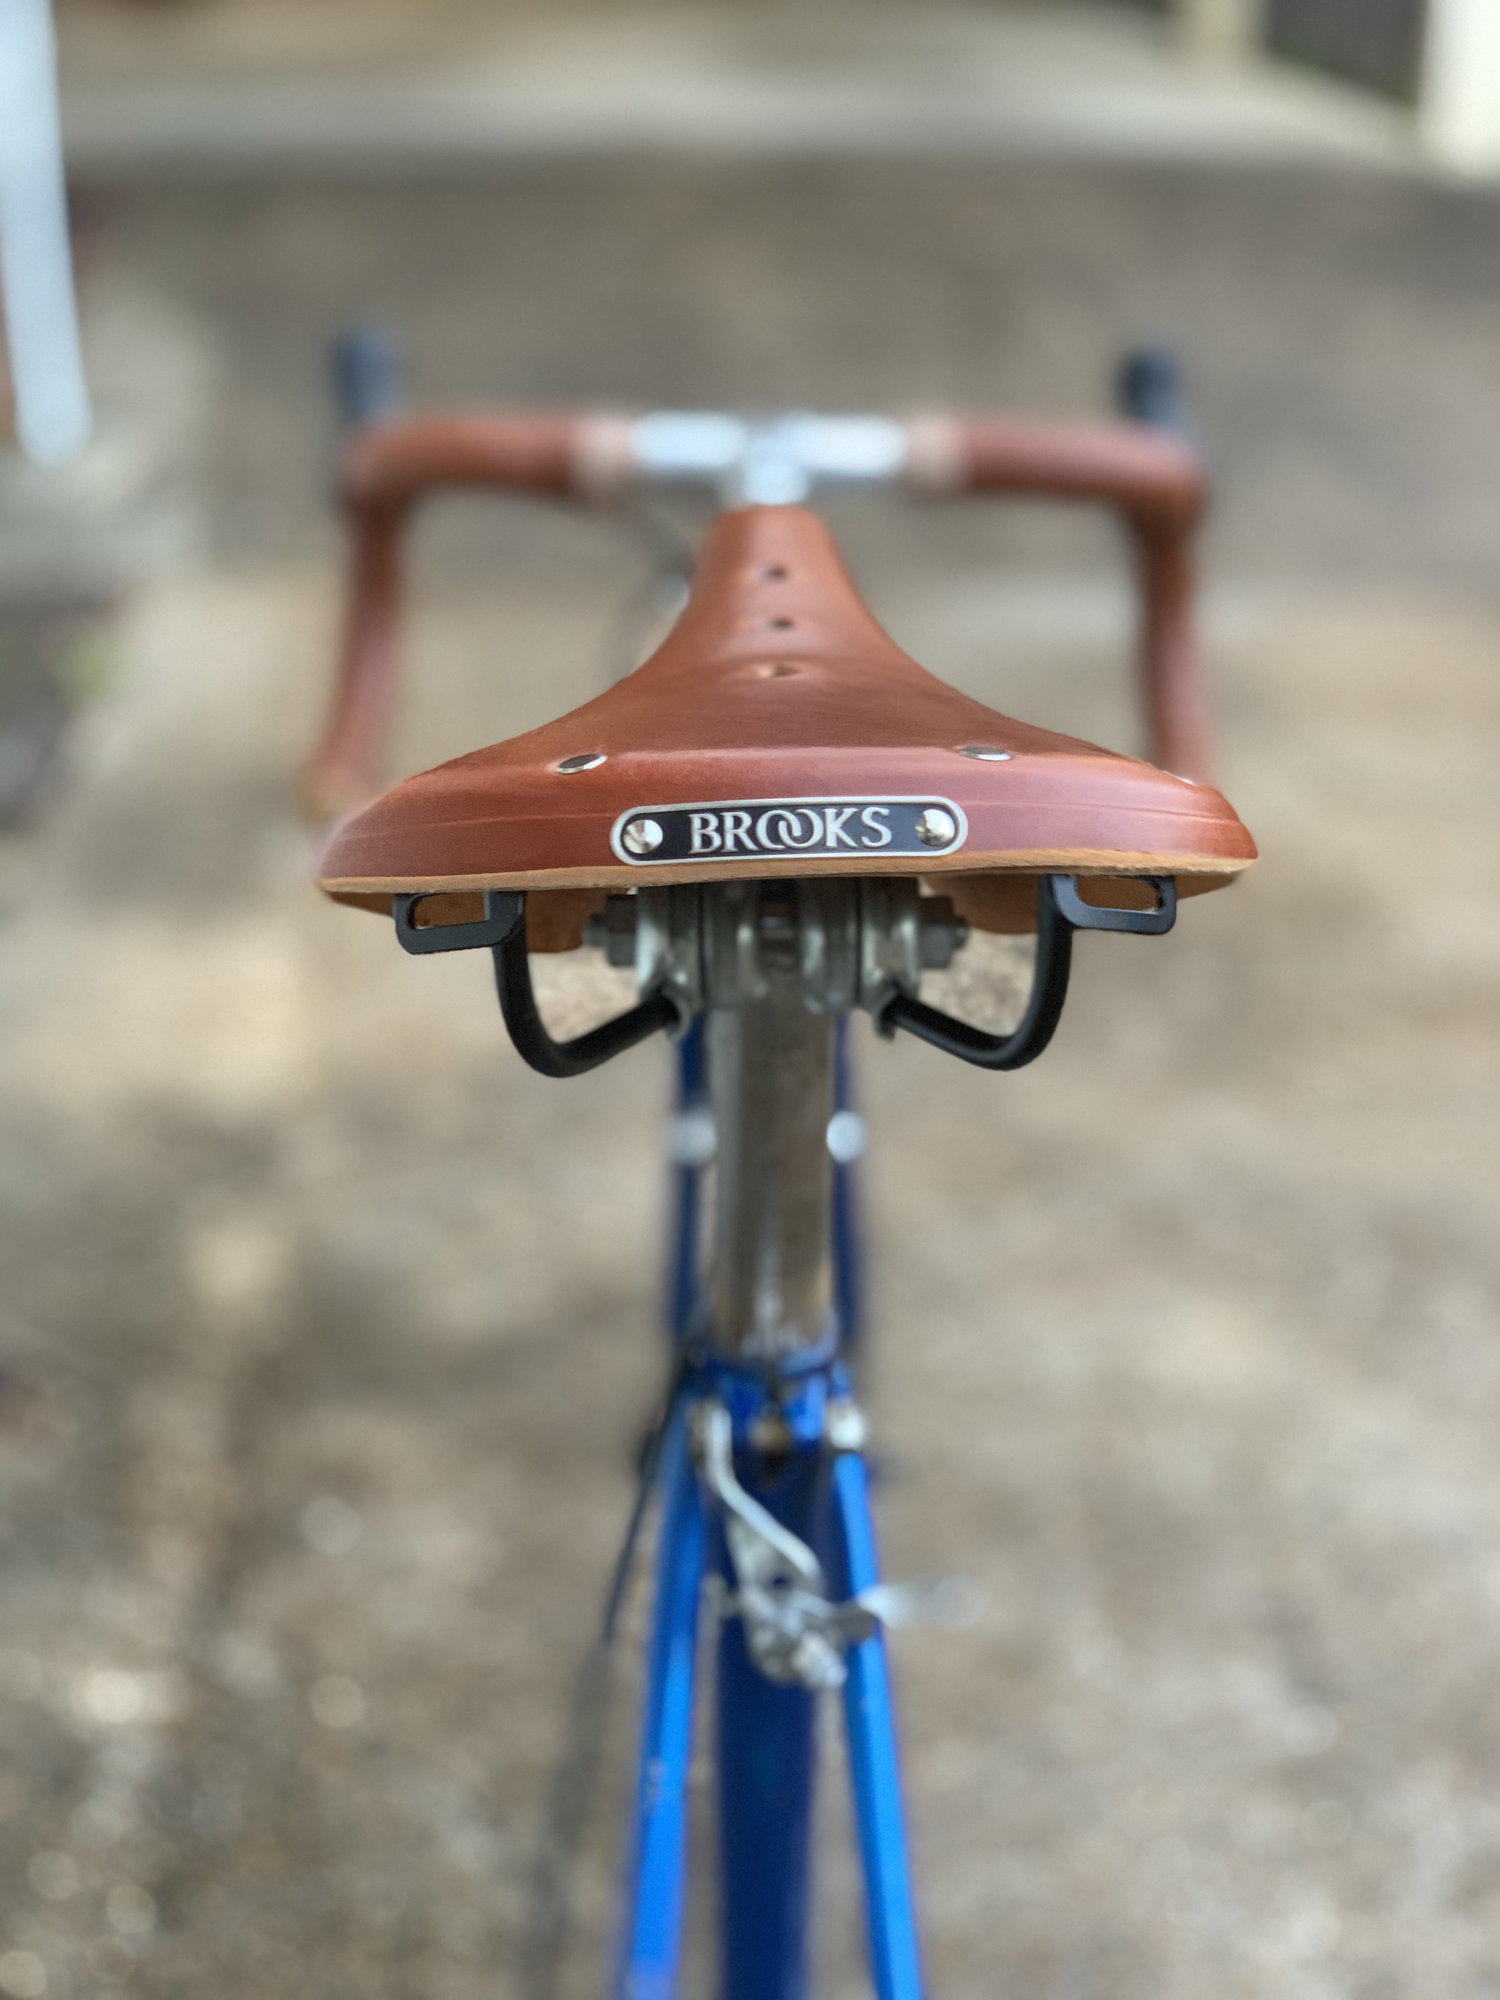
Since my last update I have just about completed it. I bought Mavic CXP Elite wheels and put 28mm wide tires on them. Ended up using Tektro R559 for my brakes. I am still waiting for my pedals which for now are going to be flats (will probably add clipless at some point), Brooks B17 saddle in honey brown and matching Brooks honey brown bar tape. It should finally be rideable at that point.
Future upgrades may involve putting some more attractive cranks on it, better pedals, and new seat tube.
Also, if anybody knows of where I can find a frame mount pump that fits on the braze-on mounts on the bike that would match the vintage look then I would be very

appreciative.
To recap:
Started with 1973 Fuji Special Road Racer and tore it apart. Converted it to Shimano 105 components and 700c wheels.
Since my last update I have just about completed it. I bought Mavic CXP Elite wheels and put 28mm wide tires on them. Ended up using Tektro R559 for my brakes. I am still waiting for my pedals which for now are going to be flats (will probably add clipless at some point), Brooks B17 saddle in honey brown and matching Brooks honey brown bar tape. It should finally be rideable at that point.
Future upgrades may involve putting some more attractive cranks on it, better pedals, and new seat tube.
Also, if anybody knows of where I can find a frame mount pump that fits on the braze-on mounts on the bike that would match the vintage look then I would be very
appreciative.
02-14-19, 01:23 AM
#19
Senior Member
Join Date: Nov 2013
Location: Southern California
Posts: 1,467
Mentioned: 14 Post(s)
Tagged: 0 Thread(s)
Quoted: 800 Post(s)
Liked 753 Times
in
410 Posts
It's a bit of a funny site to navigate but yellow jersey has quite a few types. Be precise and accurate with measuring for the right size frame pump. Looks like there's a pump that may work for you near the bottom of the page.
https://www.yellowjersey.org/hpx.html
https://www.yellowjersey.org/hpx.html
02-14-19, 04:32 PM
#21
Sophomore Member

Join Date: Jan 2019
Posts: 2,531
Mentioned: 12 Post(s)
Tagged: 0 Thread(s)
Quoted: 1628 Post(s)
Liked 1,057 Times
in
631 Posts
That's some extra-generous tire clearance on that frame, I'd be running 35's on that if it was mine. There's nothing like those early 70's 27 inch frames for gravel conversions.
02-15-19, 05:56 PM
#22
Junior Member
Thread Starter
Join Date: May 2015
Posts: 20
Mentioned: 1 Post(s)
Tagged: 0 Thread(s)
Quoted: 1 Post(s)
Likes: 0
Liked 0 Times
in
0 Posts
Finally finished...for now. Probably have some tinkering in the the future. Maybe swap a part here and there, but I am pretty happy with it. It is not perfect, but I knew absolutely nothing about bike mechanics prior to this project. If I had to do it again then for my first project I probably would have chosen a slightly newer frame that wouldn't have had as many compatibility issues with modern components. I pushed through, though, and found solutions for the issues and I think it worked out. Rode it today, and was pleasantly surprised. Felt light, agile and quick for a 1970s steel frame bike.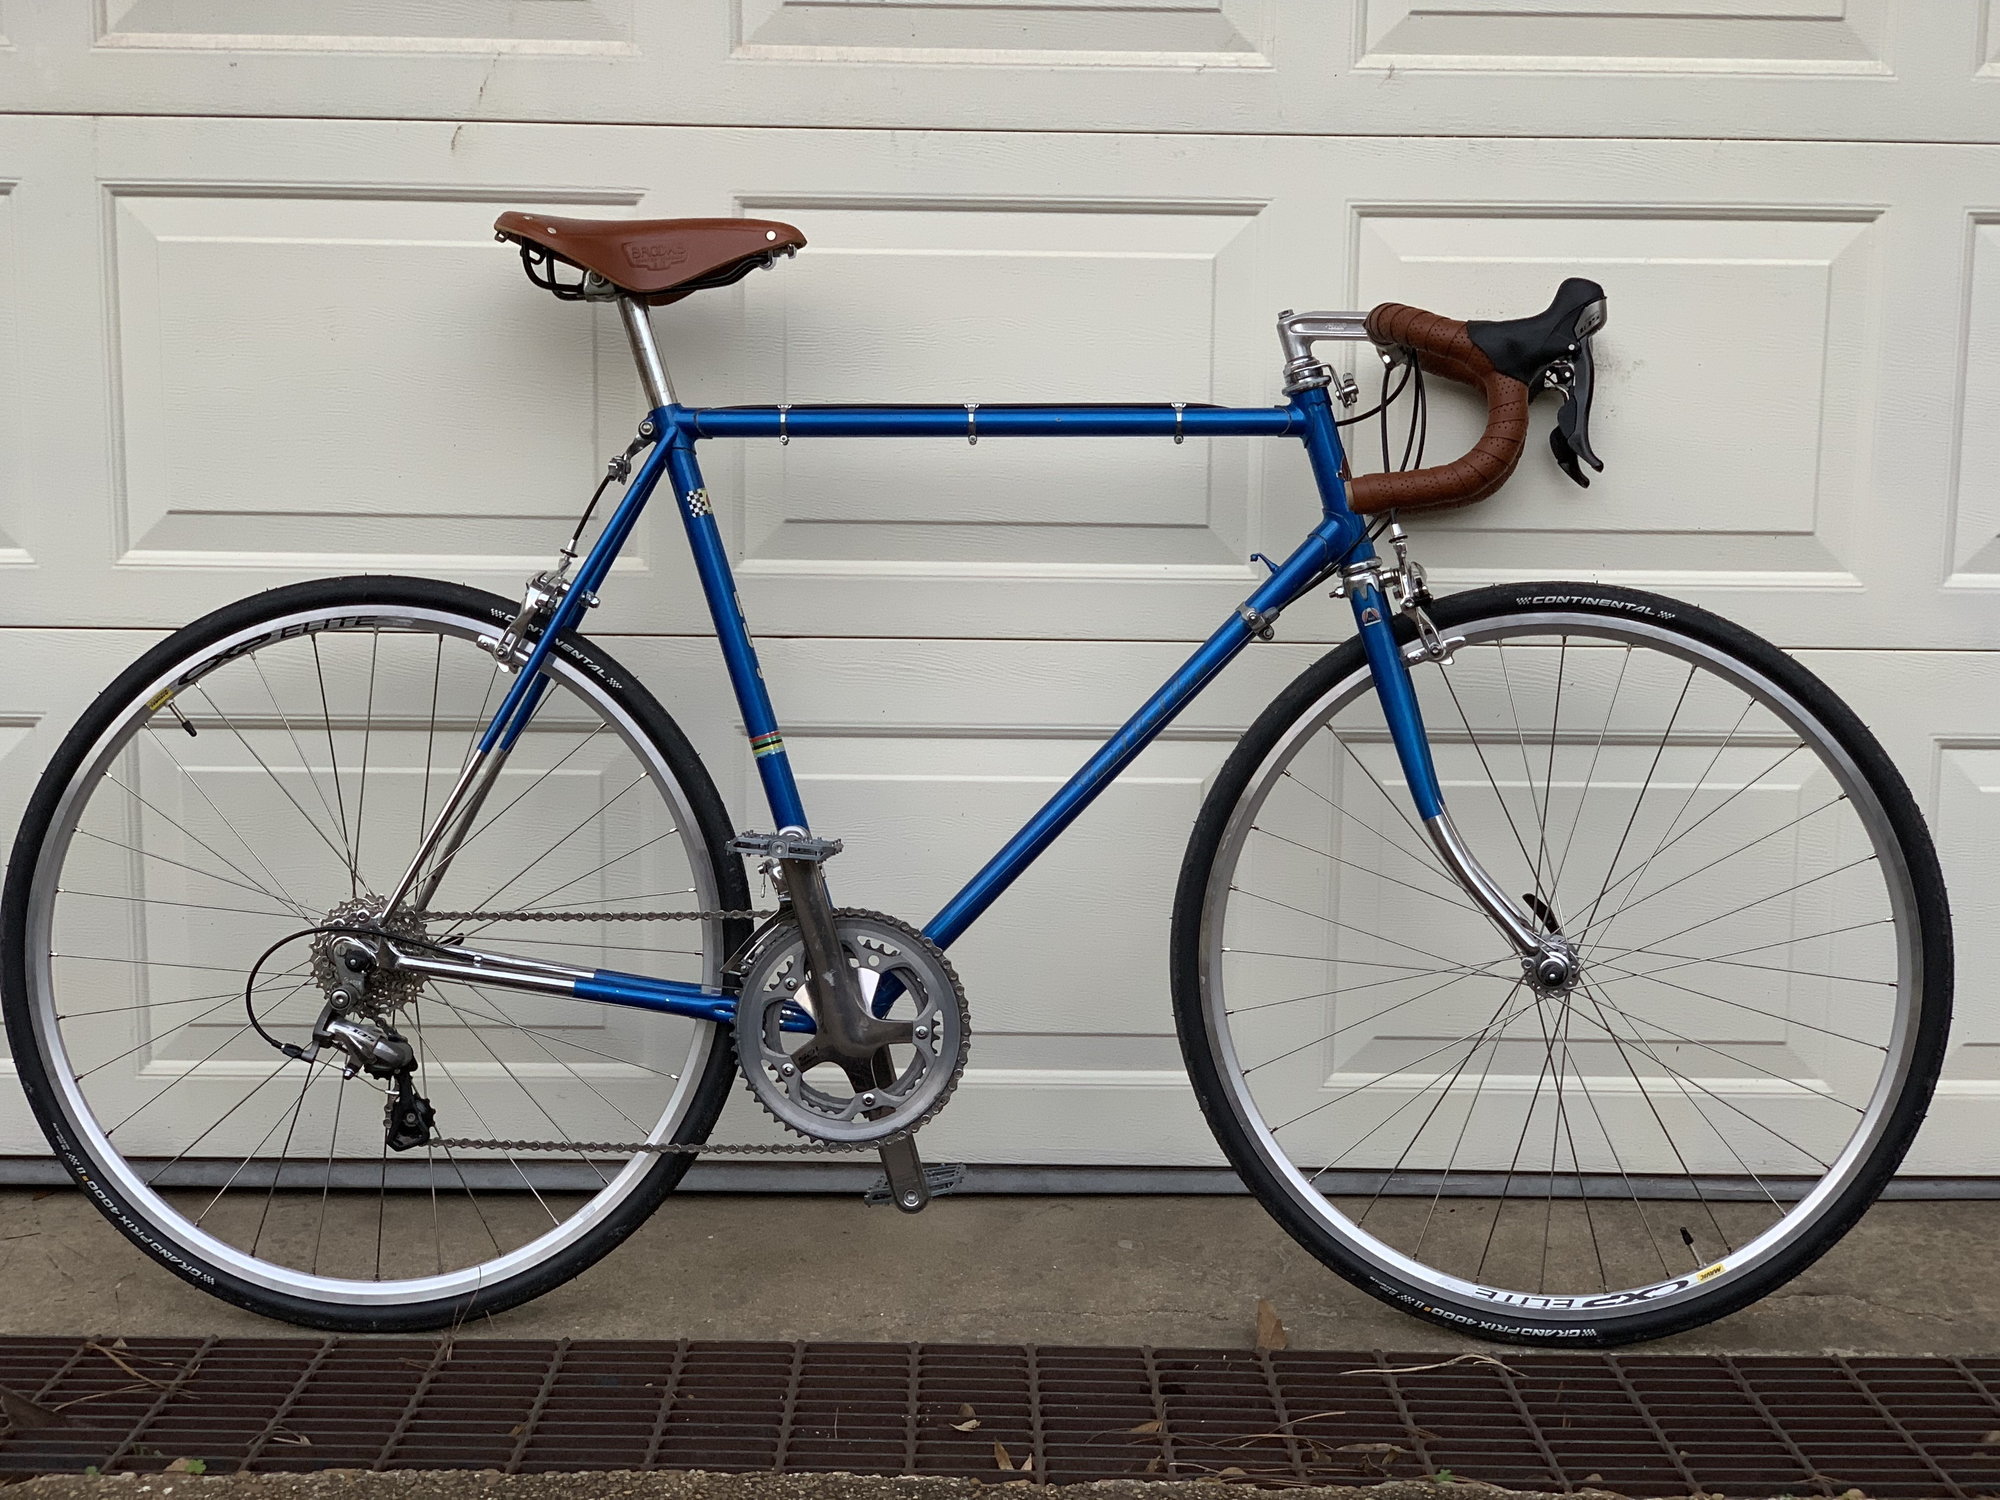


02-15-19, 06:58 PM
#23
Senior Member
Join Date: Nov 2013
Location: Southern California
Posts: 1,467
Mentioned: 14 Post(s)
Tagged: 0 Thread(s)
Quoted: 800 Post(s)
Liked 753 Times
in
410 Posts
Great retro roadie, you really put together a nice bike.
Only thing I'm wondering about is if the downtube cable stop is likely to move at all.
Only thing I'm wondering about is if the downtube cable stop is likely to move at all.
02-15-19, 07:17 PM
#24
Junior Member
Thread Starter
Join Date: May 2015
Posts: 20
Mentioned: 1 Post(s)
Tagged: 0 Thread(s)
Quoted: 1 Post(s)
Likes: 0
Liked 0 Times
in
0 Posts
Thanks! Not sure what you mean about the cable stop. I still have much to learn, so please educate me. The cable stops are attached to the former mount for the downtube shifters. Everything shifts smoothly on both the front and rear derailleurs.
10-04-20, 04:55 PM
#25
Junior Member
Join Date: Oct 2020
Posts: 9
Mentioned: 0 Post(s)
Tagged: 0 Thread(s)
Quoted: 7 Post(s)
Liked 0 Times
in
0 Posts
Hello,
I'm currently looking to replace by BB but running against the 70mm shell issue… here you mention that: "So I got my LBS to face the housing down to 68mm so I could put a new shimano bottom bracket" – would you mind specifying what kind of tool where you using to fit the 68mm axle? Is it difficult to do?
I'm aiming at converting my special road racer into a single speed, something lighter to use in the city, and in that conversion I'm looking at shorter axles but most come in 68mm it seems. I'm new to all of this, so any help/tips more than welcome!