


Legnano project
 01-31-21, 08:05 PM
#1

Senior Member
Thread Starter
Join Date: Feb 2020
Posts: 2,813
Mentioned: 49 Post(s)
Tagged: 0 Thread(s)
Quoted: 1105 Post(s)
Likes: 0
Liked 1,326 Times
in
782 Posts
Legnano project
EDIT: pics of now-rideable bike in last post.
Purists be warned; I am not one.
This bike will *not* be restored attempting to achieve originality. I have not the time, the money, or the inclination.
It will be restored to be a nice rider with quality period-correct equipment, that will take care of the first two and the third will take care of itself.
It's at best a third-level Legnano frame, 53cm c-c, 5,0 pounds and 1.7 pounds for the fork.
A recent purchase, here are the before pics (well, I did remove a bunch of nasty-looking repro stickers):

Original seat-tube decal, still good condition, a little crooked though:

This bit's important:

Thickest stamped dropouts I've ever seen:

Look to me as though a vinyl sticker was placed over the stenciled logo, not exactly the same, so registration errors:


The hole for the seat post binder looks to be ovaled - is this normal; if not I'm thinking of having a small bit of sheet brazed to take up the clearance and give the binder something to bear against:

Why did I buy this when I have a considerable number of other projects?
BLING. Bling *always* wins:

Purists be warned; I am not one.
This bike will *not* be restored attempting to achieve originality. I have not the time, the money, or the inclination.
It will be restored to be a nice rider with quality period-correct equipment, that will take care of the first two and the third will take care of itself.
It's at best a third-level Legnano frame, 53cm c-c, 5,0 pounds and 1.7 pounds for the fork.
A recent purchase, here are the before pics (well, I did remove a bunch of nasty-looking repro stickers):
Original seat-tube decal, still good condition, a little crooked though:
This bit's important:
Thickest stamped dropouts I've ever seen:
Look to me as though a vinyl sticker was placed over the stenciled logo, not exactly the same, so registration errors:
The hole for the seat post binder looks to be ovaled - is this normal; if not I'm thinking of having a small bit of sheet brazed to take up the clearance and give the binder something to bear against:
Why did I buy this when I have a considerable number of other projects?
BLING. Bling *always* wins:
Last edited by oneclick; 05-26-22 at 06:30 AM.

Likes For oneclick:
01-31-21, 08:22 PM
#2

feros ferio

Join Date: Jul 2000
Location: www.ci.encinitas.ca.us
Posts: 21,793
Bikes: 1959 Capo Modell Campagnolo; 1960 Capo Sieger (2); 1962 Carlton Franco Suisse; 1970 Peugeot UO-8; 1982 Bianchi Campione d'Italia; 1988 Schwinn Project KOM-10;
Mentioned: 44 Post(s)
Tagged: 0 Thread(s)
Quoted: 1391 Post(s)
Liked 1,322 Times
in
835 Posts
Thick stamped dropouts such as yours were fairly common in the 1950s and 1960s. Nice frame!
__________________
"Far and away the best prize that life offers is the chance to work hard at work worth doing." --Theodore Roosevelt
Capo: 1959 Modell Campagnolo, S/N 40324; 1960 Sieger (2), S/N 42624, 42597
Carlton: 1962 Franco Suisse, S/N K7911
Peugeot: 1970 UO-8, S/N 0010468
Bianchi: 1982 Campione d'Italia, S/N 1.M9914
Schwinn: 1988 Project KOM-10, S/N F804069
01-31-21, 08:43 PM
#3
Senior Member

Join Date: Feb 2013
Location: Alta California
Posts: 14,244
Mentioned: 415 Post(s)
Tagged: 1 Thread(s)
Quoted: 3803 Post(s)
Liked 3,324 Times
in
2,170 Posts
-----
the joinery technique shown where the stays meet the dropouts is one employed by Bozzi for a rather long period.
have never known specific start/stop dates for it; no doubt member Condorino could advise...
there is a base model Frejus frame handing in me racks which i believe to date from 1960 which also expresses this junction with the square ends of the dropout tangs exposed.
it was not something unique to Bozzi; have encountered it on some other marques as well.
shall look forward to following along with this project. original chainset and headset were likely Way-Assauto; at this era Bozzi tended to employ Way-Assauto over Magistroni.
-----
Last edited by juvela; 01-31-21 at 08:45 PM. Reason: spellin'
01-31-21, 09:19 PM
#4
Senior Member
Thread Starter
Join Date: Feb 2020
Posts: 2,813
Mentioned: 49 Post(s)
Tagged: 0 Thread(s)
Quoted: 1105 Post(s)
Likes: 0
Liked 1,326 Times
in
782 Posts
-----
the joinery technique shown where the stays meet the dropouts is one employed by Bozzi for a rather long period.
have never known specific start/stop dates for it; no doubt member Condorino could advise...
there is a base model Frejus frame handing in me racks which i believe to date from 1960 which also expresses this junction with the square ends of the dropout tangs exposed.
it was not something unique to Bozzi; have encountered it on some other marques as well.
shall look forward to following along with this project. original chainset and headset were likely Way-Assauto; at this era Bozzi tended to employ Way-Assauto over Magistroni.
-----
I looked at those dropout ends and thought they might actually be slotted - not the stays (although they are slotted), but the dropouts, so that a part of the stay wall is held by the slot, further from the normal joint.
01-31-21, 10:58 PM
#5
RUSA #3100

Join Date: Feb 2012
Location: Oregon City
Posts: 836
Bikes: Yes
Mentioned: 20 Post(s)
Tagged: 0 Thread(s)
Quoted: 237 Post(s)
Liked 505 Times
in
181 Posts
Legnano's had hand painted downtube logos until the early 1960's, as per a couple of 1962 examples which I have (Gran Premio, Roma Olympiade). On the lower tier models, who knows if that is still true. Looks like a fun project anyway, and on a third tier bike who cares about "period correct" anyway!
__________________
https://utahrandonneur.wordpress.com
https://utahrandonneur.wordpress.com
01-31-21, 11:48 PM
#6
Senior Member
Join Date: Feb 2013
Location: Alta California
Posts: 14,244
Mentioned: 415 Post(s)
Tagged: 1 Thread(s)
Quoted: 3803 Post(s)
Liked 3,324 Times
in
2,170 Posts
-----
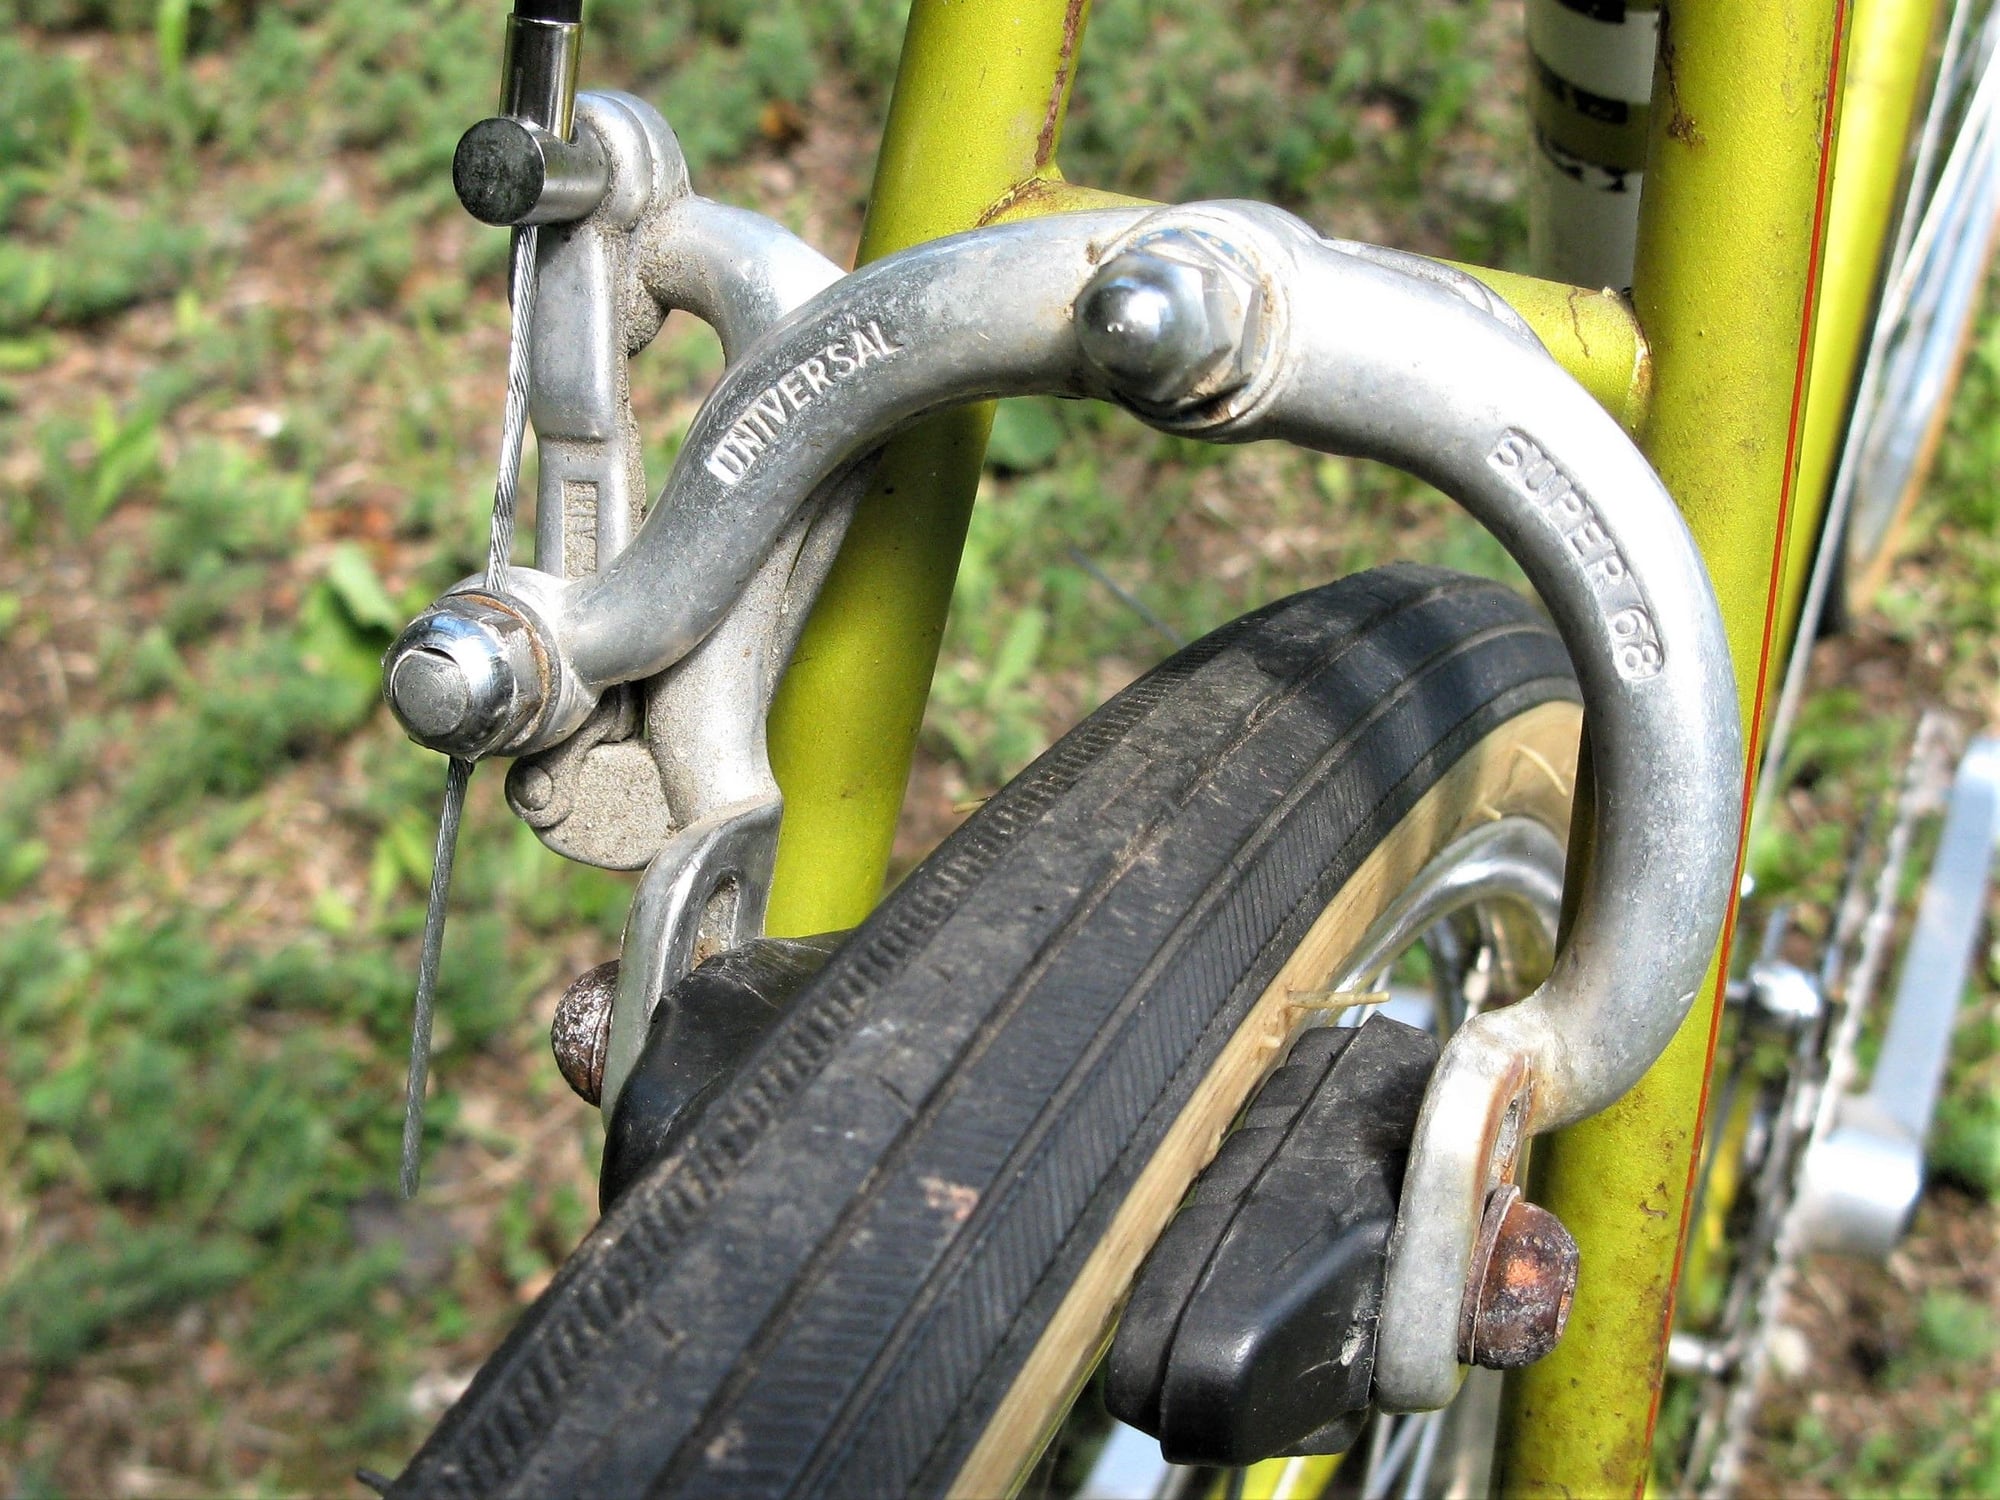
one piece of kitting we do not have to do much guesswork on is the cycle's arrestor set
the presence of the boss on the backside of the seat tube tells us it came with centrepulls
Giovanni Galli S.p.A. (Balilla) and Fratelli Pietra (Universal) launched their centrepull sets right near the same time
the original stem & bar set was likely Ambrosio I-beam
for most Italian cycles in this range at this time one would expect Noli-Cattaneo (Sheffield) pedals but Bozzi seemed to be fond of Way-Assauto and often employed them instead
two plausible hubs would be the Simplex of Italy by Fratelli Brivio and the Campag Sportman
[have not forgotten your notice that you are not going for a period correct build, just thinking aloud, or rather on the computer screen ]
]
-----
one piece of kitting we do not have to do much guesswork on is the cycle's arrestor set
the presence of the boss on the backside of the seat tube tells us it came with centrepulls
Giovanni Galli S.p.A. (Balilla) and Fratelli Pietra (Universal) launched their centrepull sets right near the same time
the original stem & bar set was likely Ambrosio I-beam
for most Italian cycles in this range at this time one would expect Noli-Cattaneo (Sheffield) pedals but Bozzi seemed to be fond of Way-Assauto and often employed them instead
two plausible hubs would be the Simplex of Italy by Fratelli Brivio and the Campag Sportman
[have not forgotten your notice that you are not going for a period correct build, just thinking aloud, or rather on the computer screen
]-----
02-01-21, 05:25 AM
#7
Senior Member

Join Date: Apr 2007
Location: Thunder Bay, Ontario, Canada - burrrrr!
Posts: 11,674
Bikes: 1958 Rabeneick 120D, 1968 Legnano Gran Premio, 196? Torpado Professional, 2000 Marinoni Piuma
Mentioned: 210 Post(s)
Tagged: 0 Thread(s)
Quoted: 1372 Post(s)
Likes: 0
Liked 1,749 Times
in
937 Posts
@ Oldairhead...
[QUOTE]Looks like a fun project anyway, and on a third tier bike who cares about "period correct" anyway
I was a bit bummed to learn that it was a third tier model. I always believed the Grand Permio to be second from top of the line. Mine is from the sixties, I believe and a wonderful bike. Since I got it, as a frame/fork set, I have ridden it with what ever worked while I collected the bits and pieces I needed to make it "period correct"...


Best of luck with finding that rear brake caliper guide hanger - they are rare as hen's teeth...
[QUOTE]Looks like a fun project anyway, and on a third tier bike who cares about "period correct" anyway![/QUOT
Some of us do care about "period correct" and with such a bike, "period and model correct' are important to me and my guess are many others. That said...
I have owned two Grand Premio road bikes and still have one of them. My Legnano is and has been my favorite bike for many years...
I was a bit bummed to learn that it was a third tier model. I always believed the Grand Permio to be second from top of the line. Mine is from the sixties, I believe and a wonderful bike. Since I got it, as a frame/fork set, I have ridden it with what ever worked while I collected the bits and pieces I needed to make it "period correct"...
Best of luck with finding that rear brake caliper guide hanger - they are rare as hen's teeth...
__________________
"98% of the bikes I buy are projects".
"98% of the bikes I buy are projects".
Likes For randyjawa:
02-01-21, 05:54 AM
#8
Senior Member
Thread Starter
Join Date: Feb 2020
Posts: 2,813
Mentioned: 49 Post(s)
Tagged: 0 Thread(s)
Quoted: 1105 Post(s)
Likes: 0
Liked 1,326 Times
in
782 Posts
-----
one piece of kitting we do not have to do much guesswork on is the cycle's arrestor set
the presence of the boss on the backside of the seat tube tells us it came with centrepulls
Giovanni Galli S.p.A. (Balilla) and Fratelli Pietra (Universal) launched their centrepull sets right near the same time
the original stem & bar set was likely Ambrosio I-beam
for most Italian cycles in this range at this time one would expect Noli-Cattaneo (Sheffield) pedals but Bozzi seemed to be fond of Way-Assauto and often employed them instead
two plausible hubs would be the Simplex of Italy by Fratelli Brivio and the Campag Sportman
[have not forgotten your notice that you are not going for a period correct build, just thinking aloud, or rather on the computer screen]
-----
one piece of kitting we do not have to do much guesswork on is the cycle's arrestor set
the presence of the boss on the backside of the seat tube tells us it came with centrepulls
Giovanni Galli S.p.A. (Balilla) and Fratelli Pietra (Universal) launched their centrepull sets right near the same time
the original stem & bar set was likely Ambrosio I-beam
for most Italian cycles in this range at this time one would expect Noli-Cattaneo (Sheffield) pedals but Bozzi seemed to be fond of Way-Assauto and often employed them instead
two plausible hubs would be the Simplex of Italy by Fratelli Brivio and the Campag Sportman
[have not forgotten your notice that you are not going for a period correct build, just thinking aloud, or rather on the computer screen
]-----
Curious, I measured the seatpost hole as 26.2-something but a 3TTT post marked 26.4 fits. Edit: the problem with calipers with a settable zero is that they have a settable zero. I remeasured, it's 26.6-something.
As for Sheffield, I have a front hub marked with that brand - not in velobase...if I had a matching rear they'd probably be the start of the wheels, as it is I don't know what to build,
Last edited by oneclick; 02-04-21 at 06:23 AM.
02-01-21, 12:55 PM
#9
RUSA #3100
Join Date: Feb 2012
Location: Oregon City
Posts: 836
Bikes: Yes
Mentioned: 20 Post(s)
Tagged: 0 Thread(s)
Quoted: 237 Post(s)
Liked 505 Times
in
181 Posts
https://utahrandonneur.wordpress.com...io-completato/
__________________
https://utahrandonneur.wordpress.com
https://utahrandonneur.wordpress.com
Last edited by Oldairhead; 02-01-21 at 04:34 PM.
02-01-21, 01:25 PM
#10
Senior Member
Thread Starter
Join Date: Feb 2020
Posts: 2,813
Mentioned: 49 Post(s)
Tagged: 0 Thread(s)
Quoted: 1105 Post(s)
Likes: 0
Liked 1,326 Times
in
782 Posts
-----
the joinery technique shown where the stays meet the dropouts is one employed by Bozzi for a rather long period.
have never known specific start/stop dates for it; no doubt member Condorino could advise...
there is a base model Frejus frame handing in me racks which i believe to date from 1960 which also expresses this junction with the square ends of the dropout tangs exposed.
-----

Gratuitous bling shot:

Likes For oneclick:
02-01-21, 03:07 PM
#11
Senior Member
Join Date: Apr 2007
Location: Thunder Bay, Ontario, Canada - burrrrr!
Posts: 11,674
Bikes: 1958 Rabeneick 120D, 1968 Legnano Gran Premio, 196? Torpado Professional, 2000 Marinoni Piuma
Mentioned: 210 Post(s)
Tagged: 0 Thread(s)
Quoted: 1372 Post(s)
Likes: 0
Liked 1,749 Times
in
937 Posts
One of the things that keeps me from painting my Legnano GP is the stenciled on down tube art. I have been meaning to try some practice stenciling on a scrap frame, just to see if I can get it right. Were it not for the uglified top tube, I would never paint the bike but ugly is ugly...

How do I reproduce this...

How do I reproduce this...
__________________
"98% of the bikes I buy are projects".
"98% of the bikes I buy are projects".
02-01-21, 03:43 PM
#12
Junior Member
It may be easier to fix the paint on the top tube than to duplicate the original stenciling. It would leave the bike far more original in the end.
Go to the biggest used car lot in town, and find out who does their spot repairs, chances are they can spray that top tube and make it 99% undetectable.
I worked for years at a dealer who had a couple guys who were experts in fixing bad paint. They'd take a total mess and make it look like a clean used car in a matter of hours. One guy would do interior fixes, the other did paint and small dent repair.
Paint can be scanned and matched easily these days. I'd rather have a top tube that's been touched up the what may turn out to be badly redone decals or stenciling.
Likes For dirtman:
02-01-21, 04:06 PM
#13
Cat 6

Join Date: Dec 2007
Location: Mountain Brook, AL
Posts: 7,482
Mentioned: 27 Post(s)
Tagged: 0 Thread(s)
Quoted: 500 Post(s)
Liked 183 Times
in
118 Posts
Do you have the seat binder bolt? Are you aware Legnano had 2 styles and you need to get the correct one?
__________________
72 Frejus (for sale), Holdsworth Record (for sale), special CNC & Gitane Interclub / 74 Italvega NR (for sale) / c80 French / 82 Raleigh Intl MkII f&f (for sale)/ 83 Trek 620 (for sale)/ 84 Bruce Gordon Chinook (for sale)/ 85 Ron Cooper / 87 Centurion IM MV (for sale) / 03 Casati Dardo / 08 BF IRO / 09 Dogma FPX / 09 Giant TCX0 / 10 Vassago Fisticuff
72 Frejus (for sale), Holdsworth Record (for sale), special CNC & Gitane Interclub / 74 Italvega NR (for sale) / c80 French / 82 Raleigh Intl MkII f&f (for sale)/ 83 Trek 620 (for sale)/ 84 Bruce Gordon Chinook (for sale)/ 85 Ron Cooper / 87 Centurion IM MV (for sale) / 03 Casati Dardo / 08 BF IRO / 09 Dogma FPX / 09 Giant TCX0 / 10 Vassago Fisticuff
Likes For oneclick:
 02-02-21, 11:50 AM
#16
Senior Member
Join Date: Apr 2007
Location: Thunder Bay, Ontario, Canada - burrrrr!
Posts: 11,674
Bikes: 1958 Rabeneick 120D, 1968 Legnano Gran Premio, 196? Torpado Professional, 2000 Marinoni Piuma
Mentioned: 210 Post(s)
Tagged: 0 Thread(s)
Quoted: 1372 Post(s)
Likes: 0
Liked 1,749 Times
in
937 Posts
That should work just fine. I refuse to leave a bike off of the road for a single part or two parts. I use what I have on hand and then go about finding the "period correct" components at a "price point" that suits my pocket book (free is best).
__________________
"98% of the bikes I buy are projects".
"98% of the bikes I buy are projects".
Likes For randyjawa:
02-04-21, 04:53 AM
#17
Senior Member
Thread Starter
Join Date: Feb 2020
Posts: 2,813
Mentioned: 49 Post(s)
Tagged: 0 Thread(s)
Quoted: 1105 Post(s)
Likes: 0
Liked 1,326 Times
in
782 Posts
Now I know why there was a funny shadow underlying the down-tube stickers. I had thought that the colour behind the white letters was the same red as the sticker; it isn't, much darker instead:

And now it wasn't, because the whole frame is now pretty much bare:

I think the whole thing was copper-plated. Underneath the primer everything was a nice pink-ish brown colour - not rust, everywhere the same, and where there was rust under the top-tube a distinct colour difference:

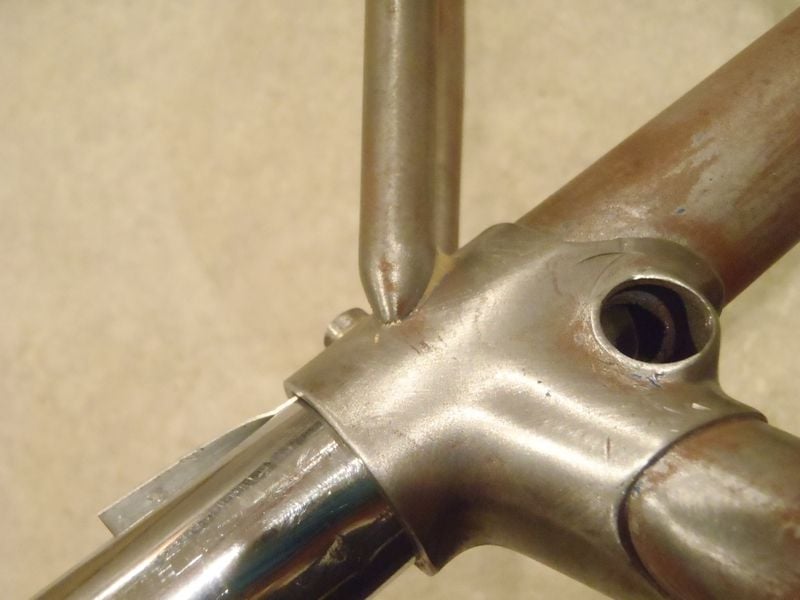
There is some nice work here. The reinforcing tangs on the fork look very much as though they are carried up into the socket:

BB joint details - my Mark 1 seam-detector came up negative on the chanstays:

Seam of the seat-lug - you can see the copper-colour, and where it's been removed is bright steel:

It's a fair bit of sanding with the Mark 1 digital-detail pressure applicator to get from the first of these pics to the second - there are a lot of compound curves meeting:

One of the few advantages of a socket-head screws and nuts is that they reduce the chance of an errant spanner application scarring the lug as below.
I have the existing binder-bolt but may make a replacement using them.

And now it wasn't, because the whole frame is now pretty much bare:
I think the whole thing was copper-plated. Underneath the primer everything was a nice pink-ish brown colour - not rust, everywhere the same, and where there was rust under the top-tube a distinct colour difference:
There is some nice work here. The reinforcing tangs on the fork look very much as though they are carried up into the socket:
BB joint details - my Mark 1 seam-detector came up negative on the chanstays:
Seam of the seat-lug - you can see the copper-colour, and where it's been removed is bright steel:
It's a fair bit of sanding with the Mark 1 digital-detail pressure applicator to get from the first of these pics to the second - there are a lot of compound curves meeting:
One of the few advantages of a socket-head screws and nuts is that they reduce the chance of an errant spanner application scarring the lug as below.
I have the existing binder-bolt but may make a replacement using them.
Likes For oneclick:
 02-08-21, 04:17 AM
#19
Senior Member
Thread Starter
Join Date: Feb 2020
Posts: 2,813
Mentioned: 49 Post(s)
Tagged: 0 Thread(s)
Quoted: 1105 Post(s)
Likes: 0
Liked 1,326 Times
in
782 Posts
Fixed a flaw
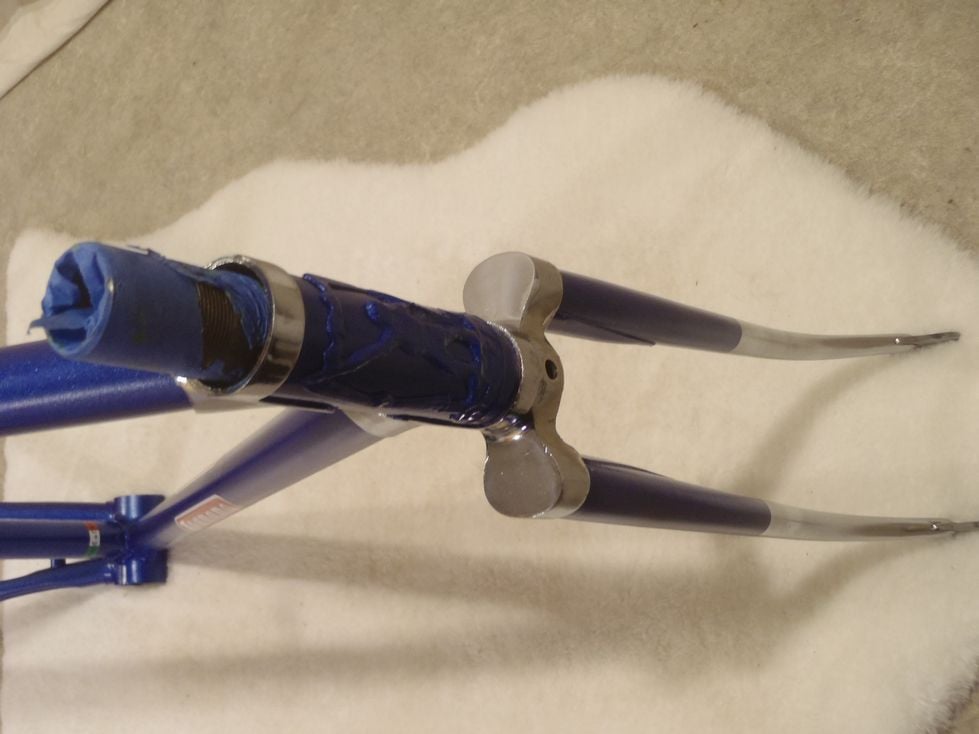
There was a bit of the seat-tube that had become distorted to point where it was hindering (and if forced scratching) the seatpost. It's possible that this occurs in other Legnanos so details follow:
The bit that was distorted was the lower edge of the hole inside the seat lug. It had been moved inward; I can think of two possibilities
a) during manufacture if the hole was sized the metal have have bent out of the way instead of being removed; or
b) a misalignment of the seat binder bolt combined with over-zealous spanner application.
Here is a before pic; you can see the lip but the distortion isn't visible - but when felt it was clearly a small ridge, about a mm wide,
running around the periphery of the bottom edge (the sides and top were fine):

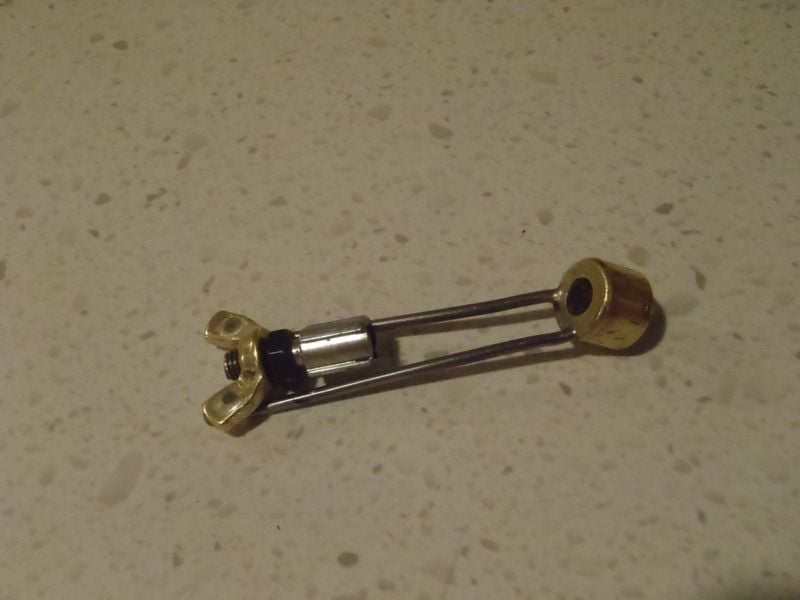
And here's how to fix it. Take a steel seatpost a bit smaller than the true size, and make a shim that will just take about up the clearance.
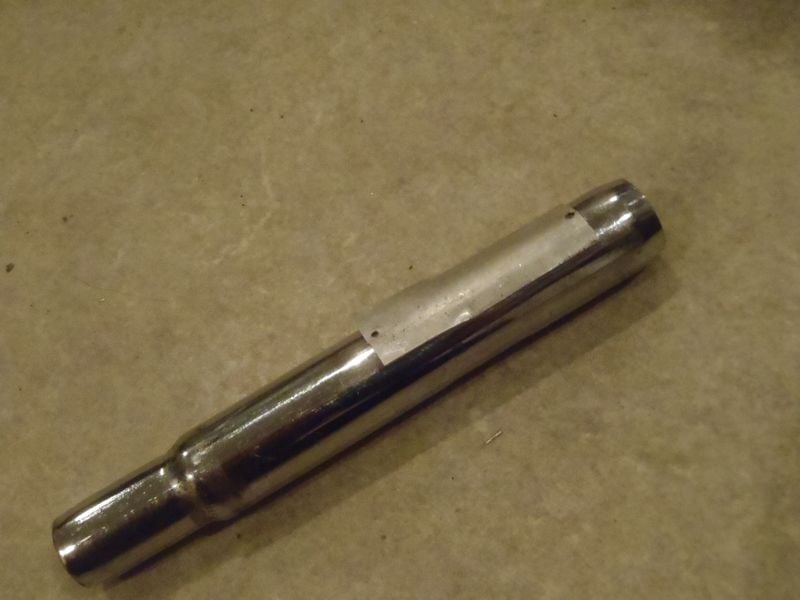
The post should have as much of a rounded or tapered bottom as you can find, and it should be a nice shiny chrome SMOOTH one.
My seatpost size is 26.4, I used a 25.6 post and an 0.60 shim, and after doing this the nice seatpost which is actually 26.35-ish goes in with no trouble.
Place the shim opposite the bent lip, insert the post, and apply hammer (you can just see the bottom edge of the post in the hole here).
I only had to do this once; after about an inch past the contact point it was well tight, needed a good grip with the pliers to get it out:
That steel tube was hard; it left these witness marks on the post (about an inch up from the bottom):

The bit that was distorted was the lower edge of the hole inside the seat lug. It had been moved inward; I can think of two possibilities
a) during manufacture if the hole was sized the metal have have bent out of the way instead of being removed; or
b) a misalignment of the seat binder bolt combined with over-zealous spanner application.
Here is a before pic; you can see the lip but the distortion isn't visible - but when felt it was clearly a small ridge, about a mm wide,
running around the periphery of the bottom edge (the sides and top were fine):
And here's how to fix it. Take a steel seatpost a bit smaller than the true size, and make a shim that will just take about up the clearance.
The post should have as much of a rounded or tapered bottom as you can find, and it should be a nice shiny chrome SMOOTH one.
My seatpost size is 26.4, I used a 25.6 post and an 0.60 shim, and after doing this the nice seatpost which is actually 26.35-ish goes in with no trouble.
Place the shim opposite the bent lip, insert the post, and apply hammer (you can just see the bottom edge of the post in the hole here).
I only had to do this once; after about an inch past the contact point it was well tight, needed a good grip with the pliers to get it out:
That steel tube was hard; it left these witness marks on the post (about an inch up from the bottom):
Last edited by oneclick; 03-18-21 at 04:55 AM.
03-18-21, 04:52 AM
#20
Senior Member
Thread Starter
Join Date: Feb 2020
Posts: 2,813
Mentioned: 49 Post(s)
Tagged: 0 Thread(s)
Quoted: 1105 Post(s)
Likes: 0
Liked 1,326 Times
in
782 Posts
Here's an update.
The frame is stripped and smooth and masked and a first coat of primer:

Masking this was a bother but it had to be done as I wasn't taking the badge off:

The fork is a bit ahead, has its colour now. I found an interesting rattle-can paint, Duplicolor Metal Specks:

Up close you can see the sparkles:

Right beside those cans was another *very* interesting paint, Duplicolor Metalcast, essentially a transparent colour meant for shiny surfaces. It comes in blue, I am sorely tempted to get some and see what happens if that goes on top of the Metal Specks. It also comes in yellow, which the Metal Specks does not.
The frame is stripped and smooth and masked and a first coat of primer:
Masking this was a bother but it had to be done as I wasn't taking the badge off:
The fork is a bit ahead, has its colour now. I found an interesting rattle-can paint, Duplicolor Metal Specks:
Up close you can see the sparkles:
Right beside those cans was another *very* interesting paint, Duplicolor Metalcast, essentially a transparent colour meant for shiny surfaces. It comes in blue, I am sorely tempted to get some and see what happens if that goes on top of the Metal Specks. It also comes in yellow, which the Metal Specks does not.
03-18-21, 10:40 AM
#21
Cat 6
Join Date: Dec 2007
Location: Mountain Brook, AL
Posts: 7,482
Mentioned: 27 Post(s)
Tagged: 0 Thread(s)
Quoted: 500 Post(s)
Liked 183 Times
in
118 Posts
Here's an update.
Right beside those cans was another *very* interesting paint, Duplicolor Metalcast, essentially a transparent colour meant for shiny surfaces. It comes in blue, I am sorely tempted to get some and see what happens if that goes on top of the Metal Specks. It also comes in yellow, which the Metal Specks does not.
Right beside those cans was another *very* interesting paint, Duplicolor Metalcast, essentially a transparent colour meant for shiny surfaces. It comes in blue, I am sorely tempted to get some and see what happens if that goes on top of the Metal Specks. It also comes in yellow, which the Metal Specks does not.
03-18-21, 02:11 PM
#22
Senior Member
Join Date: Apr 2007
Location: Thunder Bay, Ontario, Canada - burrrrr!
Posts: 11,674
Bikes: 1958 Rabeneick 120D, 1968 Legnano Gran Premio, 196? Torpado Professional, 2000 Marinoni Piuma
Mentioned: 210 Post(s)
Tagged: 0 Thread(s)
Quoted: 1372 Post(s)
Likes: 0
Liked 1,749 Times
in
937 Posts
I gave up on masking tape for intricate masking chores. These days I use Liquid Mask, a great product that takes the oops out of masking difficult curves and the like. The masking liquid is the white bottle with the black to, near the top left of the picture (sorry I do not have a better picture)...

The results speak for themselves...

The results speak for themselves...
__________________
"98% of the bikes I buy are projects".
"98% of the bikes I buy are projects".
03-19-21, 02:37 AM
#23
Senior Member
Thread Starter
Join Date: Feb 2020
Posts: 2,813
Mentioned: 49 Post(s)
Tagged: 0 Thread(s)
Quoted: 1105 Post(s)
Likes: 0
Liked 1,326 Times
in
782 Posts
I've used the Metalcast blue on a set of rims. My intent was more to go to an anodized look [as opposed to a true chromoveleto], and it worked well for that. I had black rims that I coated with the MC silver base, then the MC blue. It held up reasonably well, too. (until the bike was struck by a car)
03-19-21, 07:50 AM
#24
Cat 6
Join Date: Dec 2007
Location: Mountain Brook, AL
Posts: 7,482
Mentioned: 27 Post(s)
Tagged: 0 Thread(s)
Quoted: 500 Post(s)
Liked 183 Times
in
118 Posts
The front wheel is the Metalcast painted rim. (the rear is a factory ano Velocity rim). I had plenty of leftover paint - but it was only one rim. Used only a couple of medium coats.

Unfortunately, I've been hit while on this scooter (scooter totaled), and while riding those wheels, but on a another bike (and that bike totaled).
Last edited by Ex Pres; 03-19-21 at 07:53 AM.
04-01-21, 12:02 PM
#25
Senior Member
Thread Starter
Join Date: Feb 2020
Posts: 2,813
Mentioned: 49 Post(s)
Tagged: 0 Thread(s)
Quoted: 1105 Post(s)
Likes: 0
Liked 1,326 Times
in
782 Posts
More pics - now in colour!
So the colour coat and decals and a couple of light coats of clearcoat are on, still a few tiny touch-ups to do. I like this Metal Specks paint, it sometimes catches the light and looks a quarter-of-an-inch deep, none of the pics really show this very well. Alberto is still masked, the decals are from Greg Softley in Oz, no they are not the right ones, they are the pretty ones. You were warned.


Likes For oneclick: