


Welding my own frame -- is it crazy?
 10-25-20, 09:22 AM
#1

Senior Member
Thread Starter
Welding my own frame -- is it crazy?
I have finished my build of a touring bike in August using a 1994 Trek 520 frame. So far I've put about 500 miles on it, with shorter (20-50 miles) rides around town. I am restless, and curious about making the same/similar bike with a lighter frame. Would transfer the wheels and saddle, but put a new groupset. It would not be a tourer, but an everyday rider plus randonneur. I like the slender lines of steel frames; in fact I gave my 2021 Trek FX4 Sport Carbon, a very fine bike by any measure, to my wife. She loves it and says it's the highest quality bike she's ever had. But for me it's steel all the way.
I am considering welding up my own frame. By background, I am a medical professional, but I am a garage guy, and hobby welder, and am moderately experienced with TIG welding (and am decent with SilBr brazing) and own a competent AC TIG machine. I can also do basic fabrication, have a shop press, a brake, tube notcher, metal bandsaw, CNC plasma setup (Hypertherm 45XP), fixturing top.
The voice of reason in me says it's crazy and "Don't do it", but wanted to solicit y'allz's opinion.
The plan is to start with a Rene Herse superlight Kaizei tubeset (around $200) plus the BB shell, fork crown and blades, and various smaller add-ons. Would probably need to build a frame-maker fixture out of plywood and 8020. Maybe I should have myself professionally sized/fitted first (although my current Trek 520 fits well).
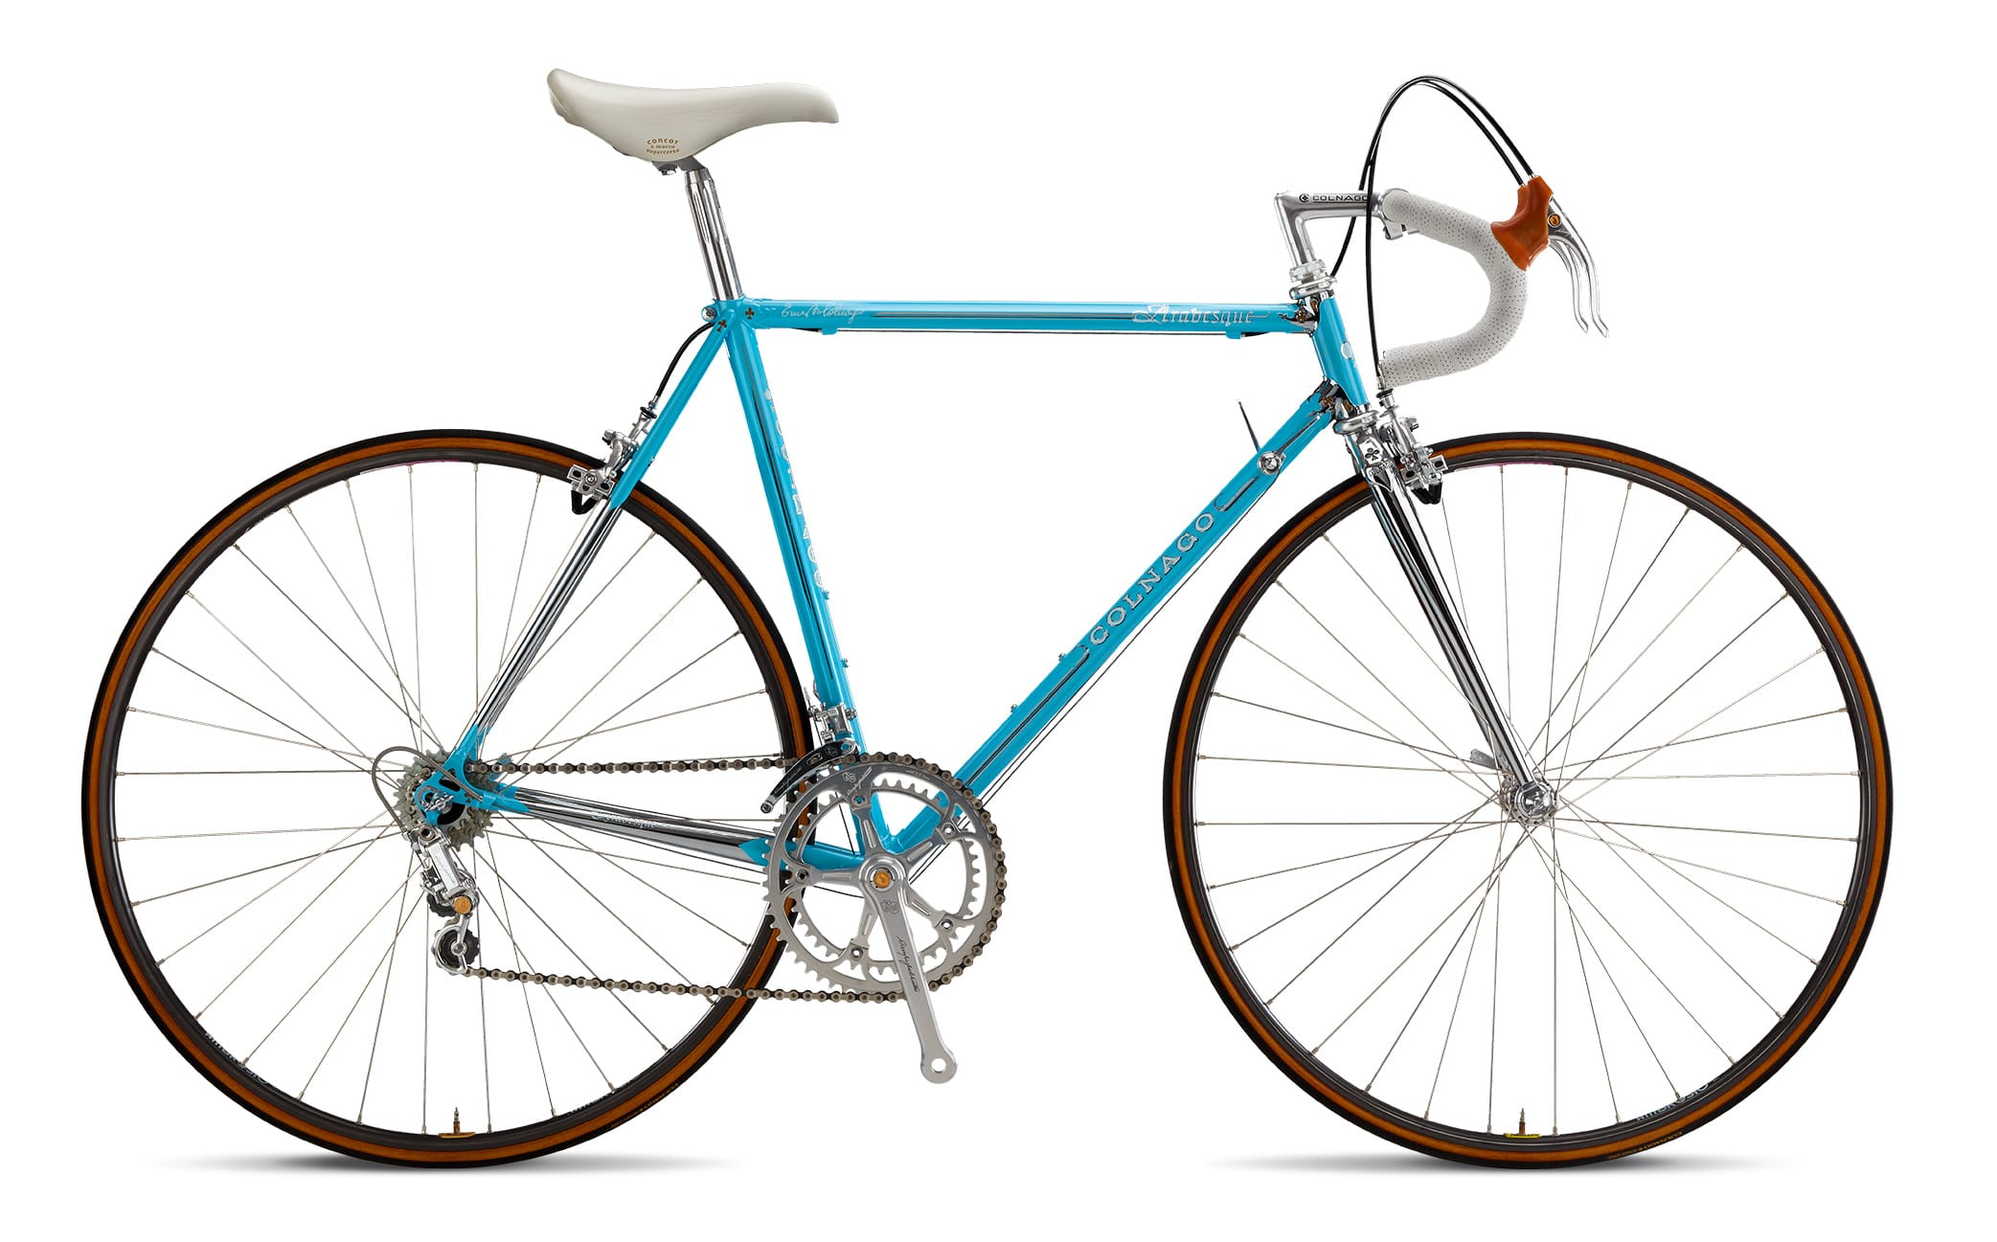
In the end will paint it this gorgeous Colnago blue.
Would add a 2x groupset, maybe campagnolo with rim brakes (probably centerpull).
Alternative #2 is to buy an old (1980s-1990s) Italian frame off eBay and build that up. My concern is about how wide a tire I can fit. I have a very strong preference for knobby 42-44 mm tires which work best for the style of riding I am doing; certainly nothing thinner than 38mm is of interest).
How hard is it to build a frame from a set like the one above? WHat alternatives are there -- can I buy a frameset from other sources? Any and all advice is greatly appreciated.
I am considering welding up my own frame. By background, I am a medical professional, but I am a garage guy, and hobby welder, and am moderately experienced with TIG welding (and am decent with SilBr brazing) and own a competent AC TIG machine. I can also do basic fabrication, have a shop press, a brake, tube notcher, metal bandsaw, CNC plasma setup (Hypertherm 45XP), fixturing top.
The voice of reason in me says it's crazy and "Don't do it", but wanted to solicit y'allz's opinion.
The plan is to start with a Rene Herse superlight Kaizei tubeset (around $200) plus the BB shell, fork crown and blades, and various smaller add-ons. Would probably need to build a frame-maker fixture out of plywood and 8020. Maybe I should have myself professionally sized/fitted first (although my current Trek 520 fits well).
In the end will paint it this gorgeous Colnago blue.
Would add a 2x groupset, maybe campagnolo with rim brakes (probably centerpull).
Alternative #2 is to buy an old (1980s-1990s) Italian frame off eBay and build that up. My concern is about how wide a tire I can fit. I have a very strong preference for knobby 42-44 mm tires which work best for the style of riding I am doing; certainly nothing thinner than 38mm is of interest).
How hard is it to build a frame from a set like the one above? WHat alternatives are there -- can I buy a frameset from other sources? Any and all advice is greatly appreciated.
 10-25-20, 10:25 AM
#2
Senior Member
Join Date: Apr 2013
Posts: 1,173
Bikes: Surly Disk Trucker, 2014 w/Brooks Flyer Special saddle, Tubus racks - Duo front/Logo Evo rear, 2019 Dahon Mariner D8, Both bikes share Ortlieb Packer Plus series panniers, Garmin Edge 1000
Mentioned: 2 Post(s)
Tagged: 0 Thread(s)
Quoted: 405 Post(s)
Liked 115 Times
in
99 Posts
I do a fair bit of welding, also, and have since I was about 15. In fact, I just restored a 1966 Lincoln Idealarc 250 (round top tombstone, if you are familiar with the oldies). I don't have a tig machine yet - but would love to have one. I was going to get one but what made more sense to me at the moment is a transformer-based stick machine - they are bomb-proof - and I happened to luck out and find a real good shape round top for cheap. I took it down to bare metal and repainted it. Looks and works great.
As to your project - I say give it a shot. Just be aware that different alloys require different welding, tempering, hardening, etc processes. You will likely want to do some test joints and destructive testing on bits of the material you are going to make the frameset from so you can prove your methods. I am not sure if I would want to go straight in to welding up a frameset without having confidence in my processes - joint prep, welding, etc. as would be proven in successful destructive testing. Though, if early failures occur it is a sign you need to improve your processes.
Best of luck and if you take on the project - let us know.
10-25-20, 11:14 AM
#3
Senior Member
Thread Starter
Yeah, I am familiar with the tombstones, of course! The tombstones are the classics of the welding world (along with the SA). I never stick welded; started with MIG on a Lincoln 140, then moved on to the 210MP, got into TIG with an HTP Invertig 221, and sold the 210. Still miss it, and a MIG is good to have around, but my garage only has room for one welder. I suppose the Invertig can also do stick should I ever need it. I love restoring old stuff (the 1994 Trek, or my wife's recent purchase of a 1962 Ideor) and would happily take on a tombstone. Do you have before and after photos? I don't mean to hijack a bike forum, but I hope folks wouldn't mind it.
Re: the frame, I was thinking of silicone-bronze brazing the tubes into the lugs, and only weld the parts that are directly butted up. Also thought of buying one extra tube (you can buy the kit, as I intend to, and also individual tubes), practice the weld, cut it up, and test penetration etc, before the actual weld.
Re: the frame, I was thinking of silicone-bronze brazing the tubes into the lugs, and only weld the parts that are directly butted up. Also thought of buying one extra tube (you can buy the kit, as I intend to, and also individual tubes), practice the weld, cut it up, and test penetration etc, before the actual weld.
Last edited by koenbro; 10-25-20 at 11:21 AM. Reason: clarity, brevity, links
10-25-20, 11:57 AM
#4
Senior Member
Join Date: Dec 2019
Posts: 954
Mentioned: 3 Post(s)
Tagged: 0 Thread(s)
Quoted: 321 Post(s)
Liked 263 Times
in
212 Posts
Yes make your own frame! I started a couple of years ago and have made 5 now, all TIG. Nothing beats the stoke of riding with some friends where at least one of you is on a frame you made.
I'm not sure that sil bronze onto lugs is a good idea. Lugs are meant to work with the capillary action style of brazing.
What worked for me was to get an old frame (it was actually my own Trek 520 that failed, replaced under lifetime warranty by Trek) and cut it up into little pieces and weld them back together. After a while I reached enough confidence to actually make a new frame with new tubes. Practice until you can do it right then keep practicing until you can't do it wrong. Or not much anyway
It's very thin wall tubing and always needs respect. Most joints are thin to thick. You will want a thin welding rod (1mm is my favourite some use even thinner) and the only special TIG accessory I would recommend is one of those CK red leads that are super flexible and don't get in the way. Obviously you need a foot pedal. Some people do pulse and lay wire which might be easier if you have perfect fit up. I never do and anyway I'm not a fan of that method.
You will find some of the joints have rather extreme angles and are hard to get into. You will need to use aluminium foil and lots of stickout for these. For welding behind the top of the seatstays on a road frame I usually switch to silicon bronze as you can kind of fill that whole area up and it looks quite neat. For an MTB frame with a sloping TT it's usually possible to TIG weld all the way around the SS.
The top of the SS is not highly stressed and is mostly in compression. But I actually think you could make the whole frame with sil bro. It's not as strong as a weld but not far off. This would certainly be easier but maybe a cop-out also use it for dropouts if they're the slot in kind (but I get breezer dropouts and weld them in most cases) and also for all the bottle cage bosses and things. You can actually silver solder those just with a MAPP torch but a neat little silbro fillet is fine if you ask me.
I'm not sure that sil bronze onto lugs is a good idea. Lugs are meant to work with the capillary action style of brazing.
What worked for me was to get an old frame (it was actually my own Trek 520 that failed, replaced under lifetime warranty by Trek) and cut it up into little pieces and weld them back together. After a while I reached enough confidence to actually make a new frame with new tubes. Practice until you can do it right then keep practicing until you can't do it wrong. Or not much anyway
It's very thin wall tubing and always needs respect. Most joints are thin to thick. You will want a thin welding rod (1mm is my favourite some use even thinner) and the only special TIG accessory I would recommend is one of those CK red leads that are super flexible and don't get in the way. Obviously you need a foot pedal. Some people do pulse and lay wire which might be easier if you have perfect fit up. I never do and anyway I'm not a fan of that method.
You will find some of the joints have rather extreme angles and are hard to get into. You will need to use aluminium foil and lots of stickout for these. For welding behind the top of the seatstays on a road frame I usually switch to silicon bronze as you can kind of fill that whole area up and it looks quite neat. For an MTB frame with a sloping TT it's usually possible to TIG weld all the way around the SS.
The top of the SS is not highly stressed and is mostly in compression. But I actually think you could make the whole frame with sil bro. It's not as strong as a weld but not far off. This would certainly be easier but maybe a cop-out
also use it for dropouts if they're the slot in kind (but I get breezer dropouts and weld them in most cases) and also for all the bottle cage bosses and things. You can actually silver solder those just with a MAPP torch but a neat little silbro fillet is fine if you ask me.
10-25-20, 12:13 PM
#5
Not a newbie to cycling
Join Date: Oct 2020
Posts: 911
Bikes: Omnium Cargo Ti with Rohloff, Bullitt Milk Plus, Dahon Smooth Hound
Mentioned: 2 Post(s)
Tagged: 0 Thread(s)
Quoted: 356 Post(s)
Liked 323 Times
in
199 Posts
I'd sooner glue up some carbon with some carbon muffs etc. than try my hand at thin tube welding that - if cracking - would send me straight to the ECU. If I were lucky.
10-25-20, 01:20 PM
#6
Bikeable
Join Date: Jan 2011
Posts: 326
Mentioned: 1 Post(s)
Tagged: 0 Thread(s)
Quoted: 173 Post(s)
Likes: 0
Liked 104 Times
in
73 Posts
My only objection to saying "go for it" is that your goal is to make a lighter frame. I doubt that a frame built from Herse tubing would turn out much less than the Trek frame.
10-25-20, 01:49 PM
#7
Bikeable
Join Date: Jan 2011
Posts: 326
Mentioned: 1 Post(s)
Tagged: 0 Thread(s)
Quoted: 173 Post(s)
Likes: 0
Liked 104 Times
in
73 Posts
I have been doing frame building for over 20 years. The biggest "take Away" that I can tell you you is that you will need to be a quality control person, and you really need to know exactly what to look out for in regards to Q.C., or an attempted frame can end up as landfill. You definitely will not learn anything on you tube, in fact the posters on you tube are so far wrong, that they largely can be used as examples of what NOT to do. I saw on one guy on you tube who crammed lug onto the ends of tubes and brazed them together in a bike repair stand. No calculation for angles or bottom bracket height let alone there was no way that the head tube and seat tube would come out remotely close to parallel. --- TOTAL LANDFILL--
10-25-20, 02:07 PM
#8
Senior Member
Join Date: Dec 2019
Posts: 954
Mentioned: 3 Post(s)
Tagged: 0 Thread(s)
Quoted: 321 Post(s)
Liked 263 Times
in
212 Posts
You definitely will not learn anything on you tube, in fact the posters on you tube are so far wrong, that they largely can be used as examples of what NOT to do. I saw on one guy on you tube who crammed lug onto the ends of tubes and brazed them together in a bike repair stand. No calculation for angles or bottom bracket height let alone there was no way that the head tube and seat tube would come out remotely close to parallel. --- TOTAL LANDFILL--
I learnt everything I know about welding from the welding tips and tricks channel. There are also two very good amateur framebuilding channels (Pithy Bikes and Cobra Frames) I know of. Amateur but they made some very nice frames and Pithy inspired me to have a go myself. Recently Paul Brodie who is anything but amateur has started a channel which is awesome. That guy is an artist.
Agree that anyone making a frame needs to understand about quality and how to do a good weld as it is obviously safety-critical. Also advisable not to make the fork on your first build. Most frame failures (if you do have one) are not that dramatic.
I don't know what that lug brazing video you saw was but there were a few videos Jody of welding tips and tricks made with Mike Zanconato (a very highly skilled and respected professional framebuilder) which I would consider required viewing. On one of those they brazed a lug but it wasn't part of a complete frame. They just wanted to demonstrate the brazing process.
10-25-20, 02:33 PM
#9
Bikeable
Join Date: Jan 2011
Posts: 326
Mentioned: 1 Post(s)
Tagged: 0 Thread(s)
Quoted: 173 Post(s)
Likes: 0
Liked 104 Times
in
73 Posts
I actually dislike Pithy on you tube. He's the guy who uses leather to hold braze ons in place while tig tacking them. He also uses some huge mountain bike wheel with a tire attached to check the rear end alignment. Really really bad/ wrong/ Inaccurate. I did like Cobra, but I cannot recall why. Funny you mention about fork building, because in 20 years I have still to make a fork.
10-25-20, 03:30 PM
#10
Senior Member

Join Date: Oct 2013
Location: Great White North
Posts: 926
Bikes: I have a few
Mentioned: 6 Post(s)
Tagged: 0 Thread(s)
Quoted: 340 Post(s)
Liked 210 Times
in
104 Posts
I will be following this for sure. I have repaired frames, replaced tubes and added mounts for various bits but never attempted a complete frame (all with torch). A complete frame is on my wish list to do.
10-25-20, 05:47 PM
#11
Senior Member
Thread Starter
Wow, very thoughtful answers here, thank you all for sharing your insights and experience.
As expected, this is a complicated matter, and my thinking is evolving; just started the thought process. I've read up today on tubing (Ishiwata/Kaisei, Tange, Reynolds, Columbus) at Retrogrouch. Have a few questions, in no particular order:
1. Geometry. I will have myself measured/fitted. Will aim for a randonneur geometry, to be comfortable for long hours. Will also look for published geometry data on touring/rando bikes. Anyone has a good source for geometry?
2. Will think about building a jig. Will need to read up on that, but I am confident I can build one up to pretty good precision, using 8020, plasma cut stuff, ply. etc.
3. I am not clear on brazing vs TIG welding. I have done lots of steel and aluminum TIG including pulse welding, using both a pedal or a TIG Button. The Rene Herse website lists the end-thickness of their tube as 0.027 inches so, if welding, will need to go in the 25-30 A range and probably pulse. Somebody mentioned capillary brazing, will have to read up more on brazing. Most photos of builderson the internet showed them using a torch, and I have never sweated copper pipe or used a torch. Maybe they use a torch because TIG equipment is a lot more expensive and requires a different skill? In other words can I use TIG brazing instead of a torch? After all, TIG heat is very adjustable, maybe more than a torch. Any thoughts?
4. Weight. My Trek frame without the fork is 2280 grams.I'm going to email Rene Herse about their estimate for a Kaisei superlight frame.
10-25-20, 06:09 PM
#12
Senior Member
My advice is to go for it. I have never built a bike, but have built and paddled, rowed and sailed numerous small craft over the years. There is satisfaction all the way, from solving problems and the personal growth in doing the build to the pride in using it, and the ego trip of saying 'Thanks, I built it" when someone compliments it.
Don't worry about making mistakes, you will, but I'm betting that if you do build one, it will just be your first one.
Good luck
Don't worry about making mistakes, you will, but I'm betting that if you do build one, it will just be your first one.
Good luck
Likes For Pratt:
10-25-20, 07:41 PM
#13
Senior Member
Join Date: Apr 2013
Posts: 1,173
Bikes: Surly Disk Trucker, 2014 w/Brooks Flyer Special saddle, Tubus racks - Duo front/Logo Evo rear, 2019 Dahon Mariner D8, Both bikes share Ortlieb Packer Plus series panniers, Garmin Edge 1000
Mentioned: 2 Post(s)
Tagged: 0 Thread(s)
Quoted: 405 Post(s)
Liked 115 Times
in
99 Posts
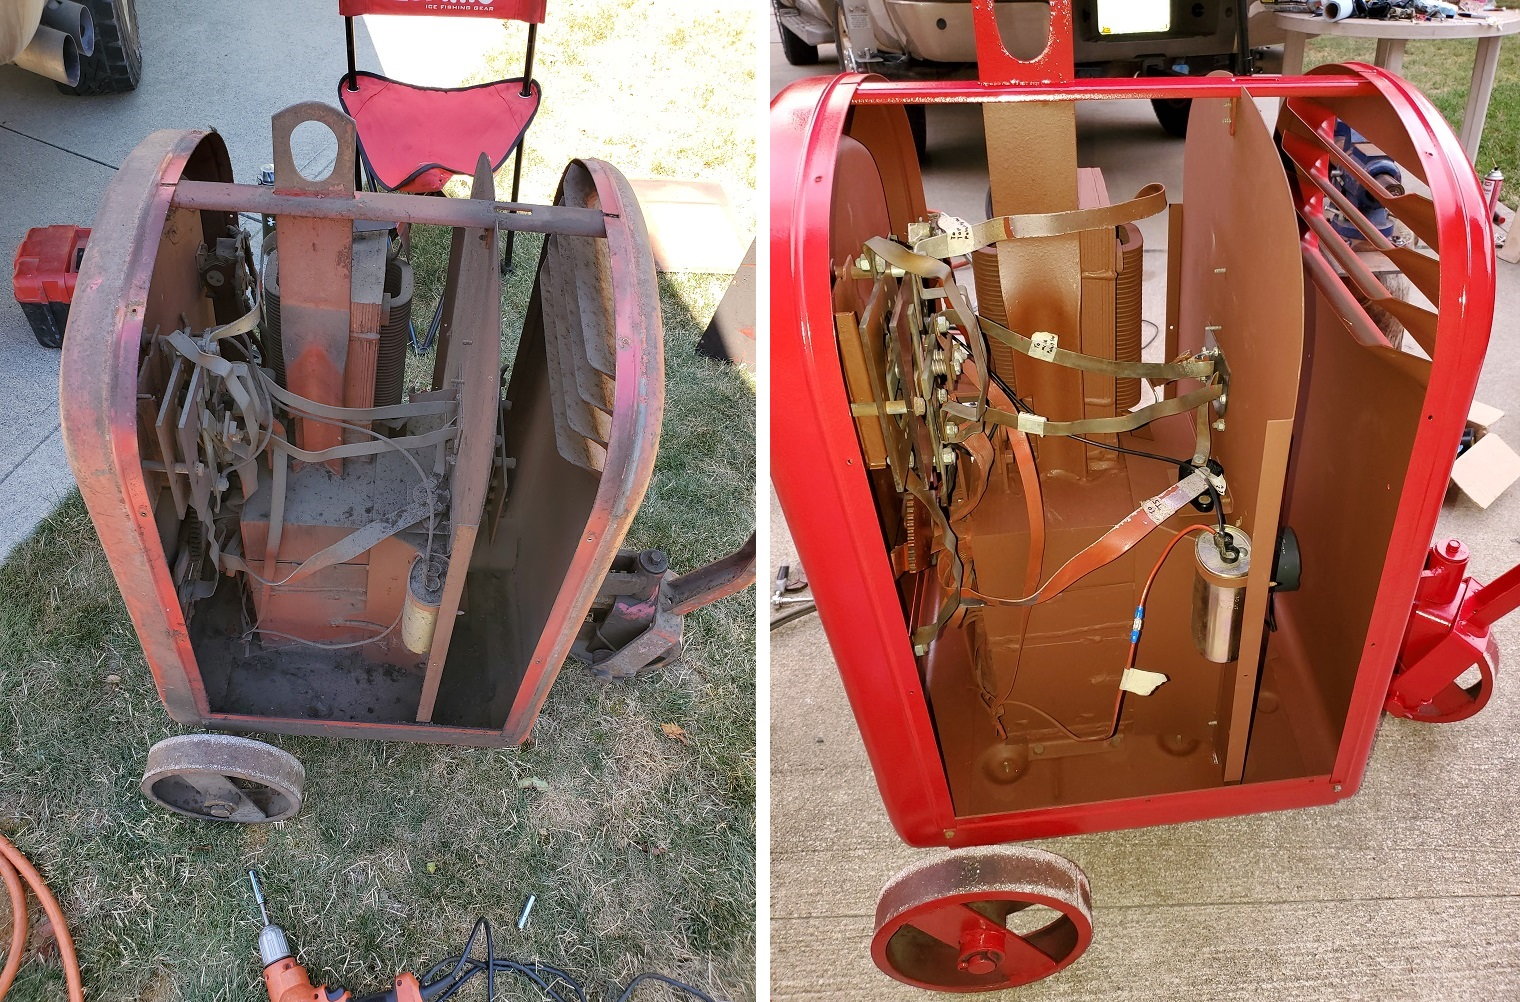
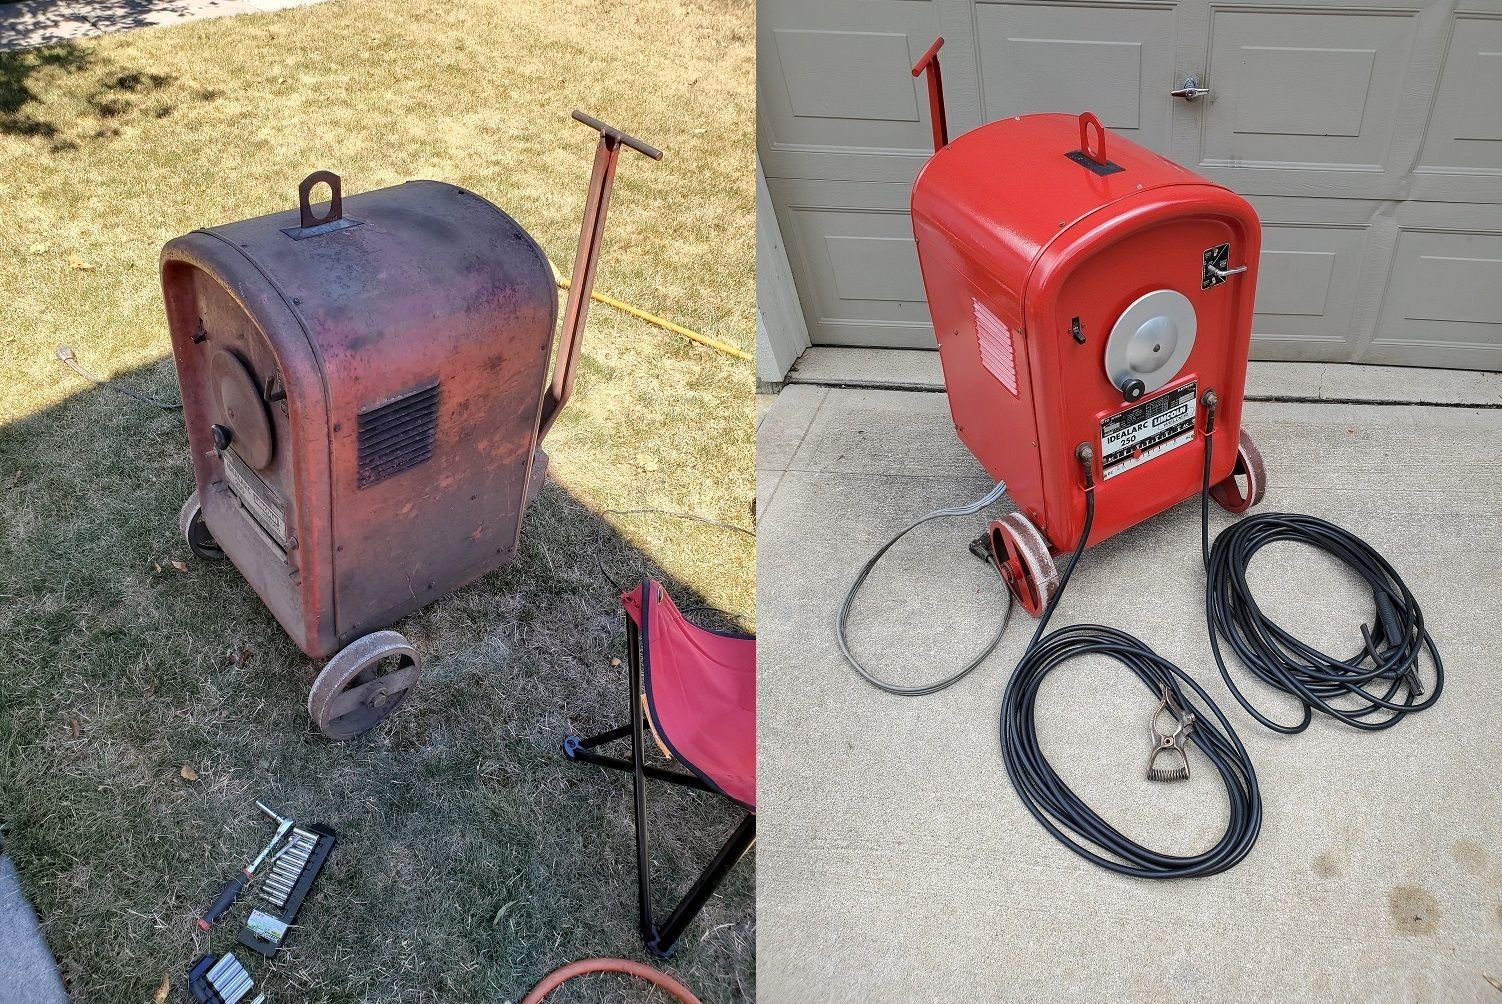
Here is a thread on Welding Web I had of the restoration. There are a lot more project pictures and discussion in here:
https://weldingweb.com/vbb/showthread.php?708543-1966-Round-Top-Idealarc-250
Last edited by KC8QVO; 10-25-20 at 07:44 PM.
10-26-20, 02:11 AM
#14
Senior Member
Join Date: Dec 2019
Posts: 954
Mentioned: 3 Post(s)
Tagged: 0 Thread(s)
Quoted: 321 Post(s)
Liked 263 Times
in
212 Posts
3. I am not clear on brazing vs TIG welding. I have done lots of steel and aluminum TIG including pulse welding, using both a pedal or a TIG Button. The Rene Herse website lists the end-thickness of their tube as 0.027 inches so, if welding, will need to go in the 25-30 A range and probably pulse.
Somebody mentioned capillary brazing, will have to read up more on brazing. Most photos of builderson the internet showed them using a torch, and I have never sweated copper pipe or used a torch. Maybe they use a torch because TIG equipment is a lot more expensive and requires a different skill? In other words can I use TIG brazing instead of a torch? After all, TIG heat is very adjustable, maybe more than a torch. Any thoughts?
The first method is what you do with lugs but people often do something like that as a first pass on fillet brazed frames, and the SS are sometimes held on just with that first pass.
So why do they do all this when in every other industry the oxyacetylene torch is really now only used for chopping up farm equipment when you don't have anywhere to plug in a plasma cutter? Well it's traditional, and also the brazing rods available for torch brazing do have a higher UTS than TIG brazing rod.
If you made a TIG brazed frame (with silicon bronze) it would be a bit weaker than one that was torch-brazed. But if you TIG weld it it will be extremely strong, just as good as any fillet brazed or lugged frame. So if you already know TIG I would TIG it. If you do TIG you won't use lugs.
[/QUOTE]
I've made two Reynolds 631 road frames both of which weighed 1600g minus the fork. The MTB frame (Columbus Zona) was 1900. You should be able to get way under 2280. Commercial frames tend to be a bit overbuilt, which makes them too stiff and heavy. You can actually make something much nicer than most of them.
10-26-20, 03:44 AM
#15
Senior Member
or is it possible to basement weld a ti frame if you buy the tubing or kit yourself?
Likes For saddlesores:
10-26-20, 05:21 AM
#16
Senior Member
Join Date: Jan 2010
Posts: 39,229
Mentioned: 211 Post(s)
Tagged: 1 Thread(s)
Quoted: 18409 Post(s)
Liked 15,518 Times
in
7,324 Posts
Likes For indyfabz:

Likes For robow:
10-27-20, 11:20 AM
#18
Bikeable
Join Date: Jan 2011
Posts: 326
Mentioned: 1 Post(s)
Tagged: 0 Thread(s)
Quoted: 173 Post(s)
Likes: 0
Liked 104 Times
in
73 Posts
You might want to check out ebay they have Colnago framesets starting at just $450. No worries about getting it right, it's all ready to go. for only $250 more than your tubeset cost a ready to go Colnago.
10-27-20, 04:55 PM
#19
Sunshine

Join Date: Aug 2014
Location: Des Moines, IA
Posts: 16,608
Bikes: '18 class built steel roadbike, '19 Fairlight Secan, '88 Schwinn Premis , Black Mountain Cycles Monstercross V4, '89 Novara Trionfo
Mentioned: 123 Post(s)
Tagged: 0 Thread(s)
Quoted: 10954 Post(s)
Liked 7,482 Times
in
4,184 Posts
The OP wants to build a lightweight road frame...I would think that would compare well it to a production 520 for weight.
10-27-20, 05:06 PM
#20
Sunshine
Join Date: Aug 2014
Location: Des Moines, IA
Posts: 16,608
Bikes: '18 class built steel roadbike, '19 Fairlight Secan, '88 Schwinn Premis , Black Mountain Cycles Monstercross V4, '89 Novara Trionfo
Mentioned: 123 Post(s)
Tagged: 0 Thread(s)
Quoted: 10954 Post(s)
Liked 7,482 Times
in
4,184 Posts
- no 80s or 90s Italian road bike will handle 42-44mm tires. That was the era of tight tire clearances. Maybe you could find an Italian CX bike, but even that wouldn't handle tires that wide. Basically no road bikes from that era took 40+mm tires. In the early 90s some hybrid bikes took 40mm tires, but something like the trek 750 was basically a flatbar 520...which you have.
- I built a road frame a few winters ago in a class. Columbus Zona brazed with lugs.
Based on that, I would not want to start out in my own with anything heat treated as its difficult to work with.. i also wouldn't want to start off with anything super light(Zona is plenty fine for my use and style) since the first bike will be tough to get perfect temps. Better to have a bit more beef at the ends.
Also, its a steel bike- 120g of weight difference in the frame due to tube butting thicknesses is just not something ill care about once the frame is built.
- the most difficult part as a beginner is ensuring proper alignment. Getting the correct angles and keeping them is not easy. A jig for tacking is critical.
Read the proteus framebuilding book and/or other books like it.
10-27-20, 09:20 PM
#21
Senior Member
Thread Starter
On tour right now and I dont have the laptop fired up tonight. Just on my phone. Lets see if these pics come thru...
[...]
Here is a thread on Welding Web I had of the restoration. There are a lot more project pictures and discussion in here:
https://weldingweb.com/vbb/showthrea...p-Idealarc-250
[...]
Here is a thread on Welding Web I had of the restoration. There are a lot more project pictures and discussion in here:
https://weldingweb.com/vbb/showthrea...p-Idealarc-250
Yes you will need something to hold the front triangle while you tack it. I also find a cheap laser level box a very good way to check things. I actually fixture the rear triangle with things clamped to the table as I can get more precision that way. But your jig may turn out better
I would start with the "lower end" tube sets like Columbus Cromor which is usually 0.9mm (0.035") at the ends. But still very nice tubes. For everything on the bike, even with thinner tubes, I just set the welder to 80A and use the pedal but this is a personal choice. But bear in mind that the BB shell may be more than 2mm thick. The HT and the top of the ST are usually about 1.2mm or so (for TIG you will want to get the slightly thicker HTs from the frame catalogue and I recommend the "externally butted" or "bulge" STs that are 1.2mm at the top). When doing thin to thick you want to set the amps to roughly what the thicker part needs and then direct the heat. My preferred method is "manual pulse" where you push the pedal a bit as you dip the rod in. I find it easier to time things this way. But a lot of people do use the pulse and it's a case of practising and finding what works best for you. The main concern is just not blowing holes in the thin tube which takes a lot of care. For example when tacking etc. always start on the thicker tube. A good fit-up helps of course but I would practise on some joints that are a bit less than perfect as well just to make sure you don't get caught out.
I would start with the "lower end" tube sets like Columbus Cromor which is usually 0.9mm (0.035") at the ends. But still very nice tubes. For everything on the bike, even with thinner tubes, I just set the welder to 80A and use the pedal but this is a personal choice. But bear in mind that the BB shell may be more than 2mm thick. The HT and the top of the ST are usually about 1.2mm or so (for TIG you will want to get the slightly thicker HTs from the frame catalogue and I recommend the "externally butted" or "bulge" STs that are 1.2mm at the top). When doing thin to thick you want to set the amps to roughly what the thicker part needs and then direct the heat. My preferred method is "manual pulse" where you push the pedal a bit as you dip the rod in. I find it easier to time things this way. But a lot of people do use the pulse and it's a case of practising and finding what works best for you. The main concern is just not blowing holes in the thin tube which takes a lot of care. For example when tacking etc. always start on the thicker tube. A good fit-up helps of course but I would practise on some joints that are a bit less than perfect as well just to make sure you don't get caught out.
There are basically two styles of brazing with a torch. In both you cover everything with flux and heat it up. In one style you then sort of touch it with the rod and the filler immediately melts and gets sucked around the joint towards the heat, just like sweating a copper pipe, although not as easy. The second style is more like TIG welding or brazing-- you sort of dip the rod and build up a "stack of dimes". You use a different kind of rod for this. You make a much bigger fillet than a TIG weld would be and then most people sand it down to look lovely and smooth. This is called "fillet brazing".
The first method is what you do with lugs but people often do something like that as a first pass on fillet brazed frames, and the SS are sometimes held on just with that first pass.
So why do they do all this when in every other industry the oxyacetylene torch is really now only used for chopping up farm equipment when you don't have anywhere to plug in a plasma cutter? Well it's traditional, and also the brazing rods available for torch brazing do have a higher UTS than TIG brazing rod.
If you made a TIG brazed frame (with silicon bronze) it would be a bit weaker than one that was torch-brazed. But if you TIG weld it it will be extremely strong, just as good as any fillet brazed or lugged frame. So if you already know TIG I would TIG it. If you do TIG you won't use lugs.
Super helpful, thank you!
10-27-20, 09:31 PM
#22
Senior Member
Thread Starter
- no 80s or 90s Italian road bike will handle 42-44mm tires. That was the era of tight tire clearances. Maybe you could find an Italian CX bike, but even that wouldn't handle tires that wide. Basically no road bikes from that era took 40+mm tires. In the early 90s some hybrid bikes took 40mm tires, but something like the trek 750 was basically a flatbar 520...which you have.
- I built a road frame a few winters ago in a class. Columbus Zona brazed with lugs.
Based on that, I would not want to start out in my own with anything heat treated as its difficult to work with.. i also wouldn't want to start off with anything super light(Zona is plenty fine for my use and style) since the first bike will be tough to get perfect temps. Better to have a bit more beef at the ends.
Also, its a steel bike- 120g of weight difference in the frame due to tube butting thicknesses is just not something ill care about once the frame is built.
- the most difficult part as a beginner is ensuring proper alignment. Getting the correct angles and keeping them is not easy. A jig for tacking is critical.
Read the proteus framebuilding book and/or other books like it.
- I built a road frame a few winters ago in a class. Columbus Zona brazed with lugs.
Based on that, I would not want to start out in my own with anything heat treated as its difficult to work with.. i also wouldn't want to start off with anything super light(Zona is plenty fine for my use and style) since the first bike will be tough to get perfect temps. Better to have a bit more beef at the ends.
Also, its a steel bike- 120g of weight difference in the frame due to tube butting thicknesses is just not something ill care about once the frame is built.
- the most difficult part as a beginner is ensuring proper alignment. Getting the correct angles and keeping them is not easy. A jig for tacking is critical.
Read the proteus framebuilding book and/or other books like it.
I have looked at buying a used Italian frame off eBay, and there are many gorgeous examples I am drooling over, but I share your concern that they will not accommodate 42 mm tires, and I certainly don't intend to ride on blade-thin high pressure tires. I already have a 1987 Bianchi (not collector grade) with 20mm tires; the chainstay is only about 33mm.
Ideally I'd find a reasonably priced good looking used or new steel frame for 700c wheels, 42mm tubes and rim brakes, but if I can't find it, then building comes into the picture.
10-27-20, 09:33 PM
#23
Senior Member
Thread Starter
Yeah my touring frame certainly feels overbuilt! Don't need that for rando and daily riding.
10-28-20, 02:34 AM
#24
Senior Member
Join Date: Dec 2019
Posts: 954
Mentioned: 3 Post(s)
Tagged: 0 Thread(s)
Quoted: 321 Post(s)
Liked 263 Times
in
212 Posts
Yeah a lower end tube may be an easier start, considering that the thinnest thing I've welded thus far is 1/16" alu. I am not excited about welding 0.4mm, though I can probably practice my way to it, blowing holes through lots of tubes on the way. Do you need any special filler for bike-grade Cromoly or will regular ER70S-2 do?
ER70S-2 (or S-6 or whatever the other common one is) is fine and is what most people use. I think Columbus recommend ER80 but it doesn't matter. It's not a good idea to use a cromoly filler because it's less ductile. Some people use stainless rods but I don't know of any reason other than they like the rainbow colours.The key to not blowing holes that I figured out eventually is not just what you do with the heat but with the filler rod. You need to be johnny on the spot with the filler and the instant that edge starts to curl back you do two things. Back off the pedal and get some rod in there to put the fire out. You need to practice so you do this without thinking, because there isn't time to think!
10-28-20, 08:07 AM
#25
Senior Member
Join Date: Aug 2010
Location: Madison, WI
Posts: 11,195
Bikes: 1961 Ideor, 1966 Perfekt 3 Speed AB Hub, 1994 Bridgestone MB-6, 2006 Airnimal Joey, 2009 Thorn Sherpa, 2013 Thorn Nomad MkII, 2015 VO Pass Hunter, 2017 Lynskey Backroad, 2017 Raleigh Gran Prix, 1980s Bianchi Mixte on a trainer. Others are now gone.
Mentioned: 47 Post(s)
Tagged: 0 Thread(s)
Quoted: 3458 Post(s)
Liked 1,465 Times
in
1,143 Posts
If you are a great welder, that it good.
To make a long story short, I bought a first year of production LHT. It had some bad welding in the bottom bracket shell area, the shell was badly warped. But Surly refused to warranty it, said that was normal. I had a bike shop re-thread the bottom bracket shell. Rode it around town for several years, then finally took it on a tour, Pacific Coast, segment I was doing was about 900 miles. I had ridden less than 10 miles and I knew that I brought a bad bike, it had a bad shimmy with a load that I never could get rid of. When I finally got home, I stripped all the parts off of it and put the frame in the metal recycle bin.
A couple years later I was on a tour and met a frame builder in a campground, mentioned my frame issues to her and she started explaining to me in great detail exactly how the welder had their heat settings all wrong and how that weakened the bottom bracket shell area enough to make the bike handle like a wet noodle.
My point is that it is not just the tubing, the geometry, the finishing later (paint, etc.). The actual execution of welding that stuff together, if you do not do the actual welding just right, you could make something that deserves to go into the metal recycling bin.
That said, if you are going to go ahead and weld up your own frame, that would be a custom frame. Think about what you would like on it that would be unique, if anything. If you want a kickstand, will the frame be strong enough, do you need a plate for it? If you want it to be a disc brake bike, do you know how strong the frame has to be to take the wheel torque?
Several months ago on a different sub-forum, someone was considering getting a custom frame made. This post is my thoughts on what I would have thought about if I was getting a custom frame.
https://www.bikeforums.net/21459908-post7.html