


Campagnolo bottom bracket removal C record
 07-20-21, 05:55 PM
#1

Senior Member
Thread Starter
Join Date: Mar 2016
Location: North of Boston
Posts: 898
Bikes: 1973 Schwinn Sports Tourer plus a " few" more :)
Mentioned: 4 Post(s)
Tagged: 0 Thread(s)
Quoted: 211 Post(s)
Liked 199 Times
in
147 Posts
Campagnolo bottom bracket removal C record
This is an update for another thread.
I removed the arms!!!!
Came off pretty easy
Now...how to remove the BB.
Friend at the bike shop was not sure
Knows its Italian thread??
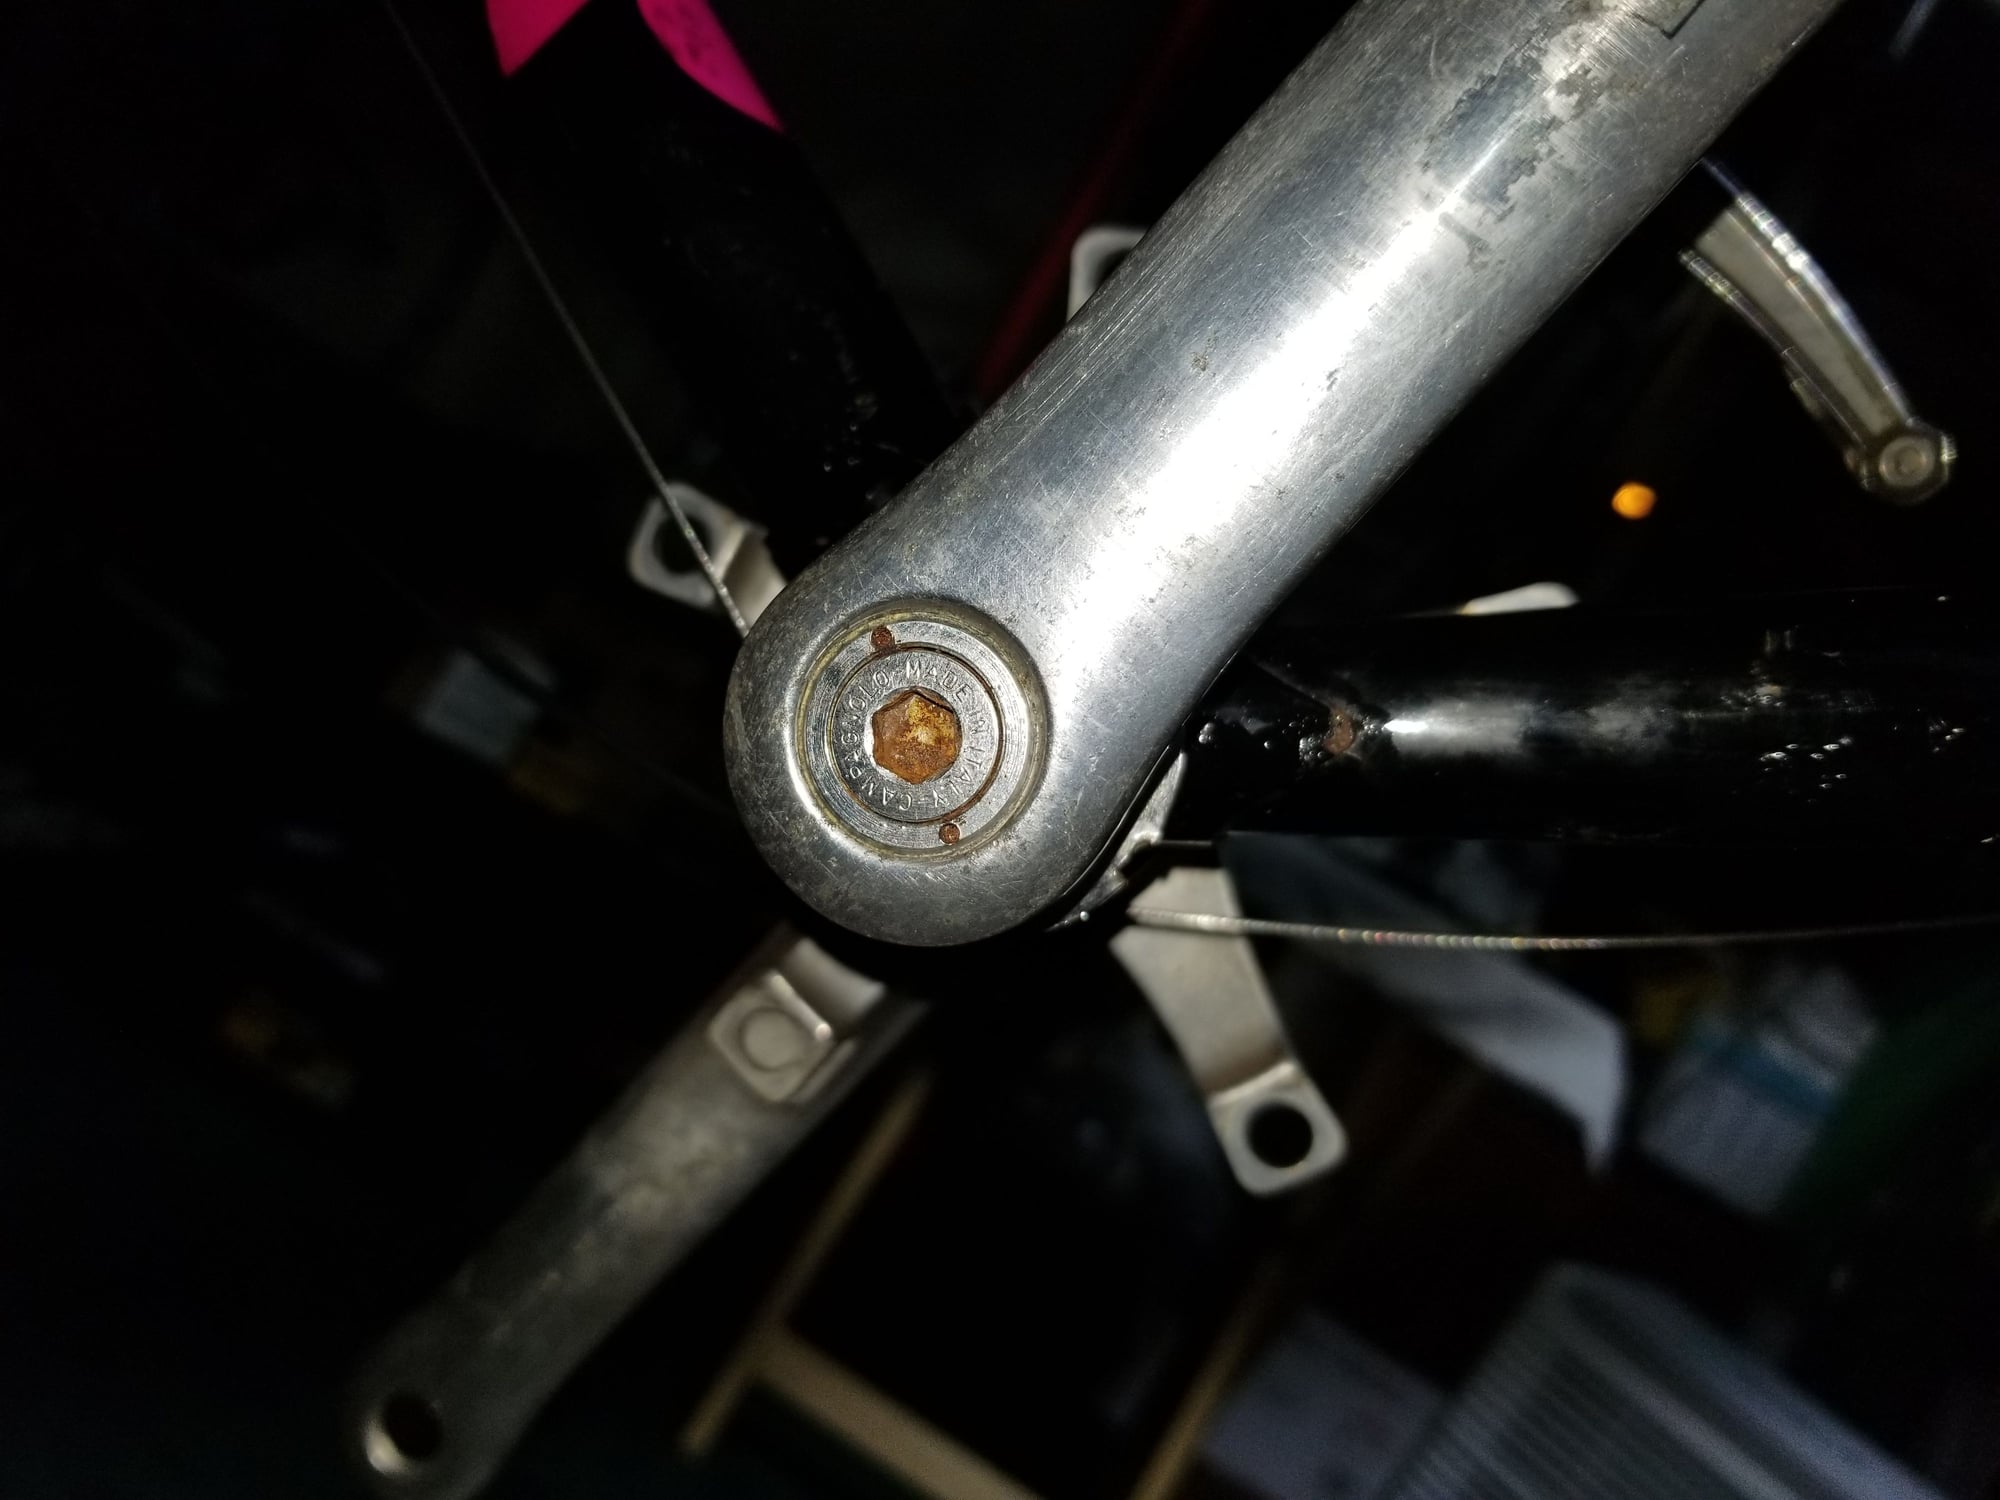
Here are some pics
3rd pic is what was on there
And again...thank you all for your help
Really...greatly appreciated


I removed the arms!!!!
Came off pretty easy
Now...how to remove the BB.
Friend at the bike shop was not sure
Knows its Italian thread??
Here are some pics
3rd pic is what was on there
And again...thank you all for your help
Really...greatly appreciated
 07-20-21, 06:44 PM
#2
Really Old Senior Member


 07-20-21, 09:08 PM
#3
Friendship is Magic

Join Date: Nov 2010
Location: Sacramento, CA
Posts: 22,984
Bikes: old ones
Mentioned: 304 Post(s)
Tagged: 0 Thread(s)
Quoted: 26415 Post(s)
Liked 10,380 Times
in
7,208 Posts
,
...the adjustable cup, on the non drive side, is RH threaded and held in place by that lock ring (which is threaded the same way) .
Once you remove the lock ring (use a lock ring plier or hook spanner), you can figure out whether it's standard (English) or Italian by the diameter of the cup.
Or with Campy parts, the threading standard is often marked on the cups, somewhere.
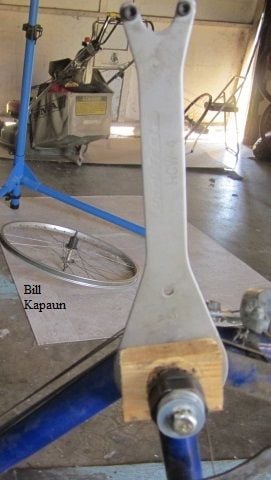
The above photos gives you a method for removing the drive side (fixed) cup. But unless there's something srong with it, just clean it in place and reuse it with new grease.
...the adjustable cup, on the non drive side, is RH threaded and held in place by that lock ring (which is threaded the same way) .
Once you remove the lock ring (use a lock ring plier or hook spanner), you can figure out whether it's standard (English) or Italian by the diameter of the cup.
Or with Campy parts, the threading standard is often marked on the cups, somewhere.
The above photos gives you a method for removing the drive side (fixed) cup. But unless there's something srong with it, just clean it in place and reuse it with new grease.
07-20-21, 09:39 PM
#4
Junior Member
Join Date: Apr 2016
Location: San Jose, CA
Posts: 22
Bikes: 1983 Bianchi Nuova Racing 12 Vel, 1985 Bianchi Centenario, 1988 Bianchi SuperLeggera, 2017 Bianchi Infinito CV (Ultegra), 2017 Bianchi Infinito CV Disc (Red eTap)
Mentioned: 0 Post(s)
Tagged: 0 Thread(s)
Quoted: 7 Post(s)
Liked 11 Times
in
6 Posts
I 'm kind of surprised the bike shop doesn't know how to remove this. You need a Pin Spanner to remove the remove the adjustable cup.

Park tool image

Park tool image
I would avoid removing the fixed cup if possible, as it's usually a real bear between torque and possible corrosion/seizing. Bill showed a good setup to remove the cup if you really need to do so, like a frame resto.
Park tool image
Park tool image
I would avoid removing the fixed cup if possible, as it's usually a real bear between torque and possible corrosion/seizing. Bill showed a good setup to remove the cup if you really need to do so, like a frame resto.
07-21-21, 05:03 AM
#5
Senior Member
Thread Starter
Join Date: Mar 2016
Location: North of Boston
Posts: 898
Bikes: 1973 Schwinn Sports Tourer plus a " few" more :)
Mentioned: 4 Post(s)
Tagged: 0 Thread(s)
Quoted: 211 Post(s)
Liked 199 Times
in
147 Posts
Thank you all
Really appreciate your help
This is a Campagnolo C record group
So the lock ring and spanner would loosen to the left?
Counter clockwise?
Thanks again
Really appreciate your help
This is a Campagnolo C record group
So the lock ring and spanner would loosen to the left?
Counter clockwise?
Thanks again
07-21-21, 05:28 AM
#6
Senior Member

Join Date: May 2008
Location: Fredericksburg, Va
Posts: 9,579
Bikes: '65 Frejus TDF, '73 Bottecchia Giro d'Italia, '83 Colnago Superissimo, '84 Trek 610, '84 Trek 760, '88 Pinarello Veneto, '88 De Rosa Pro, '89 Pinarello Montello, '94 Burley Duet, 97 Specialized RockHopper, 2010 Langster, Tern Link D8
Mentioned: 73 Post(s)
Tagged: 0 Thread(s)
Quoted: 1607 Post(s)
Liked 2,216 Times
in
1,103 Posts
Rotation on the non drive side is always the same regardless of the BB shell threading (internal threads). Righty tighty, lefty loosy.
Campagnolo BB normally mark the threading on the DS cup.
Campagnolo BB normally mark the threading on the DS cup.
__________________
Bikes don't stand alone. They are two tired.
Bikes don't stand alone. They are two tired.
07-21-21, 06:02 AM
#7
Senior Member
Join Date: Jun 2018
Location: SW Ohio
Posts: 2,397
Mentioned: 93 Post(s)
Tagged: 0 Thread(s)
Quoted: 1104 Post(s)
Liked 1,825 Times
in
878 Posts
If a BB isn't marked with the thread/pitch, measure the shell witdth. Tipically, an English BB is 68mm and Italian is 70mm.
__________________
07-21-21, 06:10 AM
#8
Old fart

Join Date: Nov 2004
Location: Appleton WI
Posts: 24,784
Bikes: Several, mostly not name brands.
Mentioned: 153 Post(s)
Tagged: 0 Thread(s)
Quoted: 3587 Post(s)
Liked 3,400 Times
in
1,934 Posts
07-21-21, 06:46 AM
#9
Let your bike be the tool

Join Date: Jun 2006
Location: NC/SC border
Posts: 939
Bikes: '66 Raleigh Carlton, '70 Ron Cooper, '95 Bianchi CD'I, Zonal Frame with Xenon gruppo, Carbon Frame with Record Gruppo, Columbia Twosome, Terry Classic, Bianchi SX, Gravity SS/FG
Mentioned: 2 Post(s)
Tagged: 0 Thread(s)
Quoted: 338 Post(s)
Liked 314 Times
in
194 Posts
I believe 36 x 24 f in the first photo does indicate Italian threading
__________________
Never try to teach a pig to sing...
Never try to teach a pig to sing...
07-21-21, 10:08 AM
#10
Senior Member
Thread Starter
Join Date: Mar 2016
Location: North of Boston
Posts: 898
Bikes: 1973 Schwinn Sports Tourer plus a " few" more :)
Mentioned: 4 Post(s)
Tagged: 0 Thread(s)
Quoted: 211 Post(s)
Liked 199 Times
in
147 Posts
Thanks once again for all the great help, knowledge, expertise!!!
Really appreciate it.
I'll remove the non drive side as suggested and put new bb and grease.
Stay/be safe
Michael
Really appreciate it.
I'll remove the non drive side as suggested and put new bb and grease.
Stay/be safe
Michael
