


Drilling Out a Dropout Adjuster
 05-20-21, 05:12 PM
#1
Senior Member
Thread Starter
Join Date: Aug 2013
Posts: 2,321
Mentioned: 35 Post(s)
Tagged: 0 Thread(s)
Quoted: 767 Post(s)
Liked 1,898 Times
in
889 Posts
Drilling Out a Dropout Adjuster
How many of us have encountered this annoying issue? My Colnago's adjusters were seized when it came to me, and I only managed to remove the NDS screw successfully. No amount of penetrant or finesse helped with the drive side screw, and it snapped off. I wasn't exactly eager to take a drill to it, so it stayed that way. Until today, that is.
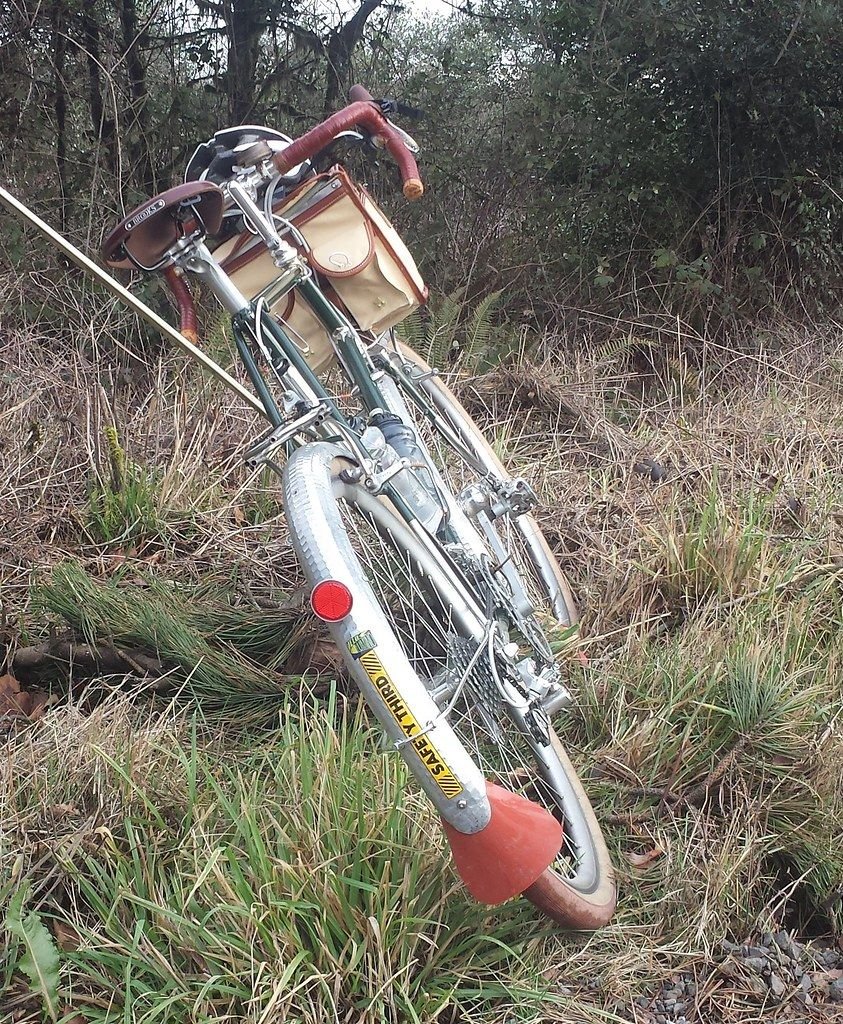
I just got tired of it being borked, so I figured either I'll bork it more, or fix it. As I contemplated my approach, it occurred to me that the biggest challenge is fixturing. What is the best way to keep the frame from moving? The drill press is out on this one. The work stand isn't solid enough. It'll flex and wobble just enough. I decided that keeping everything assembled and simply butting the front tire against the step down into my garage while leaning it against the door was actually the best way to limit any movement as I drill out the screw. I began by filing the broken end of the shank flat and blackening it with a Sharpie. I then scribed it with a fine dental pick to find as close to the center as possible.
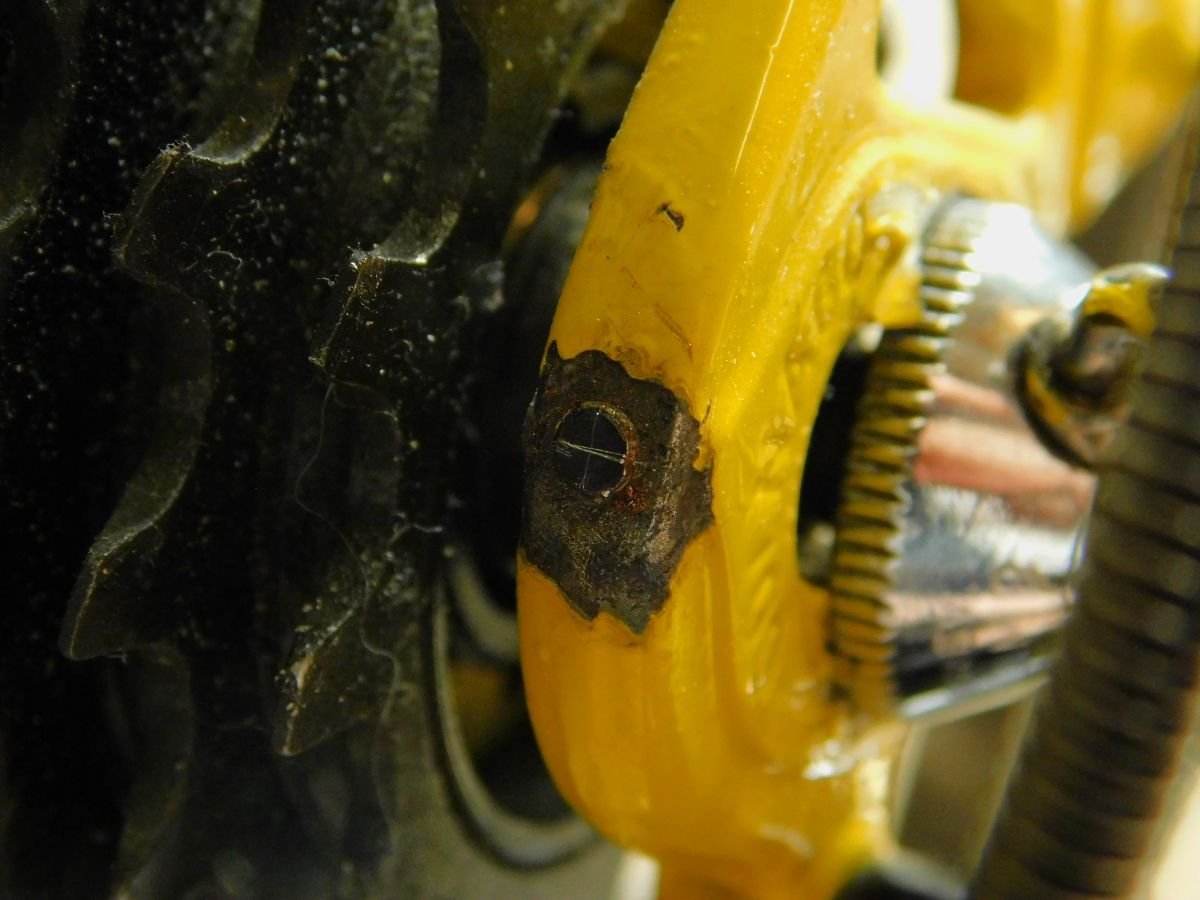
My center punch is homemade from a 1/4" hardened steel dowel pin. It works well and gave me a good starting point to begin drilling.
It is crucial to use a brand new drill bit here, and I chose a .075 diameter bit for the first through passage.

I just got tired of it being borked, so I figured either I'll bork it more, or fix it. As I contemplated my approach, it occurred to me that the biggest challenge is fixturing. What is the best way to keep the frame from moving? The drill press is out on this one. The work stand isn't solid enough. It'll flex and wobble just enough. I decided that keeping everything assembled and simply butting the front tire against the step down into my garage while leaning it against the door was actually the best way to limit any movement as I drill out the screw. I began by filing the broken end of the shank flat and blackening it with a Sharpie. I then scribed it with a fine dental pick to find as close to the center as possible.
My center punch is homemade from a 1/4" hardened steel dowel pin. It works well and gave me a good starting point to begin drilling.
It is crucial to use a brand new drill bit here, and I chose a .075 diameter bit for the first through passage.

Likes For BFisher:
05-20-21, 05:20 PM
#2
Senior Member
Thread Starter
Join Date: Aug 2013
Posts: 2,321
Mentioned: 35 Post(s)
Tagged: 0 Thread(s)
Quoted: 767 Post(s)
Liked 1,898 Times
in
889 Posts
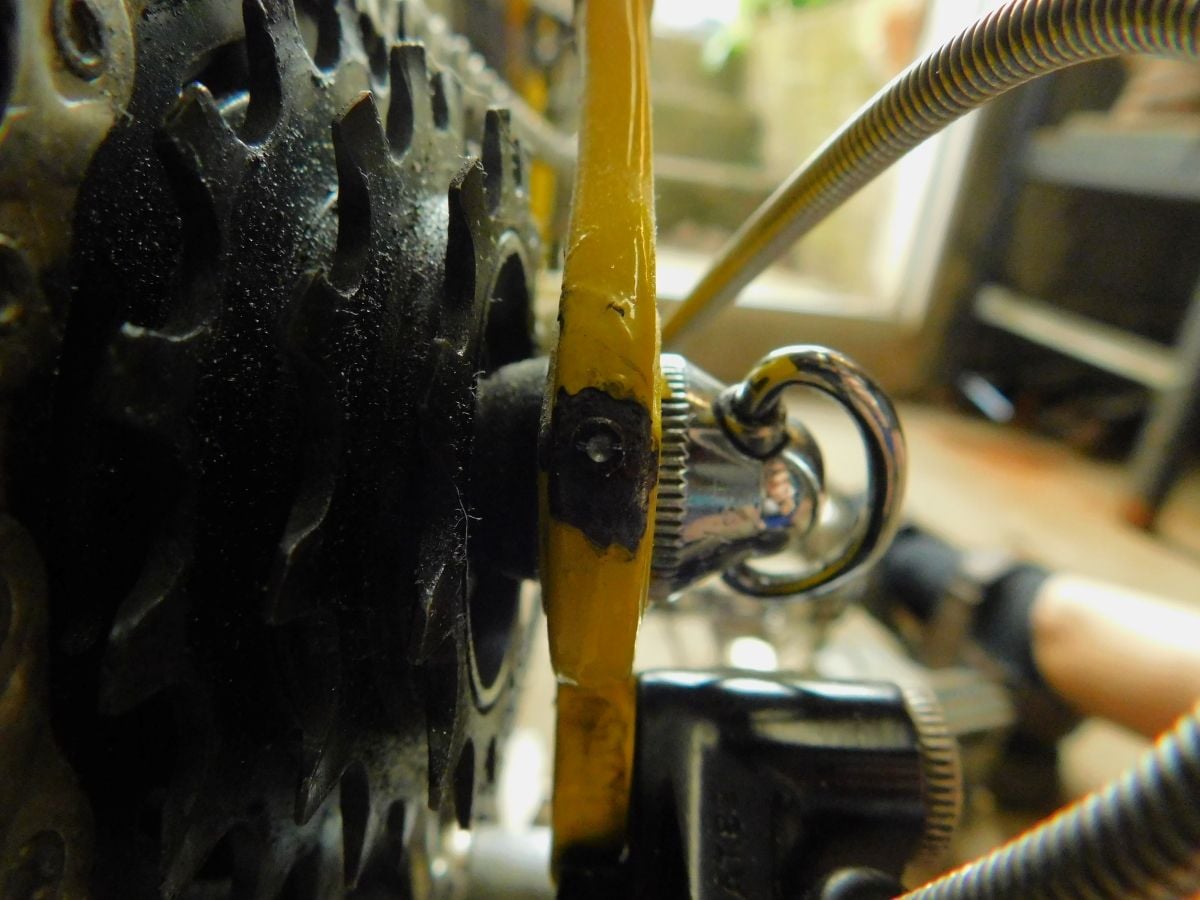
You really need to choke up on the bit as much as possible here to limit any flex, because at these thicknesses the bit flex will ruin any chance of success. I left just enough so that it will pass through without contacting any other parts. One helpful advantage I had with this dropout was that the "N" in COLNAGO matched the angle and placement of the screw almost exactly, giving me a good reference point on how to hold the drill. In the absence of that feature I would have drawn a line on the dropout with a black Sharpie to serve as a guide.
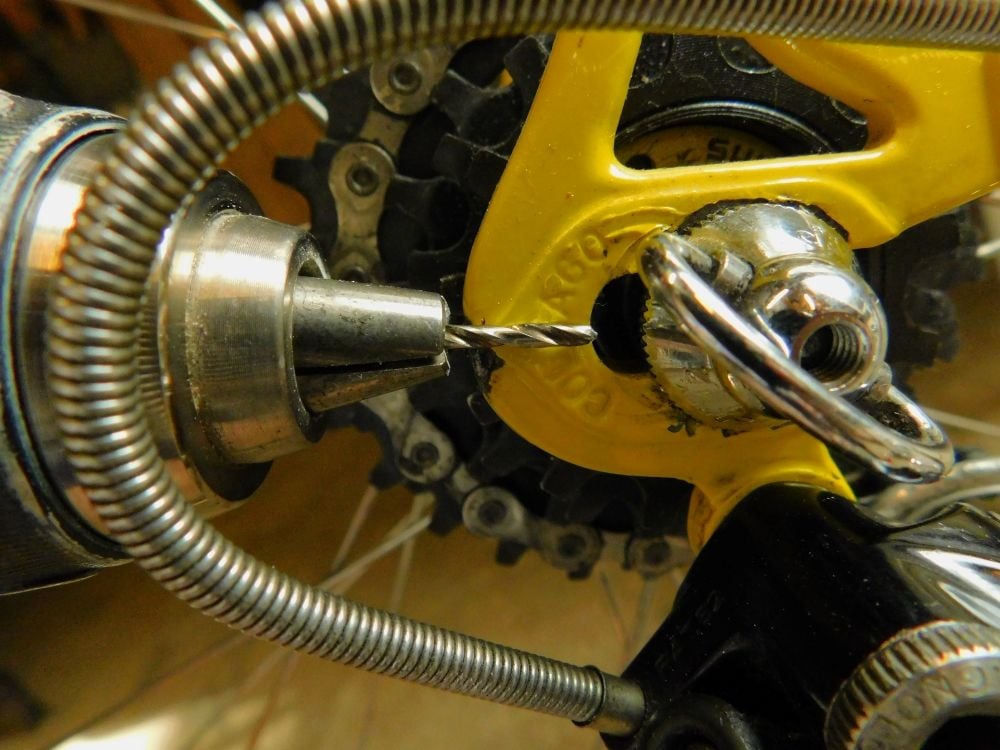
My approach was to drill a little at a time, always checking my progress, cleaning any chips off of the bit, and relubricating the bit. Yes, use cutting fluid or oil for sure. Little by little I made my way through.

My approach was to drill a little at a time, always checking my progress, cleaning any chips off of the bit, and relubricating the bit. Yes, use cutting fluid or oil for sure. Little by little I made my way through.
Likes For BFisher:
05-20-21, 05:25 PM
#3
 05-20-21, 05:30 PM
#4
Senior Member
Thread Starter
Join Date: Aug 2013
Posts: 2,321
Mentioned: 35 Post(s)
Tagged: 0 Thread(s)
Quoted: 767 Post(s)
Liked 1,898 Times
in
889 Posts
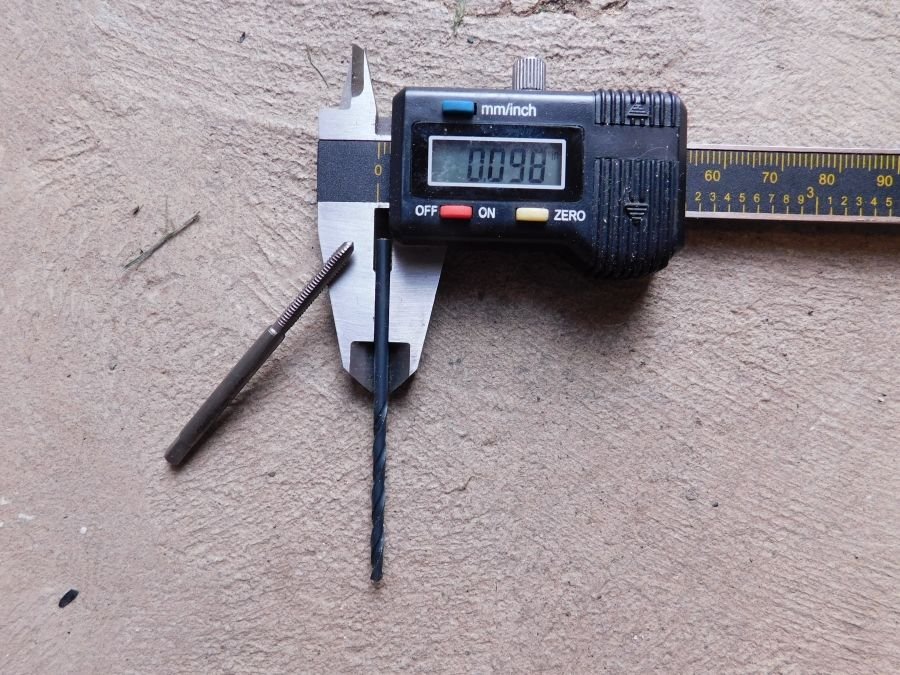
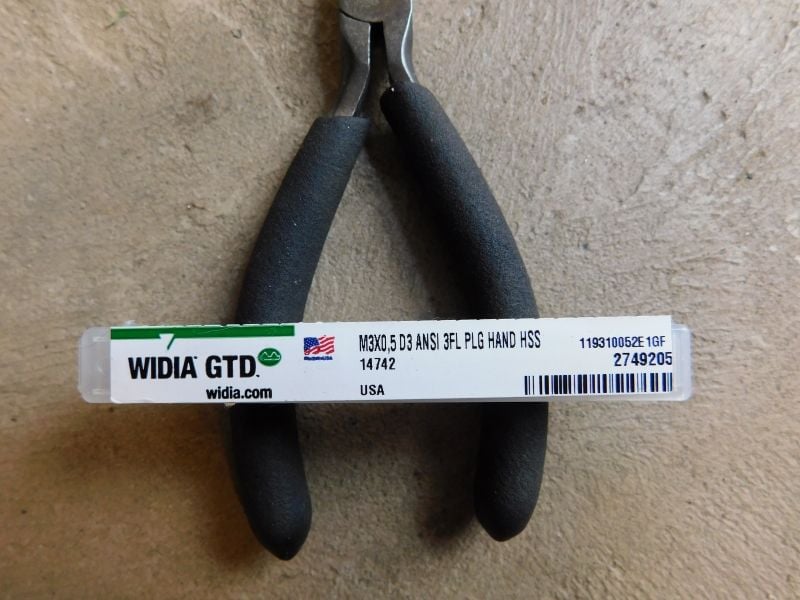
But that's not it. Now I only have a .075" hole, where the tap drill size for 3x.5 threading is 2.5mm, or .0984". So I made a pass through with a #44 bit, which is .086", and finally with a #40.
I realized that my tap is 3x0.6, so I went and ordered the correct tap. Always double check! Here are some after shots as I wait for delivery.

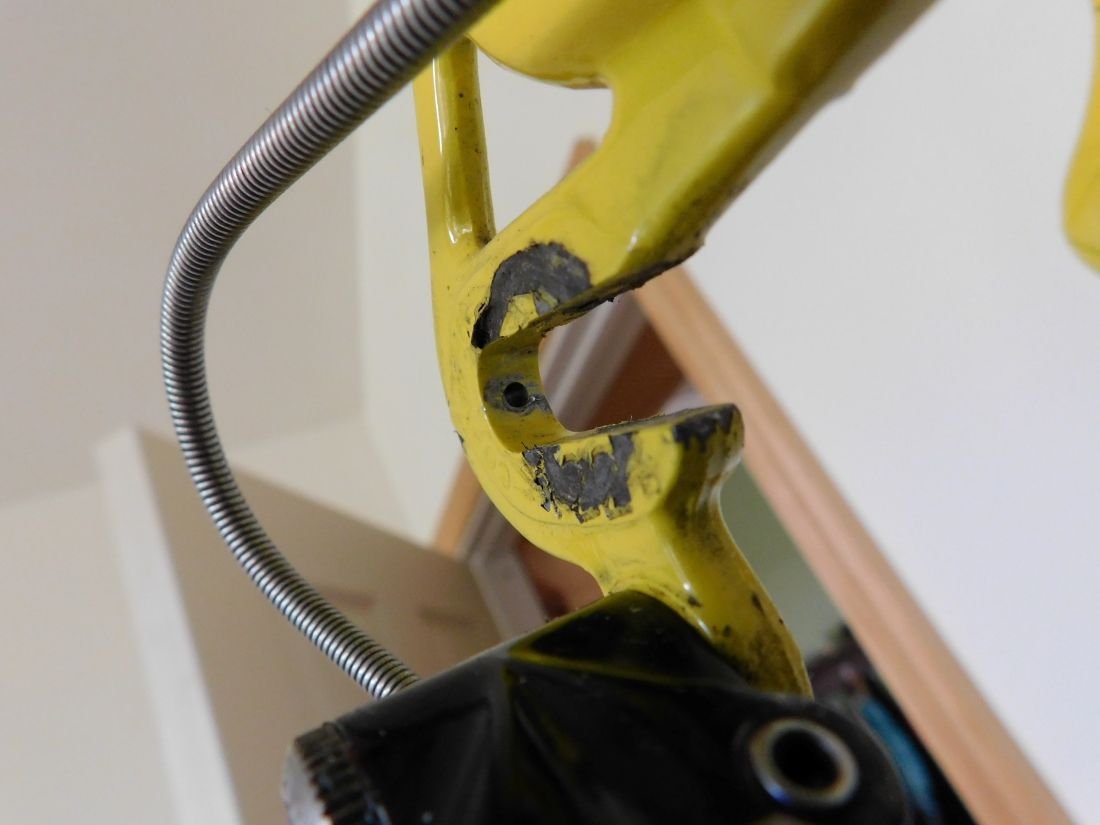
I realized that my tap is 3x0.6, so I went and ordered the correct tap. Always double check! Here are some after shots as I wait for delivery.
Likes For BFisher:
05-20-21, 05:38 PM
#5
Senior Member
Thread Starter
Join Date: Aug 2013
Posts: 2,321
Mentioned: 35 Post(s)
Tagged: 0 Thread(s)
Quoted: 767 Post(s)
Liked 1,898 Times
in
889 Posts
@BFisher Nice job! Is the next step to chase the threads or do you have a different plan to clean it and prep it for a new adjuster?
05-20-21, 06:07 PM
#6
Senior Member
Join Date: May 2019
Location: Bloomington, IN
Posts: 2,947
Bikes: Paramount, Faggin, Ochsner, Ciocc, Basso
Mentioned: 116 Post(s)
Tagged: 0 Thread(s)
Quoted: 1303 Post(s)
Liked 1,910 Times
in
1,140 Posts
The #40 is the right size and don't ask me why I know this. It sure looks like you did this the exact way I do it here in the shop. But I don't use the door to hold the frame. Har! smiles, MH
Likes For Mad Honk:
05-20-21, 11:09 PM
#7
Bike Butcher of Portland

Join Date: Jul 2014
Location: Portland, OR
Posts: 11,634
Bikes: It's complicated.
Mentioned: 1299 Post(s)
Tagged: 0 Thread(s)
Quoted: 4678 Post(s)
Liked 5,795 Times
in
2,281 Posts
I have a heavy vice bolted to a workbench, I can carefully clamp a dropout in it and rest the BB on the bench after I pivot it just right.
I've had success drilling out a broken adjuster screw pretty much as the OP describes it.
I've had success drilling out a broken adjuster screw pretty much as the OP describes it.
__________________
If someone tells you that you have enough bicycles and you don't need any more, stop talking to them. You don't need that kind of negativity in your life.
If someone tells you that you have enough bicycles and you don't need any more, stop talking to them. You don't need that kind of negativity in your life.
Likes For gugie:
05-21-21, 12:16 AM
#8
too many bikes
Join Date: Aug 2013
Location: Berkeley, CA
Posts: 64
Mentioned: 1 Post(s)
Tagged: 0 Thread(s)
Quoted: 34 Post(s)
Likes: 0
Liked 32 Times
in
16 Posts
amazing
Great job. Many years ago I tried to drill out a broken adjuster screw in a campy dropout, and the hole I drilled ended up quite a bit off center on the outlet side. Obviously, I couldn't figure out how to keep the bit parallel to the dropout face using a hand drill. I also did not use a high quality drill bit. I ended up not tapping the hole for a new adjuster screw and just used one of those clunky inserts. Afterwards I still rode the bike but I always worried about the dropout integrity. Even after reading about your success, I don't think I will attempt it again.
05-21-21, 04:08 AM
#9
Senior Member
Join Date: Feb 2020
Posts: 2,817
Mentioned: 49 Post(s)
Tagged: 0 Thread(s)
Quoted: 1106 Post(s)
Likes: 0
Liked 1,326 Times
in
782 Posts
Great job. Many years ago I tried to drill out a broken adjuster screw in a campy dropout, and the hole I drilled ended up quite a bit off center on the outlet side. Obviously, I couldn't figure out how to keep the bit parallel to the dropout face using a hand drill. I also did not use a high quality drill bit.
Most drill bits you'll find outside of specialists are ground for steel, so that's ok; are you can test for symmetry by looking at the end, with a lens if necessary. If it's not symmetrical it will cut more on one face than the other, and if there are any differences in pressure or missalignments the bit will go off line. For small drills you can also put it in a chuck held in your hand - or even take it between your thumb and forefinger - and drill into some softish plastic; you watch the chips to see if they are equal, and feel how the bit is cutting.
If you have a choice, for your pilot hole pick the one with the best point.
If you know how to grind bits (not that difficult, takes a bit of practice) you can cut one down to almost no flutes and put a point on it and it use it to start the first part of your hole, it's a bit better than holding it by the corners of the flutes as in the picture; stiffer, and you're less likely to add to the bit's woes with over-zealous tightening of the chuck jaws.
A trick for centre-punches, especially if you have to point one by hand: make a triangular point. Make all the faces look the same and you know the point is on the axis.
A drill bit with two lobes won't wobble in a three-pointed punch-mark, and I find it easier to see if the point is on the scratch-mark.
The quality of the hole is determined in great part by fixturing. I am impressed by your willingness to attempt and subsequent success at this tricky job holding the work and the drill-motor as you did. You could have made a simple drill-guide from a thickish bit of extruded L-section aluminium and some way to clamp it to the dropout.
Thickish enough to guide the bit in alignment not just location. Extruded because the inner corner will(should/must) be sharp enough to allow it to be clamped correctly to the dropout face. Angle-iron would also do, you just might need to dress the corner to fit.
You drill a hole in the other leg of the L one-half the dropout width away from the mating face (an easy way is clamp it to the other dropout and using that adjuster hole as a guide drill from the axle end).
Last edited by oneclick; 05-21-21 at 06:29 AM.
05-21-21, 05:37 AM
#10
South Carolina Ed
Join Date: Mar 2007
Location: Greer, SC
Posts: 3,889
Bikes: Holdsworth custom, Macario Pro, Ciocc San Cristobal, Viner Nemo, Cyfac Le Mythique, Giant TCR, Tommasso Mondial, Cyfac Etoile
Mentioned: 5 Post(s)
Tagged: 0 Thread(s)
Quoted: 344 Post(s)
Liked 291 Times
in
138 Posts
Very impressive
05-21-21, 06:41 AM
#11
Senior Member
Thread Starter
Join Date: Aug 2013
Posts: 2,321
Mentioned: 35 Post(s)
Tagged: 0 Thread(s)
Quoted: 767 Post(s)
Liked 1,898 Times
in
889 Posts
I appreciate the compliments, as well as other's experiences with handling these stuck screws. Gugie's vise method is perhaps more secure, and I do have one on my workbench here, but had doubts about being able to clamp it and support the rest of the frame at the same time. And I totally understand the hesitation to tackle these, as that's exactly what I have been doing. But for such a nice bike, and one that I really want to get some touch-up work done on, well, how could I do that without getting the screw out?
05-21-21, 07:14 AM
#12
Senior Member

Very nicely done, and thanks especially for the step-by-step.
Also many thanks for finally giving me words to express what I now realize has always been my motto. I think I'll rephrase it a little for my next shop coffee mug:
"Welp, I'll either fix it, or make it worse."
For me, I'll have to add:
"Oh, crap! What made me think I could do that?"
Also many thanks for finally giving me words to express what I now realize has always been my motto. I think I'll rephrase it a little for my next shop coffee mug:
"Welp, I'll either fix it, or make it worse."
For me, I'll have to add:
"Oh, crap! What made me think I could do that?"
__________________
Fuggedaboutit!
Fuggedaboutit!
05-21-21, 10:22 AM
#13
Bike Butcher of Portland
Join Date: Jul 2014
Location: Portland, OR
Posts: 11,634
Bikes: It's complicated.
Mentioned: 1299 Post(s)
Tagged: 0 Thread(s)
Quoted: 4678 Post(s)
Liked 5,795 Times
in
2,281 Posts
One of my favorite phrases.
__________________
If someone tells you that you have enough bicycles and you don't need any more, stop talking to them. You don't need that kind of negativity in your life.
If someone tells you that you have enough bicycles and you don't need any more, stop talking to them. You don't need that kind of negativity in your life.
Likes For gugie:
05-21-21, 12:32 PM
#14
South Carolina Ed
Join Date: Mar 2007
Location: Greer, SC
Posts: 3,889
Bikes: Holdsworth custom, Macario Pro, Ciocc San Cristobal, Viner Nemo, Cyfac Le Mythique, Giant TCR, Tommasso Mondial, Cyfac Etoile
Mentioned: 5 Post(s)
Tagged: 0 Thread(s)
Quoted: 344 Post(s)
Liked 291 Times
in
138 Posts
Safety Fast!
05-21-21, 02:58 PM
#15
Senior Member

Join Date: Sep 2011
Location: Baltimore MD
Posts: 3,332
Bikes: '72 Motobecane Grand Record, '72 Gitane tandem, '72 Raleigh Super Course, '73 Raleigh Gran Sport, '73 Colnago Super, '76 Fiorelli Coppi, '78 Raleigh SBDU Team Pro, '78 Trek 930, '81 Holdsworth Special 650B, '86 Masi GC, ’94 Bridgestone RB-T
Mentioned: 67 Post(s)
Tagged: 0 Thread(s)
Quoted: 786 Post(s)
Liked 518 Times
in
281 Posts
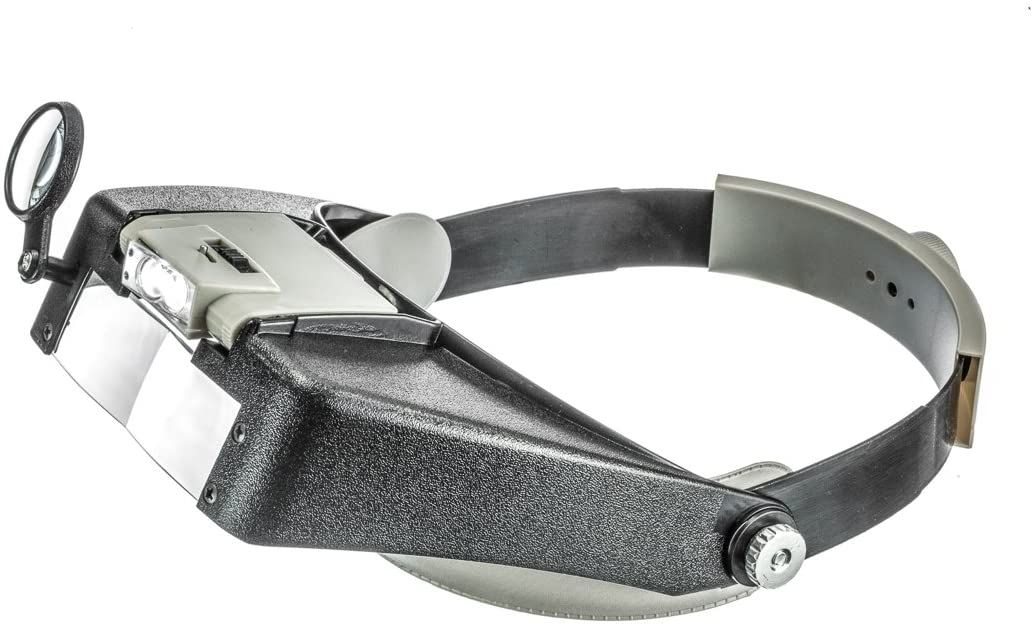
Well done. The one time I did that so far was also on the drive side of a Colnago. I found that wearing these helped a lot:
__________________
The man who dies with the most toys�is dead. - Rootboy
The man who dies with the most toys�is dead. - Rootboy
05-22-21, 04:49 PM
#16
Senior Member
Thread Starter
Join Date: Aug 2013
Posts: 2,321
Mentioned: 35 Post(s)
Tagged: 0 Thread(s)
Quoted: 767 Post(s)
Liked 1,898 Times
in
889 Posts
Just following up as I completed this repair project. The tap came today and I put it right to use.
Once I ran it into what remained of the old screw, it pushed it right out.


I was a little concerned that maybe I had taken too big of a bite out of one side of the hole, as obviously the drill through wasn't perfectly centered. But after cleaning up I greased the new adjuster screw and installed it. It went in cleanly with good engagement. Now both dropouts sport fresh adjusters.

Once I ran it into what remained of the old screw, it pushed it right out.
I was a little concerned that maybe I had taken too big of a bite out of one side of the hole, as obviously the drill through wasn't perfectly centered. But after cleaning up I greased the new adjuster screw and installed it. It went in cleanly with good engagement. Now both dropouts sport fresh adjusters.
Likes For BFisher:
05-22-21, 05:02 PM
#17
Senior Member
Join Date: Aug 2020
Location: Saratoga, CA
Posts: 825
Bikes: 1981 Bianchi Specialissim, 1976 Colnago Super. 1971 Bob Jackson. 2012 Kestrel 4000. 2012 Willier. 2016 Fuji Cross 1.1
Mentioned: 25 Post(s)
Tagged: 0 Thread(s)
Quoted: 276 Post(s)
Liked 952 Times
in
389 Posts
@BFisher Great job! Thanks for the step by step. I was afraid I was going to need to do something like this on my Colnago, but, luckily I was able to eventually get it out with penetrant and a lot of patience.
Likes For SwimmerMike:
