


Grandpa's 1980's Vitus 788 steel road bike
 06-17-20, 10:47 AM
#26
Member
Thread Starter


Lovely work here.
Can you provide a little more info on your specific method for restoring the chrome fork? Everyone seems to do it slightly differently. You mentioned sanding? Wet? Then what did you use for polishing compound and method? Likewise, I'd be curious to know the compound and method you used on the other parts (stem, brakes, cranks)?
Can you provide a little more info on your specific method for restoring the chrome fork? Everyone seems to do it slightly differently. You mentioned sanding? Wet? Then what did you use for polishing compound and method? Likewise, I'd be curious to know the compound and method you used on the other parts (stem, brakes, cranks)?
It depends on the parts and sort of metal you'll want to polish. A lot of aluminum parts can't be mirror finished unless you remove the anodization first. This doesn't necessarily need to be a colour layer but can also be clear ano. The cranks, stem, bars, brake levers (these were a PAIN to sand) and brakes were all clear anodized so had to remove this layer first in order to get to bare alu. I sanded all those parts (400-600-800-1200-2500-3200) and then used 2 different polishing compounds, the last being the Meguiar's All Metal Polish with a soft polishing disc. Another option is to use oven cleaner with some sodium solution in it. I tried this on the brake levers and actually had more work afterwards with sanding the chemical reaction it had on the alu...

It's actually pretty sad because my grandpa had a bleeding in his head for the third time last week and is still in ICU atm. Paralyzed on the left side and not awake since then so he might actually never see the bike finished...
 06-17-20, 10:59 AM
#27
Member
Thread Starter
So... On Monday I received some missing parts that were needed to start assembling the bike.
Vittoria Corsa Control tubs in 25mm, Zefal Christophe straps etc.

But then I decided to stick a frame protection on the downtube by using clear sticky tape... BAD IDEA!
Tore a strip of paint, for sure it also didn't stick too well to the epoxy primer so I must've done something wrong I guess...
I was very bummed tbh, I already spent ages on sanding and painting the frame and was so happy to finally receive the missing parts to start the assembly 🙄
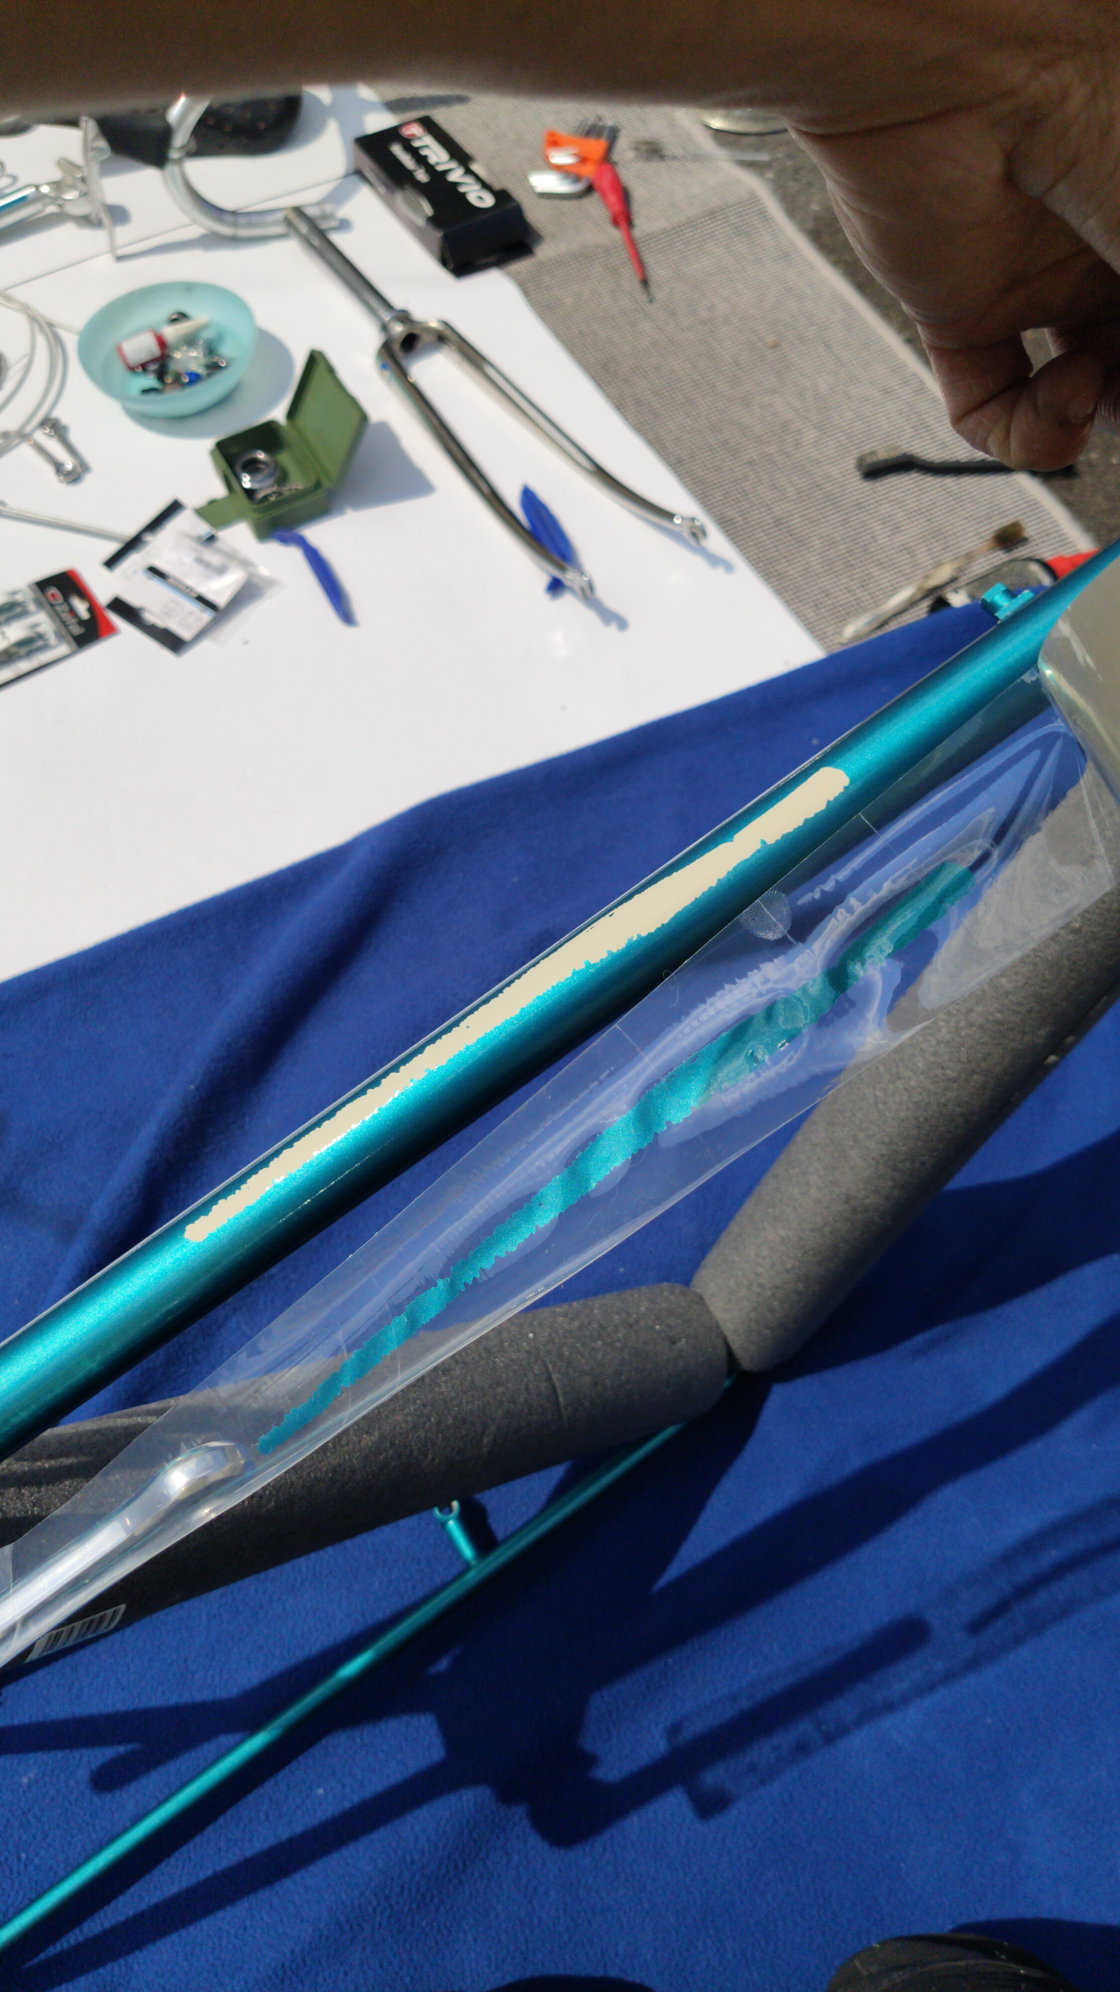
I've already sanded the downtube again and colour + clear is ordered.
Wish me luck on fixing this....
Vittoria Corsa Control tubs in 25mm, Zefal Christophe straps etc.
But then I decided to stick a frame protection on the downtube by using clear sticky tape... BAD IDEA!
Tore a strip of paint, for sure it also didn't stick too well to the epoxy primer so I must've done something wrong I guess...
I was very bummed tbh, I already spent ages on sanding and painting the frame and was so happy to finally receive the missing parts to start the assembly 🙄
I've already sanded the downtube again and colour + clear is ordered.
Wish me luck on fixing this....
06-17-20, 01:29 PM
#28

Shifting is fun!

Join Date: Aug 2009
Location: South Holland, NL
Posts: 11,004
Bikes: Yes, please.
Mentioned: 280 Post(s)
Tagged: 0 Thread(s)
Quoted: 2198 Post(s)
Liked 4,600 Times
in
1,764 Posts
I made the same mistake, whatever the mistake was. I blamed the paint at the time. ")
In my case the spot was small enough to cover it with a piece of bar tape and a St Christophe medal, but I found that St Christophe kept reminding me daily of my error, just by his presence. I will be repainting this frame.
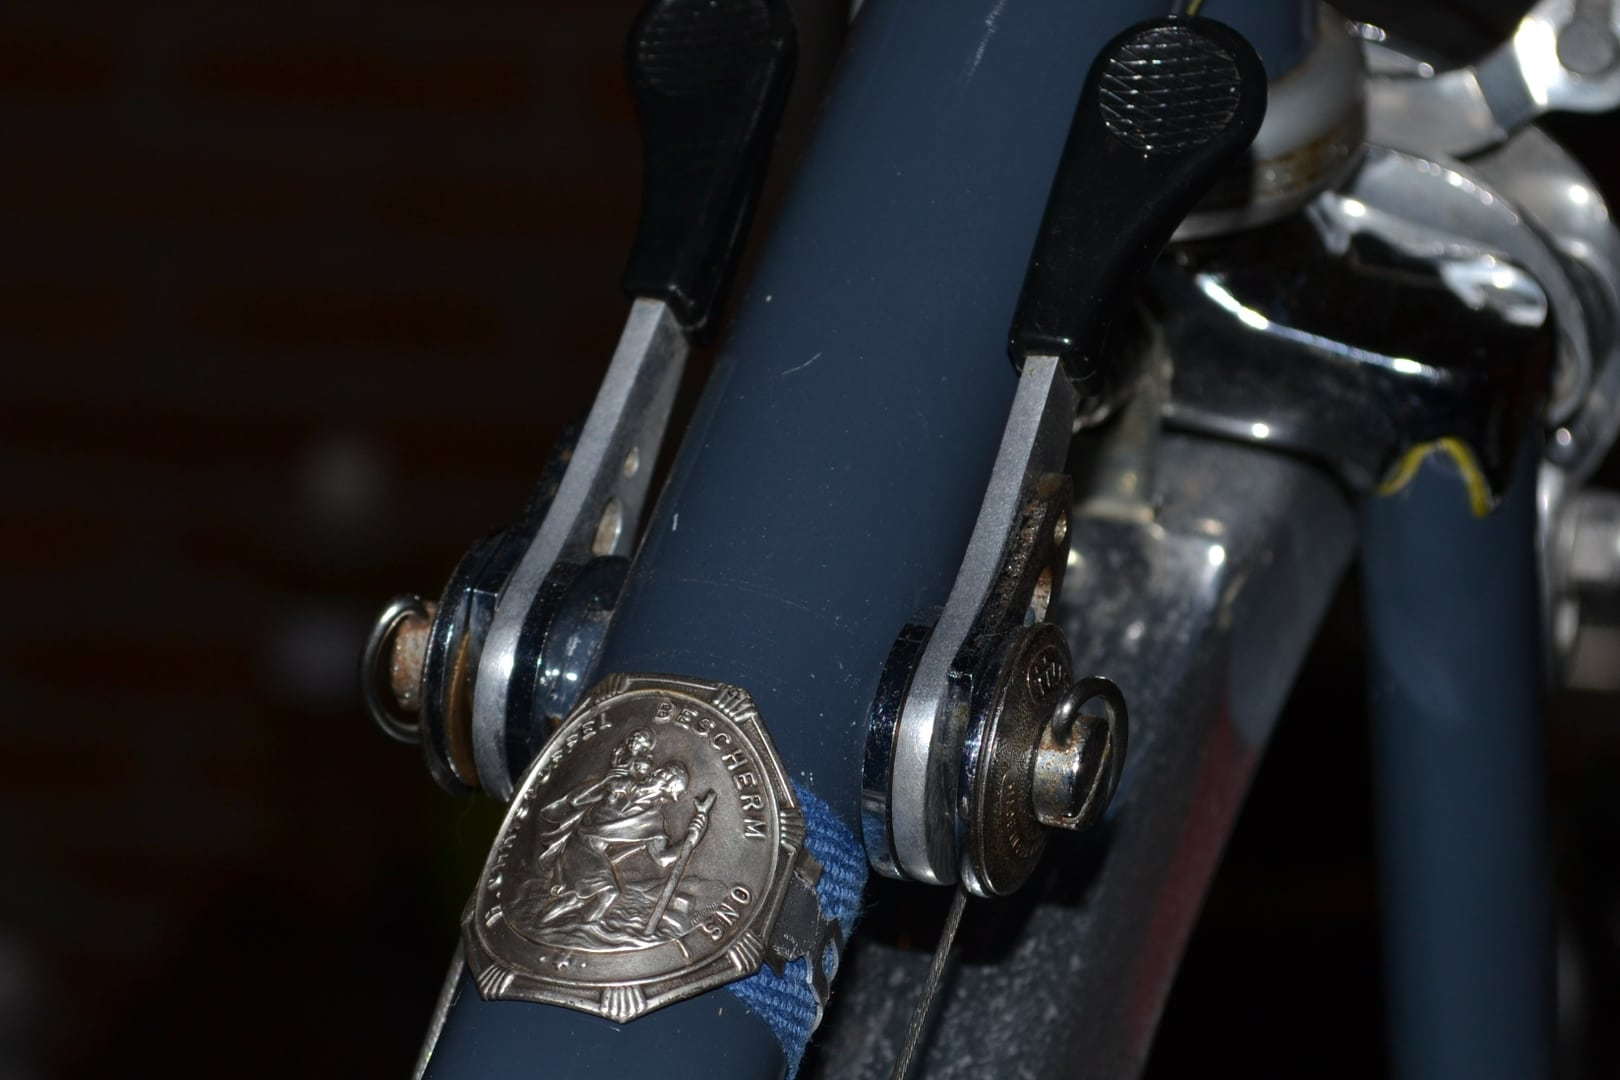
In my case the spot was small enough to cover it with a piece of bar tape and a St Christophe medal, but I found that St Christophe kept reminding me daily of my error, just by his presence.
I will be repainting this frame.
06-17-20, 02:12 PM
#30
Senior Member
Join Date: Oct 2005
Location: Upper Left, USA
Posts: 1,915
Mentioned: 50 Post(s)
Tagged: 0 Thread(s)
Quoted: 634 Post(s)
Liked 444 Times
in
298 Posts
So... On Monday I received some missing parts that were needed to start assembling the bike.
Vittoria Corsa Control tubs in 25mm, Zefal Christophe straps etc.
But then I decided to stick a frame protection on the downtube by using clear sticky tape... BAD IDEA!
Tore a strip of paint, for sure it also didn't stick too well to the epoxy primer so I must've done something wrong I guess...
I was very bummed tbh, I already spent ages on sanding and painting the frame and was so happy to finally receive the missing parts to start the assembly 🙄
I've already sanded the downtube again and colour + clear is ordered.
Wish me luck on fixing this....

Question about your paint job: how long did it cure before you tried applying the paint protection film?
06-17-20, 02:59 PM
#31
Member
Thread Starter
Oh noooo! I feel your pain. It sucks spending so much time on something to have it messed up by a mistake. If it makes you feel any better, your thread is one of the most impressive newbie threads I've seen.
Question about your paint job: how long did it cure before you tried applying the paint protection film?
Question about your paint job: how long did it cure before you tried applying the paint protection film?
The paint cured for more than 4 weeks, had to wait for the parts to arrive until now so you can imagine my joy to start assembling. I guess I used the wrong emery cloth (grey, fine) on the primer so surface was too smooth for the colour to stick?


I had to respray this part, since some masking tape also tore off some silver paint


The same for this part of the frame, masking tape tore off some colour, right in the middle of the headtube, had to mask everything and only spray the silver again

As it was finished before downtube massacre 🤕
Likes For MaxDB:
06-17-20, 04:46 PM
#33
Senior Member

Join Date: Jul 2017
Location: Queens, NY for now...
Posts: 1,515
Bikes: 82 Lotus Unique, 86 Lotus Legend, 88 Basso Loto, 88 Basso PR, 89 Basso PR, 96 Bianchi CDI, 2013 Deda Aegis, 2019 Basso Diamante SV
Mentioned: 46 Post(s)
Tagged: 0 Thread(s)
Quoted: 943 Post(s)
Liked 172 Times
in
113 Posts
Thanks for all the info on the polishing.
Sorry to hear about the paint issue and even more sorry to hear about your grandfather in the ICU (I couldn't "like" your post with that part in it). I hope he gets better soon.
Sorry to hear about the paint issue and even more sorry to hear about your grandfather in the ICU (I couldn't "like" your post with that part in it). I hope he gets better soon.
06-17-20, 05:02 PM
#34
Member
Thread Starter
I understand the confusion, cheers
One more top tip: make absolutely sure you have sanded off every last tiny spot of anodisation. I had to start some parts all over again (stem even twice all over). Sometimes it's hard to see, until you've started the final polishing 🙄
And thanks, today was a better day for him, said some words. He's right between his dialysis that has to happen twice a week so let's see... my dad told him to live to see the bike 😅
And thanks, today was a better day for him, said some words. He's right between his dialysis that has to happen twice a week so let's see... my dad told him to live to see the bike 😅
Likes For MaxDB:
 06-17-20, 10:01 PM
#36
Senior Member
Join Date: Oct 2014
Location: Portland, OR
Posts: 12,903
Bikes: (2) ti TiCycles, 2007 w/ triple and 2011 fixed, 1979 Peter Mooney, ~1983 Trek 420 now fixed and ~1973 Raleigh Carlton Competition gravel grinder
Mentioned: 129 Post(s)
Tagged: 0 Thread(s)
Quoted: 4803 Post(s)
Liked 3,925 Times
in
2,553 Posts
Beautiful bike and work!
Ben

Likes For 79pmooney:
06-18-20, 07:01 AM
#37
Member
Thread Starter
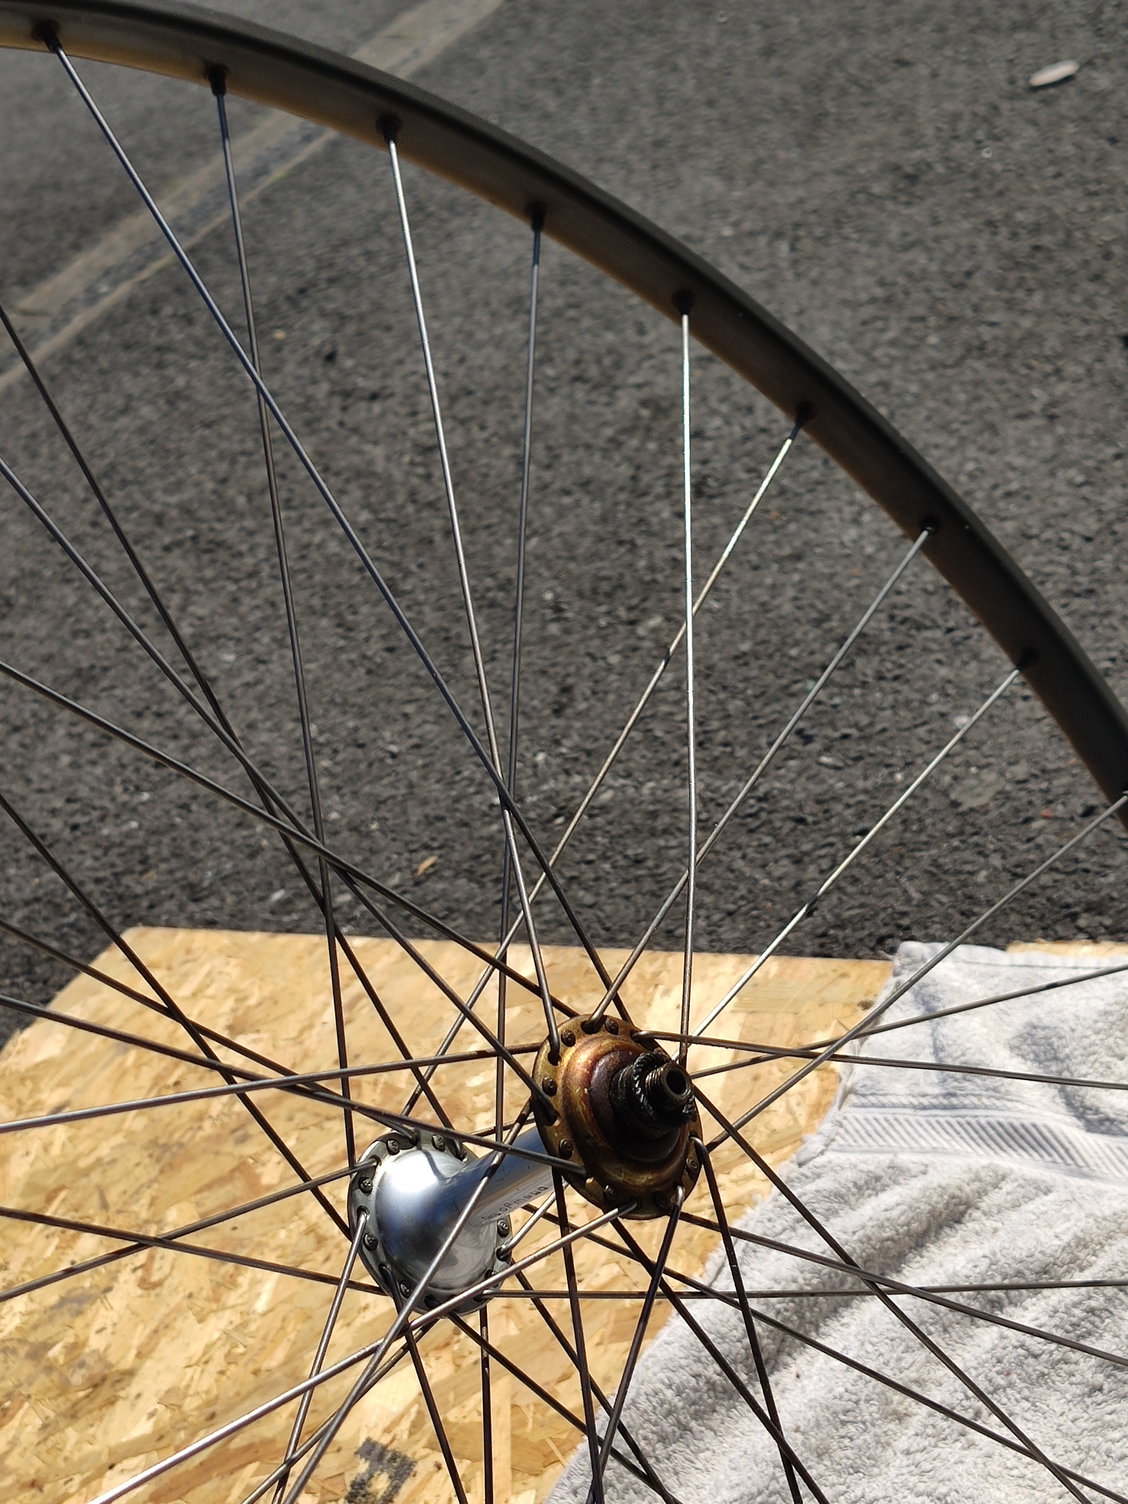
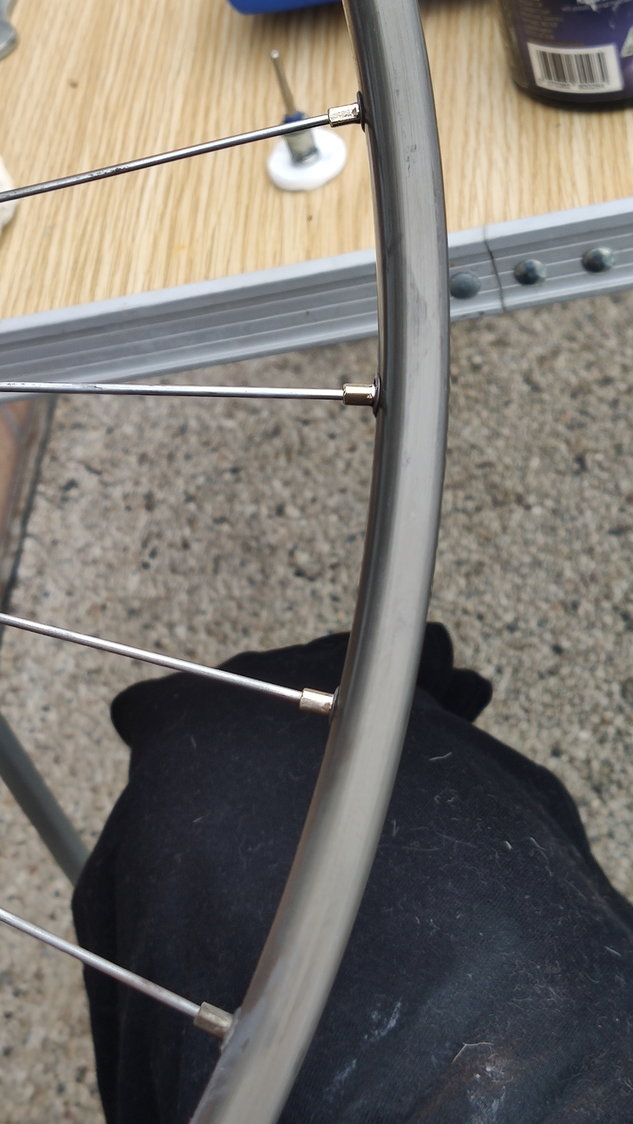
Wheels:
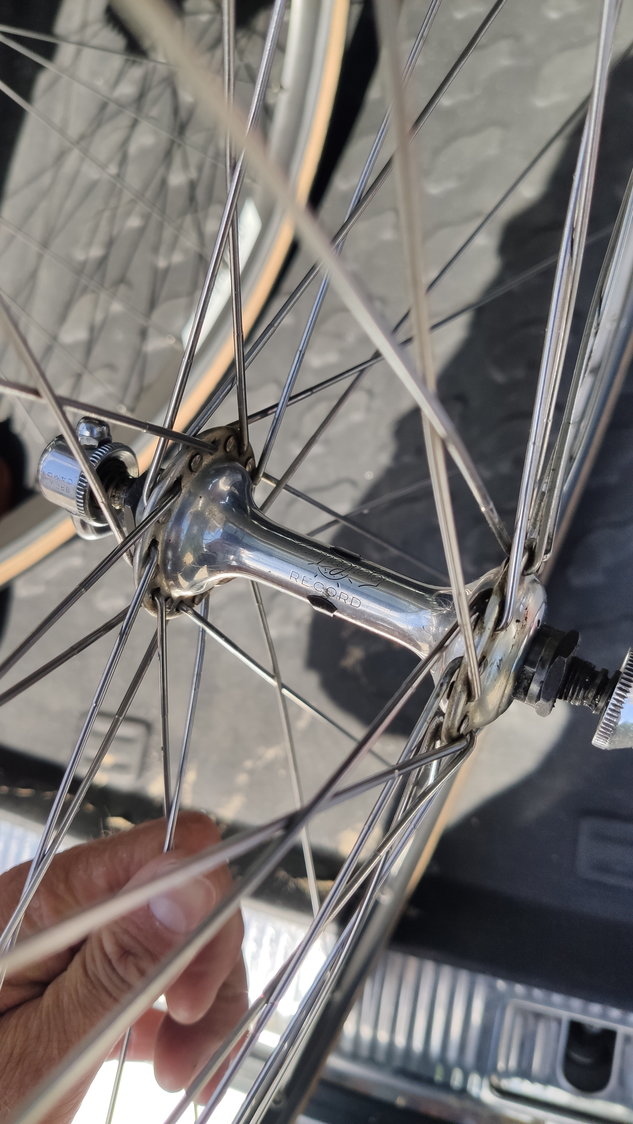
Since front (GP4 dark grey) and rear wheel (Mavic unknown silver) were different I started searching for a matching set.
I found a set of GP4's for $45 in need of some TLC.
Eyelets and nipples were corroded, bearings looked like they were never cleaned etc.
These gave me a couple days of work getting them in this condition again but the results was pretty satisfactory.
Likes For MaxDB:
06-18-20, 04:50 PM
#38
Senior Member

Join Date: Mar 2014
Location: City of Angels
Posts: 4,870
Bikes: A few too many
Mentioned: 42 Post(s)
Tagged: 1 Thread(s)
Quoted: 1364 Post(s)
Liked 2,180 Times
in
1,183 Posts
^^^ Very nice work....How did you get the eyelets so clean, did you tear the wheels completely down?
I have enjoyed following the progress, I wish that you could help me with my Bertoni!
Best, Ben
I have enjoyed following the progress, I wish that you could help me with my Bertoni!
Best, Ben
Last edited by xiaoman1; 06-18-20 at 11:16 PM.
06-20-20, 04:00 PM
#39
Member
Thread Starter
I didn't tear them apart, but it's def an option. I have one more rim to do from another set and I'll upload a step by step if interested.
Tomorrow I'll paint the bottomtube again and hopefully the damage is limited 😅
Where are you at with your Bertoni?
Br, Max
Likes For MaxDB:
06-20-20, 05:26 PM
#40
Senior Member
Join Date: Oct 2015
Location: PDX
Posts: 13,035
Bikes: Merz x 5 + Specialized Merz Allez x 2, Strawberry/Newlands/DiNucci/Ti x3, Gordon, Fuso/Moulton x2, Bornstein, Paisley,1958-74 Paramounts x3, 3rensho, 74 Moto TC, 73-78 Raleigh Pro's x5, Marinoni x2, 1960 Cinelli SC, 1980 Bianchi SC, PX-10 X 2
Mentioned: 267 Post(s)
Tagged: 0 Thread(s)
Quoted: 4510 Post(s)
Liked 6,377 Times
in
3,667 Posts
Wow!Great work on the eyelets and nipples especially with ano rims, usually very difficult to clean those without compromising.
06-22-20, 02:12 PM
#41
Member
Thread Starter
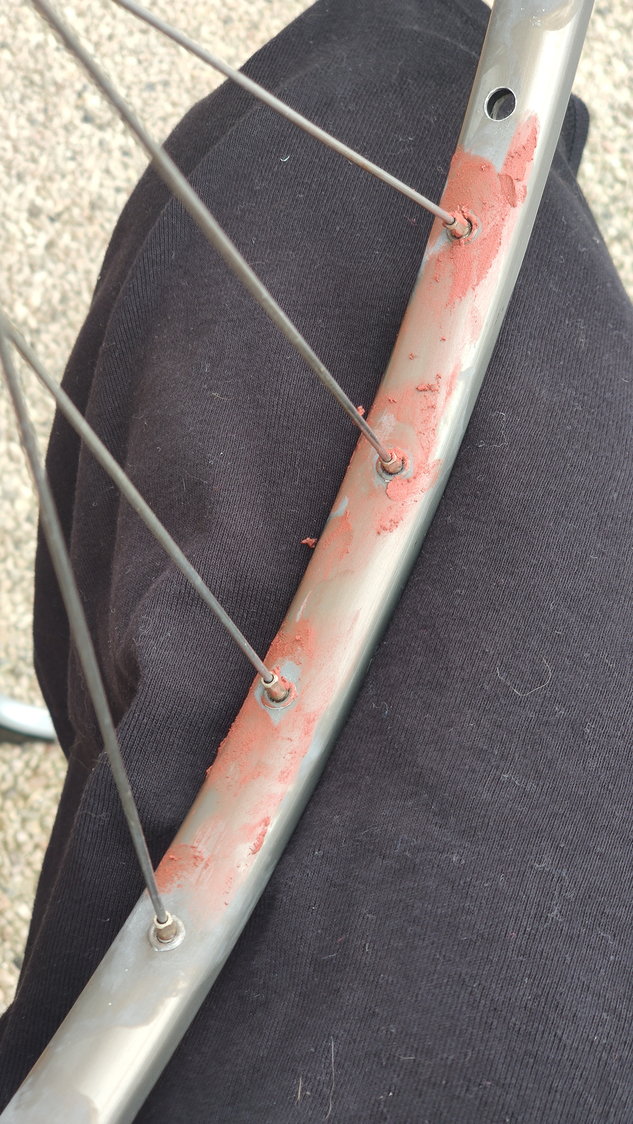
I made the mistake to apply the rust remover with a too thick of a brush, and leaving it on for too long before rinsing the rim. I applied Rustyco the first time, rinsed after half an hour, let the rim dry and then applied another coat, but left that last one on too long and it made black markings on the ano as you can see on the photos.
After this trial and error I used a fine brush to apply the Rustyco only on the eyelets and nipples of the 2 other rims (the set I am going to be using eventually) and rinsed a lot sooner after applying to
not get the black discoloration in the grey ano.
I made some photos of the tools and methods used, this is the first rim I tried.
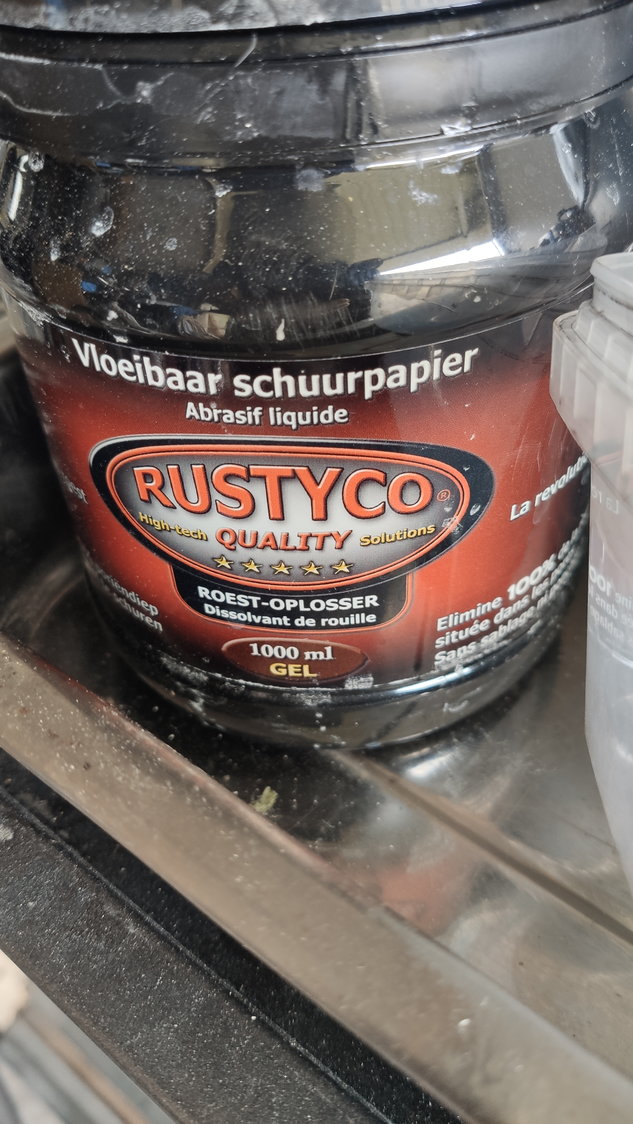
Rust dissolver (not the same as rust converter)


You can see where I applied the Rustyco and caused the discoloration
Dremel polishing compound

After dremel polishing wheel

Meguiars All Metal Polish
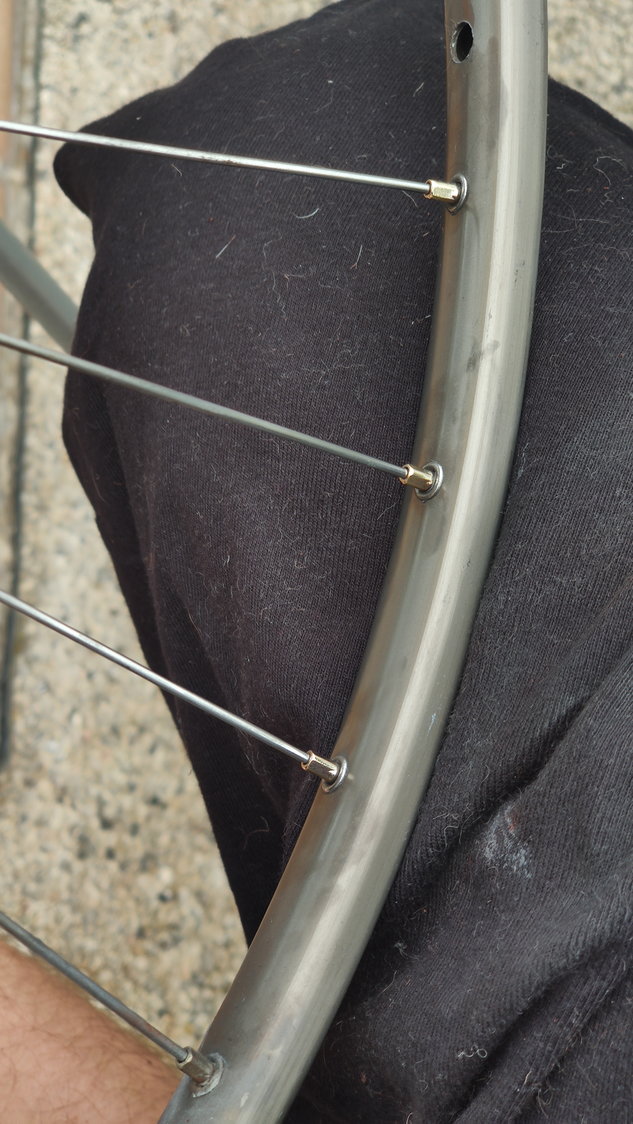
After polishing wheel on electric drill with the Meguiars

The black discoloration is still there, but could have been avoided
Have a lot of patience is also a good tip 😅
Cheers!
06-22-20, 02:23 PM
#42
Member
Thread Starter
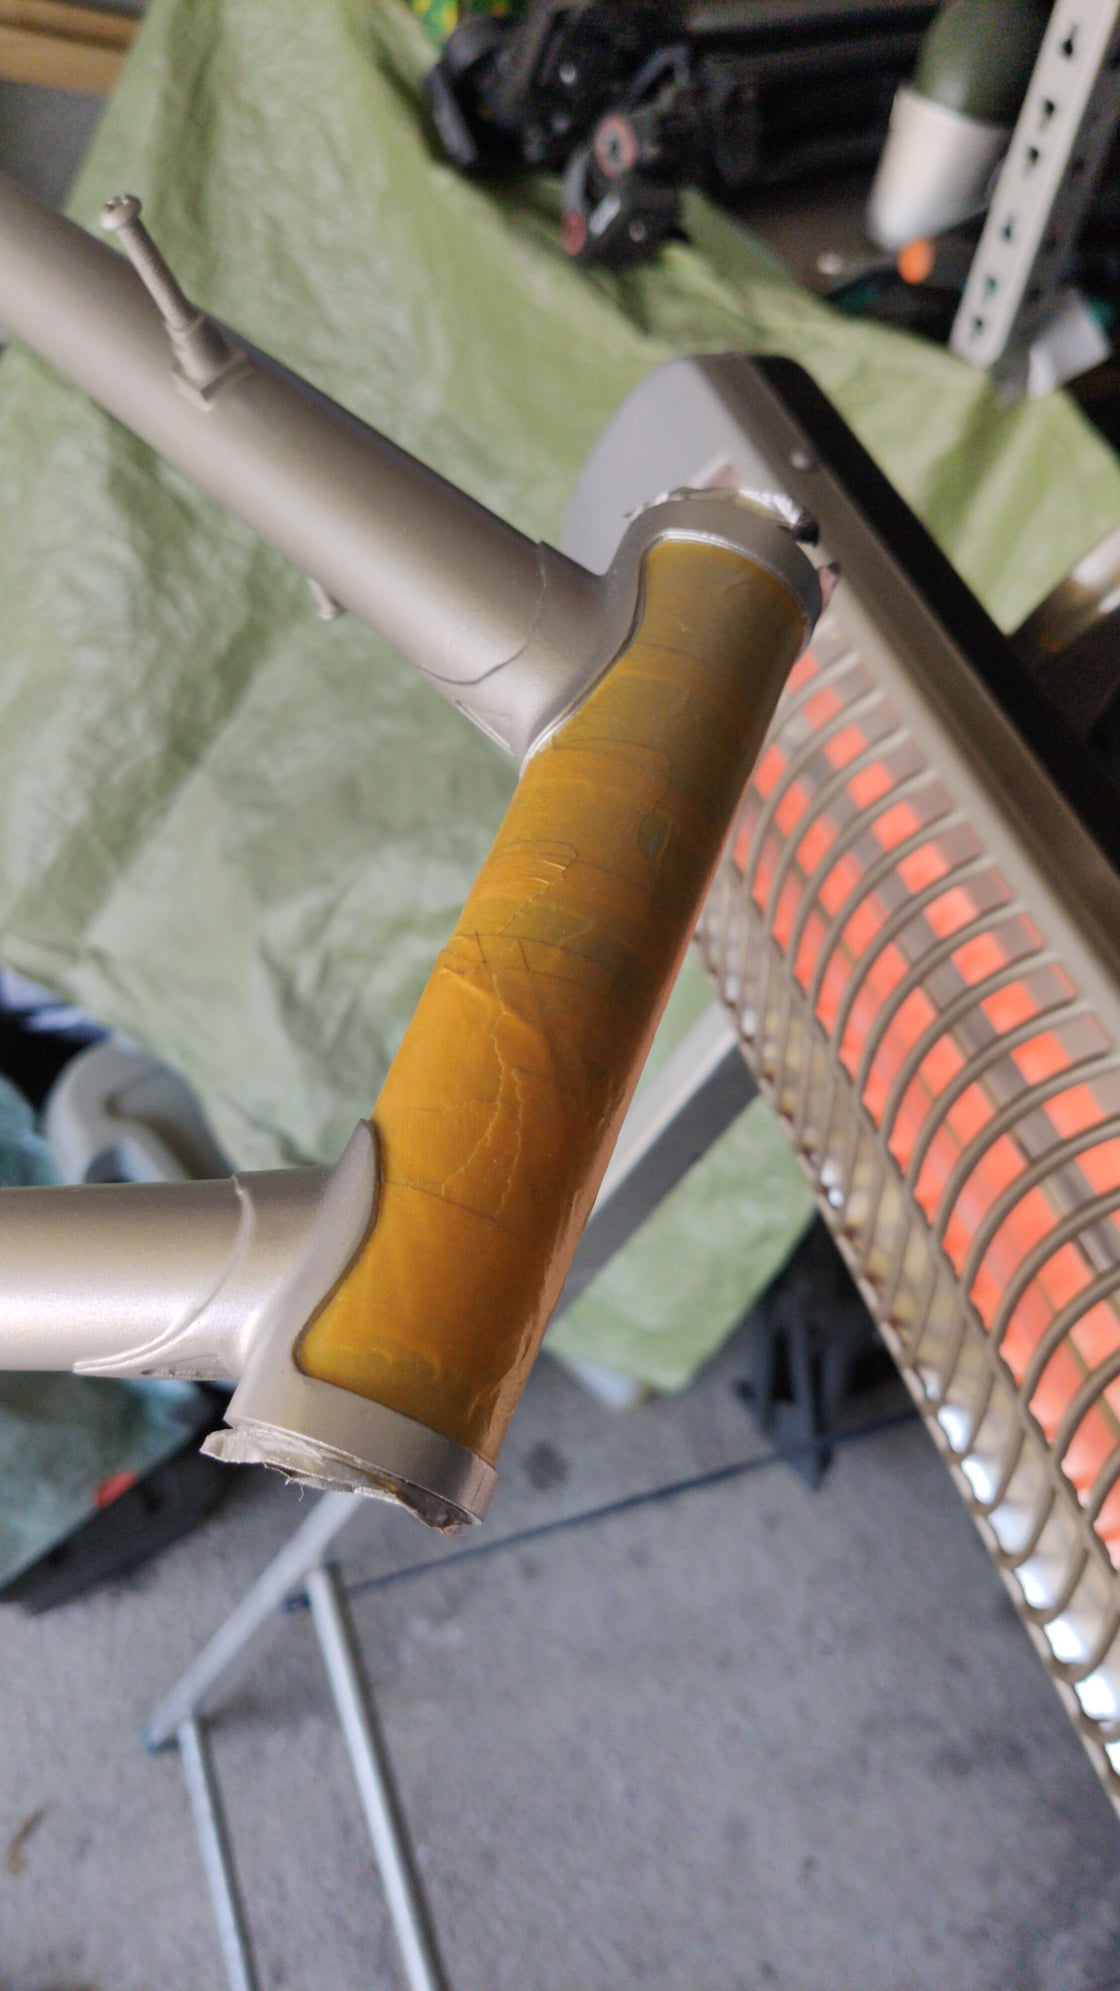
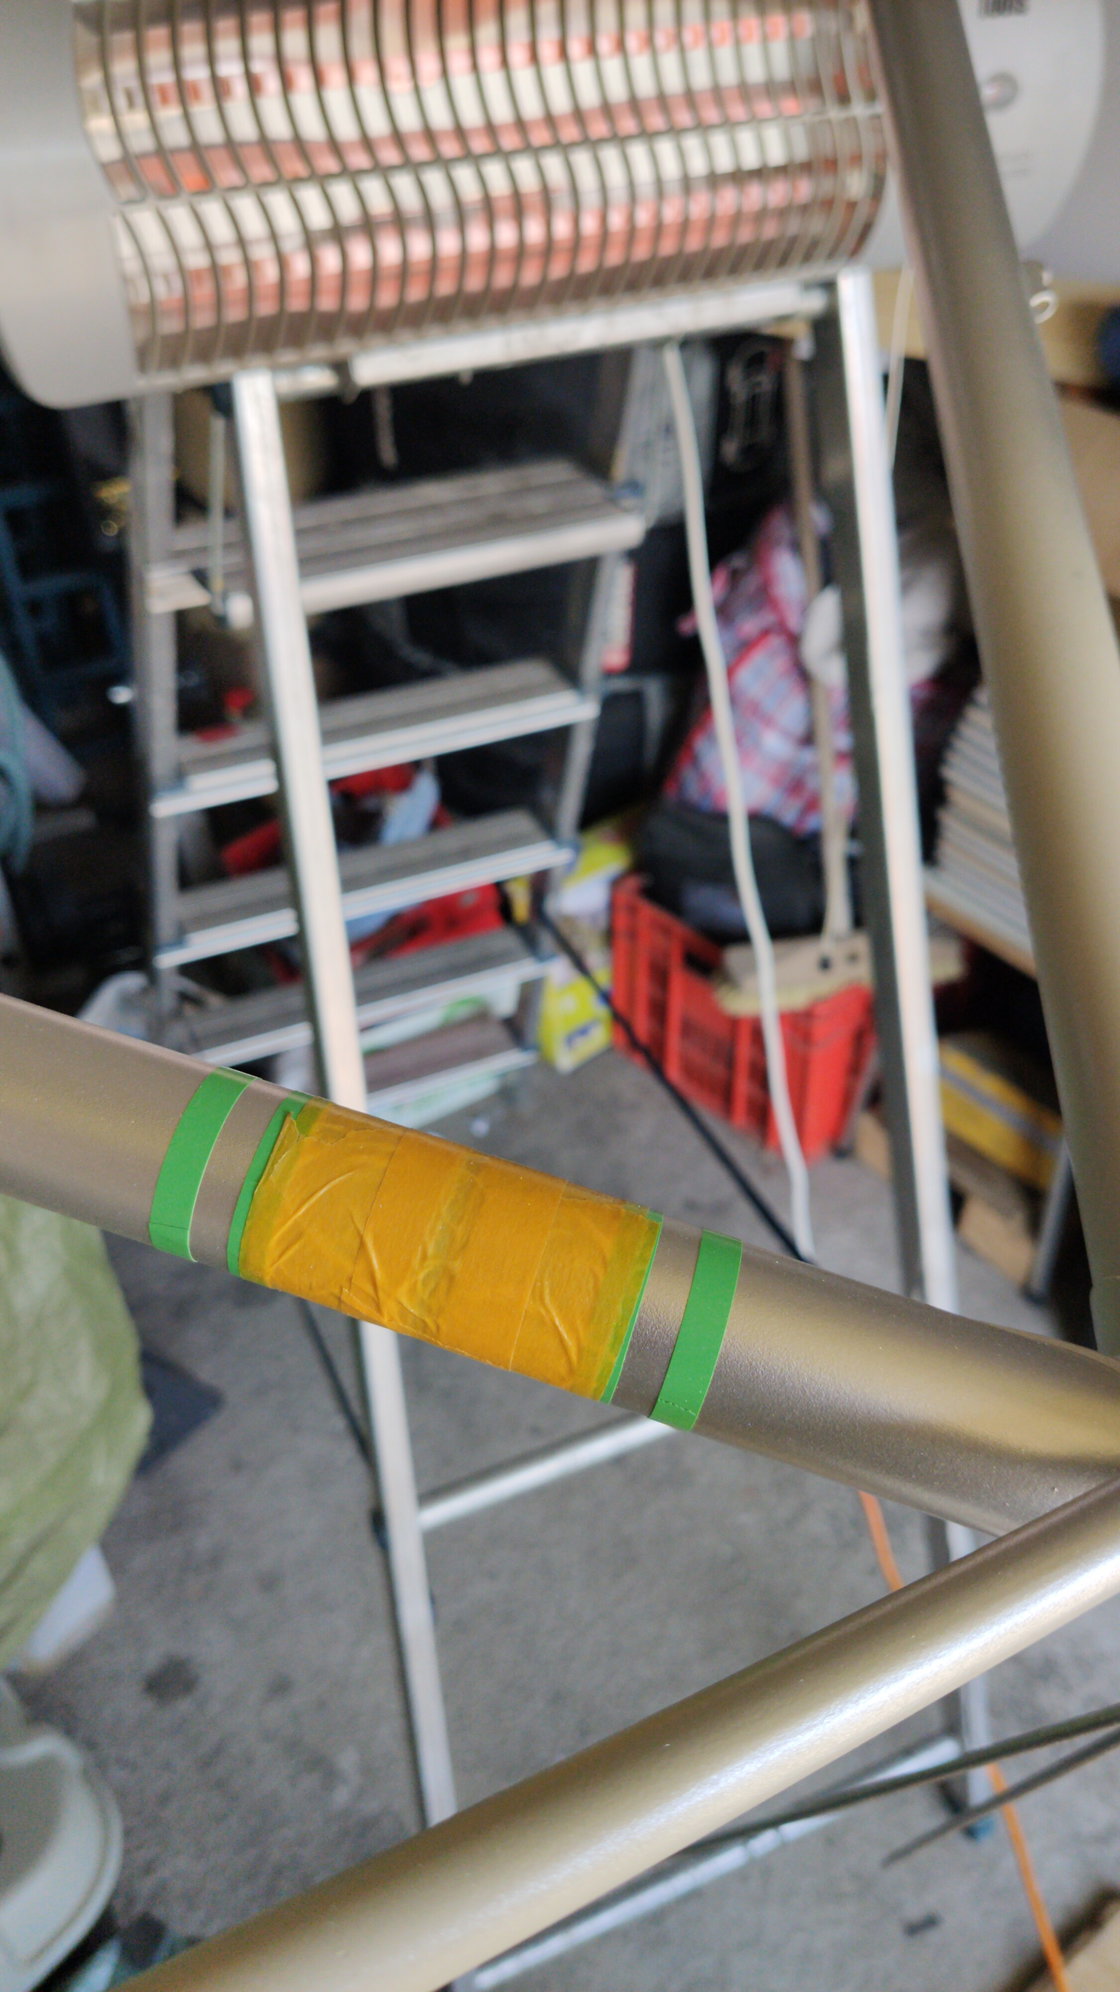
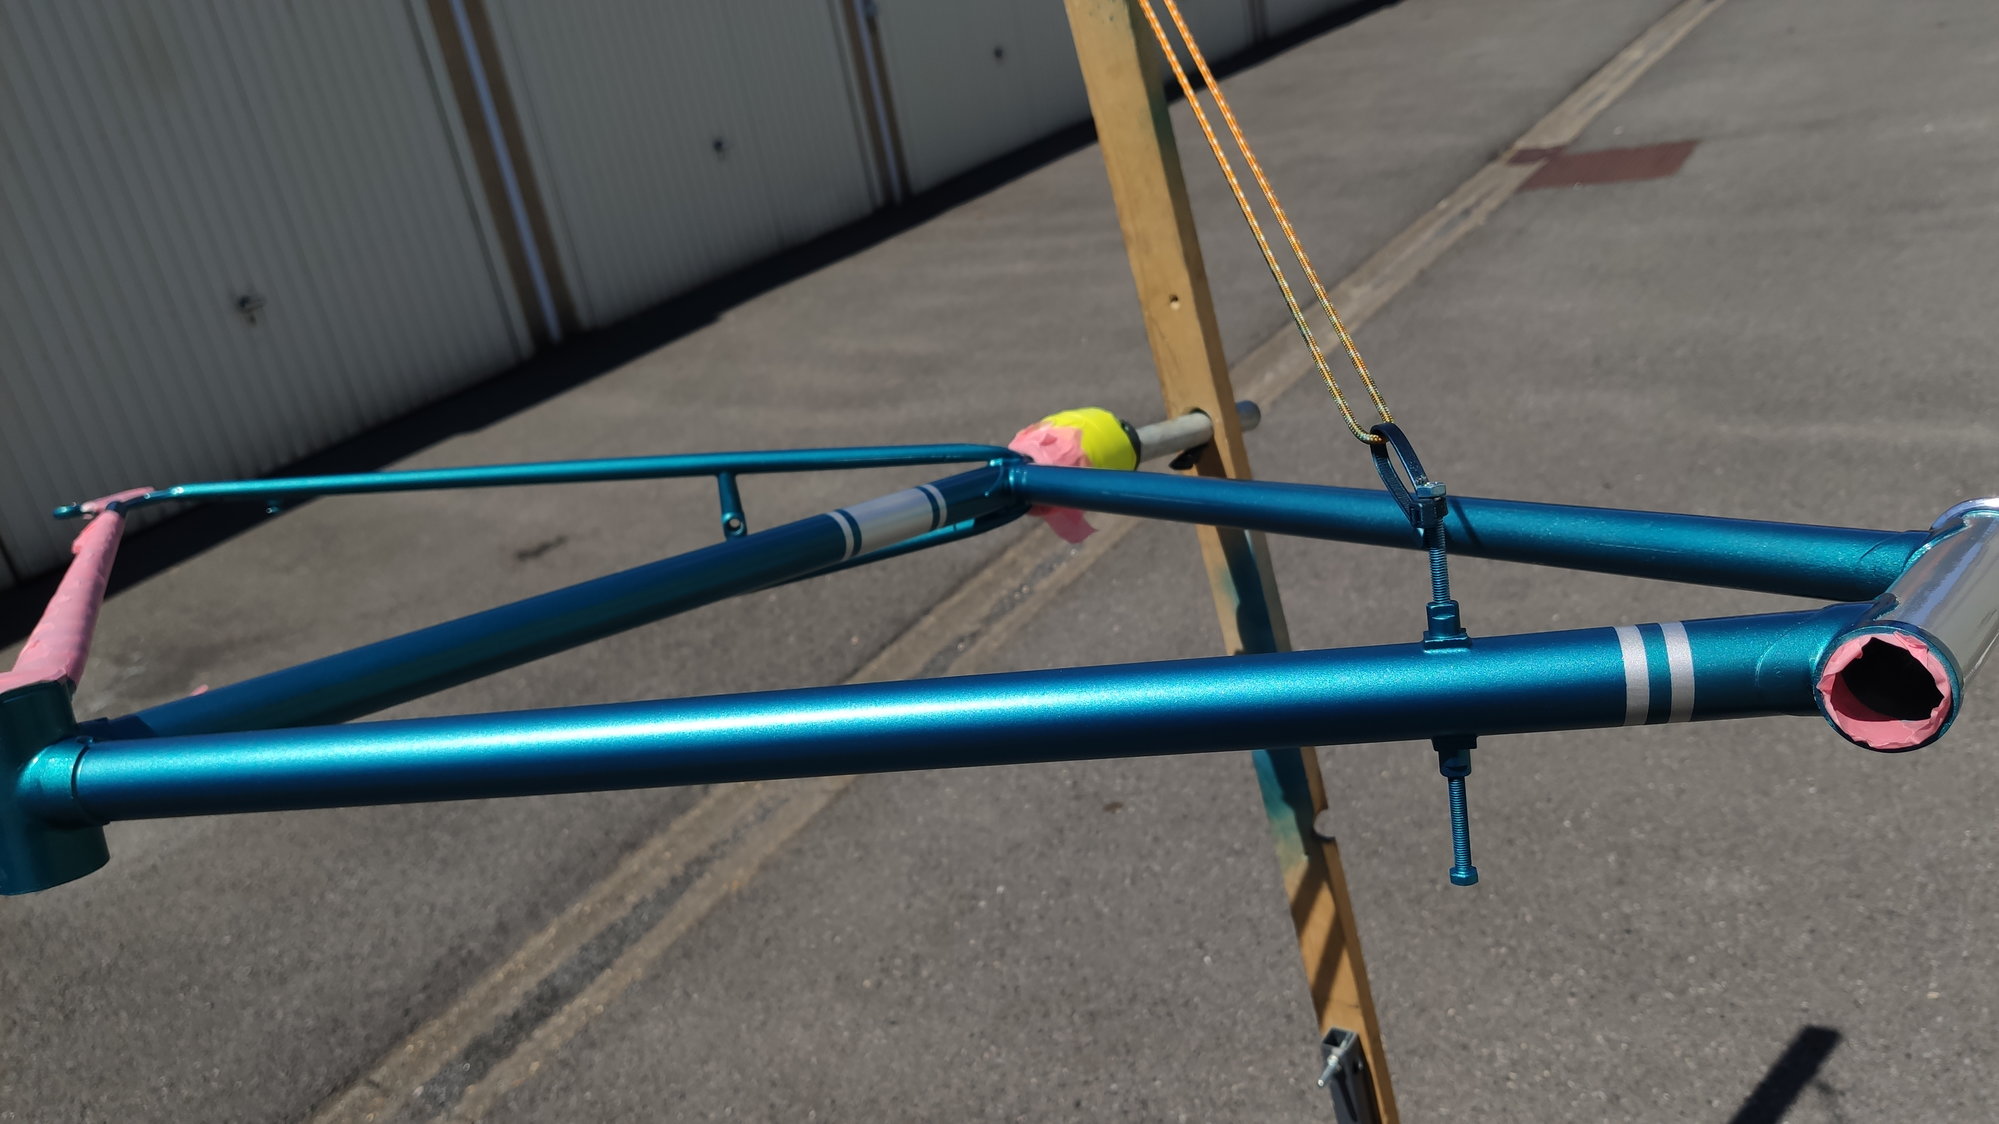
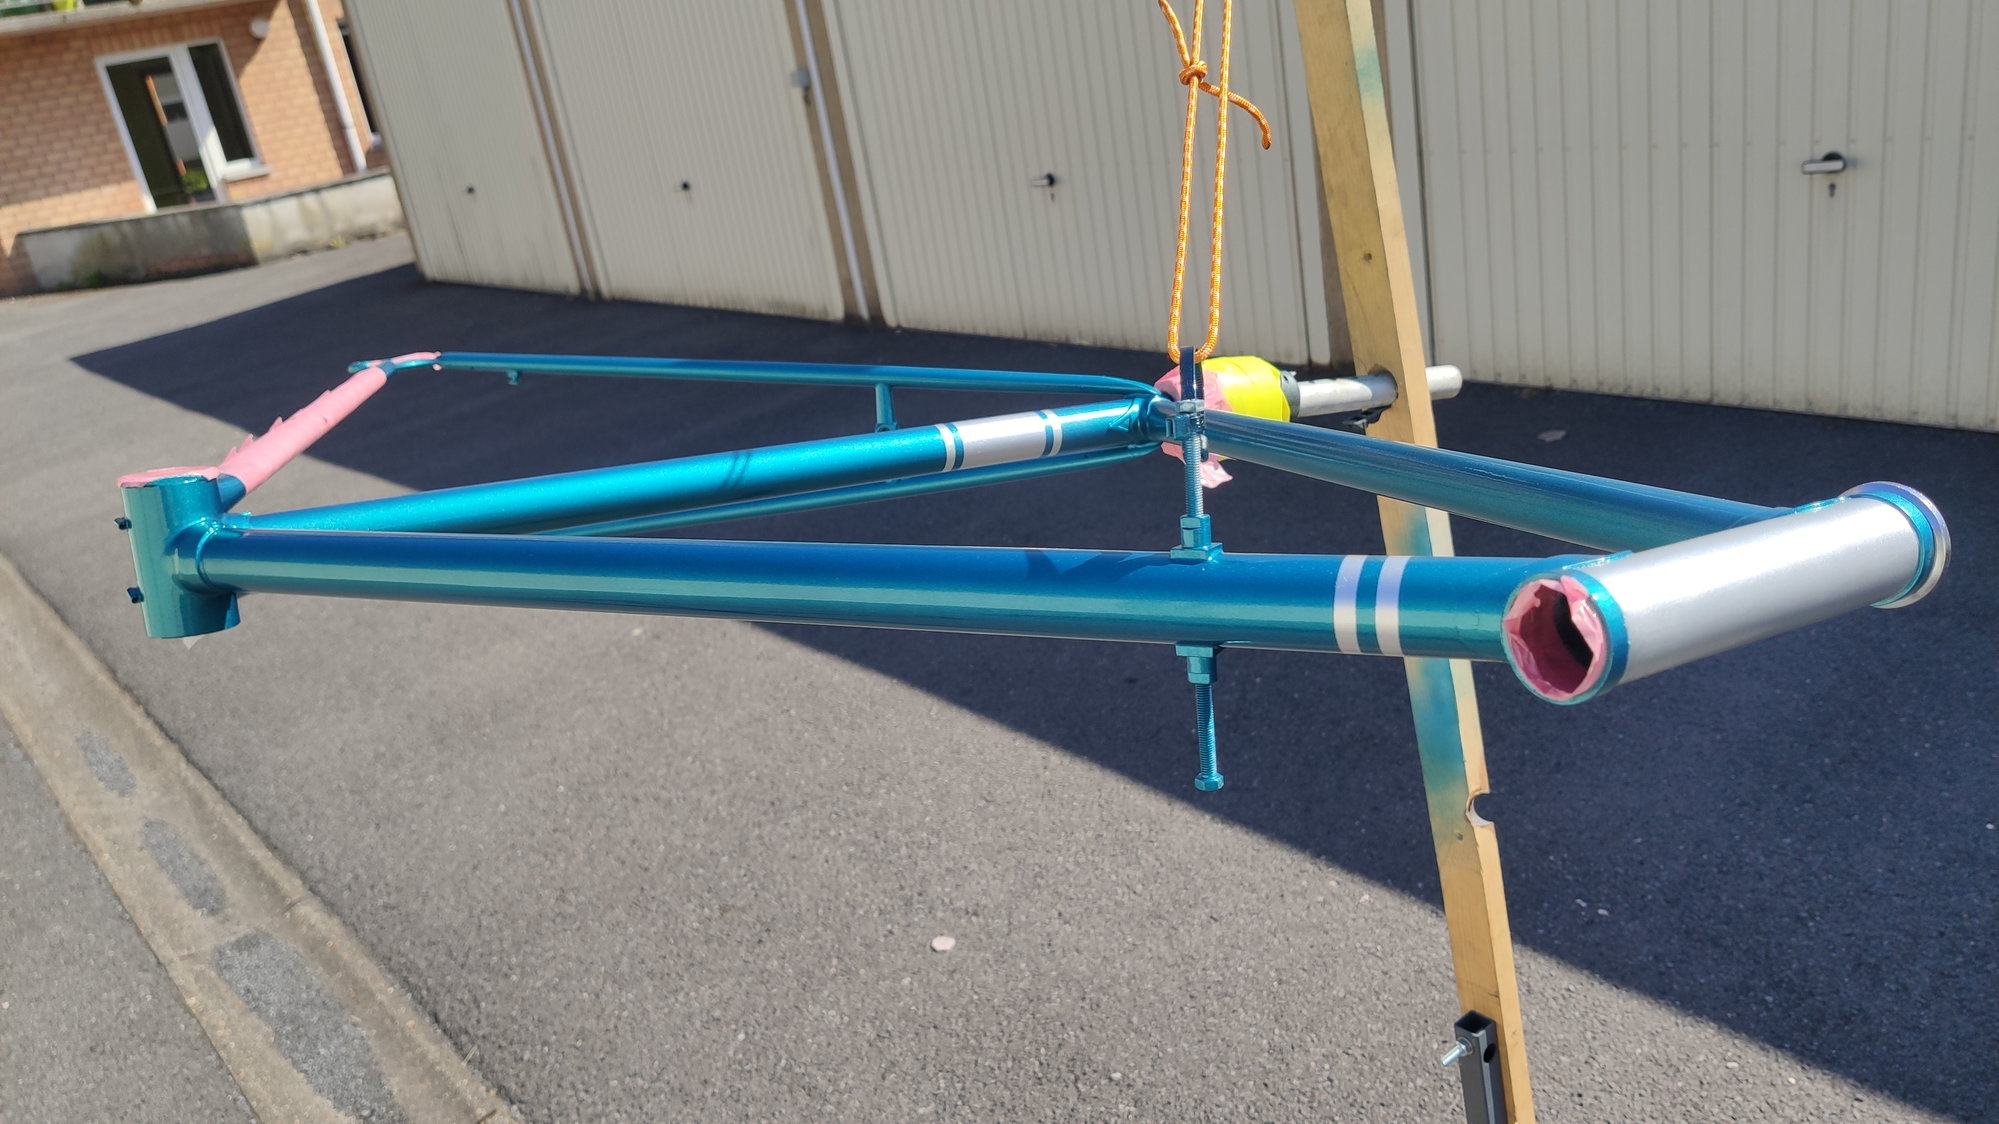
Today I tried fixing the paint damage after the clear tape disaster on the downtube 😷
Took me 2 attempts (first attempt still had some visible edges where the damage was so sanded everything down again and started over), I would say the colour looks pretty good again, I've let it sit for now before applying the high gloss paint maybe tomorrow 🤞🏼


After second attempt


Next up is gloss and hopefully assembling soon...
Took me 2 attempts (first attempt still had some visible edges where the damage was so sanded everything down again and started over), I would say the colour looks pretty good again, I've let it sit for now before applying the high gloss paint maybe tomorrow 🤞🏼
After second attempt
Next up is gloss and hopefully assembling soon...
06-22-20, 02:55 PM
#43
Senior Member

Join Date: Mar 2012
Location: Niagara Region, Canada
Posts: 1,455
Bikes: 1970s Alex Singer, 1960s Peugeot PX 10, 1960s Bertin C37, 1973 Carre Bertin C 37, 1972 Carlton Kermesse, 1981 Peugeot PX 14 Super Competition
Mentioned: 65 Post(s)
Tagged: 0 Thread(s)
Quoted: 346 Post(s)
Liked 266 Times
in
157 Posts
MaxDB-
Thanks for the illustrated how-to on the eyelet and spoke nipple cleaning. I was about to start that on a set of two old wheels and I am going to use your method. Thank you.
Thanks for the illustrated how-to on the eyelet and spoke nipple cleaning. I was about to start that on a set of two old wheels and I am going to use your method. Thank you.
07-03-20, 11:12 AM
#44
Member
Thread Starter
Quick update!
In the meantime I've resprayed the bottomtube, I'll see how the rest of the paint holds up when in use, might do a full respray next year, kind of depends on usage of the bike etc...
Gloss went really good, overall satisfied with the look of the paint job.

And today I started assembling. Must say, this feels pretty awesome after all this time and all the misery I had with the polishing and doing stuff all over again for 2 or 3 times 😂


Next up somewhere next week is glueing tubulars, chain, handlebar tape, gear cables etc.
Cheers and have a good weekend!
In the meantime I've resprayed the bottomtube, I'll see how the rest of the paint holds up when in use, might do a full respray next year, kind of depends on usage of the bike etc...
Gloss went really good, overall satisfied with the look of the paint job.
And today I started assembling. Must say, this feels pretty awesome after all this time and all the misery I had with the polishing and doing stuff all over again for 2 or 3 times 😂
Next up somewhere next week is glueing tubulars, chain, handlebar tape, gear cables etc.
Cheers and have a good weekend!
Likes For MaxDB:
07-03-20, 11:28 AM
#45
Senior Member

Join Date: Jun 2008
Location: Louisville, KY
Posts: 13,445
Mentioned: 33 Post(s)
Tagged: 0 Thread(s)
Quoted: 4233 Post(s)
Liked 2,948 Times
in
1,807 Posts
Great job. I wish I had your patience.
07-03-20, 09:03 PM
#46
Senior Member
Join Date: Aug 2010
Location: Utah
Posts: 8,671
Bikes: Paletti,Pinarello Monviso,Duell Vienna,Giordana XL Super,Lemond Maillot Juane.& custom,PDG Paramount,Fuji Opus III,Davidson Impulse,Pashley Guv'nor,Evans,Fishlips,Y-Foil,Softride, Tetra Pro, CAAD8 Optimo,
Mentioned: 156 Post(s)
Tagged: 0 Thread(s)
Quoted: 2323 Post(s)
Liked 4,988 Times
in
1,776 Posts
WOW, that is looking beautiful
__________________
Steel is real...and comfy.
Steel is real...and comfy.
07-03-20, 09:37 PM
#47
Full Member
Join Date: Jul 2016
Location: Denver CO
Posts: 233
Bikes: 2014 Fuji Cross 2.0 LE, 1993 Santana Vision, 1993 Specialized Allez Pro, 1993 Trek 930, 1985 Panasonic DX3000
Mentioned: 0 Post(s)
Tagged: 0 Thread(s)
Quoted: 49 Post(s)
Liked 74 Times
in
55 Posts
That is beautiful!! Great job
07-06-20, 01:47 PM
#48
Member
Thread Starter
Thank you all!
Today I went shopping 🙄 saw an add on the local second hand market for some Campa record stuff, seller didn't live far so went to have a look what he had. I wanted some Campa brakes to replace the Universal's. This is what I came home with:

Campa Omega Strada Hardox wheelset with record hubs and Campa skewers.
Anyone some tips on removing the Maillard freewheel? I don't have the park tool fr2 but made a somewhat similar tool myself, didn't manage to loosen it however...

Like new

He made me take all these skewers for free. Said I didn't need them but he insisted 😀

Payed 67 dollars for the 2 brake sets+wheelset, he dropped the price by 12 dollars because he couldn't find the monoplane brake set I also came for. Stayed 2 hours with a drink and a good talk, very nice guy!

Current state. The end is near.
Today I went shopping 🙄 saw an add on the local second hand market for some Campa record stuff, seller didn't live far so went to have a look what he had. I wanted some Campa brakes to replace the Universal's. This is what I came home with:
Campa Omega Strada Hardox wheelset with record hubs and Campa skewers.
Anyone some tips on removing the Maillard freewheel? I don't have the park tool fr2 but made a somewhat similar tool myself, didn't manage to loosen it however...
Like new
He made me take all these skewers for free. Said I didn't need them but he insisted 😀
Payed 67 dollars for the 2 brake sets+wheelset, he dropped the price by 12 dollars because he couldn't find the monoplane brake set I also came for. Stayed 2 hours with a drink and a good talk, very nice guy!
Current state. The end is near.
07-06-20, 02:05 PM
#49
Senior Member
Join Date: Aug 2013
Posts: 2,321
Mentioned: 35 Post(s)
Tagged: 0 Thread(s)
Quoted: 767 Post(s)
Liked 1,898 Times
in
889 Posts
Beautiful work! I have a Vitus 888-tubed bike that I am very fond of.
On the freewheel removal, the tool for the job is always the best choice, but homemade tools can work if you get good engagement in the notches and can get good leverage on it. You should use a skewer to keep the tool from rocking and damaging the notches. If it won't budge with a skewer and a long handled wrench, then a bench vise may do the trick. Clamp the tool in the vise and make like your drivin' a bus. Leave the tire on, of course. If that fails, then the freewheel can be disassembled and sometimes clamping the remaining freewheel body in the vise will work, although damage to the body is almost certain.
On the freewheel removal, the tool for the job is always the best choice, but homemade tools can work if you get good engagement in the notches and can get good leverage on it. You should use a skewer to keep the tool from rocking and damaging the notches. If it won't budge with a skewer and a long handled wrench, then a bench vise may do the trick. Clamp the tool in the vise and make like your drivin' a bus. Leave the tire on, of course. If that fails, then the freewheel can be disassembled and sometimes clamping the remaining freewheel body in the vise will work, although damage to the body is almost certain.
07-10-20, 04:33 PM
#50
Member
Thread Starter
Hi guys, hope everyone is doing fine and riding bikes...
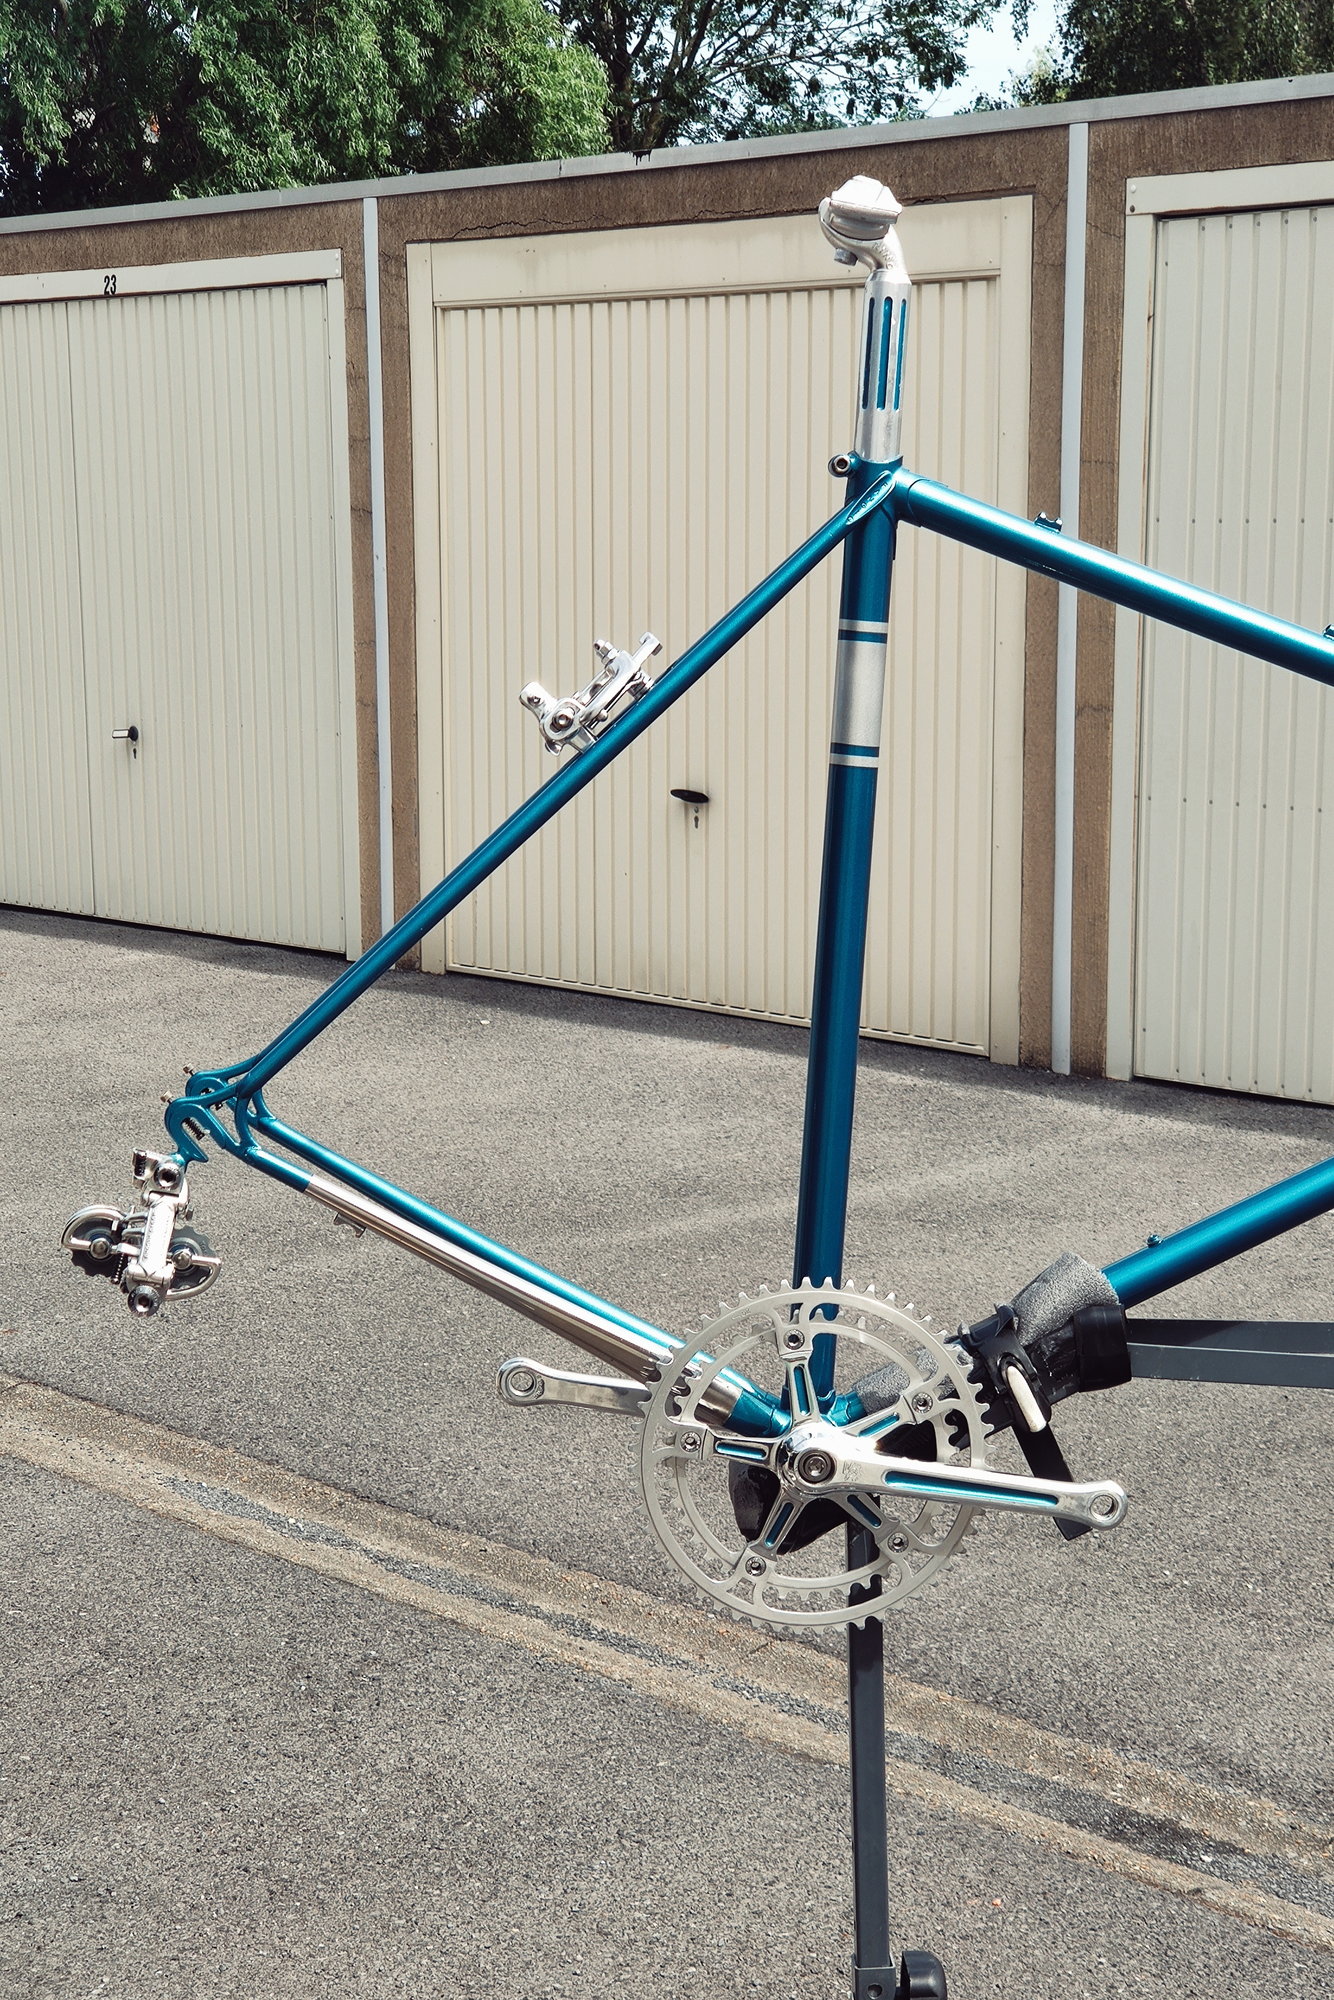
Again I've spent a lot of time working on the bike, had to replace an axle on the maillard rear hub of the Mavic GP4 rims, apparently previous owner did whatever and when trying to install the wheel I noticed the chain was touching the frame when on smallest cog. Luckily had an axle I saved from an old broken wheel I threw away that same day. I've cut it to 135 and placed some extra washers on drive side, all perfect now.
Then went on with glueing the tubs yesterday and installing them today, that was a first for me but all went well (had to redo the rear completely however, logo's were on wrong side due to a nosey neighbour distracting me ).

Frame also fell on the parking lot, had to move all my stuff for a car and probably didn't set the foot properly so the whole thing tilted over 😕 had damage on brake lever and left dropout so again sanding and polishing of the lever and touching up the drop out 🙄. That sound nearly killed me 😂
Damage, luckily the old saddle on there

Retouched but probably going to sand it down and do a better job

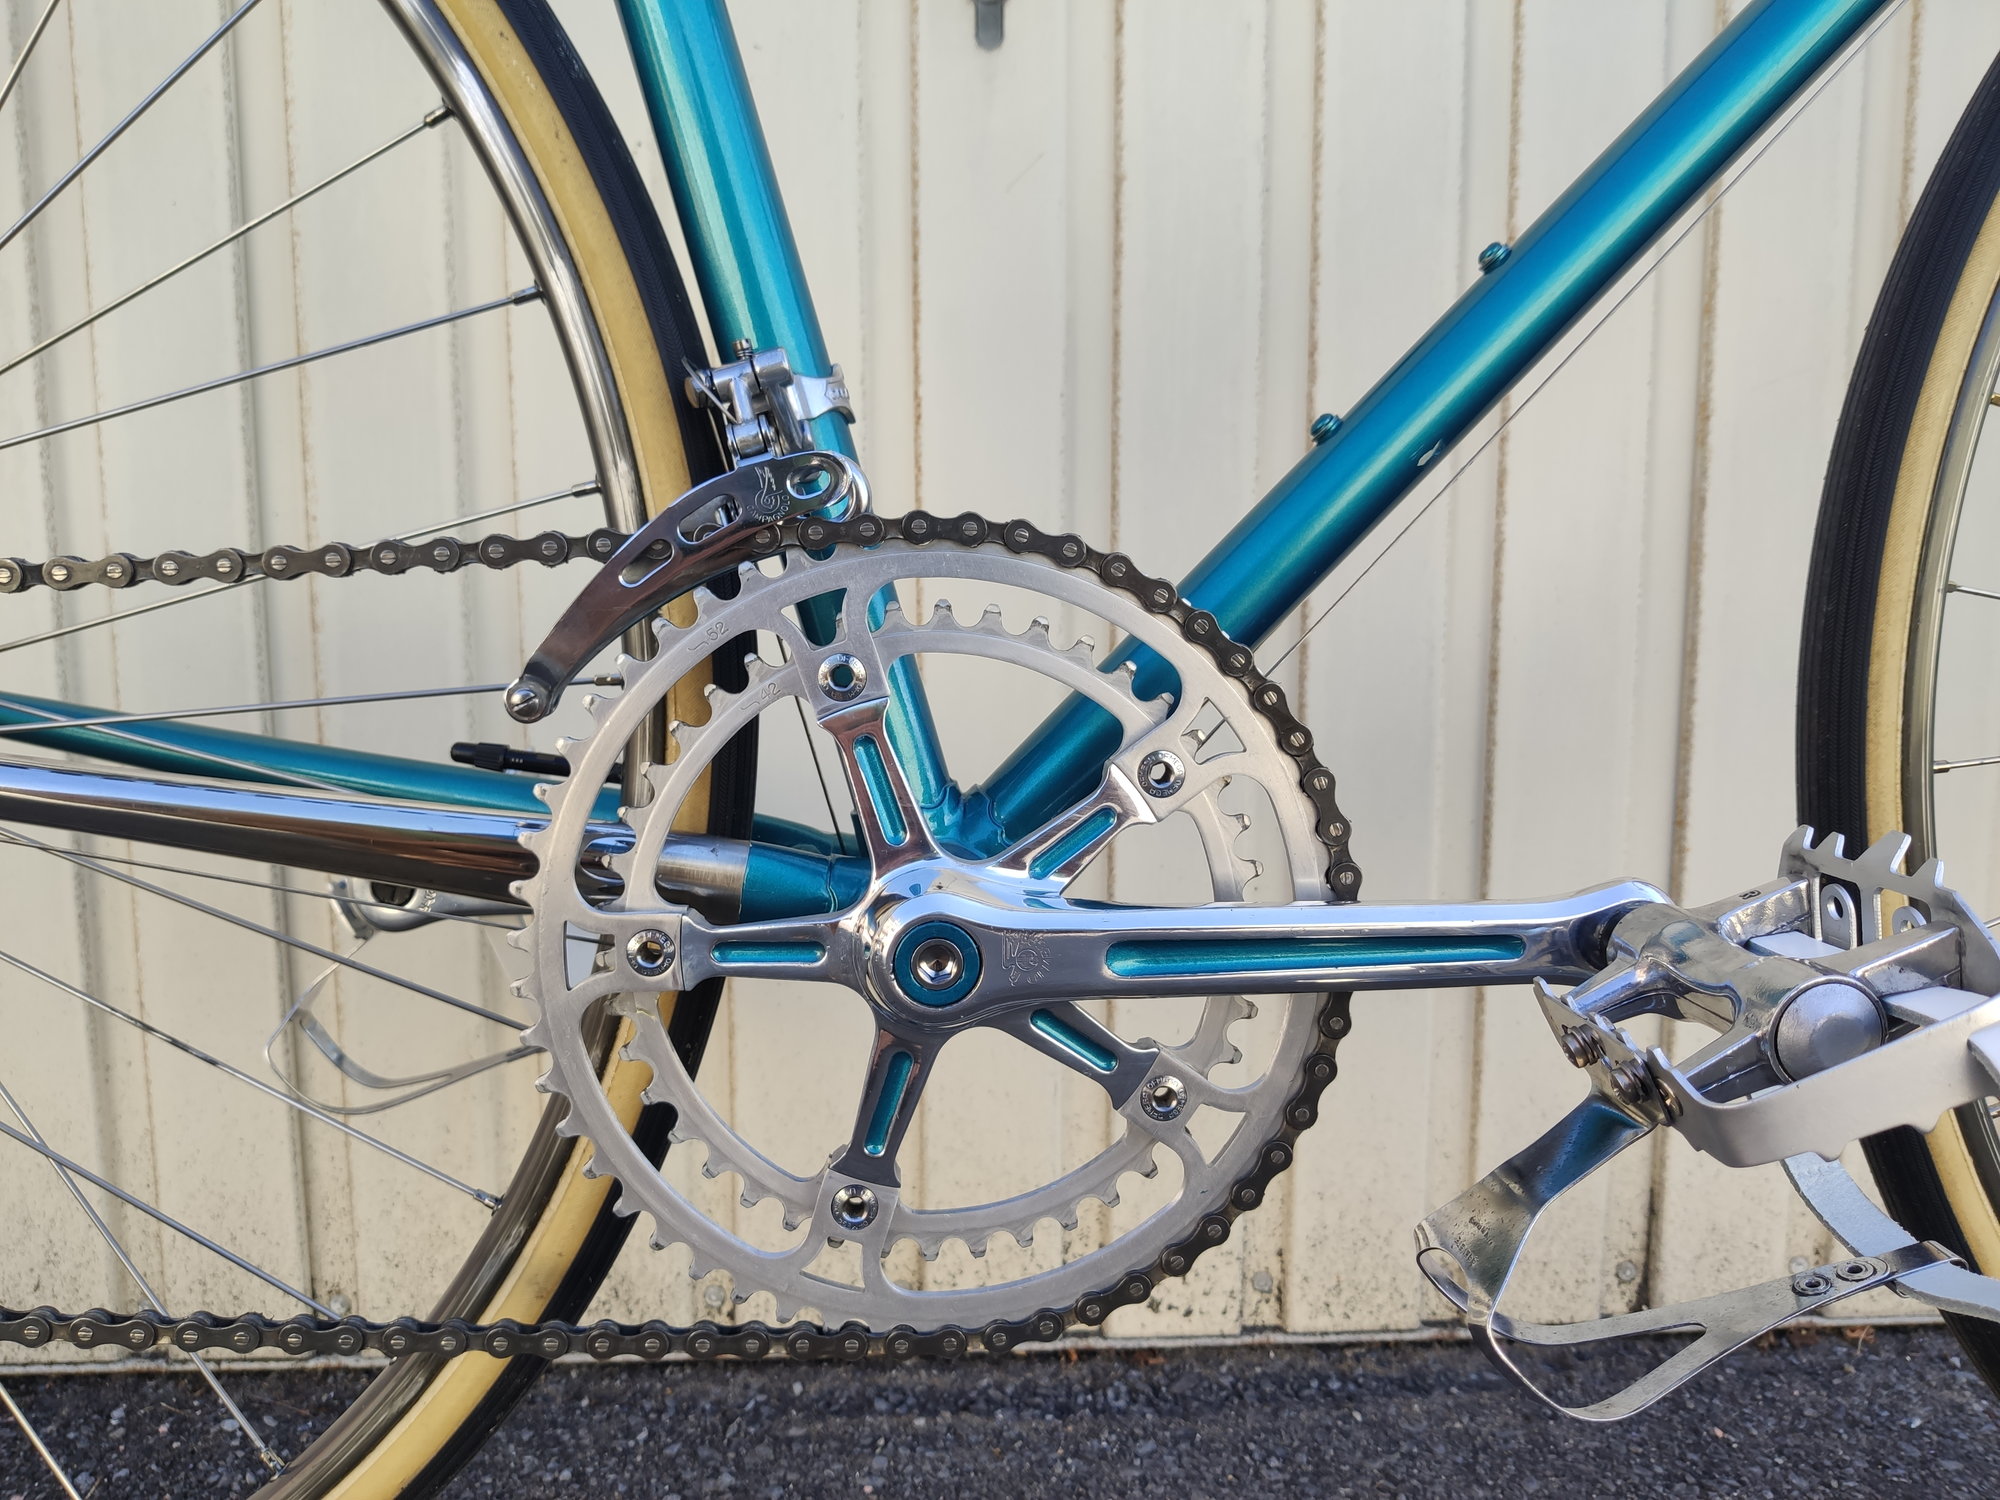
The brakes I bought a couple of days ago got polished as well to match the rest.

Old chain not staying since too short?

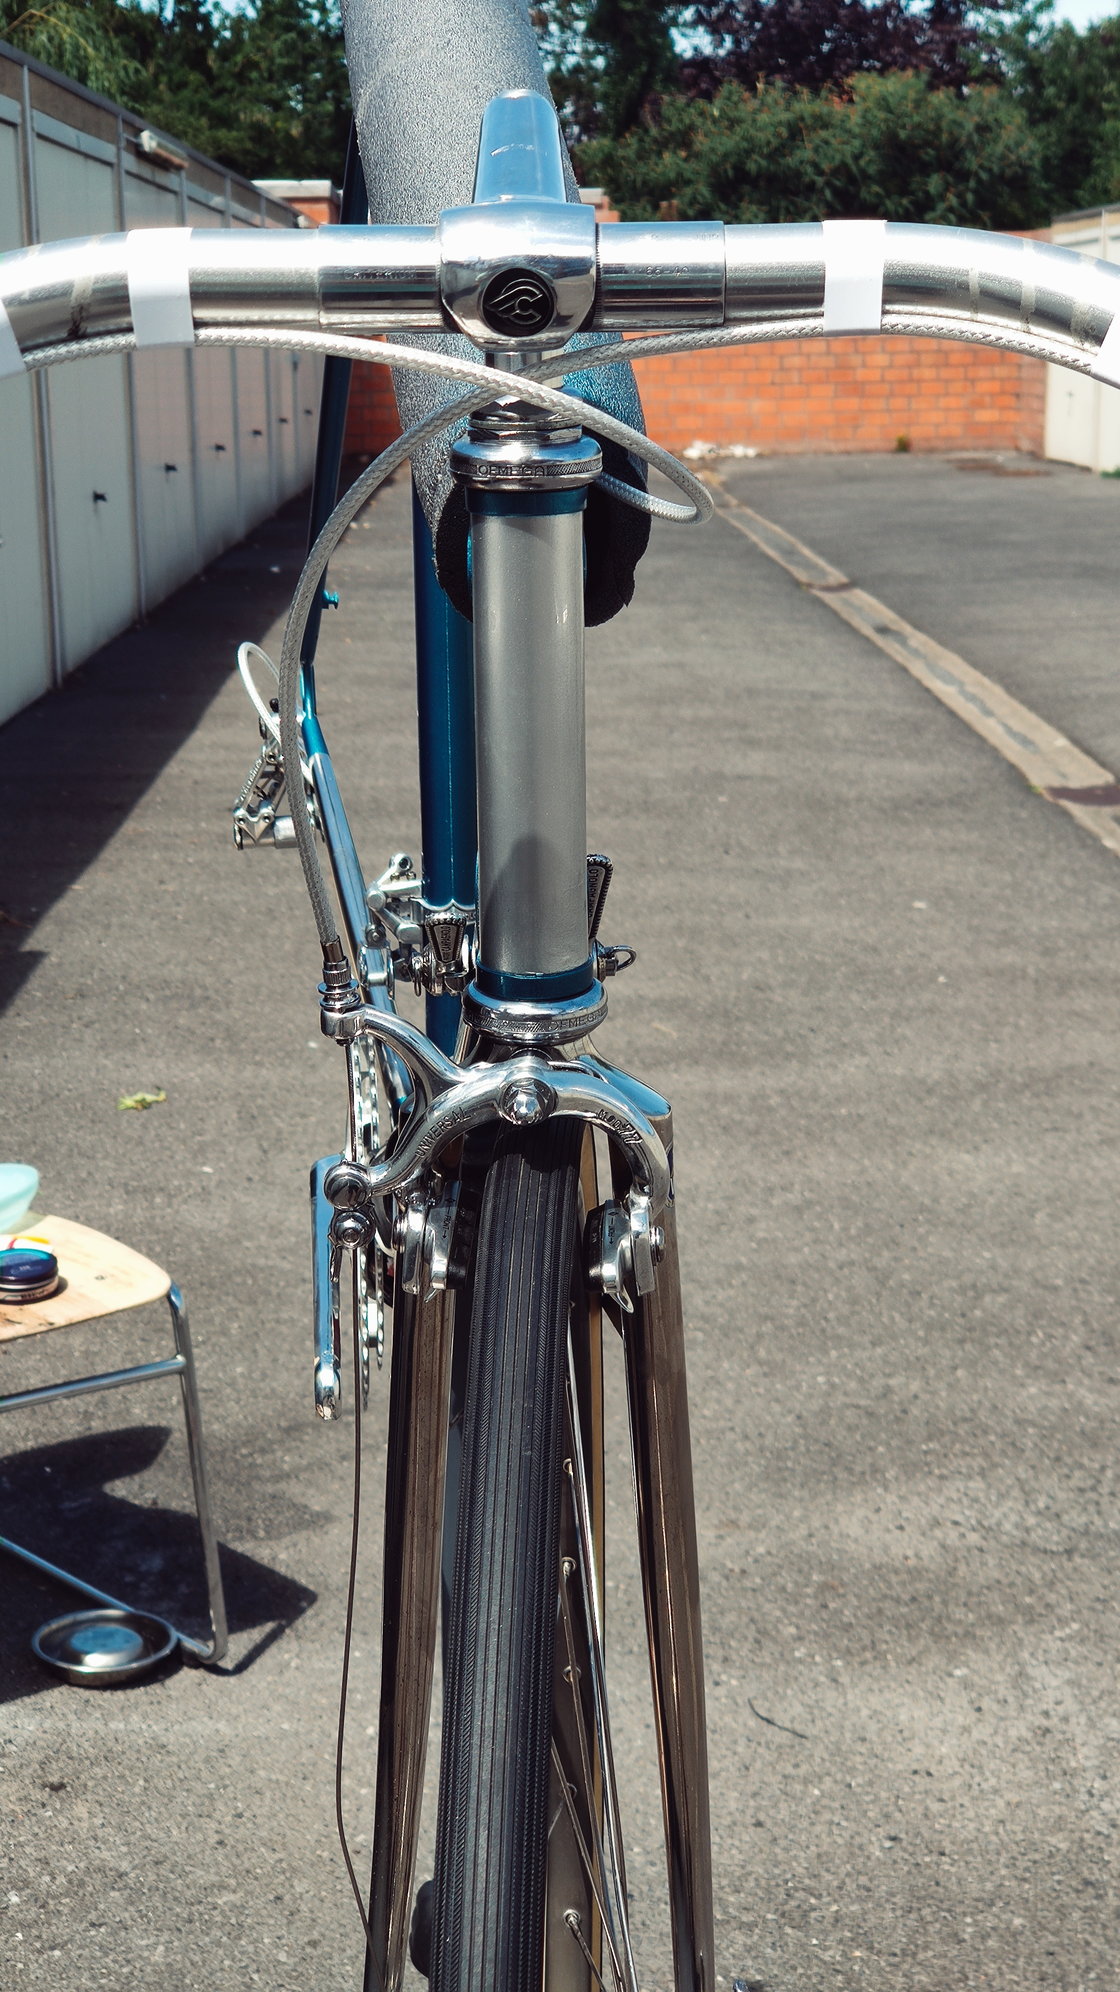
First complete photo, made me a bit emotional after all this effort and sweat to be honest...
Not that convinced about the silver bartape tho, I guess plain black or white would be a better contrast?
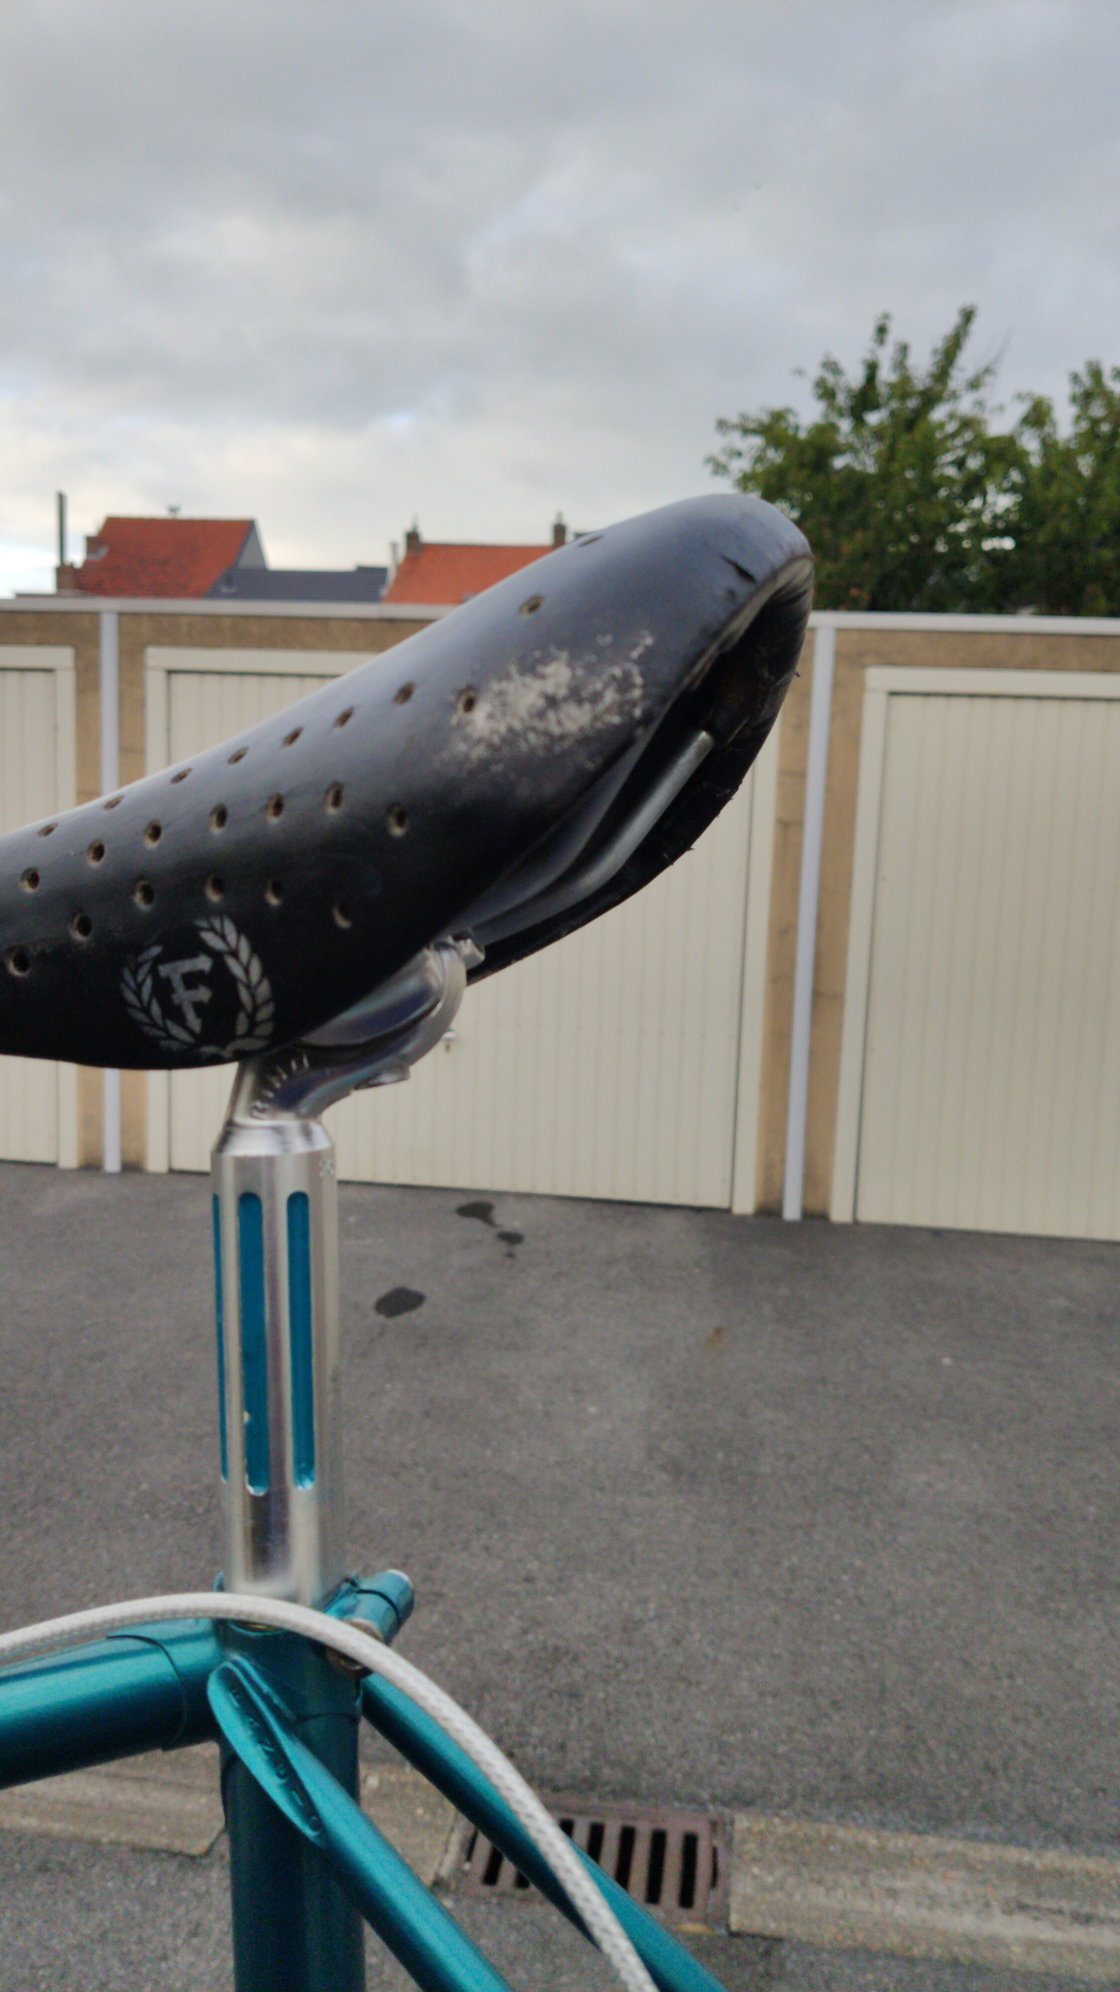
Also another seatpost since too short and another saddle, a Fabric Line wide. Looks better than the original I think.

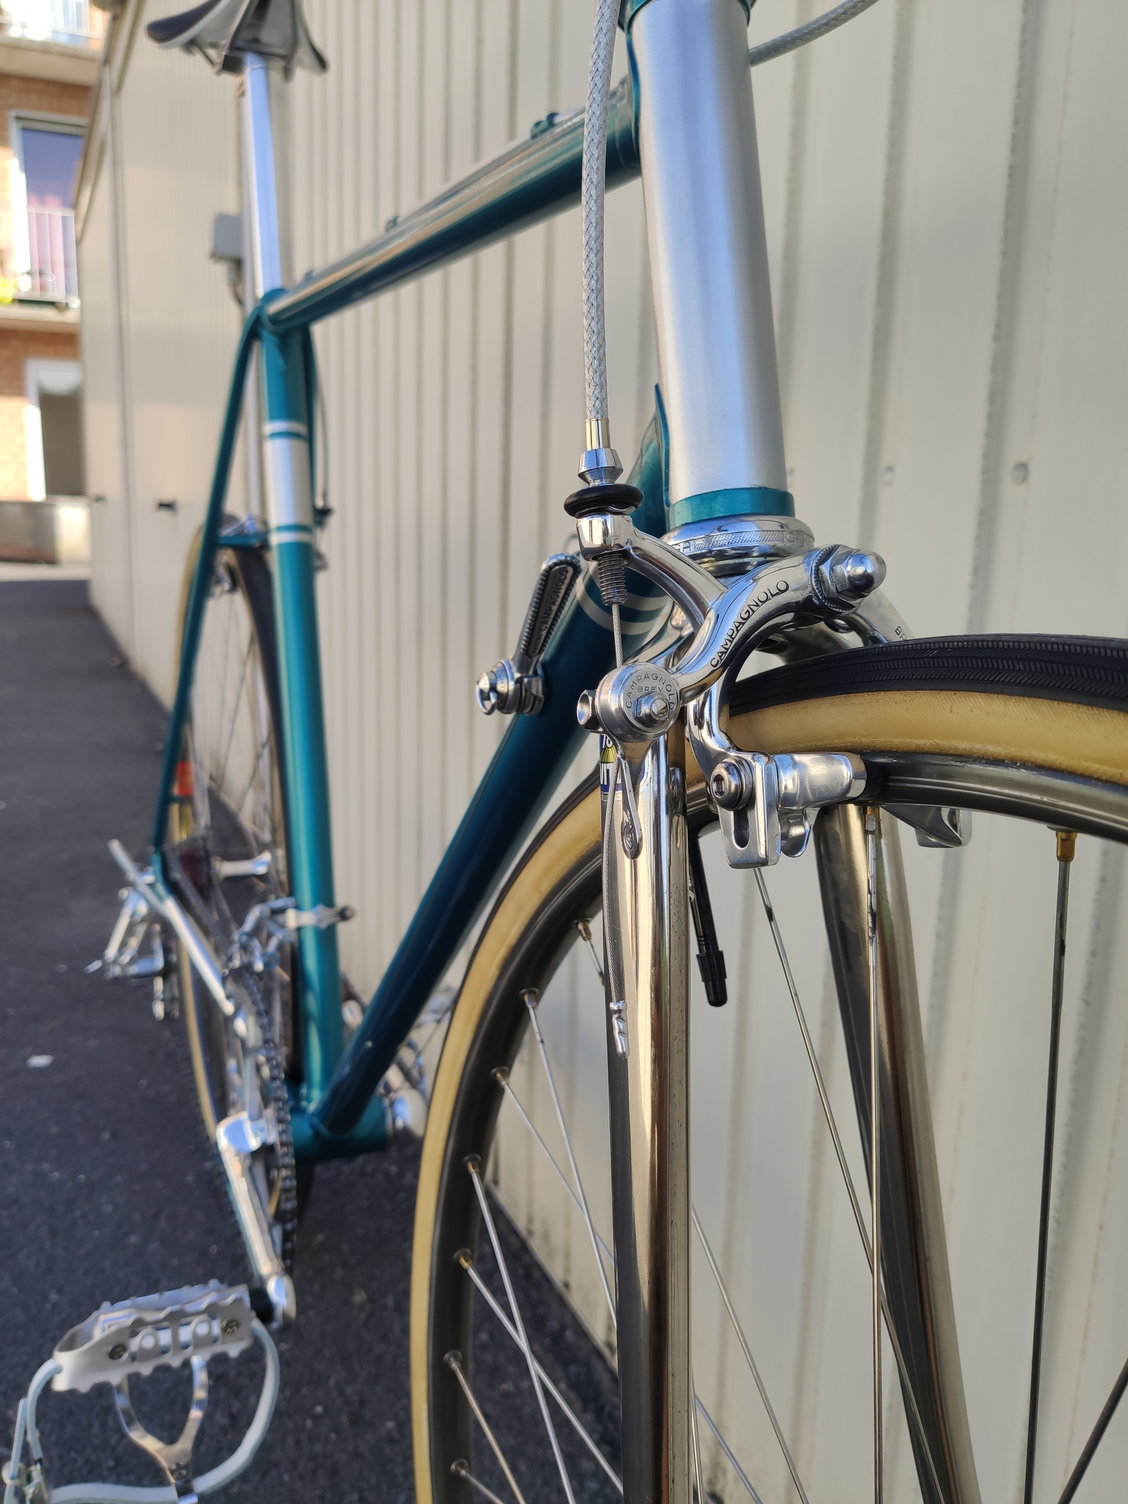
Brakes matching perfect with the other polished bits
Next is opening the hubs on the Campa rims and ordering some tan wall clinchers. Might feel more complete with those on, and also safer for longer rides in case of punctures.
Cheers from Belgium!
Again I've spent a lot of time working on the bike, had to replace an axle on the maillard rear hub of the Mavic GP4 rims, apparently previous owner did whatever and when trying to install the wheel I noticed the chain was touching the frame when on smallest cog. Luckily had an axle I saved from an old broken wheel I threw away that same day. I've cut it to 135 and placed some extra washers on drive side, all perfect now.
Then went on with glueing the tubs yesterday and installing them today, that was a first for me but all went well (had to redo the rear completely however, logo's were on wrong side due to a nosey neighbour
distracting me ).Frame also fell on the parking lot, had to move all my stuff for a car and probably didn't set the foot properly so the whole thing tilted over 😕 had damage on brake lever and left dropout so again sanding and polishing of the lever and touching up the drop out 🙄. That sound nearly killed me 😂
Damage, luckily the old saddle on there
Retouched but probably going to sand it down and do a better job
The brakes I bought a couple of days ago got polished as well to match the rest.
Old chain not staying since too short?
First complete photo, made me a bit emotional after all this effort and sweat to be honest...
Not that convinced about the silver bartape tho, I guess plain black or white would be a better contrast?
Also another seatpost since too short and another saddle, a Fabric Line wide. Looks better than the original I think.
Brakes matching perfect with the other polished bits
Next is opening the hubs on the Campa rims and ordering some tan wall clinchers. Might feel more complete with those on, and also safer for longer rides in case of punctures.
Cheers from Belgium!
Last edited by MaxDB; 07-10-20 at 04:40 PM.
Likes For MaxDB: