


Weld Protrusion Into Seatpost Area?
 05-29-23, 07:16 PM
#26
Full Member
Thread Starter
I remembered that I have some 4 foot pipe clamps that I use for woodworking. One of these might make a good press for installing the the new shim.
 05-29-23, 07:29 PM
#27
Full Member
Thread Starter
Here is a way to make a controlled depth metal removing tool:
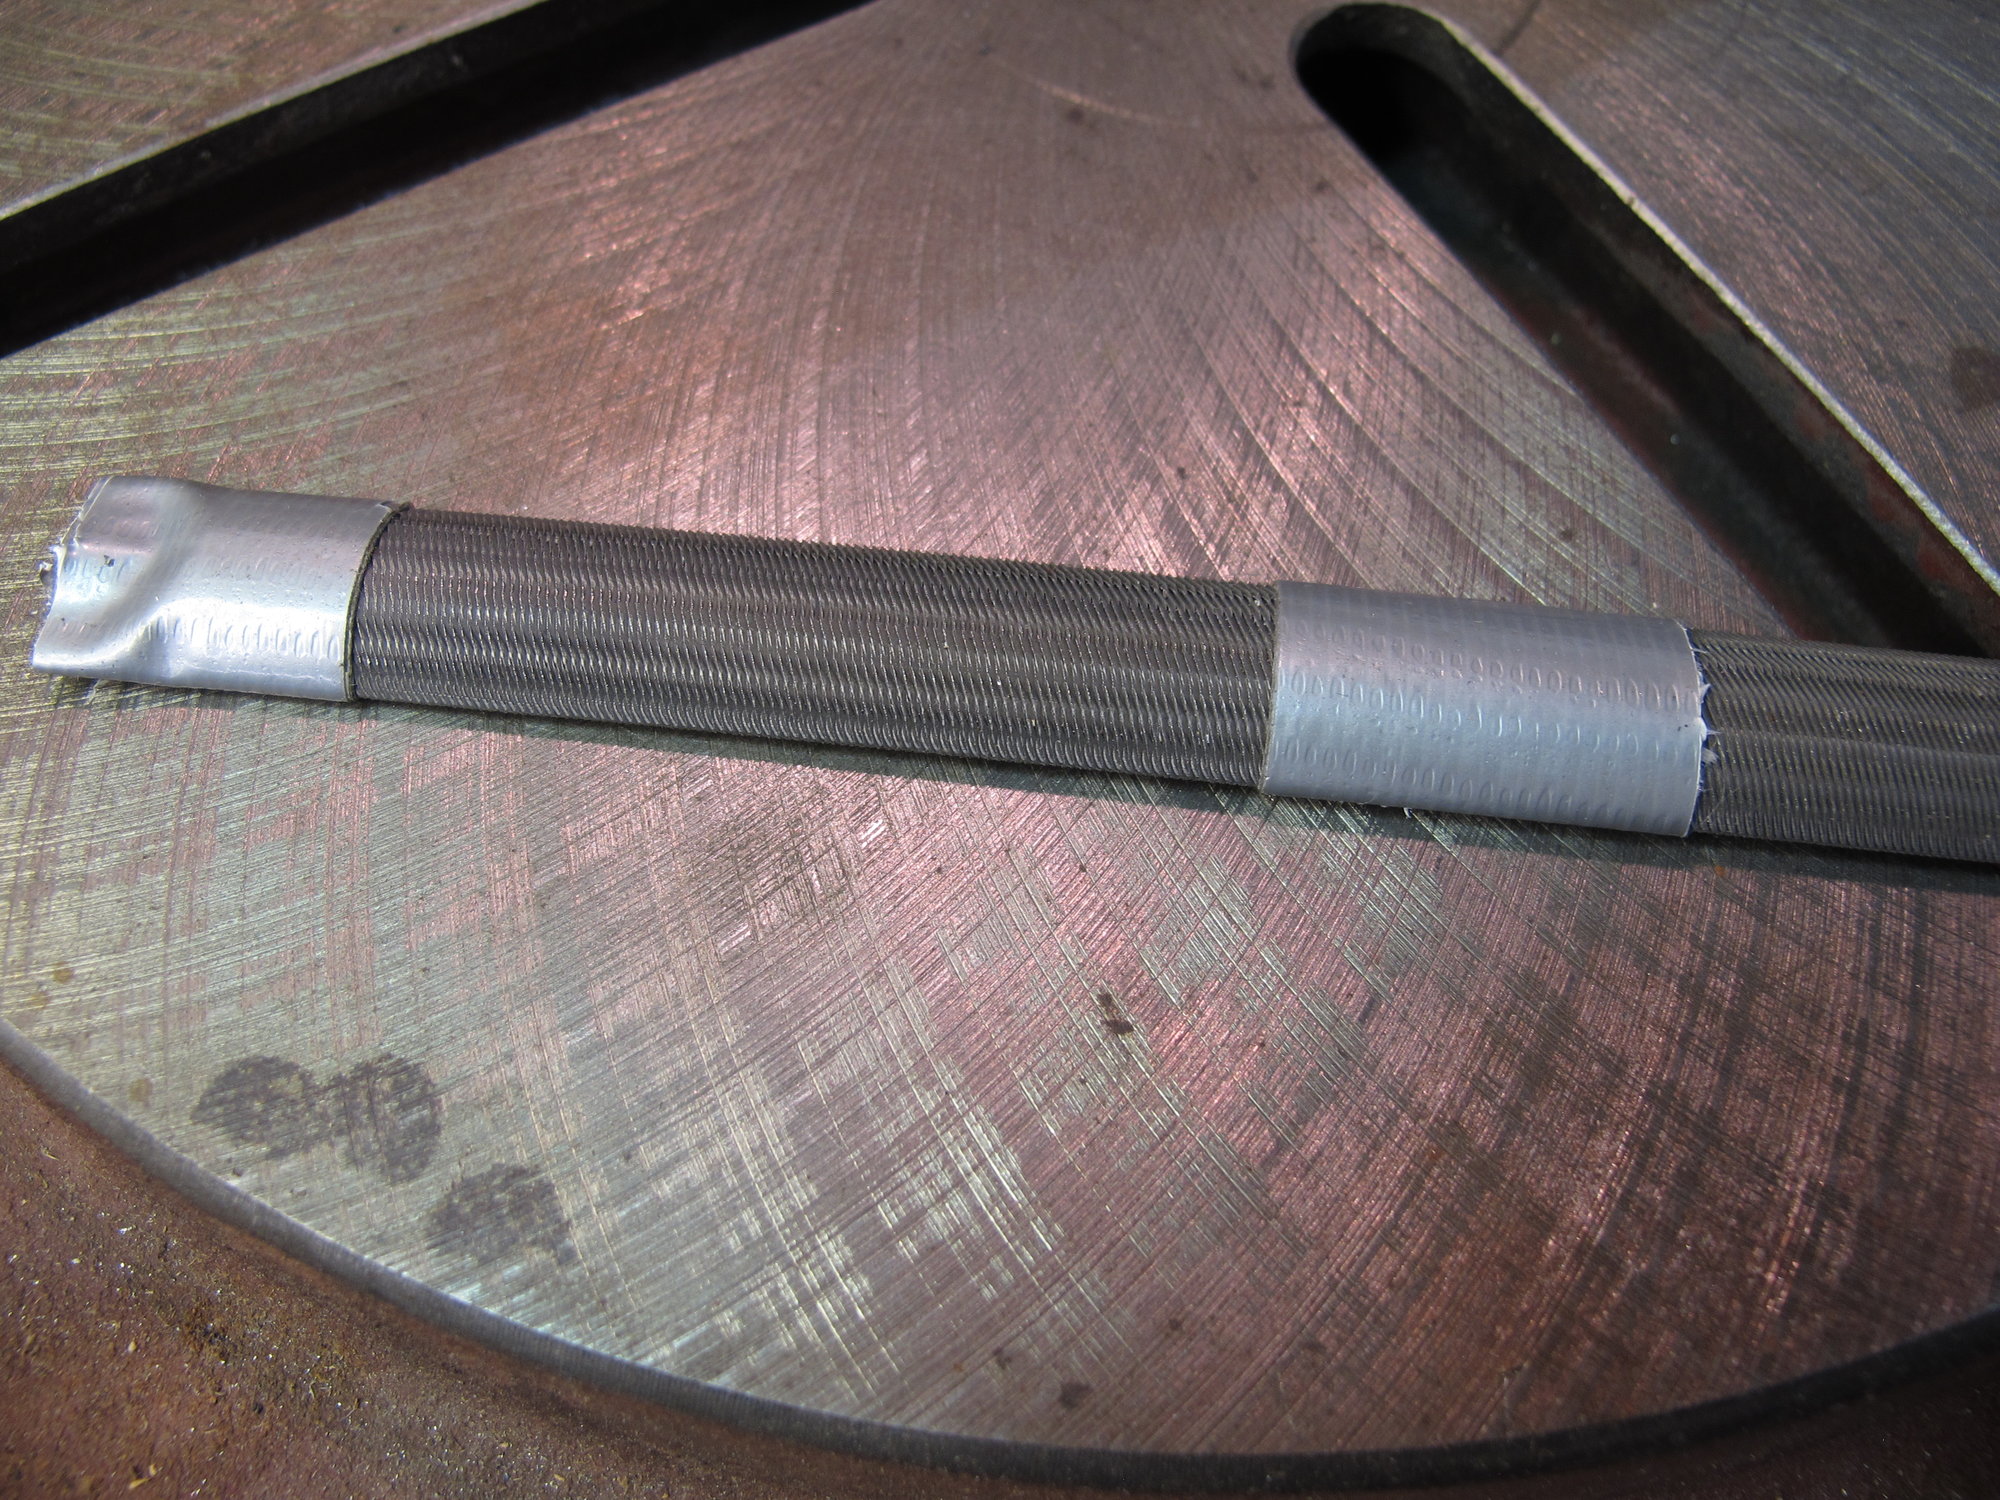
Controlled depth metal remover
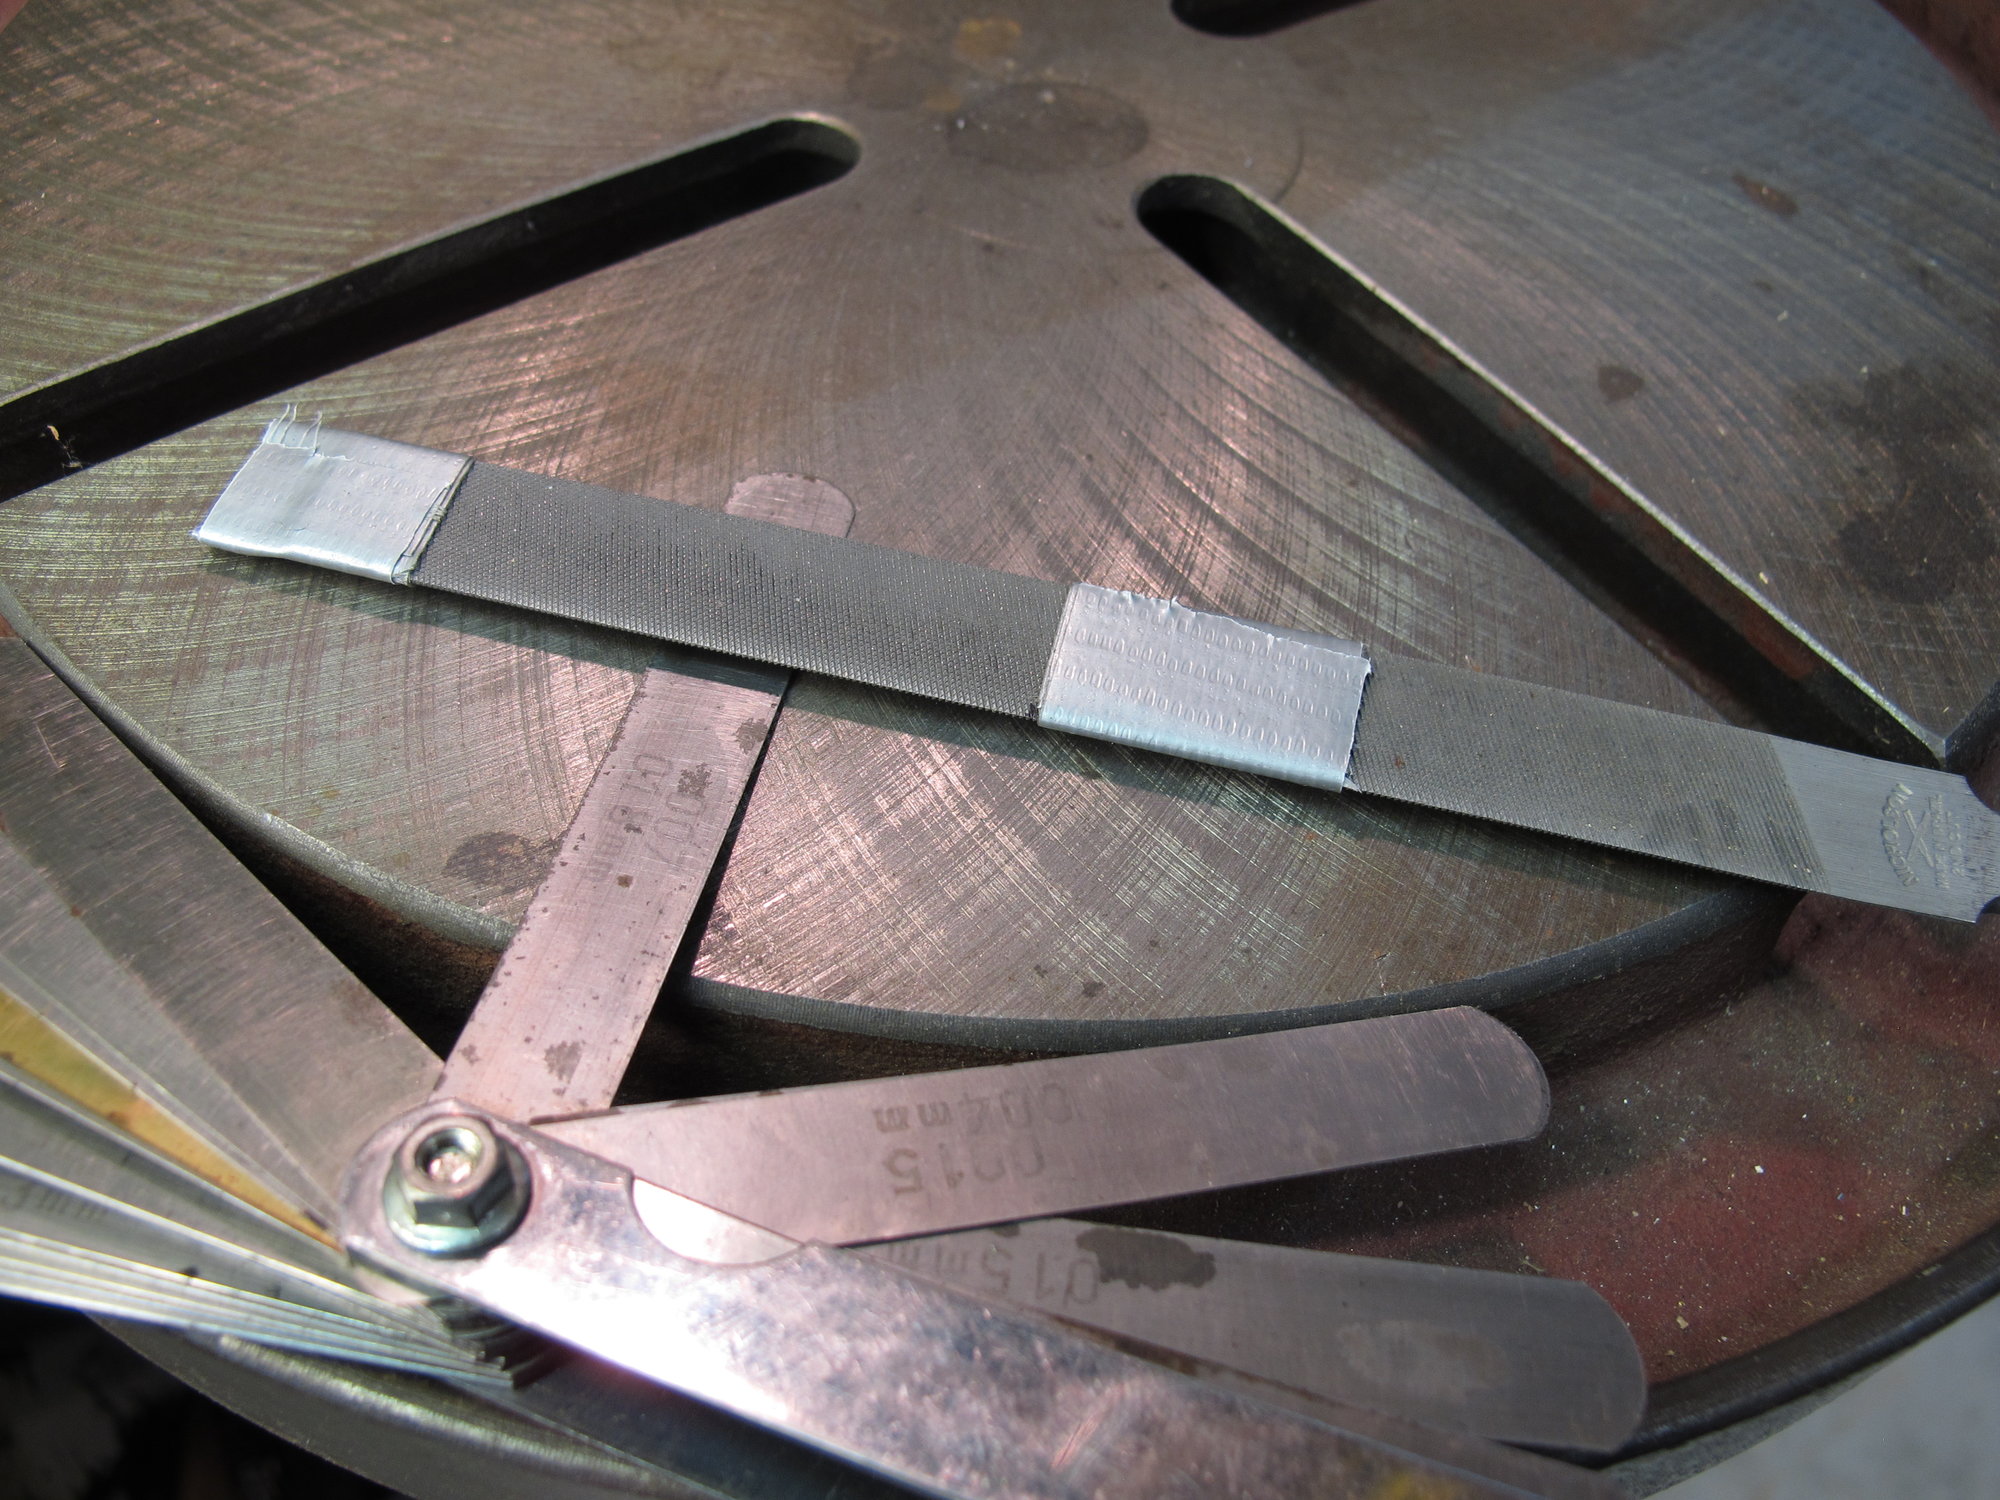
2 layers of duct tape is good for .007"
The tape sections were spaced to ride past the weld area or from the top of the tube to the weld area.
Controlled depth metal remover
2 layers of duct tape is good for .007"
The tape sections were spaced to ride past the weld area or from the top of the tube to the weld area.
Likes For Steve_sr:
05-29-23, 07:30 PM
#28

blahblahblah chrome moly

Join Date: Apr 2009
Location: Seattle
Posts: 1,986
Mentioned: 92 Post(s)
Tagged: 0 Thread(s)
Quoted: 1172 Post(s)
Liked 2,567 Times
in
1,072 Posts
I remembered that I have some 4 foot pipe clamps that I use for woodworking. One of these might make a good press for installing the the new shim.
Let us know how it goes!
05-29-23, 07:49 PM
#29
Full Member
Thread Starter
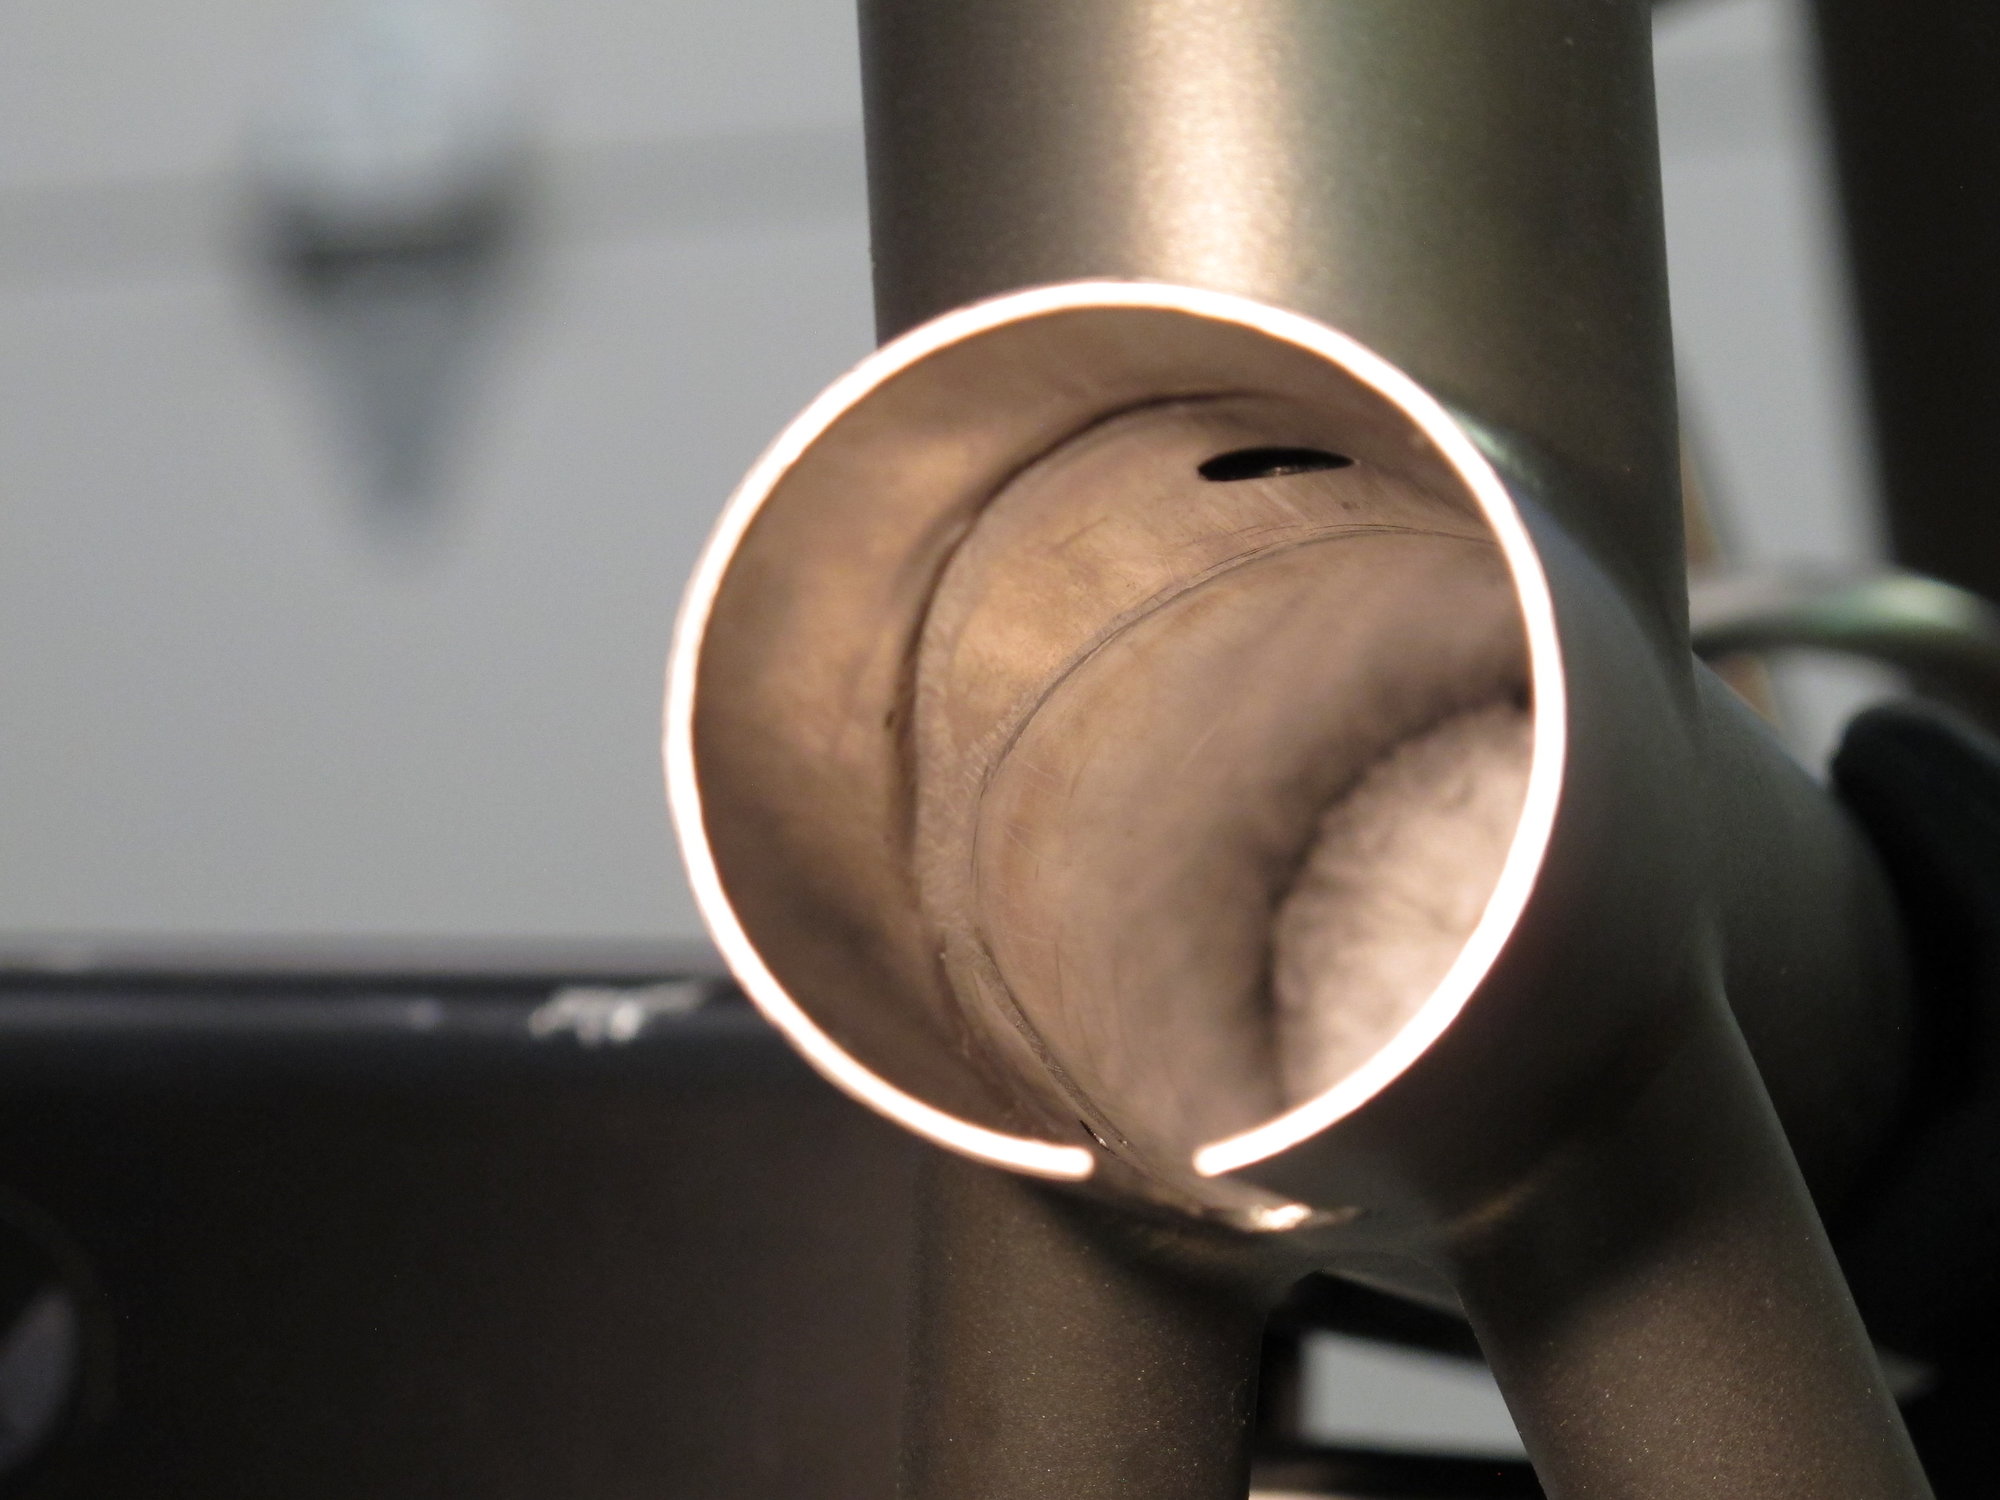
I spent some time using the above tool and was somewhat surprised to find that some of the areas that seemed worse would not hit the file teeth while other areas that looked good did hit. This confirms others thoughts that the tube is deformed by the welding process. The left and right side seemed to be the worst for deformation (or perhaps indentation). Here are a couple of photos of the results.


05-29-23, 08:06 PM
#30
Full Member
Thread Starter
Actually, I am going to use the J-B Qwik-Weld as the builder used before as it would be good for filling the many gaps around the weld area. I am not sure that Loctite would be able to fill gaps that size and support the shear load when the new shim is reamed.
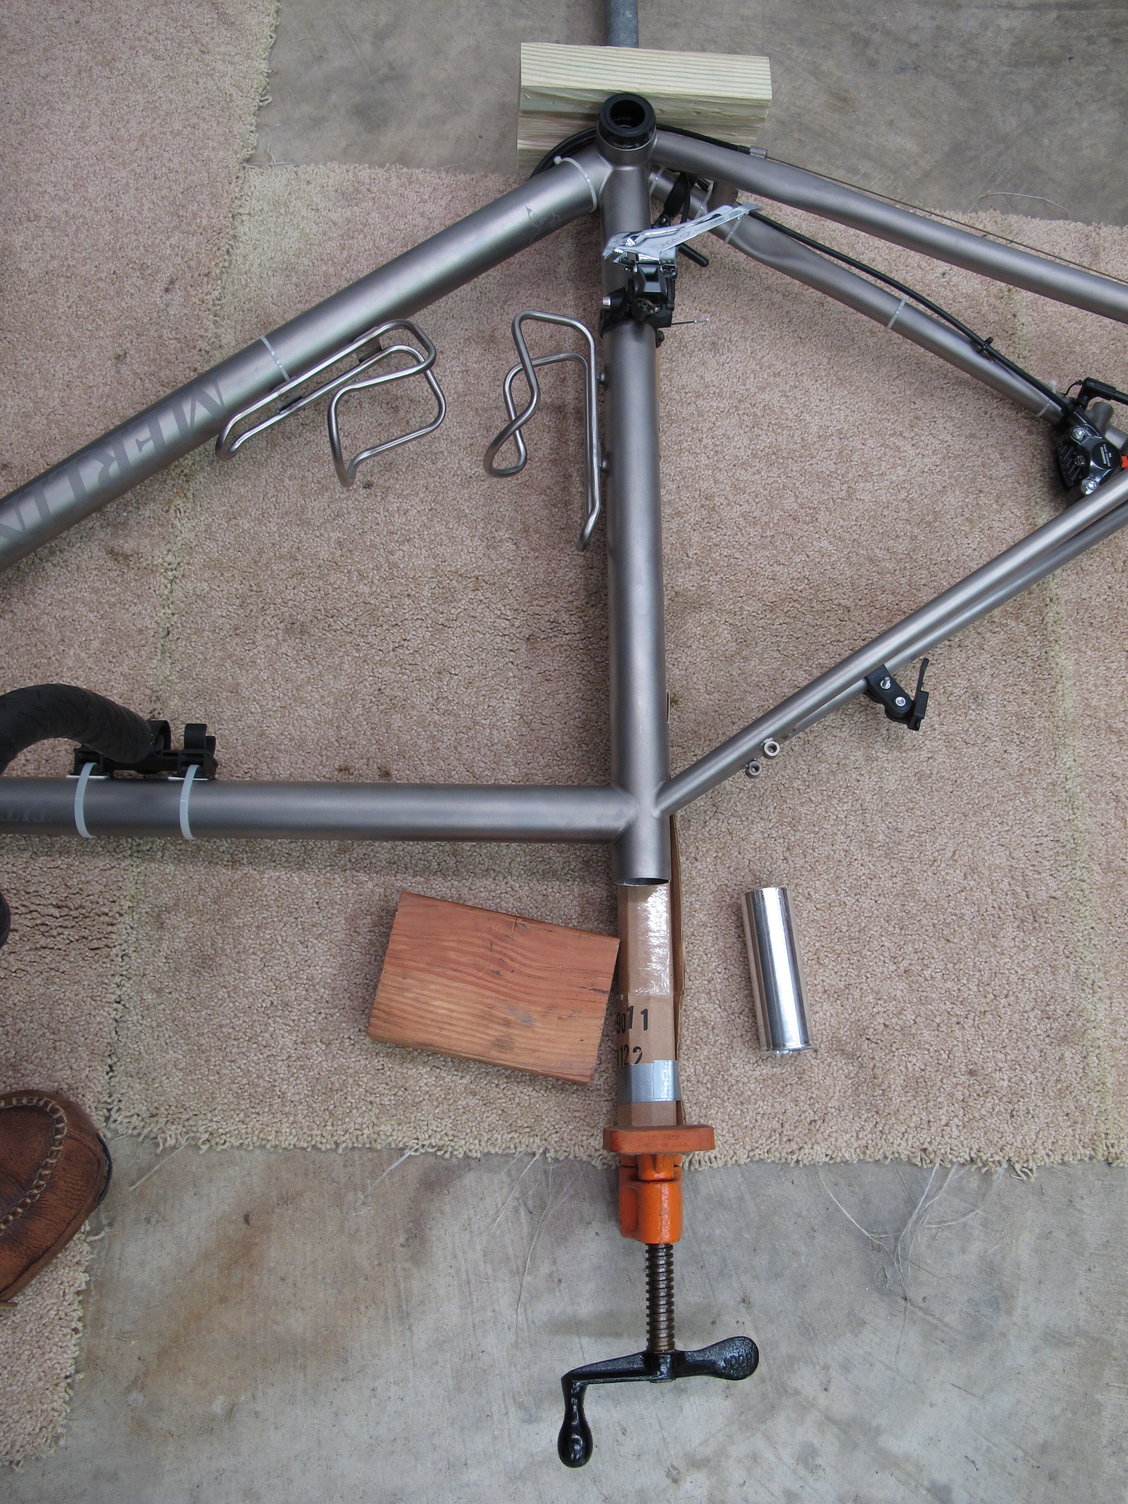
BB cups are still installed and I made a special cradle out of a 2x4 scrap with a relief for the hoses and cables going under the BB. There is about 3/4" of wood on each side of the BB to support the shell.
BB cups are still installed and I made a special cradle out of a 2x4 scrap with a relief for the hoses and cables going under the BB. There is about 3/4" of wood on each side of the BB to support the shell.
06-11-23, 06:15 PM
#31
Full Member
Thread Starter
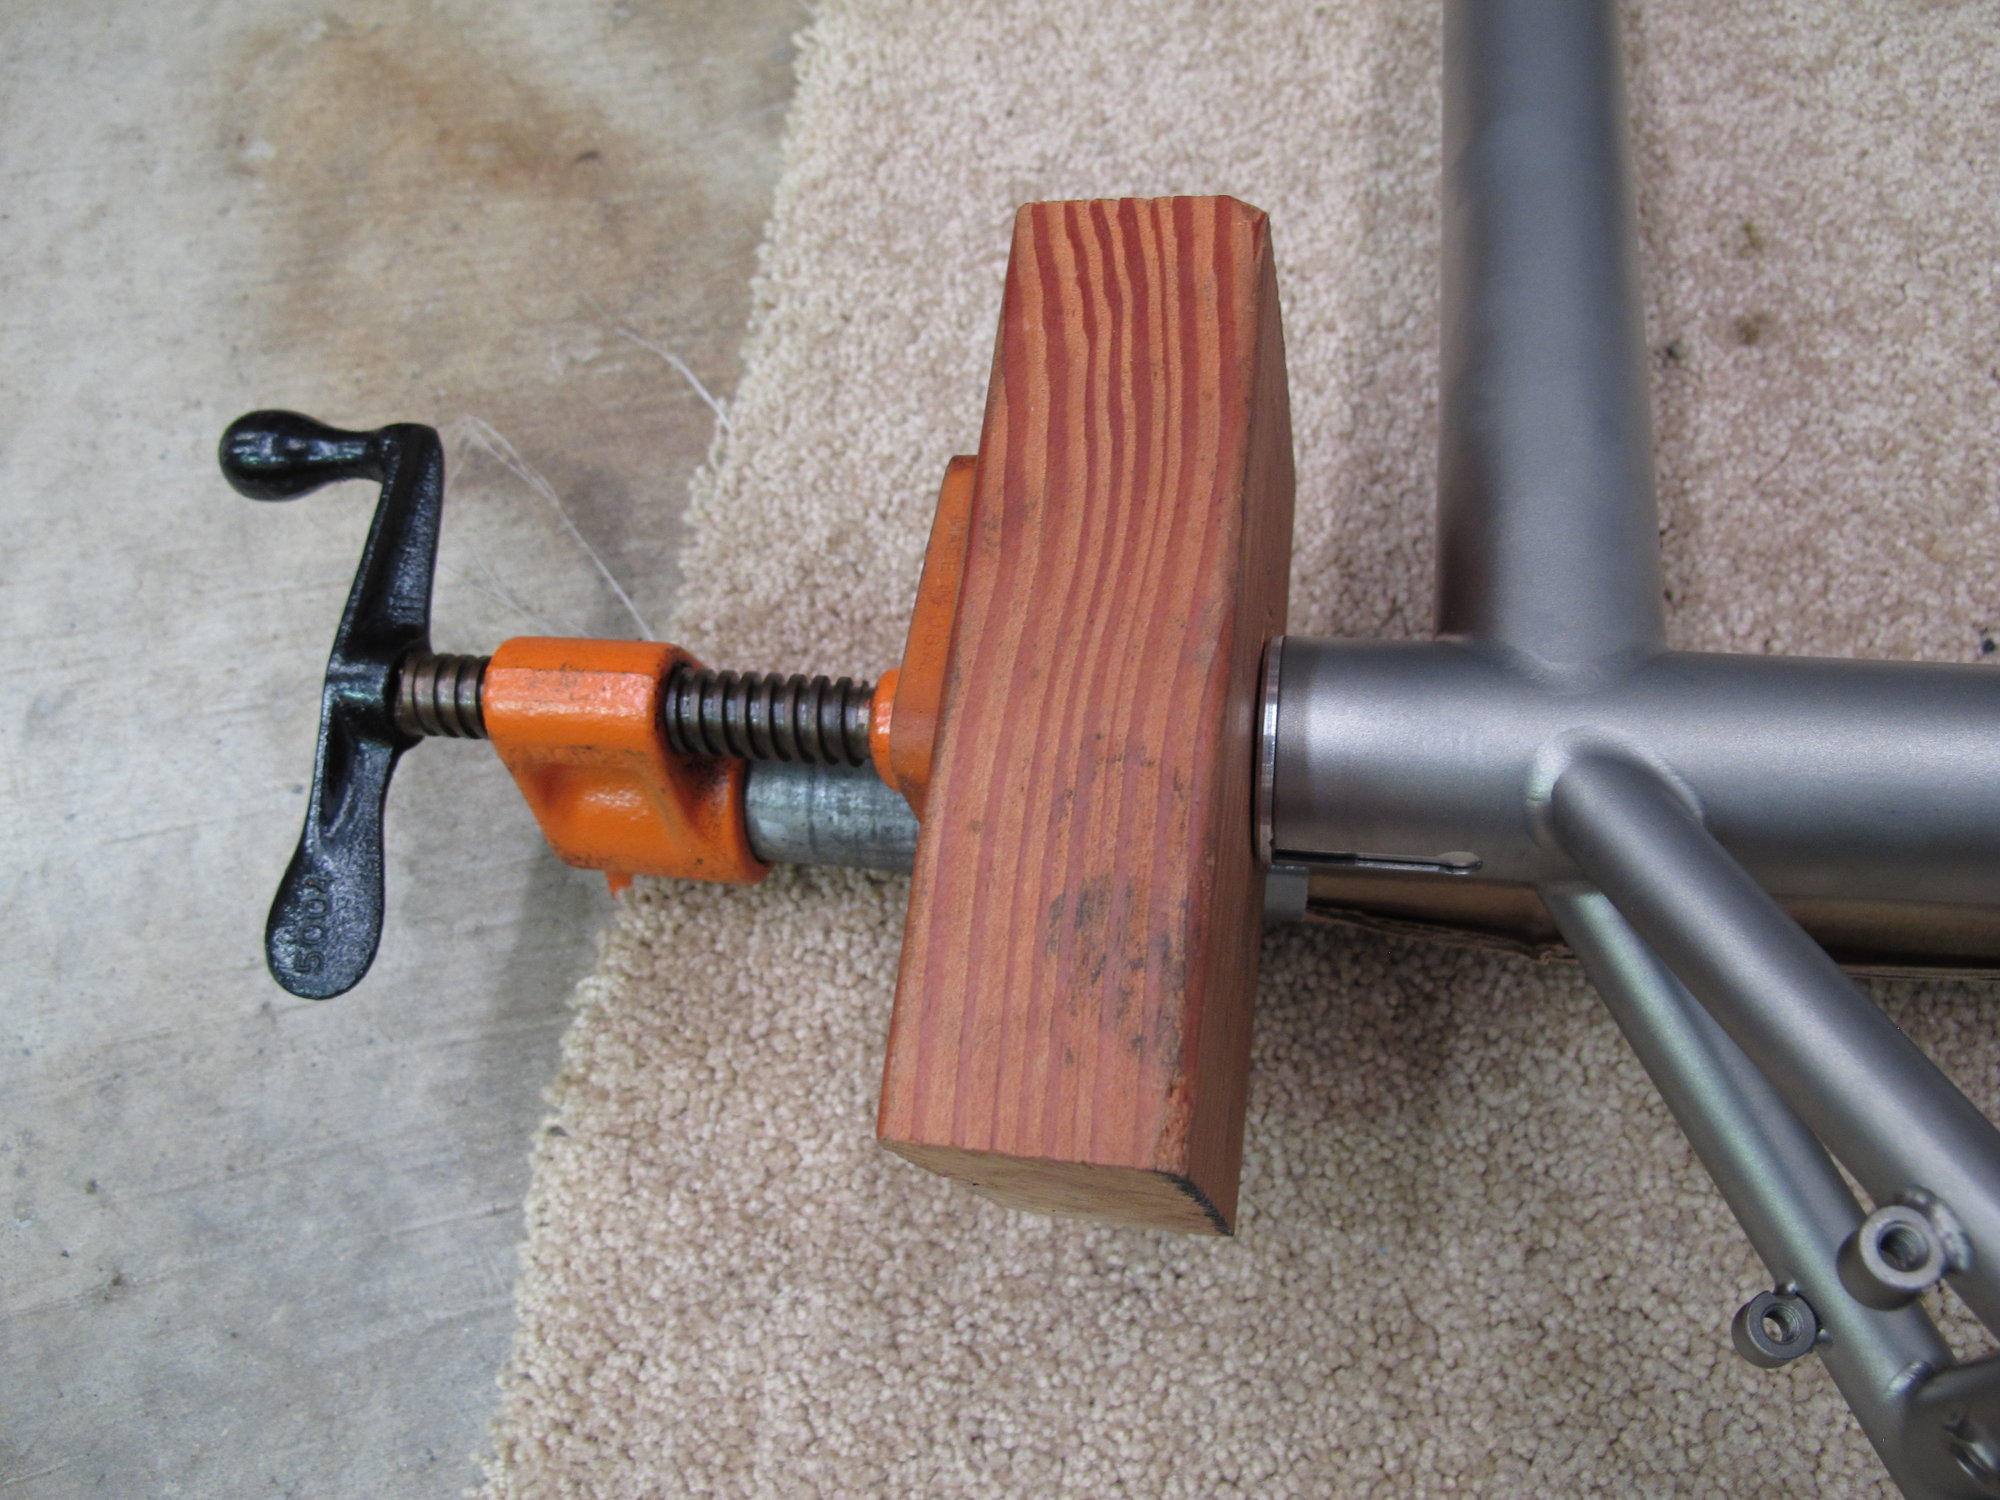
Well, it is getting closer to champagne time. I took advantage of some cooler weather to slow down the curing of the glue. I also decided to use my woodworking pipe clamp to press the new sleeve in. I am glad that I did as it took every bit of strength on the crank to press the sleeve in. Based on this the old shim would NEVER have come out without cutting the relief slot in it. In retrospect the threads on the clamp are pretty coarse.
That J-B Qwik sure sets up FAST! Really too fast for this kind of operation. The only good thing is that the excess epoxy that got pushed off the bottom of the shim was pretty much setup before I could scrape it out of the bore. Good thing that It didn't stick to anything critical. Maybe that is why they use this type of epoxy.
A couple of photos are posted below. The next step is to find (or become) the guy with the reamer.
Clamp / Press setup

Bottom Bracket Support
Shim Seated!
That J-B Qwik sure sets up FAST! Really too fast for this kind of operation. The only good thing is that the excess epoxy that got pushed off the bottom of the shim was pretty much setup before I could scrape it out of the bore. Good thing that It didn't stick to anything critical. Maybe that is why they use this type of epoxy.
A couple of photos are posted below. The next step is to find (or become) the guy with the reamer.
Clamp / Press setup
Bottom Bracket Support
Shim Seated!
Likes For Steve_sr:
