


Unexpected spacer behind Arai drum
 04-28-21, 03:24 PM
#1
Senior Member
Thread Starter
Join Date: May 2005
Location: SFBay
Posts: 2,334
Bikes: n, I would like n+1
Mentioned: 0 Post(s)
Tagged: 0 Thread(s)
Quoted: 127 Post(s)
Likes: 0
Liked 133 Times
in
108 Posts
Unexpected spacer behind Arai drum
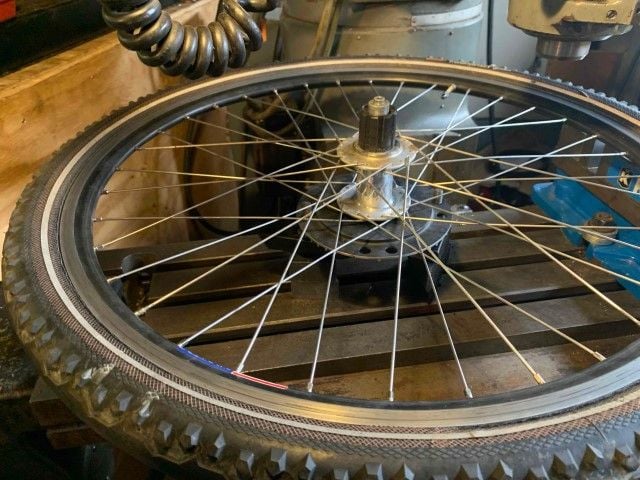
The time finally came to replace our 1976 mixte framed Lejeune tandem with a newer bike. New bike is an S&S coupled early 2000's Da Vinci. Tearing down the rear White Industries DJ hub to replace a rough bearing I discovered access to the 2 mm spacer screws was covered by the 41 mm hex on the rear drum. After removing the drum I found this spacer behind it:

Here is the hub with the spacer removed:

I haven't seen this in the past, do any of you have ideas on why it was included?
Other notes:
1. The spacer sits directly on the hub flange, not the stop that the brake drum normally goes up against. This also means it contacts the back of the drum at a larger diameter than usual, and the drum no longer seats directly against the hub.
2. It is reasonably parallel, but does have some burrs. I'm guessing it was shop or home made. It is a larger diameter than a cassette spacer.
3. The drum clears the spokes with and without the spacer. The drum clears the chain stays with and without the spacer.
4. The backing plate/shoe assembly was just floating on the axle. The ?2mm? removable spacer on the axle lines up where the backing plate should sit (if this mystery spacer is removed), but the drum backing plate was drilled out. I figure this will be easily remedied by some time with a welder and a mill.
5. The reaction arm fits into the chain stay Pac-man just fine with and without the mystery spacer.
I'm planning to just remove it, but I figure someone put it there for a reason. The only thing I can think of is that it provides some coverage for the 2.5 mm allen access hole right below the drum threads, but it isn't as if the inside of these drum brakes gets particularly dirty, and it still doesn't fully seal that, it just obscures it so that I have to remove the drum to access the hub bearings.
Here is the hub with the spacer removed:
I haven't seen this in the past, do any of you have ideas on why it was included?
Other notes:
1. The spacer sits directly on the hub flange, not the stop that the brake drum normally goes up against. This also means it contacts the back of the drum at a larger diameter than usual, and the drum no longer seats directly against the hub.
2. It is reasonably parallel, but does have some burrs. I'm guessing it was shop or home made. It is a larger diameter than a cassette spacer.
3. The drum clears the spokes with and without the spacer. The drum clears the chain stays with and without the spacer.
4. The backing plate/shoe assembly was just floating on the axle. The ?2mm? removable spacer on the axle lines up where the backing plate should sit (if this mystery spacer is removed), but the drum backing plate was drilled out. I figure this will be easily remedied by some time with a welder and a mill.
5. The reaction arm fits into the chain stay Pac-man just fine with and without the mystery spacer.
I'm planning to just remove it, but I figure someone put it there for a reason. The only thing I can think of is that it provides some coverage for the 2.5 mm allen access hole right below the drum threads, but it isn't as if the inside of these drum brakes gets particularly dirty, and it still doesn't fully seal that, it just obscures it so that I have to remove the drum to access the hub bearings.
 04-29-21, 01:45 PM
#2
Newbie
Assuming the spacer moves the drum outboard it would change the brake shoe path inside of the drum. Perhaps the brake shoe path was not lining up with the internal drum braking surface. If that is not the case, I see no reason to use it, since you covered all the other variables that come to mind.
04-29-21, 06:04 PM
#3
Full Member
Just spit-balling here but maybe it was to move the reaction bar to be inline with the pac-man on a different bike, or it was to move the drum assembly further from the hub/bearing for perceived thermal reasons
Likes For Alcanbrad:
04-29-21, 06:30 PM
#4

I am potato.

Join Date: Jun 2015
Location: Pacific Northwest
Posts: 3,116
Bikes: Only precision built, custom high performance elitist machines of the highest caliber. 🍆
Mentioned: 29 Post(s)
Tagged: 0 Thread(s)
Quoted: 1789 Post(s)
Liked 1,629 Times
in
933 Posts
I fabricated & installed a very similar spacer for my new Phil Hub. The spokes touched the back side of the drum & I was concerned that the interference would put undue pressure on the spoke nipples. A �-1 mm spacer is all that was needed to afford the clearance.
The shoe assembly then needed to be spaced outboard accordingly to prevent rubbing on the drum. This was as simple as finding the right diameter thin stainless steel washer from an Ace Hardware. The newly installed axle spacer also made the wheel a 146mm width instead of the usual 145mm, but, whatever. It's not like the � mm of paint on the drop outs accounted for that much thickness anyway.
The hole in the center of the shoe assembly is, in my experience, always bigger than it needs to be. It's purpose is not to center the shoe assembly on the axle, but instead to allow float to center the shoe assembly to the drum.
When affixing the shoe assembly to the drum, you will need to firmly actuate the lever to hold everything centered/concentric else both shoes will not contact the drum face equally. A third hand or a bit of wire to apply some squeeze pressure between the actuation arm & the reaction arm is simple enough to do while tightening the nut to hold the (now) centered shoe assembly in place.
Edit: The spacer in question may be to prevent binding or lock up to the wheel when the drum is used. In simple terms, every time the brake is used, it'll want to tighten slightly. At some point, it'll be so tight that it'll be permanent. A washer behind the drum will allow for it to be removed in the future. Much like how a brass/bronze washer will allow you to remove a hole saw from the centering drill bit.
FWIW: A bit of anti-seize or a very, very sparing use of grease on the hub threads is advised if you ever plan on removing the drum assembly ever again.
Last edited by base2; 04-29-21 at 06:39 PM.
04-30-21, 01:02 AM
#5
Senior Member
Thread Starter
Join Date: May 2005
Location: SFBay
Posts: 2,334
Bikes: n, I would like n+1
Mentioned: 0 Post(s)
Tagged: 0 Thread(s)
Quoted: 127 Post(s)
Likes: 0
Liked 133 Times
in
108 Posts
Assuming the spacer moves the drum outboard it would change the brake shoe path inside of the drum. Perhaps the brake shoe path was not lining up with the internal drum braking surface. If that is not the case, I see no reason to use it, since you covered all the other variables that come to mind.
I fabricated & installed a very similar spacer for my new Phil Hub. The spokes touched the back side of the drum & I was concerned that the interference would put undue pressure on the spoke nipples. A �-1 mm spacer is all that was needed to afford the clearance.
The shoe assembly then needed to be spaced outboard accordingly to prevent rubbing on the drum. This was as simple as finding the right diameter thin stainless steel washer from an Ace Hardware. The newly installed axle spacer also made the wheel a 146mm width instead of the usual 145mm, but, whatever. It's not like the � mm of paint on the drop outs accounted for that much thickness anyway.
The shoe assembly then needed to be spaced outboard accordingly to prevent rubbing on the drum. This was as simple as finding the right diameter thin stainless steel washer from an Ace Hardware. The newly installed axle spacer also made the wheel a 146mm width instead of the usual 145mm, but, whatever. It's not like the � mm of paint on the drop outs accounted for that much thickness anyway.
The hole in the center of the shoe assembly is, in my experience, always bigger than it needs to be. It's purpose is not to center the shoe assembly on the axle, but instead to allow float to center the shoe assembly to the drum.
When affixing the shoe assembly to the drum, you will need to firmly actuate the lever to hold everything centered/concentric else both shoes will not contact the drum face equally. A third hand or a bit of wire to apply some squeeze pressure between the actuation arm & the reaction arm is simple enough to do while tightening the nut to hold the (now) centered shoe assembly in place.
When affixing the shoe assembly to the drum, you will need to firmly actuate the lever to hold everything centered/concentric else both shoes will not contact the drum face equally. A third hand or a bit of wire to apply some squeeze pressure between the actuation arm & the reaction arm is simple enough to do while tightening the nut to hold the (now) centered shoe assembly in place.
Edit: The spacer in question may be to prevent binding or lock up to the wheel when the drum is used. In simple terms, every time the brake is used, it'll want to tighten slightly. At some point, it'll be so tight that it'll be permanent. A washer behind the drum will allow for it to be removed in the future. Much like how a brass/bronze washer will allow you to remove a hole saw from the centering drill bit.
FWIW: A bit of anti-seize or a very, very sparing use of grease on the hub threads is advised if you ever plan on removing the drum assembly ever again.
FWIW: A bit of anti-seize or a very, very sparing use of grease on the hub threads is advised if you ever plan on removing the drum assembly ever again.
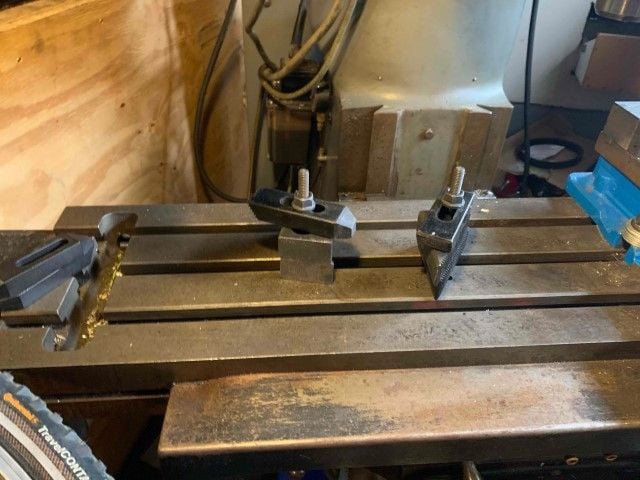
The threads were disappointingly dry when I removed the drum, so I put some aluminum based anti-seize on it when I re-installed. Last time I removed a drum I was had someone sit on the back of the bike and rolled it in reverse. I was working solo this time, so I just set up two threaded posts on the mill table like this:
 05-01-21, 08:47 PM
#6
Senior Member
Thread Starter
Join Date: May 2005
Location: SFBay
Posts: 2,334
Bikes: n, I would like n+1
Mentioned: 0 Post(s)
Tagged: 0 Thread(s)
Quoted: 127 Post(s)
Likes: 0
Liked 133 Times
in
108 Posts
Seeing as how the backing plate from my other brake lined up with the axle slot when the mystery spacer was removed I opted to leave it out. The only thing that needed to be done was turn the large wallowed out hole into the right size hole to sit in the axle slot. The offset from the inside of the flange to the inside of the spacer location on the other drum was almost exactly 5 mm, and the material was just under 2.5 mm thick (2.47 mm).
Repair became a function of materials, tools, and skills on hand, so while the weld isn't pretty, it will work without issue. I first machined out the rusty worn hole in the center:
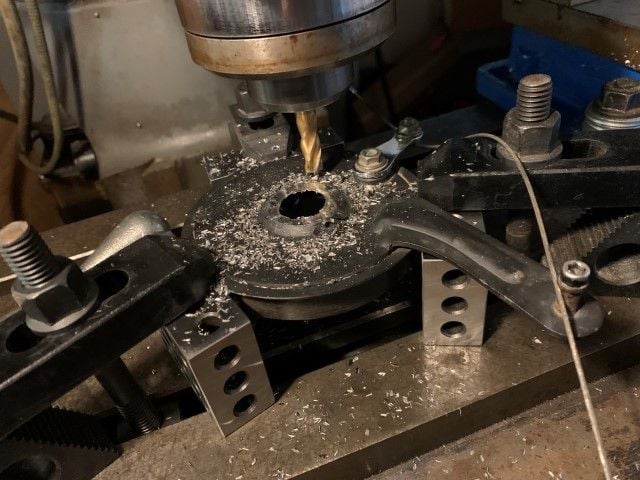
Next was this very high tech assembly to keep everything centered while I tacked it (after wrapping anything I didn't want spatter on). The washer is ~0.2 mm thicker than it should be, but the hole in the center was the right size and it was on hand. It didn't present any issues installing the rear wheel, and I can always thin it out a bit if needed later.
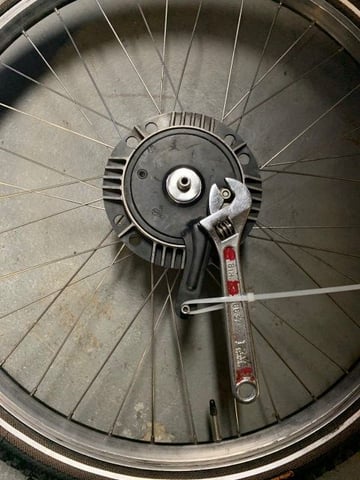
After some weld clean-up and paint touched up it's back on the bike:

Mrs. Jccaclimber, was occupied with a different hobby today, so I ran it up and down a few hills by myself to try things out. I still have no idea why that spacer was there, but everything seems to be in working order.
Repair became a function of materials, tools, and skills on hand, so while the weld isn't pretty, it will work without issue. I first machined out the rusty worn hole in the center:
Next was this very high tech assembly to keep everything centered while I tacked it (after wrapping anything I didn't want spatter on). The washer is ~0.2 mm thicker than it should be, but the hole in the center was the right size and it was on hand. It didn't present any issues installing the rear wheel, and I can always thin it out a bit if needed later.
After some weld clean-up and paint touched up it's back on the bike:
Mrs. Jccaclimber, was occupied with a different hobby today, so I ran it up and down a few hills by myself to try things out. I still have no idea why that spacer was there, but everything seems to be in working order.
Last edited by jccaclimber; 05-01-21 at 08:51 PM.
