


Chainring Remodel - Stronglight 57 Content
 06-13-22, 09:07 PM
#1

Senior Member
Thread Starter

Join Date: May 2012
Location: Point Reyes Station, California
Posts: 4,527
Bikes: Indeed!
Mentioned: 92 Post(s)
Tagged: 0 Thread(s)
Quoted: 1506 Post(s)
Liked 3,469 Times
in
1,131 Posts
Chainring Remodel - Stronglight 57 Content
If this stuff wasn't so much fun I'd consider my self a little daft!
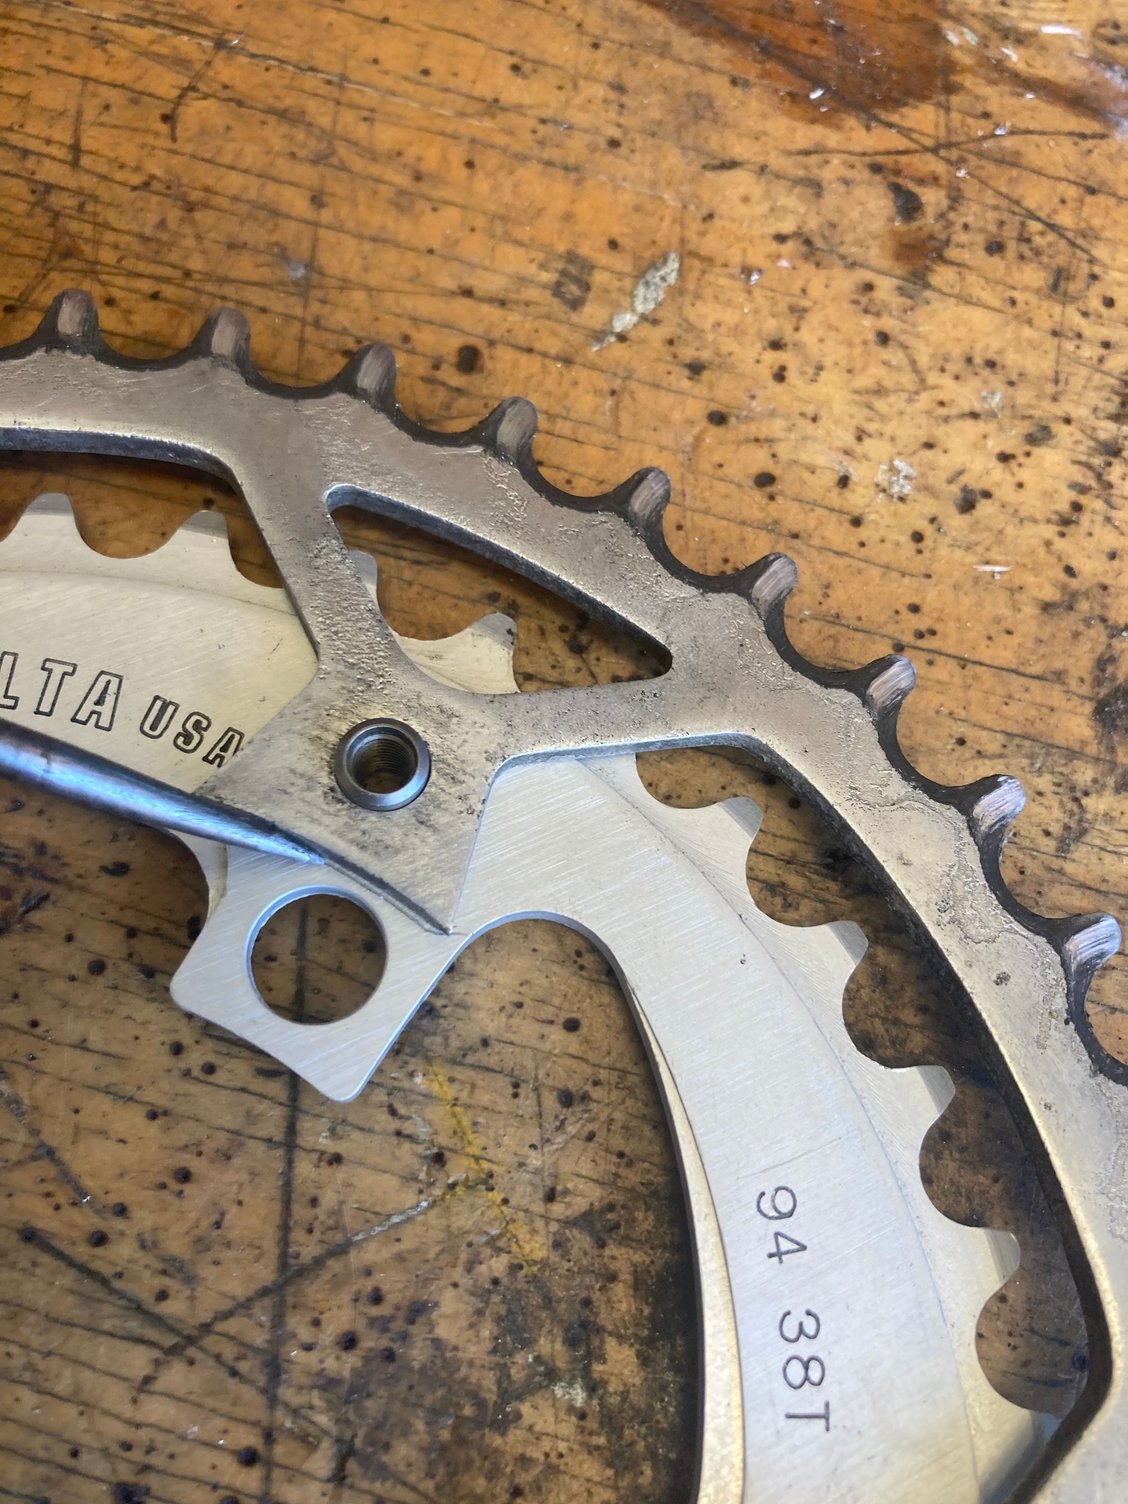
The early Stronglight cranks take unusuallysmall diameter chainring bolts, 7mm to be precise, with a 9.5mm counterbore. I'm in love with the Stronglight 57 Crankset on the late fifties Allegro that I'm taking to Cino this year, but I'm not so much in love with its 46-tooth small ring coupled with the maximum 28-tooth cog that the Record rear derailleur can handle. I've been looking for a smaller ring with the old small bore for about a year now, with no luck. Cino is just around the corner so necessity is my mother.
I'm pretty sure that, around the time that Stronglight increased the bolt size on their chainrings, anyone running an older crank just bored out the bolt holes to the larger size, but I'm inordinately proud of this old crankset and don't want to remodel it. My solution is to make a chainring out of another 38-tooth ring with a smaller bolt center diameter. I'll drill new holes to accommodate the smaller bolts.
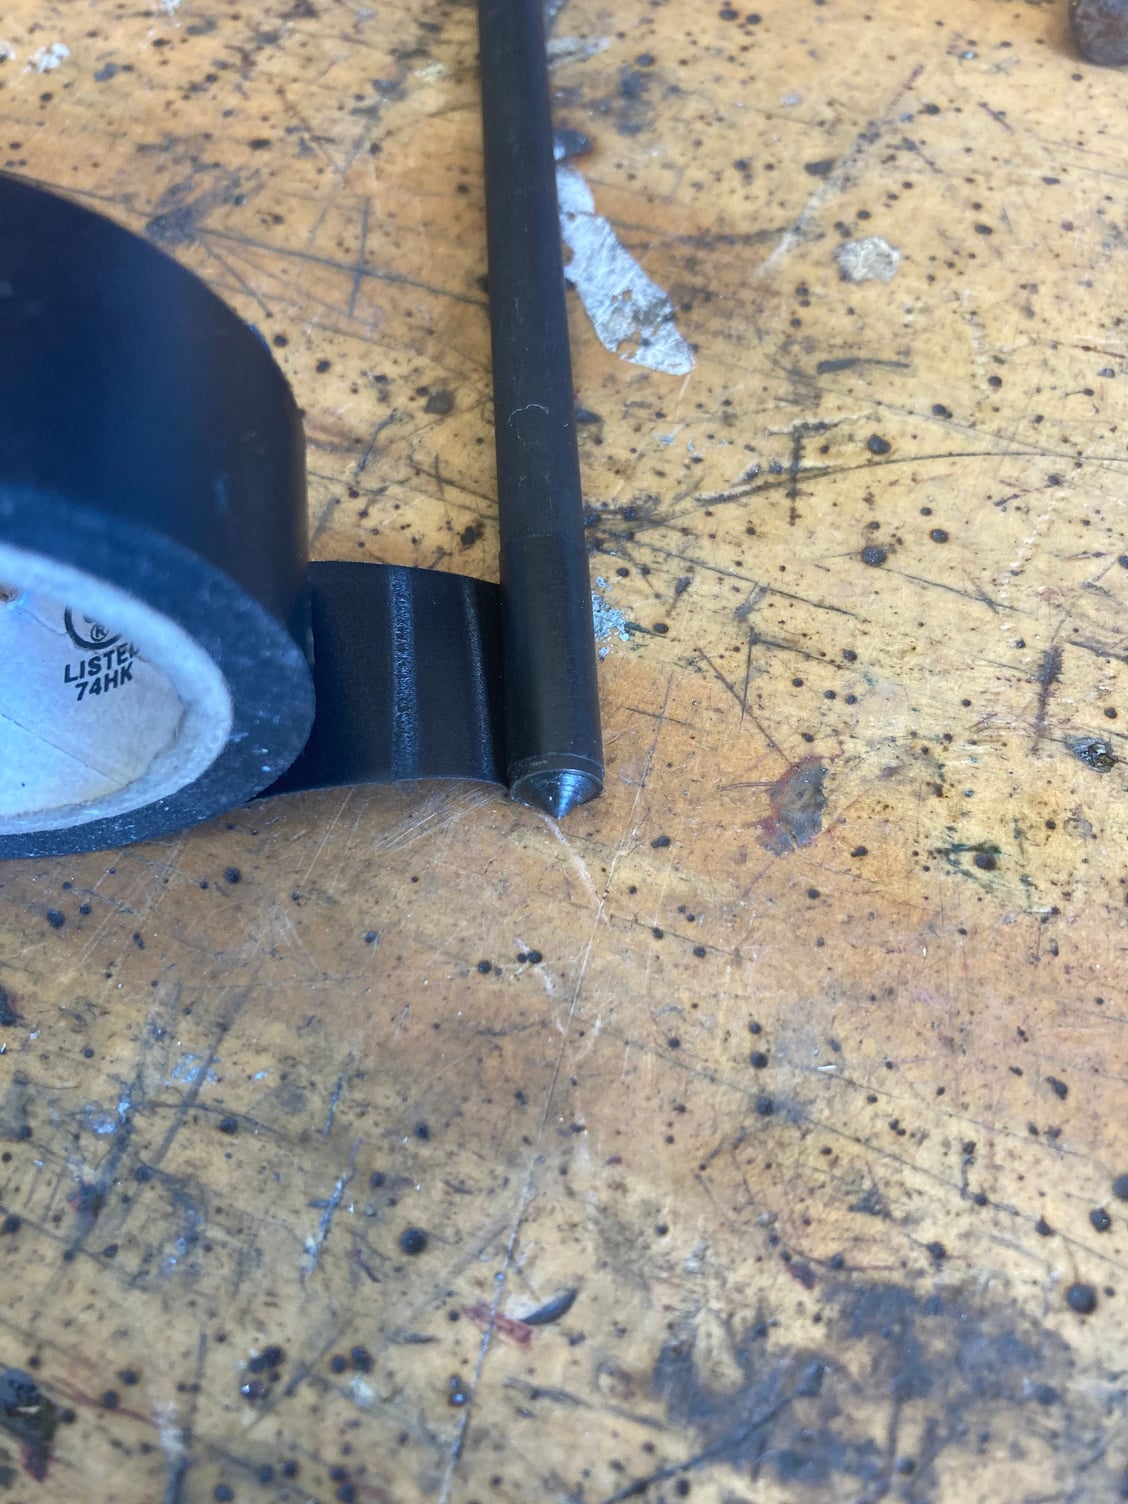
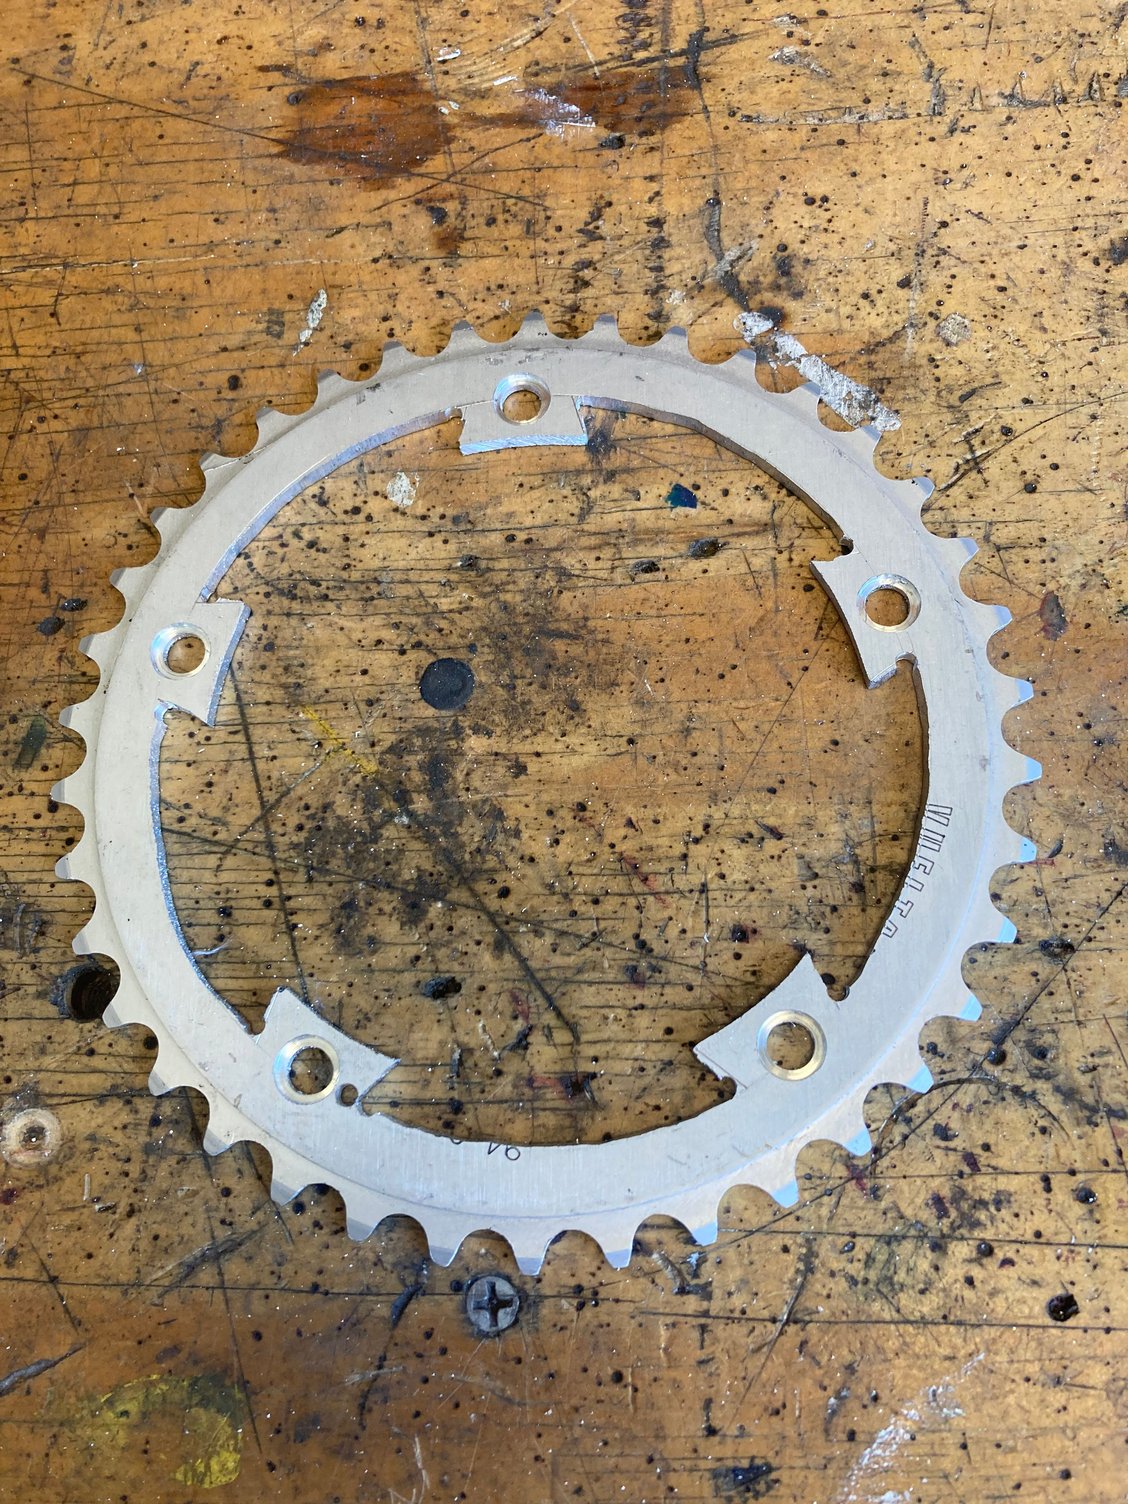
First step was to use a centering punch to transfer the bolt hole locations from an old chainring to the new one. Living in the land of inches and feet, a 7mm centering punch was not readily available so I wrapped some electrical tape around a 17/64" punch to bring it up to size.
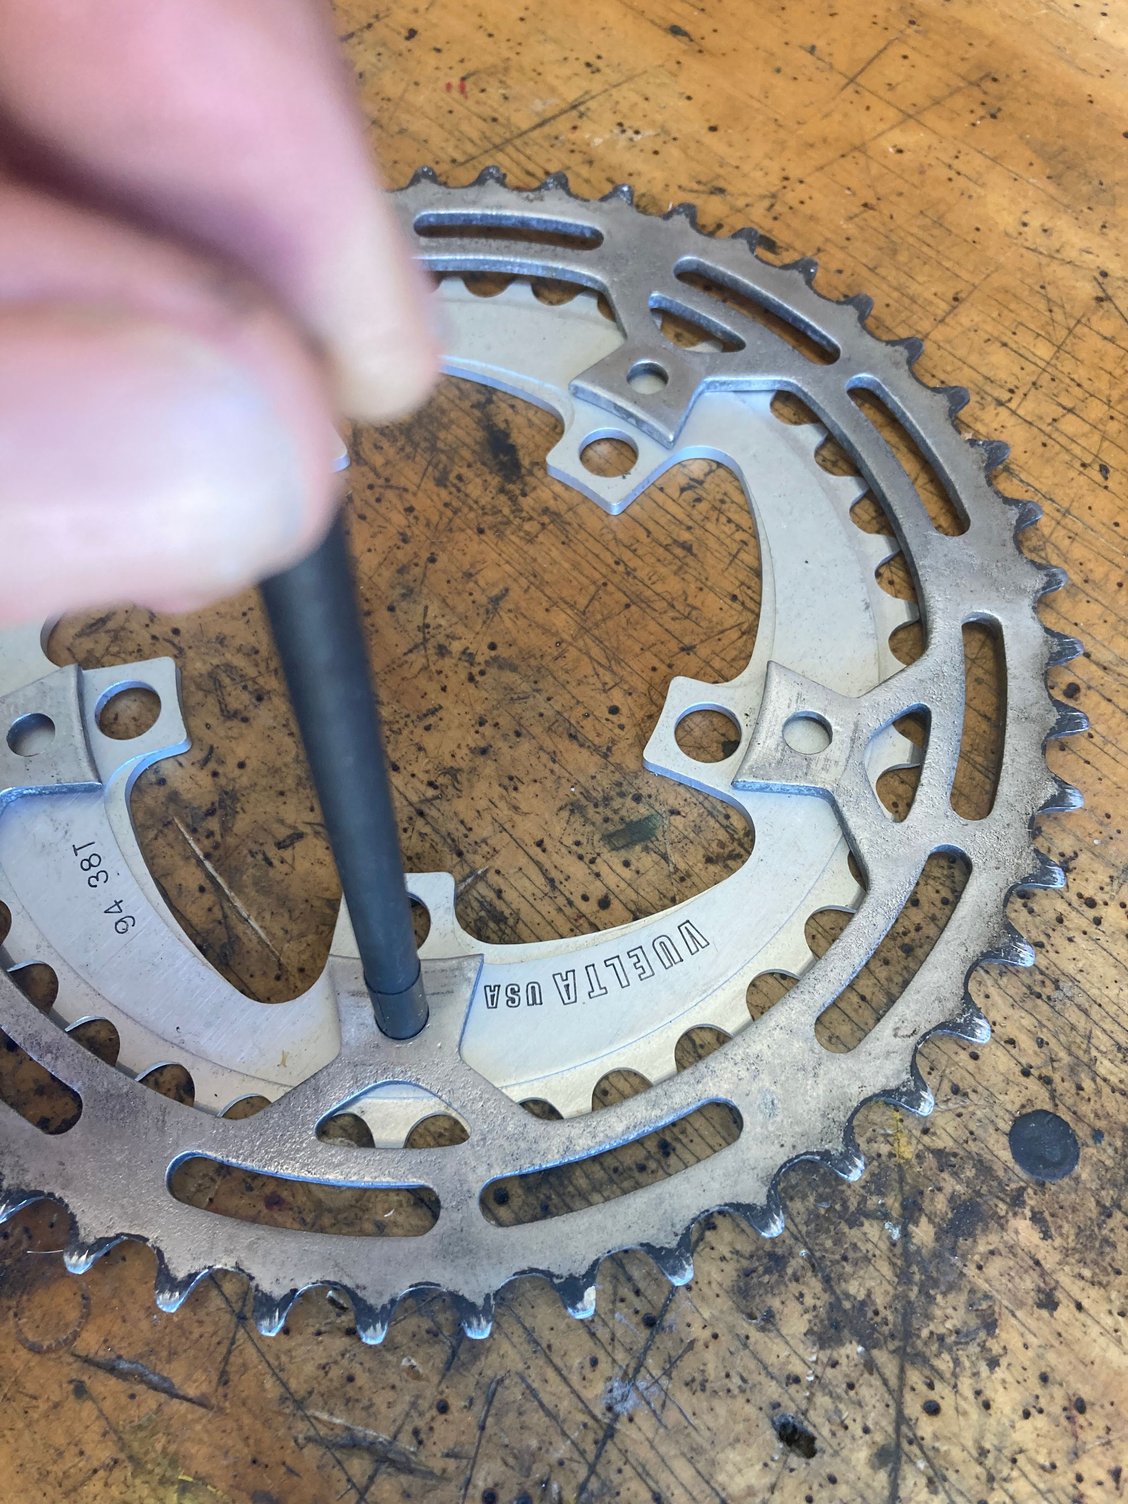
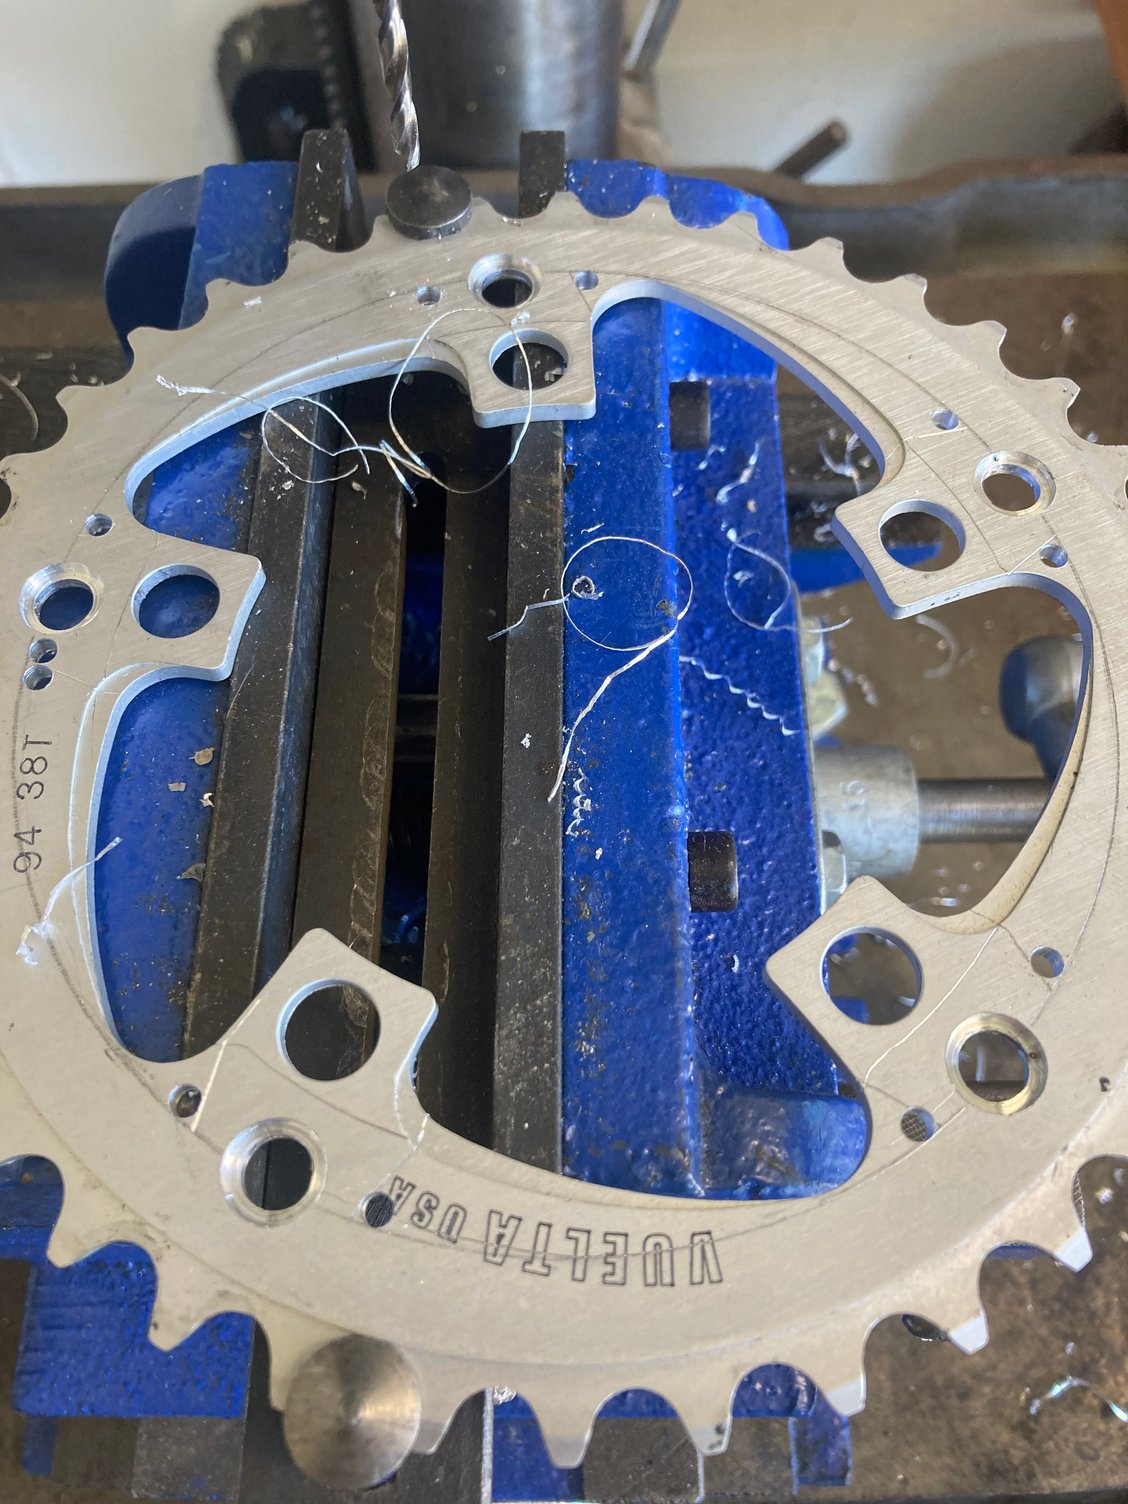
I used my old Regina freewheel vise to hold the chainring in the drill vise while drilling the 7mm holes.

First quality control test passed!

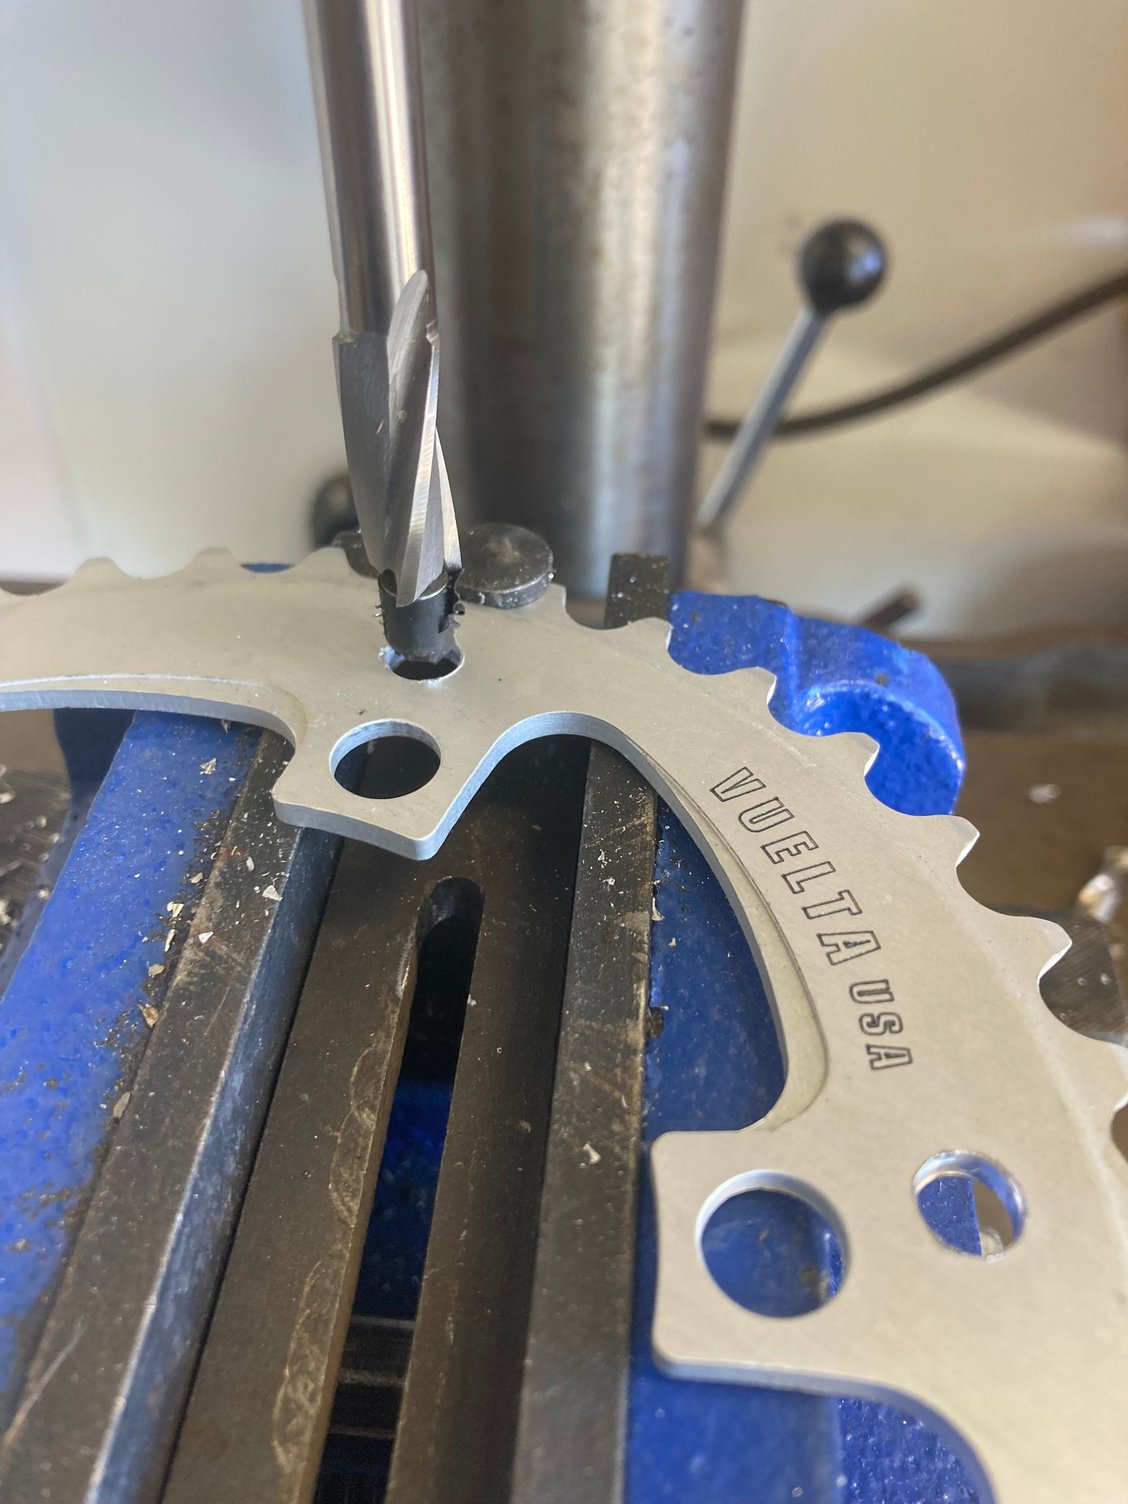
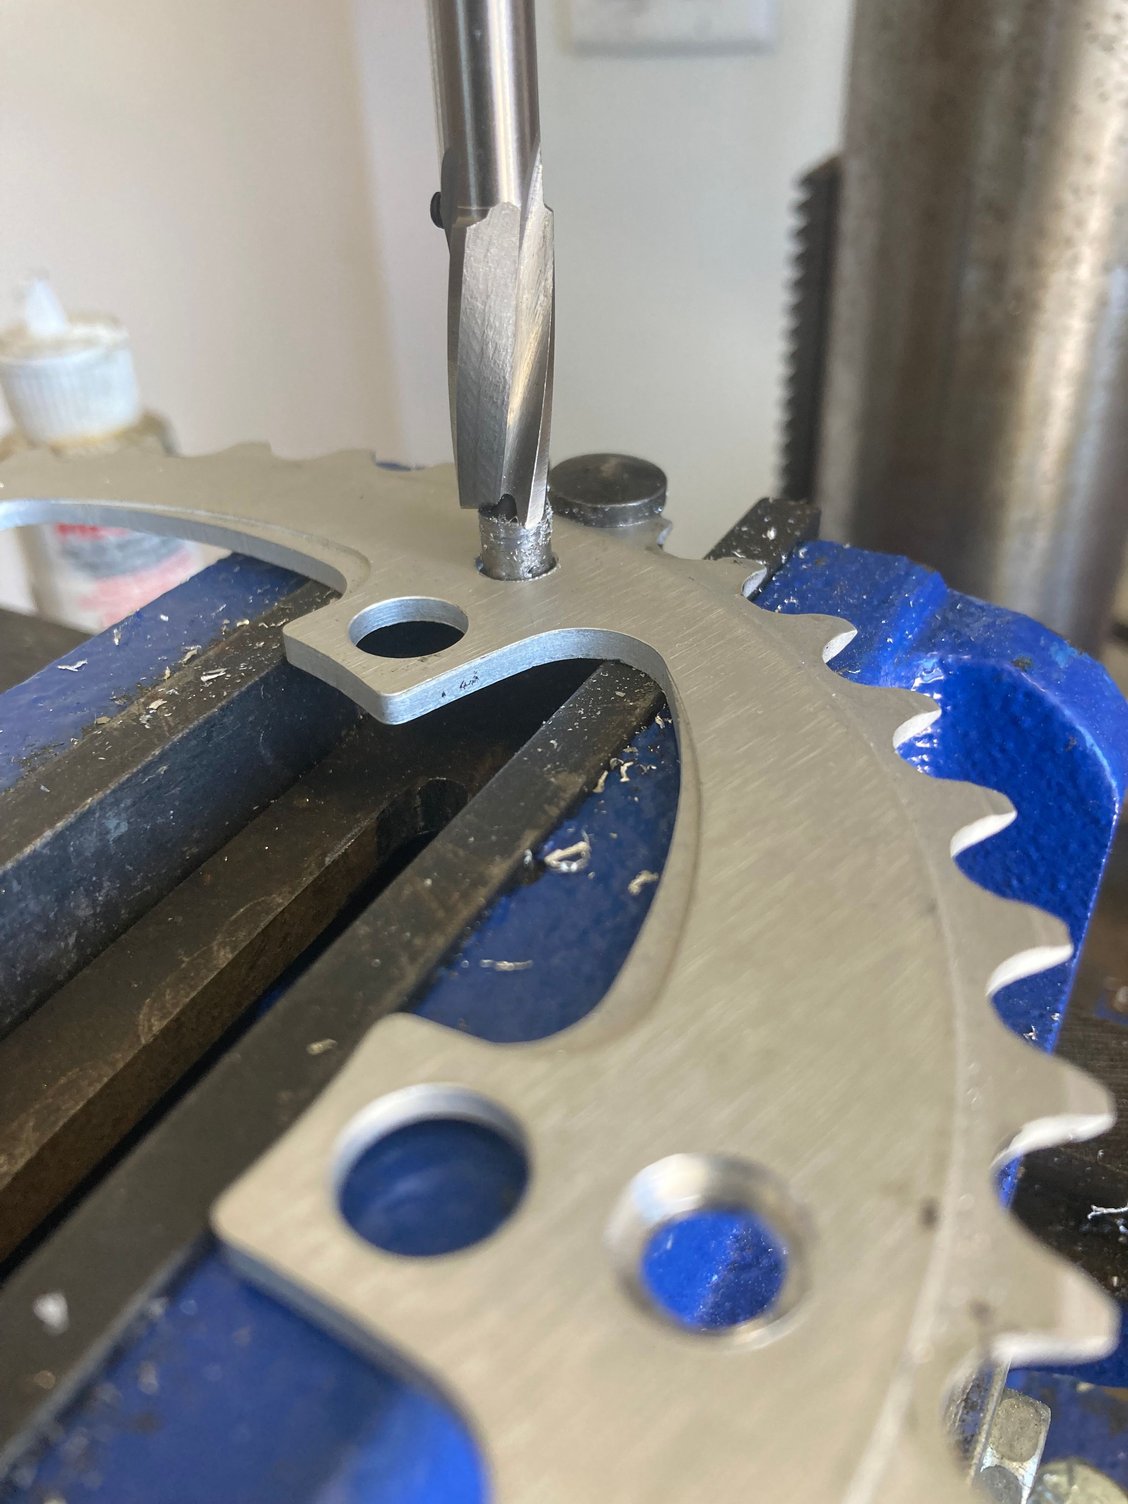
Next step was to counterbore the back side of the chainring. Again, no 9.5mm counterbore easily available but 3/8" is very close. Since my tooling is crude and I have no milling machine or rotary table I used a counterbore with an interchangeable pilot to make sure everything was concentric.

This time the electrical tape around the undersized pilot was a failure: It just tore when spinning in the hole. Fortunately, carefully eyeballing each hole was accurate enough.
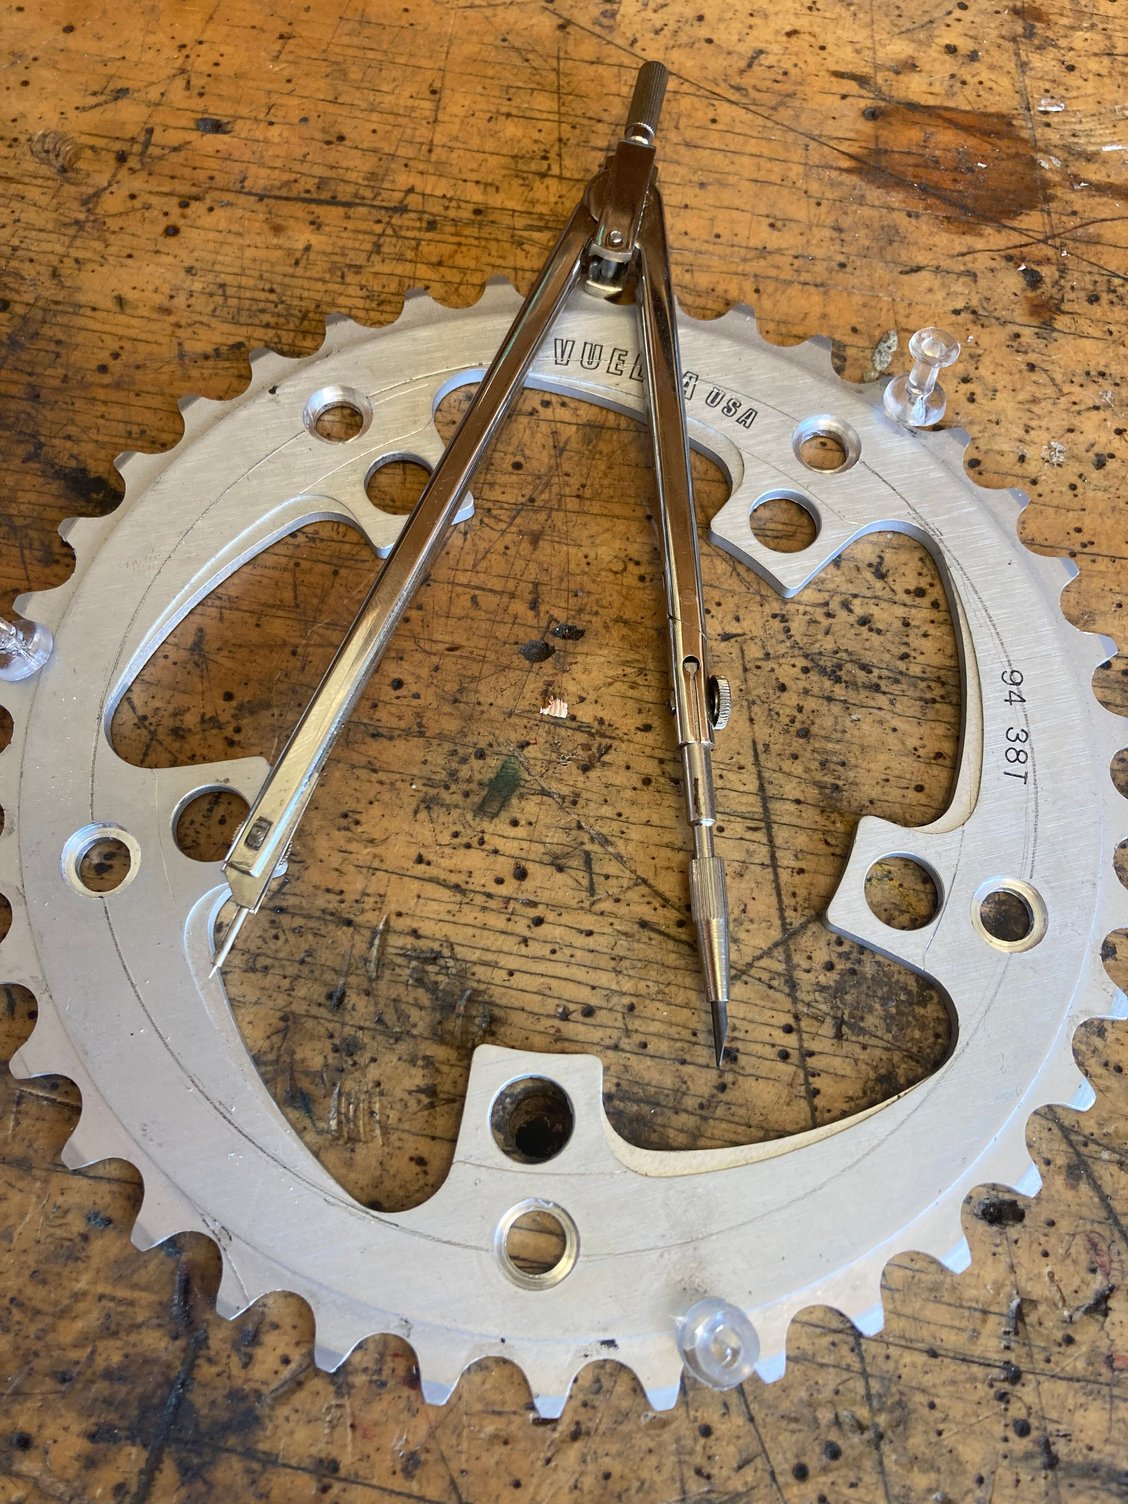
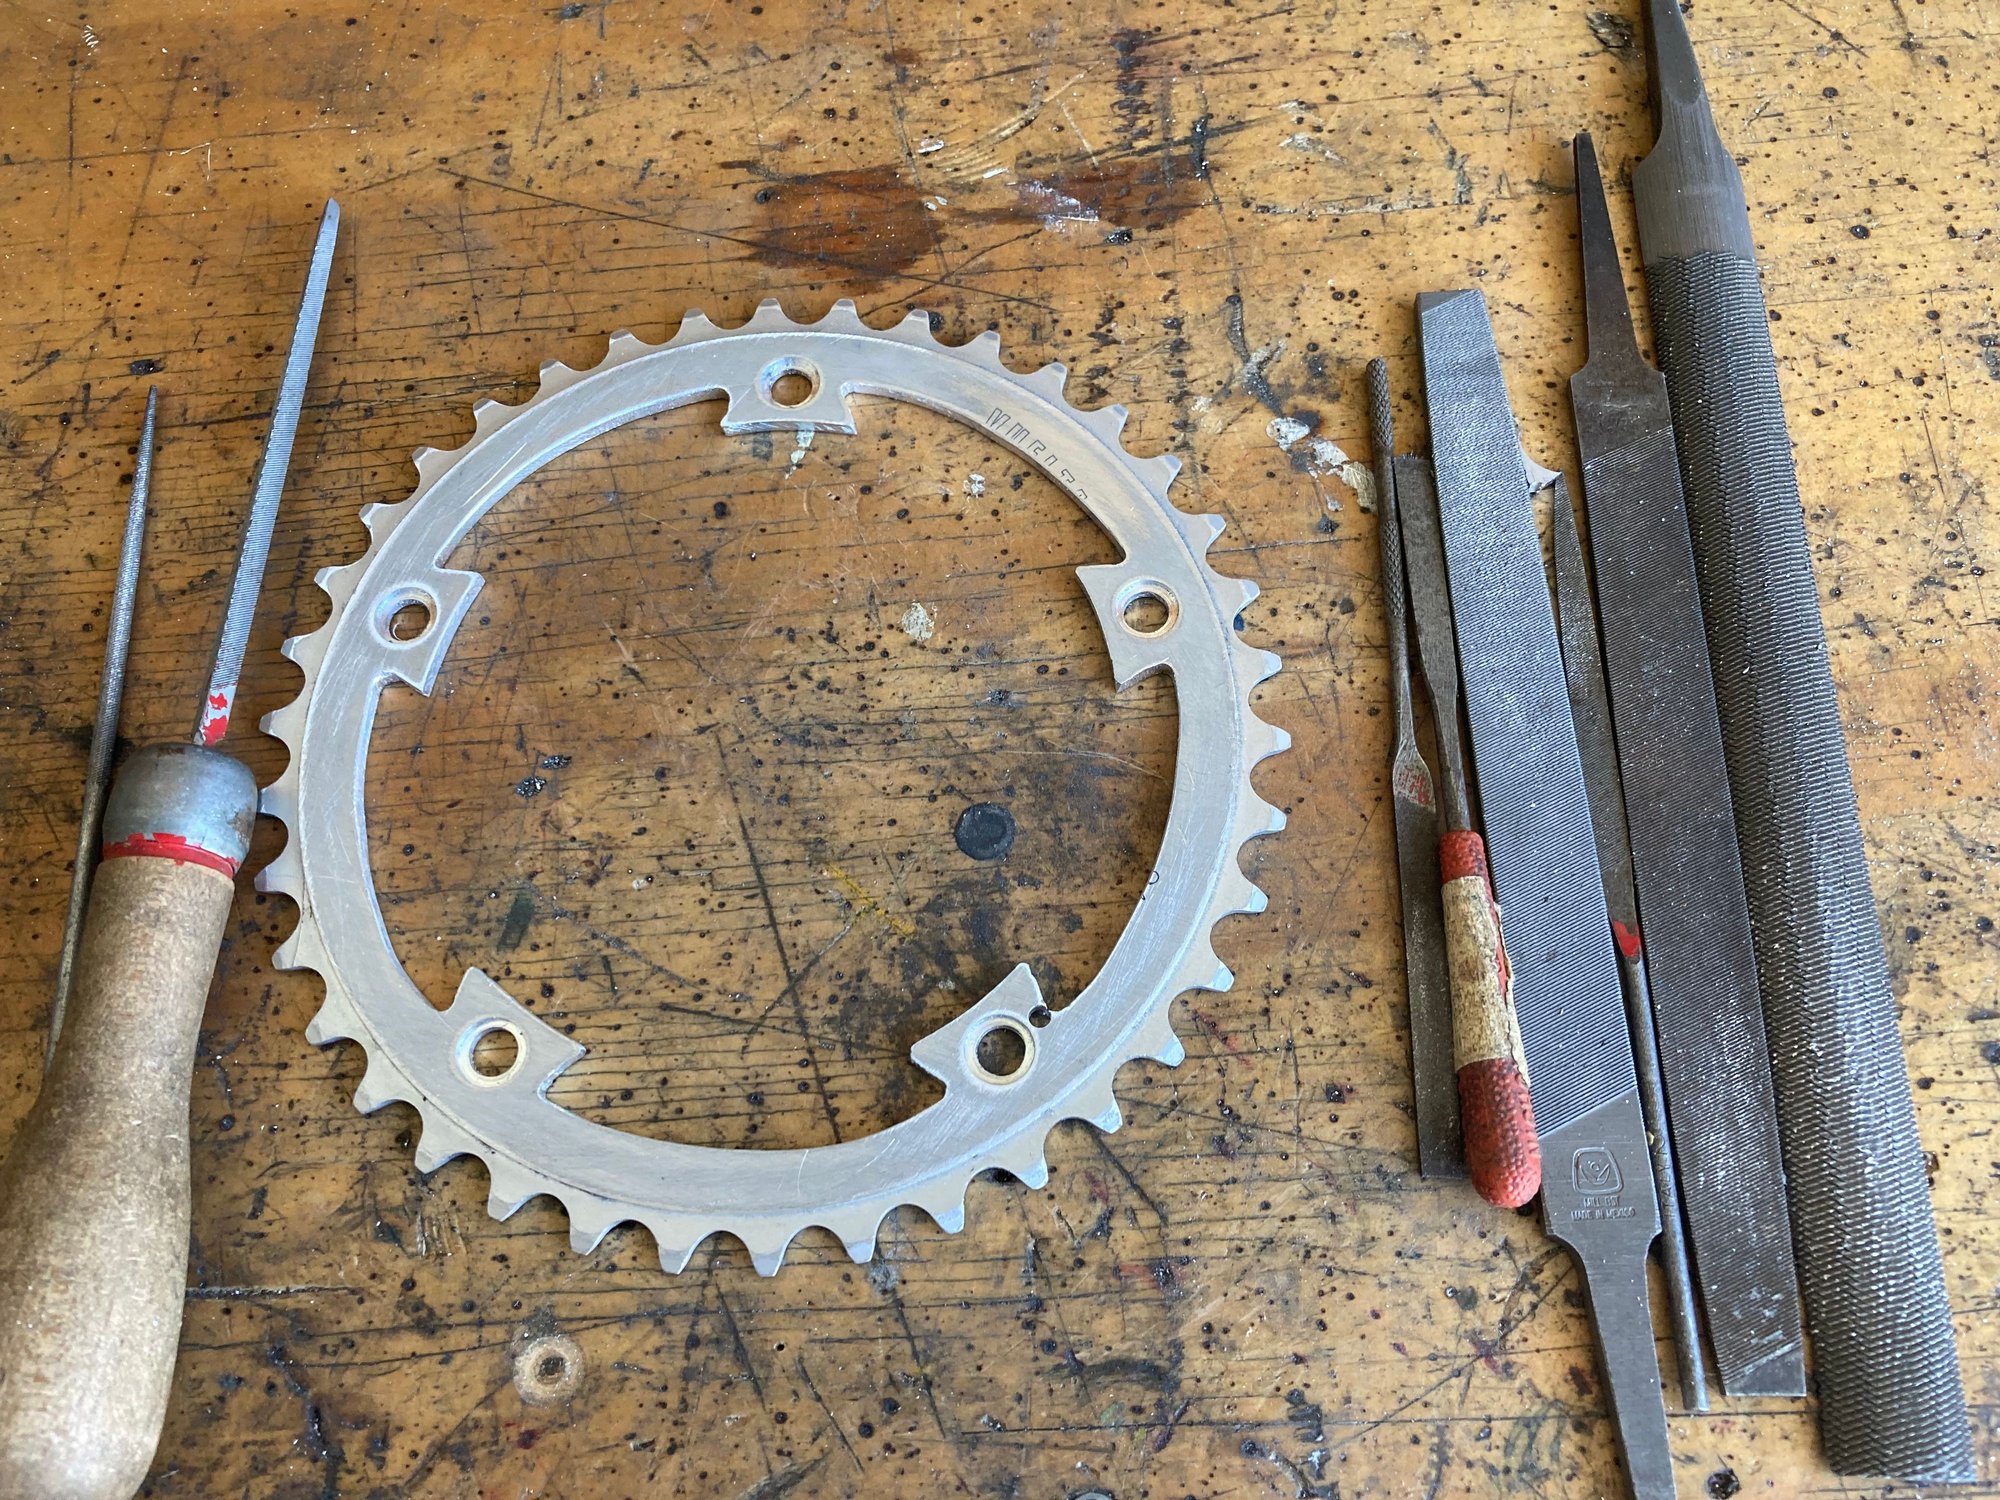
Holes finished, I now needed to cut down the chainring to its new size. I scribed the cut lines with a scratch awl and a divider with a pencil lead tip.
...Continued below.
Brent
The early Stronglight cranks take unusuallysmall diameter chainring bolts, 7mm to be precise, with a 9.5mm counterbore. I'm in love with the Stronglight 57 Crankset on the late fifties Allegro that I'm taking to Cino this year, but I'm not so much in love with its 46-tooth small ring coupled with the maximum 28-tooth cog that the Record rear derailleur can handle. I've been looking for a smaller ring with the old small bore for about a year now, with no luck. Cino is just around the corner so necessity is my mother.
I'm pretty sure that, around the time that Stronglight increased the bolt size on their chainrings, anyone running an older crank just bored out the bolt holes to the larger size, but I'm inordinately proud of this old crankset and don't want to remodel it. My solution is to make a chainring out of another 38-tooth ring with a smaller bolt center diameter. I'll drill new holes to accommodate the smaller bolts.
First step was to use a centering punch to transfer the bolt hole locations from an old chainring to the new one. Living in the land of inches and feet, a 7mm centering punch was not readily available so I wrapped some electrical tape around a 17/64" punch to bring it up to size.
I used my old Regina freewheel vise to hold the chainring in the drill vise while drilling the 7mm holes.
First quality control test passed!
Next step was to counterbore the back side of the chainring. Again, no 9.5mm counterbore easily available but 3/8" is very close. Since my tooling is crude and I have no milling machine or rotary table I used a counterbore with an interchangeable pilot to make sure everything was concentric.
This time the electrical tape around the undersized pilot was a failure: It just tore when spinning in the hole. Fortunately, carefully eyeballing each hole was accurate enough.
Holes finished, I now needed to cut down the chainring to its new size. I scribed the cut lines with a scratch awl and a divider with a pencil lead tip.
...Continued below.
Brent
Last edited by obrentharris; 06-13-22 at 09:36 PM. Reason: grammar

Likes For obrentharris:
06-13-22, 09:24 PM
#2
Senior Member

Join Date: Feb 2013
Location: Alta California
Posts: 14,260
Mentioned: 415 Post(s)
Tagged: 1 Thread(s)
Quoted: 3810 Post(s)
Liked 3,335 Times
in
2,175 Posts
-----
although obrentharris is a pretty full name we may have to figger out how to add a Verot in there somewheres...
-----
although obrentharris is a pretty full name we may have to figger out how to add a Verot in there somewheres...
-----
Likes For juvela:
06-13-22, 09:32 PM
#3
Senior Member
Thread Starter
Join Date: May 2012
Location: Point Reyes Station, California
Posts: 4,527
Bikes: Indeed!
Mentioned: 92 Post(s)
Tagged: 0 Thread(s)
Quoted: 1506 Post(s)
Liked 3,469 Times
in
1,131 Posts
The old chainring provided a template for the shape of the new one. A 1/8" drill provided a radius at the corners.
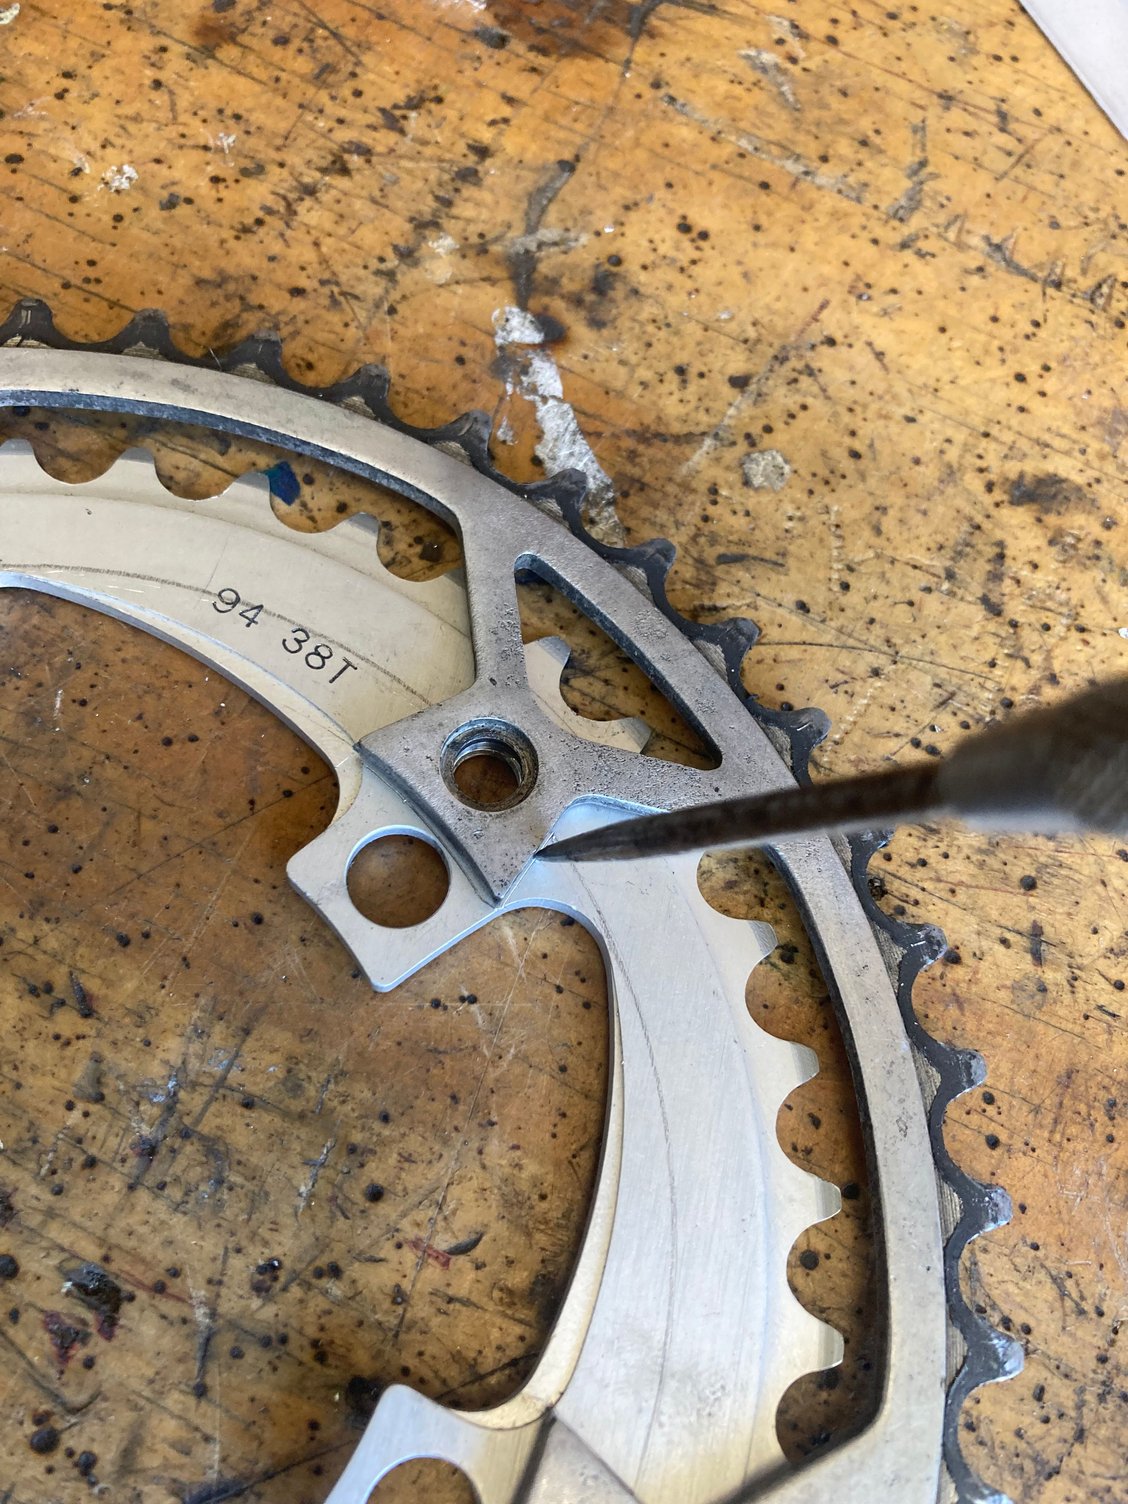
Uh oh! See that extra hole on the left side of the photo? Yep, I drilled on the wrong side of the line. I guess we call this a working prototype now.
This is a good time for me to point out that I am not a professional metal worker, or even an educated amateur. The steps I am outlining here are only the best method I could invent given my lack of tools and training. I would be grateful for any critique of my methods.
I used a jewelers saw to make my rough cuts, always cutting a little short of the line, then cleaned up my work with a file while test fitting to the crank.


After insuring a snug fit on the crank spider I finished up the rough cuts. Rough indeed!
I cleaned up my cuts with a variety of files.
Some sanding and polishing eliminated the brushed finish of the new chainring.
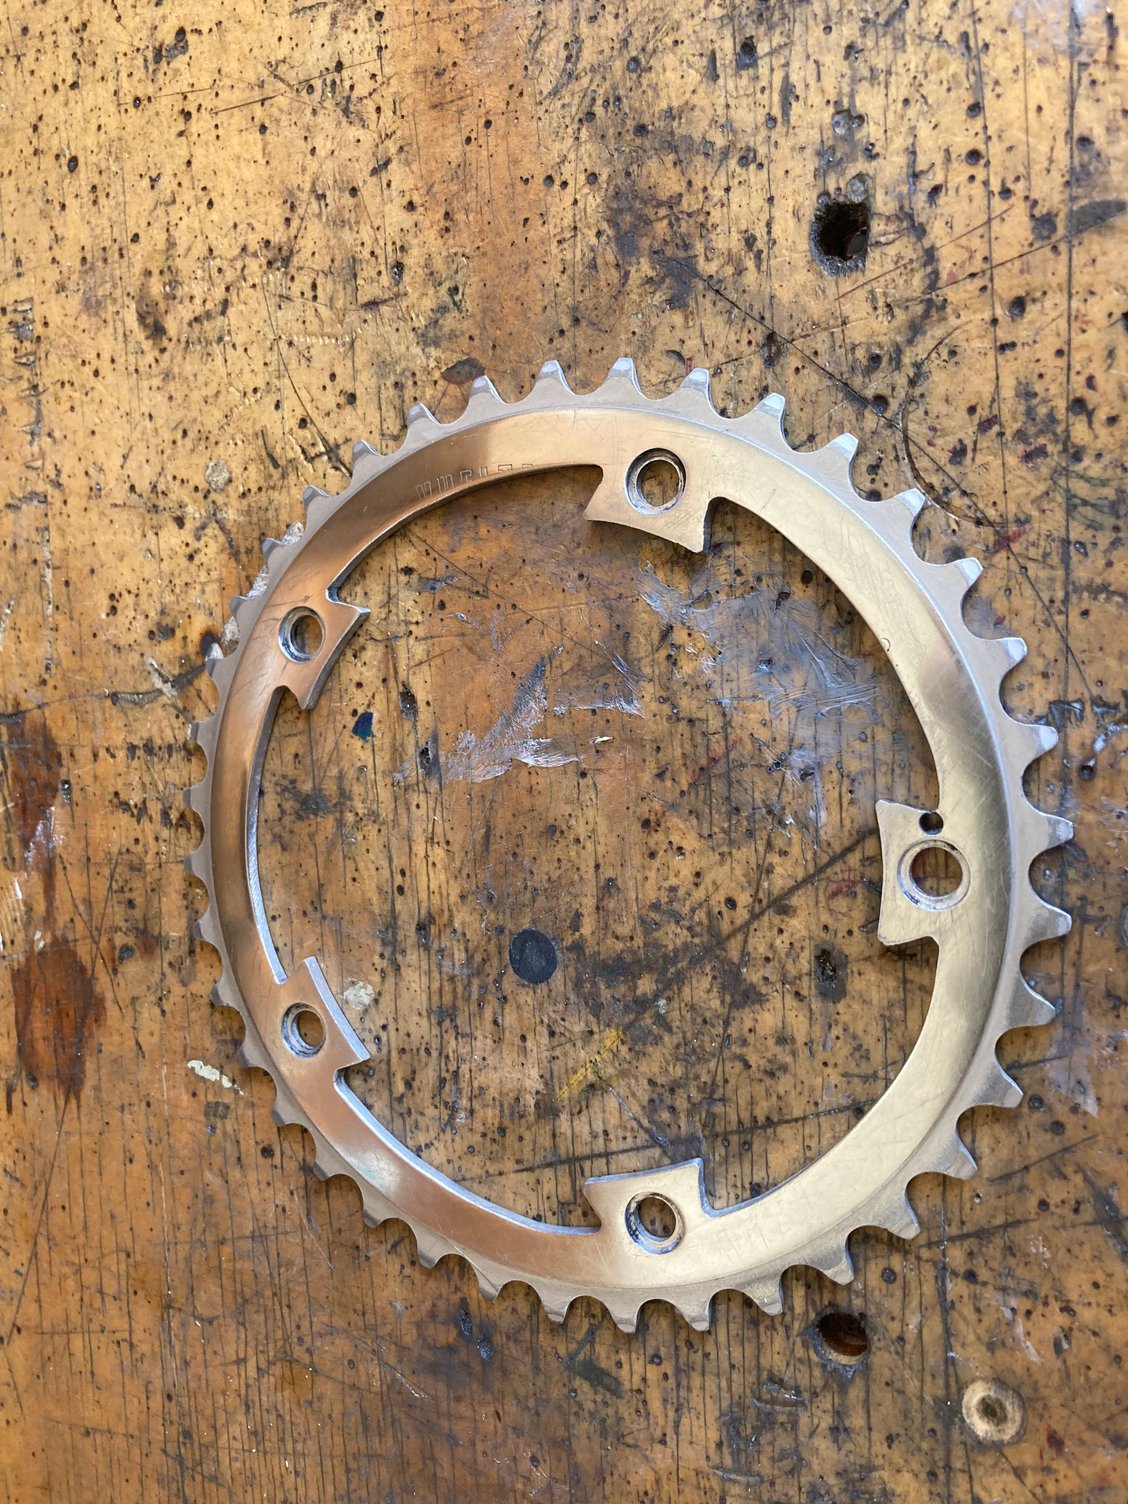
In hindsite I should have cut the web between the holes a bit thinner to better match the big chainring, but I am still fairly pleased with the result.
Brent
Uh oh! See that extra hole on the left side of the photo? Yep, I drilled on the wrong side of the line. I guess we call this a working prototype now.
This is a good time for me to point out that I am not a professional metal worker, or even an educated amateur. The steps I am outlining here are only the best method I could invent given my lack of tools and training. I would be grateful for any critique of my methods.
I used a jewelers saw to make my rough cuts, always cutting a little short of the line, then cleaned up my work with a file while test fitting to the crank.
After insuring a snug fit on the crank spider I finished up the rough cuts. Rough indeed!
I cleaned up my cuts with a variety of files.
Some sanding and polishing eliminated the brushed finish of the new chainring.
In hindsite I should have cut the web between the holes a bit thinner to better match the big chainring, but I am still fairly pleased with the result.
Brent
Likes For obrentharris:
06-13-22, 09:47 PM
#4
Senior Member
Join Date: Feb 2013
Location: Alta California
Posts: 14,260
Mentioned: 415 Post(s)
Tagged: 1 Thread(s)
Quoted: 3810 Post(s)
Liked 3,335 Times
in
2,175 Posts
-----
one takes this project to mean that ye shall plan to be accompanied to Cino by a certain migrant from Neuchatel
-----
one takes this project to mean that ye shall plan to be accompanied to Cino by a certain migrant from Neuchatel
-----
06-13-22, 09:52 PM
#5
Senior Member
Thread Starter
Join Date: May 2012
Location: Point Reyes Station, California
Posts: 4,527
Bikes: Indeed!
Mentioned: 92 Post(s)
Tagged: 0 Thread(s)
Quoted: 1506 Post(s)
Liked 3,469 Times
in
1,131 Posts
06-14-22, 02:16 AM
#6
Senior Member
Join Date: Feb 2020
Posts: 2,817
Mentioned: 49 Post(s)
Tagged: 0 Thread(s)
Quoted: 1106 Post(s)
Likes: 0
Liked 1,326 Times
in
782 Posts
Tap that hole, put a bit of aluminium screw through, just long enough to go through and let you peen both ends. You do that enough to distort the threads below the surfaces of the hole (so the bit will stay put), file/sand the ends flush and burnish.
Last edited by oneclick; 06-14-22 at 12:57 PM.
Likes For oneclick:
06-14-22, 05:15 AM
#7
Senior Member
Join Date: Feb 2013
Location: Alta California
Posts: 14,260
Mentioned: 415 Post(s)
Tagged: 1 Thread(s)
Quoted: 3810 Post(s)
Liked 3,335 Times
in
2,175 Posts
-----
one point not mentioned in this very fine account is that the modern "donor" chainwheel probably has its dentition cut from both sides of the stock while Verot chainwheels of this era had their dentition cut from one side only
if this is the case with the donor chainwheel the distance between the chainwheel teeth in this two plateau configuration will have been increased from the OEM configuration
a state of affairs which opens the possibility for derailments where the chain is wedged between the chainwheels
Verot ceased the practice of cutting chainwheel teeth from one side of the stock only with the 1977 launch of models 104 and 105
-----
Last edited by juvela; 06-14-22 at 09:38 AM. Reason: addition
Likes For juvela:
06-14-22, 05:24 AM
#8
ambulatory senior
Join Date: Dec 2016
Location: Peoria Il
Posts: 5,998
Bikes: Austro Daimler modified by Gugie! Raleigh Professional and lots of other bikes.
Mentioned: 76 Post(s)
Tagged: 0 Thread(s)
Quoted: 1955 Post(s)
Liked 3,661 Times
in
1,679 Posts
Inspiring.
Likes For 52telecaster:
06-14-22, 06:28 AM
#9
weapons-grade bolognium

Join Date: Dec 2008
Location: Across the street from Chicago
Posts: 6,344
Bikes: Battaglin Cromor, Ciocc Designer 84, Schwinn Superior 1981
Mentioned: 44 Post(s)
Tagged: 0 Thread(s)
Quoted: 985 Post(s)
Liked 2,378 Times
in
891 Posts
Where there’s a will, there’s a way.
Likes For thinktubes:
06-14-22, 07:03 AM
#10
Freewheel Medic

Join Date: Oct 2005
Location: An Island on the Coast of GA!
Posts: 12,882
Bikes: Snazzy* Schwinns, Classy Cannondales & a Super Pro Aero Lotus (* Ed.)
Mentioned: 140 Post(s)
Tagged: 0 Thread(s)
Quoted: 1452 Post(s)
Liked 2,194 Times
in
962 Posts
Exceptionally well executed! I made a similar modification a few years ago. I added a granny chainring to a Nevar double crankset. But after careful planning, I recruited a machinist to complete the bolt hole drilling. I just didn't trust my skills. My hat's off to you!
__________________
Bob
Enjoying the GA coast all year long!
Thanks for visiting my website: www.freewheelspa.com
Bob
Enjoying the GA coast all year long!
Thanks for visiting my website: www.freewheelspa.com
Likes For pastorbobnlnh:
06-14-22, 07:28 AM
#11
Senior Member
Join Date: Apr 2011
Location: Maryland, USA
Posts: 2,431
Bikes: Drysdale/Gitane/Zeus/Masi/Falcon/Palo Alto/Raleigh/Legnano
Mentioned: 34 Post(s)
Tagged: 0 Thread(s)
Quoted: 981 Post(s)
Liked 631 Times
in
402 Posts
Not familiar with model 57 (looks like a cross between 49 & 93, but [49+93]/2 is 71, so I am wrong), but I like how the results look!
__________________
Larry:1958 Drysdale, 1961 Gitane Gran Sport, 1974 Zeus track, 1988 Masi Gran Corsa, 1974 Falcon, 1980 Palo Alto, 1973 Raleigh Gran Sport, 1974 Legnano. Susan: 1976 Windsor Profesional.
Larry:1958 Drysdale, 1961 Gitane Gran Sport, 1974 Zeus track, 1988 Masi Gran Corsa, 1974 Falcon, 1980 Palo Alto, 1973 Raleigh Gran Sport, 1974 Legnano. Susan: 1976 Windsor Profesional.
Likes For tiger1964:
06-14-22, 08:51 AM
#12
Senior Member
Thread Starter
Join Date: May 2012
Location: Point Reyes Station, California
Posts: 4,527
Bikes: Indeed!
Mentioned: 92 Post(s)
Tagged: 0 Thread(s)
Quoted: 1506 Post(s)
Liked 3,469 Times
in
1,131 Posts
-----
one point not mentioned in this very fine account is that the modern "donor" chainwheel probably has its dentition cut from both sides of the stock while Verot chainwheels of this era had their dentition cut from one side only
if this is the case with the donor chainwheel the distance between the chainwheel teeth in this two plateau configuration will have been increased from the OEM configuration
a state of affairs which opens the possibility for derailments where the chain is wedged between the chainwheels
Verot ceased the practice of cutting chainwheel teeth from one side of the stock only with the launch of models 104 and 105
-----
Brent
Likes For obrentharris:
06-14-22, 08:44 PM
#13
Senior Member
Thread Starter
Join Date: May 2012
Location: Point Reyes Station, California
Posts: 4,527
Bikes: Indeed!
Mentioned: 92 Post(s)
Tagged: 0 Thread(s)
Quoted: 1506 Post(s)
Liked 3,469 Times
in
1,131 Posts
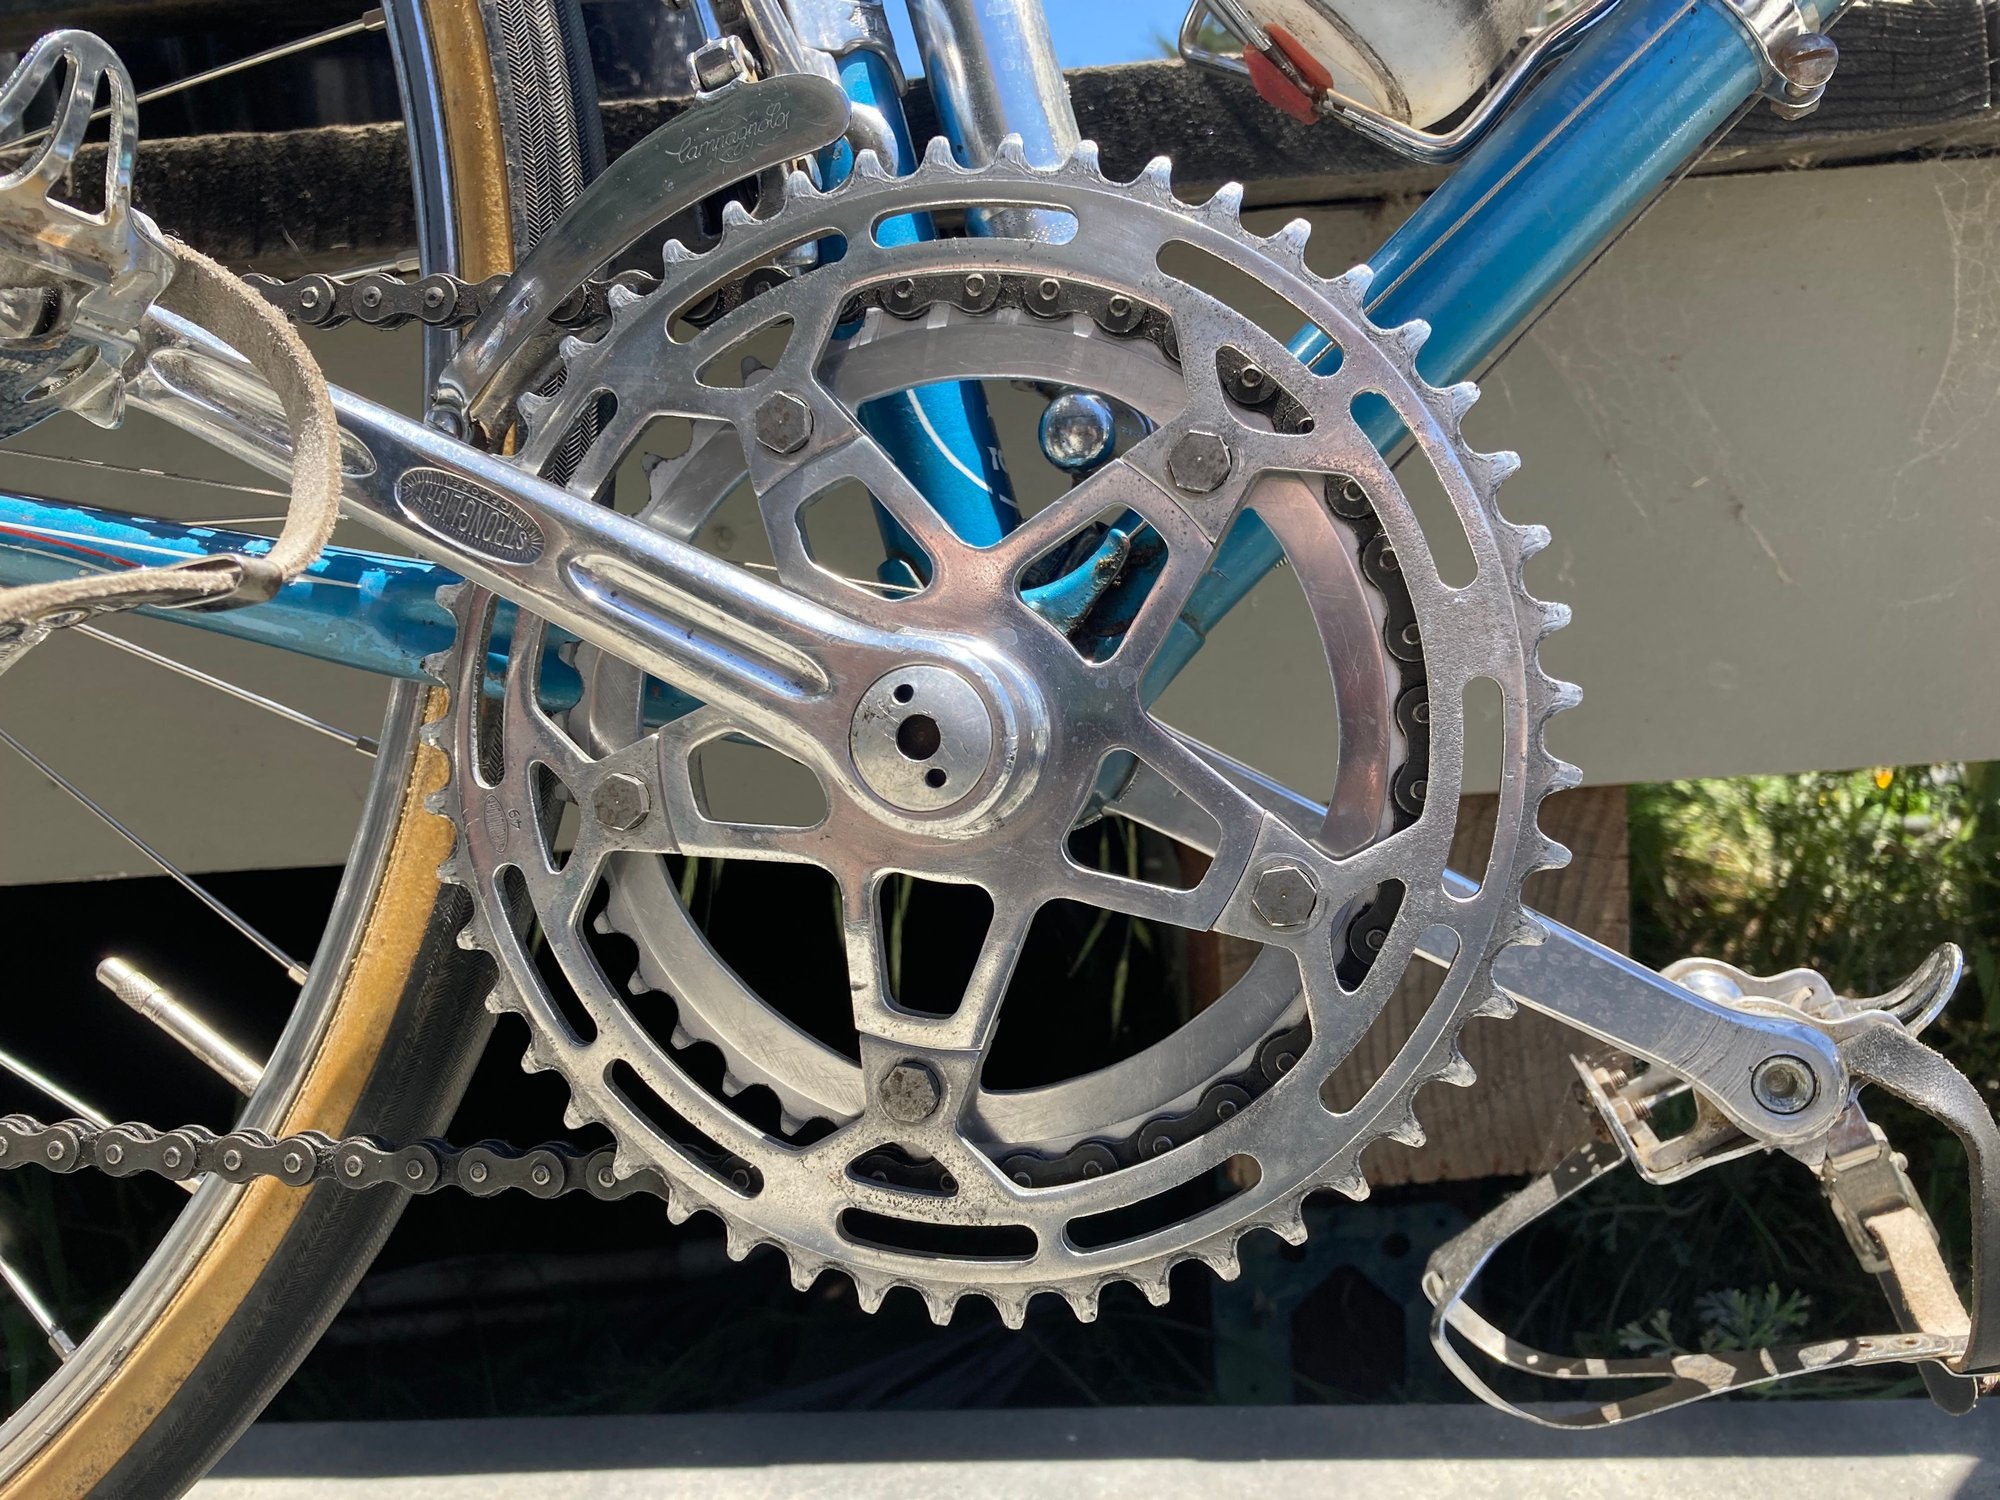
Today's 30 mile shakedown cruise was a success, lots of back and forth between the two chainwheels and it never missed a shift. A beautiful day for a ride too!


Brent
Brent
Likes For obrentharris:
06-14-22, 08:59 PM
#14
Senior Member
Join Date: Feb 2013
Location: Alta California
Posts: 14,260
Mentioned: 415 Post(s)
Tagged: 1 Thread(s)
Quoted: 3810 Post(s)
Liked 3,335 Times
in
2,175 Posts
-----

Maitre Jacques powering his Carre built Helyett with a LVII from Verot -

-----
Maitre Jacques powering his Carre built Helyett with a LVII from Verot -
-----
Likes For juvela:
