


I want to make my own leather brake hoods
 09-17-17, 07:40 AM
#26

multimodal commuter

Join Date: Nov 2006
Location: NJ, NYC, LI
Posts: 19,808
Bikes: 1940s Fothergill, 1959 Allegro Special, 1963? Claud Butler Olympic Sprint, Lambert 'Clubman', 1974 Fuji "the Ace", 1976 Holdsworth 650b conversion rando bike, 1983 Trek 720 tourer, 1984 Counterpoint Opus II, 1993 Basso Gap, 2010 Downtube 8h, and...
Mentioned: 584 Post(s)
Tagged: 0 Thread(s)
Quoted: 1908 Post(s)
Liked 574 Times
in
339 Posts
My suggestion, for those who want to try this at home, is:
1 cut the leather too small. It will stretch.
2 punch the holes with a proper leather hole punch and get them exactly where you want them. This is the trickiest thing.
3 plan to put the thread through the holes, with a lot of extra, long before you put the leather in place. You will waste a foot or two of thread and save an hour of aggravation. You may even want to put the thread through the holes before you soak the leather; I never did that, but next time I think I will. The holes close up in the soaking.
4 soak the leather until it's really really soft. A couple hours minimum.
5 install the leather hood on the brake lever without the handlebar attached.
6 once it's in place, gradually cinch up the threads, a little at a time, using a tool that won't cut the thread or mar the leather. Work it around, massage the leather to get it to comply. Your goal is to get or any wrinkles or bulges, and bring the seams together snugly.
7 trim the leather from the edges an hour or so later, when the leather is more dry but still dark. That's the easiest time to cut it, with a sharp knife. The leather has a mind of its own and it will try to steer the knife. Don't let it.
At this stage you can emboss a design on the leather, if you want. Plan your design ahead of time, though!
You may now trim the thread and install the lever on the bar, but....
8 a real perfectionist will let the thing dry completely now, then cut and discard the threads. Carefully smooth the cut edges of the leather with sandpaper. You may apply finish now or later.
9 reinstall new thread, again, loosely. And then install the hood on the lever, as tightly as before. Tuck the cut end of the thread (at least an inch long?) under the hood somewhere.
________________
Anyway, that's how I'd go about it. If Rootboy has a different method, it's probably better. Good luck, everyone!
Last edited by rhm; 09-17-17 at 07:44 AM.

Likes For rhm:
09-17-17, 08:19 AM
#27
Senior Member
Join Date: Aug 2017
Posts: 160
Mentioned: 1 Post(s)
Tagged: 0 Thread(s)
Quoted: 91 Post(s)
Likes: 0
Liked 1 Time
in
1 Post
True, it may be tough to fit eyelets into the hood design but I'm not ready to give up on that idea yet. I'll just save it for later.
I'd be interested to see those pics. Try hosting them on Imgur, that's where I've been putting them for the past few years and hasn't given me issues.
--
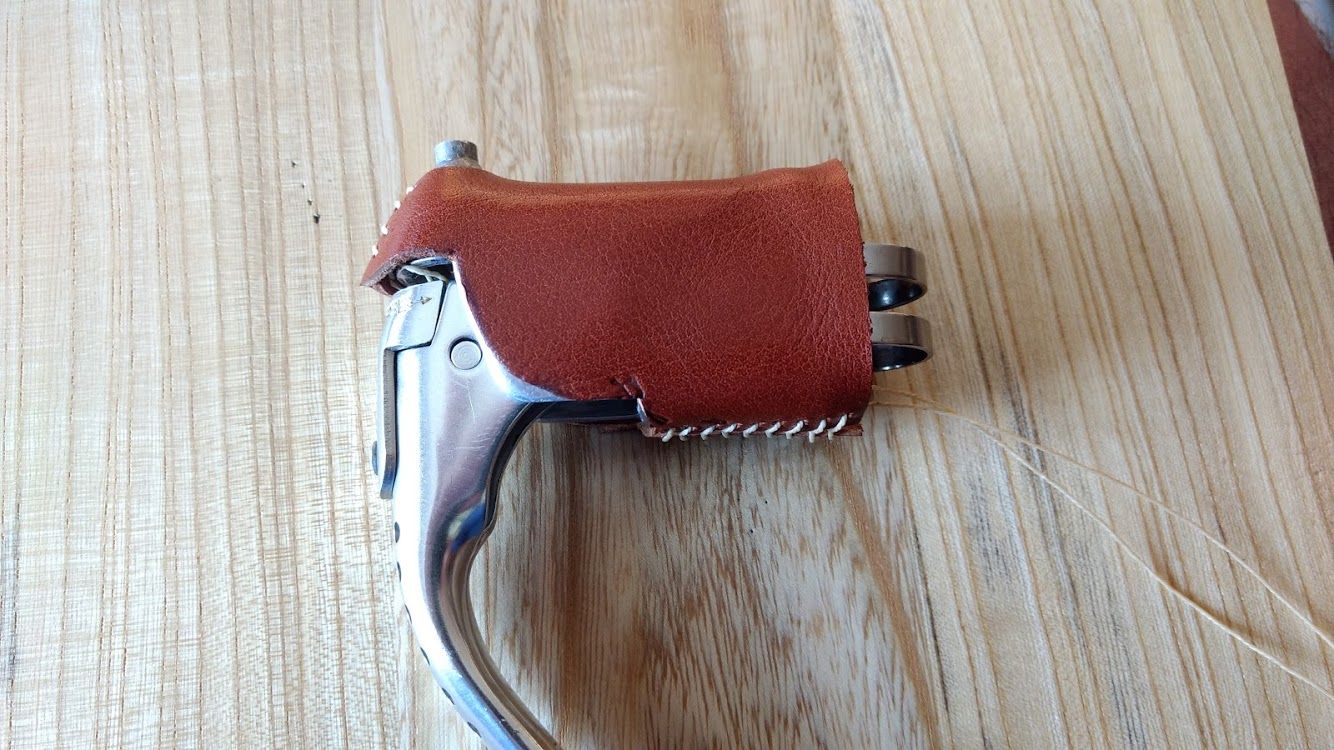
Anwyay, here's a bit of progress for tonight. I'm going to use a layer of padding of some sort underneath the leather, not sure what yet. It'll have to be molded into shape though.

I'd be interested to see those pics. Try hosting them on Imgur, that's where I've been putting them for the past few years and hasn't given me issues.
--
Anwyay, here's a bit of progress for tonight. I'm going to use a layer of padding of some sort underneath the leather, not sure what yet. It'll have to be molded into shape though.
10-16-17, 08:47 PM
#28
Banned
Join Date: Aug 2013
Posts: 6,480
Mentioned: 93 Post(s)
Tagged: 0 Thread(s)
Quoted: 1361 Post(s)
Likes: 0
Liked 423 Times
in
282 Posts
Rootboy's superior work-
Here's how they arrived complete with waxed thread and installation instructions.
[IMG] DSC_0574 by carrera247, on Flickr[/IMG]
He did all the hard work and I got the fun and easy to do ;-)
[IMG]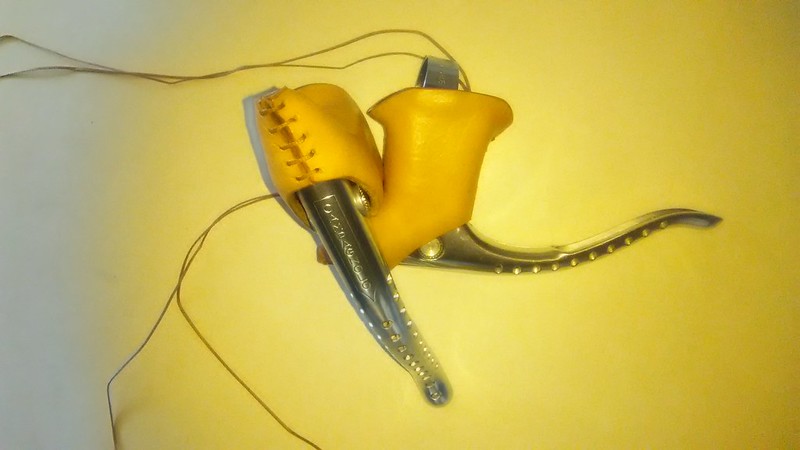 DSC_0618 by carrera247, on Flickr[/IMG]
[IMG]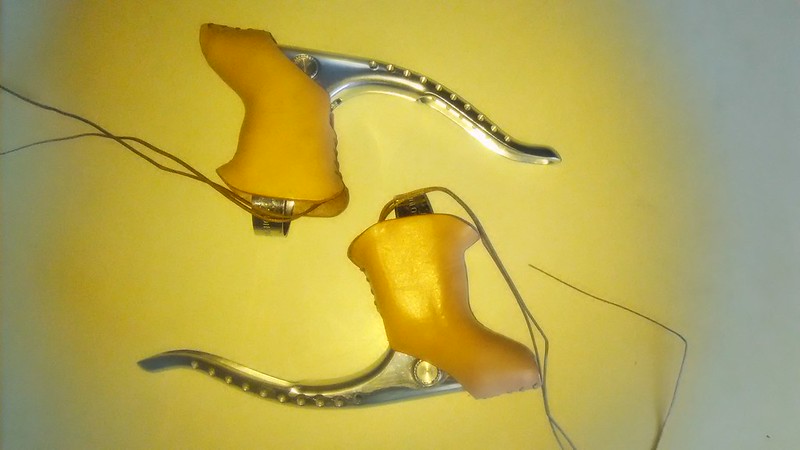 DSC_0617 by carrera247, on Flickr[/IMG]
[IMG]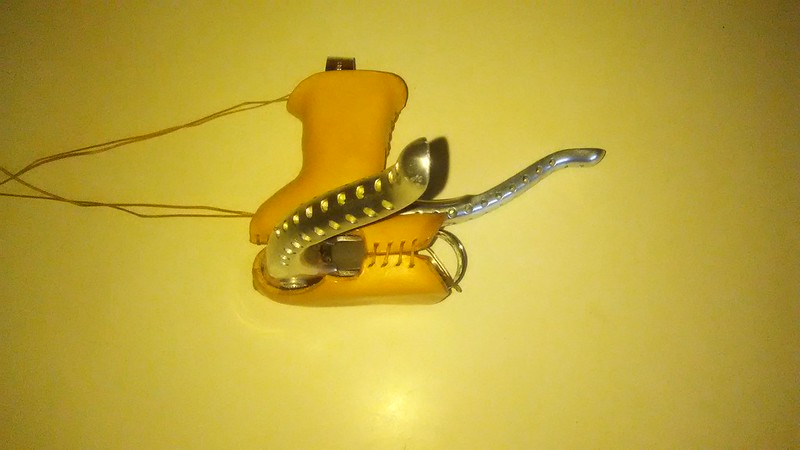 DSC_0616 by carrera247, on Flickr[/IMG]
I've since darkened them and close to match the original Cinelli V.I.P. bar wrap by using brown shoe polish.
[IMG] DSC_0715 by carrera247, on Flickr[/IMG]
Here's how they arrived complete with waxed thread and installation instructions.
[IMG]
DSC_0574 by carrera247, on Flickr[/IMG]He did all the hard work and I got the fun and easy to do ;-)
[IMG]
DSC_0618 by carrera247, on Flickr[/IMG][IMG]
DSC_0617 by carrera247, on Flickr[/IMG][IMG]
DSC_0616 by carrera247, on Flickr[/IMG]I've since darkened them and close to match the original Cinelli V.I.P. bar wrap by using brown shoe polish.
[IMG]
DSC_0715 by carrera247, on Flickr[/IMG]
10-17-17, 06:27 AM
#29

Freewheel Medic

Join Date: Oct 2005
Location: An Island on the Coast of GA!
Posts: 12,881
Bikes: Snazzy* Schwinns, Classy Cannondales & a Super Pro Aero Lotus (* Ed.)
Mentioned: 140 Post(s)
Tagged: 0 Thread(s)
Quoted: 1452 Post(s)
Liked 2,185 Times
in
961 Posts
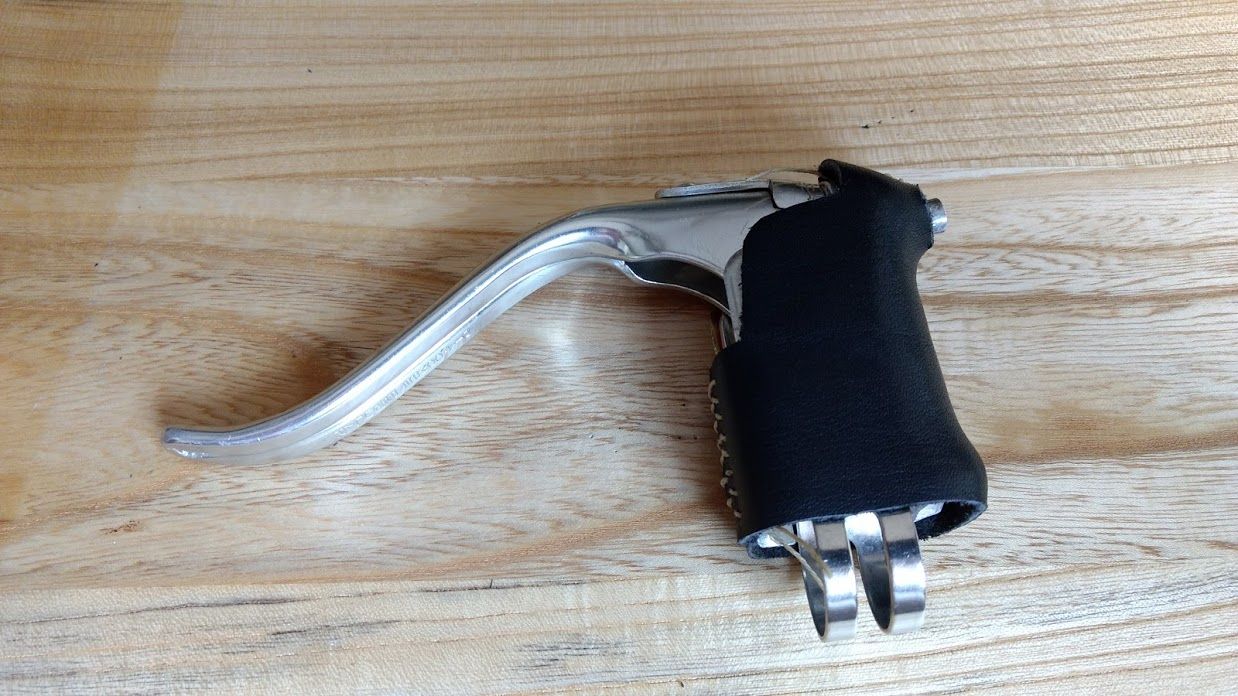
Inspired by @rootboy, I tried my hand at making Weinmann/Diacompe leather hoods over last winter. The black one is softer and was made from leather in a Coach purse. The brown came from another purse and the leather was very stiff and more difficult to work. (look for them in consignment shops). The trickiest part was the "doom" area which covers the cable housing stop/feral.
__________________
Bob
Enjoying the GA coast all year long!
Thanks for visiting my website: www.freewheelspa.com
Bob
Enjoying the GA coast all year long!
Thanks for visiting my website: www.freewheelspa.com
10-17-17, 08:29 AM
#30
Senior Member

^ Nice work! I need to hurry and finish mine up.
 10-19-21, 05:00 PM
#32
Junior Member
Join Date: Oct 2021
Posts: 18
Mentioned: 0 Post(s)
Tagged: 0 Thread(s)
Quoted: 4 Post(s)
Likes: 0
Liked 7 Times
in
5 Posts
Just a thought.
My mother was into crafting, she used to make leather gloves for her friends that gardened. She used a automated cutting thing called a Cricut. Traced the friend's hands on to two separate pieces of paper ( added something like a 3/8" border to the tracing) and scanned them onto the machine. Cut two pieces each then sewed them together, trimmed excess and turned them inside out.
She would get the leather from a discount fabric store that sold scraps by the pound.
She would get the leather from a discount fabric store that sold scraps by the pound.
10-20-21, 06:20 AM
#33
Freewheel Medic
Join Date: Oct 2005
Location: An Island on the Coast of GA!
Posts: 12,881
Bikes: Snazzy* Schwinns, Classy Cannondales & a Super Pro Aero Lotus (* Ed.)
Mentioned: 140 Post(s)
Tagged: 0 Thread(s)
Quoted: 1452 Post(s)
Liked 2,185 Times
in
961 Posts
My mother was into crafting, she used to make leather gloves for her friends that gardened. She used a automated cutting thing called a Cricut. Traced the friend's hands on to two separate pieces of paper ( added something like a 3/8" border to the tracing) and scanned them onto the machine. Cut two pieces each then sewed them together, trimmed excess and turned them inside out.
She would get the leather from a discount fabric store that sold scraps by the pound.
She would get the leather from a discount fabric store that sold scraps by the pound.
Welcome to C&V and Bike Forums. Keep on posting and reach 10 so you can post pictures.
Thanks for this suggestion. I'll look into this as a possibility.
I primarily use goat and sheep skins which I've been purchasing from the same ebay seller for my leather projects. I do enjoy doing it by hand, but a Cricut would add precision. Thanks for the suggestion.

__________________
Bob
Enjoying the GA coast all year long!
Thanks for visiting my website: www.freewheelspa.com
Bob
Enjoying the GA coast all year long!
Thanks for visiting my website: www.freewheelspa.com
10-21-21, 01:09 AM
#35
Full Member
Join Date: Oct 2021
Location: San Antonio, Texas
Posts: 360
Mentioned: 4 Post(s)
Tagged: 0 Thread(s)
Quoted: 116 Post(s)
Liked 367 Times
in
154 Posts
True, it may be tough to fit eyelets into the hood design but I'm not ready to give up on that idea yet. I'll just save it for later.
I'd be interested to see those pics. Try hosting them on Imgur, that's where I've been putting them for the past few years and hasn't given me issues.
--
Anyway, here's a bit of progress for tonight. I'm going to use a layer of padding of some sort underneath the leather, not sure what yet. It'll have to be molded into shape though.
10-23-21, 08:22 PM
#36
Senior Member
Join Date: Dec 2005
Location: Sunny Tampa, Florida
Posts: 1,542
Mentioned: 0 Post(s)
Tagged: 0 Thread(s)
Quoted: 101 Post(s)
Liked 49 Times
in
41 Posts

Last edited by Ronsonic; 10-24-21 at 06:42 PM.
10-23-21, 09:02 PM
#37
Senior Member

Join Date: Nov 2015
Posts: 4,472
Mentioned: 102 Post(s)
Tagged: 0 Thread(s)
Quoted: 1635 Post(s)
Likes: 0
Liked 823 Times
in
532 Posts
I'm wondering if anyone considered making hoods out of modern "pleather" material, like "Lorica".
The material looks and feel like leather and even breathes like leather. It is also less likely to get damaged by repeated exposure to moisture/rain, so they do not dry out and shrink. Durability is also good, as it had been used for many years now on motorcycle apparel like race boots and gloves for its abrasion resistance.
The material looks and feel like leather and even breathes like leather. It is also less likely to get damaged by repeated exposure to moisture/rain, so they do not dry out and shrink. Durability is also good, as it had been used for many years now on motorcycle apparel like race boots and gloves for its abrasion resistance.


