The Classic & Vintage Pass Around [Cotter] Press
 03-25-23, 12:48 PM
#76
Junior Member
I think I have tried both! I believe aligned with the crank arm is how the manufacturer recommends, at least for removal.
 04-29-23, 10:08 PM
#77

www.theheadbadge.com
Thread Starter

Join Date: Sep 2005
Location: Southern Florida
Posts: 28,513
Bikes: https://www.theheadbadge.com
Mentioned: 124 Post(s)
Tagged: 0 Thread(s)
Quoted: 2422 Post(s)
Liked 4,392 Times
in
2,092 Posts
Just bringing this up to the top so those interested in the tool can join. Also tagging Iowa10Speed for some pictures.
-Kurt
-Kurt
__________________


04-30-23, 02:34 PM
#78
Iowa10Speed
Join Date: Mar 2012
Location: Iowa
Posts: 76
Bikes: 87 Schwinn Prologue, 85 Trek 720, 86 Panasonic Pro Touring, 75 Schwinn Voyageur II ("Voyareo"). projects: 98 Lemond Zurich, 81 Raleigh Competition GS, 50 Schwinn Superior
Mentioned: 2 Post(s)
Tagged: 0 Thread(s)
Quoted: 22 Post(s)
Liked 34 Times
in
18 Posts
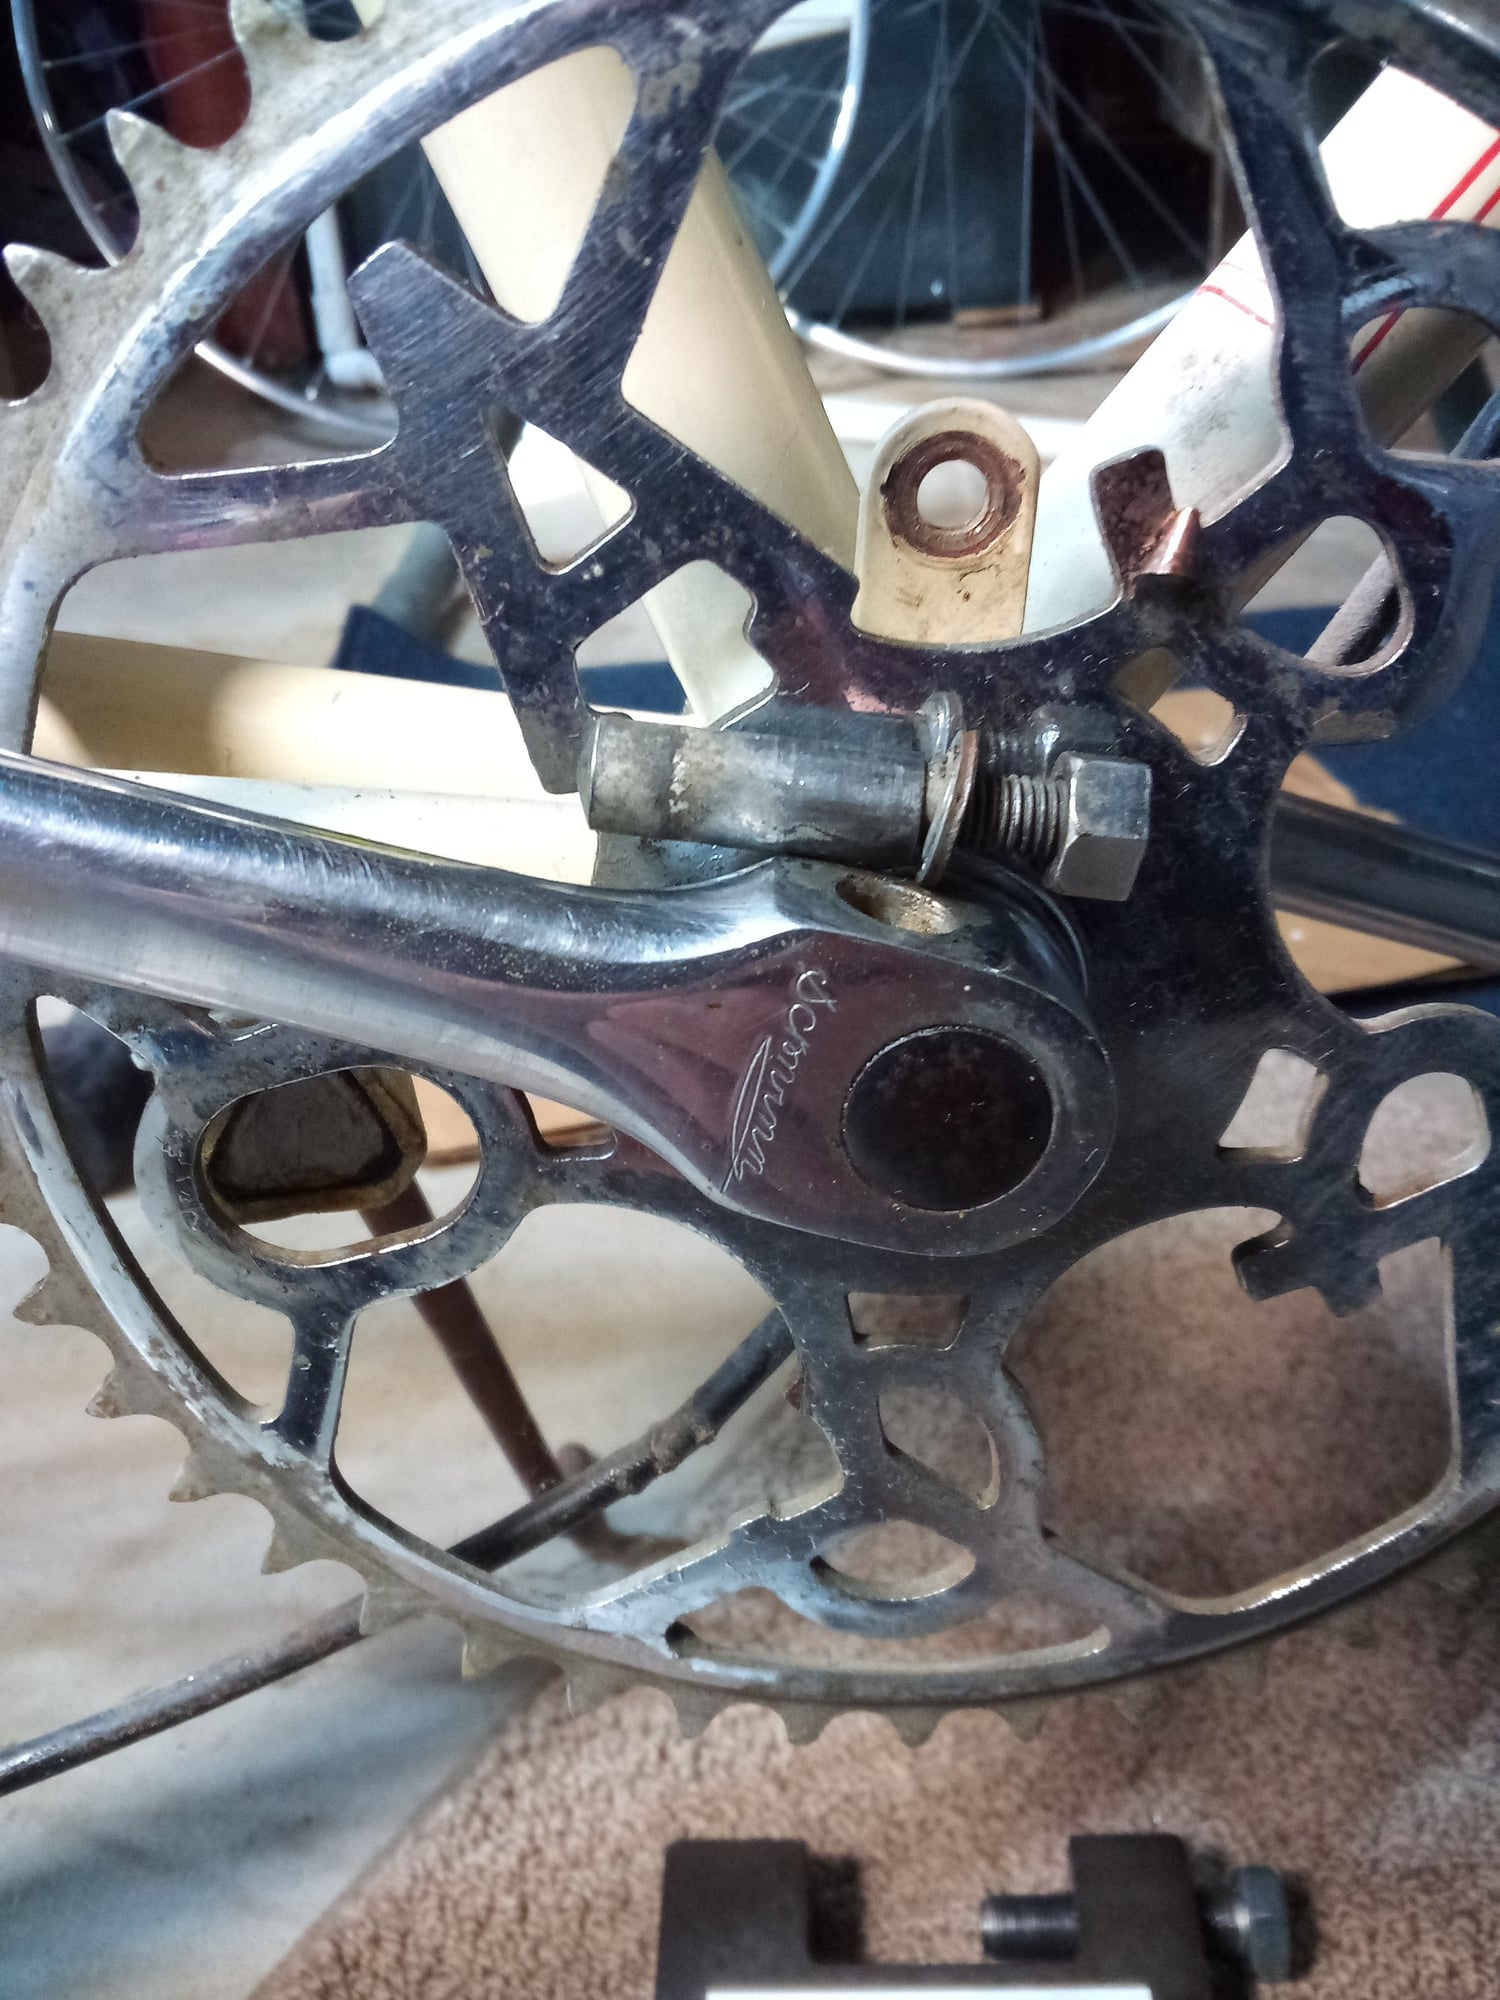
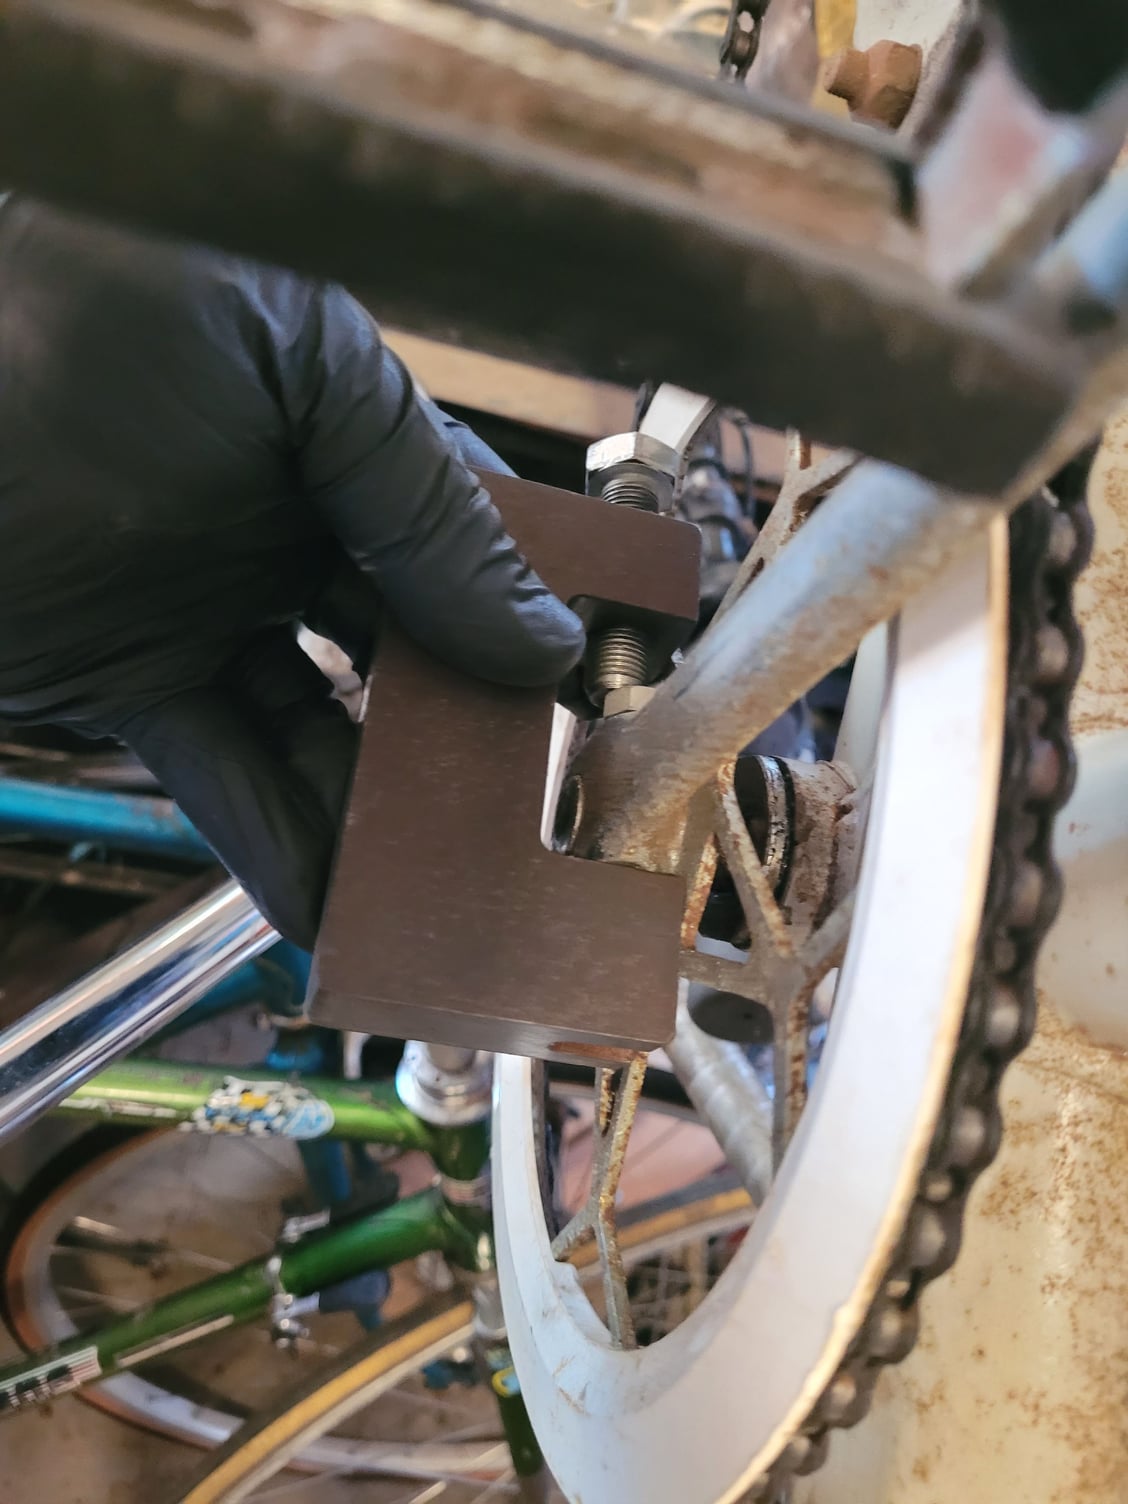
There must be vibes in the universe. As it happens, just yesterday I kicked my butt in gear and pulled the cranks off my 1950 Schwinn Superior. I'm a hopeless procrastinator. I have more projects queued, but IF ANYONE WANTS THE PRESS I'll mail it out immediately.
I'm very disappointed with the BikeSmith cotter press. There was absolutely no drama getting the cotters out. I feel cheated that I can't join the Cotter Pin Tale of Woe Club (yet).

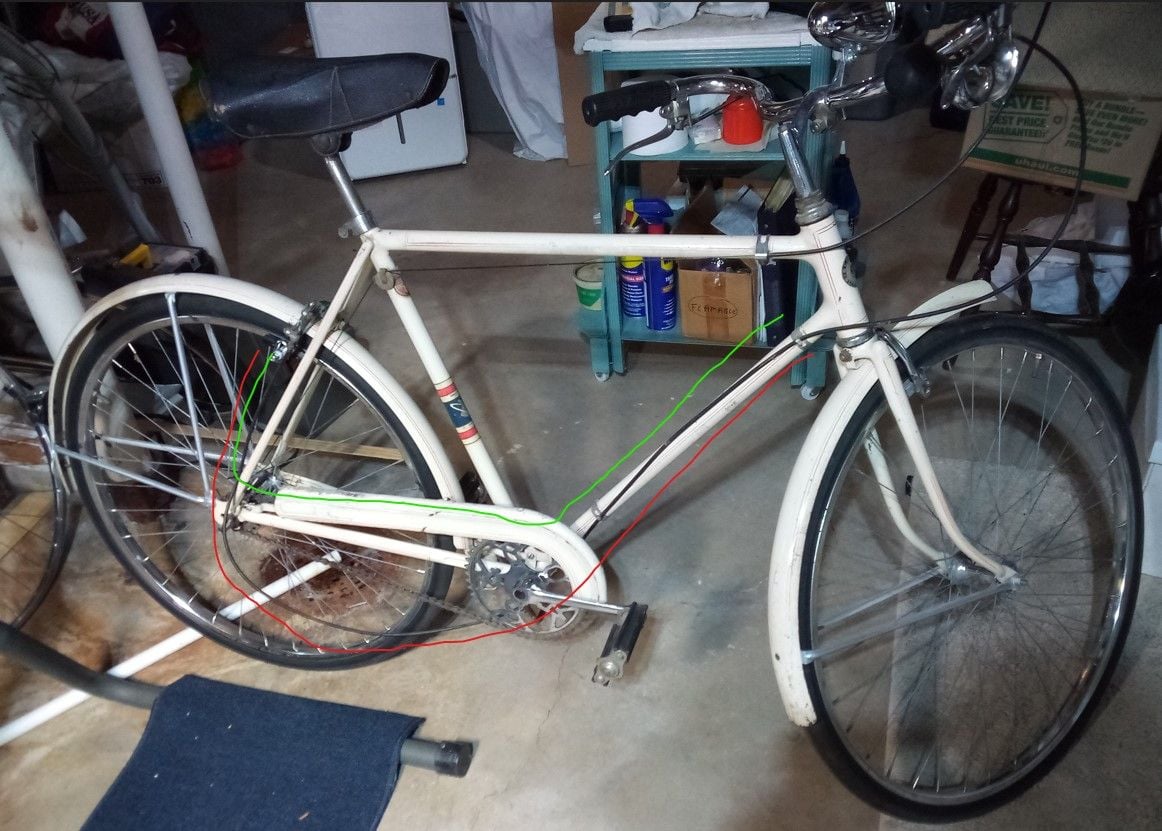
I'm soliciting theories on the rear brake cable routing below. Current "method" (red line) hangs loose under the bottom bracket and lazily loops up to the brake. Green line shows how the Schwinn catalog routes it along the top of the chainguard through a well designed and very visible clip. The cable is old. It's been there a long while.
My theories:
1) The Schwinn dealership got creative
2) The previous owner removed the original cable to show the Schwinn store what kind of replacement he needed. But being a horrible procrastinator, by the time he got around to installing it 4 years later, he had long forgotten how it was supposed go.
3) He didn't have anything to cut the housing, so he used all 8 feet.
4) He was cheap, and by golly he used every inch to get his money's worth.
Creative cable routing
I'm very disappointed with the BikeSmith cotter press. There was absolutely no drama getting the cotters out. I feel cheated that I can't join the Cotter Pin Tale of Woe Club (yet).
I'm soliciting theories on the rear brake cable routing below. Current "method" (red line) hangs loose under the bottom bracket and lazily loops up to the brake. Green line shows how the Schwinn catalog routes it along the top of the chainguard through a well designed and very visible clip. The cable is old. It's been there a long while.
My theories:
1) The Schwinn dealership got creative
2) The previous owner removed the original cable to show the Schwinn store what kind of replacement he needed. But being a horrible procrastinator, by the time he got around to installing it 4 years later, he had long forgotten how it was supposed go.
3) He didn't have anything to cut the housing, so he used all 8 feet.
4) He was cheap, and by golly he used every inch to get his money's worth.
Creative cable routing
Likes For Iowa10Speed:
04-30-23, 04:42 PM
#79
Senior Member
Join Date: Mar 2007
Location: SF Bay Area, East bay
Posts: 7,658
Bikes: Miyata 618 GT, Marinoni, Kestral 200 2002 Trek 5200, KHS Flite, Koga Miyata, Schwinn Spitfire 5, Mondia Special, Univega Alpina, Miyata team Ti, Santa Cruz Highball
Mentioned: 53 Post(s)
Tagged: 0 Thread(s)
Quoted: 1609 Post(s)
Liked 2,590 Times
in
1,224 Posts
There must be vibes in the universe. As it happens, just yesterday I kicked my butt in gear and pulled the cranks off my 1950 Schwinn Superior. I'm a hopeless procrastinator. I have more projects queued, but IF ANYONE WANTS THE PRESS I'll mail it out immediately.
I'm very disappointed with the BikeSmith cotter press. There was absolutely no drama getting the cotters out. I feel cheated that I can't join the Cotter Pin Tale of Woe Club (yet).
I'm soliciting theories on the rear brake cable routing below. Current "method" (red line) hangs loose under the bottom bracket and lazily loops up to the brake. Green line shows how the Schwinn catalog routes it along the top of the chainguard through a well designed and very visible clip. The cable is old. It's been there a long while.
My theories:
1) The Schwinn dealership got creative
2) The previous owner removed the original cable to show the Schwinn store what kind of replacement he needed. But being a horrible procrastinator, by the time he got around to installing it 4 years later, he had long forgotten how it was supposed go.
3) He didn't have anything to cut the housing, so he used all 8 feet.
4) He was cheap, and by golly he used every inch to get his money's worth.
Creative cable routing
Likes For curbtender:
04-30-23, 04:43 PM
#80
www.theheadbadge.com
Thread Starter
Join Date: Sep 2005
Location: Southern Florida
Posts: 28,513
Bikes: https://www.theheadbadge.com
Mentioned: 124 Post(s)
Tagged: 0 Thread(s)
Quoted: 2422 Post(s)
Liked 4,392 Times
in
2,092 Posts

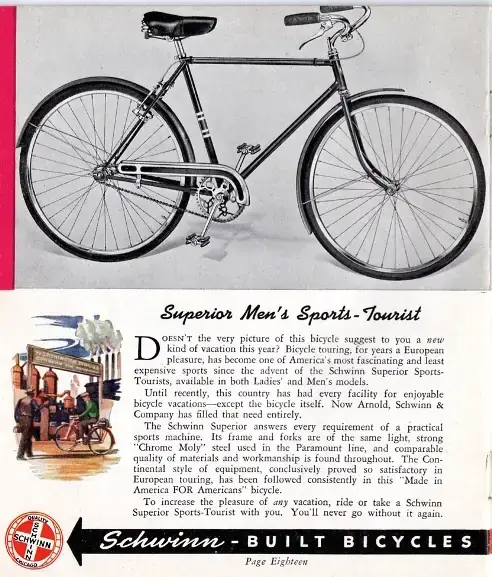
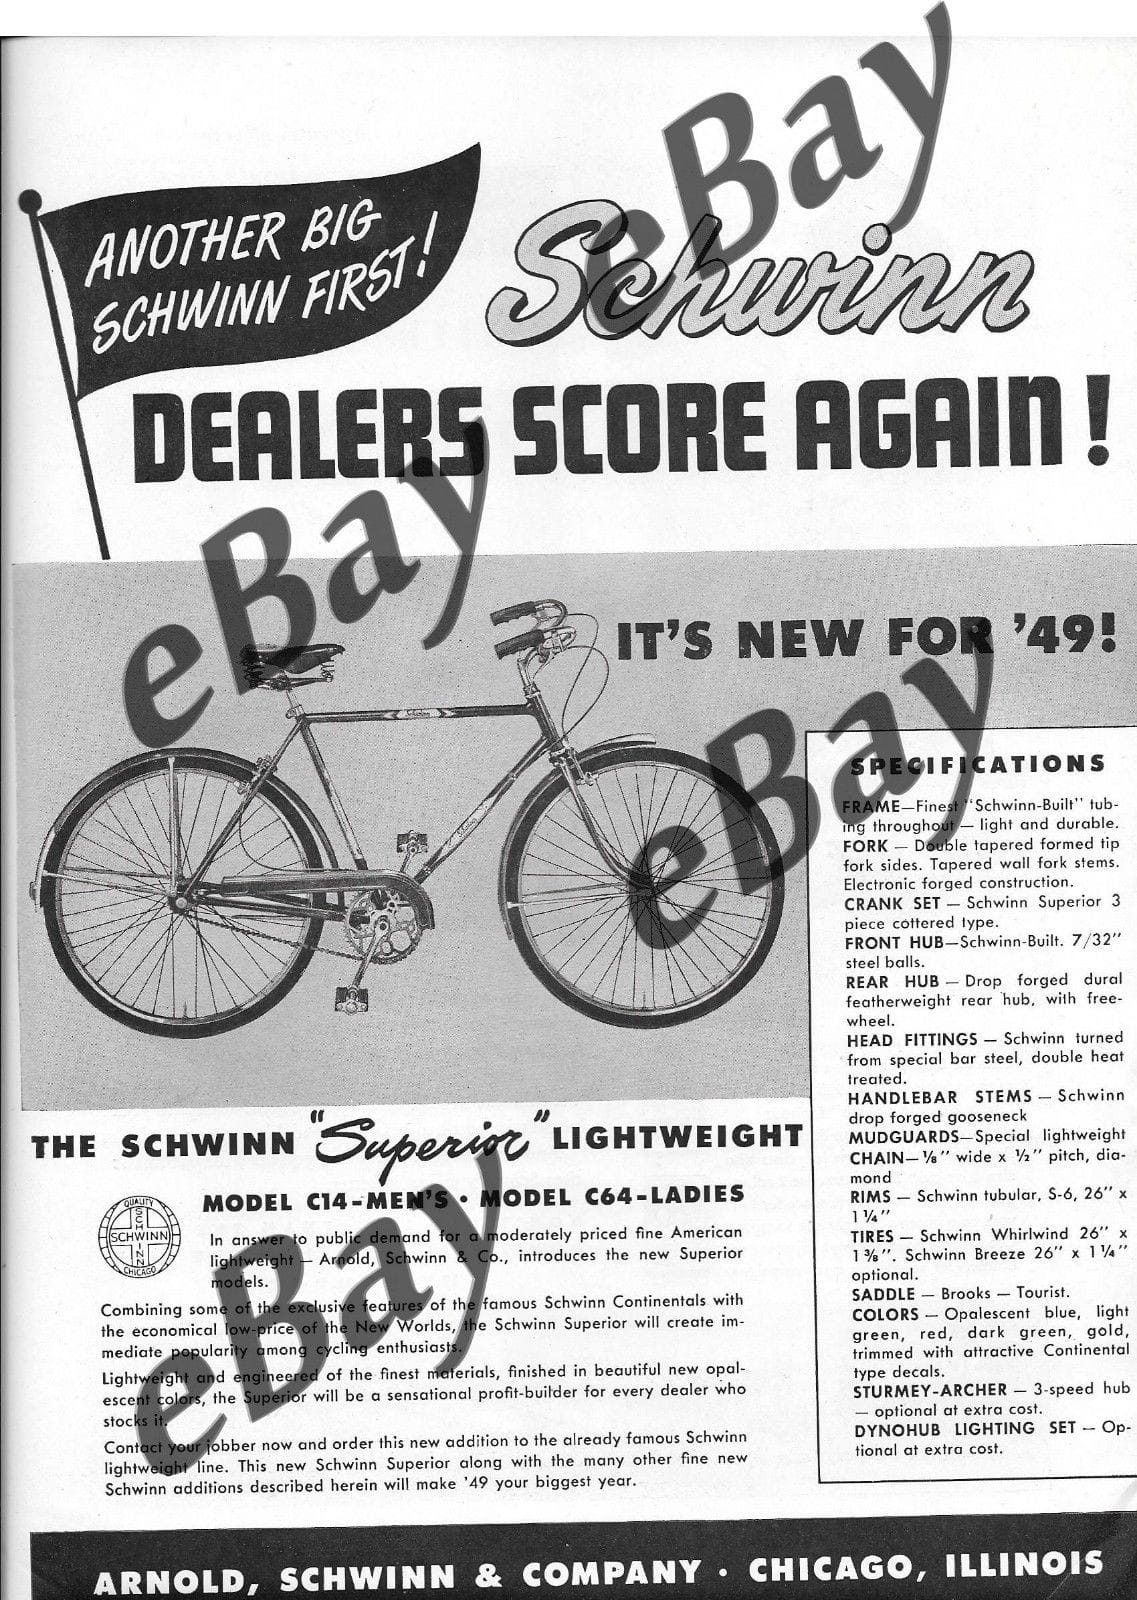
Don't do any of those three. Route it on the top tube with a pair of cable clips, conventionally. The 1940 catalog shows it run this way, so there's no reason to deviate from the norm:
(https://bikehistory.org/bikes/superior/)
-Kurt
__________________
04-30-23, 06:59 PM
#81
Iowa10Speed
Join Date: Mar 2012
Location: Iowa
Posts: 76
Bikes: 87 Schwinn Prologue, 85 Trek 720, 86 Panasonic Pro Touring, 75 Schwinn Voyageur II ("Voyareo"). projects: 98 Lemond Zurich, 81 Raleigh Competition GS, 50 Schwinn Superior
Mentioned: 2 Post(s)
Tagged: 0 Thread(s)
Quoted: 22 Post(s)
Liked 34 Times
in
18 Posts
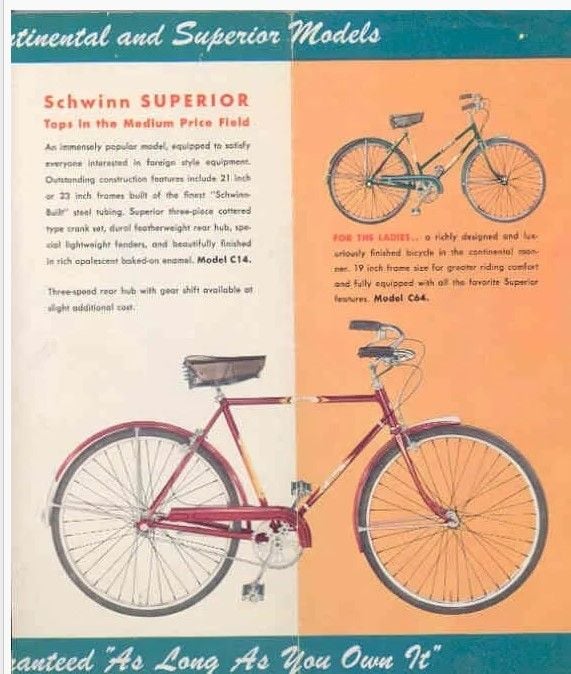
1950's catalog
04-30-23, 07:22 PM
#82
Senior Member
Join Date: Oct 2020
Location: Phoenix, AZ
Posts: 909
Bikes: 1964(?) Frejus Tour de France, 1967(?) Dawes Double Blue, 1979 Trek 710, 1982 Claud Butler Dalesman, 1983 Schwinn Paramount Elite, 2014 Brompton, maybe a couple more
Mentioned: 8 Post(s)
Tagged: 0 Thread(s)
Quoted: 310 Post(s)
Liked 678 Times
in
330 Posts
I've seen a lot of step-throughs with the cable routed low like that, but regular diamond frames it's usually along the top tube from above. The caliper is usually reversible so you can approach it from top or bottom.
By routed low I mean like in the catalog pictures, not all the way down near the ground like the OP's example.
By routed low I mean like in the catalog pictures, not all the way down near the ground like the OP's example.
04-30-23, 07:26 PM
#83
Senior Member
Join Date: Mar 2007
Location: SF Bay Area, East bay
Posts: 7,658
Bikes: Miyata 618 GT, Marinoni, Kestral 200 2002 Trek 5200, KHS Flite, Koga Miyata, Schwinn Spitfire 5, Mondia Special, Univega Alpina, Miyata team Ti, Santa Cruz Highball
Mentioned: 53 Post(s)
Tagged: 0 Thread(s)
Quoted: 1609 Post(s)
Liked 2,590 Times
in
1,224 Posts
They also have the shift cable on the downtube. If you run the brake cable that way you make a bend that can trap moisture and then you are dealing with rusted cable and housing.
04-30-23, 07:32 PM
#84
www.theheadbadge.com
Thread Starter
Join Date: Sep 2005
Location: Southern Florida
Posts: 28,513
Bikes: https://www.theheadbadge.com
Mentioned: 124 Post(s)
Tagged: 0 Thread(s)
Quoted: 2422 Post(s)
Liked 4,392 Times
in
2,092 Posts
Green is definitely the way to route it per the catalogs, but I can't get over how awkward it is.
-Kurt
__________________
04-30-23, 09:13 PM
#85
On the road

Join Date: Aug 2005
Location: New England
Posts: 2,171
Bikes: Old Schwinns and old Raleighs
Mentioned: 35 Post(s)
Tagged: 0 Thread(s)
Quoted: 373 Post(s)
Liked 847 Times
in
323 Posts
Schwinn did that to standardize production so that the women's and men's used the same rear cable set up. There's a loop on top of the chain guard that holds the rear cable. The standard top tube mounting for the rear cable is preferable for the men's bike, but if you want to go totally period correct, you can do the chain guard route for the rear cable. If you're re-using all original brake cables and housings, you'll probably need to use the chain guard route because the cable will be too long for top tube (my experience is that at least). Given how good the condition and originality is on that bike, I'd be inclined to re-use as much as you can to keep it original.
Schwinn's cottered cranks appear to have been made as a copy of Birmingham Hercules/Phillips/BSA type cranks. I've had luck replacing cottered 1940s era Schwinn bottom bracket parts with Birmingham production parts. The AS&CO sprocket is a copy of the BSA style. The Schwinn frames tend to have similar frame angles to pre-war BSA and Hercules type bikes (more laid back than the Raleigh Sports we are more familiar with). The bikes were made to compete with English imports.
I have a 1950 Superior as well - in an aluminum-green color. The cable covers were shot on mine, so I rebuilt with new black covers and the top tube cable routing.

The chain guard routing is seen on this early 1950s Traveler I rebuilt a few years ago:

Schwinn's cottered cranks appear to have been made as a copy of Birmingham Hercules/Phillips/BSA type cranks. I've had luck replacing cottered 1940s era Schwinn bottom bracket parts with Birmingham production parts. The AS&CO sprocket is a copy of the BSA style. The Schwinn frames tend to have similar frame angles to pre-war BSA and Hercules type bikes (more laid back than the Raleigh Sports we are more familiar with). The bikes were made to compete with English imports.
I have a 1950 Superior as well - in an aluminum-green color. The cable covers were shot on mine, so I rebuilt with new black covers and the top tube cable routing.
The chain guard routing is seen on this early 1950s Traveler I rebuilt a few years ago:
__________________
Classic American and British Roadsters, Utility Bikes, and Sporting Bikes (1935-1979):
https://bikeshedva.blogspot.com/
Classic American and British Roadsters, Utility Bikes, and Sporting Bikes (1935-1979):
https://bikeshedva.blogspot.com/
Last edited by SirMike1983; 04-30-23 at 09:17 PM.
Likes For SirMike1983:
04-30-23, 09:35 PM
#86
Iowa10Speed
Join Date: Mar 2012
Location: Iowa
Posts: 76
Bikes: 87 Schwinn Prologue, 85 Trek 720, 86 Panasonic Pro Touring, 75 Schwinn Voyageur II ("Voyareo"). projects: 98 Lemond Zurich, 81 Raleigh Competition GS, 50 Schwinn Superior
Mentioned: 2 Post(s)
Tagged: 0 Thread(s)
Quoted: 22 Post(s)
Liked 34 Times
in
18 Posts
Beautiful bikes! I'm new to this era of bikes, They're growing on me quickly!
Likes For Iowa10Speed:
05-01-23, 08:13 AM
#87
On the road
Join Date: Aug 2005
Location: New England
Posts: 2,171
Bikes: Old Schwinns and old Raleighs
Mentioned: 35 Post(s)
Tagged: 0 Thread(s)
Quoted: 373 Post(s)
Liked 847 Times
in
323 Posts
The post-war Superior and New World are still pretty reasonable buys if you want an old Schwinn three speed. Performance is on a par with a basic Raleigh Sports, though the feel is a little different because of the frame angles. The New World and post-war Superior are generally a little heavier than a comparably sized Raleigh.
The skills to repair them are pretty much the same as those needed to fix an old Raleigh Sports. The Bikesmith press should work for both Schwinn and Raleigh cottered cranks from that era, so no issue there either. The only place I've had trouble with the first-generation Bikesmith press is on particularly low-profile cottered cranks like Raleigh Clubman and Lenton types (still doable, but you need to watch your positioning carefully and, if necessary, remove the bolt-on chainring before going at it). Perhaps the rounded, second generation press is better in that use.
__________________
Classic American and British Roadsters, Utility Bikes, and Sporting Bikes (1935-1979):
https://bikeshedva.blogspot.com/
Classic American and British Roadsters, Utility Bikes, and Sporting Bikes (1935-1979):
https://bikeshedva.blogspot.com/
Likes For SirMike1983:
05-01-23, 09:49 AM
#88
Junior Member
I believe the rear brake will dictate wether to run the cable from above or below. Look at were the housing stops on the brake and then the cable proceeds to the cable clamp. That direction will indicate running cable from top down or bottom up.
05-01-23, 09:54 AM
#89
Old fart

Join Date: Nov 2004
Location: Appleton WI
Posts: 24,784
Bikes: Several, mostly not name brands.
Mentioned: 153 Post(s)
Tagged: 0 Thread(s)
Quoted: 3587 Post(s)
Liked 3,400 Times
in
1,934 Posts
Many calipers on these older bikes allow you to swap the mounting position of the housing stop and cable anchor to allow routing in either direction.
Likes For JohnDThompson:
05-01-23, 09:59 AM
#90
Junior Member
05-01-23, 10:23 AM
#91
On the road
Join Date: Aug 2005
Location: New England
Posts: 2,171
Bikes: Old Schwinns and old Raleighs
Mentioned: 35 Post(s)
Tagged: 0 Thread(s)
Quoted: 373 Post(s)
Liked 847 Times
in
323 Posts
That's exactly right for the period "Schwinn Built" calipers - you swap the adjuster barrel and pinch bolt to whichever direction you prefer.
__________________
Classic American and British Roadsters, Utility Bikes, and Sporting Bikes (1935-1979):
https://bikeshedva.blogspot.com/
Classic American and British Roadsters, Utility Bikes, and Sporting Bikes (1935-1979):
https://bikeshedva.blogspot.com/
05-02-23, 10:21 AM
#92
Senior Member

Join Date: Jan 2015
Location: Los Angeles
Posts: 4,704
Bikes: 82 Medici, 2011 Richard Sachs, 2011 Milwaukee Road
Mentioned: 55 Post(s)
Tagged: 0 Thread(s)
Quoted: 1949 Post(s)
Liked 2,010 Times
in
1,109 Posts
I've just contacted BikesmithDesign about new cotters for my Peugeot. I made a bit of mess when removed and replaced the originals. Are you guys using the press to install the cotters as well as removing them? I think that is recommended by Bikesmithdesign and therefore I will wait until I have new cotters in hand before I participate in this wonderful program.
Jeff
Jeff
__________________
I don't do: disks, tubeless, e-shifting, or bead head nymphs.
I don't do: disks, tubeless, e-shifting, or bead head nymphs.
Likes For Classtime:
05-02-23, 10:27 AM
#93
www.theheadbadge.com
Thread Starter
Join Date: Sep 2005
Location: Southern Florida
Posts: 28,513
Bikes: https://www.theheadbadge.com
Mentioned: 124 Post(s)
Tagged: 0 Thread(s)
Quoted: 2422 Post(s)
Liked 4,392 Times
in
2,092 Posts
I've just contacted BikesmithDesign about new cotters for my Peugeot. I made a bit of mess when removed and replaced the originals. Are you guys using the press to install the cotters as well as removing them? I think that is recommended by Bikesmithdesign and therefore I will wait until I have new cotters in hand before I participate in this wonderful program.
-Kurt
__________________
Likes For cudak888:
05-04-23, 08:13 PM
#94
Senior Member
Join Date: Aug 2005
Location: Minneapolis, MN
Posts: 798
Mentioned: 2 Post(s)
Tagged: 0 Thread(s)
Quoted: 16 Post(s)
Likes: 0
Liked 24 Times
in
11 Posts
You would strip the threads off the stem way before you could install a cotter tightly enough with the nut.
Please be sure to follow the instructions at New Crank Cotter Press
The throat dimensions on the early presses were taken from a Park Tool press after they discontinued them. The problem was that when the press body is at 90� to the arm the offset stem is often not centered in the cupped bolt. Late models have a deep enough throat that you can have the body in line (or nearly so) with the arm and the press bolt can center on the stem.
Mark Stonich
Likes For MnHPVA Guy:
05-04-23, 08:39 PM
#95
www.theheadbadge.com
Thread Starter
Join Date: Sep 2005
Location: Southern Florida
Posts: 28,513
Bikes: https://www.theheadbadge.com
Mentioned: 124 Post(s)
Tagged: 0 Thread(s)
Quoted: 2422 Post(s)
Liked 4,392 Times
in
2,092 Posts
I heartily endorse the idea of a pass around cotter press. In fact I'm a little ambivalent about selling my tools to someone who only has one bike that needs them.
You would strip the threads off the stem way before you could install a cotter tightly enough with the nut.
Please be sure to follow the instructions at New Crank Cotter Press
The throat dimensions on the early presses were taken from a Park Tool press after they discontinued them. The problem was that when the press body is at 90� to the arm the offset stem is often not centered in the cupped bolt. Late models have a deep enough throat that you can have the body in line (or nearly so) with the arm and the press bolt can center on the stem.
Mark Stonich
By the way, in the years that I've owned the V1 of the tool, I can't recall having an issue where the tool hasn't been deep enough to center it. If anything, I had the opposite experience. On my Mk.1 Moulton, both the V1 and the VAR tool that Mad Honk sent to me have been too deep to work correctly, but just close enough to manage a safe(ish) removal and reinstallation.
The Moulton has a particularly thin area between the chainring and the crankarm swedging, so I shouldn't be surprised though.
-Kurt
__________________
05-05-23, 06:58 AM
#96
On the road
Join Date: Aug 2005
Location: New England
Posts: 2,171
Bikes: Old Schwinns and old Raleighs
Mentioned: 35 Post(s)
Tagged: 0 Thread(s)
Quoted: 373 Post(s)
Liked 847 Times
in
323 Posts
I heartily endorse the idea of a pass around cotter press. In fact I'm a little ambivalent about selling my tools to someone who only has one bike that needs them.
You would strip the threads off the stem way before you could install a cotter tightly enough with the nut.
Please be sure to follow the instructions at New Crank Cotter Press
The throat dimensions on the early presses were taken from a Park Tool press after they discontinued them. The problem was that when the press body is at 90� to the arm the offset stem is often not centered in the cupped bolt. Late models have a deep enough throat that you can have the body in line (or nearly so) with the arm and the press bolt can center on the stem.
Mark Stonich
You would strip the threads off the stem way before you could install a cotter tightly enough with the nut.
Please be sure to follow the instructions at New Crank Cotter Press
The throat dimensions on the early presses were taken from a Park Tool press after they discontinued them. The problem was that when the press body is at 90� to the arm the offset stem is often not centered in the cupped bolt. Late models have a deep enough throat that you can have the body in line (or nearly so) with the arm and the press bolt can center on the stem.
Mark Stonich
I will add that the BikeSmith "Grade A" cotter pins are also a "must have" to work on a bike that needs pins replaced. The BikeSmith pins are the only pins I've come across on a par with really good quality, vintage pins. In some cases the BikeSmith was actually a better pin than even the vintage ones were.
__________________
Classic American and British Roadsters, Utility Bikes, and Sporting Bikes (1935-1979):
https://bikeshedva.blogspot.com/
Classic American and British Roadsters, Utility Bikes, and Sporting Bikes (1935-1979):
https://bikeshedva.blogspot.com/
05-24-23, 12:42 PM
#97
Senior Member

Join Date: Feb 2013
Location: Alta California
Posts: 14,262
Mentioned: 415 Post(s)
Tagged: 1 Thread(s)
Quoted: 3811 Post(s)
Liked 3,336 Times
in
2,176 Posts
Cotter Pin Press Tool of 1900
-----
came across this Manufrance catalogue Nr. 58 of 1900 with a listing for a somewhat familiar looking cotter pin press...


-----
came across this Manufrance catalogue Nr. 58 of 1900 with a listing for a somewhat familiar looking cotter pin press...
-----
Likes For juvela:
06-18-23, 04:05 PM
#98
The Huffmeister

Join Date: Jul 2008
Location: The Le Grande HQ
Posts: 2,735
Bikes: '79 Trek 938, '86 Jim Merz Allez SE, '90 Miyata 1000, '68 PX-10, '80 PXN-10, '73 Super Course, '87 Guerciotti, '83 Trek 600, '80 Huffy Le Grande
Mentioned: 45 Post(s)
Tagged: 0 Thread(s)
Quoted: 1225 Post(s)
Liked 3,543 Times
in
1,407 Posts
Alright sir, I�m here, and volunteering for the next set of coffered crank carnage pictures to be posted to this thread. The cheap actually-sort-of-nice dept store bike whining at me from the garage is getting too loud
I�ll get behind whoever is currently last on the list.
Iowa10Speed are you the current torch bearer?
I�ll get behind whoever is currently last on the list.
Iowa10Speed are you the current torch bearer?
Last edited by AdventureManCO; 06-18-23 at 04:12 PM.
Likes For AdventureManCO:
06-25-23, 11:48 AM
#99
Iowa10Speed
Join Date: Mar 2012
Location: Iowa
Posts: 76
Bikes: 87 Schwinn Prologue, 85 Trek 720, 86 Panasonic Pro Touring, 75 Schwinn Voyageur II ("Voyareo"). projects: 98 Lemond Zurich, 81 Raleigh Competition GS, 50 Schwinn Superior
Mentioned: 2 Post(s)
Tagged: 0 Thread(s)
Quoted: 22 Post(s)
Liked 34 Times
in
18 Posts
Iowa10Speed are you the current torch bearer?
Likes For Iowa10Speed:
06-25-23, 11:55 AM
#100

Senior Member

Join Date: Apr 2005
Location: Ann Arbor, MI
Posts: 16,874
Bikes: 1980 Masi, 1984 Mondonico, 1984 Trek 610, 1980 Woodrup Giro, 2005 Mondonico Futura Leggera ELOS, 1967 PX10E, 1971 Peugeot UO-8
Mentioned: 49 Post(s)
Tagged: 0 Thread(s)
Quoted: 1856 Post(s)
Liked 664 Times
in
506 Posts