


Help wanted about lugged frame compatibility!
 03-20-21, 08:50 AM
#1
Junior Member
Thread Starter
Help wanted about lugged frame compatibility!
Hi!
I’m looking to build my first lugged frame bicycle and I am considering buying a tubes and parts kit from Ceeway. I like the idea of a kit to get started, but I would like to carve my own lugs for the toptube/headtube and downtube/headtube joints.
Framebuilder supply has some blanks lugs for carvings that I would like to get, but I’m wondering if they’re compatible with the tubes from the Ceeway kit.
The dimensions listed for the toptube (25.4mm) and downtube (28.6mm) of the framebuilder supply lugs are the same as the ones for the tubes from the kit,
but the listed headtube dimension is 31.8mm for the lug and the tube from the kit is 31.7mm
Will the tubes be compatible with the blank lugs?
Also, I’m new to brazing and need to read more on the subject, but I was wondering if the steel lugs from framebuilder supply would braze to the chromoly steel tubes from the kit?
I plan to read more about lugged framebuilding and get help along the way from metalworking friends, but for now, figuring out materials is an important step and any help is appreciated!
Have a good day!

Likes For JaraNS:
03-20-21, 09:41 AM
#2


Randomhead
Join Date: Aug 2008
Location: Happy Valley, Pennsylvania
Posts: 24,396
Mentioned: 0 Post(s)
Tagged: 0 Thread(s)
Quoted: 4 Post(s)
Liked 3,696 Times
in
2,517 Posts
Yes those lugs will work with the tubes from Ceeway. You might want to ask Peter if he has something like that.
I would practice brazing with 4130 tubes before you get too far, especially if you are going to put a lot of work into your frame. The next size up tube can be purchased with a wall thickness that slides onto a tube. Start with 1/2" wide rings and go up to 1" wide rings.
I would practice brazing with 4130 tubes before you get too far, especially if you are going to put a lot of work into your frame. The next size up tube can be purchased with a wall thickness that slides onto a tube. Start with 1/2" wide rings and go up to 1" wide rings.
03-20-21, 11:04 AM
#4
Senior Member
Join Date: Dec 2019
Posts: 955
Mentioned: 3 Post(s)
Tagged: 0 Thread(s)
Quoted: 321 Post(s)
Liked 263 Times
in
212 Posts
Cromoly is a kind of steel and will braze to the lugs just fine. If you're in the UK I've not found anywhere I can buy generic cromoly at a better price than the actual bike tubes you can get from Ceeway (or Reynolds) but you could ask at your local steelyard.
A good source of metal for practice is just buy an old junker bike or two for a few quid. The wall thickness might a bit thicker than on your nice Columbus tubes for the real frame but not by much.
Good luck and have fun!
A good source of metal for practice is just buy an old junker bike or two for a few quid. The wall thickness might a bit thicker than on your nice Columbus tubes for the real frame but not by much.
Good luck and have fun!
 03-20-21, 07:07 PM
#6

Senior Member
Join Date: Feb 2012
Location: Rochester, NY
Posts: 18,073
Bikes: Stewart S&S coupled sport tourer, Stewart Sunday light, Stewart Commuting, Stewart Touring, Co Motion Tandem, Stewart 3-Spd, Stewart Track, Fuji Finest, Mongoose Tomac ATB, GT Bravado ATB, JCP Folder, Stewart 650B ATB
Mentioned: 0 Post(s)
Tagged: 0 Thread(s)
Quoted: 4201 Post(s)
Liked 3,857 Times
in
2,305 Posts
I will second the advice to trial braze a number of practice sleeves before going too far with your hopes of carving lugs on your first frame. One tends to invest more then just time with their initial carving attempts and it is a shame when the frame construction part isn't up to the task of really making a lug look nice, independent of the shape. Andy
__________________
AndrewRStewart
AndrewRStewart
Likes For Andrew R Stewart:
03-20-21, 07:29 PM
#7
Junior Member
Thread Starter
Thank you for the advice! I’ll definitely put more time into trial brazing before starting the project.
Likes For JaraNS:
03-20-21, 09:22 PM
#8
framebuilder
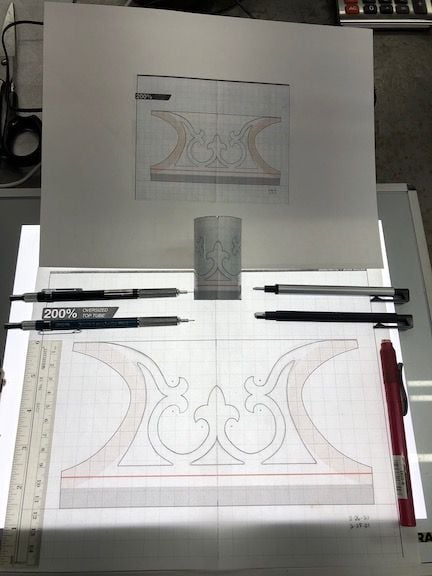
JaraNS, I went to England in the 70's to learn frame building partly because I wanted to shape my own lugs. I got a Hetchins when I was still in college to tour England and that frame showed me that aesthetics and function could be combined. Over the years I've refined a process to create the design and cut the lugs. I can send you the instructions if you email me. The cliff notes version is that I have created lug socket templates that are twice life size. This makes it much easier to draw a design on vellum paper. This design is reduced to life size by a copier that prints on Avery label paper that can be cut and stuck to a blank lug.
I was a high school teacher when I went to England and have taught framebuilding classes since my return. Many of them choose to design and carve their own lugs. Some designs are simple and others complicated. I want to be encouraging but also realistic that there are many challenges to doing it really well. Andy's right in that brazing a carved lug so you have clean shorelines is difficult. Finding out how to build a frame well on their 1st try without getting discouraged and frustrated is what keeps bringing students to my class.
I could post many pictures of student created lug designs but here is an example of a set cut and painted in class based on trillium flowers.
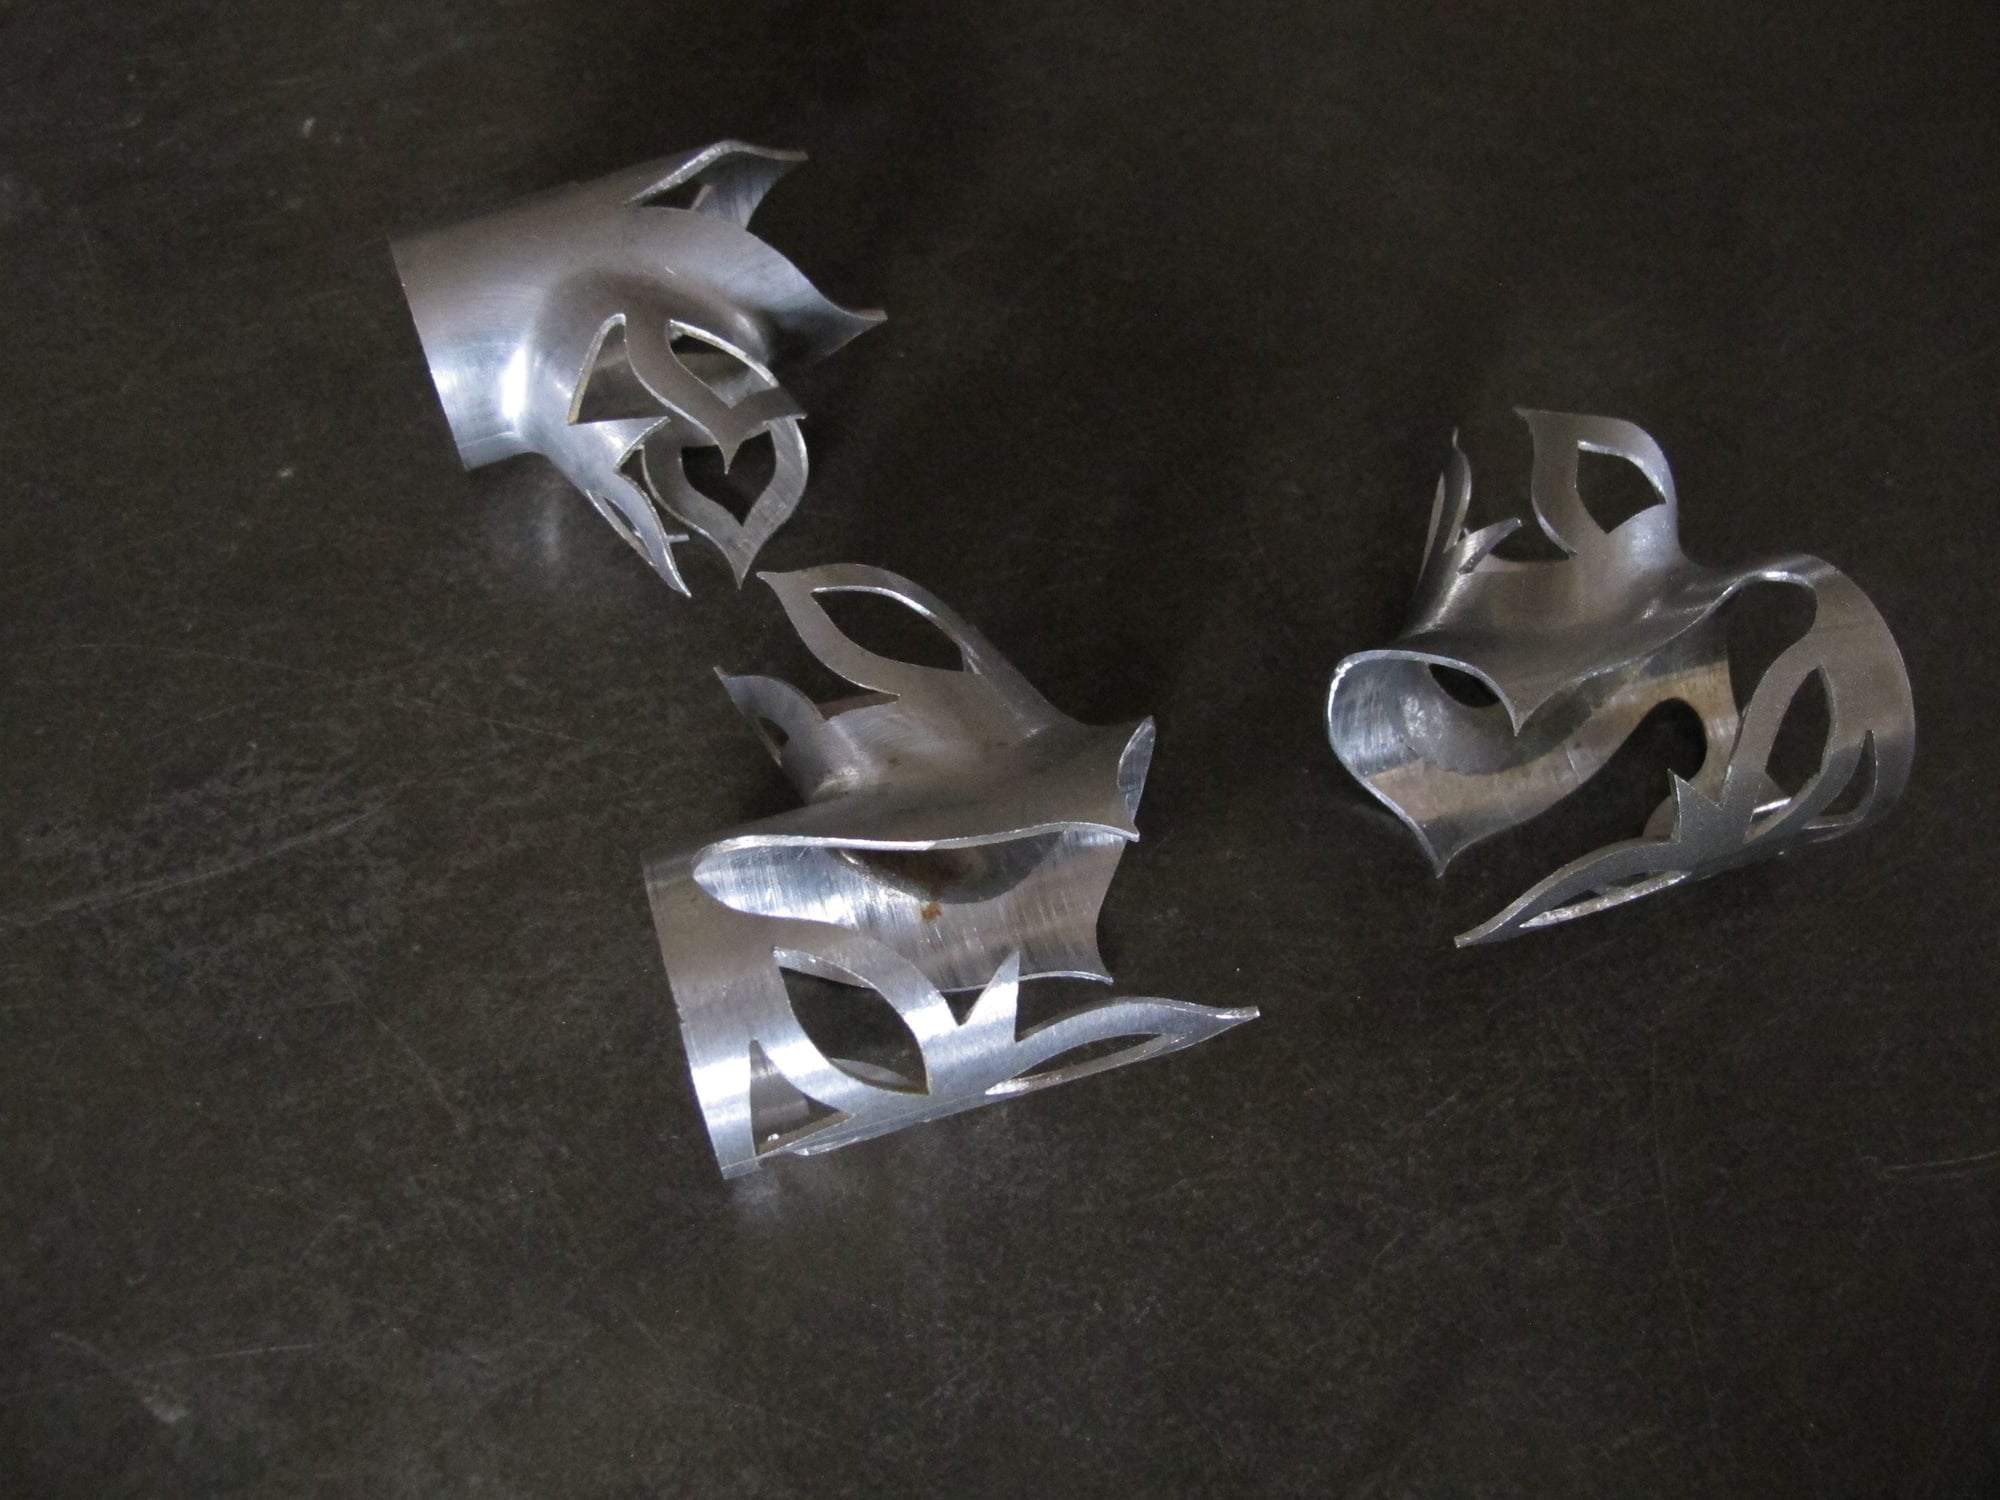
Likes For Doug Fattic:
03-21-21, 06:26 AM
#9
Junior Member
Thread Starter
Thank you for sharing! I really appreciate it. I just emailed you to learn more about your process to design and cut the lugs.
03-21-21, 08:49 AM
#10
Senior Member
Join Date: Feb 2012
Location: Rochester, NY
Posts: 18,073
Bikes: Stewart S&S coupled sport tourer, Stewart Sunday light, Stewart Commuting, Stewart Touring, Co Motion Tandem, Stewart 3-Spd, Stewart Track, Fuji Finest, Mongoose Tomac ATB, GT Bravado ATB, JCP Folder, Stewart 650B ATB
Mentioned: 0 Post(s)
Tagged: 0 Thread(s)
Quoted: 4201 Post(s)
Liked 3,857 Times
in
2,305 Posts
The OP can do little better but to follow Doug's advise. Andy
__________________
AndrewRStewart
AndrewRStewart
Likes For Andrew R Stewart:
03-21-21, 10:25 AM
#11
framebuilder
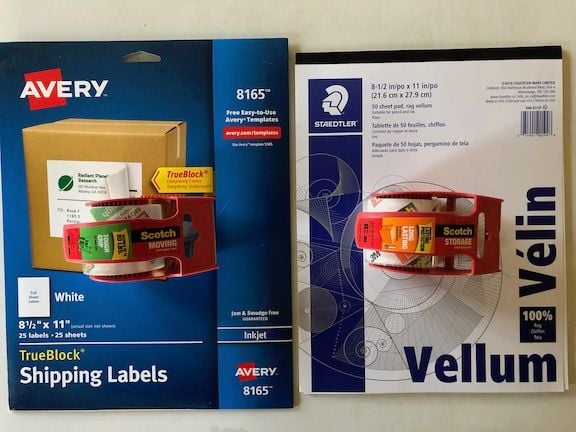
Here are a couple of pictures of basic stuff you will want to get. Vellum paper w/100% rag content (available at office supply or art stores) works much better than regular paper to print the templates on. It is durable and can stand up to multiple erasing. It is somewhat translucent to copy/trace the other side after folding the pattern in two. Avery makes some label sticky back paper that works well to attach the pattern to your lug (after your printer has reduced your drawing back to life size). Backing paper can be peeled off to revel the adhesive after printing. Sometimes I like to cover the pattern before it is cut out with clear tape so my hands don't rub off the printed pattern while working on it. "Storage" or "moving" tape works better than "shipping" tape because it isn't so thick.
Here are my primary drawing tools. I have a nice LED light board but holding the pattern up to a window works too. I've used a section of glass held up over a fluorescent light with short sections of two by fours as well. I use mechanical pencils and special erasers. Fine erasers can refine and thin drawn lines. A compass makes it easier to draw curved parallel lines. I like a clear plastic ruler to draw straight lines.
 03-22-21, 09:06 AM
#12
Junior Member
Thread Starter
Thank you Doug for all the info ! I received the templates by email and it’s going to be very useful to design and cut my own lugs!
