


What have you been wrenching on lately?
 03-18-23, 08:18 AM
#6026
Senior Member

Join Date: May 2021
Location: London
Posts: 558
Bikes: Motobecane C41, Matsu$hita Nashonaru
Mentioned: 7 Post(s)
Tagged: 0 Thread(s)
Quoted: 213 Post(s)
Liked 420 Times
in
246 Posts
I will be finally getting on with removing the fixed cup on the Superbe frame today and hopefully make a start on cleaning aluminium saw dust from there (remnants of the previous owner's seatpost removal). I think at some point I'll just have to flush it with something. Any recommendations for what I should do that with?
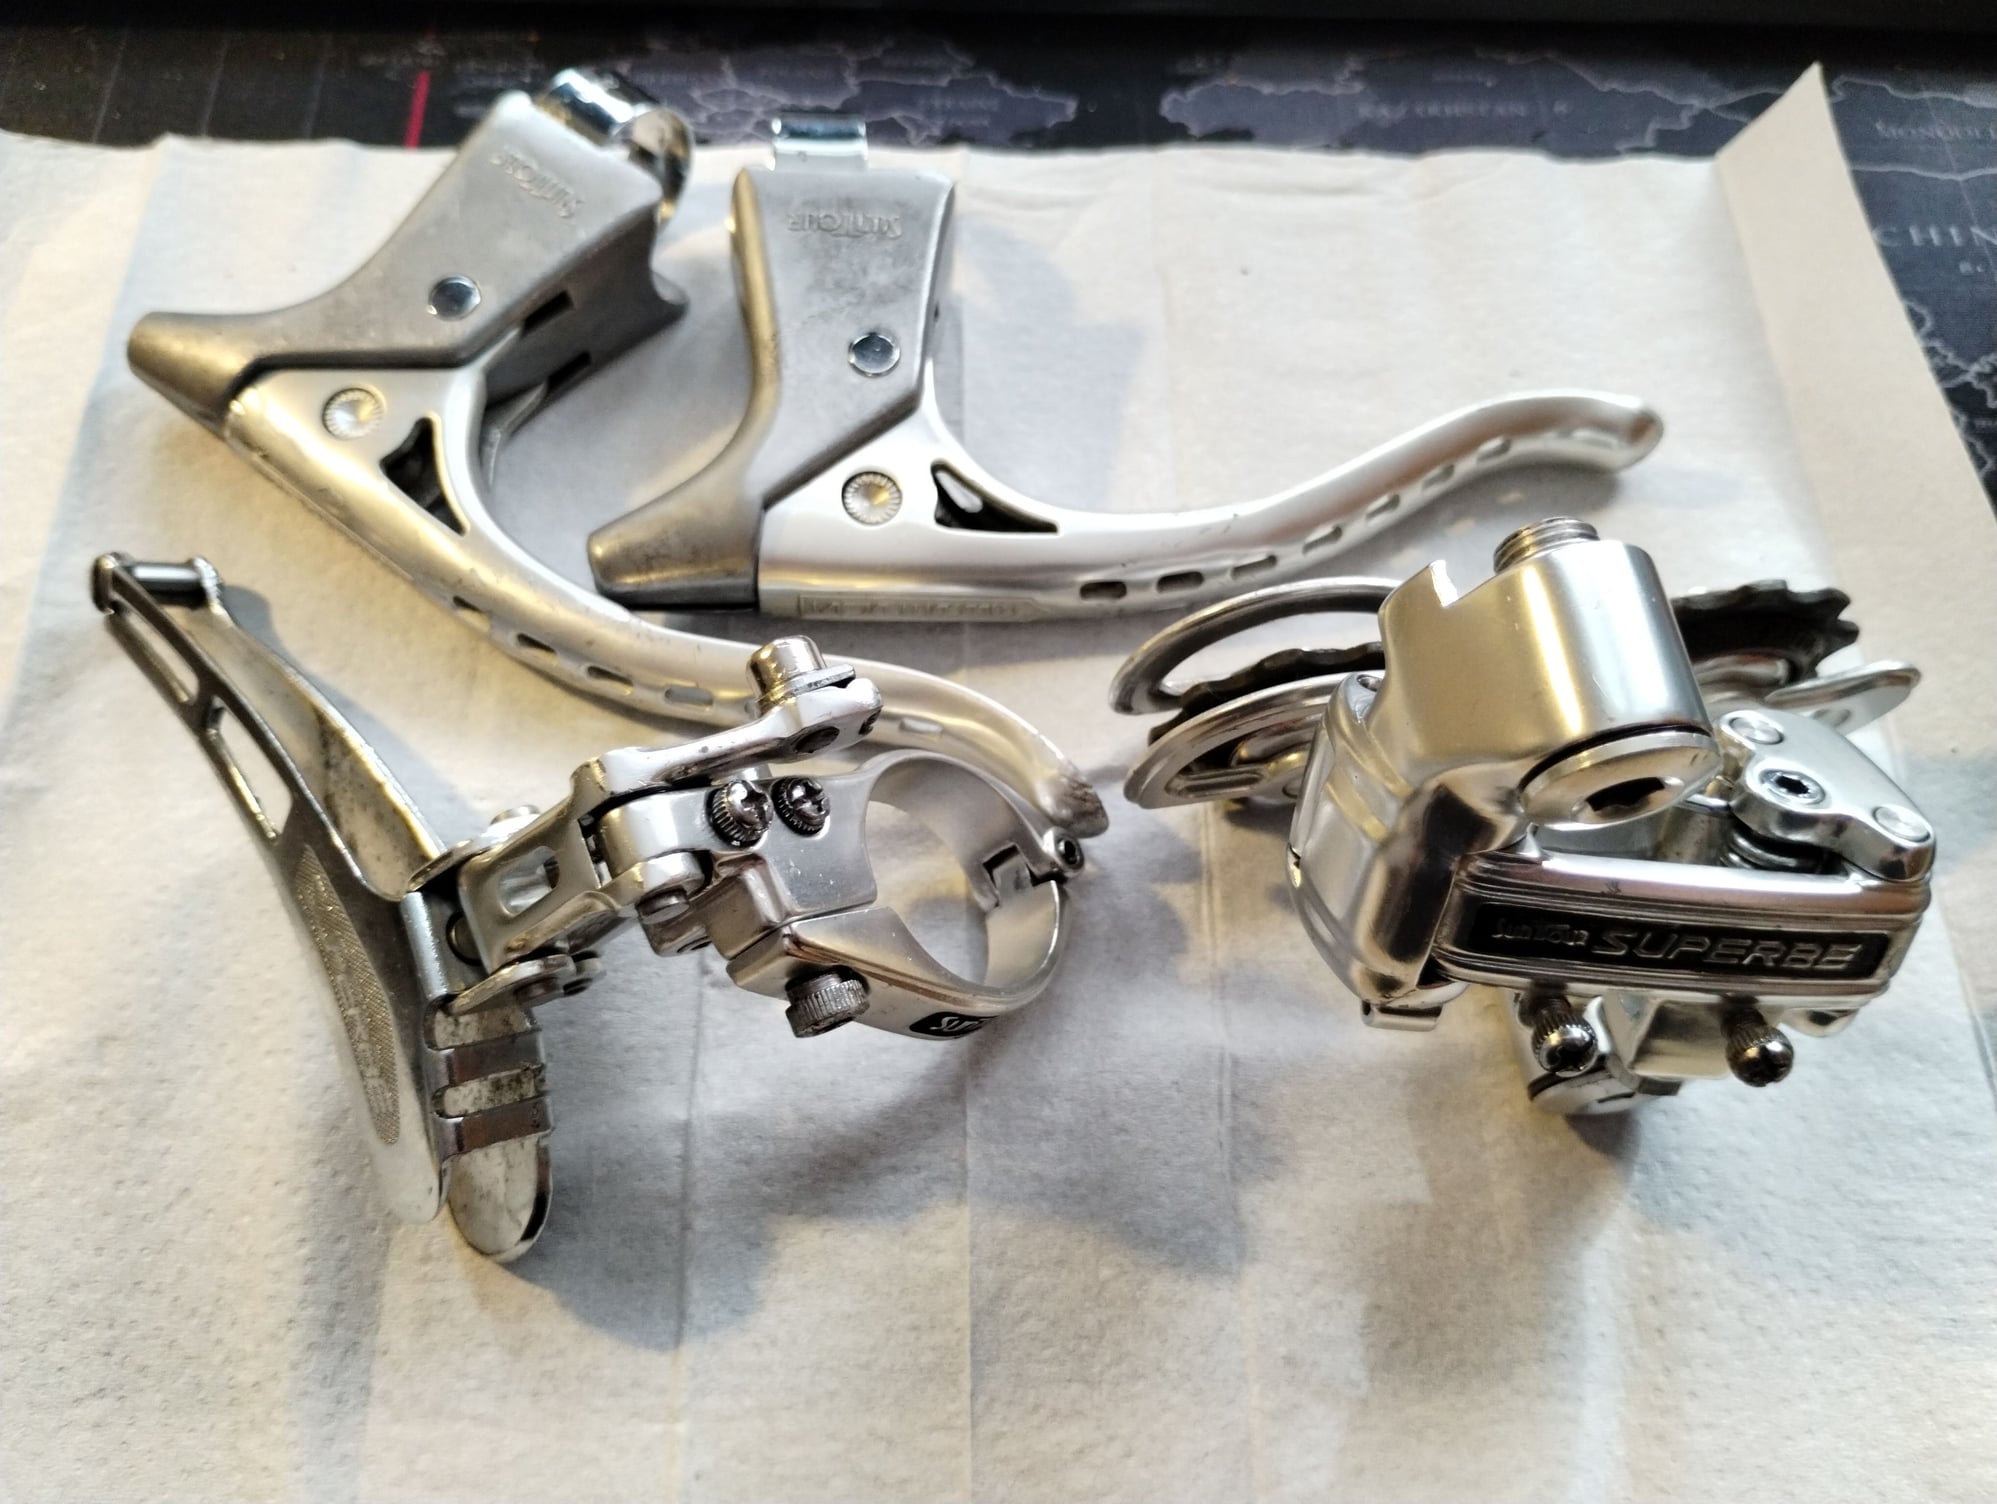
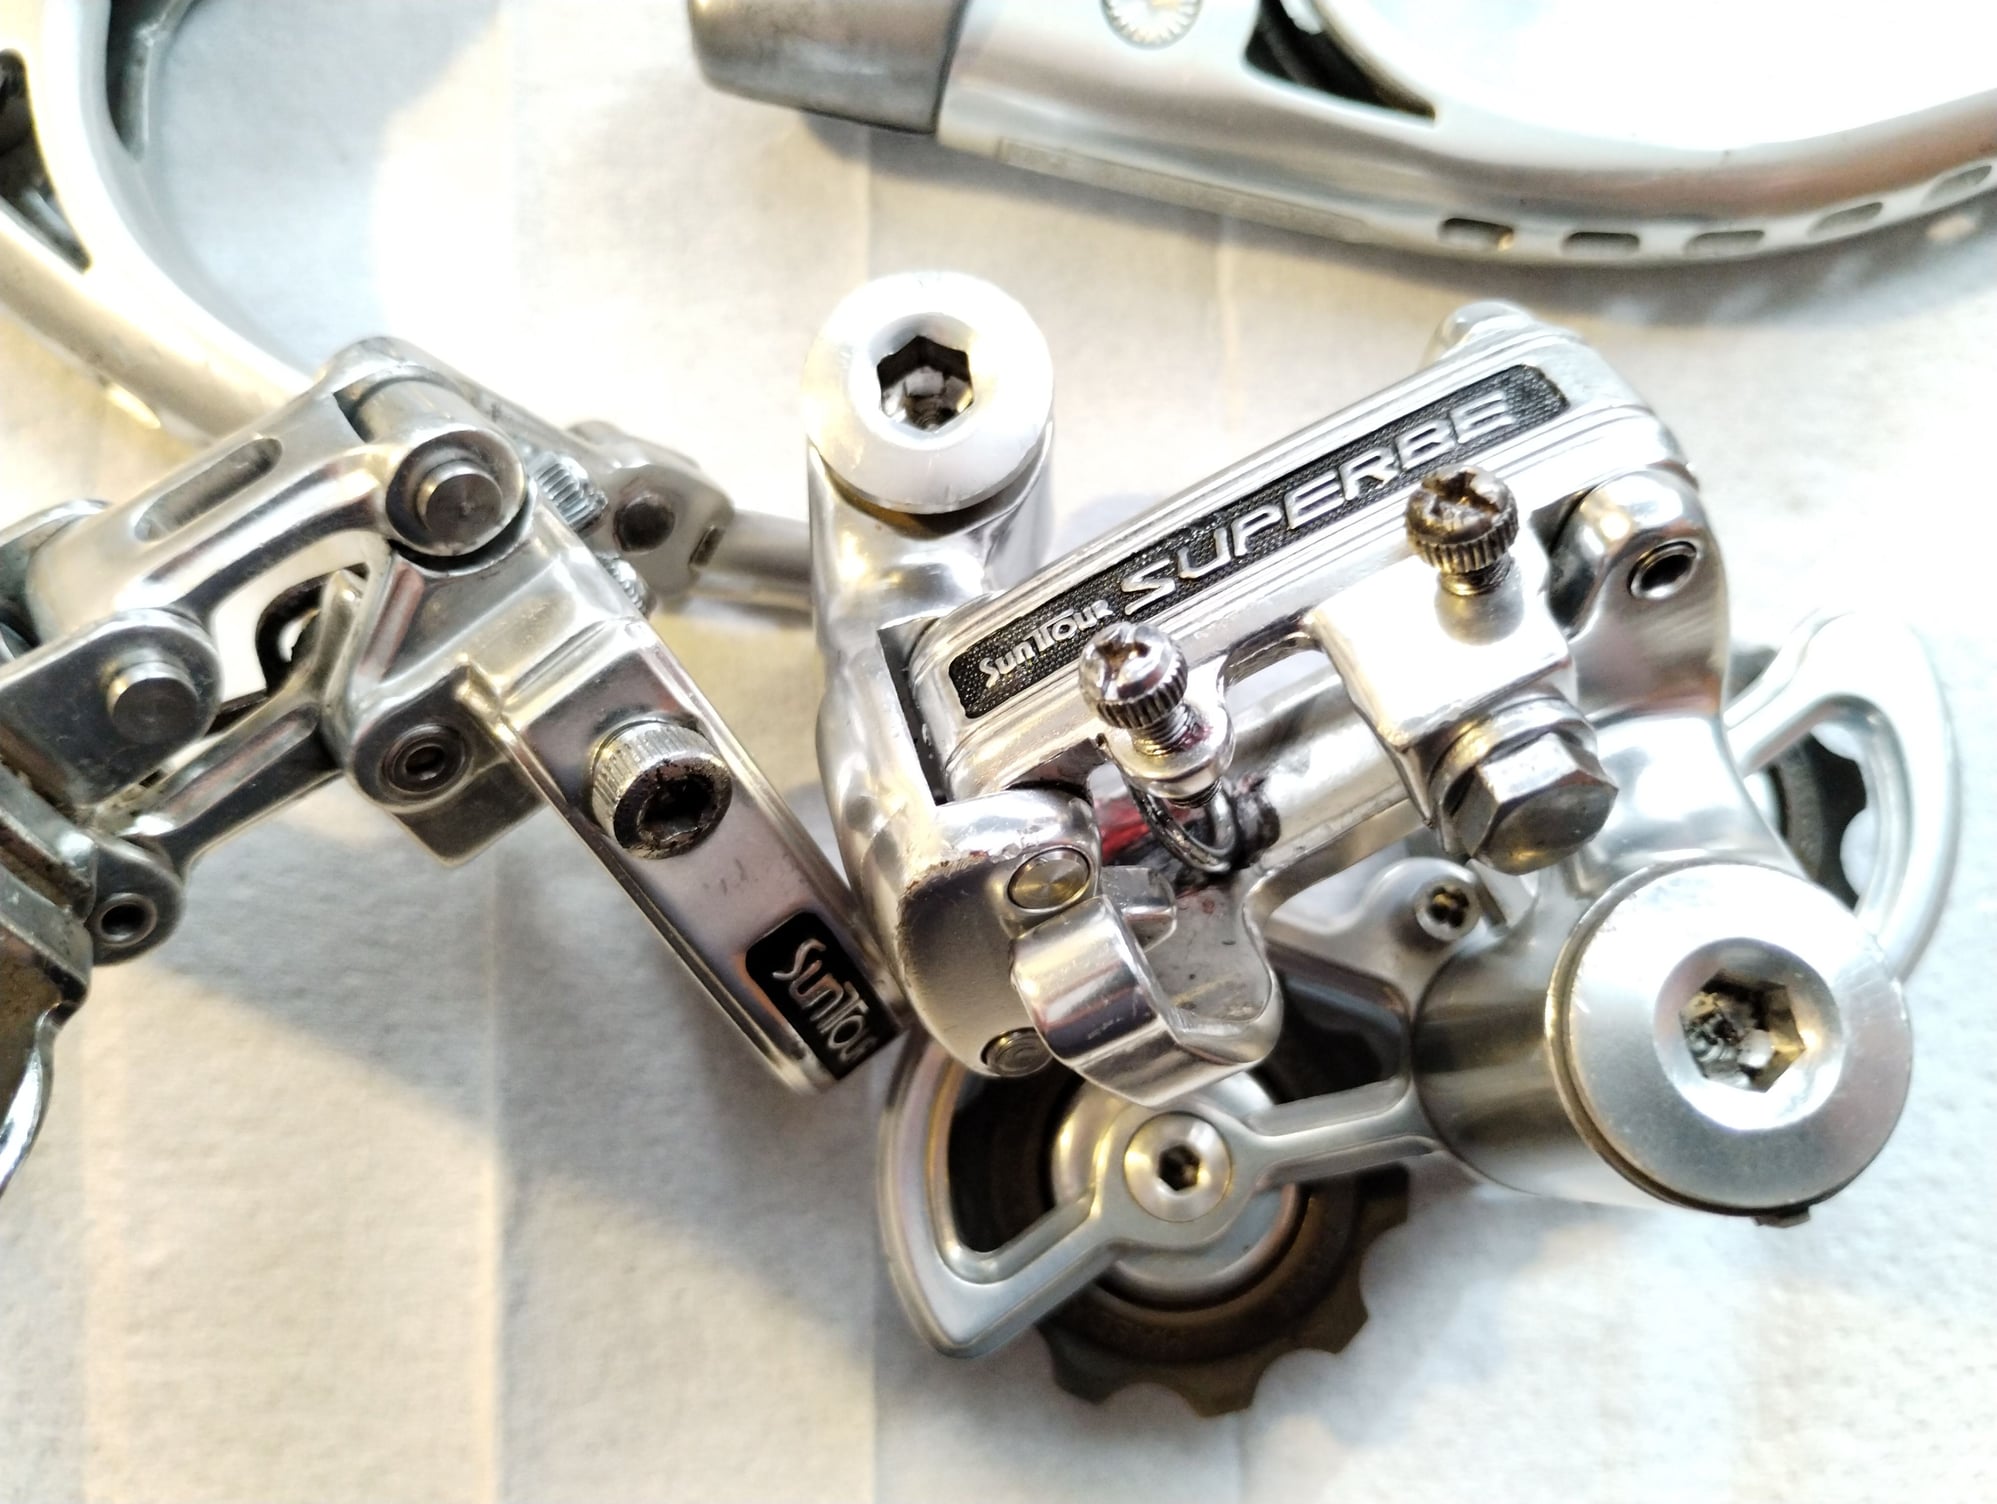
In the meantime, I'm getting on with cleaning the components. This batch was the brake levers, front derailleur and rear derailleur. All items have some scuff marks, but nothing too bad.
The rear derailleur is very similar to another one I have, which I previously thought was RD-2100 or some variant of. Right now I'm convinced both are actually versions of RD-3100. The difference between the ones I have is the type of bolt used to hold the parallelogram spring (hex on the other one vs allen key on the on in the photos). Both have aluminium pulley bolts and pivot bolts. So I think initially Suntour was reusing components from RD-2100 with slight updates to make it lighter and then at some point around 1979 they decided to change the bolt for parallelogram spring and go for allen key one for the cable clamping bolt.
This one wasn't quite as springhtly as the previous RD-3100 I got (which was NOS or close to). Pulley cage felt sluggish. After I disasembled the cage pivot, I found out that Suntour decided to use a shim (they sure loved their shims), or two, to be precise, to keep the spring firmly in place. Both shims / washers were shattered, which I suspect made the end of the spring loose. Of course, these washers were not exactly any standard washers, but very thin, stainless steel pieces designed to fit precisely over the bolt and notches for tensioning the spring. After a bit of rummaging I found out I have nothing remotely similar, so modified a standard washer to fit in there. Not the most elegant solution and will probably look for something else at some point, but it works and almost as good as the other copy.
I decided to disagree with Suntour's idea for allen key cable clamp bolt. There's no room on the derailleur for the one they chose and its head bumps into the casing for the cage pivot spring. So I went with the older solution: 8mm hex. After thoroughly cleaning, oiling and greasing the derailleur where needed I've put some black enamel into places on the logo where it was worn out. I think it doesn't look to shabby. I look forward to facing problems with maximum sprocket size and chain wrap Well, not really, I seldom use anything bigger than 24T, so should be alright.
In the meantime, I'm getting on with cleaning the components. This batch was the brake levers, front derailleur and rear derailleur. All items have some scuff marks, but nothing too bad.
The rear derailleur is very similar to another one I have, which I previously thought was RD-2100 or some variant of. Right now I'm convinced both are actually versions of RD-3100. The difference between the ones I have is the type of bolt used to hold the parallelogram spring (hex on the other one vs allen key on the on in the photos). Both have aluminium pulley bolts and pivot bolts. So I think initially Suntour was reusing components from RD-2100 with slight updates to make it lighter and then at some point around 1979 they decided to change the bolt for parallelogram spring and go for allen key one for the cable clamping bolt.
This one wasn't quite as springhtly as the previous RD-3100 I got (which was NOS or close to). Pulley cage felt sluggish. After I disasembled the cage pivot, I found out that Suntour decided to use a shim (they sure loved their shims), or two, to be precise, to keep the spring firmly in place. Both shims / washers were shattered, which I suspect made the end of the spring loose. Of course, these washers were not exactly any standard washers, but very thin, stainless steel pieces designed to fit precisely over the bolt and notches for tensioning the spring. After a bit of rummaging I found out I have nothing remotely similar, so modified a standard washer to fit in there. Not the most elegant solution and will probably look for something else at some point, but it works and almost as good as the other copy.
I decided to disagree with Suntour's idea for allen key cable clamp bolt. There's no room on the derailleur for the one they chose and its head bumps into the casing for the cage pivot spring. So I went with the older solution: 8mm hex. After thoroughly cleaning, oiling and greasing the derailleur where needed I've put some black enamel into places on the logo where it was worn out. I think it doesn't look to shabby. I look forward to facing problems with maximum sprocket size and chain wrap
Well, not really, I seldom use anything bigger than 24T, so should be alright.

Likes For VintageSteelEU:
03-18-23, 07:06 PM
#6027

Cantilever believer

Join Date: Nov 2021
Location: Phoenix, AZ
Posts: 1,543
Mentioned: 5 Post(s)
Tagged: 0 Thread(s)
Quoted: 527 Post(s)
Liked 1,804 Times
in
818 Posts
At Recycle Your Bicycle, we go through a lot of saddles every year. We want the bikes to look as close to new as practicable when given to the foster kid, and a ripped, torn, discolored, or otherwise excessively weathered saddle gets yanked & replaced. But replacement saddles are expensive, with even the basic "butt buster" ones costing over $10 each. We felt bad about tossing saddles with relatively intact padding but trashed covers, but there didn't seem to be too many good options.
After some research and inquiry, we were able to source some stretchy saddle covers in bulk at a reasonable price. So now in my spare time I'm popping/ripping the old covers off (so many staples...) and replacing with a new cover. We then tie the cover in place with a thin wire or reuse the saddle's bottom edging to keep it from pulling off in case of vacuum butt, corduroy adhesion, or other similar issue.
Example: a once-nicer but old and sun-damaged saddle. Before:
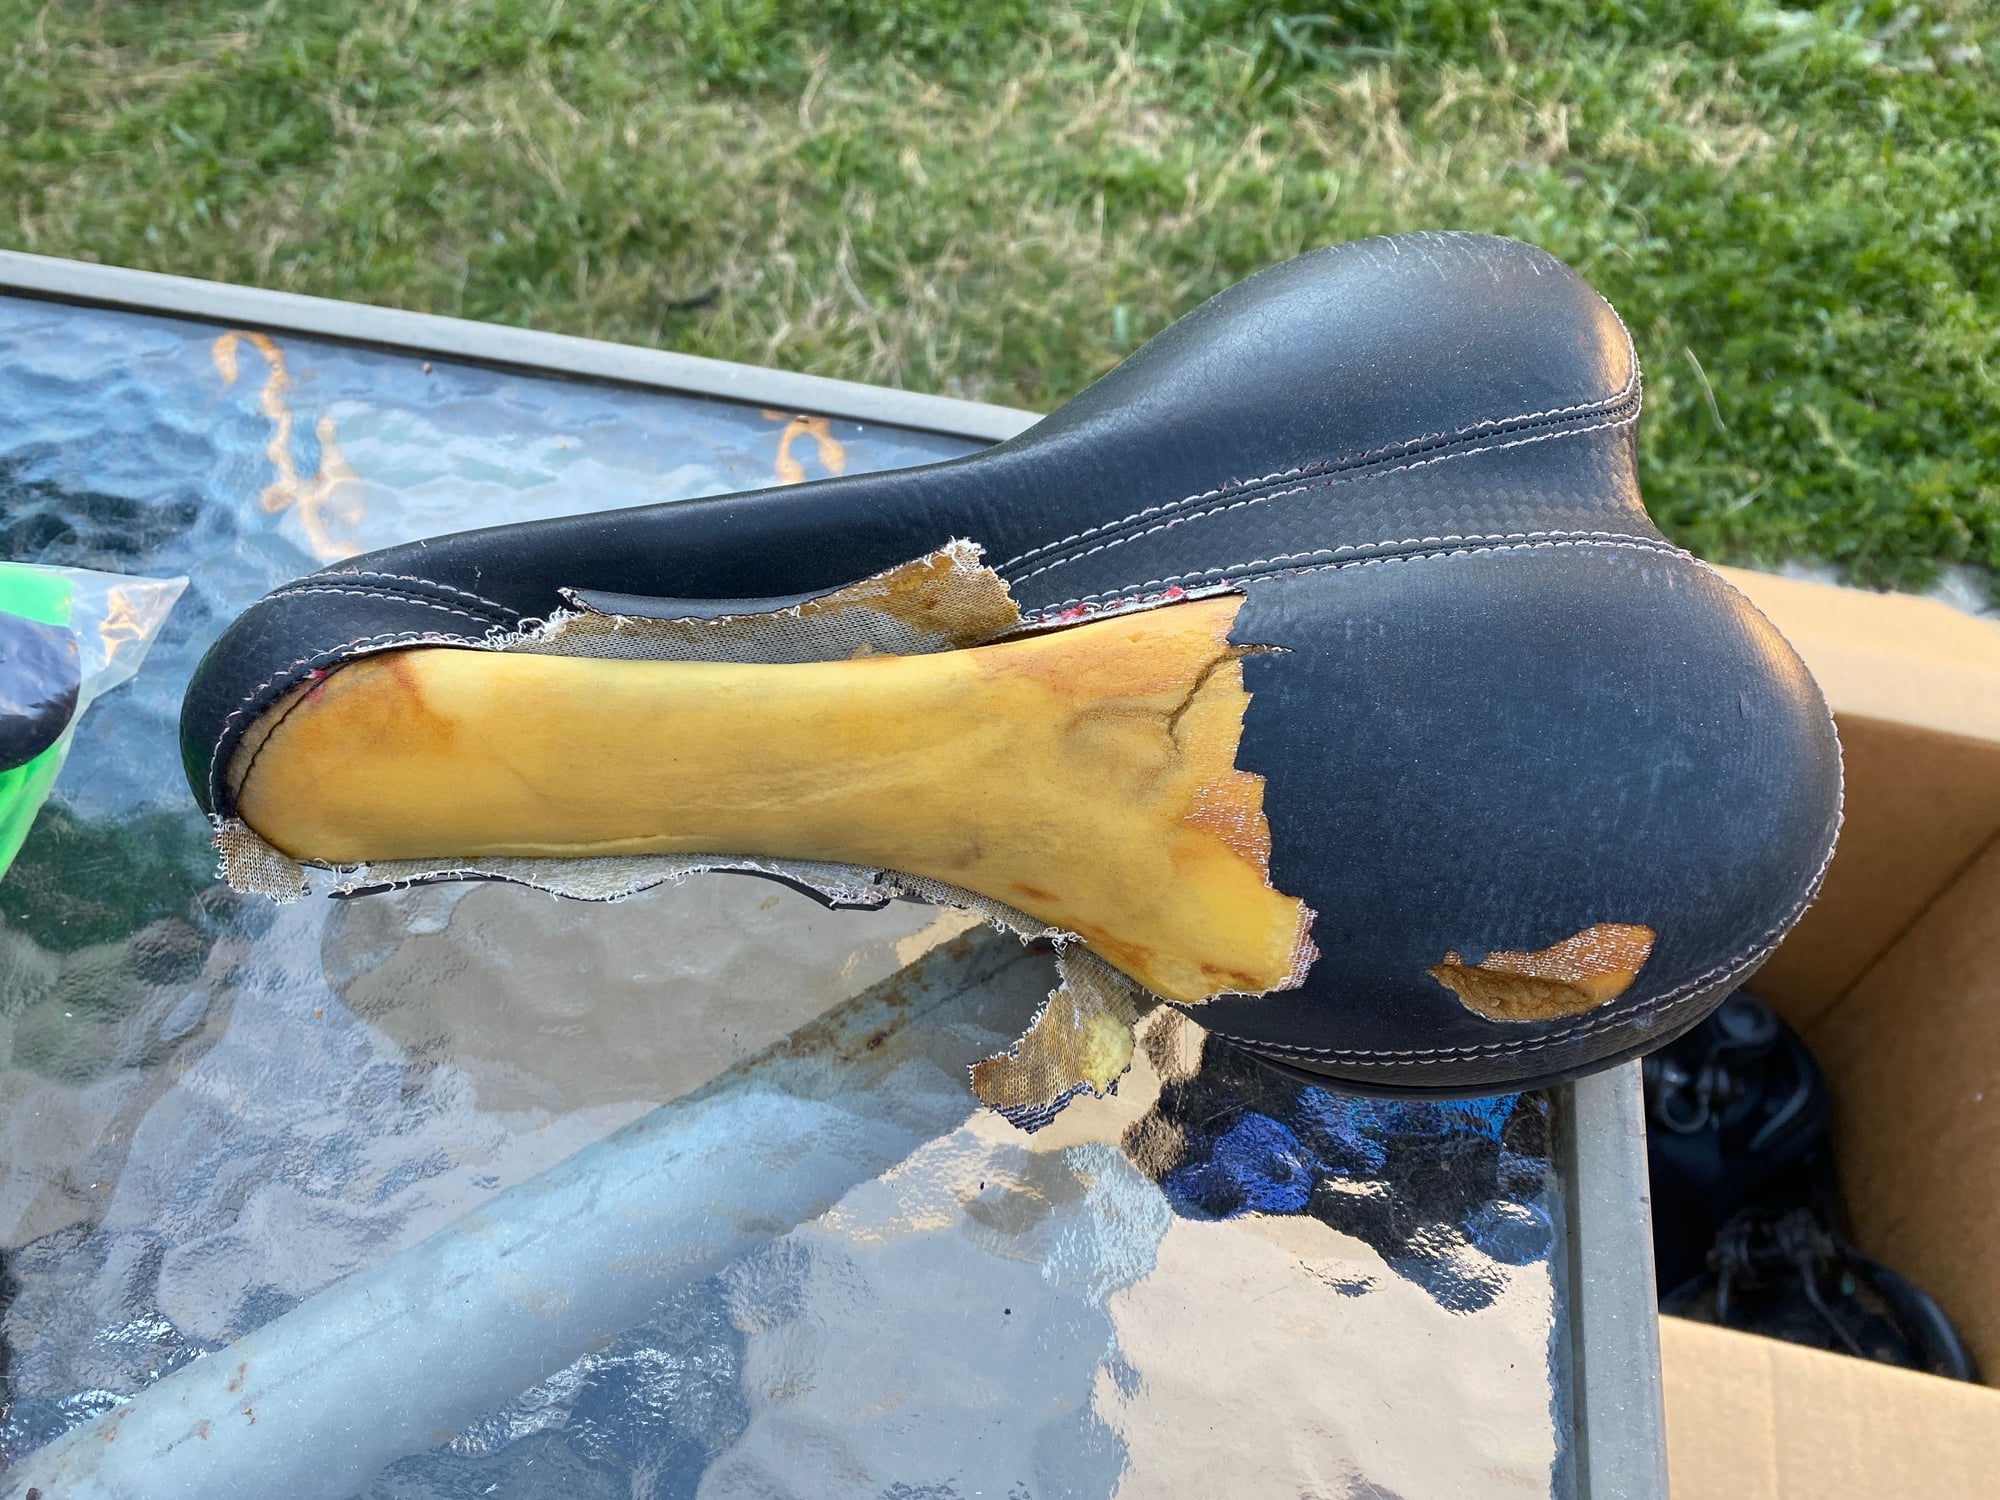
After:

Now, repeat many dozens of times, and hopefully we'll have some cushier tushies out there while saving some decent money.
After some research and inquiry, we were able to source some stretchy saddle covers in bulk at a reasonable price. So now in my spare time I'm popping/ripping the old covers off (so many staples...) and replacing with a new cover. We then tie the cover in place with a thin wire or reuse the saddle's bottom edging to keep it from pulling off in case of vacuum butt, corduroy adhesion, or other similar issue.
Example: a once-nicer but old and sun-damaged saddle. Before:
After:
Now, repeat many dozens of times, and hopefully we'll have some cushier tushies out there while saving some decent money.
Likes For RCMoeur:
03-18-23, 07:14 PM
#6028
se�or miembro

Join Date: Dec 2018
Location: Pac NW
Posts: 6,602
Bikes: '70s - '80s Campagnolo
Mentioned: 92 Post(s)
Tagged: 0 Thread(s)
Quoted: 3869 Post(s)
Liked 6,456 Times
in
3,192 Posts
 03-18-23, 09:24 PM
#6029
Banned.

Join Date: Jul 2009
Location: PAZ
Posts: 12,294
Mentioned: 255 Post(s)
Tagged: 0 Thread(s)
Quoted: 2588 Post(s)
Liked 4,823 Times
in
1,709 Posts
Best of luck with your polishing

DD
 03-19-23, 04:30 AM
#6030
Senior Member
Join Date: May 2021
Location: London
Posts: 558
Bikes: Motobecane C41, Matsu$hita Nashonaru
Mentioned: 7 Post(s)
Tagged: 0 Thread(s)
Quoted: 213 Post(s)
Liked 420 Times
in
246 Posts
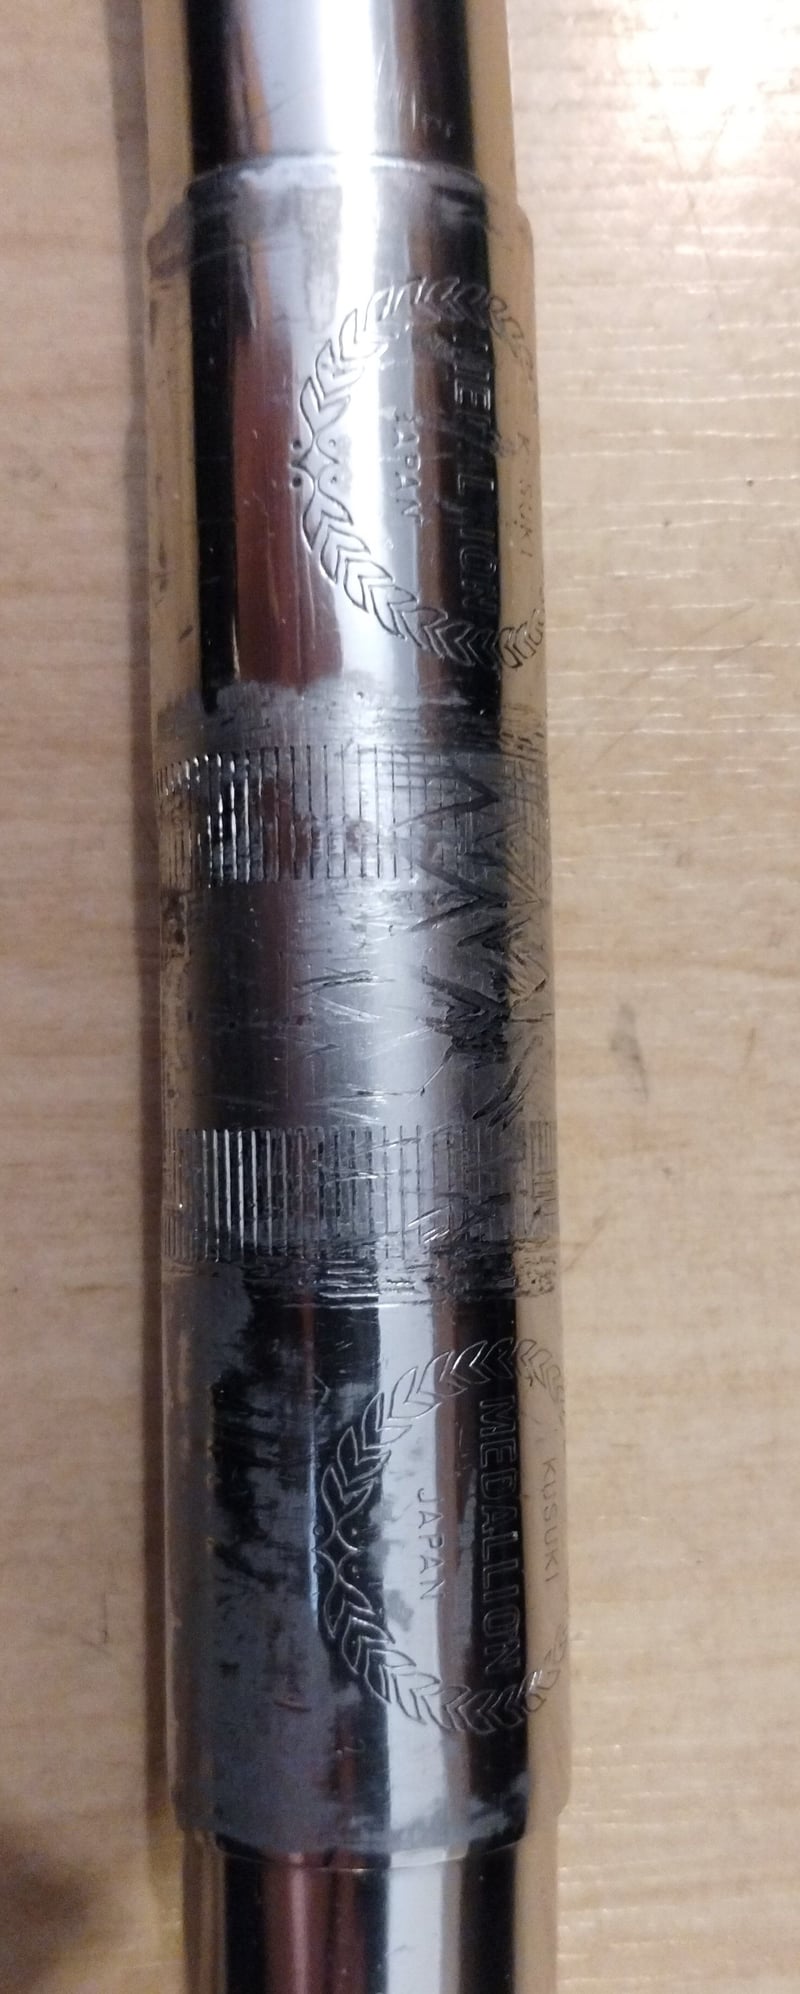
As for the Kusuki handlebar, I'll definitely get there. I'm nearly done with other components - cleaning shifter levers now. When I finish, I'm going to find my pile of sandpaper, grab something less fine to go over the remaining anodising and work on that section. Then again 1k grit and then I think I will ggo for 2k and 3k before the final buffing.
03-19-23, 06:41 AM
#6031
Bianchi Goddess

Join Date: Apr 2009
Location: Shady Pines Retirement Fort Wayne, In
Posts: 27,845
Bikes: Too many to list here check my signature.
Mentioned: 192 Post(s)
Tagged: 2 Thread(s)
Quoted: 2925 Post(s)
Liked 2,921 Times
in
1,489 Posts
Not much bike related going on here, but spent some time tinkering with Morticia adding some semi useless accessories

And I unfortunately came to the conclusion I desperately need to clean out and reorganize my tool boxes. Maybe it's time to part with a few tolls I may never use again like a 40 and 36 headset wrenches, a C-Rec dust cap tool.....


And I unfortunately came to the conclusion I desperately need to clean out and reorganize my tool boxes. Maybe it's time to part with a few tolls I may never use again like a 40 and 36 headset wrenches, a C-Rec dust cap tool.....
__________________
�One morning you wake up, the girl is gone, the bikes are gone, all that's left behind is a pair of old tires and a tube of tubular glue, all squeezed out"
Sugar "Kane" Kowalczyk
�One morning you wake up, the girl is gone, the bikes are gone, all that's left behind is a pair of old tires and a tube of tubular glue, all squeezed out"
Sugar "Kane" Kowalczyk
Likes For Bianchigirll:
03-19-23, 07:04 AM
#6032
Senior Member
Join Date: Oct 2008
Location: Northern NY...Brownville
Posts: 2,568
Bikes: Specialized Aethos, Specialized Diverge Comp E5
Mentioned: 2 Post(s)
Tagged: 0 Thread(s)
Quoted: 237 Post(s)
Liked 451 Times
in
263 Posts
Did a bit of an overhaul on a nice Spesh Awol last week...covered in dirty, greasy sandy ick...everything went in the dunk tank for a good soaking, scrubbed clean, lubed and reassembled left a bike running and looking like new.
Also got my first gravel bike. A very sweet Spesh Diverge Comp E5 in Tarmac Black. Practically no assembly needed and it went together nicely. I've never used Sram before but it is a nice system and I'm looking forward to a few gravel races/rides this year.
Can't ride it yet as we have a winter storm watch in the area. Very very windy, cold and snowy...ugh I dislike March...can't wait for April to get here and hope it's a warm month...here is northern ny on lake Ontario/Thousand Islands area.
Likes For Kai Winters:
03-19-23, 10:02 PM
#6033
Cantilever believer
Join Date: Nov 2021
Location: Phoenix, AZ
Posts: 1,543
Mentioned: 5 Post(s)
Tagged: 0 Thread(s)
Quoted: 527 Post(s)
Liked 1,804 Times
in
818 Posts
__________________
Richard C. Moeur, PE - Phoenix AZ, USA
https://www.richardcmoeur.com/bikestuf.html
Richard C. Moeur, PE - Phoenix AZ, USA
https://www.richardcmoeur.com/bikestuf.html
03-20-23, 12:03 PM
#6034
Junior Member

Join Date: Oct 2021
Location: Northern Virginia
Posts: 107
Bikes: Motobecane Grand Record, Motobecane Super Mirage (3x5 speeds), Motobecane Mirage, Atala (unknown model), Peugeot mixte frame Tourist and Schwinn Sport. A bunch more kids bikes. Most recently a Trek Verve One, tricked up for serious touring.
Mentioned: 1 Post(s)
Tagged: 0 Thread(s)
Quoted: 38 Post(s)
Liked 43 Times
in
27 Posts
Oh, so true! I have had this happen to me as well. It is the kiss of death...
Likes For sbrudno:
03-20-23, 12:54 PM
#6035
Full Member
"And I unfortunately came to the conclusion I desperately need to clean out and reorganize my tool boxes. Maybe it's time to part with a few tolls I may never use again like a 40 and 36 headset wrenches, a C-Rec dust cap tool....."
Bianchigirll, I am intrigued by the special tool in your toolbox picture that looks like a champagne cork with the wire and foil attached. Is this a special McGyver tool for Columbus tubing?
Mike
Bianchigirll, I am intrigued by the special tool in your toolbox picture that looks like a champagne cork with the wire and foil attached. Is this a special McGyver tool for Columbus tubing?
Mike
Likes For IcySwan1:


 03-20-23, 02:34 PM
#6037
Full Member
Join Date: Jan 2022
Posts: 475
Mentioned: 6 Post(s)
Tagged: 0 Thread(s)
Quoted: 253 Post(s)
Liked 223 Times
in
118 Posts
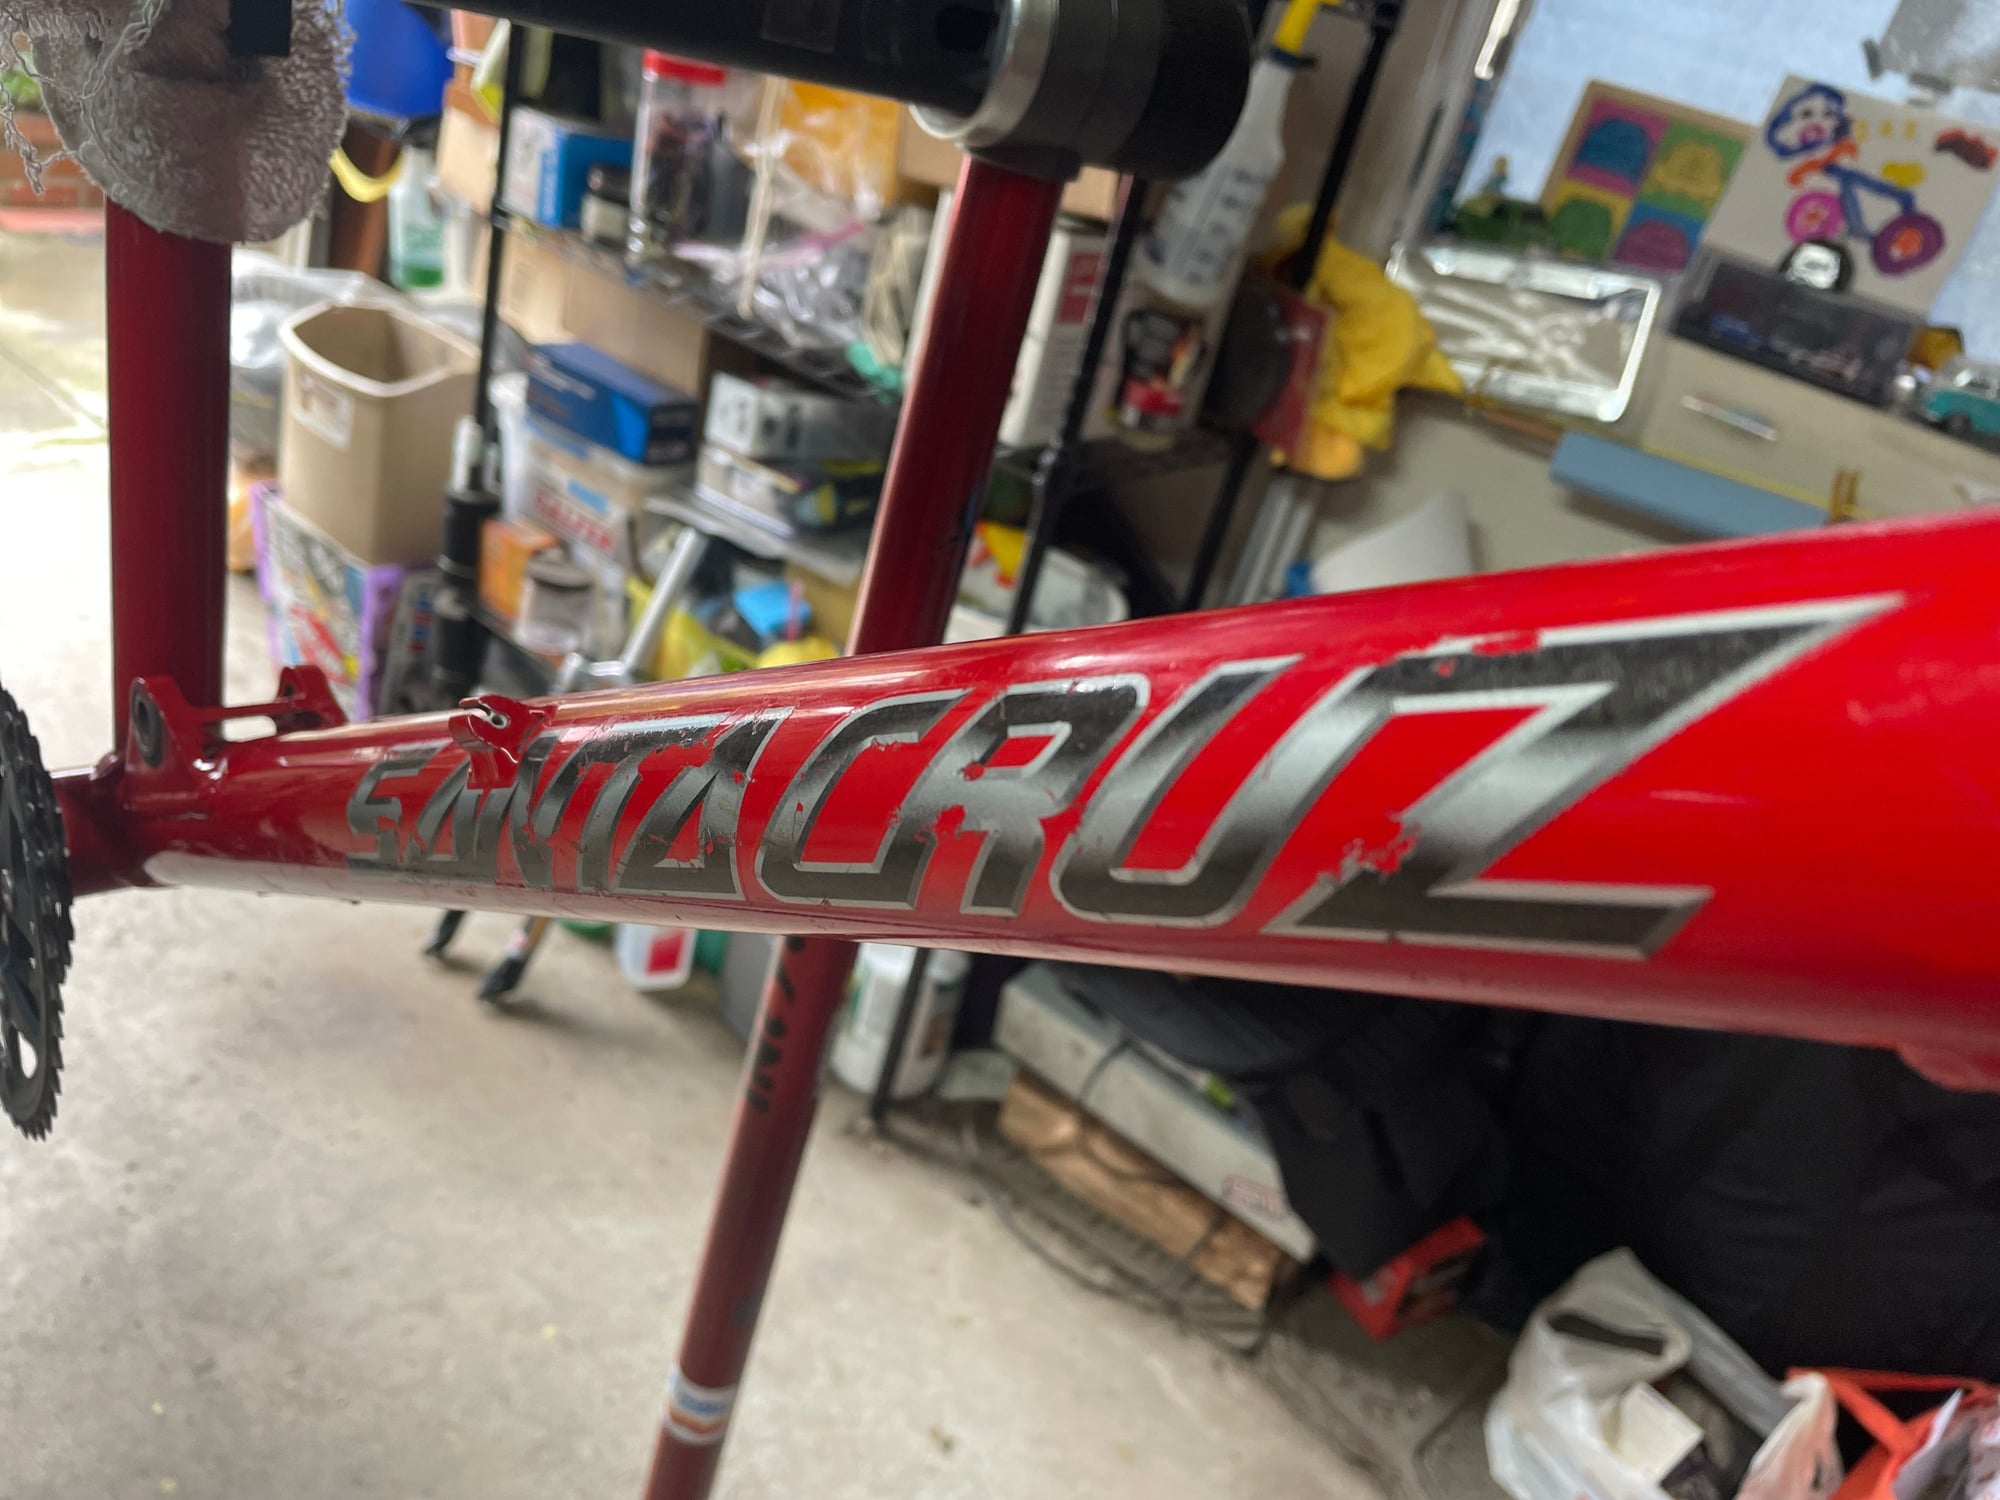
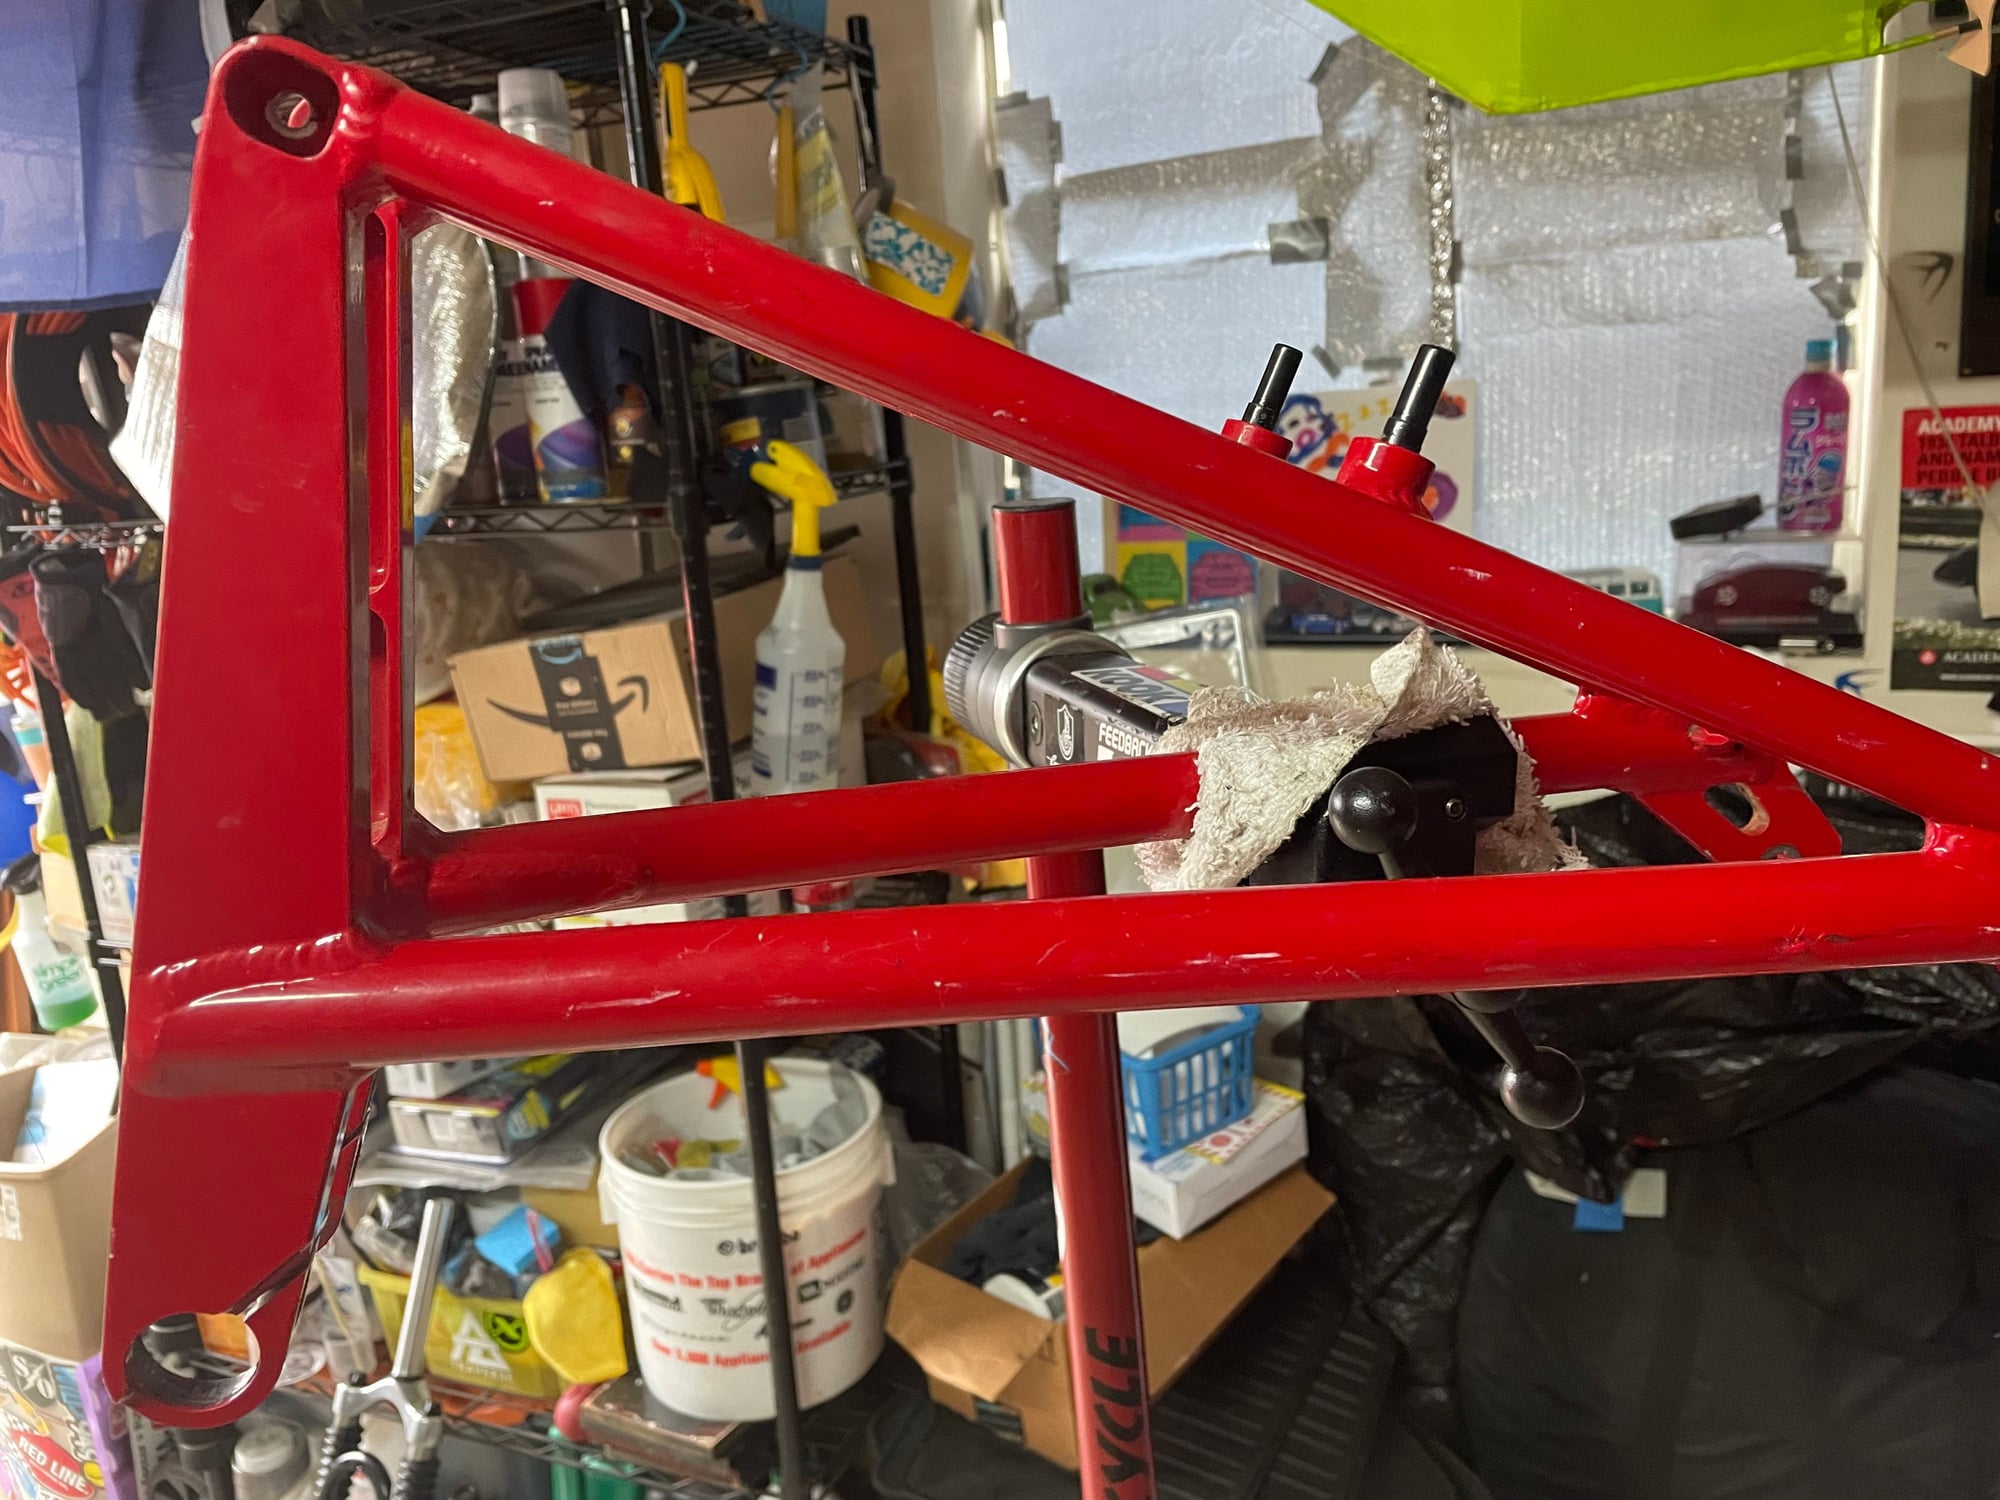
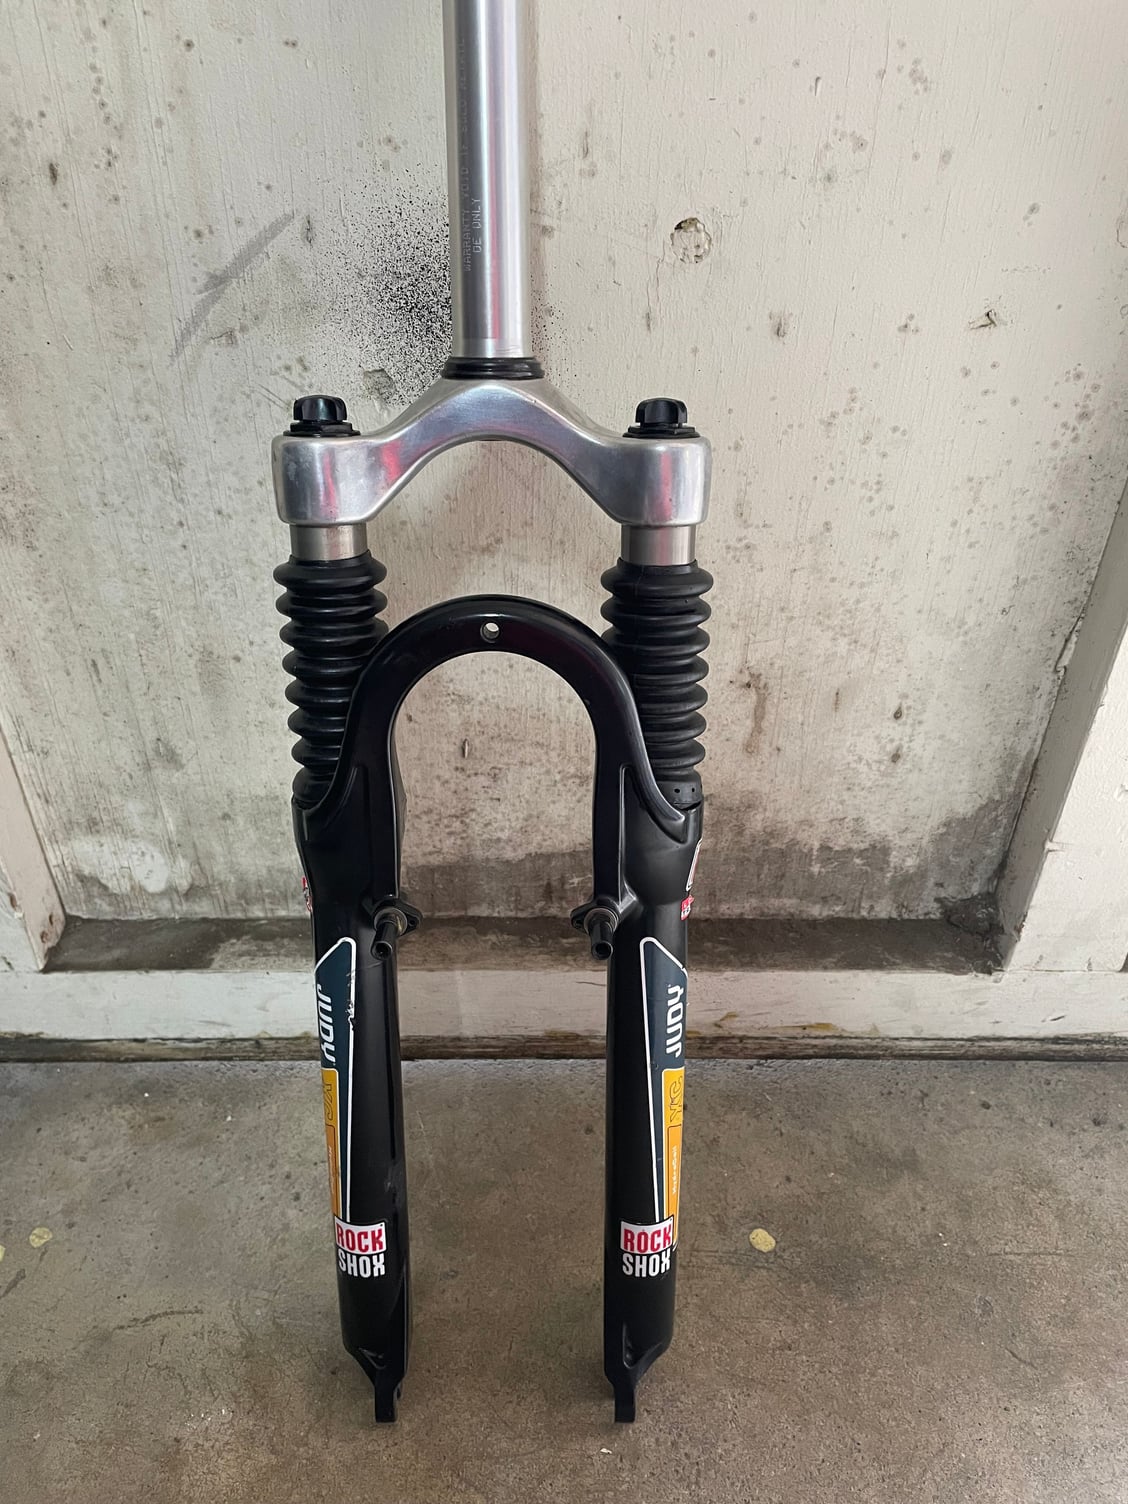
Got me a new bike from a recent yard sale, with the seat stuck. I was picturing all manners of worst nightmare, but despite my worst assumptions, soaking it with WD40 for 48 h and some rust remover as lubricant made the seat come right out.
Would've been a terrible shame if this beauty would be a waste, but I am the proud owner of a Puch Royal Force from the (what i assume) late 70ties/early 80ties with full first gen Dura Ace Black version groupset:
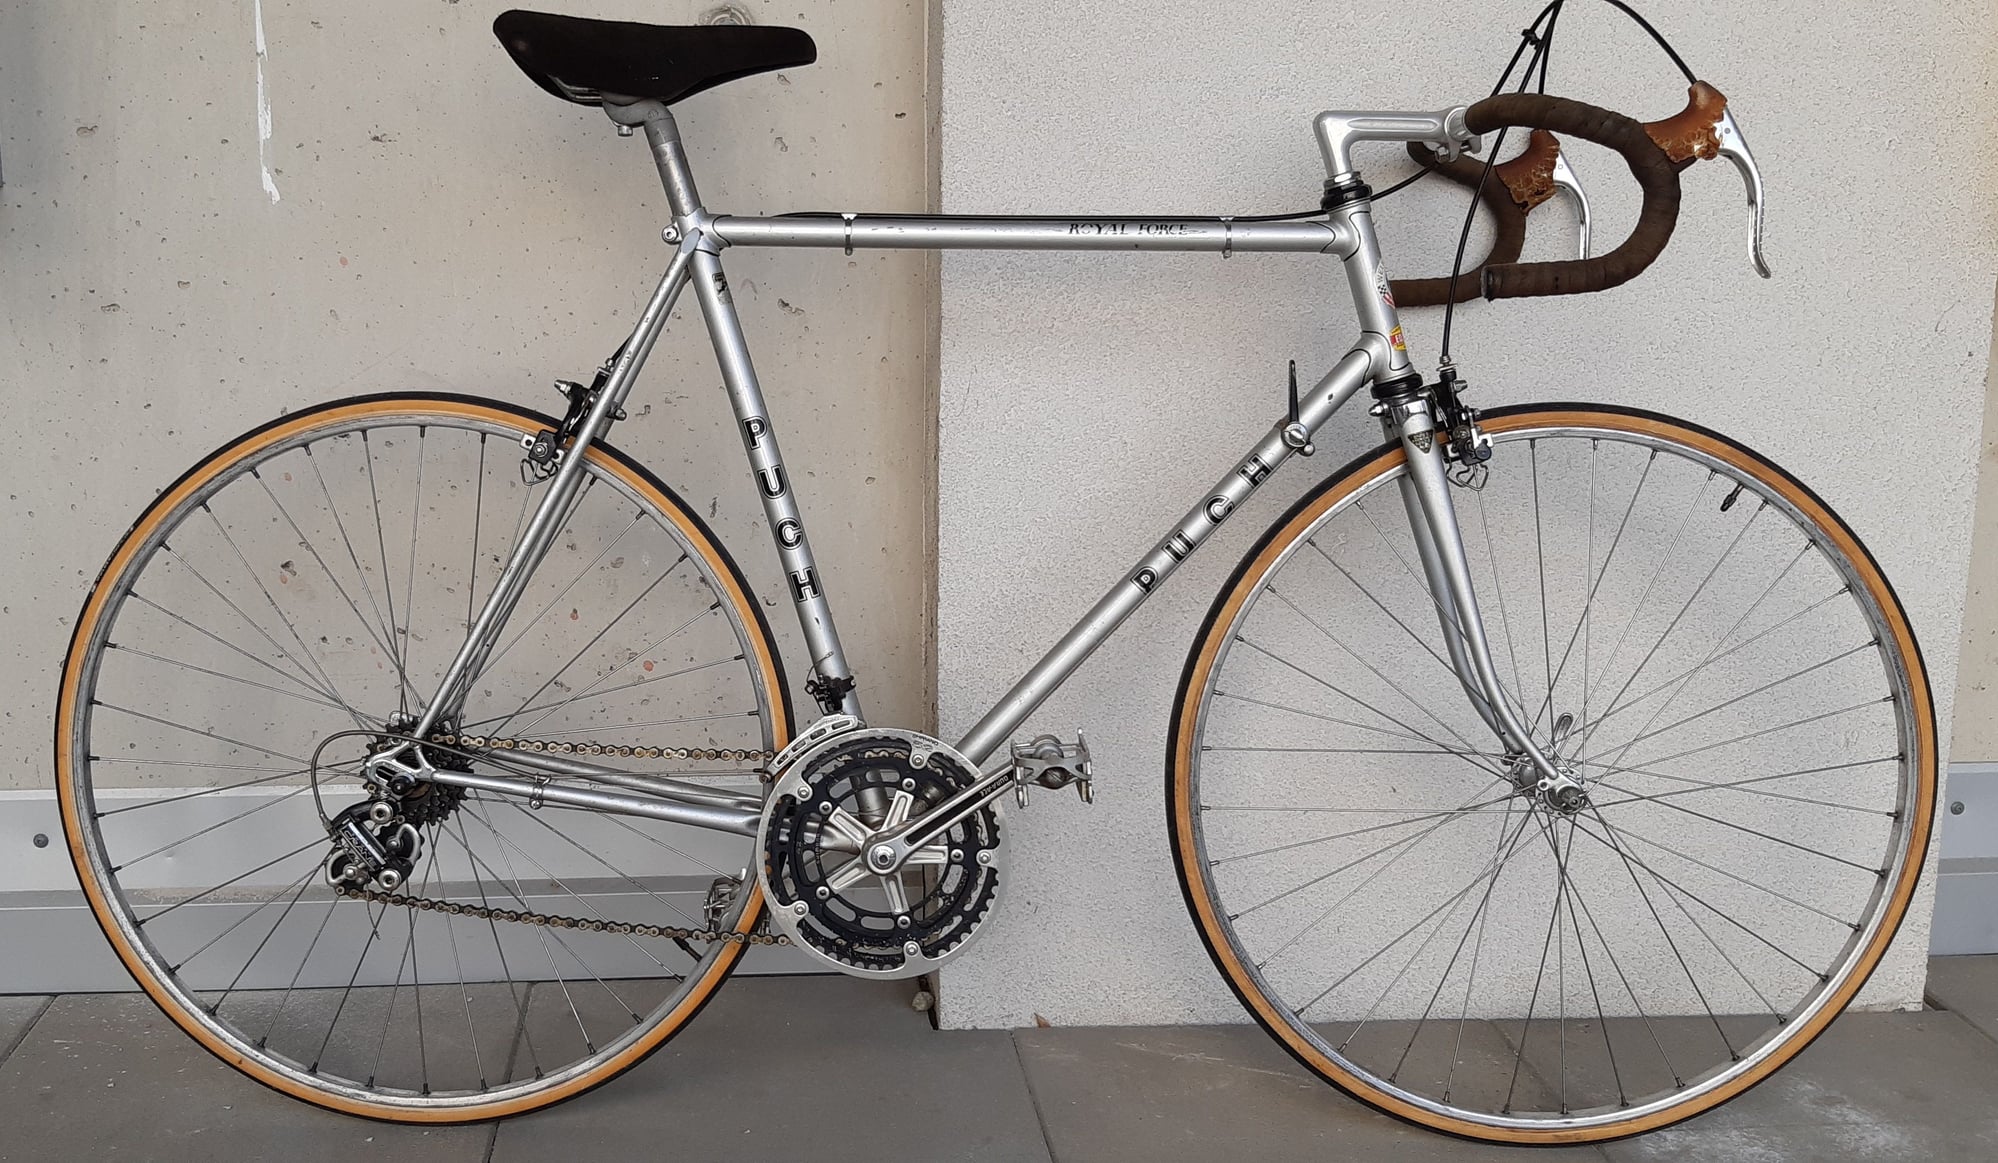
Hoods disintegrated and will be replaced, but that's a very minor issue
Would've been a terrible shame if this beauty would be a waste, but I am the proud owner of a Puch Royal Force from the (what i assume) late 70ties/early 80ties with full first gen Dura Ace Black version groupset:
Hoods disintegrated and will be replaced, but that's a very minor issue
Likes For Positron400:
03-20-23, 03:44 PM
#6038
Junior Member
Join Date: Oct 2021
Location: Northern Virginia
Posts: 107
Bikes: Motobecane Grand Record, Motobecane Super Mirage (3x5 speeds), Motobecane Mirage, Atala (unknown model), Peugeot mixte frame Tourist and Schwinn Sport. A bunch more kids bikes. Most recently a Trek Verve One, tricked up for serious touring.
Mentioned: 1 Post(s)
Tagged: 0 Thread(s)
Quoted: 38 Post(s)
Liked 43 Times
in
27 Posts
Don't know much about Puch but if nothing else that frame is a beauty!
03-20-23, 03:53 PM
#6039
Senior Member
Join Date: May 2021
Location: London
Posts: 558
Bikes: Motobecane C41, Matsu$hita Nashonaru
Mentioned: 7 Post(s)
Tagged: 0 Thread(s)
Quoted: 213 Post(s)
Liked 420 Times
in
246 Posts
Got me a new bike from a recent yard sale, with the seat stuck. I was picturing all manners of worst nightmare, but despite my worst assumptions, soaking it with WD40 for 48 h and some rust remover as lubricant made the seat come right out.
Would've been a terrible shame if this beauty would be a waste, but I am the proud owner of a Puch Royal Force from the (what i assume) late 70ties/early 80ties with full first gen Dura Ace Black version groupset:
Hoods disintegrated and will be replaced, but that's a very minor issue
Would've been a terrible shame if this beauty would be a waste, but I am the proud owner of a Puch Royal Force from the (what i assume) late 70ties/early 80ties with full first gen Dura Ace Black version groupset:
Hoods disintegrated and will be replaced, but that's a very minor issue
I wonder whether Crane / Dura Ace is original to the bike.
03-20-23, 03:57 PM
#6040
Full Member
Join Date: Jan 2022
Posts: 475
Mentioned: 6 Post(s)
Tagged: 0 Thread(s)
Quoted: 253 Post(s)
Liked 223 Times
in
118 Posts
To the best of my knowledge, this frame came stock with Crane/DA which makes it kinda cool, and my first ever frame with such high end components. Size i think is a 57 which is right in my wheelhouse, since i usually ride a 58 with a shorter stem.
03-20-23, 04:15 PM
#6041
Senior Member

Join Date: Jun 2019
Location: Michigan USA
Posts: 875
Bikes: A bunch of old bikes.
Mentioned: 7 Post(s)
Tagged: 0 Thread(s)
Quoted: 278 Post(s)
Liked 862 Times
in
415 Posts
Yea, not much to do really on this one (apart from changing the tires, not sure if these tubulars still work.)
To the best of my knowledge, this frame came stock with Crane/DA which makes it kinda cool, and my first ever frame with such high end components. Size i think is a 57 which is right in my wheelhouse, since i usually ride a 58 with a shorter stem.
To the best of my knowledge, this frame came stock with Crane/DA which makes it kinda cool, and my first ever frame with such high end components. Size i think is a 57 which is right in my wheelhouse, since i usually ride a 58 with a shorter stem.
Here is a page with a bunch of old Austro Daimler and Puch history,
My Austro-Daimler "Vent Noir II" Bicycle And Brief History of Steyr Daimler Puch
03-20-23, 06:36 PM
#6042
Senior Member
Join Date: Nov 2014
Location: Saratoga calif.
Posts: 1,049
Bikes: Miyata 610(66cm), GT Vantara Hybrid (64cm), Nishiki International (64cm), Peugeot rat rod (62 cm), Trek 800 Burning Man helicopter bike, Bob Jackson frame (to be restored?) plus a never ending stream of neglected waifs from the Bike exchange.
Mentioned: 28 Post(s)
Tagged: 0 Thread(s)
Quoted: 339 Post(s)
Likes: 0
Liked 631 Times
in
229 Posts
RC Moeur
Something to keep in mind if the saddle cover is mostly good but has a tear in it. I recntly used a large tire patch on one of the saddles at the Bike Exchange to cover the tear then put a slip on stretchy saddle cover over it. It worked great.
Something to keep in mind if the saddle cover is mostly good but has a tear in it. I recntly used a large tire patch on one of the saddles at the Bike Exchange to cover the tear then put a slip on stretchy saddle cover over it. It worked great.
Likes For capnjonny:
03-20-23, 07:23 PM
#6043
Senior Member
Join Date: Nov 2014
Location: Saratoga calif.
Posts: 1,049
Bikes: Miyata 610(66cm), GT Vantara Hybrid (64cm), Nishiki International (64cm), Peugeot rat rod (62 cm), Trek 800 Burning Man helicopter bike, Bob Jackson frame (to be restored?) plus a never ending stream of neglected waifs from the Bike exchange.
Mentioned: 28 Post(s)
Tagged: 0 Thread(s)
Quoted: 339 Post(s)
Likes: 0
Liked 631 Times
in
229 Posts
Today I started work on the 1958 Follis

.
When I found it in the back room of the Bike Exchange it was just a frame and fork. It had been repainted at some time and the paint, except for some nicks and scratches, was pretty good. I origionally intended to strip it to bare metal and repaint but I wasn't really looking forward to all the work having just finished a 1958 Lenton and a 1875 Pinarello.
When I first brought it home I had fitted it out with all the age appropriate hardware I wanted to use on it to make sure I had everything I needed so today I stripped it back down and catalogued all the shiny bits, to be polished later. I wiped down the frame with mineral spirits to remove any grease and used white polishing compound to deep clean the paint. The more I put my hands on it the more certain I was that I could save the existing paint. I got out my stash of half used Rustoleum rattle cans and using navy blue and white was able to mix a seemingly perfect color match to the existing paint. Tomorrow I will treat all the rust spots with naval jelly and a dremel tool to clean off the rust and do the touch ups. The bike is painted a solid blue which is a shame because the Steer tube has a beutiful raised logo on it. I will paint the back ground white to show off the Raised letters. A final coat of Rustoleum automotive clear and it should look like new.
Just as VeloCals was closing its shop I ordered a full decal set for it. A few days later I got an e mail saying they were refunding my money. When I called to find out why they told me they were giving me the decals Gratis. Good on you Velocals.
Likes For capnjonny:
03-21-23, 03:51 AM
#6044
Bianchi Goddess
Join Date: Apr 2009
Location: Shady Pines Retirement Fort Wayne, In
Posts: 27,845
Bikes: Too many to list here check my signature.
Mentioned: 192 Post(s)
Tagged: 2 Thread(s)
Quoted: 2925 Post(s)
Liked 2,921 Times
in
1,489 Posts
oh for sure.
__________________
�One morning you wake up, the girl is gone, the bikes are gone, all that's left behind is a pair of old tires and a tube of tubular glue, all squeezed out"
Sugar "Kane" Kowalczyk
�One morning you wake up, the girl is gone, the bikes are gone, all that's left behind is a pair of old tires and a tube of tubular glue, all squeezed out"
Sugar "Kane" Kowalczyk
Likes For kevin norcal:
03-21-23, 04:48 PM
#6046
Senior Member
Join Date: May 2021
Location: London
Posts: 558
Bikes: Motobecane C41, Matsu$hita Nashonaru
Mentioned: 7 Post(s)
Tagged: 0 Thread(s)
Quoted: 213 Post(s)
Liked 420 Times
in
246 Posts
Today I started work on the 1958 Follis
.
When I found it in the back room of the Bike Exchange it was just a frame and fork. It had been repainted at some time and the paint, except for some nicks and scratches, was pretty good. I origionally intended to strip it to bare metal and repaint but I wasn't really looking forward to all the work having just finished a 1958 Lenton and a 1875 Pinarello.
When I first brought it home I had fitted it out with all the age appropriate hardware I wanted to use on it to make sure I had everything I needed so today I stripped it back down and catalogued all the shiny bits, to be polished later. I wiped down the frame with mineral spirits to remove any grease and used white polishing compound to deep clean the paint. The more I put my hands on it the more certain I was that I could save the existing paint. I got out my stash of half used Rustoleum rattle cans and using navy blue and white was able to mix a seemingly perfect color match to the existing paint. Tomorrow I will treat all the rust spots with naval jelly and a dremel tool to clean off the rust and do the touch ups. The bike is painted a solid blue which is a shame because the Steer tube has a beutiful raised logo on it. I will paint the back ground white to show off the Raised letters. A final coat of Rustoleum automotive clear and it should look like new.
Just as VeloCals was closing its shop I ordered a full decal set for it. A few days later I got an e mail saying they were refunding my money. When I called to find out why they told me they were giving me the decals Gratis. Good on you Velocals.
One of the reasons I like Motobecane so much is because their paints are magic.Though navy blue looks alright and the frame looks great. I'm tempted to make a trip to Lyon sometime and start looking around for Follis frames I could work on
03-21-23, 05:31 PM
#6047
Senior Member

Join Date: Feb 2008
Location: Peoria, IL
Posts: 4,467
Mentioned: 86 Post(s)
Tagged: 0 Thread(s)
Quoted: 1826 Post(s)
Liked 3,367 Times
in
1,573 Posts
I tried doing a full "harlequin" bar wrap in 2019. It's one of those things that you do out of curiosity, just to see if you can do it. It wasn't great, but also not terrible.

I wasn't prepared for the difficulty of getting around the corners, so I didn't go too much past the curves.
Well, that was in 2019, and the tape has seen a lot of miles since then The orange was faded and the edges of the tape were starting to fray.
I decided to redo it, but with black and brown tape instead of black and orange. Mostly, it was to avoid having an orange tape that clashed with the burnt orange paint.
I also decided to try "squeezing" the tape together a bit to be able to manage the shorter distance on the inside of the curves.
It didn't turn out perfect, but the concept is fairly good. My technique could still use some refinement, though.
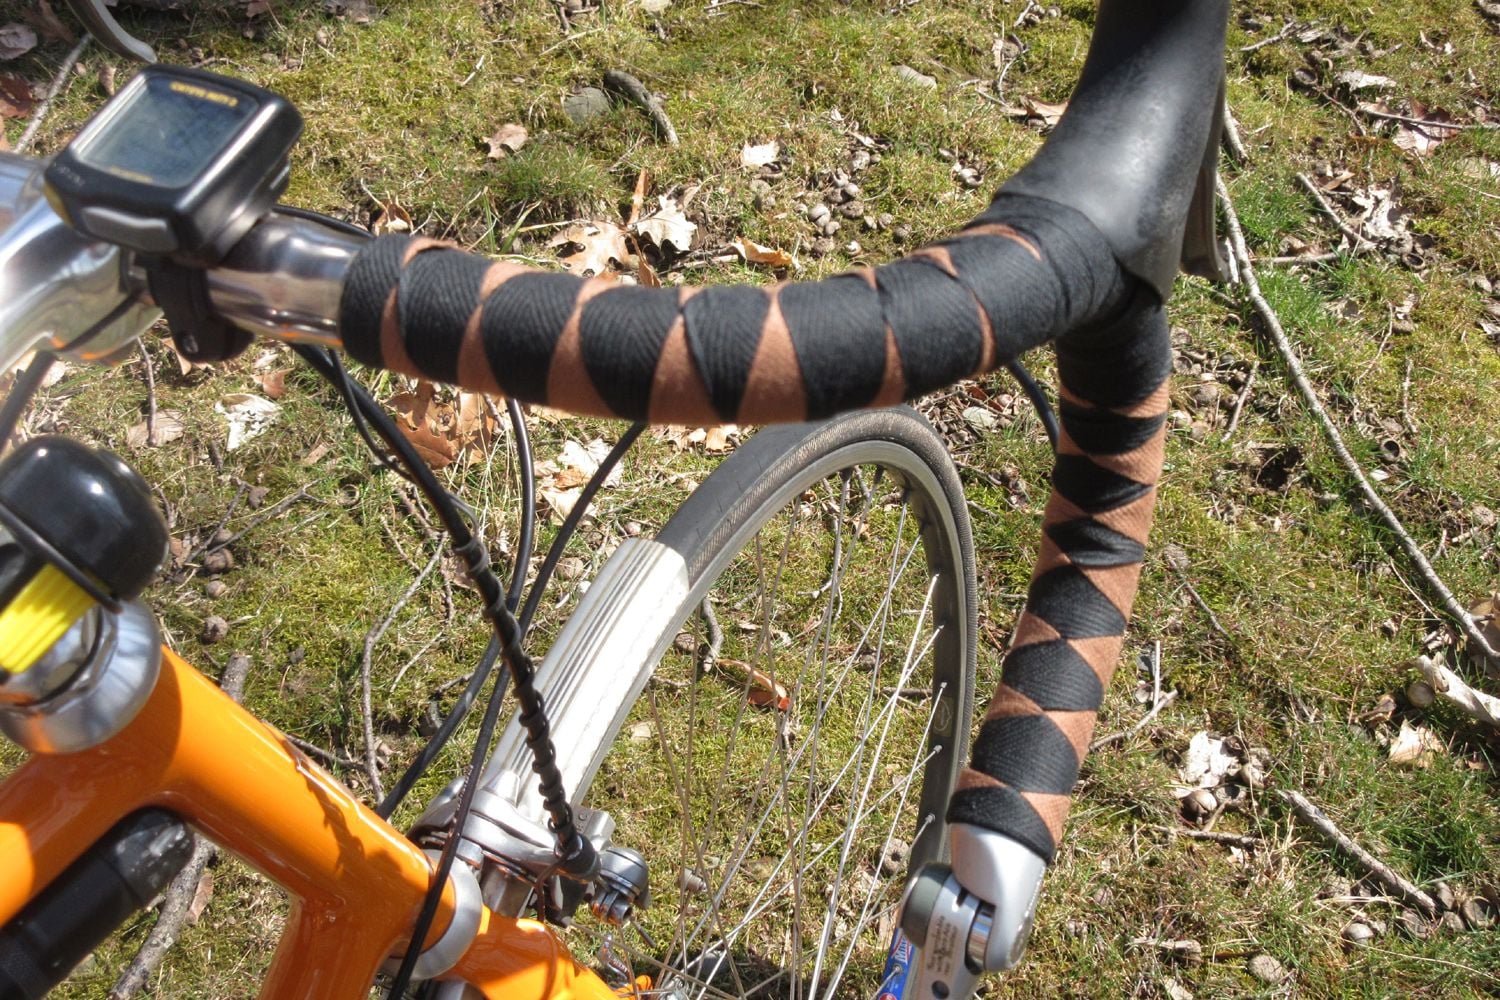
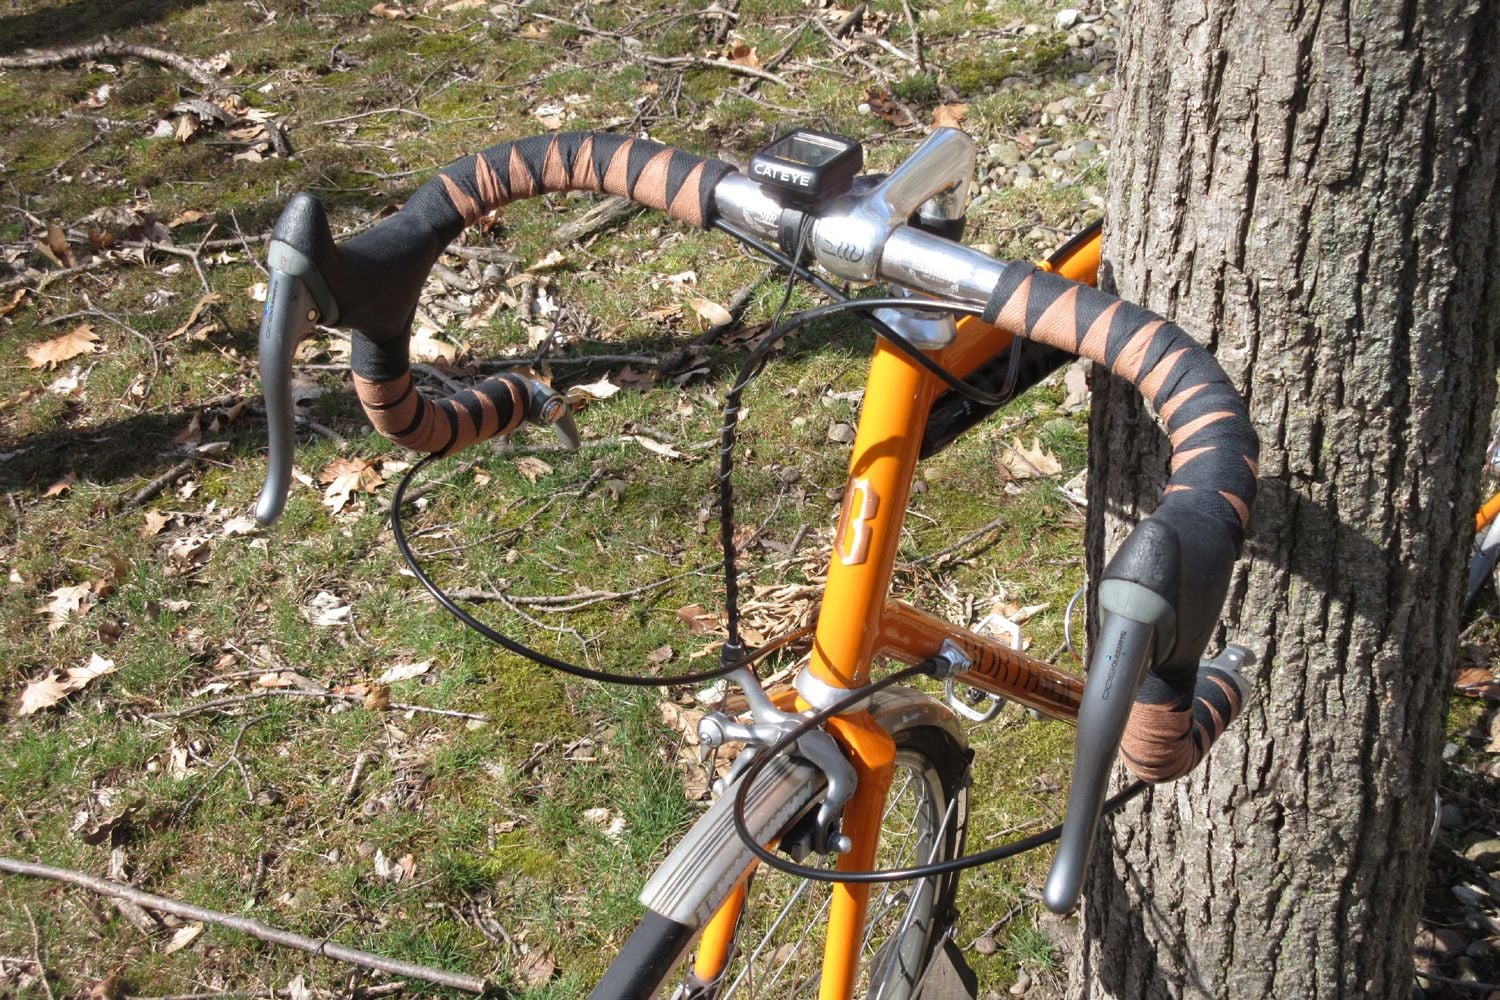
Steve in Peoria
I wasn't prepared for the difficulty of getting around the corners, so I didn't go too much past the curves.
Well, that was in 2019, and the tape has seen a lot of miles since then The orange was faded and the edges of the tape were starting to fray.
I decided to redo it, but with black and brown tape instead of black and orange. Mostly, it was to avoid having an orange tape that clashed with the burnt orange paint.
I also decided to try "squeezing" the tape together a bit to be able to manage the shorter distance on the inside of the curves.
It didn't turn out perfect, but the concept is fairly good. My technique could still use some refinement, though.
Steve in Peoria
03-22-23, 11:35 AM
#6048
Senior Member

Join Date: Jul 2007
Location: Manhattan & Woodstock NY
Posts: 2,744
Bikes: 1987 Mercian Pro, 1985 Shogun 500, early '70s Falcon San Remo, 1972 Peugeot PX-10, 1972 Schwinn Paramount P13-9, 1971 Raleigh International, 1971 Peugeot PX-10, 1970 Raleigh Professional Mk1
Mentioned: 109 Post(s)
Tagged: 0 Thread(s)
Quoted: 938 Post(s)
Liked 2,922 Times
in
976 Posts
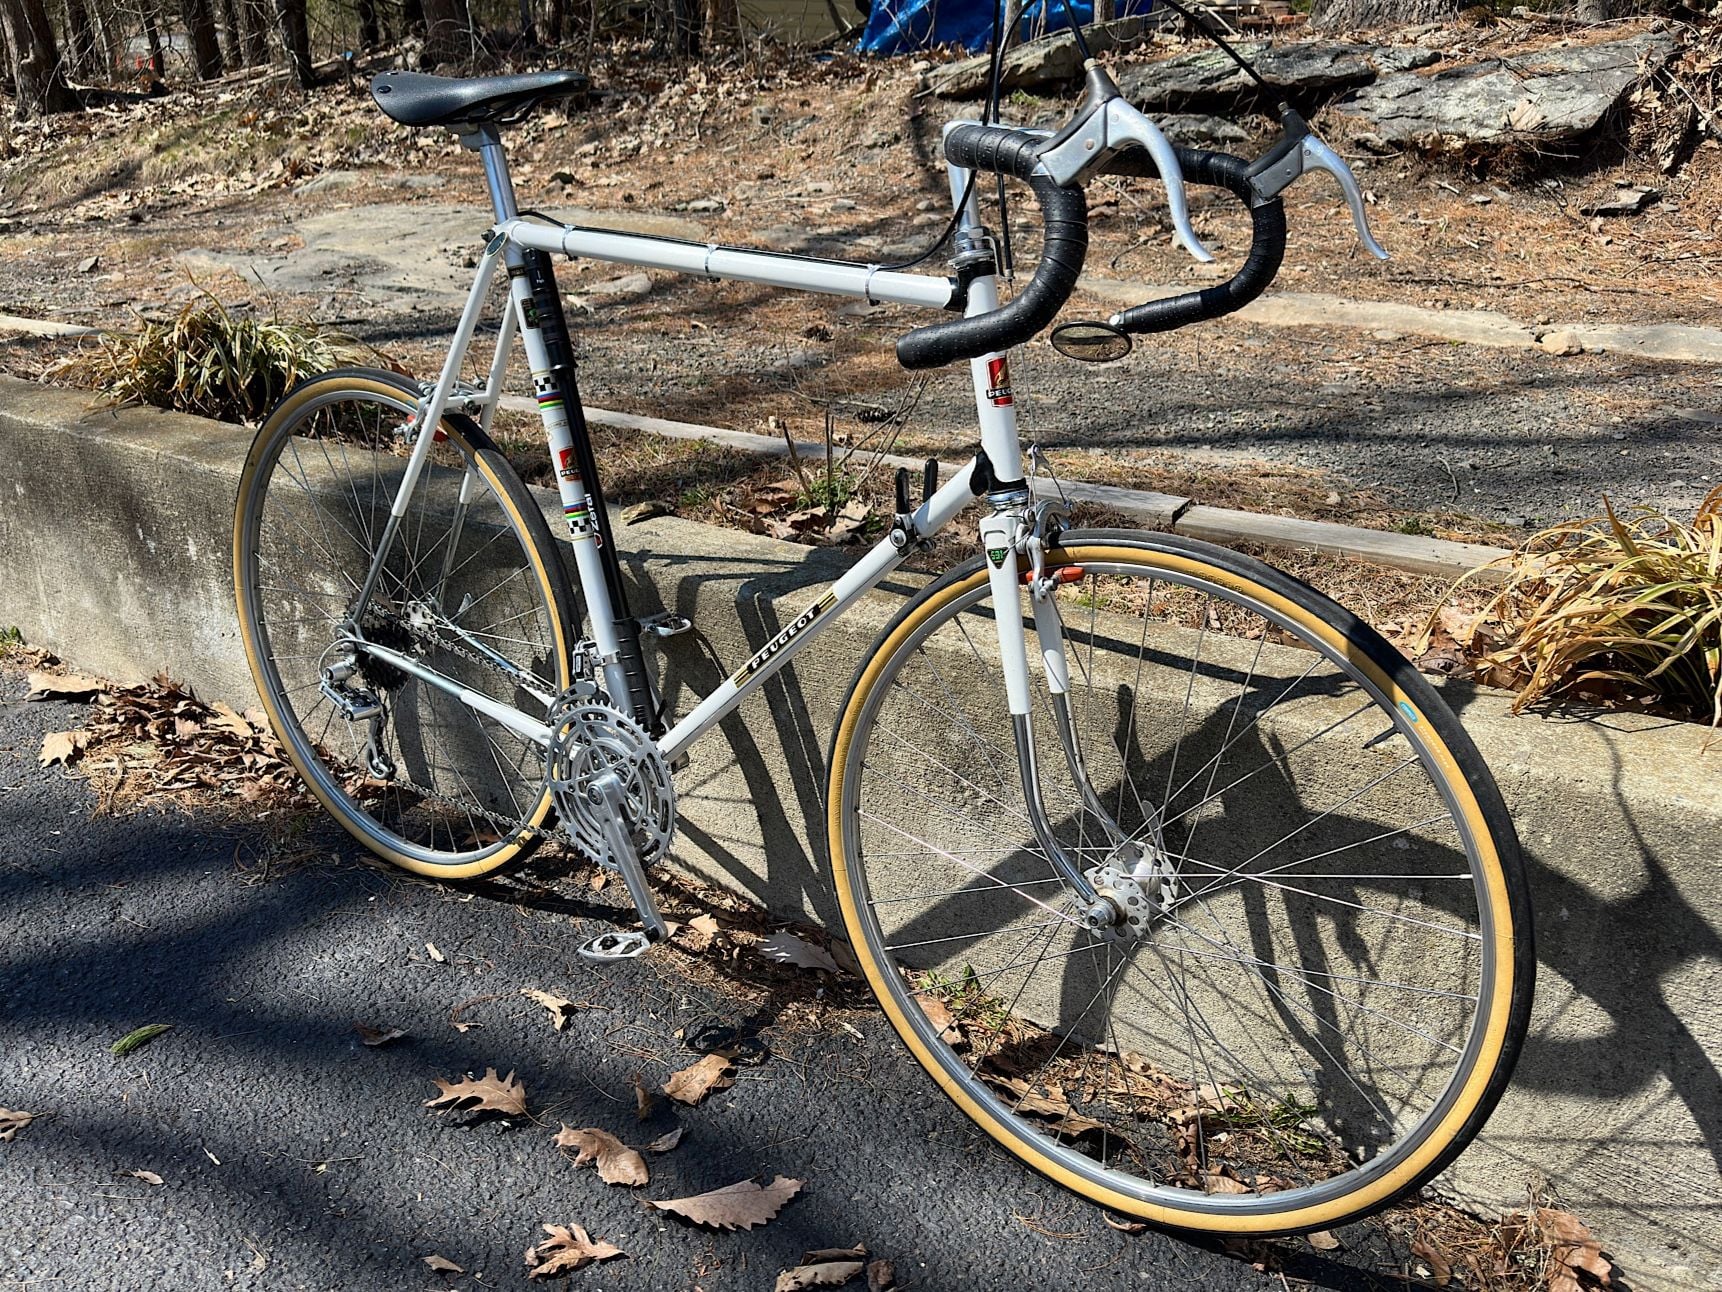
Reassembled the �72. Putting them together is always so much faster! I still have to clean up the rims and hubs and polish a few other bits, and the RD coiled housing is tried is too short and will revert to black. I�m really happy with how well it cleaned up, hope to take it out for a spin soon.
__________________
1987 Mercian Pro, 1985 Shogun 500, 197? Falcon San Remo, 1972 Peugeot PX-10, 1972 Schwinn Paramount P13-9, 1971 Peugeot PX-10, 1971 Raleigh International, 1970 Raleigh Professional Mark I
Curator/Team Mechanic: 2016 Dawes Streetfighter, 1984 Lotus Eclair, 1975 Motobecane Jubile Mixte, 1974 Raleigh Sports, 1973 Free Spirit Ted Williams, 1972 Raleigh Super Course, 1971 Philips Sport
Likes For ascherer:
03-22-23, 03:04 PM
#6049
Full Member
Join Date: Jan 2022
Posts: 475
Mentioned: 6 Post(s)
Tagged: 0 Thread(s)
Quoted: 253 Post(s)
Liked 223 Times
in
118 Posts
Reassembled the �72. Putting them together is always so much faster! I still have to clean up the rims and hubs and polish a few other bits, and the RD coiled housing is tried is too short and will revert to black. I�m really happy with how well it cleaned up, hope to take it out for a spin soon.
03-22-23, 03:21 PM
#6050
Senior Member
Join Date: May 2021
Location: London
Posts: 558
Bikes: Motobecane C41, Matsu$hita Nashonaru
Mentioned: 7 Post(s)
Tagged: 0 Thread(s)
Quoted: 213 Post(s)
Liked 420 Times
in
246 Posts
Another day, another problem to solve. The missing adjuster for the Superbe brakes arrived in post today, which is great. It also looks like the adjuster ring and cable holder / bolt are pretty much fused. Not so great. And it's not something you can just pop in to your LBS for and buy. I've seen a genuine Superbe one for something like $35 (plus shipping which would be another $20 for me) on fleabay, which I think is a bit excessive (even before the shipping cost). So that will be out of the question. Thankfully, compatible adjusters are fairly easily obtainable (for like 1/3rd the price of the original). The only problem is all I've seen have black O-rings, other than that, they look exactly the same.
For now I decided that the bit to save here is the brown / orange O ring. That came off easily enough helped by soaking in some warm water. This way, if I destroy other pieces whilst trying to free them, at least I can use the O ring on a replacement adjuster. I grabbed both parts with pliers through pieces of fabric and tried to pry this thing open, to no avail. I'll see if I can heat up the whole bit and cool down a few times, maybe that will help. I expect that at some point the thread between both parts got mangled, so I'm not raising my hopes high. I'm guessing eventually I will have to drill the cable tunnel / bolt out of the adjuster ring. This way I can re-tap the remaining adjuster ring and use it with another bolt, should there be any compatibility issues.
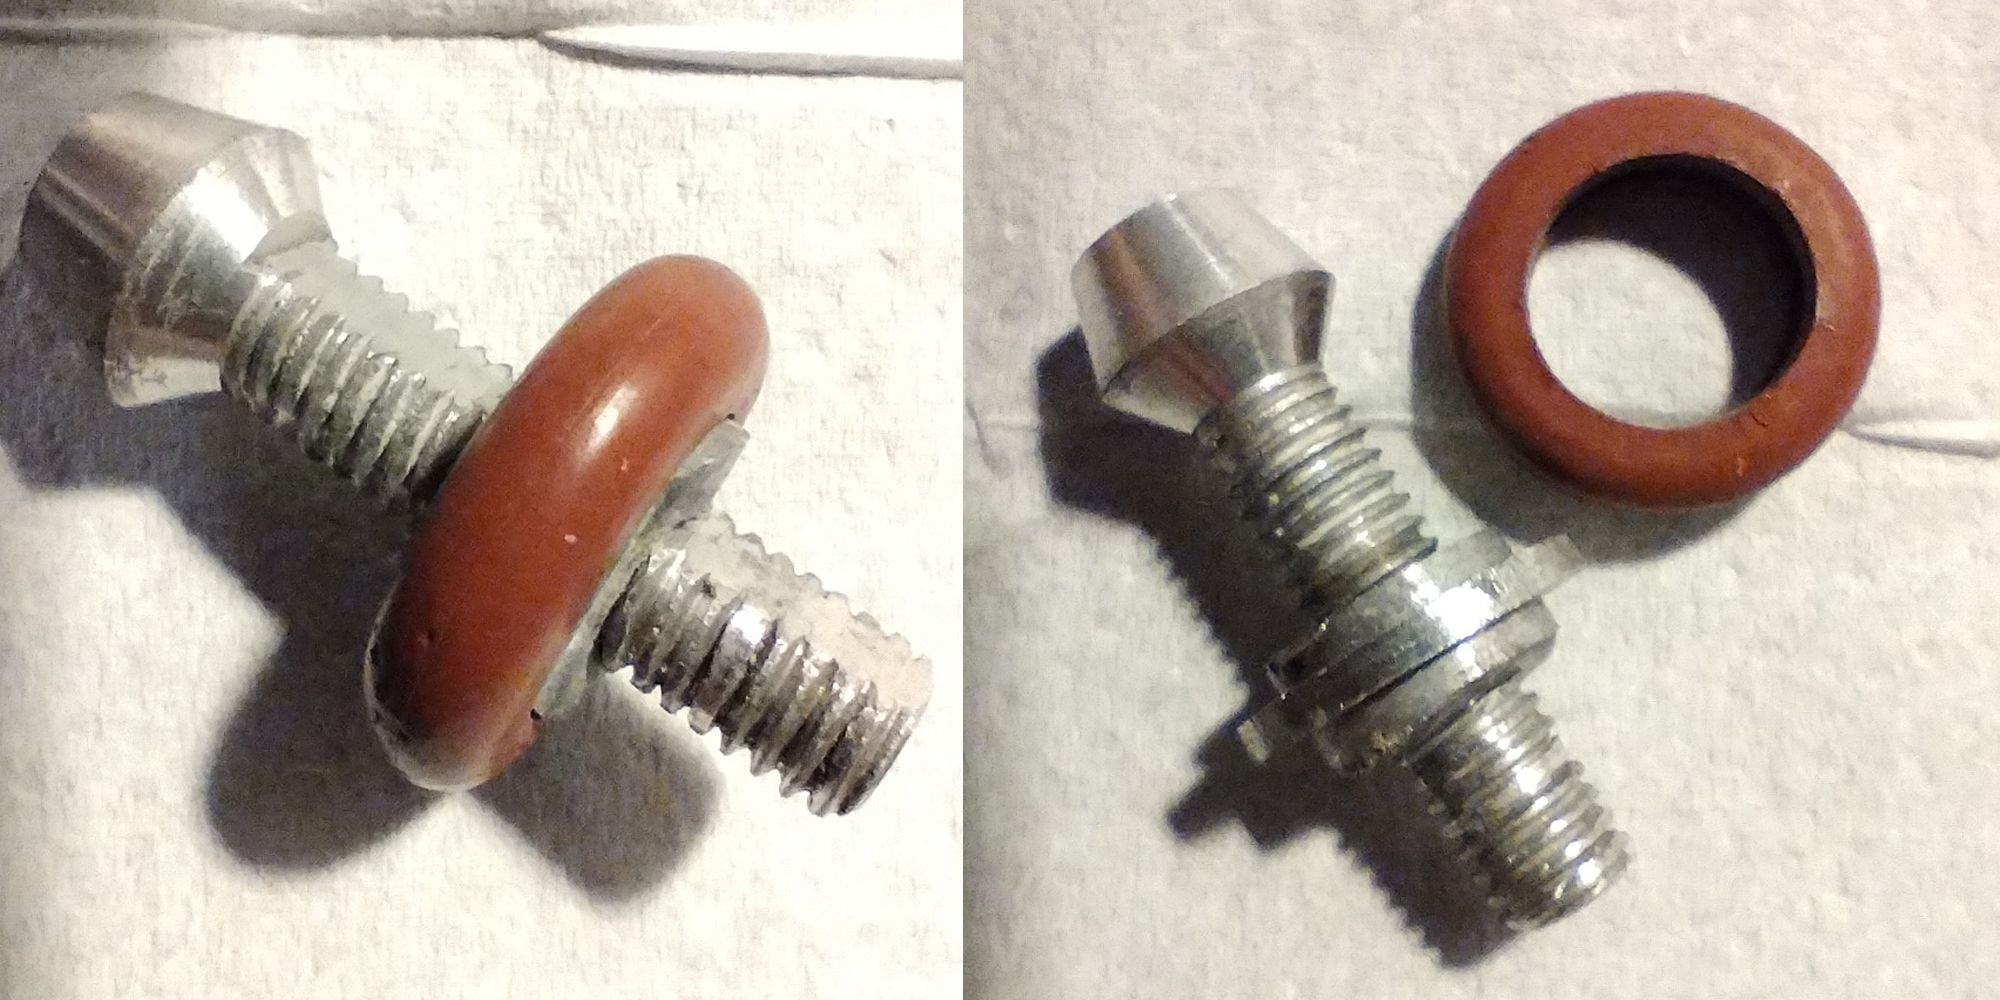
For now I decided that the bit to save here is the brown / orange O ring. That came off easily enough helped by soaking in some warm water. This way, if I destroy other pieces whilst trying to free them, at least I can use the O ring on a replacement adjuster. I grabbed both parts with pliers through pieces of fabric and tried to pry this thing open, to no avail. I'll see if I can heat up the whole bit and cool down a few times, maybe that will help. I expect that at some point the thread between both parts got mangled, so I'm not raising my hopes high. I'm guessing eventually I will have to drill the cable tunnel / bolt out of the adjuster ring. This way I can re-tap the remaining adjuster ring and use it with another bolt, should there be any compatibility issues.