


Polishing out scratches on aluminum crankset
 11-09-19, 11:39 AM
#1

WGB
Thread Starter
Join Date: Jul 2017
Location: Niagara Region
Posts: 2,917
Bikes: Panasonic PT-4500
Mentioned: 46 Post(s)
Tagged: 0 Thread(s)
Quoted: 1800 Post(s)
Liked 2,334 Times
in
1,378 Posts
Polishing out scratches on aluminum crankset
I have seen references to using oven cleaner on cranks to remove anodizing.
I have used aluminum foil to remove rust spots on derailleurs, just never on bigger items.
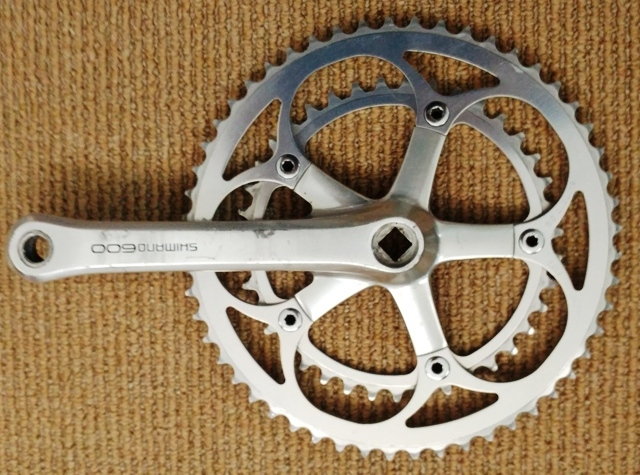
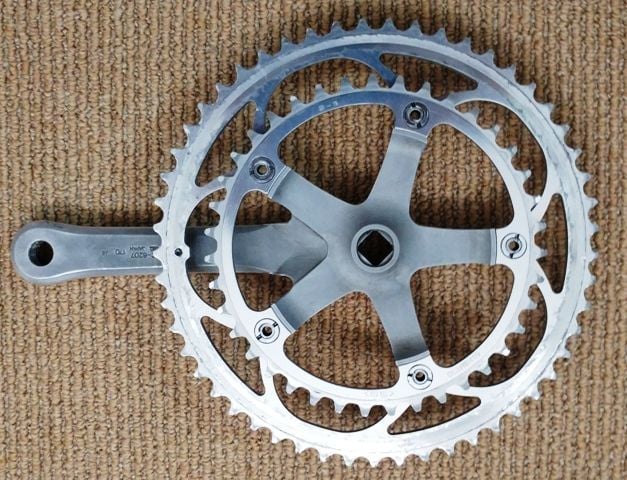
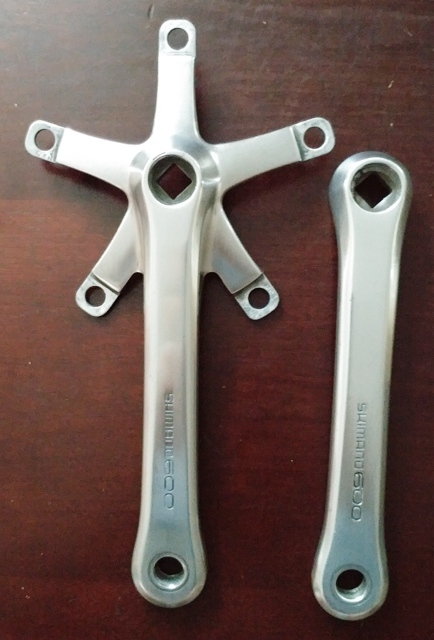
Enter these cranks.,
Can I use aluminum foil to buff them?? I know I'd need lubricant but would the little scuffs buff out??
I have used aluminum foil to remove rust spots on derailleurs, just never on bigger items.
Enter these cranks.,
Can I use aluminum foil to buff them?? I know I'd need lubricant but would the little scuffs buff out??
 11-09-19, 11:46 AM
#2
Senior Member

Join Date: Nov 2014
Location: Eugene, Oregon, USA
Posts: 27,547
Mentioned: 217 Post(s)
Tagged: 0 Thread(s)
Quoted: 18375 Post(s)
Liked 4,510 Times
in
3,352 Posts
One of the issues with aluminum is anodizing. Or, perhaps even a layer of oxidization. Which gets you into an all or none with the polishing.
A good way to polish is just successive sandpaper. Depending on the depth of damage, start low, and work up to 600 or 1000 grit. Maybe oil or polishing compound near the end.
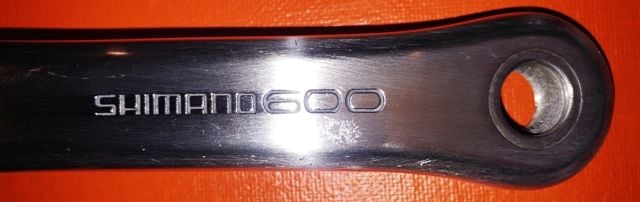
It appears as if your Shimano 600 logo is imprinted into the crank. Be careful around it, but there is not the same risk as simple painted on logos.
Overall your scratches don't look that deep, so perhaps there is a better way.
A good way to polish is just successive sandpaper. Depending on the depth of damage, start low, and work up to 600 or 1000 grit. Maybe oil or polishing compound near the end.
It appears as if your Shimano 600 logo is imprinted into the crank. Be careful around it, but there is not the same risk as simple painted on logos.
Overall your scratches don't look that deep, so perhaps there is a better way.
11-09-19, 12:00 PM
#3

Senior Member
Join Date: Jun 2006
Posts: 20,305
Mentioned: 130 Post(s)
Tagged: 0 Thread(s)
Quoted: 3464 Post(s)
Liked 2,829 Times
in
1,995 Posts
They are anodized, to accomplish any surface smoothing, you will sand through that.
So, it is time to decide before if you are willing to remove that.
So, it is time to decide before if you are willing to remove that.
11-09-19, 12:01 PM
#4
PM me your cotters

Join Date: Jun 2015
Location: ATL
Posts: 3,241
Mentioned: 80 Post(s)
Tagged: 0 Thread(s)
Quoted: 1137 Post(s)
Liked 590 Times
in
422 Posts
I would start by testing out some Mother's mag and aluminum polish OR if you prefer something even less abrasive, NEVR DULL tends to do a solid job at removing marks and stains. I also like using Simichrome, but reserve it for special occasions and smaller projects.
Ultra-fine bronze wool (0000) is a safe way to remove light marks in aluminum, then follow up with a compound like the Mother's.
As not mentioned above, some alloy parts are clearcoated. Anodizing is also used on much of what you get. I've found after polishing parts out, waterspotting and tarnish seems to become a problem where it didn't exist before. You can at-home re-anodize on your own, instructions all over the internet. Involves liquid and electricity however, so be advised.
11-09-19, 01:01 PM
#5
aka: Dr. Cannondale
Join Date: Jul 2009
Posts: 7,733
Mentioned: 234 Post(s)
Tagged: 0 Thread(s)
Quoted: 2155 Post(s)
Liked 3,404 Times
in
1,205 Posts
Shimano 620X cranks have quite a thick layer of anodizing on them. This is what I do:
Use 80 grit to wet sand them enough that the anodizing will be scratched thru in multiple locations
Put on a pair of latex or rubber gloves
Spray Easy Off brand oven cleaner on them and wait ten minutes
Wet sand again with 80 grit. You will see that some (but not all) of the anodizing has been removed.
Spray again with Easy Off and wait ten minutes
Wet sand with 220 grit until you are down to bare aluminum
Clean with SOS pad, scrubbing fairly hard
Rinse well with soap and water, then proceed with polishing by hand or with a buffing wheel.
I do this in a stainless steel sink with access to running water and good ventilation, e.g. the kitchen while Mrs. Doc is out of the house for a few hours. Cuz it stinks.
__________________
Hard at work in the Secret Underground Laboratory...
Hard at work in the Secret Underground Laboratory...
11-09-19, 04:46 PM
#6
Senior Member

Join Date: Mar 2015
Location: Western MI
Posts: 2,770
Mentioned: 45 Post(s)
Tagged: 0 Thread(s)
Quoted: 656 Post(s)
Liked 469 Times
in
302 Posts
@rccardr is spot on. If you do more wet sanding with higher grits all the way up to 3000 you can get a mirror finish if that’s what you’re looking for. You’ll want a polishing compound to finish it. Have had good luck with Blue Magic, Meguiars rim polish and Simichrome.
11-09-19, 04:59 PM
#7
Senior Member
Join Date: Jan 2019
Posts: 528
Mentioned: 8 Post(s)
Tagged: 0 Thread(s)
Quoted: 237 Post(s)
Likes: 0
Liked 83 Times
in
64 Posts
1500 or so is probably as high as you need to go up to before an aggressive polish. Aluminum is a soft metal, and stripping the anodizing removes the harder more scratch resistant coating. You might be able to achieve a showroom mirror finish with higher grits, but if it's going to be actually used and the maintenance is just buffing with more metal polish, I don't think the 3000 is going to appreciably improve the result unless you plan on doing that prep work every time you get a slight scuff.
11-09-19, 05:23 PM
#8
working on my sandal tan

Join Date: Aug 2011
Location: CID
Posts: 22,629
Bikes: 1991 Bianchi Eros, 1964 Armstrong, 1988 Diamondback Ascent, 1988 Bianchi Premio, 1987 Bianchi Sport SX, 1980s Raleigh mixte (hers), All-City Space Horse (hers)
Mentioned: 98 Post(s)
Tagged: 0 Thread(s)
Quoted: 3871 Post(s)
Liked 2,568 Times
in
1,579 Posts
11-09-19, 05:28 PM
#9
Senior Member
Join Date: May 2011
Location: Seattle WA
Posts: 2,841
Bikes: 2009 Handsome Devil, 1987 Trek 520 Cirrus, 1978 Motobecane Grand Touring, 1987 Nishiki Cresta GT, 1989 Specialized Allez Former bikes; 1986 Miyata Trail Runner, 1979 Miyata 912, 2011 VO Rando, 1999 Cannondale R800, 1986 Schwinn Passage
Mentioned: 72 Post(s)
Tagged: 0 Thread(s)
Quoted: 796 Post(s)
Liked 522 Times
in
367 Posts
I might also try Mothers polish before going the sandpaper route just to see how that cleans up
11-09-19, 06:04 PM
#10
Banned.

Join Date: Jul 2009
Location: PAZ
Posts: 12,294
Mentioned: 255 Post(s)
Tagged: 0 Thread(s)
Quoted: 2588 Post(s)
Liked 4,824 Times
in
1,709 Posts
There are anodizing-removal products on the market that are much less messy and much more efficient to use than Easy-Off.
In fact, I'd state categorically that Easy-Off is not what you want to use at all. Why? There's no way of estimating accurately how long one should leave it on. Foam it on, you can't see how it's affecting the anodizing unless you take it out of the foam, rinse it off and then assess. Didn't come all the way off? More Easy-Off goes on, repeat, perhaps repeat again. No fun. Plus it is messy as all get-out.
Do yourself a favor and get some of this: Jestco Anodizing Remover
I swear by it because, put simply, it works best. I used Easy-Off before discovering this stuff and will never go back. The Jestco remover has mixing instructions (EO does not), and because it is mixed with warm water the solution into which you put your part is clear. Once the part is dunked, the remover goes to work in a bubbling froth of white - through which you can observe the part. When the part turns uniformly black or grey, the anodizing is gone. Pull the part, rinse with water and a fine scouring pad to remove the black/grey residue. It's now ready for polishing.
Dump the stuff down the drain after use. It's lye-based, the same as most kitchen sink cleaners, so it'll help keep your pipes clean as a secondary use.
Seriously, this stuff ends up paying for itself.
See this thread for more details: Drillium How-To Guide: Stripping Anodizing
DD

Likes For Drillium Dude:

 11-09-19, 06:22 PM
#12
Senior Member
Join Date: Jan 2019
Posts: 528
Mentioned: 8 Post(s)
Tagged: 0 Thread(s)
Quoted: 237 Post(s)
Likes: 0
Liked 83 Times
in
64 Posts
I swear by it because, put simply, it works best. I used Easy-Off before discovering this stuff and will never go back. The Jestco remover has mixing instructions (EO does not), and because it is mixed with warm water the solution into which you put your part is clear. Once the part is dunked, the remover goes to work in a bubbling froth of white - through which you can observe the part. When the part turns uniformly black or grey, the anodizing is gone. Pull the part, rinse with water and a fine scouring pad to remove the black/grey residue. It's now ready for polishing.
Dump the stuff down the drain after use. It's lye-based, the same as most kitchen sink cleaners, so it'll help keep your pipes clean as a secondary use.
Dump the stuff down the drain after use. It's lye-based, the same as most kitchen sink cleaners, so it'll help keep your pipes clean as a secondary use.
Last edited by Kuromori; 11-09-19 at 06:26 PM.
11-09-19, 06:37 PM
#13
Banned.
Join Date: Jul 2009
Location: PAZ
Posts: 12,294
Mentioned: 255 Post(s)
Tagged: 0 Thread(s)
Quoted: 2588 Post(s)
Liked 4,824 Times
in
1,709 Posts

DD
11-09-19, 06:51 PM
#14
Senior Member
Join Date: Jan 2019
Posts: 528
Mentioned: 8 Post(s)
Tagged: 0 Thread(s)
Quoted: 237 Post(s)
Likes: 0
Liked 83 Times
in
64 Posts
I can't even remember, I was just at the dollar store and bought some NaOH (sodium hydroxide or lye) based drain cleaner to experiment with. I think it was Mr. Plumber or something like that. I'm sure it's slower given that it's probably more diluted and not warm. I also do this thing with melted candle wax to plug up holes in things like stems and seatposts where you can't easily remove the residue on the inside.
11-09-19, 09:36 PM
#15
Senior Member

Join Date: Jun 2010
Location: Medford MA
Posts: 2,089
Bikes: Ron Cooper touring, 1959 Jack Taylor 650b ladyback touring tandem, Vitus 979, Joe Bell painted Claud Butler Dalesman, Colin Laing curved tube tandem, heavily-Dilberted 1982 Trek 6xx, Ren� Herse tandem
Mentioned: 80 Post(s)
Tagged: 0 Thread(s)
Quoted: 964 Post(s)
Liked 1,451 Times
in
723 Posts
I work in a science lab, so I use chemically-pure NaOH to remove anodizing. I use about 5% weight by volume, so that means if you have a solution of 100mL you would use 5g of NaOH. The process is the same as @Drillium Dude described, with the bubbling and then the part turning black. The only problem is if you have black anodizing, then it can be tricky to know if you've gotten it all. The technical term for the black/gray residue left behind is "smut". I usually use a toothbrush and soap to de-smut.
I bet that Jestco stuff is just NaOH with a little non-foaming surfactant to help with the de-smut.
The NaOH will have etched the base aluminum a little. This is unavoidable. The finish will be matte-ish, about equivalent to a wet-sand with 800-1200 grit (not a dry-sand, which would be worse). Depending on alloy. I have gone directly to polishing on some die-cast parts. Some require a little finish sanding with some high grit like 800 or 1000 after the NaOH and de-smut, and before polishing.
I use Mothers Mag and Aluminum polish, but you can really use any of the above-suggested. Mothers is what the car and motorcycle guys use, and you can get it at walmart, so I bought a tub long ago when I only did car stuff and lived where there were no other options, and now I still have it. Works on foggy plastic headlights and dull bronzework and copper kettles too. I think it has a wax built in that sorta protects your part after you've polished it up.
I don't like scouring pads because I find the grit in them varies quite a bit, like you'll need to go so hard to remove the ano that you'll be making a few deep scratches from the coarser bits in the scouring pad. Then you'll spend forever sanding those scratches out. Not fun.
__________________
Owner & co-founder, Cycles Ren� Hubris. Unfortunately attaching questionable braze-ons to perfectly good frames since about 2015. With style.
Owner & co-founder, Cycles Ren� Hubris. Unfortunately attaching questionable braze-ons to perfectly good frames since about 2015. With style.
Last edited by scarlson; 11-09-19 at 10:09 PM.
11-09-19, 10:23 PM
#16
Senior Member
I have a orbital buffer that is made to remove the scratches from automotive clear coat. After sanding with the finer sand paper it makes short work of the polishing. I use the same polish that is made for paint.
11-10-19, 04:55 AM
#17
Senior Member

Join Date: Apr 2007
Location: Thunder Bay, Ontario, Canada - burrrrr!
Posts: 11,674
Bikes: 1958 Rabeneick 120D, 1968 Legnano Gran Premio, 196? Torpado Professional, 2000 Marinoni Piuma
Mentioned: 210 Post(s)
Tagged: 0 Thread(s)
Quoted: 1372 Post(s)
Likes: 0
Liked 1,751 Times
in
938 Posts
Foil won't help at all. First, remove the anodized coating. I use Extra Strength Eazy-Off. Apply to a small area, let sit for a couple of minutes then scrubb it off. I use a soft brass brush for this task. Rinse immediately and do it again (failure to rinse will cause the caustic in the Easy-Off to eat into the alloy if left on too long...

After removing the anodizing, time to polish. I use wet and dry sand paper at first (1000 to 2000 grit) after which I switch to my yard sale purchased home made polisher, coupled with two grades of polishing stick compound...
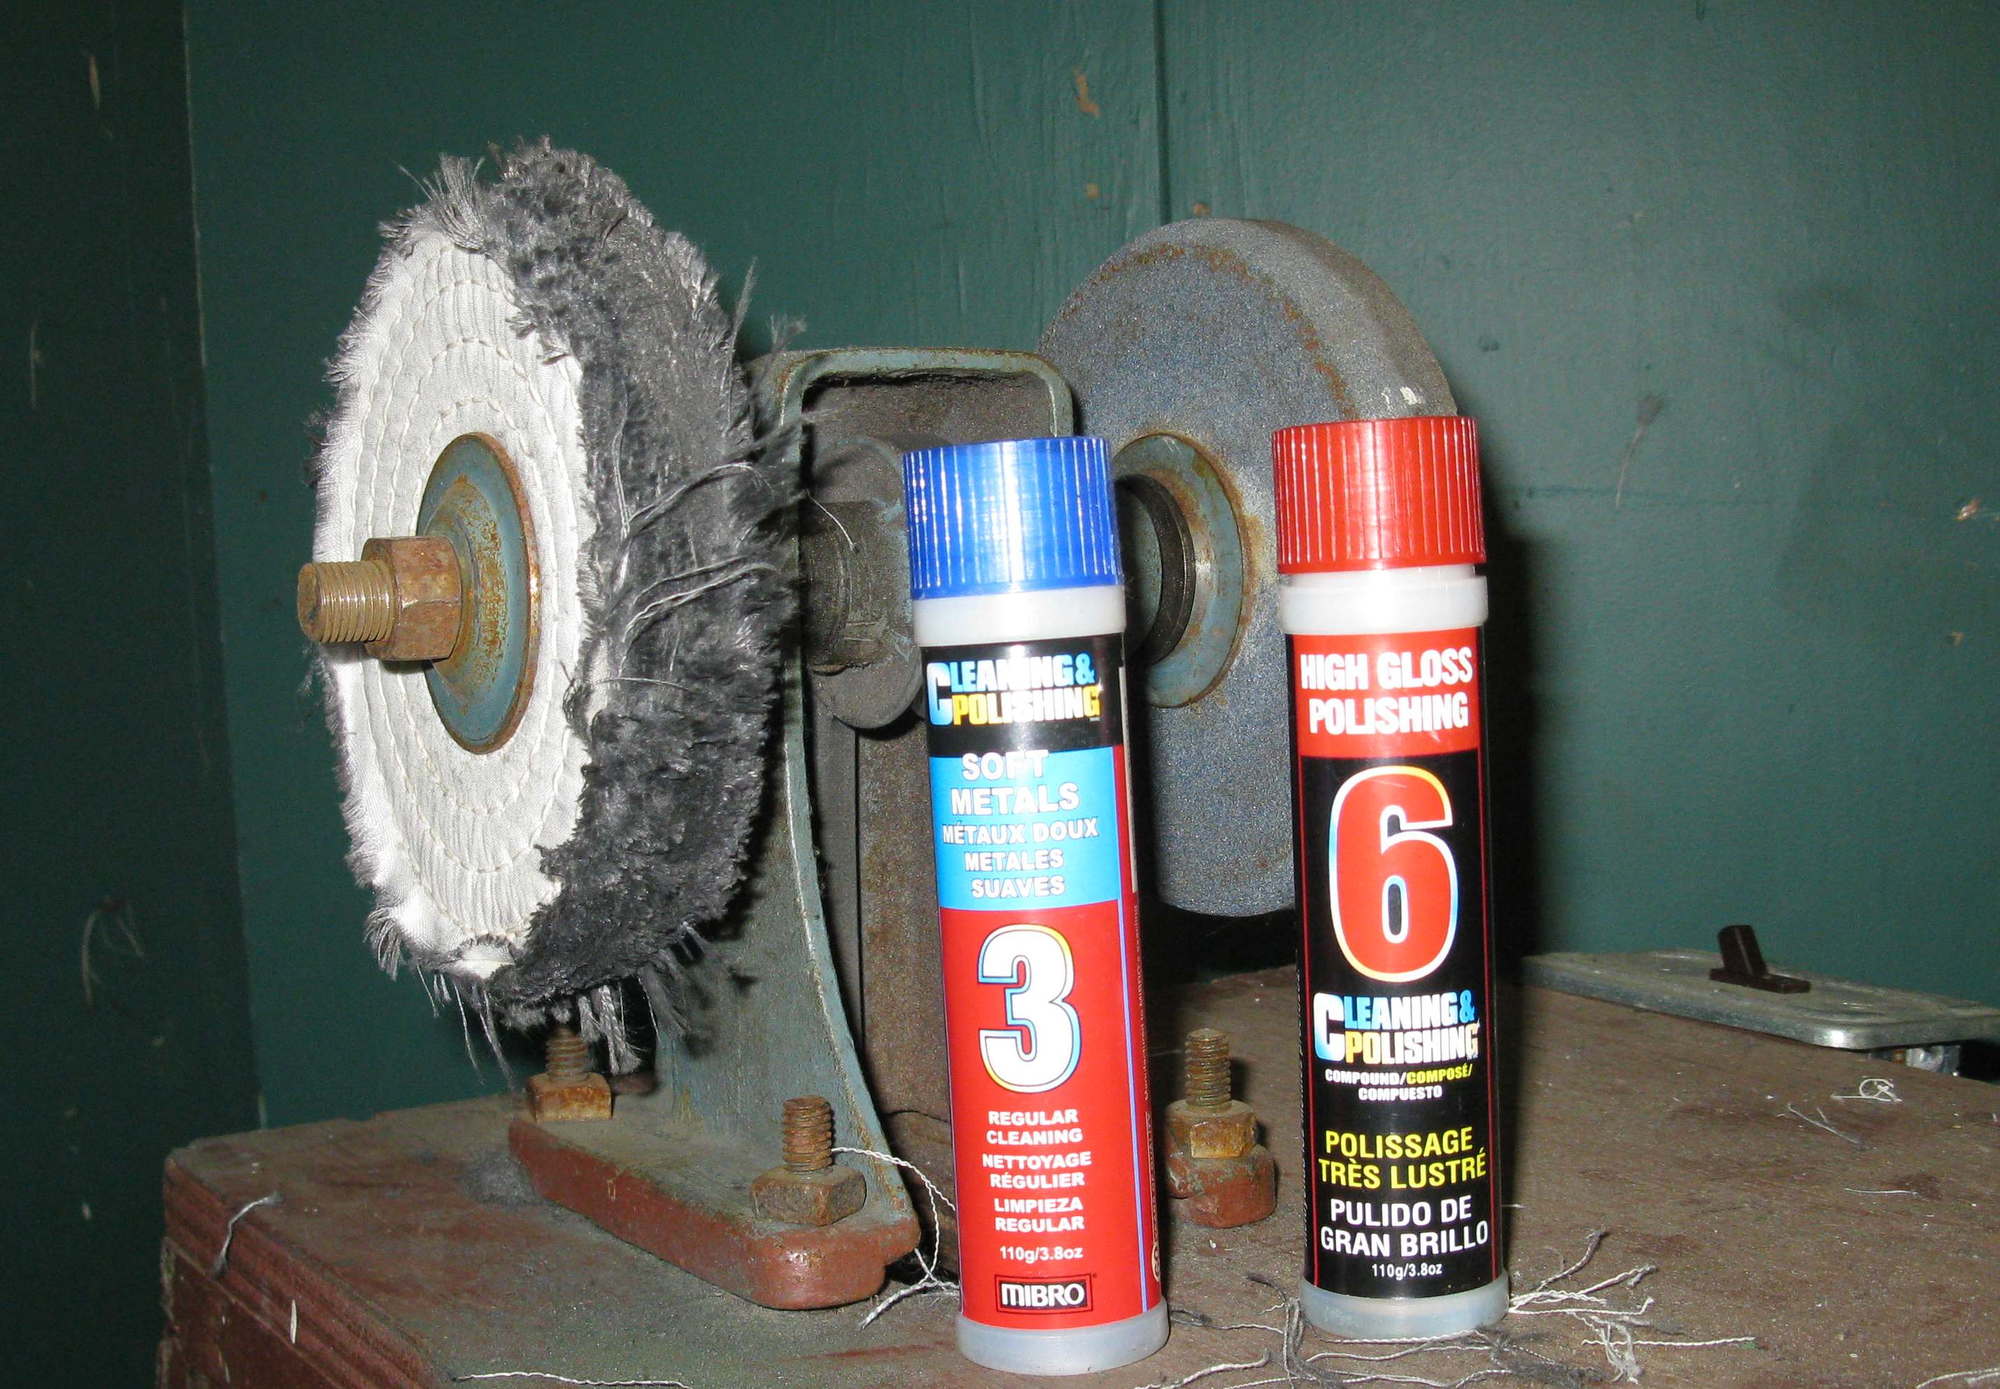
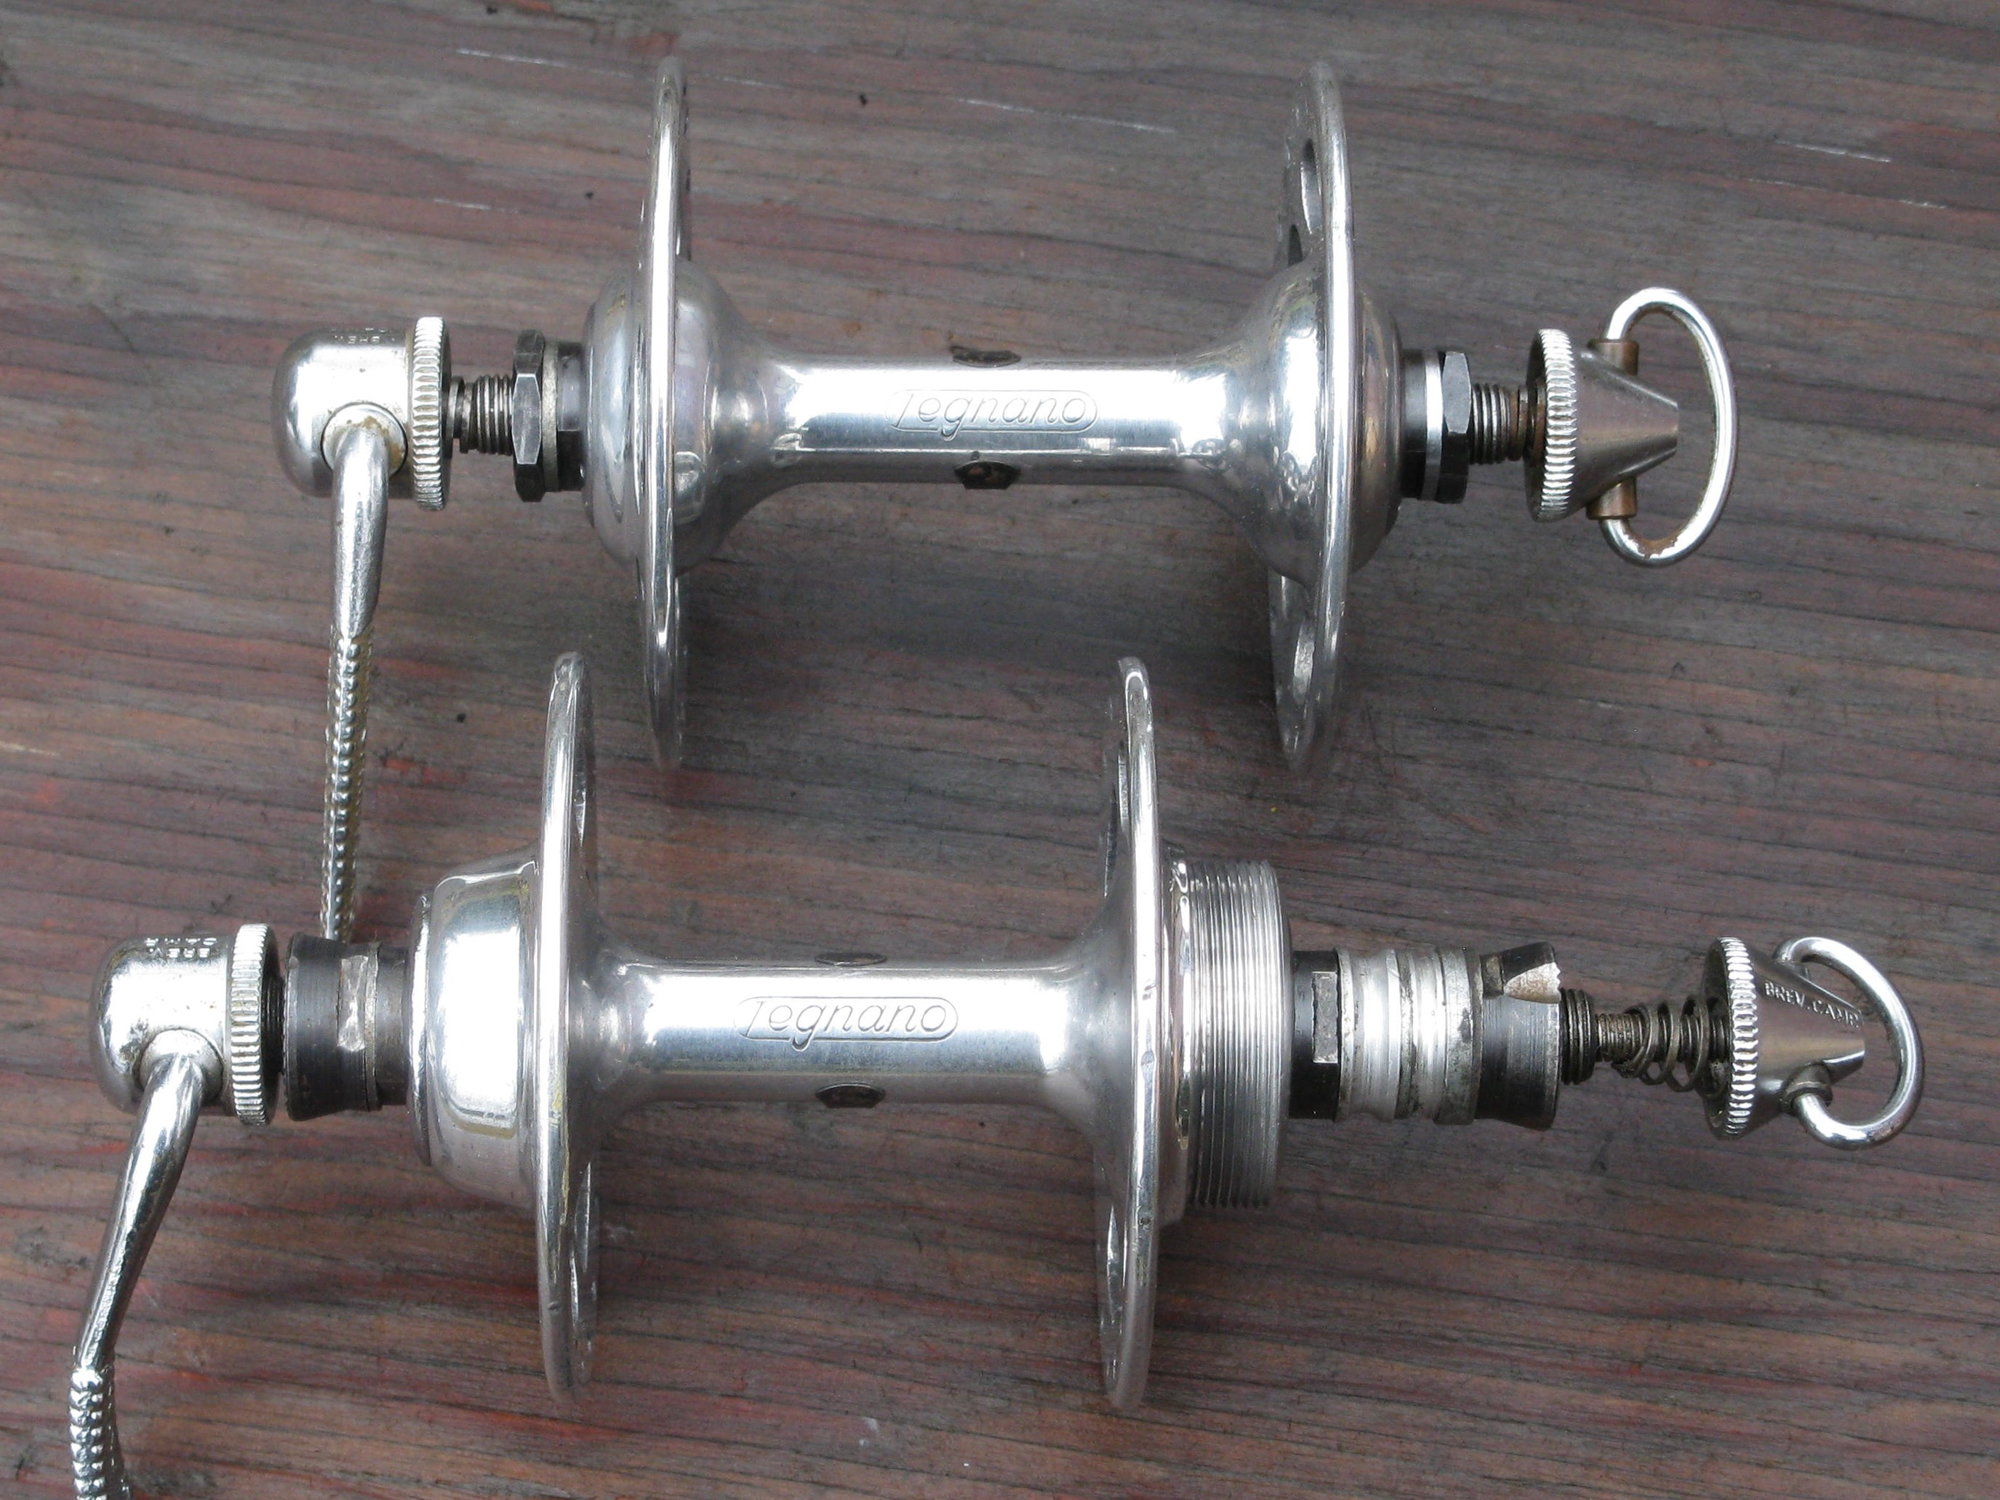
I should add that, as often as not and assuming no anodizing, the machine polisher can be used without sanding anything, offering results like this with only a few minutes of effort.
From this...
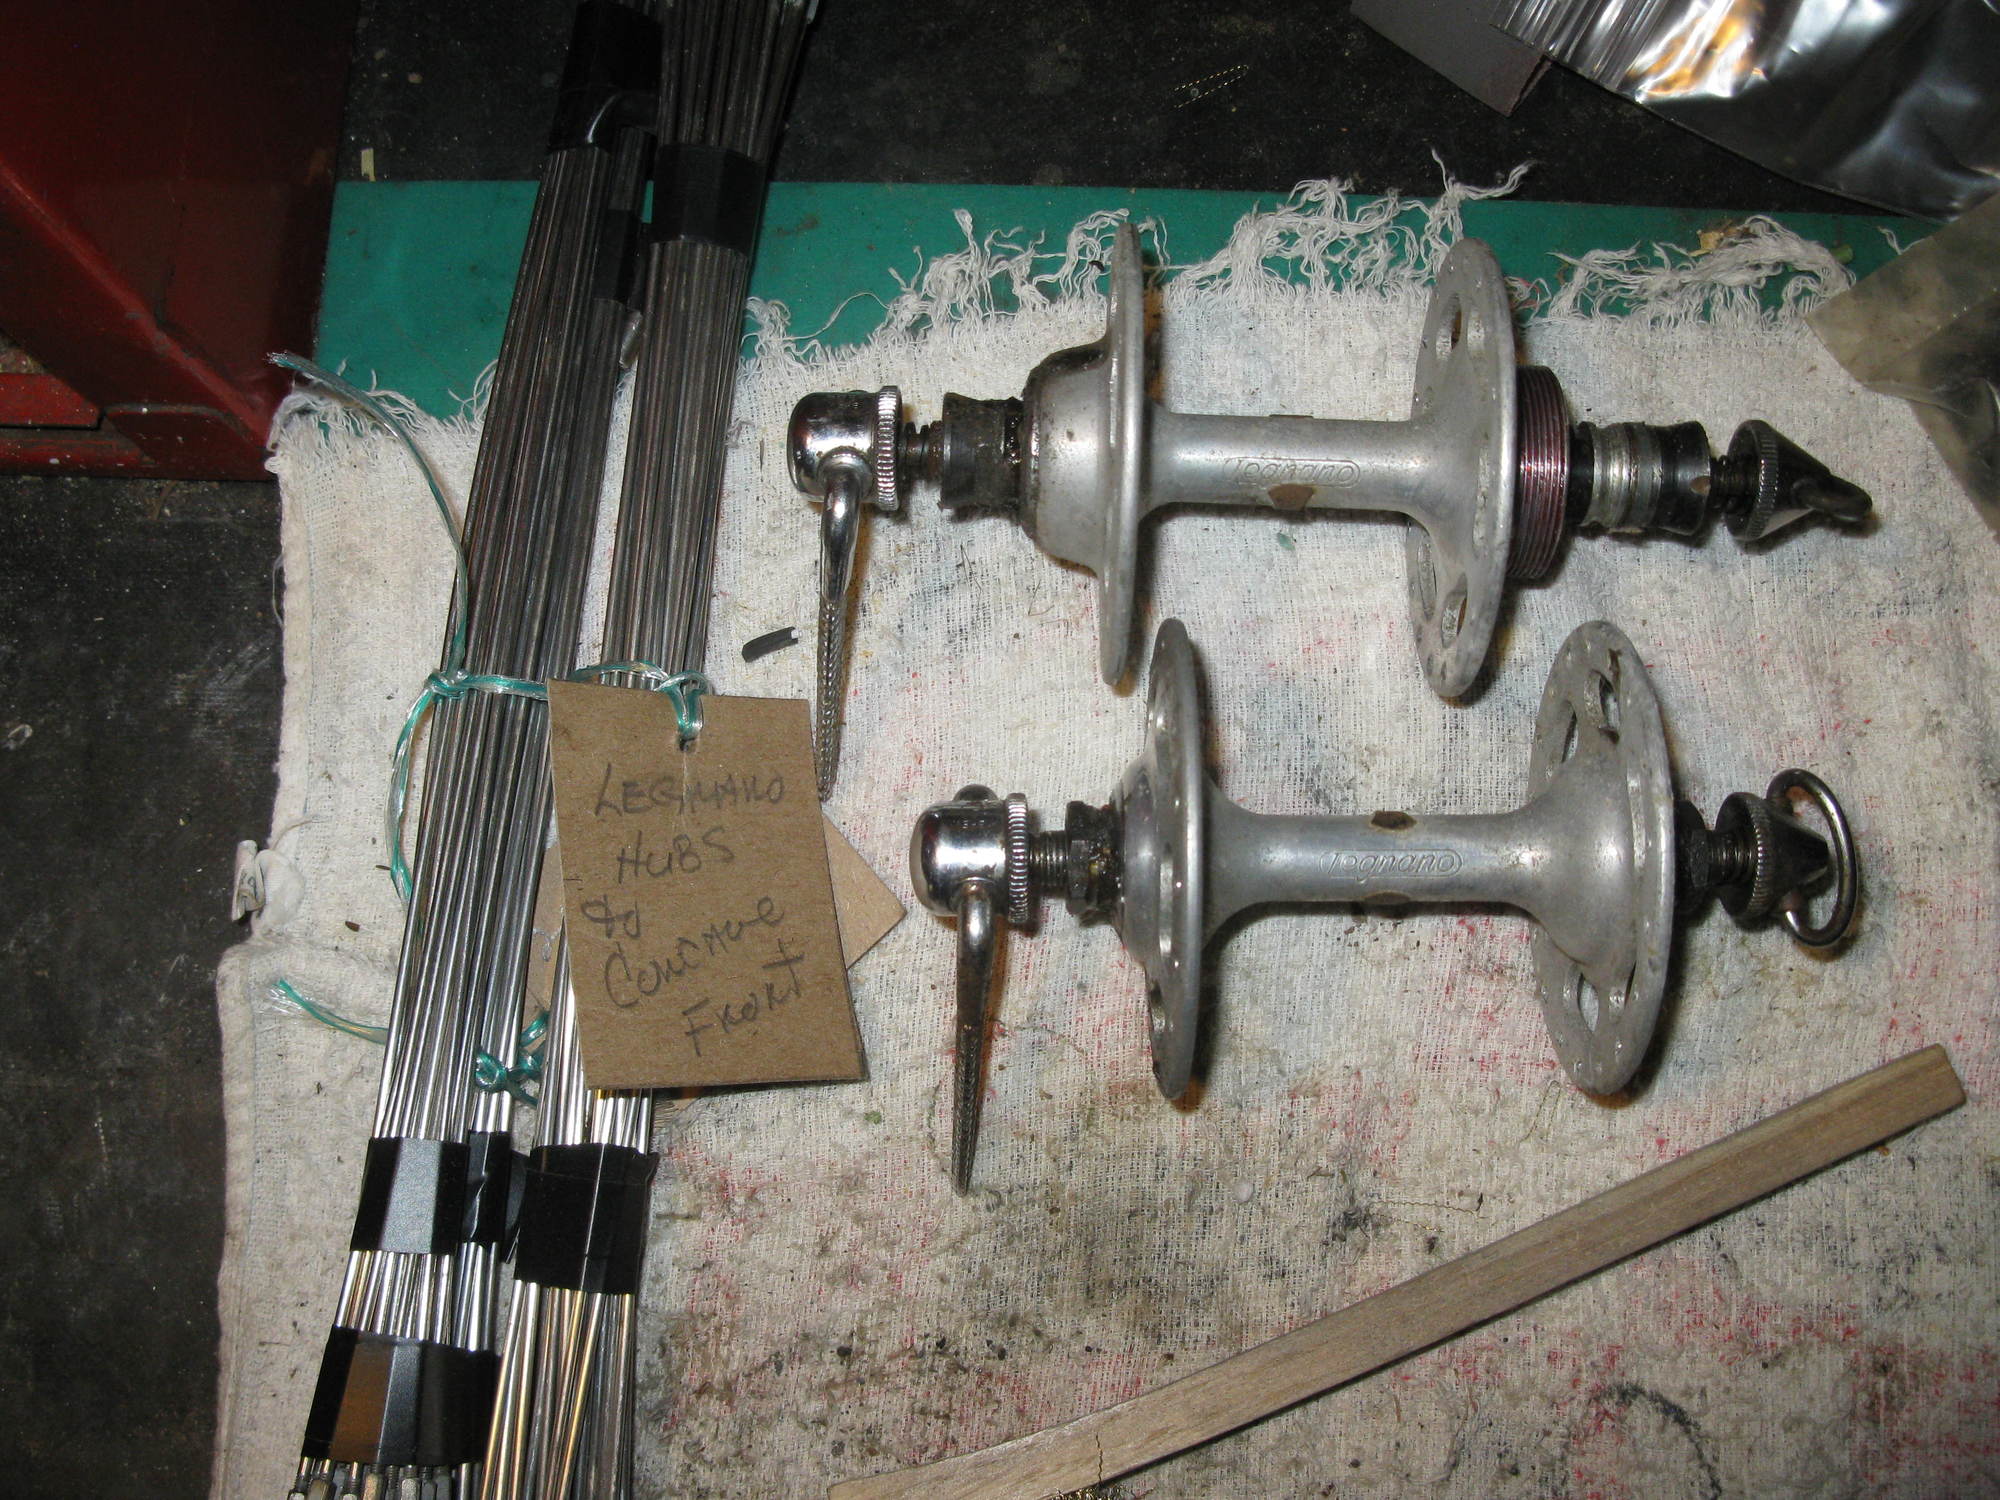
To this...
After removing the anodizing, time to polish. I use wet and dry sand paper at first (1000 to 2000 grit) after which I switch to my yard sale purchased home made polisher, coupled with two grades of polishing stick compound...
I should add that, as often as not and assuming no anodizing, the machine polisher can be used without sanding anything, offering results like this with only a few minutes of effort.
From this...
To this...
__________________
"98% of the bikes I buy are projects".
"98% of the bikes I buy are projects".
11-10-19, 06:45 AM
#19
se�or miembro

Join Date: Dec 2018
Location: Pac NW
Posts: 6,623
Bikes: '70s - '80s Campagnolo
Mentioned: 92 Post(s)
Tagged: 0 Thread(s)
Quoted: 3886 Post(s)
Liked 6,481 Times
in
3,206 Posts
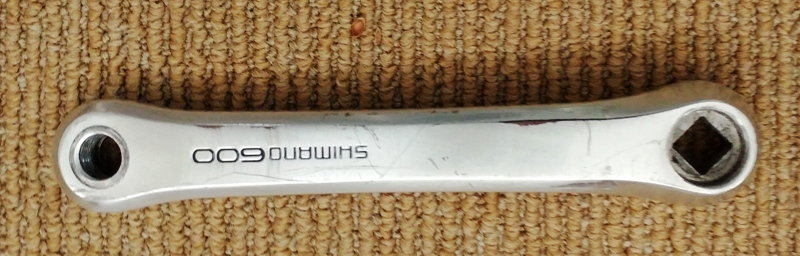
I say leave it alone. Chances are you're not putting a 600 crank on a prized keeper, so no need for perfection. Remove the big scuff from the drive side arm with some wet sanding. No one cares about the nds.
11-10-19, 07:33 AM
#20
Senior Member
Join Date: Jan 2013
Posts: 2,679
Bikes: too many sparkly Italians, some sweet Americans and a couple interesting Japanese
Mentioned: 10 Post(s)
Tagged: 0 Thread(s)
Quoted: 569 Post(s)
Liked 581 Times
in
409 Posts
If all of this is not enough, when you get the beautifully polished peace put an aluminum sealer on it to resist oxidation. I use Wolfgang MetallWerk but others are just as good. Auto parts houses have it for keeping polished aluminum wheels looking good.
11-10-19, 03:22 PM
#21
Port

Join Date: Jan 2008
Location: Boston
Posts: 6,653
Bikes: 2022 Soma Fog Cutter, 2021 Calfee Draqonfly 44, 1984 Peter Mooney, 2017 Soma Stanyan, 1990 Fuji Ace, 1990 Bridgestone RB-1, 1995 Independent Fabrications Track, 2003 Calfee Dragonfly Pro
Mentioned: 18 Post(s)
Tagged: 0 Thread(s)
Quoted: 984 Post(s)
Liked 1,862 Times
in
1,062 Posts
While 600 is not top of the line, it can be made to look super bling-y with some (a LOT) elbow grease.
Check out this super helpful thread on polishing al parts. There is also some helpful info about removing scratches along the way.
https://www.bikeforums.net/classic-v...ng-thread.html
Check out this super helpful thread on polishing al parts. There is also some helpful info about removing scratches along the way.
https://www.bikeforums.net/classic-v...ng-thread.html
__________________
https://rowdml.tripod.com/panmass
https://rowdml.tripod.com/panmass
 11-10-19, 04:40 PM
#22
Used to be Conspiratemus
Join Date: Jan 2009
Location: Hamilton ON Canada
Posts: 1,512
Mentioned: 4 Post(s)
Tagged: 0 Thread(s)
Quoted: 297 Post(s)
Liked 245 Times
in
163 Posts
Well, if she notices the smell when she gets home and there are lye stains on the floor, you could always say you cleaned the oven..........
11-12-19, 04:13 PM
#23
WGB
Thread Starter
Join Date: Jul 2017
Location: Niagara Region
Posts: 2,917
Bikes: Panasonic PT-4500
Mentioned: 46 Post(s)
Tagged: 0 Thread(s)
Quoted: 1800 Post(s)
Liked 2,334 Times
in
1,378 Posts
I tried the Easy Off method but found it was an effort to get the smut off. I tried washing but that was useless, at least for me so I went to sanding.
Next time I will try to get a proper de-anodizing product. The sales clerk at the auto parts store had never heard of such a product so I got some Easy Off.

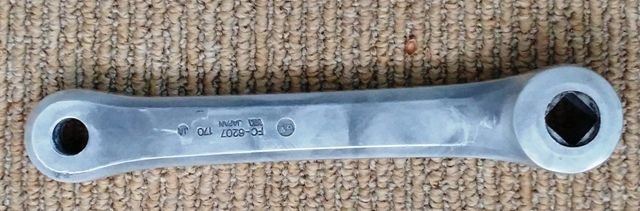
I hand buffedd with 160 to get the larger scrapes and then 220 500 and finally 1000 grit. Attempts to use a dremel tool failed miserably and I created scars that had to be sanded out by hand. There is a single rough spot that I didn't "grind" down too deep as I didn't want to leave a divot. It's just below the two zeros in the 600.
I applied some buffing compound by hand to clean up and finally used some car wax to protect the finish for now. I believe one of my neighbors has a buffing pad. He does have a bench top grinder and if he doesn't have a pad I'll buy one as I'd like to see how it turns out with a final buffing. If no machine I will have to go at it by hand.
For now I can live with this, though I want a better shine.
Next time I will try to get a proper de-anodizing product. The sales clerk at the auto parts store had never heard of such a product so I got some Easy Off.
I hand buffedd with 160 to get the larger scrapes and then 220 500 and finally 1000 grit. Attempts to use a dremel tool failed miserably and I created scars that had to be sanded out by hand. There is a single rough spot that I didn't "grind" down too deep as I didn't want to leave a divot. It's just below the two zeros in the 600.
I applied some buffing compound by hand to clean up and finally used some car wax to protect the finish for now. I believe one of my neighbors has a buffing pad. He does have a bench top grinder and if he doesn't have a pad I'll buy one as I'd like to see how it turns out with a final buffing. If no machine I will have to go at it by hand.
For now I can live with this, though I want a better shine.
11-12-19, 05:05 PM
#24
Senior Member
Join Date: Jan 2019
Posts: 528
Mentioned: 8 Post(s)
Tagged: 0 Thread(s)
Quoted: 237 Post(s)
Likes: 0
Liked 83 Times
in
64 Posts
"Proper" stripper is a mix of particularly nasty acids (NaOH is a base though and uses a different process), and unless you're a pro, you generally don't want to go through the effort of obtaining said chemicals, handling them, clean up, and responsibly disposing of them (or you could be one of those people that just dumps hazardous chemicals down the sewer because all this regulatory stuff is just a conspiracy). That looks rather dark and may have been etched by the cleaner. Aluminum is a soft metal, and one of the relatively aggressive metal polishes mentioned by others will put a very bright finish on aluminum in quick order with a little elbow grease.
11-12-19, 05:10 PM
#25
Useless Member
Join Date: Jun 2015
Location: Louisville, KY
Posts: 745
Mentioned: 5 Post(s)
Tagged: 0 Thread(s)
Quoted: 380 Post(s)
Liked 181 Times
in
113 Posts
@rccardr is spot on. If you do more wet sanding with higher grits all the way up to 3000 you can get a mirror finish if that�s what you�re looking for. You�ll want a polishing compound to finish it. Have had good luck with Blue Magic, Meguiars rim polish and Simichrome.