


531 Build Inspired by Raleigh Pros
 08-17-22, 05:45 PM
#26

Senior Member
Thread Starter
Join Date: Feb 2012
Location: Rochester, NY
Posts: 18,056
Bikes: Stewart S&S coupled sport tourer, Stewart Sunday light, Stewart Commuting, Stewart Touring, Co Motion Tandem, Stewart 3-Spd, Stewart Track, Fuji Finest, Mongoose Tomac ATB, GT Bravado ATB, JCP Folder, Stewart 650B ATB
Mentioned: 0 Post(s)
Tagged: 0 Thread(s)
Quoted: 4195 Post(s)
Liked 3,837 Times
in
2,295 Posts
I've completed the tube mitering and last lug prep before I sand blast the lugs and shell. Likely next week before more will happen. Andy
__________________
AndrewRStewart
AndrewRStewart

Likes For Andrew R Stewart:
08-18-22, 09:06 AM
#27


Randomhead
Join Date: Aug 2008
Location: Happy Valley, Pennsylvania
Posts: 24,386
Mentioned: 0 Post(s)
Tagged: 0 Thread(s)
Quoted: 4 Post(s)
Liked 3,686 Times
in
2,509 Posts
Those things are looking good. I think I would be hesitant to use hole saws too.
I should do this for my lugged dropper post bike. I'm somewhat reluctant to do it to a bb shell though. Need to learn how to tig
I should do this for my lugged dropper post bike. I'm somewhat reluctant to do it to a bb shell though. Need to learn how to tig
09-04-22, 06:47 PM
#28
Senior Member
Thread Starter
Join Date: Feb 2012
Location: Rochester, NY
Posts: 18,056
Bikes: Stewart S&S coupled sport tourer, Stewart Sunday light, Stewart Commuting, Stewart Touring, Co Motion Tandem, Stewart 3-Spd, Stewart Track, Fuji Finest, Mongoose Tomac ATB, GT Bravado ATB, JCP Folder, Stewart 650B ATB
Mentioned: 0 Post(s)
Tagged: 0 Thread(s)
Quoted: 4195 Post(s)
Liked 3,837 Times
in
2,295 Posts
I'm still chipping away at this frame project. It now is a BSO. Here are some shots

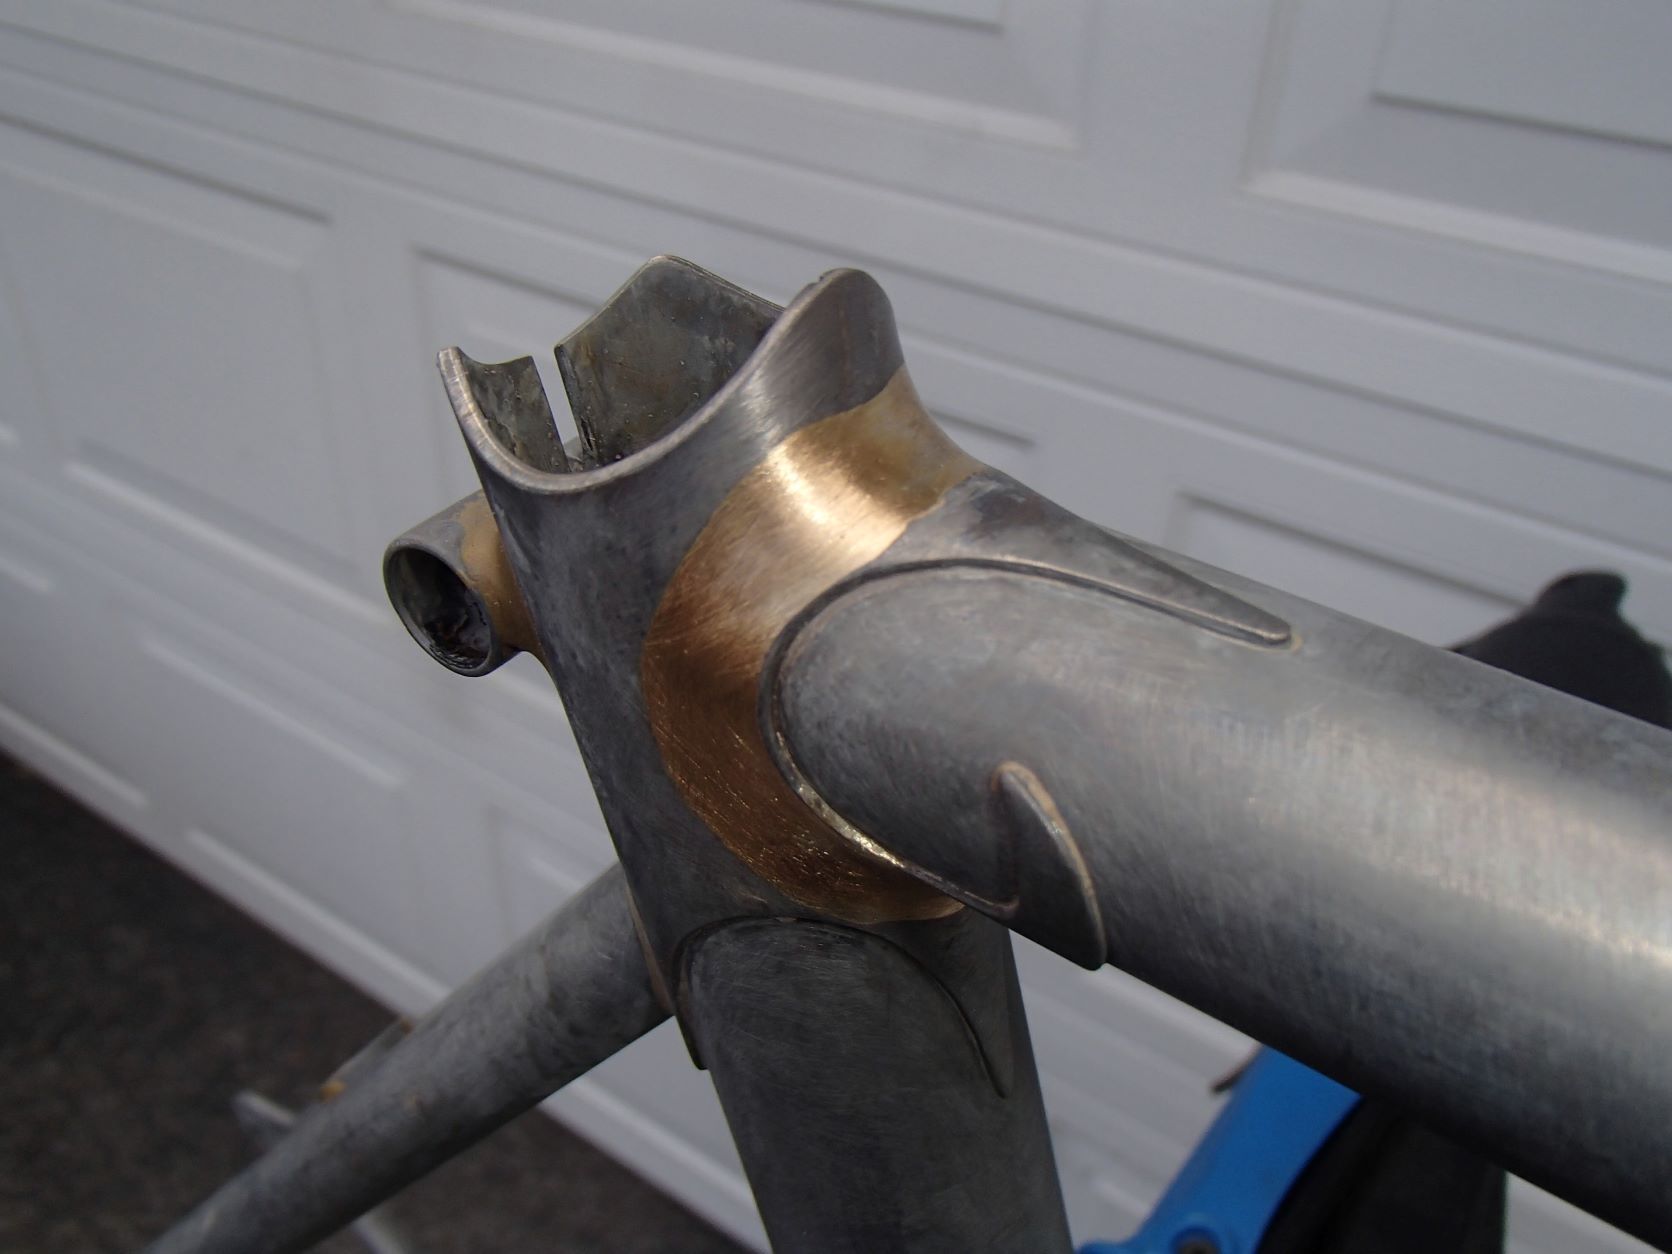
While not exactly symmetrically shaped I am happy with this. It is the most complex lug and contouring i've done yet. The bottom edge is nearly at spec length, the top ridge will have a bit of trimming.
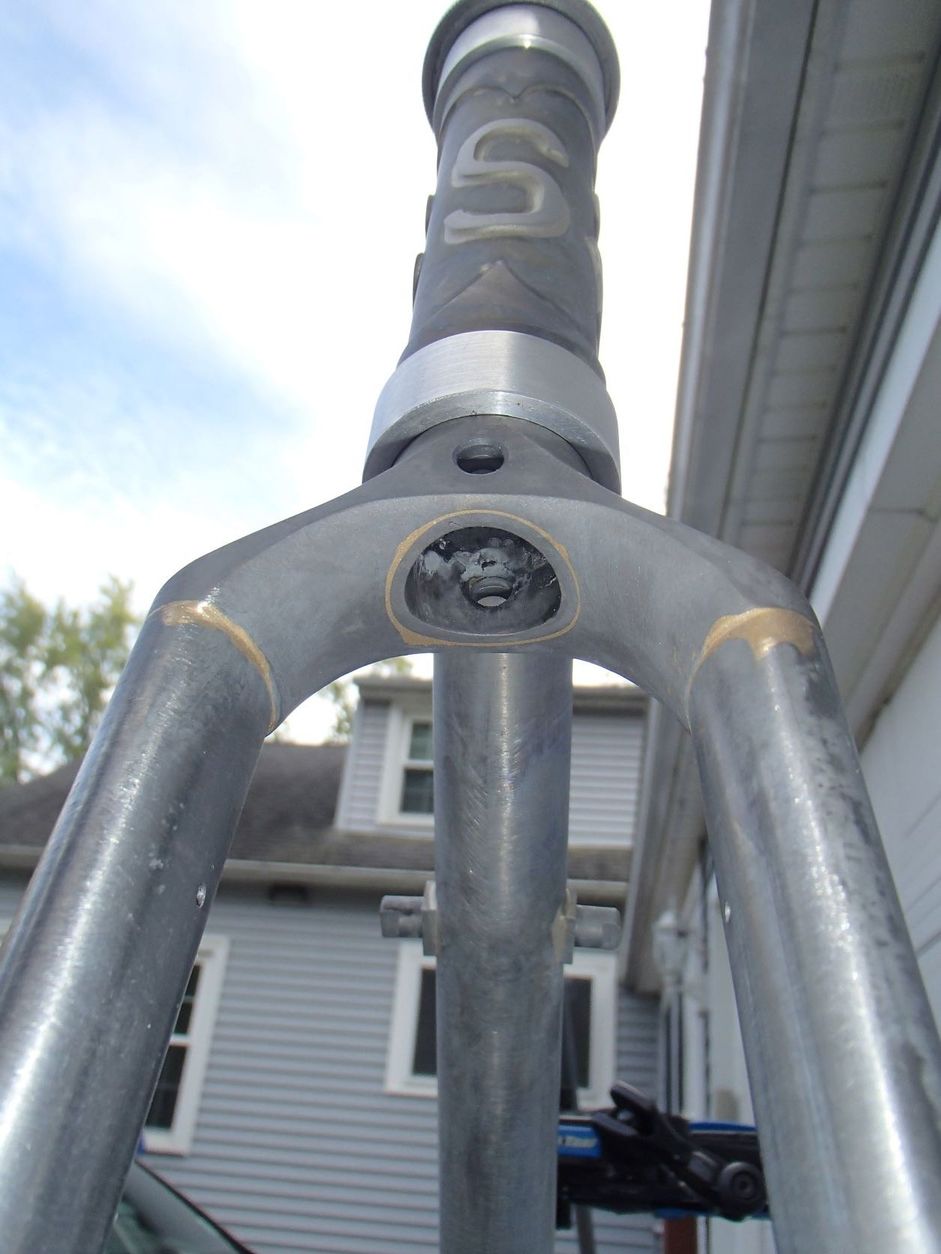
The two different techniques for making a domed end. The chain stays have a machined insert the seat stays have bent over tabs that were dilled and filed. Hopefully once paint (whenever that is) is on no one will tell the difference. The bend the stay tips, fill and file is definitely quicker, I think the machined end is cleaner.

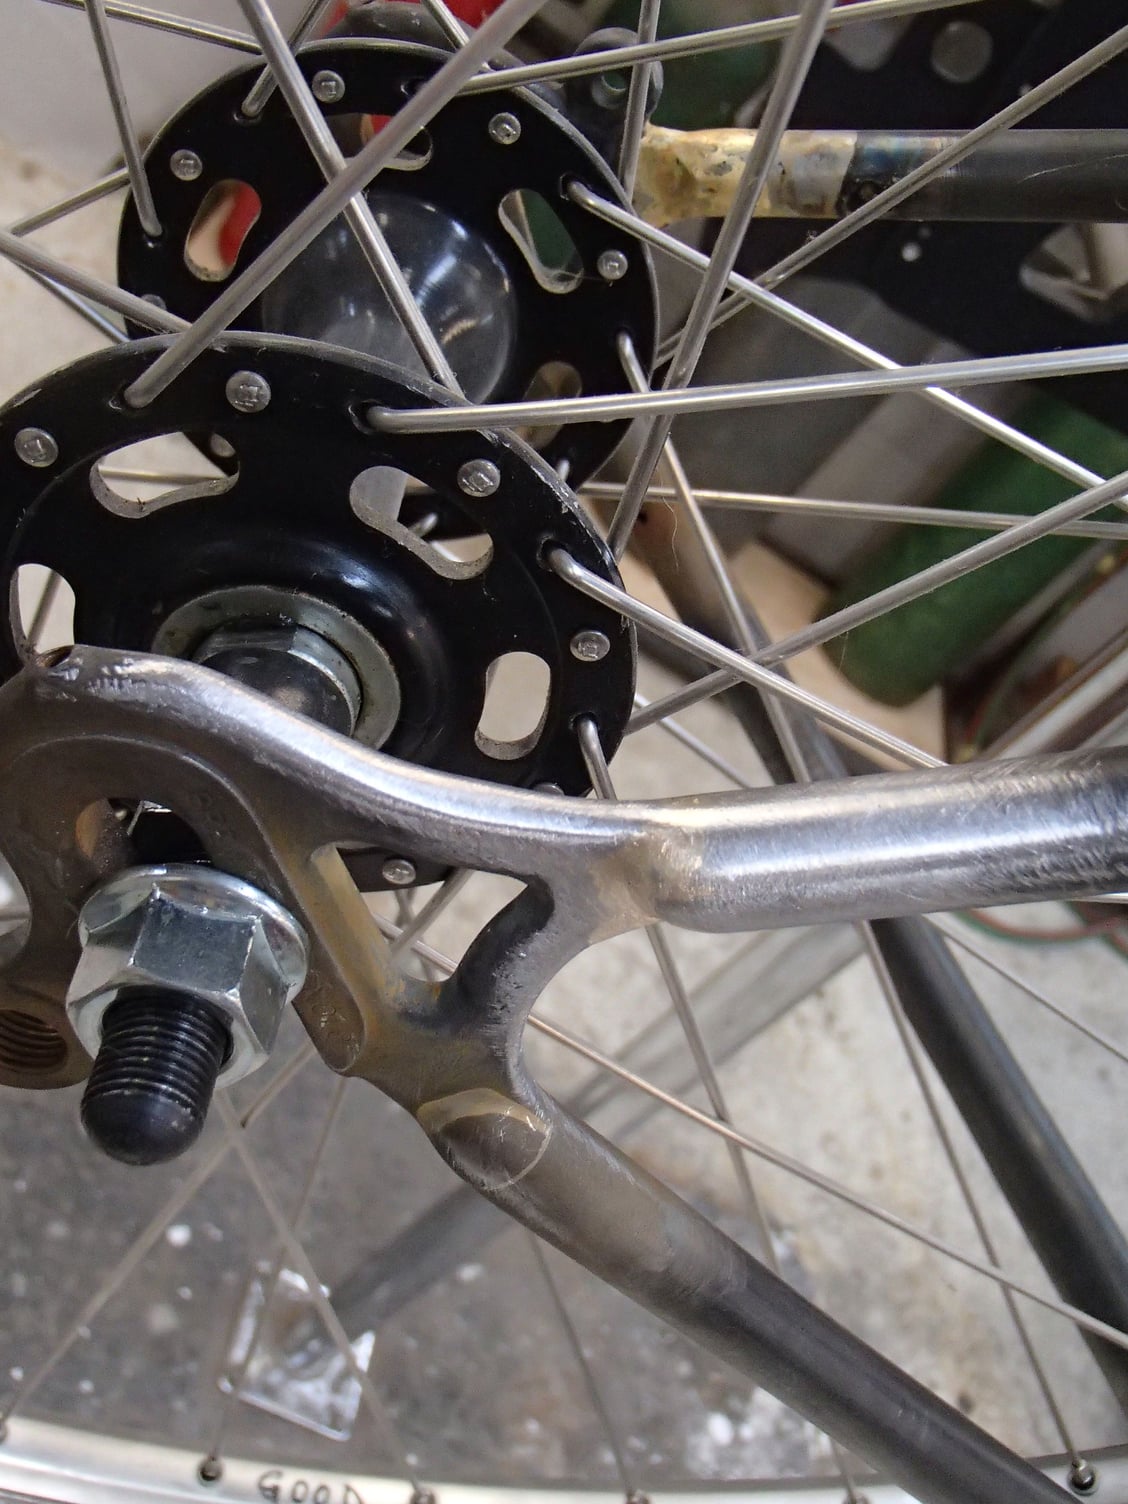
The rear Campy 1010s I had were with eyes. The fronts not so. Off with the heads! Or at least the eyes. One stay is pretty much done and it's dropout eye removed. The other waiting it's turn.
Next up are the bridges and braze ons. Then I'll trim and finish the lug ends and cut the binder slot. This next week is full, our 10th anniversary and my high school's unnumbered reunion. So I hope to update in a few weeks again. Andy
While not exactly symmetrically shaped I am happy with this. It is the most complex lug and contouring i've done yet. The bottom edge is nearly at spec length, the top ridge will have a bit of trimming.
The two different techniques for making a domed end. The chain stays have a machined insert the seat stays have bent over tabs that were dilled and filed. Hopefully once paint (whenever that is) is on no one will tell the difference. The bend the stay tips, fill and file is definitely quicker, I think the machined end is cleaner.
The rear Campy 1010s I had were with eyes. The fronts not so. Off with the heads! Or at least the eyes. One stay is pretty much done and it's dropout eye removed. The other waiting it's turn.
Next up are the bridges and braze ons. Then I'll trim and finish the lug ends and cut the binder slot. This next week is full, our 10th anniversary and my high school's unnumbered reunion. So I hope to update in a few weeks again. Andy
__________________
AndrewRStewart
AndrewRStewart
Likes For Andrew R Stewart:
10-04-22, 06:53 PM
#29
Senior Member
Thread Starter
Join Date: Feb 2012
Location: Rochester, NY
Posts: 18,056
Bikes: Stewart S&S coupled sport tourer, Stewart Sunday light, Stewart Commuting, Stewart Touring, Co Motion Tandem, Stewart 3-Spd, Stewart Track, Fuji Finest, Mongoose Tomac ATB, GT Bravado ATB, JCP Folder, Stewart 650B ATB
Mentioned: 0 Post(s)
Tagged: 0 Thread(s)
Quoted: 4195 Post(s)
Liked 3,837 Times
in
2,295 Posts
This frame is done for now. As there's no intended rider I won't spend the $ on paint. I finished it a couple of weeks ago but life took over and didn't get around to taking some shots till today. Following the images I will add comments.
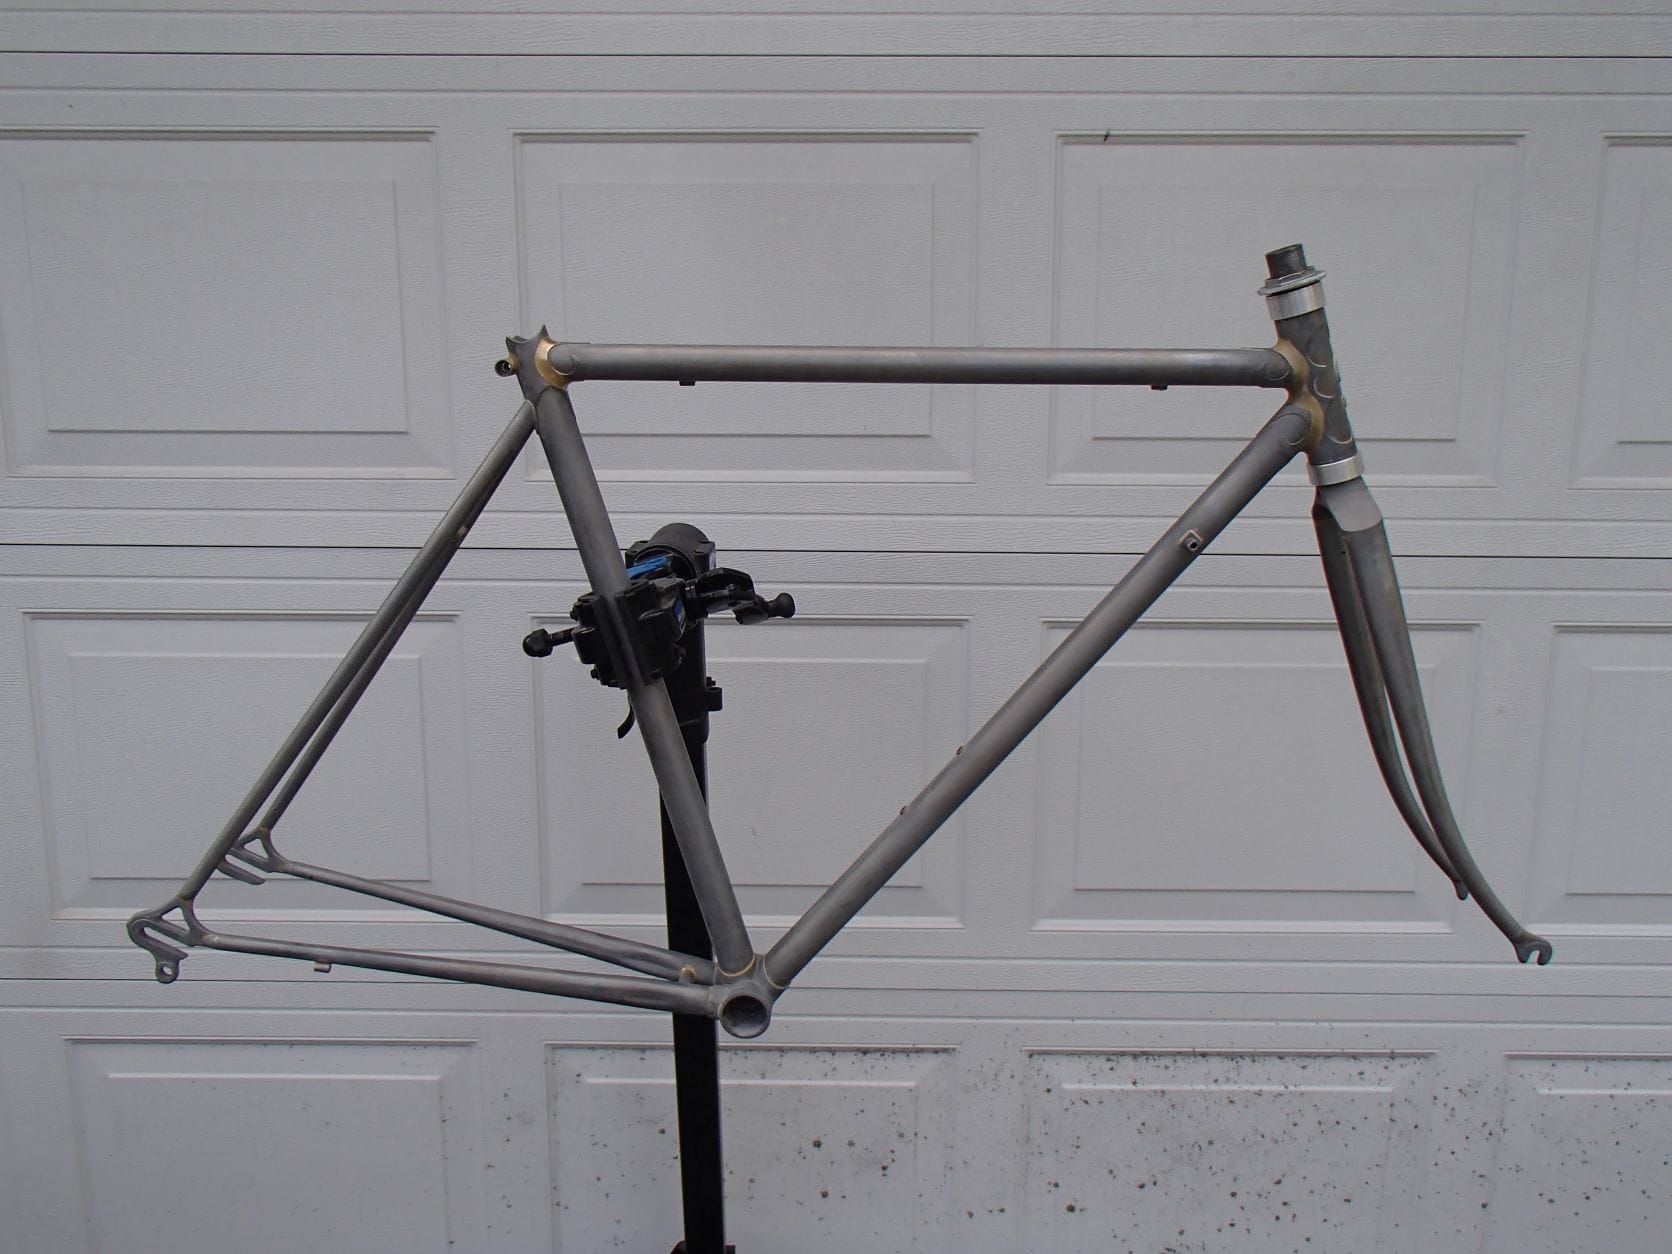


This was my second frame using old tube sets I had stashed away many years ago. Builds with no rider in mind. When I began this project I really wanted to mimic the Bird's Mouth version of the Raleigh Pros from the earlier 1970s. (As seen here Bike Forums - View Single Post - Hayden birds lugs on a 72 Raleigh pro ). But as I let my hands wander and following some internal compass these lug shapes resulted. So to a degree with the fork crown filing and dropout treatments. All in all a challenge that didn't have to meet any one's judgement .
.
Every challenge has it's struggles though. Here are some mistakes, problems and aspects i would do differently:
- I cut the first pair of fork blades too short. Due to my not paying attention to the numbers and thinking I was all good. At first I thought about lengthening the tops of the blades but decided to use my spare pair of blades and redo the dropout domed end inserts. This blade set had a much more gradual curve from the factory, so that I had to add a little bit more curve for the target rake.
- The BB shell is 65mm wide. Not sure where or when I got this one. I used a couple of SA AW cog spacers to make up the difference on the jig. Were I to have to sell this frame those spacers will go with it.
- The hand done lug shorelines are not very symmetrical from side to side and the seat lug's upper point is a bit off center. With more experience I could do better in laying out the lines, this was actually pretty hard for me with various Sharpie efforts after giving up with a paper trace. In the end I filed to match AGAP.
- The tire clearances are wide but for the seat stays, an artifact of the "shot in" stay tops. In hindsight I should have either run tighter clearances elsewhere or put a dog leg bend in the stays at the bridge to increase that spot's clearance.
- The rear dropouts (Campy 1010s) had eyes on them. I should have removed them before joining to the chain stays.
- I filled a few filing boo boos with silver. I really have to learn how to braze cleaner
- The last sort of mistake was in the design process. Since I had no real end goal I was making choices by the seat of my shorts so to speak at times. This lack of total end goal up front led me to a few things that I am not happy about.
Overall I'm glad to have done this as it provided many hours of shop time working on what I love. Although I will try to heed some of my problem points on the next one I know there will still be a list of "if I were to do this again I would..." Andy
This was my second frame using old tube sets I had stashed away many years ago. Builds with no rider in mind. When I began this project I really wanted to mimic the Bird's Mouth version of the Raleigh Pros from the earlier 1970s. (As seen here Bike Forums - View Single Post - Hayden birds lugs on a 72 Raleigh pro ). But as I let my hands wander and following some internal compass these lug shapes resulted. So to a degree with the fork crown filing and dropout treatments. All in all a challenge that didn't have to meet any one's judgement
. Every challenge has it's struggles though. Here are some mistakes, problems and aspects i would do differently:
- I cut the first pair of fork blades too short. Due to my not paying attention to the numbers and thinking I was all good. At first I thought about lengthening the tops of the blades but decided to use my spare pair of blades and redo the dropout domed end inserts. This blade set had a much more gradual curve from the factory, so that I had to add a little bit more curve for the target rake.
- The BB shell is 65mm wide. Not sure where or when I got this one. I used a couple of SA AW cog spacers to make up the difference on the jig. Were I to have to sell this frame those spacers will go with it.
- The hand done lug shorelines are not very symmetrical from side to side and the seat lug's upper point is a bit off center. With more experience I could do better in laying out the lines, this was actually pretty hard for me with various Sharpie efforts after giving up with a paper trace. In the end I filed to match AGAP.
- The tire clearances are wide but for the seat stays, an artifact of the "shot in" stay tops. In hindsight I should have either run tighter clearances elsewhere or put a dog leg bend in the stays at the bridge to increase that spot's clearance.
- The rear dropouts (Campy 1010s) had eyes on them. I should have removed them before joining to the chain stays.
- I filled a few filing boo boos with silver. I really have to learn how to braze cleaner
- The last sort of mistake was in the design process. Since I had no real end goal I was making choices by the seat of my shorts so to speak at times. This lack of total end goal up front led me to a few things that I am not happy about.
Overall I'm glad to have done this as it provided many hours of shop time working on what I love. Although I will try to heed some of my problem points on the next one I know there will still be a list of "if I were to do this again I would..." Andy
__________________
AndrewRStewart
AndrewRStewart
Likes For Andrew R Stewart:
Likes For Devin Rickey:
10-04-22, 10:17 PM
#31
Randomhead
Join Date: Aug 2008
Location: Happy Valley, Pennsylvania
Posts: 24,386
Mentioned: 0 Post(s)
Tagged: 0 Thread(s)
Quoted: 4 Post(s)
Liked 3,686 Times
in
2,509 Posts
If you ever want some 1010 dropouts with no eyelets, I will trade you 2 sets without for 1 set with.
10-05-22, 10:04 AM
#32
Senior Member
Join Date: Aug 2012
Location: Seattle
Posts: 507
Mentioned: 0 Post(s)
Tagged: 0 Thread(s)
Quoted: 103 Post(s)
Liked 144 Times
in
88 Posts
Thanks for sharing!
__________________
https://www.flickr.com/photos/54319503@N05/
https://www.draper-cycles.com
https://www.flickr.com/photos/54319503@N05/
https://www.draper-cycles.com
10-05-22, 10:23 AM
#33
Senior Member
Thread Starter
Join Date: Feb 2012
Location: Rochester, NY
Posts: 18,056
Bikes: Stewart S&S coupled sport tourer, Stewart Sunday light, Stewart Commuting, Stewart Touring, Co Motion Tandem, Stewart 3-Spd, Stewart Track, Fuji Finest, Mongoose Tomac ATB, GT Bravado ATB, JCP Folder, Stewart 650B ATB
Mentioned: 0 Post(s)
Tagged: 0 Thread(s)
Quoted: 4195 Post(s)
Liked 3,837 Times
in
2,295 Posts
Duane- Thanks for the props. The bare metal is coated with a phosphate spray to slow rust. I use a common version from the local hardware store and mix it with equal amounts of water in a plant misting pump bottle. Spray it on, wait a few minutes and wipe off the liquid. Years ago I got seriously scolded by a painter for using WD40. Andy
__________________
AndrewRStewart
AndrewRStewart
10-06-22, 01:29 AM
#34
Senior Member
Join Date: Aug 2012
Location: Seattle
Posts: 507
Mentioned: 0 Post(s)
Tagged: 0 Thread(s)
Quoted: 103 Post(s)
Liked 144 Times
in
88 Posts
Ah, so you soak then spray it with that and wipe down. Smart. The reason I asked, is one of the many projects on my list is a better soak tank. My current solution is a large garbage bin with water and some phosphoric acid. It works but the tank is too small for a full frame and it's not heated so brass flux takes forever (well, overnight) to soak off. I like the protective coating the acid provides - probably similar to what you're seeing. I have been looking for an RV water tank which is generally the right size/shape for a frame and thick enough walls for a heater and pump.
That's a good solution you have there and makes the next steps so much more pleasant.
That's a good solution you have there and makes the next steps so much more pleasant.
__________________
https://www.flickr.com/photos/54319503@N05/
https://www.draper-cycles.com
https://www.flickr.com/photos/54319503@N05/
https://www.draper-cycles.com
10-06-22, 10:02 AM
#35
Senior Member
Thread Starter
Join Date: Feb 2012
Location: Rochester, NY
Posts: 18,056
Bikes: Stewart S&S coupled sport tourer, Stewart Sunday light, Stewart Commuting, Stewart Touring, Co Motion Tandem, Stewart 3-Spd, Stewart Track, Fuji Finest, Mongoose Tomac ATB, GT Bravado ATB, JCP Folder, Stewart 650B ATB
Mentioned: 0 Post(s)
Tagged: 0 Thread(s)
Quoted: 4195 Post(s)
Liked 3,837 Times
in
2,295 Posts
I use two different container types for my soaking, both are heated above tap levels with this immersion heater. I make sure the heating element is under water fully but keep the cord end above the water.
GESAIL 1500W Electric Immersion Heater, Bucket Water Heater with 304 Stainless-Steel Guard, Submersible Bucket Heater with Thermostat and Auto Shutoff, Heats 5 Gallons Water in Minutes - - Amazon.com
One container type is plastic tub, often used for dish washing in one's sink. Good for wider frame areas like both rear drop outs. I place the tub on a riser in the wash basin by our clothes washer to allow better frame in tub fit.
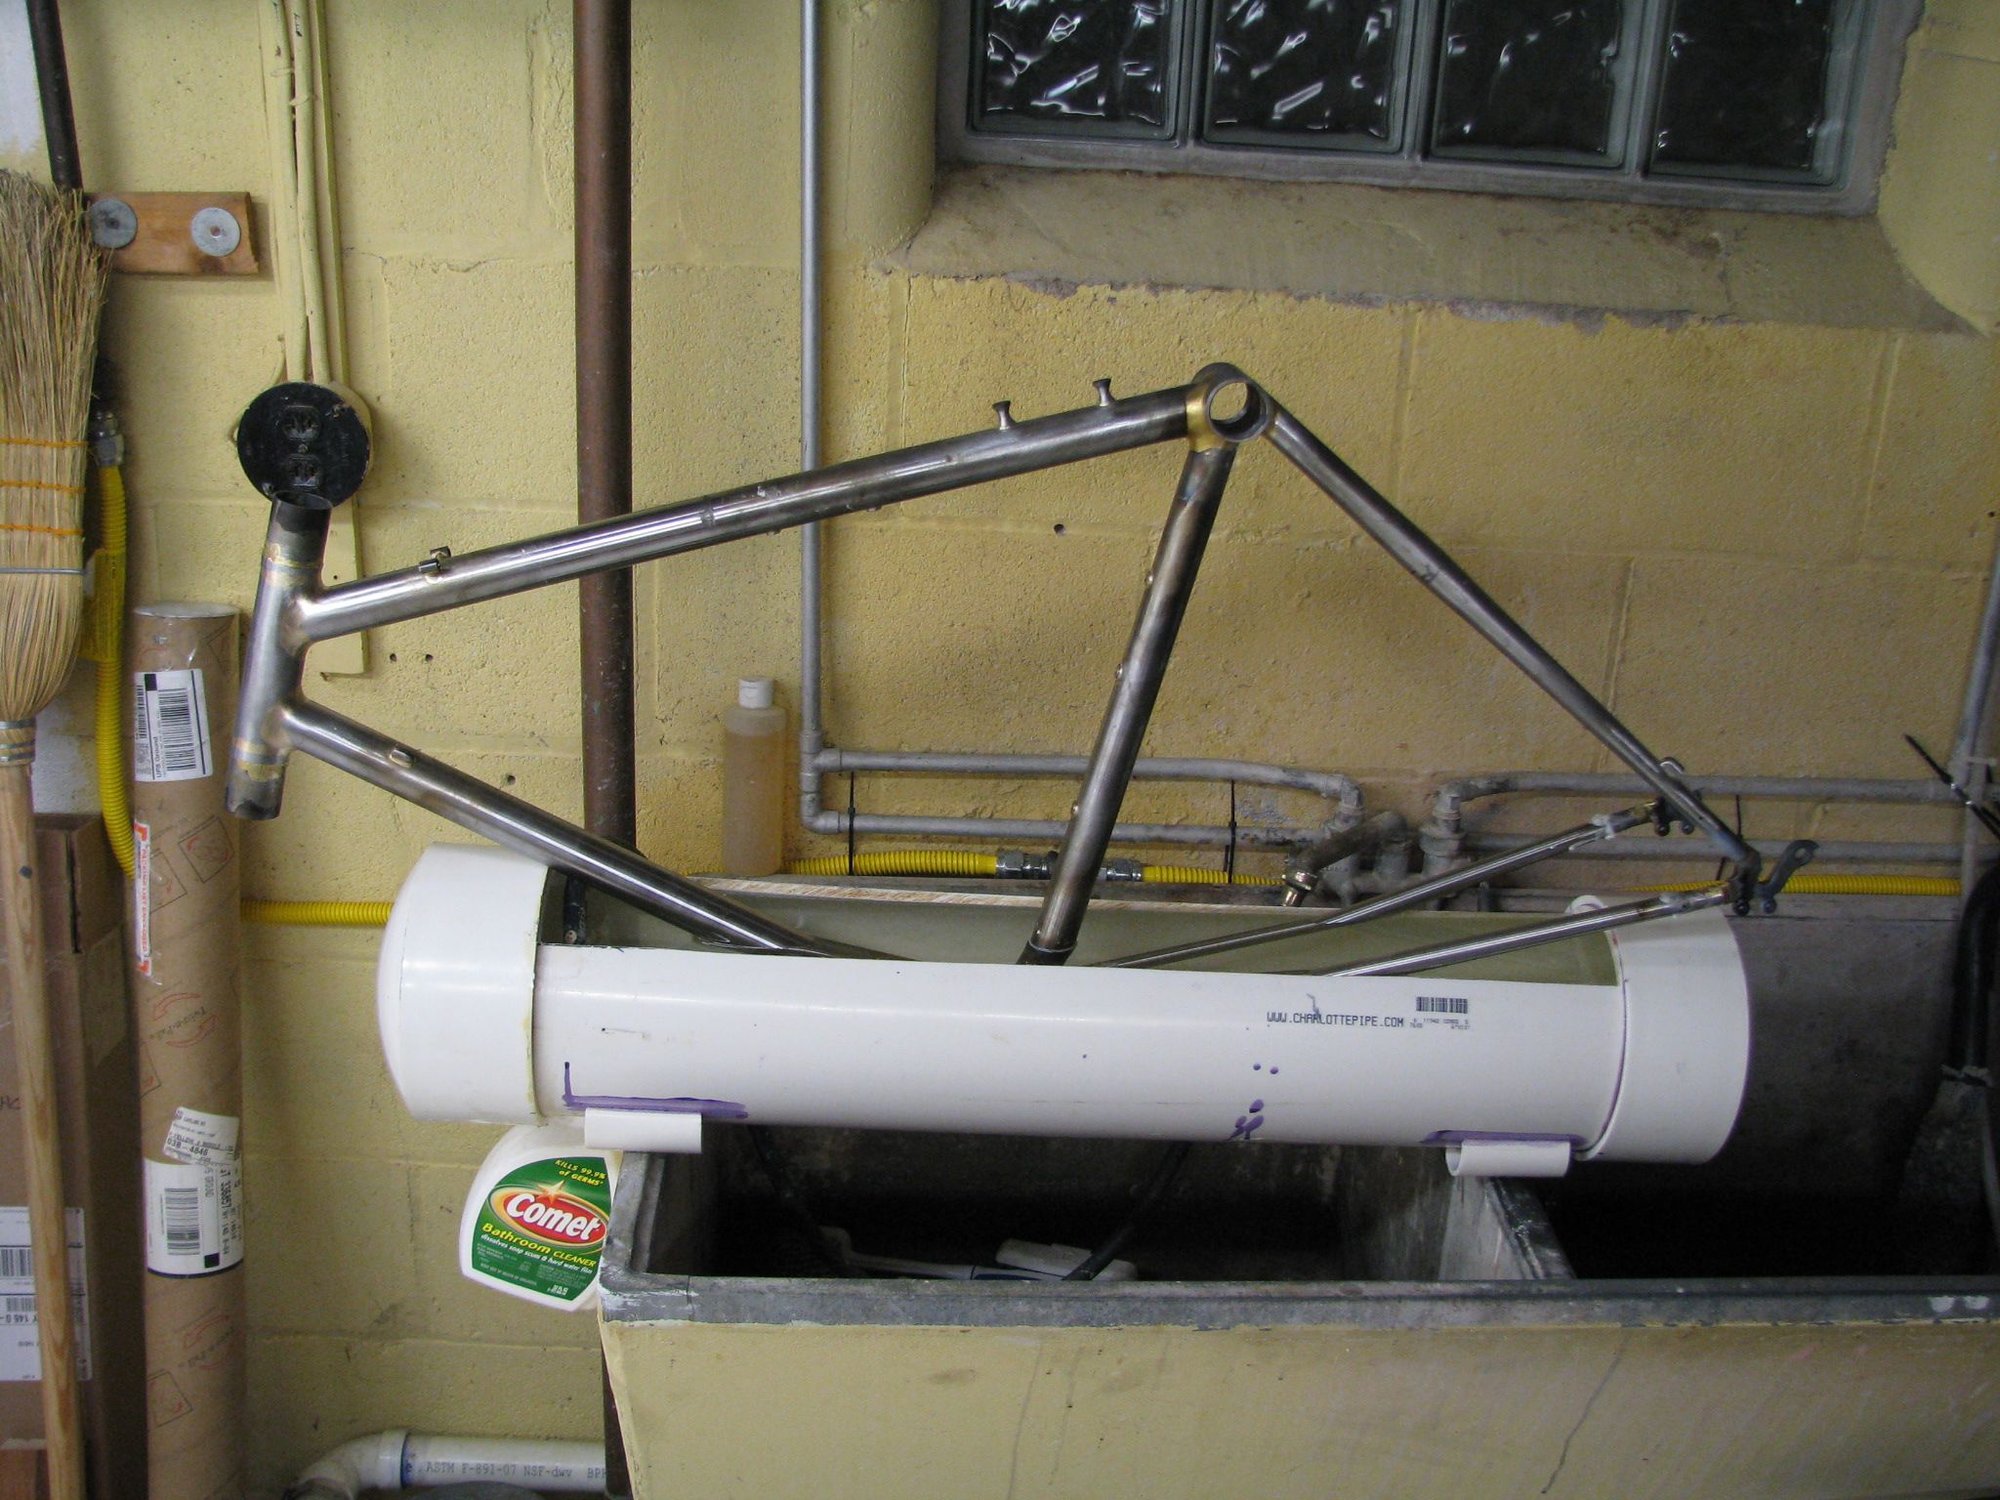
The other container is a plastic water pipe (about 8" in diameter and 3' long) that has a lengthwise section cut out and end caps glues on. Think of a horse watering trough type of shape. Good for forks and main frames. I glued on feet spaced apart so they rest on the wash basin top edges. See below.
Run hot tap water than place the heater in it before I start the brazing. In 15-30 minutes the water is painfully hot. I don't add any other chemicals, the GasFlux type B and U fluxes dissolve well enough with straight water for me. (Type B takes a lot longer than U does, maybe 15-30 minutes. I use that time for other jobs or I have a bite to eat then.) Andy
GESAIL 1500W Electric Immersion Heater, Bucket Water Heater with 304 Stainless-Steel Guard, Submersible Bucket Heater with Thermostat and Auto Shutoff, Heats 5 Gallons Water in Minutes - - Amazon.com
One container type is plastic tub, often used for dish washing in one's sink. Good for wider frame areas like both rear drop outs. I place the tub on a riser in the wash basin by our clothes washer to allow better frame in tub fit.
The other container is a plastic water pipe (about 8" in diameter and 3' long) that has a lengthwise section cut out and end caps glues on. Think of a horse watering trough type of shape. Good for forks and main frames. I glued on feet spaced apart so they rest on the wash basin top edges. See below.
Run hot tap water than place the heater in it before I start the brazing. In 15-30 minutes the water is painfully hot. I don't add any other chemicals, the GasFlux type B and U fluxes dissolve well enough with straight water for me. (Type B takes a lot longer than U does, maybe 15-30 minutes. I use that time for other jobs or I have a bite to eat then.) Andy
__________________
AndrewRStewart
AndrewRStewart
Last edited by Andrew R Stewart; 10-06-22 at 08:30 PM. Reason: spelling changed details
Likes For Andrew R Stewart:


