


How to safely remove rim scratches
 01-27-22, 04:53 PM
#1

Garage tetris expert
Thread Starter

Join Date: May 2016
Location: Texas Hill Country
Posts: 891
Bikes: A few. Ok, a lot
Mentioned: 16 Post(s)
Tagged: 0 Thread(s)
Quoted: 387 Post(s)
Liked 692 Times
in
329 Posts
How to safely remove rim scratches
Apologies if this has been covered elsewhere, but before I go heavy handed on these otherwise excellent Super Champion Competition rims, I’d like some advice on best practices.
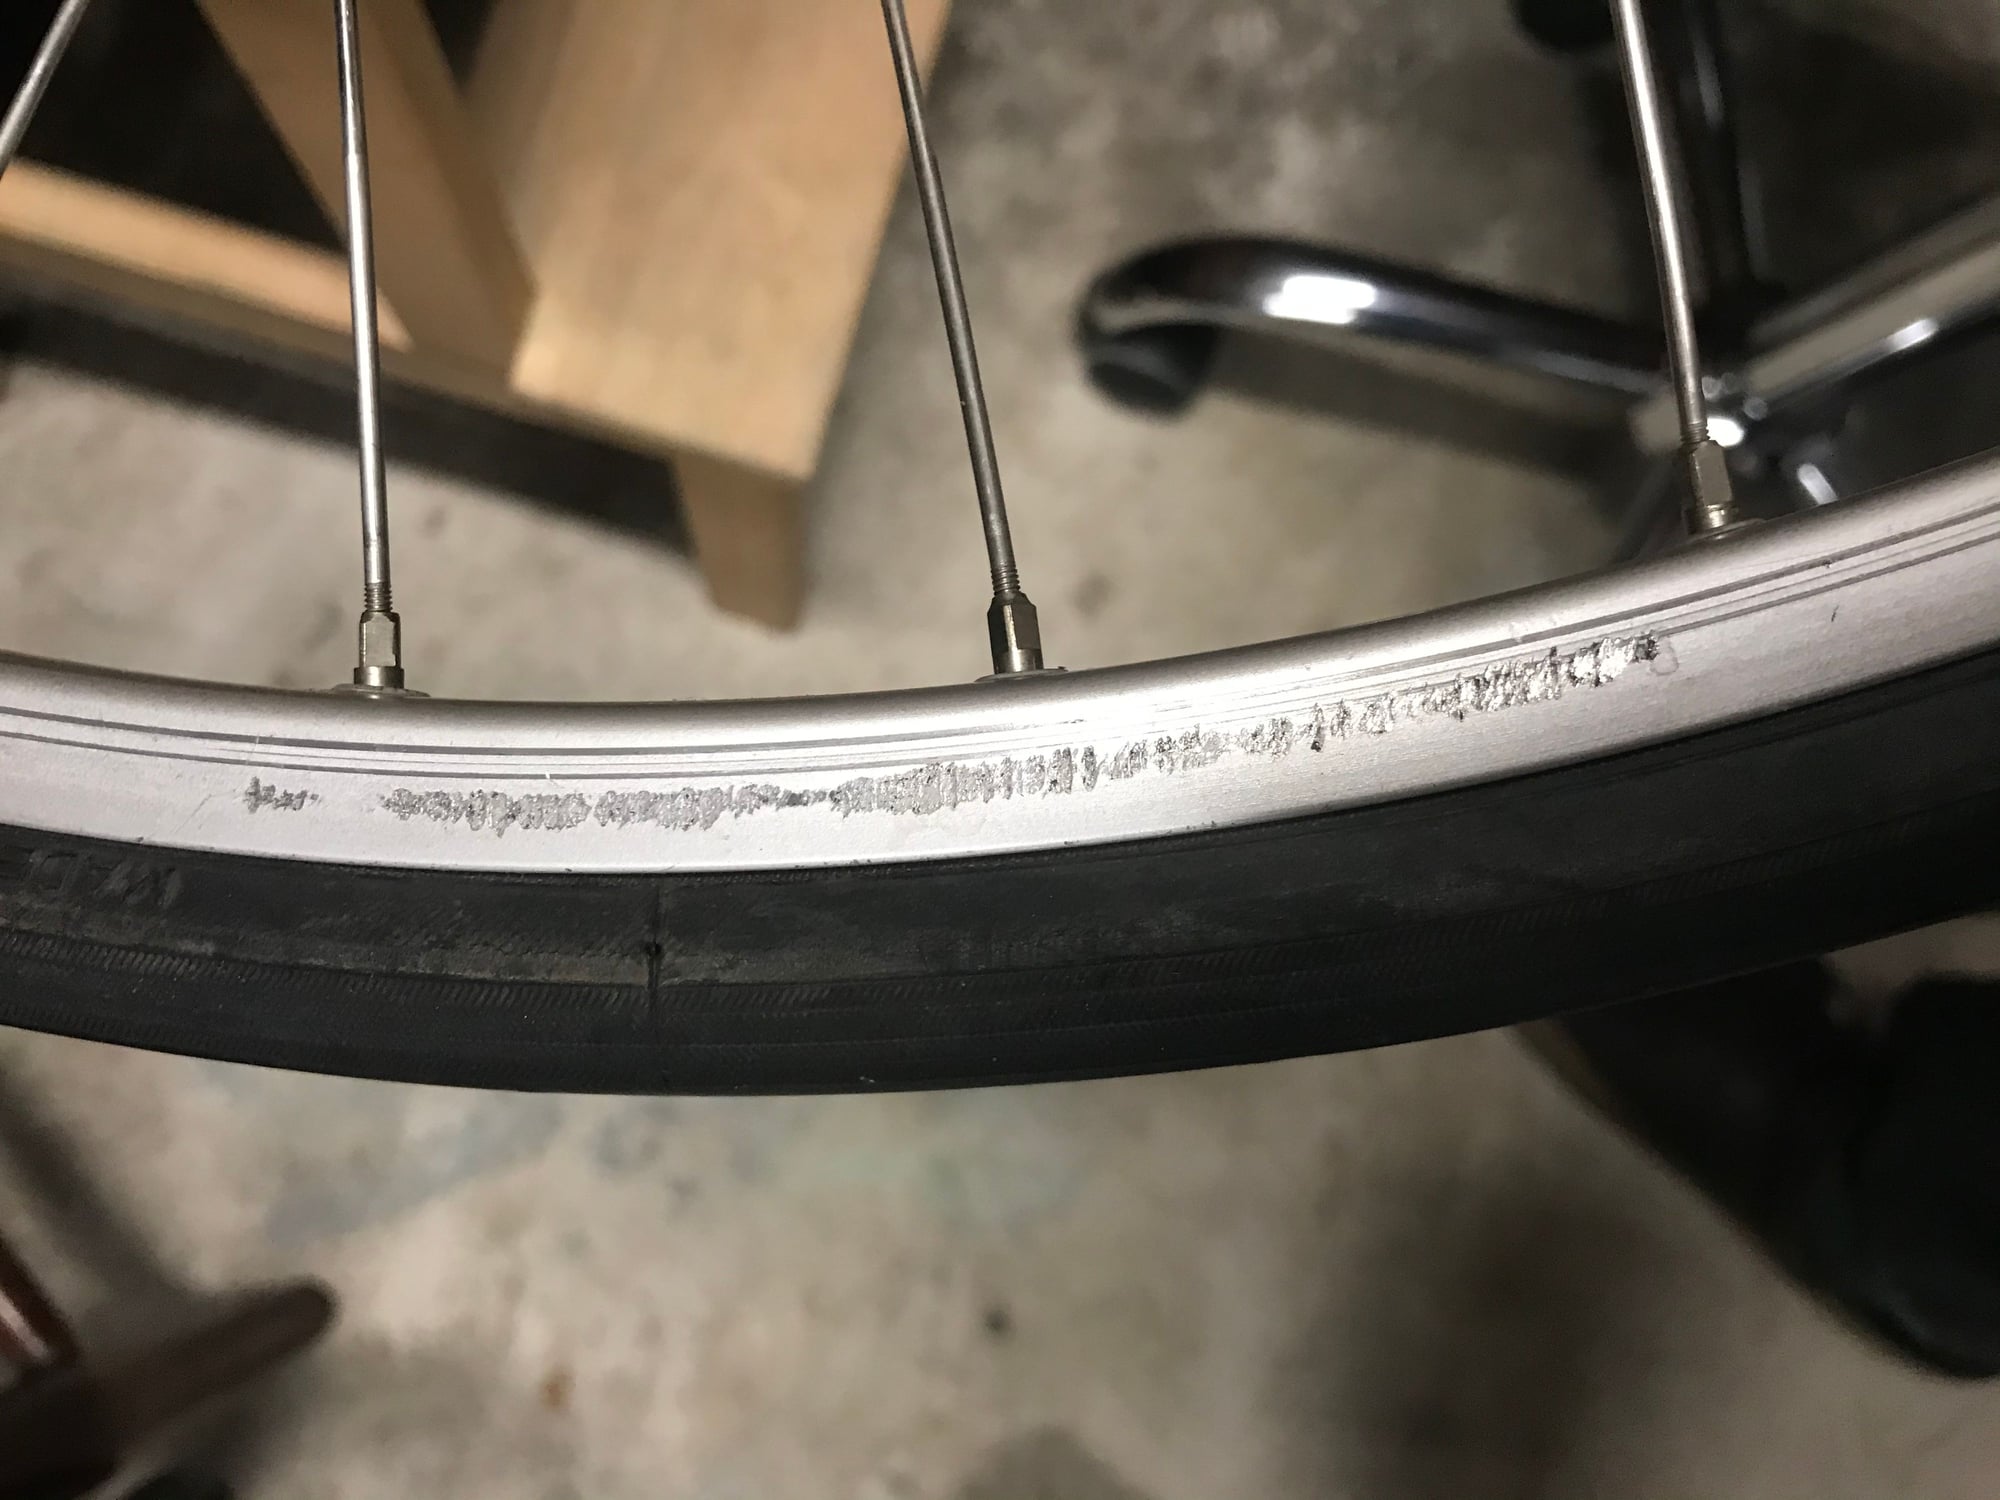
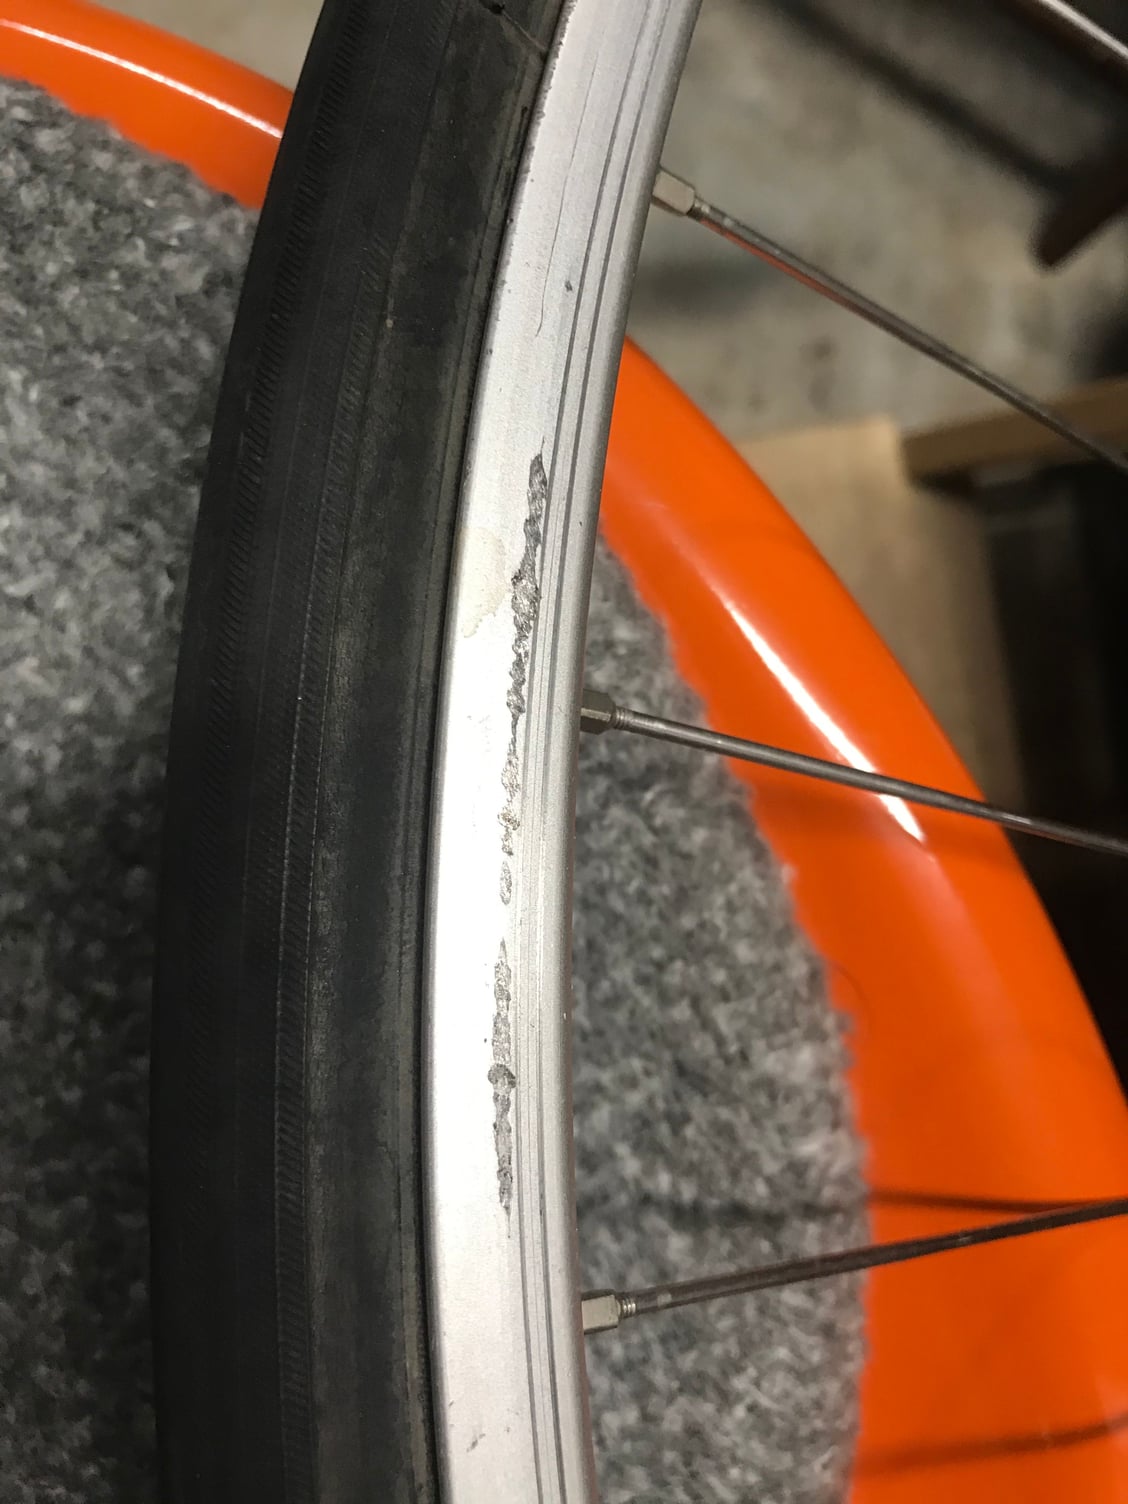
Rim got scratched up in a couple places from an unknown source during transport. How do I go about removing these whilst minimizing the amount of material removed?
Rim got scratched up in a couple places from an unknown source during transport. How do I go about removing these whilst minimizing the amount of material removed?
 01-27-22, 05:24 PM
#2
Bike Butcher of Portland

Join Date: Jul 2014
Location: Portland, OR
Posts: 11,636
Bikes: It's complicated.
Mentioned: 1299 Post(s)
Tagged: 0 Thread(s)
Quoted: 4679 Post(s)
Liked 5,797 Times
in
2,282 Posts
Hard to tell how deep those are, but if it's superficial, I'd just ride it as is. I know it looks like crap, but any attempt to sand it out might create a dip in the rim and you'll feel it pulsing when braking.
Looking at the pics, I'd be more concerned with the number of threads showing on the spokes, they're about 2-3mm short. Assuming they're well tensioned, if all of them are 2-3mm short (4-6 threads showing), you're probably ok, but much more than that and you could have issues.
Looking at the pics, I'd be more concerned with the number of threads showing on the spokes, they're about 2-3mm short. Assuming they're well tensioned, if all of them are 2-3mm short (4-6 threads showing), you're probably ok, but much more than that and you could have issues.
__________________
If someone tells you that you have enough bicycles and you don't need any more, stop talking to them. You don't need that kind of negativity in your life.
If someone tells you that you have enough bicycles and you don't need any more, stop talking to them. You don't need that kind of negativity in your life.

Likes For gugie:
01-27-22, 06:39 PM
#3
Garage tetris expert
Thread Starter
Join Date: May 2016
Location: Texas Hill Country
Posts: 891
Bikes: A few. Ok, a lot
Mentioned: 16 Post(s)
Tagged: 0 Thread(s)
Quoted: 387 Post(s)
Liked 692 Times
in
329 Posts
Looking at the pics, I'd be more concerned with the number of threads showing on the spokes, they're about 2-3mm short. Assuming they're well tensioned, if all of them are 2-3mm short (4-6 threads showing), you're probably ok, but much more than that and you could have issues.
01-27-22, 07:00 PM
#4

Thrifty Bill

Join Date: Jan 2008
Location: Mountains of Western NC
Posts: 23,524
Bikes: 86 Katakura Silk, 87 Prologue X2, 88 Cimarron LE, 1975 Sekai 4000 Professional, 73 Paramount, plus more
Mentioned: 96 Post(s)
Tagged: 0 Thread(s)
Quoted: 1236 Post(s)
Liked 964 Times
in
628 Posts
If its deep, you are going to take off too much meat from the rim. If they were light, I tend to gently file them with a very fine file.
01-27-22, 07:41 PM
#5
Mother Nature's Son

Join Date: Mar 2016
Location: Sussex County, Delaware
Posts: 3,118
Bikes: 2014 Orbea Avant MD30, 2004 Airborne Zeppelin TI, 2003 Lemond Poprad, 2001 Lemond Tourmalet, 2014? Soma Smoothie
Mentioned: 15 Post(s)
Tagged: 0 Thread(s)
Quoted: 853 Post(s)
Liked 1,435 Times
in
817 Posts
The first picture, the scratch looks fairly deep. Lightly wet sanding with 800 grit, or so, might help a bit, but making it disappear likely to take too much material off. I feel for you, that would drive me crazy. Both the feel of the scratches on the pads and the aesthetics.
01-27-22, 07:50 PM
#6
don't try this at home.

Join Date: Jan 2006
Location: N. KY
Posts: 5,939
Mentioned: 10 Post(s)
Tagged: 0 Thread(s)
Quoted: 973 Post(s)
Liked 511 Times
in
351 Posts
A file is too rough. 320 might work, but 400 or finer is slower for more control. Wet it with water and wrap on a small sanding block. I can buy one sheet of wet-or-dry sandpaper at the local hardware store, like Ace Hardware, or probably at an auto parts store. Those sheets are handy to have around the house, anyway.
I don't try to get rid of the pits at all, I just smooth off all the raised edges around the pits. The block can be a piece of wood or even a small plastic box with a flat surface.. It's surprisingly easy to sand a an unwanted dip into aluminum, as I found out many years ago when trying to smooth out a rim seam that wasn't quite flat.
I've gone over new rims that had a rough milled surface with some 400 grit, folded a few times to a narrow strip, pressed with a finger, and spin the wheel on the bike. I'm careful to stay only on the brake track.
Last edited by rm -rf; 01-27-22 at 07:54 PM.
01-27-22, 08:17 PM
#7
Bike Butcher of Portland
Join Date: Jul 2014
Location: Portland, OR
Posts: 11,636
Bikes: It's complicated.
Mentioned: 1299 Post(s)
Tagged: 0 Thread(s)
Quoted: 4679 Post(s)
Liked 5,797 Times
in
2,282 Posts
Generally speaking, proper spoke length will have zero threads showing, but you can be too long as well - the nipple threads can bottom out where the threads end. You can google "bicycle spoke thread length" and get lots of info.
__________________
If someone tells you that you have enough bicycles and you don't need any more, stop talking to them. You don't need that kind of negativity in your life.
If someone tells you that you have enough bicycles and you don't need any more, stop talking to them. You don't need that kind of negativity in your life.
01-27-22, 08:41 PM
#8
Senior Member
Join Date: Sep 2017
Location: Eastern Shore, MD
Posts: 2,107
Bikes: Road ready: 1993 Koga Miyata City Liner Touring Hybrid, 1989 Centurion Sport DLX, "I Blame GP" Bridgestone CB-1. Projects: Yea, I got a problem....
Mentioned: 24 Post(s)
Tagged: 0 Thread(s)
Quoted: 753 Post(s)
Liked 737 Times
in
422 Posts
I'd try and burnish the high spots down with a smooth metal rod. Some thing like a valve stem would be ideal, but a screw driver shaft would work.
01-27-22, 09:25 PM
#9
seńor miembro

Join Date: Dec 2018
Location: Pac NW
Posts: 6,623
Bikes: '70s - '80s Campagnolo
Mentioned: 92 Post(s)
Tagged: 0 Thread(s)
Quoted: 3886 Post(s)
Liked 6,481 Times
in
3,206 Posts
Smooth braking is far more important than appearance. Use a digital caliper to understand what you're starting with. Maybe you can sand it down a little bit; maybe you can't. Go slow and take a ride in between sanding sessions to understand the changes on braking performance.
01-28-22, 05:16 PM
#10
Garage tetris expert
Thread Starter
Join Date: May 2016
Location: Texas Hill Country
Posts: 891
Bikes: A few. Ok, a lot
Mentioned: 16 Post(s)
Tagged: 0 Thread(s)
Quoted: 387 Post(s)
Liked 692 Times
in
329 Posts
Thanks all for the feedback. I like the burnishing idea. I’m not concerned about looks, just don’t want the rim slowly shredding the brake pad.
The rims are otherwise really nice, almost no wear, and mounted to high-flange campy hubs. Didn’t realize super champion competition 27” hooked clinchers were 23mm wide.
The rims are otherwise really nice, almost no wear, and mounted to high-flange campy hubs. Didn’t realize super champion competition 27” hooked clinchers were 23mm wide.
01-28-22, 06:55 PM
#11
Senior Member

Join Date: Apr 2007
Location: Thunder Bay, Ontario, Canada - burrrrr!
Posts: 11,674
Bikes: 1958 Rabeneick 120D, 1968 Legnano Gran Premio, 196? Torpado Professional, 2000 Marinoni Piuma
Mentioned: 210 Post(s)
Tagged: 0 Thread(s)
Quoted: 1372 Post(s)
Likes: 0
Liked 1,751 Times
in
938 Posts
I use a broken piece of a smooth file to remove wheel rim marks. You do not want to remove gouges as doing so will result in a thinned rim wall and grabby braking. Using the short piece of file, I slowly and carefully remove only the protruding parts of a scratch. The result will not look much better but the shredding of brake pads will be dramatically reduced.
Additionally, I often times dress an entire rim braking surface in an effort to get rid on the splotchy anodized material that, in my opinion, destroys the appearance of a rim and, with a bit of practice can actually end up looking pretty good. Once again, working slowly and carefully is the key to a successful result.
Additionally, I often times dress an entire rim braking surface in an effort to get rid on the splotchy anodized material that, in my opinion, destroys the appearance of a rim and, with a bit of practice can actually end up looking pretty good. Once again, working slowly and carefully is the key to a successful result.
__________________
"98% of the bikes I buy are projects".
"98% of the bikes I buy are projects".
